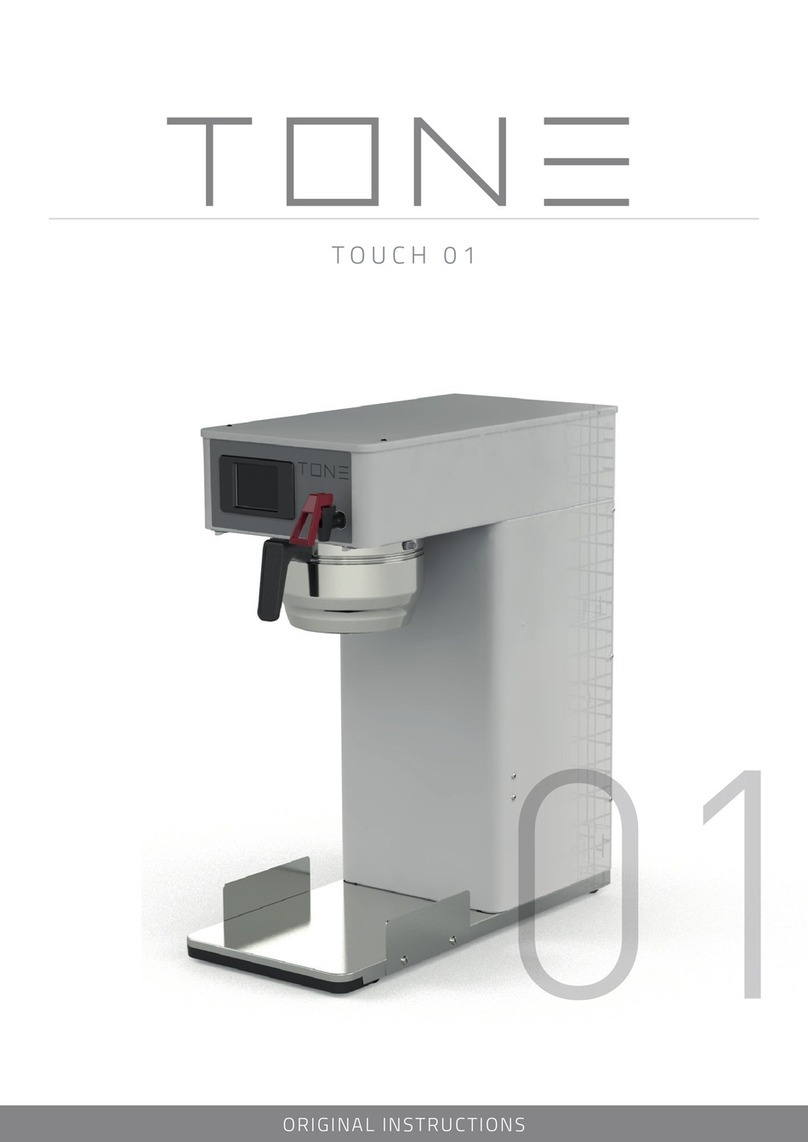
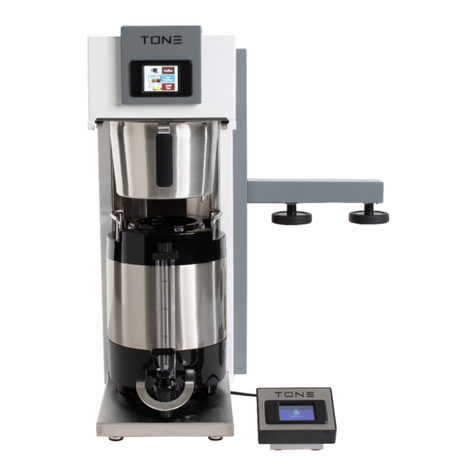
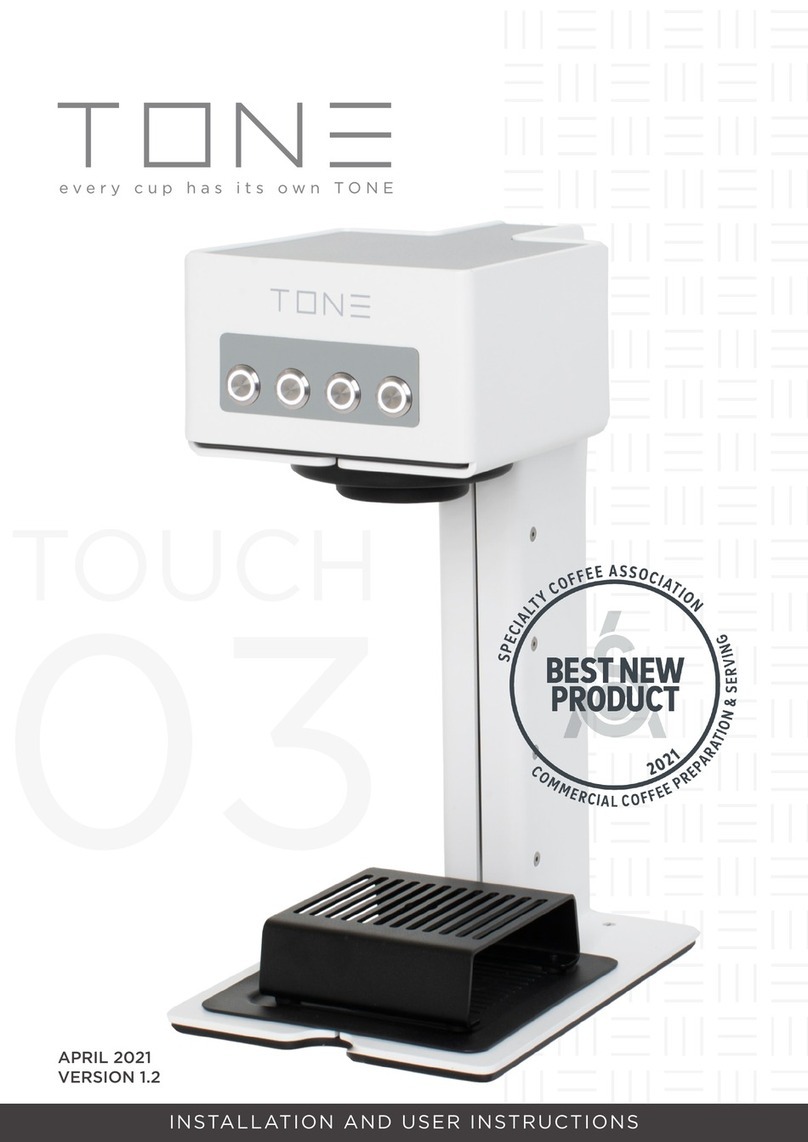
Tone TOUCH 02 Guide

INSTALLATION AND USER INSTRUCTIONS
02
TOUCH
NOVEMBER 2021
VERSION 1.2
02
TOUCH
NOVEMBER 2021
NOVEMBER 2021
NOVEMBER 2021
NOVEMBER 2021
NOVEMBER 2021
VERSION 1.2
DIGITAL MANUAL

DISCLAIMER
Congratulations on purchasing your new TONE product. The information in this
document affects your safety and your legal rights and responsibilities. Read this
entire document carefully to ensure proper configuration before use. Failure to read
and follow instructions and warnings in this document may result in serious injury to
yourself or others, damage to your TONE product, or damage to other objects in the
vicinity. This document and all other collateral documents are subject to change at the
sole discretion of TONE. For up-to-date product information, visit http://www.tone-
swiss.com and click on the product page for this product.
By using this product, you hereby signify that you have read this disclaimer and warning
carefully and that you understand and agree to abide by the terms and conditions
herein. You agree that you are solely responsible for your own conduct while using
this product, and for any consequences thereof. You agree to use this product only
for purposes that are proper and in accordance with all applicable laws, rules, and
regulations, and all terms, precautions, practices, policies and guidelines TONE has
made and may make available.
TONE accepts no liability for damage, injury or any legal responsibility incurred directly
or indirectly from the use of this product. The user shall observe safe and lawful
practices including, but not limited to, those set forth in this document.
Copyright © 2021 by TONE Kaffeemaschinen AG
All rights reserved. No part of this publication may be reproduced, distributed, or
transmitted in any form or by any means, including photocopying, recording, or other
electronic or mechanical methods, without the prior written permission of the publisher.
For permission requests, write to the publisher, addressed at the address below.
TONE Kaffeemaschinen AG
Rheinweg 4
8200 Schaffhausen
Switzerland
+41 52 620 06 06
contact@tone-swiss.com
www.tone-swiss.com
TRADEMARKS
TONE is a trademark of TONE Kaffeemaschinen AG (abbreviated as „TONE“) and its
affiliated companies. Names of products, brands, etc.. appearing in this manual are
trademarks or registered trademarks of their respective owner companies.

1. PROPER USE
1.1 For your safty
1.2 Explanation of safety warnings
2. DESCRIPTION OF THE PRODUCT
2.1 Purpose of the Product
2.2 Contents
2.3 Appliance overview
3. INITIAL USE
3.1 Place of use
3.2 Pumbing Connection
3.3 Electrical Connection
3.4 Initial set-up
4. PROCESS/WORKFLOW
4.1 Brewing
4.2 Programming
4.3 Personalize
4.4 Parameters
4.5 Calibration
4.6 Service
4.7 Programming - Sidearm
4.8 Brewing - Sidearm
5. CLEANING
5.1 Cleaning
5.2 Daily Cleaning
5.3 Descaling
6. FAULT RECTIFICATION
7. TECHNICAL DATA
8. RECYLING AND DISPOSAL
9. WARRANTY
APPENDIX - CONDENSED OPERATION
4
4
4
6
6
6
6
7
7
7
7
8
9
9
9
12
13
13
14
14
15
16
16
16
16
17
17
17
17
20
TABLE OF CONTENS

04
1. PROPER USE
This machine shall be destined exclusively to
the use it has been expressly designed for.
Any other use shall be considered illsuited
and improper. The manufacturer shall not
be considered responsible for any damages
caused by improper use. The electric safety
of the machine is achieved only when
the machine is correctly connected to a
grounded electric system.
This fundamental requirement shall be
assessed by qualied personnel. Manufacturer
and installer shall not be held responsible
for any damages caused by the lack or ine
ciency of system grounding.
1.1 FOR YOUR SAFTY
Read and follow the instructions in these
operating instructions in order to operate
this machine safely. Do not carry out any
independent modifi cations or repairs on the
device.
The following warning symbols are used in
these operating instructions.
1.2 EXPLANATION OF SAFETY
WARNINGS
DANGER!
Failure to observe the warn-
ing can result in danger to life
and limb.
WARNING!
Failure to observe the warn-
ing can result in material dam-
age.
CAUTION!
Matters which should be tak-
en into account when using
the appliance.
04
INFORMATION FOR COR-
RECT DISPOSAL OF THE
PRODUCT IN ACCORD-
ANCE WITH EC DIRECTIVE
2012/19/EU
This product must not be
disposed of as urban waste
at the end of its working life.
It must be taken to a special
waste collection centre licensed by local au-
thorities or to a dealer providing this service.
Separate disposal of the product will avoid
possible negative consequences for the
environment and for health resulting from
inappropriate disposal, and will enable the
constituent materials to be recovered, with
signifi cant savings in energy and resources.
OBSERVE THE FOLLOWING SAFETY
INSTRUCTIONS AT ALL TIMES:
DANGERS TO CHILDREN
AND OTHER PERSONS!
Children frequently fail to rec-
ognise dangers or underesti-
mate them.
▪ Children should be supervised in order to
ensure that they do not play with the appli-
ance.
▪ The appliance must be used only by per-
sons who are familiar with the possible dan-
gers and special features of the appliance.
DANGER DUE TO FAULTY
OPERATION!
Improper use of the appliance
can result in damage or injury.
▪ Do not use the appliance barefoot or when
hands / feet are wet.
▪ Unplug the appliance from the electric
system and turn of water supply before car-
rying out any cleaning and ordinary main-
tenance.
▪ Do not put the appliance under a jet of
water, nor plunge it into water to
clean it.
▪Do not leave the appliance turned-on and
unattended for long periods (e.g. 1 day)
PROPER USE

05
05
05
▪ In order to ensure the e ciency and correct
functioning of the appliance, it is necessary
to follow the instructions provided by the
manufacturer and to carry out its ordinary
maintenance.
▪ The appliance shall be installed so that the
highest surface is at least 1 metre high.
▪ The appliance shall be placed horizontally
(use level) by adjusting its feet to ensure a
safe use.
▪ The temperature range of the environment
surrounding the appliance shall be included
between 5°C and 30°C. In case the appli-
ance is tempo- rarily placed in an environ-
ment where the temperature is below 0°C,
contact a local Technical Service authorized
by the manufacturer.
▪ The machine shall be placed on a surface
guaranteeing secure support.
▪ The machine must be connected exclu-
sively to an appropriate cold drinking water
source, in compliance with national norms
and rules. The pressure of the incoming
water must be between 0.138 MPa and 0.3
MPa. If this requirement is not met, consult
the manufacturer.
▪ A shut-on tap must be installed between
machine water hose and water system to
block water fl ow in case of necessity.
▪ When installing the appliance, use exclu-
sively the current set of junctions provided
with the appliance itself.
WARNING DUE TO
UNAUTHORISED REPAIR!
Faulty repairs can result in
damage to the appliance.
▪ Repairs should be carried out only by au-
thorised customer service centres.
▪ If you cannot correct a fault with the aid
of the steps described in these operating
instructions, please refer to your authorised
dealer.
WARNING BEFORE
SERVICING OR OPENING
this device make sure the
brewer is disconnected from
power by pulling its plug. The service
technician has to see the pulled plug during
the whole service operation.
▪ The electric safety of the machine is
achieved only when the machine is correctly
connected to a grounded electric system.
▪ The user shall arrange electric, waterand
draining systems in a suitable position to
allow correct machine installation.
▪ The installer cannot modify the existing
system built by the user.
▪ If the electric supply cable is damaged, it
must be replaced by another cable provided
by the manufacturer or by its Technical
Service.
▪ For good machine functioning and
maintenance, it might be necessary to install
a water softener in order to avoid scale
formation. This must be evaluated by the
installer and the user shall leave a space for
the correct installation of a water softener,
following the instructions contained in its
manual.
Do not use water jet devices in
the area where Barista TOUCH
is installed!
Do NOT tilt Barista TOUCH
during operation! Max. tilt an-
gle < 2°.
Only to be operated by trained
personnel!
05

06
2. DESCRIPTION OF THE PRODUCT
2.1 Purpose of the Product
This machine shall be destined exclusively to
the use it has been expressly designed for.
Any other use shall be considered illsuited
and improper.
2.2 Contents
1x Machine 02 brewer
1x Filter coffee basket
1x External touch unit
1x ...
1x Operation manual
2.3 APPLIANCE OVERVIEW
01 Touchscreen
02 Brew rail for baske
03 Brew basket
04 Ground plate
05 Singlebrew arm one
06 Singlebrew arm two
07 On/off switch
08 External touch unit
1
8
7
5
6
2
3
4
DISCRIPTION OF THE PRODUCT

07
3. INITIAL USE
Before using your TONE Touch 02
3.1 PLACE OF USE
Brewer should be installed on a secure, lev-
el, surface capable of fully supporting the
weight of the brewer, including the water
retained in the brewer, and any fully load-
ed dispenser(s) that may be placed on the
brewer.
▪ A potable water line (cold water) capable
of consistently supplying the required min-
imum fl ow rate within the noted pressure
range is required at the install location.
▪ A grounded electrical connection to a cir-
cuit that meets the electrical specifi cations
of the brewer and is protected by the appro-
priate size and type of breaker is required.
Brewer includes a combination strainer and
fl ow control which MUST be attached to the
rear plumbing connection. A metal swivel
tube assembly is provided for attachment.
The fi tting plumbing connections are 1⁄4
male fl are. Inclusion of a coil of copper tub-
ing in the water line will allow the brewer to
be easily moved for cleaning the counter
underneath.
CAUTION
Power to brewer must be
off before proceeding with
plumbing installation.
CAUTION
Improper electrical installa-
tion will damage electronic
components. Damage caused
by incorrect electrical con-
nections in not covered by
warranty.
3.2 PLUMBING CONNECTION
▪ Flush water line before installing brewer.
Brewer should be connected to COLD WA-
TER LINE ONLY.
▪ Water pressure should be between 20 psi
and 90 psi (1,5-3 Bar). For less than a 7,6
m run, use 1/4“ copper tubing and connect
to 1/2“ or larger water line. For longer runs,
use 3/8“ copper tubing & connect to 1/2“
or larger water line and provide an adapter
fi tting for connection to the brewer. Recom-
mended minimum fl ow rate from water line
is 1 gpm (0.23 m3/h) measured at the brew-
er connection point.
▪ The use of saddle valves are not recom-
mended as the size and shape of the hole
made in the supply line may restrict fl ow.
However, if installed with saddle valve, the
valve should have a minimum of 1/8“ port
hole for up to 7,6 m run, and 5/16“ port hole
for over 7,6 m runs.
▪ Connect the strainer/fl ow control (provid-
ed) to brewer plumbing connection using
the provided swivel tube assembly. Note di-
rectional indication on the fl ow control.
▪ Connect incoming water line to the inlet
fi tting of the strainer/fl ow control. Manu-
facturer recommends connecting to copper
tubing.
NOTE: If a fi lter is provided for the brewer,
follow the fi lter manufacturer’s recommen-
dations for fl ushing prior to connecting in
line with brewer. Note the brewer has a fi l-
ter tracking function available in the service
menu of the programming module.
3.3 ELECTRICAL CONNECTION
WARNING
The brewer must be dis-
connected from the pow-
er source until specifi ed in
INITIAL SET-UP.
CAUTION
Improper electrical installa-
tion will damage electronic
components. Damage caused
by incorrect electrical con-
nections is not covered by warranty.
▪ An electrician must provide electrical ser-
vice as specifi ed in conformance with all lo-
cal, state and federal electrical codes.
▪ Use a voltmeter to check the voltage and

08
color coding of each conductor at the elec-
trical source. For models without a cord, re-
move the rear top cover then the rear panel
and feed the cord through the strain relief.
Connect cord to the terminal block as indi-
cated in the appropriate diagram above.
▪ Ensure power switch on rear of brewer is
in the off position. Connect brewer to power
source and verify voltage at terminal block.
Replace rear panel and top cover. If plumb-
ing has been hooked up, brewer is ready for
Initial Set-Up. If not, disconnect brewer from
power source.
WARNING
Electrical connections must
be made as specifi ed above.
Failure to follow these instruc-
tions can result in personal in-
jury, property or equipment
damage.
NOTE: This electrical service consist of 2
current carrying conductors (L1 and Neutral)
and a separate conductor for earth ground.
WARNING
Before servicing or opening
this device make sure the
brewer is disconnected from
power by pulling its plug. The
service technician has to see
the pulled plug during the
whole service operation.
jury, property or equipment
BLACK NEUTRAL GREEN/
L1 N YELLOW
3.4 INITIAL SET-UP
▪ Insert an empty brew basket into the brew
rails.
▪ Place an empty server or other appropri-
ate vessel on the base below brew basket.
▪ Ensure power switch at lower right of
brewer is in the off position.
▪ Connect the brewer to power source pre-
pared previously, see Electrical Connection.
▪ Ensure water supply has been connected
and is turned on.
▪ Turn on the power switch on rear of brew-
er. Water will begin fl owing into the brewer
tank.
▪ Flow will stop when full.
▪ Tank will begin to heat.
▪ Hold a cup below faucet and operate han-
dle briefl y to dispense water and remove
any air from the line.
▪ Water calibration volumes have been set
at the factory and do not normally require
adjustment.
▪ Select a brew cycle from the available rec-
ipes in the brewer and activate it (See HOW
TO BREW if unsure how).
▪ If the brewer is up to temperature the cy-
cle will begin right away. If not heating will
complete fi rst.
▪ Once the test brew cycle completes suc-
cessfully, the brewer is ready for use as per
the instructions.
▪ If adjustments are needed to recipes, max
set point, calibrations, or other items, see
the appropriate sections of the PROGRAM-
MING portion of the manual.
▪ Repeat Initial set-up with sidearms.
INITIAL USE

09
4. PROCESS/WORKFLOW
4.1 BREWING – MAIN BREW HEAD
Place coffee, tea or oth-
er product to be brewed
into a paper fi lter with-
in the brew basket and
place basket into the
holders below the spray-
head. Place an empty container in place be-
low the basket assuringall applicable brewer
dispense points align with vesselopening(s).
Select desired beverage type from the ‘bev-
erage selection’ screen. If an energy save
screen, a FRESH BREWED COFFEE screen,
or other screen is displayed, simply touch
the screen to return to the ‘beverage selec-
tion’ screen. Selecting beverage type will
take you to a ‘recipe selection’ screen.
On the ‘recipe selection’
screen, select the bever-
age size to be brewed by
pressing the appropriate
icon key. Various pictorial
or descriptive icons will
be displayed with the volume of the brew
below to help distinguish between recipes.
Dependent on the number of active recipes
within a beverage type, there may be more
than one screen of recipes available. Use the
next and previous keys to navigate among
multiple screens if applicable. Press return
to go back to the beverage selection screen
if desired.
After selecting a recipe to brew, the ‘recipe
detail’ screen will display providing more
details for the selected brew.
The ‘recipe detail’ screen
provides summary recipe
information for the cho-
sen brew cycle including
a recipe name/descrip-
tion, brew volume, time
and temperature. Press the brew button to
immediately start the brew cycle. Press re-
turn to return to the main/standby screen if
desired. If unit has been idle for some time,
a tank fi lling screen may display as the tank
is refi lled. A heating screen will display, if the
recipe temperature is set higher than the
current tank temperature, while the brewer
heats. The brew cycle may be canceled at
any point by touching the heating or brew-
ing screen when displayed.
4.2 PROGRAMMING –
MAIN BREW HEAD
To enter programming
mode, press the upper
left corner (indicated
with dashed lines) of
the ‘beverage selection’
screen and hold for 3-4
seconds. A beep will sound if beeper is ena-
bled. Release the touch screen. Many of the
steps outlined below are applicable to pro-
gramming of the side brew arm spray heads.
Applicable sections below are the calibra-
tion and recipe sections. Other settings are
controlled by the main brew head settings.
A ‘User Password’
screen with keypad will
be displayed. Type in the
4 digit user password
(3650). The entered
number will display in
the blank area in the upper right side of the
screen as you type it. Press enter. CLR will
clear entry without exiting the screen.
Pressing cancel will exit the screen.
It is not possible to save the user password.
The following screen
displays if the incorrect
value is entered. Push
the large button on the
display and you will be
returned to the user
password screen to try again. Enter the
correct password.

10
Successful password
entry will bring you
to the ‘Programming/
Service’ menu screen.
These are the cate-
gories of programma-
ble options. There are
submenus within these items. Pressing Fin-
ish returns you to the main selection screen.
EDIT RECIPES
Press Edit Recipes to set active status or to
edit recipe information.
The ‘Recipe Select’
screen displays “Get-
ting Recipes” while
the recipe information
is loaded into the dis-
play.
The ‘recipe select’
screen then shows
the recipe names on
a rotatable wheel. The
selected recipe name
displayed in the cen-
trally located target
box on the wheel may be changed by either
swiping vertically up or down over the rec-
ipe name bars or by using the + and – key.
When the desired recipe is displayed in the
target box, press the “Select Recipe” button.
You will be taken to the ‘recipe settings’
summary screen for the recipe selected.
You are now in the
‘Recipe Settings’
screen for the recipe
selected previously. A
summary of brew set-
tings is shown on this
screen.
Pressing one of the
brew attribute buttons provides a greater
level of detail of the feature and provides
access for editing the programmed values.
Note: using the + or – on this screen will
allow scrolling through all programmed
recipes in sequence. This is a conven-
ient way to quickly change status to ac-
tive or inactive on multiple recipes.
Pressing the “Active” button will toggle the
status of the recipe between available and
not available. A recipe will not be shown on
the brew selection screens unlessit is set to
Recipe Available.
Press the “Temp”
key to display the
‘Temperature’ detail
screen. Both the brew
temperature and the
recipe specifi c tem-
perature tolerance
may be adjusted here. To change either of
these two items, fi rst select the item to be
adjusted and then use the + and – keys to
change value. Note that if autoarm is set to
use a global value in the ‘Personalize, Other
Settings’ screen, the temperature tolerance
shown on this screen will have no effect.
Likewise if autoarm has been disabled on
that screen, the setting here will also have
no effect. Press return to return to the Reci-
pe Settings screen.
Press the “Volume”
key to access the ‘Vol-
ume’ detail screen.
Note the multiple
volumes associated
with the brew cycle
are all simultaneous-
ly displayed for convenience. Various math
checks are done and enable or disable oth-
er programming selections based on input.
The example recipe below shows a total
brew volume of 10.886 g (3 gallons). 2.267
g of that volume will be delivered from the
hot water tank through the sprayhead into
the brew basket (concentrate). Of the 2.267
g of hot water, 340 g will be delivered at
the start of the brew cycle as a pre-infusion
delivery. A pause between the pre-infusion
volume and the continuation of the brew cy-
cleis programmable in the brew time screen.
The temperature of the balance (bypass) of
the 10.886 g of total brew volume is select-
ed as cold since this is an ice tea recipe. The
cold water will be delivered from a separate
PROCESS/WORKFLOW

11
dispense point and will not go through the
basket. There is one brew valve turned on
of the two possibly available. This setting
will impact allowable brew time since water
delivery is different for 1 or 2 brew valves.
(Note: 1 valve is normal).
To modify the numeric values shown, fi rst
select an item and then use the + and –
keys/buttons to change the value. Tap the
non- numeric items to toggle through the
available choices. When the preferred op-
tion is displayed, it is set. Brewers may not
have componentry installed for all options.
Items will be greyed out if unavailable due
to other selections or values. Press return to
return to the ‘recipe settings’ screen.
Press the “Brew Time”
button to display the
‘brew time’ detail
screen. Note the mul-
tiple times associated
with the brew cycle
are all simultaneous-
ly displayed for convenience. Various math
checks are done and enable or disable oth-
er programming selections based on input.
The pre-infusion pause is the time delay be-
tween the completion of the delivery of the
pre-infusion volume and the continuation of
the hot water delivery through the spray-
head. The concentrate brew time is the total
time allowed for hot water to be delivered
through the sprayhead. The time may be in-
creased above the calculated minimum time
to create a pulse brewing effect. When time
is set above the minimum required, the wa-
ter delivery will cycle on and off throughout
the programmed time. The bypass delay is
the time delay between completion of the
concentrate water delivery and the starting
of any bypass water delivery.
The delay is only applicable if “After” is dis-
played as the bypass type for bypass relative
to the brew cycle. Before or during are other
types of bypass delivery. For a selection of
during, the bypass water will be delivered
during any concentrate off time available
during the concentrate delivery. Note: A rec-
ipe made up of entirely cold water dilution
(such as for making lemonade from concen-
trate) would cause all values on this screen
to be greyed out as none of the items would
be applicable. Press return to return to the
‘recipe settings’ screen.
To edit a recipe name,
press the recipe name
bar near the top of
the ‘recipe settings’
screen. This will take
you to the ‘edit reci-
pe name’ screen. This
screen will allow the user to edit the recipe
name, set the beverage type, and select an
icon to be displayed on the ‘recipe selection’
screen. To edit the recipe name, select that
key/fi eld if it is not already selected. The se-
lected character will begin to blink. Use the
L and R button to move the cursor left or
right to the letter to be changed. The but-
ton above the L and R determines whether
an upper case, lower case, or symbol char-
acter set will be used. See Appendix A at
the end of the document for a listing of the
characters and the corresponding group
and location within the group. Use the up
and down keys to scroll through the various
choices available. Use set beverage type key
to select the type of beverage for the recipe.
This will determine which category the rec-
ipe will be put in on the beverage selection
screen. This will ensure all coffee recipes are
grouped together as are all iced tea recipes,
etc. Each press of the key will display the
next choice. Stop when the correct type is
displayed for the recipe.
Next use the “Select
Icon” key to access
icons available to as-
sociate with the rec-
ipe. The recipes are
identifi ed on a ‘recipe
selection’ screen by
the icon, along with the beverage volume,
so that the user knows which recipe they
will be preparing. Icons available will be dis-
played. Next and Prev Keys are provided to
move between the various screens to select
an appropriate icon. Select an icon by press-
ing it. The icon will be highlighted. Once
satisfi ed with the selection, pick fi nish to

12
return to the ‘edit recipe name’ screen. Se-
lect return to go back to the ‘recipe settings’
screen then press return again to return to
the ‘recipe select’ screen.
Press return again and the system will exit to
the ‘programming/service’ screen.
4.3 PERSONALIZE
At right shows the
‘programming/ser-
vice’ screen again.
Press the “Personal-
ize” key to go to the
‘personalize’ screen.
‘edit recipes’ and ‘per-
sonalize’ screens do not require an addition-
al password.
The ‘personalize’
screen allows editing
the company name
and the phone num-
ber displayed when
calling for service is
required.
Changing the user password is disabled and
is greyed out. Other settings are available on
a separate menu by pressing the “Other
Settings” key. To edit the company name,
select that fi eld if it is not already selected.
The selected character will begin to blink.
Use the L and R button to move the cursor
left or right to the character to be changed.
The button above the L and R determines
whether an upper case, lower case, or sym-
bol character set will be used. See the Ap-
pendix at the end for a listing of the char-
acters and their corresponding group and
location within the group. Use the up and
down keys to scroll through the various
choices available. To change the phone
number, select the phone number.
A ‘service telephone
number’ screen with
keypad will be dis-
played. Key in the
service area code and
phone number. Press
Save to store the service telephone num-
ber. CLR will clear entry without exiting the
screen. Cancel will exit the screen without
saving changes and return you to the ‘per-
sonalize’ screen shown above.
Select “Other Set-
tings” to go to the
‘personalize, other
settings’ screen. Note:
Multiple languages are
not available. Imperial
or Metric measure-
ment units may be chosen. If imperial is se-
lected, volume will be programmed in fl uid
ounces and temperature in degrees Fahr-
enheit. If Metric measure is chosen volume
will be programmed in milliliters and tem-
perature in degrees Celsius. The end of cy-
cle/keypad beeper may be set to on or off.
The energy save mode has three choices:
No energy saver, energy saver, or power off.
No energy saver maintains normal tank tem-
perature based on the lowest temperature
setting of the active recipes. Energy saver
mode will set back the temperature that the
tank is maintained at and power off will shut
down the tank heater. The selected action
will take place when the “Setback After”
time has been reached. Use the + and – keys
to change the setback time. The autoarm
key may be used to choose autoarm on,
autoarm off, or autoarm global. If autoarm
on is chosen, the individual recipe toleranc-
es will be used to determine if the tank is
hot enough to start a brew cycle. If autoarm
global is selected, the value programmed on
this screen will be used for all recipes, re-
gardless of a tolerance set in the individual
recipes. Tap the autoarm tolerance key to
increment the tolerance value to the desired
setting. Press fi nish to return to the person-
alize screen and then press fi nish to return
to the programming/service screen.
PROCESS/WORKFLOW

13
4.4 PARAMETERS
The ‘brewer parame-
ters’ screen is meant
for factory settings.
Contact factory for
password authoriza-
tion for these settings.
Press the “Brewer Pa-
rameters” key to go to the ‘brewer parame-
ters’ screen. This screen is designed to allow
the technician to tell the control board how
the machine has been confi gured or to dis-
able certain features that may be installed.
Touch the various keys to cycle through the
available options and select the one that is
appropriate for your installation. Brew valve
choices are for one or two brew valves. If
two valves are selected, one or both may be
activated for a particular brew cycle. This is
not a common
confi guration and does not include the hot
water bypass valve. Hot bypass and cold di-
lution may be set to installed or not installed.
A hotwater dispense valve may be installed
for controlling a faucet or other hot water
dispense outlet. Recipes may then be set to
deliver premeasured volumes of hot water.
Push and hold feature is automatically avail-
able when not brewing when a hot water
valve dispense valve is installed. The heating
circuit may be programmed for either a solid
state device which would allow pulse heat-
ing, or for a mechanical relay, which would
not but would be a more economical choice.
Warning – running a mechanical relay in
pulsing mode will lead to premature failure
of the component. Press return to return to
the programming/service screen.
4.5 CALIBRATION
Press the calibrate key.
A ‘calibration Pass-
word’ screen with key-
pad will be displayed.
Type in the 4 digit ser-
vice password (3926).
The number will dis-
play in the blank area in the upper right side
of the screen as you type it. Press enter. CLR
will clear entry without exiting the screen.
Pressing cancel will
exit the screen.
The calibrate screen
will display. Items that
are not installed or
that have been disabled in the parameters
section will be greyed out. Other items may
be calibrated to ensure brewing accuracy.
Only the items for which calibration is de-
sired need be addressed.
NOTE FOR TECHIES – Due to inaccuracies
inherent in some graduated measurement
vessels, weighing the water dispensed can
be a more accurate method to determine
volume dispensed. Water density varies with
temperature however. If weighing in ounc-
es, water is closest to a 1 to 1 ratio of g in
weight to fl uid g at brewing temperatures
(87°-96°C). It is safe to say for hot water dis-
pensing that 1 g weight on scale is (nearly)
equal to 1 fl uid ml of volume. Cooler water
is denser however so a fl uid ml of water dis-
pensed at ambient temperatures will weigh
more than an g, about 1.04 g weight. A fl uid
ml of water will weigh approximately 0.96 g
so multiplying the scale weight by .96 will
yield the volume in fl uid ml.
Press “Brew Valve
1” to enter the ‘cali-
brate brew 1’ screen
for brew valve one. A
countdown clock for
the calibration interval
is located in the up-
per right of the screen. The currently pro-
grammed volume for this time frame is lo-
cated immediately below. The + and – keys
are used to adjust this value. Place a suitable
container in place below the dispense outlet
being calibrated. Press the start key and a
timed dispense will start. Heating may be re-
quired dependent on tank temperature. The
dispense cycle may be stopped if needed
by pushing the stop key. The cycle may be
started again without exiting the screen. The
water collected from a complete calibration

14
dispense cycle should be measured and the
value entered on this screen. Running mul-
tiple cycles and using a weighted average
will yield best results. Press the fi nish key to
return to the ‘calibrate’ screen. The above
process may be repeated for each installed
item to ensure proper programmed volumes
will be dispensed when brewing. Options
that are not installed or that have been dis-
abled in the “Parameters” section , will be
greyed out. Possible items that may be avail-
able for calibration are: Brew Valves 1 & 2,
Hot Bypass, Cold Dilution, and Hot Dispense
valves. Run time may varyfor the various
items. Press fi nish key to return to the Cal-
ibrate screen after fi nishing with each item.
4.6 SERVICE
Press the “Service”
key. A ‘service pass-
word’ screen with key-
pad will be displayed.
Type in the 4 digit ser-
vice password (3926).
The number will dis-
play in the blank area in the upper right side
of the screen as you type it. Press enter. CLR
will clear entry without exiting the screen.
Pressing cancel will exit the screen.
The ‘service’ menu is
displayed once the
password is success-
fully entered.
Press “Error Messag-
es”to display a histor-
ical list of error mes-
sages. Some errors
may be intermittent
due to various con-
ditions and do not
necessarily cause the brewer to shut down.
Press “Reset Errors” to reset the error count
to zero. Press fi nish to return to the service
screen.
Press the “Counters”
key to display the
‘counters’ screen. The
total cycles and gal-
lons are non-resetta-
ble. Press the “Reset
Service Cycles” to re-
set the other counters. Press the fi nish key
to return to the ‘service’ screen.
Press the “Filtration”
key to enter the “Fil-
tration” screen. Press
the top left button
to cycle between the
various selections for
the fi lter size or use
the + and – keys. Press the “Reset Filter” key
to reset the fi lter capacity. Press fi nish to re-
turn to ‘service’ screen.
The service password is fi xed and may not
be changed and is greyed out.
Press fi nish again to return to the ‘program-
ming/service’ screen. Then select fi nish to
exit programming.
4.7 PROGRAMMING - SIDEARM SPRAY
HEADS
Programming for the
brewer sidearm spray-
heads is done in much
the same manner as
for the main brewer.
The 2 sprayheads are
denoted as Font 1 and
Font 2. Font 1 is the sprayhead located clos-
est to the main brewer body, on the left side
of the arm. Font 2 is the out board spray-
head located to the right. Calibration and
recipes are programmed individually for
each font. To enter programming mode,
press the upper left corner or right corner
(indicated with dashed lines) of the ‘bever-
age selection’ screen and hold for 3-4 sec-
onds. The corner to press is dependent on
which font you wish to program. A beep will
sound if beeper is enabled. Release the
touch screen.
CARE AND CLEANING

15
A ‘User Password’
screen with keypad
will be displayed. Type
in the 4 digit user
password (3650). The
entered number will
display in the blank
area in the upper right side of the screen as
you type it. Press enter. CLR will clear entry
without exiting the screen. Pressing cancel
will exit the screen. It is not possible to save
the user password.
Successful password
entry will bring you to
the ‘Programming/
Service’ menu screen.
These are the catego-
ries of programmable
options. There are
submenus within these items. Pressing Fin-
ish returns you to the main selection screen.
For the sidearm, only two choices will be
available. These are the edit recipes and cal-
ibrate options. The instructions outlined for
the main brewer will provide an explanation
of how to use these program selections.
Please refer to the relevant sections on the
preceding pages.
4.8 BREWING -
SIDEARM SPRAY HEADS
lace coffee, tea or oth-
er product to be
brewed into appropri-
ate holder and posi-
tion with the proper
associated vessel be-
low the sprayhead to be used for brewing.
Select desired beverage type from the ‘bev-
erage selection’ screen for the appropriate
font. Selecting a beverage type will take you
to a ‘recipe selection’ screen with available
recipes for that beverage type.
On the ‘recipe selec-
tion’ screen, select
the beverage size to
be brewed by press-
ing the appropriate
icon key. Various pic-
torial or descriptive icons will be displayed
with the volume of the brew below to help
distinguish between recipes. Dependent on
the number of active recipes within a bev-
erage type, there may be more than one
screen of recipes available. Use the next
and previous keys to navigate among mul-
tiple screens if applicable. Press return to
go back to the beverage selection screen
if desired. After selecting a recipe to brew,
the ‘recipe detail’ screen will display pro-
viding more details for the selected brew.
The ‘recipe detail’ screen
provides summary recipe
information for the cho-
sen brew cycle including
a recipe name/descrip-
tion, brew volume, time
and temperature. Press
the brew button to immediately start the
brew cycle. Press return to return to the
main/standby screen if desired. Note that
the upper right corner is used to indicate
which font you are preparing to brew on.
The lower portion of the screen indicates the
current status of the other font which may
be on standby or brewing. If the other font is
brewing, the “Stop Brew” button may be
used to stop the brew if desired without
leaving the current screen.
The screen at right shows
a brew in process on Font
2 while Font 1 is idle. The
“Stop Brew” key may be
used to cancel the brew
on Font 2. A brew process
could be started on Font 1
without disrupting the brew on Font 2 if de-
sired.
The screen at right pro-
vides the last brew infor-
mation for Font 2 while
simultaneously counting
down the remaining brew
time for Font 1. The “Stop
Brew” key may be used to cancel the brew
on Font 1. The “Return To Menu” key on the
Font 2 side of the display will cancel the last
brew time display and allow another recipe

16
to be selected and brewed.
The screen at right
provides the last brew
information for fonts
1 and 2. The “Return
To Menu” key(s) will
cancel the last brew
time(s) and allow another recipe to be se-
lected and brewed.
5. CARE AND CLEANING
5.1 CLEANING
DANGER due to improper
cleaning!
Improper cleaning can result
in damage to the appliance or
personal injury.
▪ Never pull the plug out of the socket by
the cable, always grasp the plug.
▪ To guarantee proper functionality of TONE
equipment it is necessary to clean the de-
vice on each day.
▪ To clean the surface of TONE equipment is
recommended to use a damp cloth rinsed in
liquid detergent.
▪ Do not use agressiv chemicals or a water
jet device.
▪ Check and clean each sprayhead daily. All
sprayhead holes must always remain open.
▪ Never immerse the appliance itself, the
power supply cable or plug in water.
▪ Never attempt to touch or pick up and
electrical appliance if it has fallen into water.
In this case, disconnect the plug from the
socket immediately.
▪ Check the appliance and cable regularly
for damage.
16
DANGER due to
unauthorised repair!
Repairs should be carried out
only by authorised customer
service centres.
▪ If you cannot correct a fault with the aid
of the steps described in these operating
instructions, please refer to your authorised
dealer.
NOTE - Any remains on the sprayhead may
infl uence the water fl ow and impact your
coffee brewing.
5.2 DAILY CLEANING
▪ Place a fresh fi lter into brew basket and
add appropriate amount of sanitizer.
▪ Place thermal server in place and initiate a
brew cycle to fi ll dispenser.
▪ After cycle has fi nished, allow to sit for
several minutes.
▪ Draw cups of cleaner through dispenser to
ensure cleaner reaches all parts of dispenser.
▪ Rinse the brew basket and thermal serv-
er with fresh water, again drawing water
through dispenser.
▪ Discard any remaining water and you are
ready to brew.
5.3 DESCALING
To guarantee proper functionality of TONE
equipment it is necessary to descale the de-
vice each year, independent of using a water
softener. TONE Kaffeemaschinen AG rec-
ommend to execute the fi rst descaling after
one year after installation.
Descaling of TONE equipment only by qual-
ifi ed personnel.
To descale your TONE equipment, please
contact a local Technical Service that has
been authorized by the manufacturer.
TECHNICAL DATA

17
6. FAULT RECTIFICATION
EEC CONFORMITY DECLARA-
TION ACT 2006/42/EC
Declares that: The coffee ma-
chine has been projected and
manufactured in conformity
with Directive 2006/42/EC and
relevant national law, in accord-
ance with the following norm for conformity
evaluation: UNI 9887, ISPSEL rev. 95.
8. RECYCLING AND DISPOSAL
Instructions for the disposal of old prod-
ucts. The WEEE Directive (Waste from elec-
trical and electronic equipment; 2002/96/
EG) waspassed for the protection of human
health and the environment, in order to en-
sure that old products are disposed of so as
to make use of the best possible recovery
and technical recycling possibilities.
Your product has been developed and man-
ufactured from high-quality materials and
components, which can be largely recov-
ered and recycled. Do not dispose of the
product as normal domestic waste. Please
fi nd your local collection points for electri-
cal and electronic waste products, which are
marked with this symbol:
Please make use of one of the following dis-
posal possibilities:
1. Dispose of the complete product (includ-
ing the cable, plug and accessories) at the
relevant WEEE collection point.
2. If you are buying a replacement product,
you can return the old appliance to the deal-
er. Under the WEEE Directive, retailers are
obliged to take back such old appliances.
9. WARRANTY NOTE
TONE Kaffeemaschinen AG warrants
equipment manufactured by it for 1 year
parts and labor. Accessories and Dispens-
ers 1 Year parts only. Electronic Circuit and
Control Boards- 2 years parts, 1 year labor.
Equipment manufactured by others and
PROBLEM TIP
Descale
Please contact
a local Technical
Service that has
been authorized by
the manufacturer.
While coffee is
brewing, water
drips from the cold
dilution outlet.
The pressure
is too high, a
pressure regulator
is required please
contact the
technical service
7. TECHNICAL DATA
Type TOUCH 02
Dimensions in mm
(w x h x d) 585 x 715 x 627
Weight 34 kg
Power ~ 220 - 240V |
50/60Hz
Boilervolume 9 liters
Minimal Waterpressure 0,138 MPa
Maximal Waterpressure 0,3 MPa
Heating 2850W
Noise level < 70 dB

18
distributed by TONE - Please see original
equipment manufacturers warranty, TONE
Kaffeemaschinen AG will follow.
These warranty periods run from the date
of sale TONE Kaffeemaschinen AG warrants
that the equipment manufactured by it will
be commercially free of defects in materi-
al and workmanship existing at the time
of manufacture and appearing within the
applicable warranty period. This warranty
does not apply to any equipment, compo-
nent or part that was not manufactured by
TONE Kaffeemaschinen AG or that, in TONE
Kaffeemaschinen AG’s judgment, has been
affected by misuse, neglect, alteration, im-
proper installation or operation, relocation
or reinstallation, improper maintenance or
repair, incorrect voltage applied to the unit
at any time, damage or casualty. This war-
ranty does not apply to any equipment fail-
ures related to poor water quality, excessive
lime and chlorine and non periodic cleaning
and descaling. Warranty is null and void if
muriatic or any other form of hydrochloric
acid is used for cleaning or deliming. In ad-
dition, this warranty does not apply to re-
placement of items subject to normal use
including but not limited to user replaceable
parts such as faucet seat cups, sight gauge
tubes, washers, o-rings, tubing, seals and
gaskets.
This warranty is conditioned on the Buyer
1) giving TONE Kaffeemaschinen AG prompt
notice of any claim to be made under this
warranty by telephone at +41 52 620 06 06
or by mail to contact@tone-swiss.com;
2) if requested by TONE Kaffeemaschi-
nen AG, shipping the defective equip-
ment prepaid to an authorized TONE Kaf-
feemaschinen AG service location; and
3) receiving prior authorization from TONE
Kaffeemaschinen AG that the defective
equipment is under warranty.
THE FOREGOING WARRANTY IS EXCLU-
SIVE AND IS IN LIEU OF ANY OTHER WAR-
RANTY, WRITTEN OR ORAL, EXPRESS OR
IMPLIED, INCLUDING, BUT NOT LIMITED
TO, ANY IMPLIED WARRANTY OF EITHER
MERCHANTABILITY OR FITNESS FOR A
PARTICULAR PURPOSE.
The agents, dealers or employees of TONE
Kaffeemaschinen AG are not authorized to
make modifi cations to this warranty or to
make additional warranties that are binding
on TONE Kaffeemaschinen AG. Accordingly,
statements by such individuals, whether oral
or written, do not constitute warranties and
should not be relied upon.
If TONE Kaffeemaschinen AG determines in
its sole discretion that the equipment does
not conform to the warranty, TONE Kaf-
feemaschinen AG, at its exclusive option while
the equipment is under warranty, shall either
1) provide at no charge replacement
parts and/or labor (during the applica-
ble parts and labor warranty periods
specifi ed above) to repair the defective
components, provided that this repair is
done by a TONE Kaffeemaschinen AG
Authorized Service Representative; or
2) shall replace the equipment or refund the
purchase price for the equipment.
THE BUYER’S REMEDY AGAINST TONE
KAFFEEMASCHINEN AG FOR THE BREACH
OF ANY OBLIGATION ARISING OUT OF
THE SALE OF THIS EQUIPMENT, WHETHER
DERIVED FROM WARRANTY OR OTHER-
WISE, SHALL BE LIMITED, AT TONE KAF-
FEEMASCHINEN AG’S SOLE OPTION AS
SPECIFIED HEREIN, TO REPAIR, REPLACE-
MENT OR REFUND.
In no event shall TONE Kaffeemaschinen AG
be liable for any other damage or loss, in-
cluding, but not limited to, lost profi ts, lost
sales, loss of use of equipment, claims of
Buyer’s customers, cost of capital, cost of
down time, cost of substitute equipment,
facilities or services, or any other special, in-
cidental or consequential damages.

Declaration of Conformity
Manufacturer:
Address:
Device Name:
Model Type:
Function:
We herewith declare under our sole responsibility that the above mentioned device meets all the
provisions of the following EC Council Directives and Standards. All supporting documentations are
retained under the premises of the manufacturer.
DIRECTIVES
General Applicable Directive: Machinery Directive 2006/42/EC
Applied Harmonized Standards, National Standards or other Normative Documents:
EN 60335-1:2012, EN 60335-2-15:2016 + A11:2018, EN 60335-2-75:2004 + A1:2005 + A11:2006 +
A2:2008 + A12:2010, EN 55014-1:2017, EN 55014-2:2015, EN IEC 61000-6-2:2019, EN 61000-6-3:2007
Date CE Mark was axed:
From Serial Number:
Place, Date:
Signatures:
Name:
Function:
TONE Kaeemaschinen AG
Kasernenstrasse 5
3600 Thun
Switzerland
TONE TOUCH 02
90600
Coee Machine
25. May, 2020
19-A100000
CH-3600 Thun, 25. May, 2020
Holger Welz
CEO
Declaration of Conformity
Generated:
25.05.20 EL
Revision Status:
Index a
Approved:
25.05.20 HW
Released:
25.05.20 HW

20
APPENDIX - CONDENSED OPERATION
BREWING
▪ Insert funnel with product to brew as ap-
plicable. Ensure empty dispenser in place
below brew head. Touch screen to wake
brewer if necessary.
▪ Select beverage type from choices.
▪ Select brew volume from choices.
▪ Press the brew button to immediately start
brew cycle.
ENTER PROGRAMMING
▪ Press the upper left hand corner of main
beverage type selection screen. Enter pass-
word – (3650).
EDIT RECIPE
▪ Enter programming (see ”ENTER PRO-
GRAMMING”).
▪ Select “Edit Recipes”.
▪ Select recipe to be edited (use + or – on
either scrolling wheel or summary “Recipe
Settings” screen).
▪ Select feature to be modifi ed from sum-
mary screen: Temp, Volume, or Time.
▪ Adjust feature parameters on detail
screens. Push return to return to summary
Recipe Settings screen.
▪ Press return to go back to “Recipe Select”
screen. Press return again to go back to the
Programming/Service menu.
▪ Select fi nish when editing is completed.
Press Finish again to return to the main/
beverage select screen.
PERSONALIZE
▪ Enter programming (see ”ENTER PRO-
GRAMMING”).
▪ Select “Personalize”.
▪ User may edit phone number by select-
ing the phone number and using keypad
and save function. The company name may
be edited using the L,R keys to select let-
ter to be changed. Then use Up/Down keys
to change letter. Change between symbols
and upper and lower case letters using key
above the L and R keys.
▪ Select other settings to turn on/off beep-
er or energy modes. A setback time may
be programmed for energy saving options
and Autoarm options may be activated or
disabled. Metric or imperial measure may be
selected here also.
▪ Password is non-changeable.
▪ Press fi nish to go back to the Program-
ming/Service menu. Press Finish again to
return to the main screen.
CALIBRATE
▪ Enter programming (see ”ENTER PRO-
GRAMMING”).
▪ Select “Calibrate”. Enter password –
(3926).
▪ Select item to be calibrated (greyed out
items are not available for calibration. May
not be installed or have been turned off in
“Brewer Parameters” section).
▪ Countdown clock is displayed with current
setting. Place container in place at outlet to
be calibrated. Press start.
▪ Measure volume. Adjust the programmed
value if required. (Dependent on conditions,
it may be advisable to run multiple cycles
and enter weighted average).
▪ Press Finish. If no further items require
calibration select Finish again to go back
to the Programming/Service menu. Press
Finish again to return to the main/beverage
select screen.
SERVICE
▪ Enter programming (see ”ENTER PRO-
GRAMMING”).
▪ Select “Service”. Enter password – (3926).
▪ Select Error Messages to display and re-
APPENDIX
Other manuals for TOUCH 02
1
This manual suits for next models
1
Table of contents
Other Tone Coffee Maker manuals
Popular Coffee Maker manuals by other brands
SEVERIN
SEVERIN KA 4566 - CAFETIERE FINO MULTI datasheet

Breville
Breville Prima Latte III user manual
Cuisinart
Cuisinart Coffee Center BaristaBar SS-4N1C Series instructions
SEVERIN
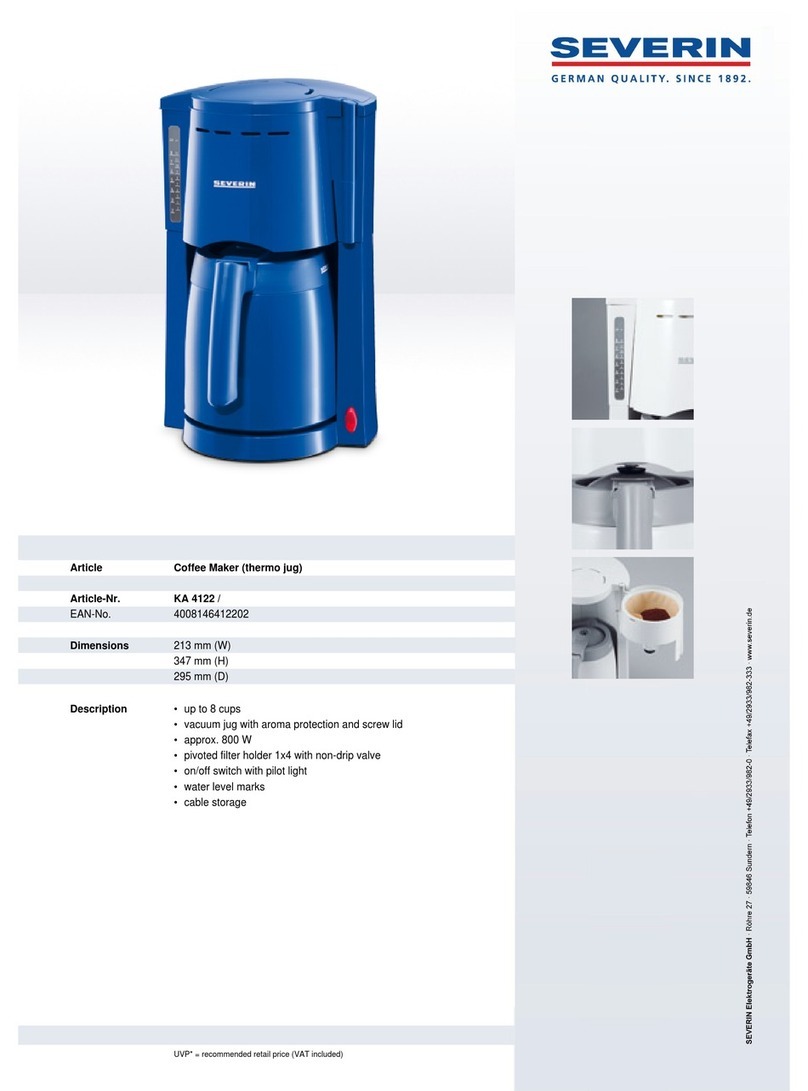
SEVERIN COFFEE MAKER - DATASHEET 3 Dimensions

Redmond
Redmond SkyCoffee RCM-M1505S-E user manual
Handpresso
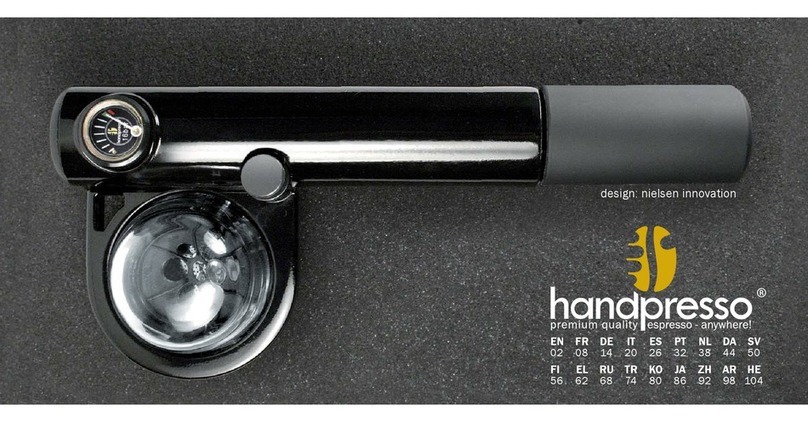
Handpresso DOMEPOD instructions
