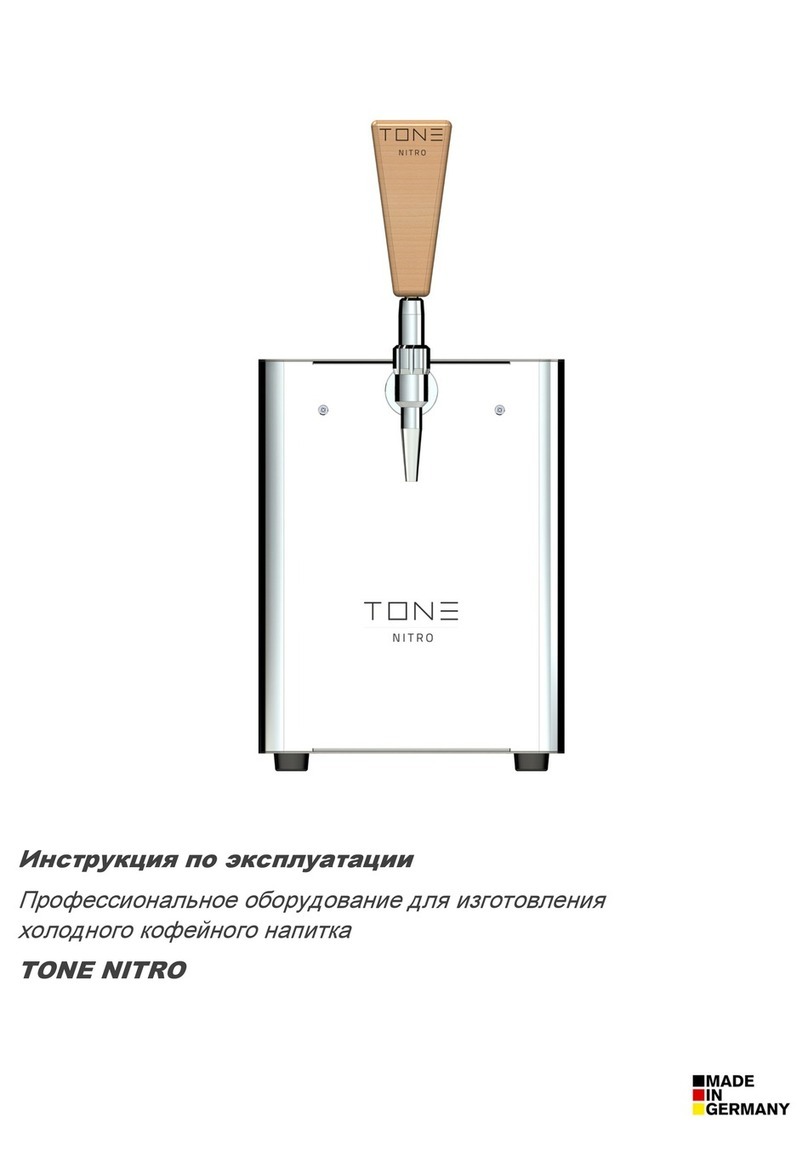
Tone NITRO User manual


Nitro DP ist eine eingetragene Wortmarke der
Gebrueder Schultes GmbH & Co. KG.
Eine CERTIFIED ORIGINAL NITRO DP® wird
ausschließlich an den Standorten in Bessenbach
oder Goldbach montiert. Die Gebrueder
Schultes GmbH & Co. KG. distanziert sich
ausdrücklich gegen Nachbauten und/oder
Geräte, die sich als „Nitro DP“ bezeichnen und
behält sich rechtliche Schritte vor.
Dieses Dokument wurde auf recycelten
Papier gedruckt. Wir stehen für
Umweltschutz und Nachhaltigkeit
Wir denken global und fertigen lokal, kurze
Wege auch in der Beschaffung sind uns
wichtig. Wir nutzen erneuerbare Energien
für unsere Fertigung.
Herausgeber:
Gebrueder Schultes GmbH & Co. KG
Am Beetacker 5
63856 Bessenbach
Germany
Revision 3 – Stand 04/2020 (Deutsch)

Manual_v3
CONTENTS
1 INTRODUCTION............................................................................................................................................................... 1
1.1 General information................................................................................................................................................. 1
1.2 Unpacking the machine ..........................................................................................................................................2
1.3 Mode of Operation................................................................................................................................................... 2
1.4 Requirements for the beverages............................................................................................................................3
1.5 Technical Data ......................................................................................................................................................... 3
1.6 EC - Declaration of conformity............................................................................................................................... 3
1.7 FDA - Declaration of conformity............................................................................................................................. 3
1.8 TONE Nitro - Warranty............................................................................................................................................. 4
2 SAFETY REGULATIONS ................................................................................................................................................. 5
2.1 General safety regulations...................................................................................................................................... 5
2.2 Electrical hazard ...................................................................................................................................................... 5
2.3 Operating overpressure.......................................................................................................................................... 6
2.4 Danger due to operational cooling ........................................................................................................................ 6
2.5 Danger due to operational heating up................................................................................................................... 6
2.6 Danger from sheet edges........................................................................................................................................ 6
3 REQUIREMENTS FOR THE LOCATION OF OPERATION.............................................................................................7
3.1 General requirements.............................................................................................................................................. 7
3.2 Electrical connections............................................................................................................................................. 7
3.3 Location of operation.............................................................................................................................................. 7
4 DESCRIPTION OF THE MACHINE.................................................................................................................................. 8
4.1 Scope of delivery: Accessories.............................................................................................................................. 8
4.2 Illustration ................................................................................................................................................................ 9
4.3 Bag-in-Box and TONE Nitro Canister .................................................................................................................. 10
5 INSTALLATION.............................................................................................................................................................. 11
5.1 Installation (Step by Step)..................................................................................................................................... 11
5.1.1 Perlator-unit ........................................................................................................................................................ 11
5.1.2 First time installation.......................................................................................................................................... 12
5.1.2 Switching on the device / Ready for operation................................................................................................ 14
5.1.3 Adjusting the foam formation by using NITRO EASY CONTROL.................................................................. 15
5.1.4 NITRO oder PUR-Modus .................................................................................................................................... 16
5.1.5 Switch cooling on / off ....................................................................................................................................... 16
6 HYGIENE AND CLEANING............................................................................................................................................17
6.1 Hygienic handling.................................................................................................................................................. 17
6.2 Cleaning schedule................................................................................................................................................. 17
6.3 Equipment areas to be cleaned............................................................................................................................18
6.4 Approved cleaning agents....................................................................................................................................18
6.5 Preparation / Switch off machine and remove tap ............................................................................................. 19
6.6 Cleaning the tap..................................................................................................................................................... 19
6.7 Cleaning the Perlator unit and the mixer housing.............................................................................................. 20
6.8 Preparation of the cleaning liquid........................................................................................................................ 21
6.9 Dry cleaning ........................................................................................................................................................... 22
6.10 Drain the system.................................................................................................................................................. 23
7 MAINTENANCE.............................................................................................................................................................. 24
7.1 Cleaning.................................................................................................................................................................. 24
7.2 O-rings, Perlators und tap unit............................................................................................................................. 24
7.3 Air filter...................................................................................................................................................................24
7.4 Condenser fins....................................................................................................................................................... 25
8 FLOW CHART AND CIRCUIT DIAGRAM...................................................................................................................... 25
8.1 Flow chart............................................................................................................................................................... 25
8.2 Circuit diagram ...................................................................................................................................................... 25
9 TROUBLESHOOTING, FAQ, TIPPS AND TRICKS....................................................................................................... 26
9.1 Troubleshooting .................................................................................................................................................... 26
9.2 FAQ, Tipps and Tricks........................................................................................................................................... 28
9.3 Recipe and menu suggestions 9.3.1 Cold Brew Drinks without alcohol.....................................................31
9.3.2 Cold Brew Drinks with alcohol.....................................................................................................................34
9.3.3 NITRO Tea without alcohol...........................................................................................................................35
9.3.4 NITRO Tea with alcohol.................................................................................................................................36
EG DECLARATION OF CONFORMITY............................................................................................................................ 37
APPENDIX: CLEANING PROOFS FOR TONE NITRO.................................................................................................... 38

Page 1 of 39
Congratulations!
Congratulations on the purchase of your TONE
Nitro.
A piece of exceptional craftsmanship and German
engineering.Your TONE Nitro stands for sensational
elegance, high performance and reliability. A
machine that you will be happy to present to your
customers and that you and your employees will
have a lot of fun with.
1 INTRODUCTION
1.1General information
This manual provides essential information for safe operation of your TONE Nitro. Please
therefore read the enclosed safety instructions carefully.
1. This applies in particular to safety during installation, operation and cleaning. Please keep this
manual in a safe place where it is accessible to all users.
2. Errors and technical changes reserved. Gebrueder Schultes GmbH & Co. KG (in accordance
with its policy) is constantly developing the products further. Gebrueder Schultes GmbH & Co.
KG therefore reserves the right to make changes and improvements to the product described in
this documentation without prior notice.
3. Reproduction of any kind without the prior written permission of Gebrueder Schultes GmbH &
Co. KG is strictly prohibited. All other brands and names mentioned in this documentation refer
to the corresponding companies or their products. Gebrueder Schultes GmbH & Co. KG claims
no right of ownership of brands or names other than its own.
4. Disclaimer: Despite careful control of the contents, Gebrueder Schultes GmbH & Co. KG
accepts no liability for the content of external links. The operators of the linked sites are solely
responsible for the content of their sites.
5. Please read the operating instructions carefully before use and keep them in a way that they
are accessible to all users!
Mandatory sign:
Please read it.
Information sign:
Information.

Page 2 of 39
Warning sign:
Attention!
1.2 Unpacking the machine
Check immediately whether any damage can be seen on the outer packaging
of the machine. Immediately report any damage tothe transporter or contract
partner and document it.
If you do not do this as an entrepreneur, the goods will be considered
"approved" and the recipient will no longer be able to rely on the transport
damage later.
After you have carefully unpacked the machine, please check
whether the device has any external damage.
Keep the packaging in case the machine
may have to be shipped by a forwarding agent. The packaging materials (boxes, plastic bags) must
never be allowed to fall into the hands of children.
If any defects or damage to the machine are found, please inform the dealer where you purchased
the machine immediately so that the matter can be dealt with.
1.3 Mode of Operation
The TONE Nitro combines various functionalities in one device:
Designed for bag-in-box applications / sucking a beverage from a pressureless container
Vacuum switch switches off automatically when the box is empty
Suitable for Cold Brew Coffee, fruit juice concentrates (without pulp), tea, wine, other
alcoholic beverages
Suitable for operation with air, nitrogen and CO2 and adjustable via NEC "NITRO EASY
CONTROL" on the unit or external gas supply
Enrichment of the drink with atmospheric nitrogen
Cooling the beverage in the appliance Cooling block
Tapping the drink in Stout style
Use with Bag-in-Box and atmospheric nitrogen

Page 3 of 39
Use with barrel and external gas supply
1.4 Requirements for the beverages
The TONE Nitro was primarily developed for use with Cold Brew Coffee. However, it can also be
used with other beverages such as tea.
It isessential to ensure that the liquidsare filtered toa filtration degree of atleast 10 µm (cf. common
disposable filters made of filter paper), as otherwise the pump inside the machine or the aerators
can clog and damage the unit. Furthermore, it is essential that the unit is cleaned with fresh drinks
after use. Only when used with pasteurised drinks do different cleaning intervals apply. Refer to
"CLEANING SCHEDULE " for information on cleaning related issues.
1.5 Technical Data
Output capacity continuous
40 l / h
Output capacity continuous
at 17°C 7°C
25 l / h
Output capacity continuous
at 22°C 7°C
15 l / h
Built-in compressor
YES
Minimum cooling capacity
4 °C
Liquid Tap temperature
5°-8°C (+/- 2°C)
Required cooling time
2 –4 min.
Supply voltage
230 V / 50 Hz
Cooling liquid
R –134a (68g)
Power
Max. 300 W
Weight
23,5 kg
Measurements
Width: 26 cm
Depth: 32 cm + 12,5 cm (=tap unit)
Height: 35 cm
1.6 EC - Declaration of conformity
This device is EC-compliant according to the following EC directives:
EU EMC Directive new 2014/30/EU
NSP Directive new 2014/35/EU
1.7 FDA - Declaration of conformity
All parts in contact with the medium/liquid and all sealants used in the TONE Nitro meet
the requirements of the FDA (Food and Drug Administration) and/or are made of stainless steel.

Page 4 of 39
1.8 TONE Nitro - Warranty
TONE Nitro offers a 12-month limited warranty on all electrical and mechanical parts.
If your TONE Nitro requires warranty service, please contact your dealer.
YOUR WARRANTY
1. The warranty period is 15 months and begins on the day of sale to the end user. The date of
purchase and the type of device must be documented by a purchase receipt.
2. Within the warranty period TONE Nitro will eliminate all defects. TONE Nitro may choose to
repair, replace defective parts or replace the instrument. The performance of warranty services
does not cause an extension or a new start of the warranty period. Replaced parts become the
property of TONE Nitro.
3. Damage to or failure of your TONE Nitro machine due to inadequately treated water and/or
other liquids is not covered by the warranty See "Beverage Requirements" for information on
beverage-related questions.
4. No warranty is provided for damage or defects resulting from improper connection, improper
handling, repair attempts by unauthorized persons or failure to follow the instructions for use.
In particular, if TONE Nitro operating or maintenance instructions are not followed, or if
consumables (cleaning agents, descaling agents, water filters) are used that do not meet the
original specifications, any warranty is also void.
5. Parts subject to wear and tear (e.g. rubber seals, gaskets, O-rings, taps, valves) are excluded
from the warranty, as are damages caused by foreign bodies in the beverage or air circuit.
Labour or shipping costs are also excluded from the warranty.
6. Due to the nature and characteristics of the wood(s) used for the handles of TONE Nitro
machines, cracks, shrinkage and/or deformation of this wood are not covered by the warranty.
7. The same applies to the powder coatings on the machines. We strive to achieve the highest
possible quality but cannot exclude small deviations in the surface due to manual production,
so that the surface quality is not covered by the guarantee.
8. Warranty services are provided in the Federal Republic of Germany. For devices which were
purchased in an EU country and brought to another EU country, services are provided within
the scope of the TONE Nitro warranty conditions valid for this EU country.
9. Warranty service is provided by TONE Nitro or by Authorized TONE dealers.

Page 5 of 39
2 SAFETY REGULATIONS
2.1 General safety regulations
The device corresponds to the current state of the art. Operational safety is only guaranteed if the
operating instructions are followed. Work instructions must be followed taking into account the
following dangers.
During the installation and operation of the TONE Nitro we also point out that the following relevant
laws, ordinances, guidelines and regulations must be observed and complied with:
1. Equipment and product safety law - GPSG
2. Occupational Safety and Health Act - ArbSchG
3. Industrial safety ordinance - BetrSichV
4. Food hygiene regulation –LMHV
5. Beverage Dispensing Systems Ordinance - SchankV (until 30.06.2005)
6. Technical rules for beverage dispensing systems (TRSK and DIN standards)
7. Ordinance on Hazardous Substances (Gefahrstoff V)
8. Generally accepted rules of technology
Relevant country-specific rules, guidelines and regulations are to be applied. Conversions or
changes to safety-relevant components or elementsare generally prohibited andautomatically lead
to the expiration of the manufacturer's warranty.
Check the device at least once a day for visible damage and defects. Contact a qualified
service technician if you need to make any changes or repair work. The power cord may only
be replaced by authorized service personnel. Use only original spare parts and accessories.
Make sure that only authorized personnel work on the device and that the operating
personnel is provided with operating instructions and this user manual.
Make sure that no unauthorized person changes settings on the device or interferes with the
device.
TONE accepts no liability for damage resulting from the use of non-original spare parts or
accessories, as well as from improper handling or use outside the device's intended purpose.
2.2 Electrical hazard
Electric shock can be fatal or lead to serious injury! Unauthorized interference with the electrical
system is therefore strictly prohibited. Water and electricity produce a deadly mixture!
The device is supplied with a moulded safety plug and may only be connected to a grounded safety
socket.
If there is no corresponding socket outlet with earthing contact, the connection may only be carried
out by authorized personnel, whereby the regulations valid at the place of installation (e.g. in
Germany VDE-DIN standard) must be observed.

Page 6 of 39
2.3 Operating overpressure
Some components are under overpressure during operation and are therefore a potential source
of danger. Do not loosen or dismantle any parts that are under excess operating pressure.
2.4 Danger due to operational cooling
The evaporation temperature in the coolant circuit can be as low as -10°C. There is therefore a
potential source of danger if maintenance, servicing, cleaning etc. are carried out on components
at the appropriate temperature without suitable protective measures.
2.5 Danger due to operational heating up
Do not touch the compressor, condenser, motors and piping, as these parts can heat up during
operation, which may cause injury if touched.
2.6 Danger from sheet edges
There is a residual risk of injury at sheet edges and corners despite constructive prevention.

Page 7 of 39
3 REQUIREMENTS FOR THE LOCATION OF OPERATION
3.1 General requirements
The respective valid national regulations regarding the place of installation must be observed.
Since the TONE Nitro is basically a dispensing system, please also observe the technical
regulations for beverage dispensing systems TRSK 400 "Installation of beverage dispensing
systems".
Attention: Low voltage can damage the compressor. The same applies if several units are
supplied with power via one power connection.
The power plug must be freely accessible.
3.2 Electrical connections
see technical specification
Voltage
230 V∼+/- 10% 50 Hz
Power
300 W
Fuse protection
max. 16 A
3.3 Location of operation
Adequate ventilation and extraction must be ensured. For this purpose, the distance to the next
wall should be at least 30 cm.
Attention:
Never cover and/or block the air slots. Otherwise there will be insufficient cooling capacity
and the cooling system may fail.
Never place the unit near heat sources or direct sunlight.
Under no circumstances should liquid enter the upper opening of the unit, otherwise there
is a danger of short circuit!
!

Page 8 of 39
4 DESCRIPTION OF THE MACHINE
4.1 Scope of delivery: Accessories
Picture
Article-Nr.
Name
Information
1
103010
Perlator-unit
„green“
Perlator-unit consisting of:
1X 103011-Perlator A „green“
1X 103012-Perlator B „green“
1X 103013-Perlator C „green“
2
108010
O-Ring Set (all)
O-Ring Set
3
102010
Tap "TONE Nitro"
Tap for TONE Nitro with "TONE Nitro” laser
engraving
4
105010
Schlauch mit NC-
Anschluss
Hose with NC connection for TONE Nitro
systems
5
109010
Power cable EU -
angled (L)
Power cable EU
6
106010
Cleaning-Canister
5l
Folding cleaning canister with 5l capacity and
NC-connection for TONE Nitro
7
107010
Cleaning powder
3X
Reliable quality cleaner with active oxygen for
regular alkaline cleaning
8
107014
Cleaning ball
Bevi Clean Ball, transparent throughout, no gaps
and valves, for indoor and outdoor cleaning
9
107015
Cleaning brush
Cleaning brush for the cleaning of the mixer
housing built in TONE Nitro.

Page 9 of 39
4.2 Illustration

Page 10 of 39
4.3 Bag-in-Box and Nitro Canister
The TONE Nitro was designed exclusively for dispensing clear and/or filtered liquids that are
drawn from a pressureless container (= bag-in-box / nitro canister). The use with insufficiently
filtered liquids is expressly forbidden (as it can lead to contamination or blockages in the device) and
will result in the loss of warranty if this is not observed!
Use with pasteurised bag-in-boxes is expressly recommended, as these have a high oxygen barrier,
so that no ambient air can reach the drink and thus no mould can form.
Picture
Article-Nr.
Name
Information
1
106010
Cleaning-
Canister 5l
Folding cleaning canister with 5l capacity
for TONE Nitro
2
106011
Cleaning-
Canister 10l
Folding cleaning canister with 10l capacity
for TONE Nitro
3
106012
Wide neck
canister
6,4l
6,4 Liter UV-resistant wide-neck canister for
TONE Nitro with stainless steel adapter and NC
keg closure, plastic barrel with screw cap
4
106013
Wide neck
canister
15l
15 Liter UV-resistant wide-neck canister for
TONE Nitro with stainless steel adapter and NC
keg closure, plastic barrel with screw cap
5
106014
Wide neck
canister
26l
26 Liter UV-resistant wide-neck canister for
TONE Nitro with stainless steel adapter and NC
keg closure, plastic barrel with screw cap
6
106015
Wide neck
canister
55l
55 Liter UV-resistant wide-neck canister for
TONE Nitro with stainless steel adapter and NC
keg closure, plastic barrel with screw cap
The wide-neck canister sucks in ambient air to
compensate for the negative pressure created by
the suction of the liquid.
The wide-neck canister does not guarantee any shelf
life of the liquids and must always be cleaned after
daily use.

Page 11 of 39
5 INSTALLATION
5.1 Installation (Step by Step)
5.1.1 Perlator-unit
Picture
Article-Nr.
Name
Information
Amount
1
103010
Perlator-unit
"green"
consisting of:
1 X - 103011-Perlator –A
"green"
3 X - 103012-Perlator - B
"green“
1 X - 103013-Perlator - C
"green"
Set
=
2
103011
Perlator - A
" green "
Front-Perlator for TONE Nitro
1
3
103012
Perlator - B
" green "
Perlator for TONE Nitro
3
4
103013
Perlator - C
" green "
Perlator for TONE Nitro
1
Note:
A ventilated perlator does not present a significantly increased risk of aerosol formation. The
supplied nitrogen is sufficiently cleaned by air filters.
To prevent the perlators from beingcontaminated with biofilm growth, the individual perlators
(Perlator - A "green", Perlator - B "green", Perlator - C "green") must be cleaned after use. In
addition, the inserts (103019 Perlator spare part "green") should be replaced at regular
intervals. Read "MAINTENANCE" for information on cleaning.
In the front piece Perlator - A "green" there are two O-rings: one at the front and one at the
back. Make sure that the O-rings are in the notch of the stainless steel part before
inserting the perlator-unit into the mixer unit. If the O-rings are missing, the tap cannot
seal and the unit will drip on the mixer unit.

Page 12 of 39
5.1.2 First time installation
1
Place TONE Nitro [A] in its place.
Note: Keep ventilation and exhaust air slots free
and do not block them under any circumstances!
When first installed at a new location, the
machine must be left standing quietly for at
least 30 minutes before use.
2
Insert perlator-unit [B] into mixer housing [C].
Note: Watch out for O-rings! Before inserting, it
is essential to remove the plugs.
3
Screw tap unit [D] onto the external thread of
the mixer housing [C] and tighten slightly.
Note: Under no circumstances should pliers be
used for tightening!
4
Set device switch [E1] on the rear panel to
"0 OFF".
5
Screw the suction hose with screw connection
[F1] to the rear opening [G]. Plug the cable [H]
of the cold appliance into the socket [E2]
provided for this purpose.
Note: Clean the suction hose with screw
connection [F1] and the rear opening [G] with
disinfection spray before use.
A
B
C
D
E1
H
V
H
E2
F1
G

Page 13 of 39
6
Turn the right-hand knob thermostat [I2] on the
back of the unit counterclockwise for less cooling
and clockwise for more cooling.
Note: Do not set the thermostat to MAX, as the
unit may freeze. To switch off the cooling
completely, turn the rotary switch all the way to
the left until a "click" is heard.
5.1.2 Connection suction hose and connector with NC-coupling
1
Open the valve at connector [F2] by pulling the snap-lock upwards and put it onto the
coupling [J].
Note: Plug the connector [F2] flush onto the coupling [J].
Make absolutely sure that the connector [F2] is plugged flush onto the coupling [J], otherwise
the system sucks in air and the system "spits" air during tapping and/or
the valve inside the connector [F2] does not open and the system does not suck in liquid
Note:
Whenever the connector [F2] is reconnected to the coupling [J],
the connector [F2] must be cleaned with a disinfectant spray.
I2
J
F2
I
F2
I
J

Page 14 of 39
5.1.2 Switching on the device / Ready for operation
1
Set the unit switch [E1] on the rear panel to "1
ON". The system starts automatically and
switches off after reaching the set temperature
and pressure. The system is ready for
operation after approx. 5 minutes.
Note: For initial commissioning, the process may
take 1-2 minutes longer.
2
Turn the middle rotary knob [I] 90° clockwise to
"PUR".
3
Place the glass under the tap [D] and pull the
handle [D1] forward by 90°. The appliance
sucks in the liquid and after a short time it flows
out of the tap in a cooled manner.
To stop the tapping process, flip the tap handle
upwards again.
4
As soon as theliquid flows, turn the middleknob
[I] 90° counterclockwise to "NITRO".
Now the NITRO settings can be made to adjust
the foaming.
More information under "5.1.3 Adjusting the
foaming with NITRO EASY CONTROL".
E1
D1
11
I
I
D

Page 15 of 39
5.1.3 Adjusting the foam formation by using NITRO EASY CONTROL
1
Set the nitrogen supply via the left " NITRO"
control knob [K]. To make the adjustment, the
"NITRO" control knob [K] must be pulled out.
Note: The pump loses power if the valve is
opened too wide and therefore too much air
is delivered.
2
Turn rotary switch "NITRO" [K] for more
air clockwise (+).
Turn rotary switch "NITRO" for less air
counterclockwise (-).
Note: The fine adjustment is very sensitive and
should therefore only be carried out in steps of
5 - 10° between tapping from time to time and
checking the result.
3
Once the perfect setting has been found, the
"NITRO" [K] control knob can be pushed
back in and locked.
Note:
Always close the tap while making the NITRO settings so that the
system can build up the pressure!
If the system only emits air, proceed as follows:
1. Close tap [D] (fold tap handle [D1] upwards again).
2. Turn rotary switch "NITRO" [K] at least half a turn (180°) counterclockwise.
3. Place a glass underneath and pull the tap handle forward by 90°.
4. If the result still does not meet your requirements, repeat step 2-3.
A total of about eight rotations are possible. As soon as liquid flows out of the tap, fine adjustment (1-2°
steps) can be made during tapping.
K
K
K

Page 16 of 39
5.1.4 NITRO oder PUR-Modus
1
Turn the middle rotary knob [I] 90° clockwise to
"PUR".
Note: After the changeover, the unit continues to
output approx. one glass with foam formation
until the PUR setting has been completely
adopted.
5.1.5 Switch cooling on / off
1
Turn the right-hand Thermostat [I2] on the back
of the unit counterclockwise for less cooling and
clockwise for more cooling.
Note: Do not set the thermostat to MAX, as the
unit may freeze. To switch off the cooling
completely, turn the rotary switch all the way
counterclockwise until a "click" is heard.
I
I2

Page 17 of 39
6 HYGIENE AND CLEANING
6.1 Hygienic handling
Observe the respective national regulations for cleaning dispensing systems valid at the installation
site. Since the TONE Nitro is basically a beverage dispensing system, we recommend that you
clean the beverage lines in accordance with the applicable cleaning regulations in accordance with
TRSK 501 "Cleaning of beverage dispensing systems". We also refer to DIN 6650-6
("Requirements for cleaning and disinfection of beverage dispensing systems")
Before every connection and every change of beverage type, pipes and connecting parts and
tap fittings must be cleaned.
Parts that come into contact with air and drink must be cleaned daily (especially tap outlets).
Follow the instructions of the detergent manufacturer. Only use cleaning agents that also meet
the requirements of ASI 6.84 and DIN 6650-6 for cleaning.
There is a risk of severe burns when handling cleaning fluids! Always observe the
safety data sheets during cleaning work, wear protective goggles, gloves and
appropriate clothing!
6.2 Cleaning schedule
Please note that different cleaning intervals apply depending on the beverage and that the device
must be rinsed regularly with water.
The national legal requirements and regulations apply!
Description
How?
When?
Description
1
Cold Brew Coffee
(pasteurized)
Cold Brew (without additives),
pasteurised, in Bag-in-Box with
CMB / NC closure
every 14
days
chemical
2
Cold Brew Coffee
(fresh)
Cold Brew (with/without additives)
freshly prepared
daily
chemical
3
Tea (pasteurized)
Tea (without additives),
pasteurized, in Bag-in-Box with
CMB / NC closure
every 7 days
chemical
4
Tea (fresh)
Tea (with/without additives), freshly
prepared
daily
chemical
5
Fruit juice
concentrates
(without fruit pulp)
Fruit juice concentrates (without
fruit pulp) with/without additives
freshly prepared
daily
chemical
6
Wine, other alcoholic
beverages
Wine, other alcoholic beverages
daily
chemical
In general, the appliance must always be cleaned after use with freshly prepared drinks, i.e.
with a chemical cleaner and subsequent water rinse. This prevents the appliance from being
contaminated and the beverage lines from taking on a different taste.
Other manuals for NITRO
2
Table of contents
Other Tone Coffee Maker manuals
