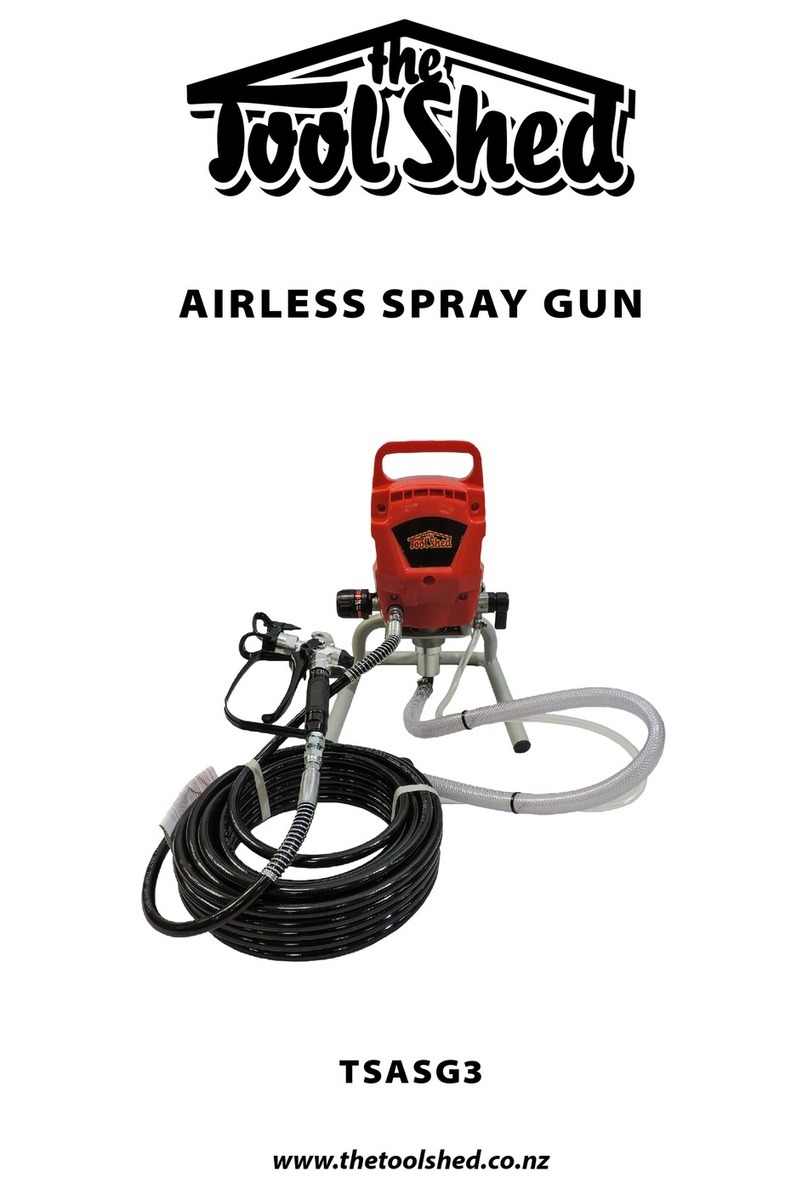
Tool Shed TSASG User manual

AIRLESS SPRAY GUN
TSASG
www.thetoolshed.co.nz

2
OPERATION MANUAL
www.thetoolshed.co.nz
PRODUCT DETAILS
PRODUCT
MODEL NO.
Airless Spray Gun
TSASG
D
ISTRIBUTED BY
NOTE:
This manual is only for your reference. Due to the continuous improvement of the ToolShed
products, changes may be made at any time without obligation or notice.
WARRANTY
This product may be covered under the ToolShed warranty. For more information see our Terms
& Conditions at www.thetoolshed.co.nz

3
OPERATION MANUAL
www.thetoolshed.co.nz
C O N T E N T S:
Specifications ...................................................................................................................................... 4
Identification ....................................................................................................................................... 5
General Safety ..................................................................................................................................... 6
Service ................................................................................................................................................. 7
Specific Safety ..................................................................................................................................... 8
Assembly ........................................................................................................................................... 10
Locking Spray Gun ............................................................................................................................. 11
Pressure Relief Procedure ................................................................................................................. 11
Purging & Priming ............................................................................................................................. 12
Operation .......................................................................................................................................... 14
Unclogging Spray Tip ......................................................................................................................... 15
Cleaning ............................................................................................................................................. 15
Storage .............................................................................................................................................. 19
Troubleshooting ................................................................................................................................ 21
Maintenance ..................................................................................................................................... 22
Parts List ............................................................................................................................................ 22

4
OPERATION MANUAL
www.thetoolshed.co.nz
SPECIFICATIONS
Power 230V / 1100W
Flow Rate Up to 1.5 LPM
Hose Length 10m
Pressure 3000psi
Weight 5.9kg (spray unit)
Nozzles 215, 415 & 515
NOZZLE SPECIFICATIONS
Nozzle Spray Fan Width At Distance Of
215 100mm 300mm
415 200mm 300mm
515 250mm 300mm

5
OPERATION MANUAL
www.thetoolshed.co.nz
IDENTIFICATION
COMPONENTS & FUNCTIONS
ON/OFF Switch Turns power to the sprayer on and off
Suction Tube Fluid is drawn through the suction tube into the
pump
Fluid Section
A piston in the fluid section moves up and down
to create the suction that draws fluid through
the suction tube.
Spray Gun The spray gun controls the delivery of the fluid
being pumped.
Spray Hose
The spray hose connects the gun to the pump.
Return Tube
Fluid is sent back out through the return tube to
the original container when PRIME/SPRAY knob
is in PRIME position.
PRIME/SPRAY Knob The PRIME/SPRAY knob directs fluid to the spray
hose when set to SPRAY or the return tube when
set to PRIME.
Pressure Control Dial This dial regulates the amount of force the pump
uses to push the fluid.
Oiler Provides lubrication to the fluid section of the
pump.
Pusher Stem Keep the inlet valve open and prevents sticking
due to dried materials.

6
OPERATION MANUAL
www.thetoolshed.co.nz
IMPORTANT INFORMATION
GENERAL SAFETY GUIDELINES
WARNING READ ALL SAFETY WARNINGS AND ALL INSTRUCTIONS. Failure to follow
instructions and warnings could lead to serious injury, electric shock, or fire. Save ALL warnings
and instructions for future reference.
WORK AREA SAFETY
- Ensure that your work area is kept well-lit and clean. Lack of visibility and clutter greatly
increase the risk of accident.
- Keep bystanders and children clear when operating a power tool or machine. They can
cause distraction or risk injury themselves.
- Ensure you are not operating the power tool or machinery in the presence of flammable
gases, dust, liquids, or anything that creates an explosive atmosphere. Power tools and
machinery can create sparks which can lead to ignition in these environments.
PERSONAL SAFETY
- Always wear personal protective equipment. Eye protection, ear protection, dust masks
and other protective equipment will help to reduce the risk of personal injury.
- Dress appropriately. Do NOT wear jewellery or loose clothing that can get caught in
moving parts. Keep hair, loose clothing, jewellery, and anything else that could be of risk
away from moving parts or they could be caught.
- Always remain alert and do NOT operate the power tool or machinery under the
influences of any substances (drugs, medication, alcohol). Losing focus could lead to injury
while operating power tools and machinery.
- Always keep proper footing and balance. Overreaching can lead to slipping and falling
which can result in injury.
- Ensure the power switch is in the off position before connecting any battery or power
source to the power tool or machinery. This can lead to accidents as tools and machinery
can fire suddenly when it is not expected and lead to accident.
ELECTRICAL SAFETY
- Do NOT use the power tool or machinery in raining conditions or wet areas where the
power tool or machinery could get wet. Water in the power tool or machinery can lead to
electric shock.
- Only use the power tool or machinery when the plug correctly matches the power outlet.
Modifying plugs greatly increases the risk of electric shock.
- Keep the power cord away from anything that could damage it such as sharp edges,
moving parts or heat. A damaged power cord increases the risk of electric shock.
- Only operate outdoors with the use of an outdoor extension lead. Not all extension leads
are suited to outdoor use and using one which is not can greatly increase the risk of electric
shock.
- Avoid body contact with grounded or earthed surfaces. Surfaces such as radiators, ranges,
pipes, and refrigerators can increase risk of electric shock due to your body being earthed or
grounded.

7
OPERATION MANUAL
www.thetoolshed.co.nz
POWER TOOL AND MACHINERY USE AND CARE
- Use the correct tool for the job. Forcing a tool to do a job it was not designed for increases
the risk of accident or injury.
- Disconnect power tools and machinery from power or remove batteries before storing
tools and machinery or making any changes or adjustments to them. This reduces or
removes the risk of power the tool or machinery accidentally firing which can help prevent
injury or accident.
- Check the power tool for damage or any condition that could affect the way the tool or
machine works. An unrepaired tool or machine can lead to accident and injury. Only have
your tool or machine repaired with genuine parts from The ToolShed.
- Only use the power tool and machinery with genuine parts or accessories that are
designed to be used with the power tool and machinery. Failure to do so could result in
accident or injury or damage your tool or machinery.
- Store your tool or machinery out of reach of children and away from untrained personnel
when not in use. Use by somebody untrained or a child could lead to accident or serious
injury.
SERVICE
- Have your tools and machinery serviced at The ToolShed with ToolShed replacement
parts. This will ensure that the safety of the power tool or machine is maintained.

8
OPERATION MANUAL
www.thetoolshed.co.nz
ADDITIONAL SAFETY FOR AIRLESS SPRAY GUN
GENERAL
Can cause severe injury or property damage.
- Read all instructions and safety precautions before operating equipment.
- Before each use, check all hoses for cuts, leaks, abrasions, or bulging of cover. Check for
damage or movement of couplings. Immediately replace the hose if any of these conditions
exist – NEVER REPAIR A PAINT HOSE.
- All hoses, fittings, and filter caps must be secured before operating the spray pump.
Unsecured parts may eject at a great force or leak a high-pressure fluid stream causing
severe injury.
- All hoses, swivels, guns, and accessories must be rated at or above 3000psi.
- Do not spray outdoors on windy days.
- Wear clothing to keep paint off your skin and hair.
- Do not operate or spray near children – keep children away from the equipment at all times.
INJECTION INJURY
A high-pressure paint stream produced by this equipment can pierce the skin and underlying
tissues, leading to serious injury.
- Never aim the gun at any part of the body.
- Do not aim the gun at / spray any person or animal.
- Never allow any part of the body to touch the fluid stream.
- Never put your hand in front of the gun. Gloves will not provide protection against an
injection injury.
- Always lock the gun trigger, shut the pump off, and release all pressure before servicing,
cleaning the tip or guard, changing tip, or leaving unattended. Pressure will not be released
by turning off the motor. The PRIME/SPRAY knob must be turned to PRIME to relive the
pressure. Refer to the PRESSURE RELIEF PROCEDURE described in the pump manual.
- Always keep the tip guard in place while spraying. The tip guard provides some protection
but is mainly a warning device.
- Always remove the spray tip before flushing or cleaning the system.
- Paint hoses can develop leaks from wear, kinking and abuse. Inspect the hose before each
use and do not use the hose to lift or pull the equipment.
- Never use a spray gun without a working trigger lock and trigger guard in place.
- All accessories must be rated at or above 3000psi. This includes spray tips, guns, extensions,
and hoses.

9
OPERATION MANUAL
www.thetoolshed.co.nz
HAZARDOUS VAPORS
Paints, solvents, insecticides, and other materials can be harmful if inhaled or if they are to come
in contact with the body.
- Use a respirator or mask if vapors can be inhaled. Read all instructions supplied with the
mask to ensure it will provide the necessary protection.
- Wear protective eyewear.
- Wear protective clothing as required.
EXPLOSION OR FIRE
Solvent and paint fumes can ignite or explode, causing severe injury and property damage.
- Provide extensive exhaust and fresh air introduction to keep the air within the spray area
free from accumulation of flammable vapors.
- Do not spray in a confined area.
- Avoid all ignition sources such as static electric sparks, open flames, pilot lights, electrical
appliances, and hot objects.
- Do not smoke in the spray area.
- Ensure floor area is well ventilated, flammable vapors are often heavier than air.
- The equipment and objects in and around the spray area must be properly grounded to
prevent static sparks.
- Keep area clean and free of paint or solvent containers, rags, and other flammable materials.
- Use only conductive or high-pressure fluid hoses.
- Always flush unit into a separate metal container, at low pump pressure, with spray tip
removed.
- Follow the material and solvent manufacturers warnings and instructions. Know the
contents of the paints and solvents being sprayed. Read all Material Safety Data Sheets
(MSDS) and container labels provided with the paints and solvents.
- Use extreme caution when using materials with a flashpoint below 21°C. (Flashpoint is the
temperature that a fluid can produce enough vapors to ignite).
- Use lowest possible pressure to flush equipment.
- Do not spray onto pump assembly.
EXPLOSION HAZARD DUE TO INCOMPATIBLE MATERIALS
Will cause property damage or severe injury.
- Do not use materials containing bleach or chlorine.
- Do not use halogenated hydrocarbon solvents such as bleach, mildewcide, methylene
chloride, and trichloroethane. They are not compatible with aluminum.

10
OPERATION MANUAL
www.thetoolshed.co.nz
ASSEMBLY
DO NOT PLUG IN THE SPRAYER UNTIL THE SETUP IS COMPLETE
Tools Required for Assembly:
- Two adjustable wrenches
- 3/16” allen wrench
INSTRUCTIONS
1. Thread the high-pressure hose to the spray hose port on the machine. Tighten this with an
adjustable wrench.
2. Thread the other end of the hose to the spray gun. Hold the gun with one adjustable wrench
and tighten the hose nut with the other.
The spray tip should NOT be attached until after the sprayer and spray hose have been purged
and primed.
3. Thread the suction tube onto the inlet valve and tighten firmly by hand. Be sure that the
threads are straight so that the fitting turns freely.
4. Press the return tube onto the return tube fitting. Squeeze the clip over the return tube
fitting to secure the return tube.
5. Verify that the seal is present inside of the suction tube. Thread the inlet filter into the end
of the suction tube.

11
OPERATION MANUAL
www.thetoolshed.co.nz
BEFORE YOU BEGIN
This section contains instructions that will be repeated throughout this manual.
LOCKING THE SPRAY GUN
Always lock the trigger off when attaching the spray tip or when the spray gun is not in use.
The gun is locked when the trigger lock is at a 90° angle. (Perpendicular to the trigger in either
direction).
To lock the gun, turn the trigger lock forward and slightly down until it stops.
PRESSURE RELIEF PROCEDURE
Be sure to follow the PRESSURE RELIEF PROCEDURE when shutting the unit off for ANY PURPOSE.
This procedure is used to relieve any pressure from the spray hose.
1. Lock the spray gun off (SEE ABOVE). Turn the ON/OFF switch to the OFF position.
2. Turn the PRIME/SPRAY knob to PRIME.
3. Unlock the spray gun and trigger the spray gun into the side of the material bucket. Lock the
spray gun.

12
OPERATION MANUAL
www.thetoolshed.co.nz
PURGING AND PRIMING THE SPRAYER
All new units are performance tested at the factory and are shipped with test fluid in the fluid
section to prevent corrosion during shipment and storage. If you have already used your pump,
some water or solvent used in cleaning may remain in the fluid section. Whether your sprayer is
new or if you have already used it, this fluid must be purged and thoroughly cleaned out of the
system before use.
1. Place a full container of spraying material underneath
the suction tube (a). Secure the return tube (b) into a
waste container.
2. Turn the pressure control dial to maximum pressure. Turn
the PRIME/SPRAY knob to PRIME.
3. Plug in the sprayer and move the ON/OFF switch to the ON (I) position.
The unit will begin to draw material up the suction tube, into the pump, and out the return
tube. Let the unit cycle long enough to remove test fluid from the pump, or until spray
material is coming from the return tube.
4. Switch the pump OFF (O). Remove the return tube from the waste container and place it in
its operating position above the container of spraying material.

13
OPERATION MANUAL
www.thetoolshed.co.nz
PURGING AND PRIMING THE SPRAY HOSE
1. Unlock the spray gun and turn the PRIME/SPRAY knob to PRIME.
The spray tip SHOULD NOT be attached to your spray gun when purging your spray hose.
2. Pull the trigger and aim the spray gun at the side wall of a waste container.
If using oil-based materials, the spray gun must be grounded while purging.
3. While pulling the trigger, switch the pump ON (I), and turn the PRIME/SPRAY knob to SPRAY.
Hold the trigger until all air, water, or solvent is purged from the spray hose and the material is
flowing freely.
4. Release the trigger and turn the PRIME/SPRAY knob to PRIME. Turn the pump OFF (O).
Trigger the gun into the waste container to be sure that no pressure is left in the hose.
5. Lock the spray gun off. Make sure the saddle and black seal are in place inside the tip guard
nut. Thread the spray tip guard assembly onto the gun. Tighten by hand.

14
OPERATION MANUAL
www.thetoolshed.co.nz
OPERATION
NOTE: Be sure that the paint hose is free of kinks and clear of objects with sharp cutting edges.
1. Switch the pump ON (I). Turn the PRIME/SPRAY knob to SPRAY. Turn the pressure control
dial to maximum pressure (+). The spray hose should stiffen as paint begins to flow through
it.
2. When the motor shuts off, unlock the spray gun, and spray a test area to check the spray
pattern.
The motor will cycle on and off automatically as it needs pressure. The pressure control dial
can be adjusted up or down to achieve the desired spray pattern.
TIPS FOR SPRAYING
- Keep the spray gun at a right angle to the surface being sprayed. This means moving your
entire arm back and forth rather than just flexing your wrist.
- Keep the spray gun perpendicular to the surface. Otherwise, one end of the pattern will be
thicker than the other.
- Pull the trigger on the spray gun after starting the stroke and release the trigger before
ending the stroke. The spray gun should be moving when the trigger is pulled and released.
- Overlap each stroke by about 30% to ensure an even coating.
Good Spray Pattern
Bad Spray Pattern – This could mean your pressure is too low or that the tip is clogged.

15
OPERATION MANUAL
www.thetoolshed.co.nz
UNCLOGGING THE SPRAY TIP
DO NOT:
- DO NOT attempt to unclog or clean the tip with your finger.
- DO NOT use a needle or other sharp pointed instrument to clean the tip. The hard tungsten
carbide can chip.
If the spray pattern becomes distorted or stops completely while the gun is triggered, follow these
steps:
1. Release the trigger and lock the gun off. Rotate the reversible tip arrow 180° so that the
point of the arrow is toward the rear of the gun (CLEAN position).
2. Turn the PRIME/SPRAY knob to SPRAY.
3. Unlock the gun and squeeze the trigger, pointing the gun at a scrap piece of wood or
cardboard. This allows pressure in the spray hose to blow out the obstruction. When the
nozzle is clean, material will come out in a straight, high-pressure stream.
4. Release the trigger and lock the gun off. Reverse the tip so the arrow points forward again
(SPRAY position). Unlock the gun and resume spraying.
CLEANING
IMPORTANT CLEANING NOTES:
- When using latex materials, clean your sprayer and components with water. When using oil-
based materials, use mineral spirits.
- Do not use mineral spirits on latex materials, or the mixture will turn into a jelly-like
substance which is difficult to remove.
- No matter which cleaning solution you use, make sure to dispose of it properly when you are
finished cleaning your sprayer.
- Thorough cleaning and lubrication of the sprayer is the most important step you can take to
ensure proper operation after storage.
NOTES FOR MINERAL SPIRITS
- Always flush the spray gun at least one hose length away from the spray pump.
- Area must be free from vapours.
SPRAY GUN FILTER
The filter must be cleaned every time you use your sprayer. When using thicker spray materials,
the filter might need to be cleaned more often.
1. Perform the PRESSURE RELIEF PROCEDURE.
2. Unscrew the fitting from the bottom of the spray gun using an adjustable wrench, making
sure to not lose the spring.
3. Unclip the trigger guard from the filter housing by pulling outward from the filter housing.
Unscrew the filter housing.
4. Remove the filter from the spray gun hosing and clean with the appropriate cleaning
solution (warm, soapy water for latex paints, and mineral spirits for oil-based materials).
5. Inspect the filter for holes and replace if any are found.

16
OPERATION MANUAL
www.thetoolshed.co.nz
6. Replace the cleaned filter, tapered end first, into the gun housing. The tapered end of the
filter must be loaded properly into the gun. Improper assembly will result in a plugged tip
or no flow from the gun.
7. Reassemble the spray gun.
INLET FILTER
The filter at the bottom of the suction tube may also need cleaning. Check it every time you
change spray containers.
1. Remove the filter by unscrewing it from the suction tube. Clean the filter with the
appropriate cleaning solution (warm, soapy water for latex materials, and mineral spirits for
oil-based materials).
2. Thread the filter back into place.
LATEX MATERIALS
Follow these steps if you used latex materials AND if you have a garden hose available. If you do
not have a garden hose available, follow the OIL-BASED MATERIALS instructions.
1. Lock the gun and remove the spray tip assembly. Place the suction tube and return tube into
an empty waste container.
2. Using a garden hose, rinse off the suction tube, return tube, and inlet filter. Empty the waste
container.
3. Remove the inlet filter from the suction tube and place into a waste container (DO NOT
DISCARD).
4. Verify that the seals are present inside the adapter and suction tube. Thread the pump
cleaning adapter onto a garden hose. Connect the hose and adapter to the fitting on the end
of the suction tube.
5. Unclip the return tube from the suction tube and place it into the waste container. Turn the
PRIME/SPRAY knob to PRIME.

17
OPERATION MANUAL
www.thetoolshed.co.nz
6. Turn the water supply on. Turn pump ON (I). Water will go into the suction tube and out
through the return tube. Let the pump run for a few minutes to allow the return tube to be
flushed.
7. Place the original material container next to the waste container. Aim the spray gun to the
side of the original material container and hold the trigger.
8. While pulling the trigger, turn the PRIME/SPRAY knob to SPRAY to purge material from the
hose back into the original container.
9. When cleaning solution comes from the spray gun, keep holding the trigger and aim the
spray gun into the side of the waste container.
10. Trigger the gun until the fluid coming out of the gun is clear. You may need to empty the
waste container and continue flushing.
11. Turn the PRIME/SPRAY knob to PRIME and trigger the gun once more to relieve pressure.

18
OPERATION MANUAL
www.thetoolshed.co.nz
OIL-BASED MATERIALS
1. Lock the gun and remove the spray tip assembly. Submerge
suction set into a bucket with appropriate cleaning solution.
2. Place a waste container next to the original material container.
Aim the spray gun into the side of the original material
container and hold the trigger.
3. While pulling the gun trigger, turn the pump ON (I), and turn
the PRIME/SPRAY knob to SPRAY to purge material from the
hose back into the original container.
4. When cleaning solution comes from the spray gun, keep
holding the trigger and aim the spray gun into the side of the
waste container.
Ground gun with a metal container if flushing with flammable solvent.
5. Trigger the gun until the fluid coming out of the gun is clear. You may need to dispose and
obtain a new cleaning solution.
6. Turn the PRIME/SPRAY knob to PRIME and trigger gun once to relieve pressure.
CLEANING THE SUCTION SET
1. Lock the gun and turn the pump OFF (O).
2. Remove the suction hose and return tube and clean it using the
appropriate cleaning solution. You should also wipe the threads of
the inlet nut (a) and remove and clean the solution set inlet filter.
3. When the suction set is clean, thread the suction tube back into the
inlet valve, and replace the return tube onto the return tube fitting.
Replace the clip.
4. Submerge the suction set into a bucket of NEW cleaning solution.
5. Turn the PRIME/SPRAY knob to PRIME. Turn the pump ON (I) and
trigger the gun once into a waste container to relieve pressure.
6. Let the pump circulate cleaning solution through the suction set for
2-3 minutes. Turn the pump OFF.
NOTE: If you used oil-based materials, you must flush the pump again using water to prepare it for
storage.
CLEANING THE SPRAY GUN COMPONENTS
1. Make sure the pump is switched OFF (O). Make sure the PRIME/SPRAY knob is turned to
PRIME. Unplug the sprayer.
2. Remove spray gun from the paint hose using adjustable wrenches.
3. Remove filter from the spray gun (refer to CLEANING THE SPRAY GUN FILTER).
4. Remove spray tip (a) from spray guard assembly. Clean spray tip with a soft-bristled brush
and the appropriate cleaning solution. Be sure to remove and clean the washer (b) and
saddle seat (c) located in the rear of the spray guard assembly.

19
OPERATION MANUAL
www.thetoolshed.co.nz
5. Install gun filter tapered end first. Reassemble the spray gun.
6. Install spray tip, saddle seat, and washer. Replace the spray guard assembly.
7. Thread the spray gun back onto the pain hose. Tighten with a wrench.
CLEANING THE INLET VALVE
Cleaning or servicing the inlet valve may be required if the unit has priming problems. Priming
problems may be prevented by properly cleaning the sprayer and following the LONG-TERM
STORAGE steps.
1. Remove the suction set.
2. Unscrew the inlet valve
assembly (a) from the
sprayer. Visually inspect the
inside and outside of the
inlet valve assembly. Clean
any paint residue with the
appropriate cleaning
solution.
3. Lubricate the O-ring on the
inlet valve (b). Replace the
inlet valve assembly by
screwing it into the sprayer.
Torque 23-27lbs.
4. Replace suction set and hand tighten.
SHORT-TERM STORAGE (up to 16 hours)
Follow these steps when using latex materials only. If using materials that are oil-based, follow the
CLEANUP and LONG-TERM STORAGE steps.
SHUTDOWN
1. Lock the spray gun off
2. Turn the PRIME/SPRAY knob to PRIME. Switch the pump OFF (O). Unplug the sprayer.
3. Pour ½ cup of water slowly over the top of the paint to prevent the paint from drying. Wrap
the spray gun assembly in a damp cloth and place it in a plastic bag.
4. Seal the bag shut.
5. Place the sprayer in a safe place out of the sun for short-term storage.

20
OPERATION MANUAL
www.thetoolshed.co.nz
STARTUP
1. Remove the gun from the plastic bag and stir the water into the paint.
2. Turn the PRIME/SPRAY knob to PRIME. Plug the sprayer in and turn the switch to ON (I).
3. Turn the PRIME/SPRAY knob to SPRAY. Test the sprayer on a practice piece and begin
spraying.
LONG-TERM STORAGE
Follow these instructions only after all clean-up steps have been performed.
1. Fill a cup or other container with separating oil
(approximately 60ml) supplied with the unit and submerge
the inlet valve into the oil.
2. Place a rag over the spray hose port and turn the switch ON
(I). When the oil has been sucked from the cup, turn the
pump OFF (O).
3. Wipe the entire unit, hose, and gun with a damp cloth to
remove accumulated paint. Replace the high-pressure hose
to the paint hose port.
Table of contents
Other Tool Shed Paint Sprayer manuals