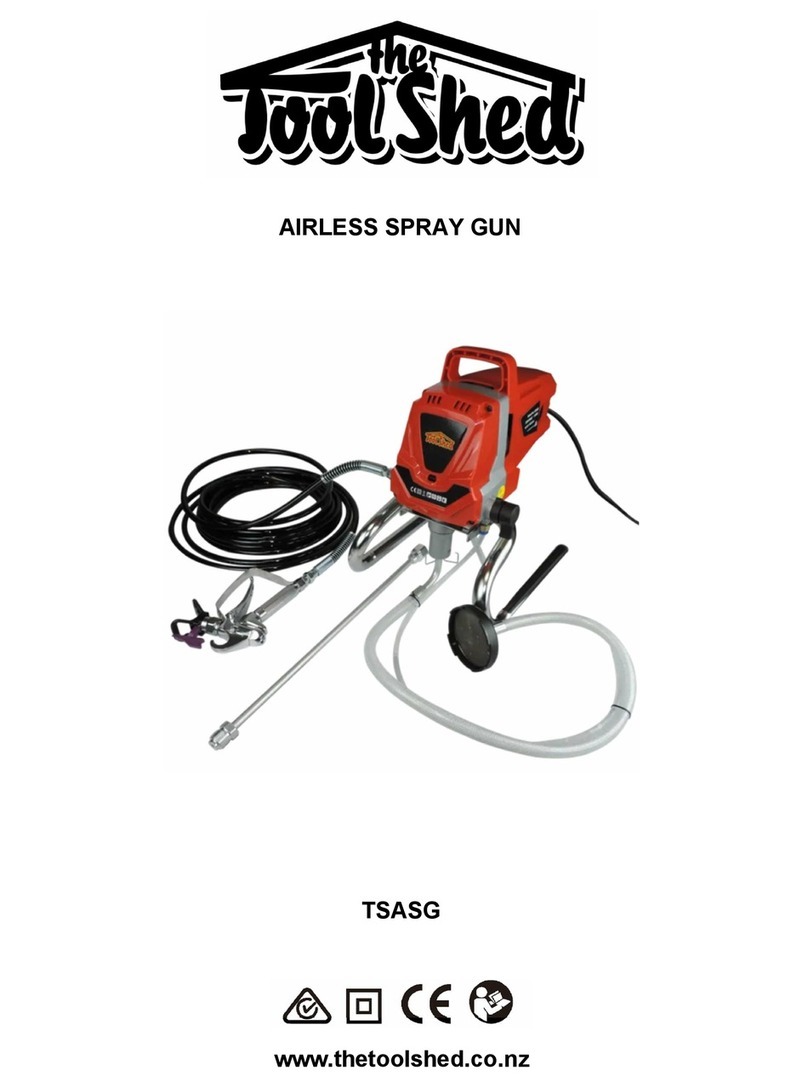
Tool Shed TSASG3 User manual

23
OPERATION MANUAL OPERATION MANUAL
WWW.THETOOLSHED.CO.NZWWW.THETOOLSHED.CO.NZ
TABLE OF CONTENTS PRODUCT DETAILS
Product Model ToolShed Airless Spray Gun
Product Code TSASG3
DISTRIBUTED BY:
Product Details 3
Specications 4
Product Identication 5
Safety Guidelines 6
Assembly 11
Operation 13
Cleaning 15
Maintenance 17
Troubleshooting 18
Note:
This manual is for your reference only. Due to the continuous improvement of
the ToolShed products, changes may be made at any time without obligation or
notice.
Warranty:
This product may be covered under The ToolShed warranty. For more information, see
our Terms & Conditions at www.thetoolshed.co.nz
Thank You
For the purchase of this ToolShed product. We try our hardest to supply customers like you
with the best quality products available, at the best price possible. We cant wait to continue
working together in the future.
Please contact us for any servicing, replacement parts, or questions you might have about
your ToolShed product by visiting our website, or calling: 0800 948 665.

45
OPERATION MANUAL OPERATION MANUAL
WWW.THETOOLSHED.CO.NZWWW.THETOOLSHED.CO.NZ
SPECIFICATIONS PRODUCT IDENTIFICATION
Motor Power 230 Volts / 50 Hertz
Motor Size 950 Watts
Maximum Working Pressure 3300 PSI
Flow Rate 0 – 2 LPM
Working Environment Temperature 5°C – 40°C
Storage Environment Temperature 25°C – 55°C
Standard Nozzle 517 (Included)
Net. Weight 7.1 KG
1Pressure Adjustment Knob
2Electrical Switch
3Pressure Relief Valve
4Fluid Outlet
5Suction Tube
6Drain Hose
715 Metre Hose
8500mm Extension Pipe
8
7
6
5
3
2
1
4

67
OPERATION MANUAL OPERATION MANUAL
WWW.THETOOLSHED.CO.NZWWW.THETOOLSHED.CO.NZ
SAFETY GUIDELINES SAFETY GUIDELINES
• DO NOT use the power tool or machinery
in rainy conditions or wet areas where the
power tool or machinery could get wet.
Water in this power tool or machinery can
lead to electric shock.
• Only use the power tool or machinery
when the plug correctly matches the
power outlet. Modifying plugs greatly
increases the risk of electric shock.
• Keep the power cord away from anything
that could damage it such as sharp edges,
moving parts or heat. A damaged power
cord increases the risk of electric shock.
• Only operate outdoors with the use of an
outdoor extension lead. Not all extension
leads are suited to outdoor use and using
one which is not can greatly increase the risk
of electric shock.
• Avoid body contact with grounded or
earthed surfaces. Surfaces such as radiators,
ranges, pipes, and refrigerators can increase
the risk of electric shock due to your body
being earthed or grounded.
• Never carry the power tool by the cord,
or yank the cable from the power outlet.
This can damage the internal wiring and may
become a hazard.
WARNING
Electric shock can cause serious injury
or, in some cases be fatal.
Electrical Safety
• Use the correct tool for the job. Forcing
a tool to do a job it was not designed for
increases the risk of accident or injury.
• Disconnect tools and machinery from
power, or remove batteries before doing
any maintenance or adjustments, or
before storing the tools and machinery.
This reduces or removes the risk of a power
connection that causes the tool or machinery
to accidentally re, which can help prevent
injury or accident.
• Check the general condition of the power
tool for damage or any problems that
could aect the way the tool or machine
works. An unrepaired tool or machine can
lead to accident and injury. Only have your
tool or machine repaired with genuine parts
from The ToolShed.
• Only use the power tool and machinery
with genuine parts or accessories that are
designed to be used with this power tool
and machinery. Failure to do so could result
in accident or injury or damage your tool or
machinery.
• Store your tool or machinery out of reach
of children, and away from untrained
personnel when not in use. Use by some-
body untrained, or a child, could lead to
accident or serious injury.
Power Tool & Machinery Use &
Care
• Always wear personal protective equip-
ment (PPE). Eye protection, ear protection,
dust masks, and other protective equipment
will help to reduce the risk of personal injury
or long-term illnesses.
• Dress appropriately. DO NOT wear loose
clothing that can get caught in moving
parts. Keep hair, loose clothing, jewellery,
and anything else that could be of risk, away
READ ALL SAFETY WARNINGS &
INSTRUCTIONS. Failure to follow
instructions and warnings could lead to
serious injury, electric shock, or re.
from moving parts in the machine, or they
could become caught therein.
• Always remain alert and DO NOT operate
power tools or machinery under the inu-
ence of any substances such as alcohol
or drugs, including prescription medica-
tions. Lack of focus could lead to injury or
accidents while operating these power tools
and machinery.
• Always ensure proper footing and
balance. Overreaching can lead to slipping
and falling which can result in injury or acci-
dent.
• Ensure the power switch is in the OFF
position before connecting any battery,
or power source to the power tool or
machinery. This can cause injury as tools
and machinery can suddenly re incidentally
when live, causing accidents.
• Use all provided dust collection and
extraction attachments, if included. This
equipment, along with the use of PPE dust
masks, can help keep you safe from dust, and
keep your work site clear from hazards.
• Ensure loose parts such as wrenches
or adjusting keys are removed before
starting the power tool or machinery.
WARNING
Work Area Safety
Personal Safety
• Ensure that your work area is kept clean
and well lit. Lack of visibility and clutter
greatly increase the risk of accident when
using tools.
• Keep bystanders, pets, and children
clear when operating this power tool or
machine. They can cause distraction or risk
injury to themselves.
• Ensure you are not operating the power
tool or machinery in the presence of dust,
liquids, ammable gases, or anything
that can create an explosive atmosphere.
Power tools and machinery can create sparks
which can lead to ignition and re hazards in
working environments.

89
OPERATION MANUAL OPERATION MANUAL
WWW.THETOOLSHED.CO.NZWWW.THETOOLSHED.CO.NZ
SAFETY GUIDELINES
Hazardous Vapours
Explosion or Fire
• Always wear personal protective equip-
ment (PPE).
• Paints, solvents, insecticides, and other mate-
rials can be harmful if inhaled, or if they are to
come in contact with the body.
• Use a respirator or mask if vapours have the
potential to be inhaled. Read all instructions
supplied with the mask to ensure it will
provide the necessary protection.
• Wear protective eye wear and clothing.
• Always ush the unit into a separate metal
container, at low pump pressure, with the
spray tip removed.
• Follow the material and solvent manufac-
turers warnings and instructions.
• Know the contents of the paints and solvents
being sprayed. Read all Material Safety Data
Sheets (MSDS) and container labels provided
with the paints and solvents.
• Use extreme caution when using materials
with a ashpoint below 21°C. (Flashpoint
is the temperature that a uid can produce
enough vapours to ignite).
• Use lowest possible pressure to ush the
equipment.
• Do not spray onto pump assembly.
• Solvent and paint fumes can ignite or
explode, causing severe injury and/or
property damage.
• Provide extensive exhaust options and fresh
air introduction to keep the air within the
spray area free from any accumulation of
ammable vapours.
• Do not spray in a conned area.
• Avoid all ignition sources such as static elec-
tric sparks, open ames, pilot lights, electrical
appliances, and hot objects.
• Do not smoke or light cigarettes in the spray
area.
• Ensure oor area is well ventilated, ammable
vapours are often heavier than air.
• The spray gun and objects in and around
the spray area must be properly grounded in
order to prevent static sparks.
• Keep area clean and free of paint or solvent
containers, rags, and other ammable mate-
rials.
• Use only conductive or high-pressure fuel
hoses.
SAFETY GUIDELINES
Injection Injury Explosion Hazard Due to
Incompatible Materials
Airless Sprayer Electrical Installation Drawing
• Will cause property damage or severe
injury.
• Do not use materials containing bleach or
chlorine.
• Do not use halogenated hydrocarbon
solvents such as bleach, mildewcide, meth-
ylene chloride, and trichloroethane. They are
not compatible with aluminium.
• The high-pressure paint stream produced
by this Airless spray gun can pierce the
skin and underlying tissues, leading to
serious injury.
• Never aim the gun at any part of the body.
• Do not aim the gun at/spray any person or
animal.
• Never allow any part of the body to touch
the uid stream.
• Never put your hand in front of the gun.
Gloves will not provide protection against an
injection injury.
• Always lock the gun trigger, shut the pump
o, and release all pressure before servicing,
cleaning the tip or guard, changing tips, or
leaving the tool unattended.
• Pressure will not be released by turning o
the motor. Refer to the section in this manual
regarding pressure release.
• Always remove the spray tip before ushing
or cleaning the system.
• Paint hoses can develop leaks from wear,
kinking, and abuse. Always inspect the hose
before each use, and do not use the hose to
lift or pull the spray gun.
• Never use a spray gun without a working
trigger lock and trigger guard in place.
• All accessories must be rated at or above 3000
PSI. This includes spray tips, guns, extensions,
and hoses.

10 11
OPERATION MANUAL OPERATION MANUAL
WWW.THETOOLSHED.CO.NZWWW.THETOOLSHED.CO.NZ
SAFETY GUIDELINES A SS E M B LY
Air Gun Specic Safety
Service
Before Starting
Pressure Relief Procedure
Procedure
• Have your tools and machinery serviced
at The ToolShed with ToolShed replace-
ment parts. This will ensure that the safety
of the power tool or machine is maintained.
• All hoses, ttings, and lter caps must be
secured before operating the spray pump.
Unsecured parts may eject at great force or
leak a high-pressure uid stream causing
severe injury.
• All hoses, swivels, guns, and accessories must
be rated at or above 3000 PSI.
• Do not spray outdoors on windy days.
• Wear protective clothing to keep paint o
your skin and hair.
• Do not operate or spray near children – keep
children away from the equipment at all
times.
• Read all instructions and safety procedures
before operating equipment.
• Before each use, check all hoses for cuts, leaks,
abrasions, or bulging. Check for damage
or movement of couplings. Immediately
replace the hose if any of these conditions
exist—NEVER REPAIR A PAINT HOSE.
• Check all ttings and connections in the
pump system, hose, and gun to ensure they
are tight.
• Check to ensure that there is a spray tip
attached to the gun, and that the tip is the
correct size for the coating you are to spray.
(There are various tips available for each type
of coating or conguration).
• Make sure the power source is securely
grounded and matches the motor rating of
your sprayer.
• Oil is used by the factory for testing and
protection. It is necessary to ush the unit
before spraying. Clean the pump with warm
soapy water. Ensure the hydraulic oil in the
pump is clean and sucient in volume, then
begin the following procedure.
Follow this pressure relief procedure whenever
you are instructed to relive pressure, stop
spraying, check or service the equipment, or
install or clean spray tip.
• Turn OFF power and turn pressure control to
the lowest pressure setting.
• Hold the gun against the side of a grounded
metal ushing pail. Trigger the gun to relive
the pressure.
• Remove spray tip from gun.
• Put the input hose and pressure relief tube
into a bucket with some water.
• Turn on the motor and push the pressure
valve upright. In a few seconds, water will
begin to ow up through the tube and ow
out from the outlet valve, tighten the outlet
valve clockwise, then the pressure valve
clockwise.
• When the pressure reaches up to around
207 Bar, check if there is any leakage on the
outlet hose.
• If there is no leakage, open the spray gun and
give it a test spray. Clean the oil in the pump.
Change the soapy water and use clean water
when the spray appears is clean.
• Turn o power, continue to spray until water
stops coming out.
• Unlock the trigger lock. Put the pressure
valve upright until there is no more soapy
water in the pump.
WARNING
The warnings and precautions
discussed in this manual cannot cover
all possible conditions and situations
that may occur. It must be understood
by the operator that common sense
and caution are factors which cannot
be built into this product, but must be
supplied by the operator.
• It is not possible to cover every conceivable
situation you can face. Always exercise care
and use your common sense. If you get into
a situation where you feel unsafe, stop and
seek expert advise. Contact your dealer,
service agent, or an experienced user. Do not
attempt any task you feel unsure of!
Always Use Common Sense • Turn the Prime Valve down.
• If you suspect the spray tip or hose is
clogged, or the pressure has not been fully
relieved after following the steps above,
VERY SLOWLY loosen the tip guard retaining
nut or hose end coupling to relieve pressure
gradually, then loosen completely.
• Engage trigger safety lock on the gun if the
unit is being shut down or left unattended.

12 13
OPERATION MANUAL OPERATION MANUAL
WWW.THETOOLSHED.CO.NZWWW.THETOOLSHED.CO.NZ
A SS E M B LY OPERATION
Set Up Priming the Spray Gun Painting
Priming & Start Up Steps
• Attach the paint hose to the paint gun and
attach with two wrenches.
• Turn the pressure control knob to the low
pressure spray setting.
• Attach the paint hose to the paint hose outlet
and tighten with a wrench.
This procedure is used for rst time operation
and also to ush storage uids out of the sprayer.
Oil Based Paint:
• Flush with mineral spirits followed by warm,
clean water.
Water Based (Latex) Paint:
• Flush with warm, clean water.
• Before painting, ensure the sprayer has
been primed and verify that the nozzle tip is
aligned properly.
• Once primed, adjust the nozzle to the spray
setting.
• Start spraying at the lowest setting on the
pressure control knob. Continue to increase
pressure as needed by turning the knob
clockwise until you achieve your ideal spray
pattern.
• Plug in sprayer and turn on the power.
• The sprayer will start pumping and water
or ushing solvent, along with air bubbles,
will be purged from the system. Let uids
discharge from the priming tube into the
waste bucket for 30–60 seconds then switch
the power to OFF.
• Remove the suction tube from water or
ushing solvent, and submerge the tube in
the paint pail.
• Switch the power to ON.
• The paint should work itself from the suction
tube to the sprayer priming tube until the
paint discharges from the return tube. Point
the gun into the waste bucket and pull the
trigger.
• Turn the spray/prime switch to spray mode
and continue to spray into the waste bucket.
• Stop spraying and activate the trigger lock.
• Remove the priming tube from the waste
bucket and clip it back to the suction tube,
and submerge in the paint pail.
• If the motor stops, the pump and tubes are
primed. If it does not stop, repeat the priming
steps.
• Separate the smaller priming tube from the
suction tube.
• Place the priming tube in the waste bucket.
• Submerge the suction tube in water or in a
ushing solvent.
• Turn the prime/spray switch to prime mode.
• Adjust the pressure control knob to the
Prime/Clean setting.
WARNING
WARNING
NOTE
Ensure that the sprayer is turned o and
unplugged from the power source.
To prevent re when using Mineral
Spirits, ground the gun by holding
it against a metal container while
ushing it.
Remove or cover any objects in the area
that you want to protect from paint
over-spray and mist.

14 15
OPERATION MANUAL OPERATION MANUAL
WWW.THETOOLSHED.CO.NZWWW.THETOOLSHED.CO.NZ
OPERATION CLEANING
Painting Techniques
• Keep the gun approximately 300mm (1 Foot)
from the surface you are painting.
• Relieve pressure and drain paint from the
tubes.
• Submerge suction tube in water or ushing
liquid.
• Un-thread the spray tip and remove.
• Turn to Spray Mode.
• Switch power to ON.
• Spray paint into the paint pail.
• Separate tubes.
• Place priming tube into an empty waste
bucket.
• Do not fan the gun or the paint will be
uneven.
• Keep gun straight and move arm across at a
steady rate while staying one foot from the
surface.
Overlap
Strokes

16 17
OPERATION MANUAL OPERATION MANUAL
WWW.THETOOLSHED.CO.NZWWW.THETOOLSHED.CO.NZ
CLEANING MAINTENANCE
• Before cleaning or performing any mainte-
nance, you must ensure the tool is switched
o and disconnected from the power supply.
• Compressed air is the most eective way to
cleanthistool.AlwayswearPPEsafetygoggles
when cleaning tools with compressed air.
• Check the carbon brushes of the machine in
the event of excessive sparking.
• Ventilation openings and switch levers must
be kept clean. DO NOT attempt to clean by
inserting pointed objects through openings.
• Do not use harsh chemicals or solvents when
cleaning this tool.
• If you discover any damaged or broken parts,
consult your nearest ToolShed for replace-
ments and advise.
Daily Maintenance
General Repair Information
• The lifetime of the equipment is reliant on
you properly maintaining the machine.
• Read the manually carefully before use.
• Check electrical requirements before use.
• Thoroughly clean the equipment and acces-
sories after use.
• Coil the tube after cleaning to help prevent
damage.
• Ensure the machine is always adequately
lubricated, especially after extended periods
without use.
• Keep all screws, nuts, washers, gaskets, and
electrical ttings that are removed during
repair procedures. These parts are not usually
provided with replacement kits.
• Test the repairs after problems are corrected.
• If the sprayer does not operate properly,
review the repair procedure under TROUBLE-
SHOOTING to ensure the correct steps were
taken.
• Do not operate the sprayer without the
motor shroud in place. Replace if damaged.
Motor shroud directs air around the motor
to prevent overheating and insulates the
control board from accidental electric shock.
WARNING
WARNING
WARNING
Protect the internal drive parts of
this sprayer from water. Openings
in the cover allow for air cooling of
the mechanical parts and electronics
inside. If water gets in these openings,
the sprayer could malfunction or be
permanently damaged.
Prevent pump corrosion and damage
from freezing. Never leave water or
water-based paint in the sprayer while
it is not in use in cold weather. Freezing
uids can seriously damage the sprayer.
Store the sprayer with pump armour to
protect it during storage.
Do not run the sprayer dry for more
than 30 seconds. Doing so could
damage pump packings.
• Change to a waste bucket as the paint thins. • Remove trigger guard from the housing.
• Unscrew the nut.
• Remove Filter.
• Clean all parts in warm, soapy water, or
ushing uid using a bristled brush.
• Turn to Prime Mode.
• Continue to ush, until water is clear.
• Release trigger, turn power o, and relieve
pressure.

18 19
OPERATION MANUAL OPERATION MANUAL
WWW.THETOOLSHED.CO.NZWWW.THETOOLSHED.CO.NZ
TROUBLESHOOTING
FAULT POSSIBLE CAUSE SUGGESTED SOLUTION
Basic Fluid
Pressure
Pressure control knob setting. Motor will
not run if set at minimum (fully counter-
clockwise).
Slowly increase pressure setting to see if
motor starts.
Spray tip or uid lter may be clogged. Relieve pressure, then clear clog, or clean
gun lter
Basic
Mechanical
Pump frozen or hardened paint
Thaw sprayer if water or water-based
paint has frozen in sprayer. Place sprayer
in warm area to thaw. Do not start sprayer
until thawed completely. If paint hardened
(dried) in sprayer, replace pump packings.
Displacement pump connecting rod
pin. Pin must be completely pushed into
connecting rod and retaining spring must
be rmly in groove or pump pin.
Push pin into place and secure with spring
retainer.
Motor. Remove drive housing assembly. Replace motor if fan won’t turn.
Low Output
Worn spray tip. Relieve pressure, Replace tip.
Verify pump does not continue to stroke
when gun trigger is released. Service pump.
Prime valve leaking. Relieve pressure, Then repair prime valve.
Suction tube connections Tighten any loose connections. Check
O-ring on suction tube.
Electric supply with volt meter.
Meter must read 220–240 VAC or 100–120
VAC (According to models). Low voltages
reduce sprayer performance.
Reset building circuit breaker; replace
building fuse. Repair electrical outlet or try
another outlet.
Extension cord size and length. Replace with a correct, grounded extension
cord.
Leads from motor to circuit board for
damaged or loose wire connectors. Inspect
wiring insulation and terminals for signs of
overheating.
Be sure male terminal pins are centred
and rmly connected to female terminals.
Replace any loose terminals or damaged
wiring. Securely reconnect terminals.
Worn motor brushes which must be greater
than 6 mm (1/4 in.). Replace brushes.
Motor brushes binding in brush holders
Clean brush holders. Remove carbon dust
by using compressed air to blow out brush
dust.
Low stall pressure. Turn pressure control
knob fully clockwise. Replace pressure control assembly.
Motor armature for shorts by using an
armature tester, or perform spin test. Replace motor.
TSASG3 EXPLODED VIEW & PARTS LIST
1
2
3
4
5
6
7
8
9
10
11
12
13
14
15
16
17
18
19
20
22
26
27
27
28
29
21
23 24
25
27
29
30
31
32 33
34
35
36
37
38
39
38 40 41
42
43
44
45
46
47 48
49
50
51
52
53
54
55
56
1Lower Pump Body Assembly
2Inlet Valve Ball DW=12.303
3Rectangular Sealing Ring
4Ball Spring
5Feed Valve Seat
6Copper Sleeve
7Large Seal Assemblies
8Plunger Rod Assembly
9Sealing Ring Positioning Seat
10 V-Ring SealX3
11 Small V-Shaped Cowhide Sealing
Ring X2
12 Sealing Ring
13 Lock Nut Guide Copper Sleeve
14 Pump Body Lock Nut
15 Pressure Relief Valve Assembly
16 Pressure Relief Aluminium Fittings
17 Outlet Connector
18 Pressure Regulator Valve Assembly
19 Gearbox Assembly
20 Coupling Gear
21 Crankshaft Gear Assembly
22 Pin 5X12 X2
23 Motor Assembly
24 Spring Washer D=5 X4
25 Bolt M5X25 X4
26 Housing
27 Screw M4X12 X11
28 Power Switch
29 Bolt M5X14 X6
30 Connecting Wire
31 PCB Pad
32 PCB Assembly
33 Screw ST3.5X12F X2
34 Power Plug
35 Lock Washers X2
36 Spring Washer D=4 X2
37 Flat Washer D=4 X2
38 Screw M4X8 X3
39 Power Cord Retaining Ring
40 Base Crimping Plate
41 Screw M4X20 X2
42 Connecting Rod Assembly
43 Split Ring
44 Plunger Rod Connecting Pin
45 Connecting Pin Limit Plate
46 Housing Cover
47 Feed Tube Assembly
48 Hoop (8–12)
49 Pressure Relief Pipe
50 Frame Components
51 Foot Pads X4
52 Threaded Sheath
53 Extension
54 Airless Paint Sprayer
55 High Pressure Hose
56 Wrench X2
Table of contents
Other Tool Shed Paint Sprayer manuals