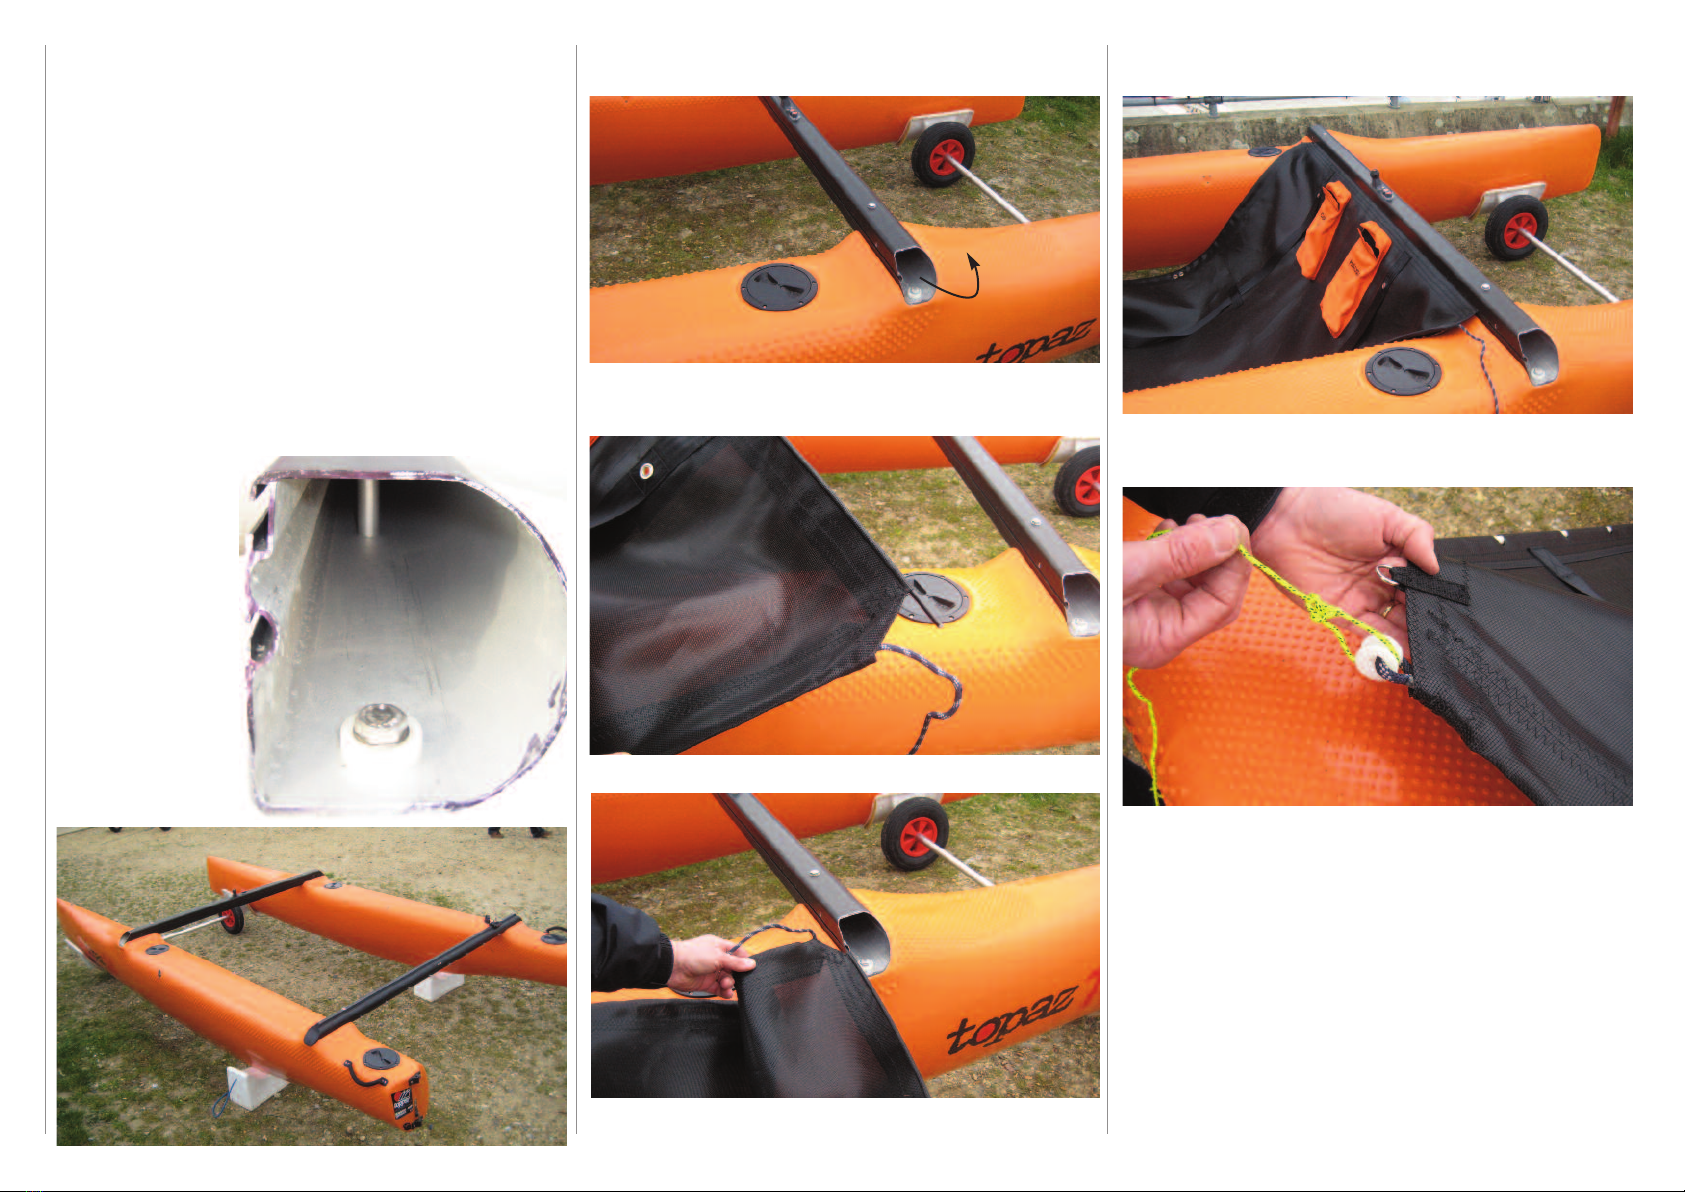
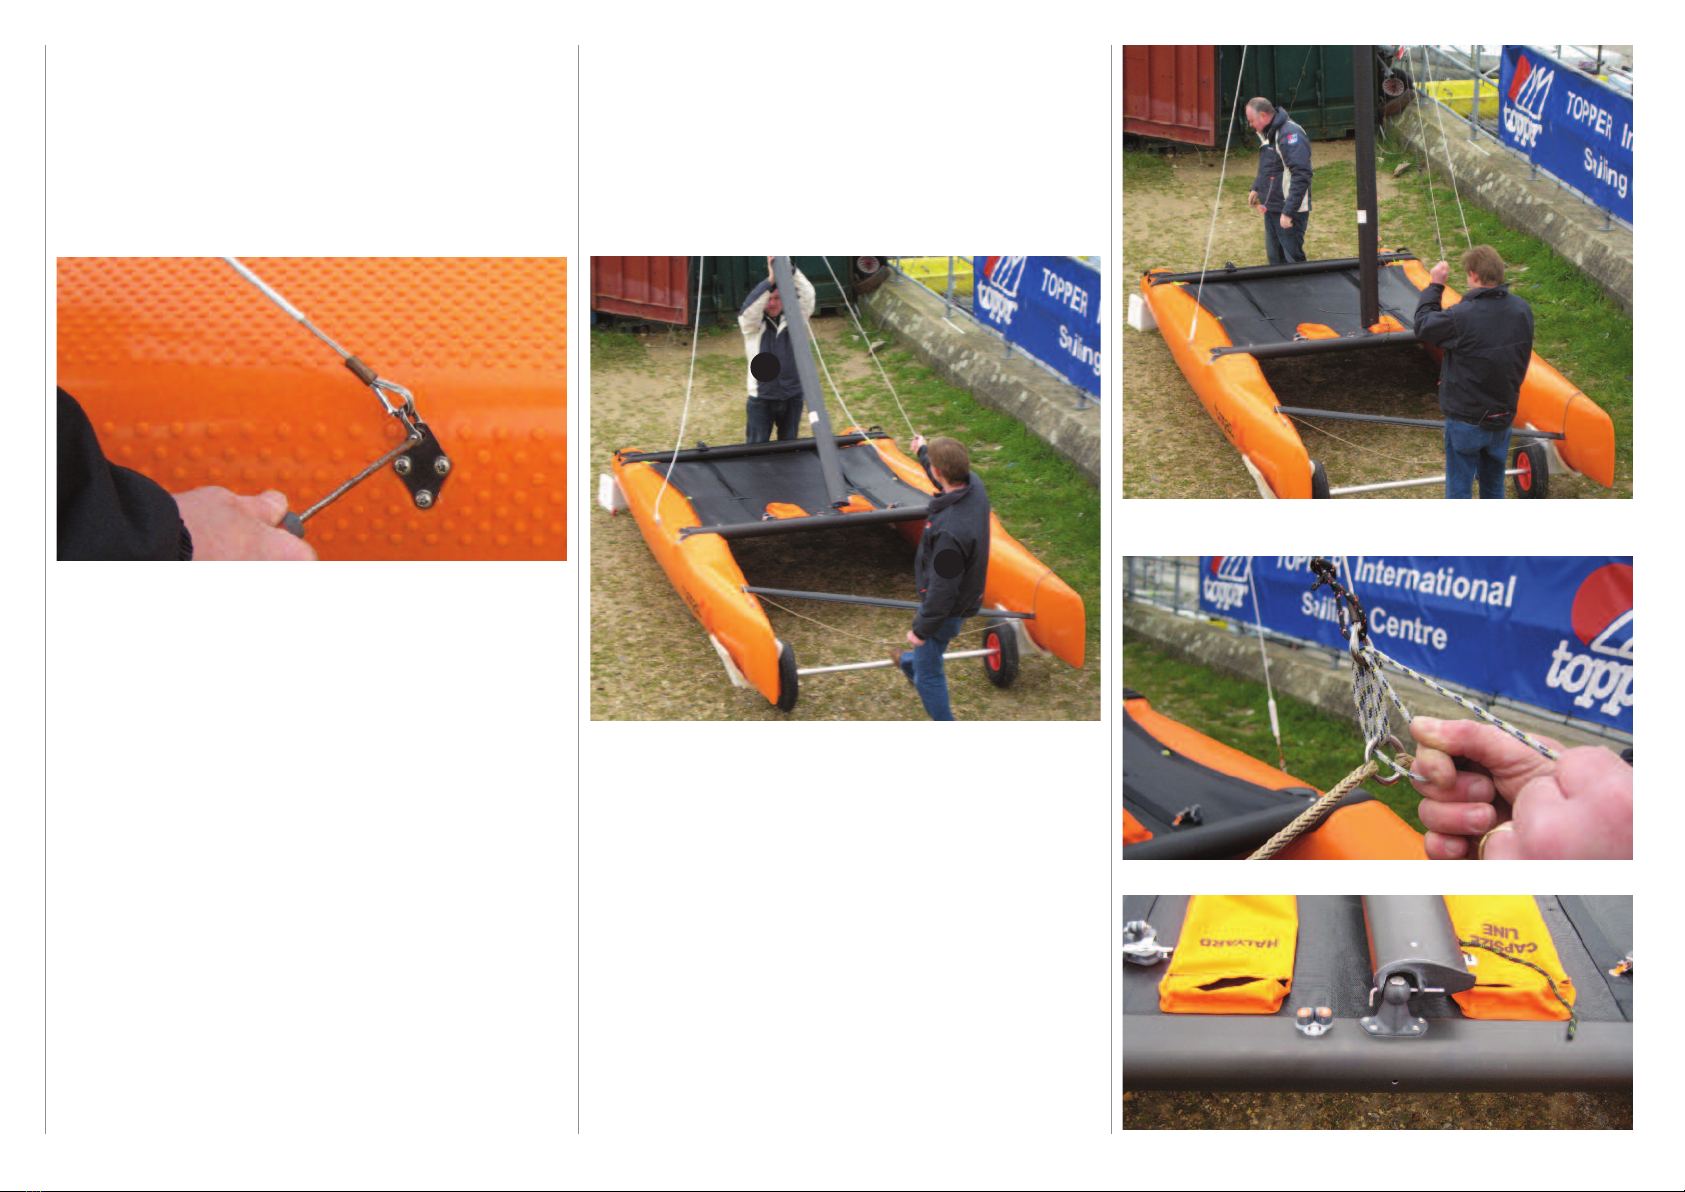
Topper topaz 14C Quick start guide
Other Topper Boat manuals

Topper
Topper TOPAZ TAZ RACE PLUS User manual

Topper
Topper TOPAZ ARGO Quick start guide

Topper
Topper Topper User manual

Topper
Topper TOPAZ XENON Quick start guide

Topper
Topper Topaz UNO PLUS Quick start guide

Topper
Topper TOPAZ XENON XK1 User manual

Topper
Topper TOPAZ TRES User manual

Topper
Topper TOPAZ TRES Quick start guide

Topper
Topper TOPAZ VIBE Quick start guide

Topper
Topper Topaz UNO PLUS User manual


Popular Boat manuals by other brands


PURSUIT
PURSUIT OS 335 owner's manual

Boston Whaler
Boston Whaler CONQUEST 345 owner's manual

Jeanneau
Jeanneau SUN ODYSSEY 41 DS owner's manual

Meridian
Meridian 490 Pilothouse owner's manual

Advanced Elements
Advanced Elements AdvancedFrame Expedition AE1009 owner's manual

Robo Marine Indonesia
Robo Marine Indonesia GEOMAR user manual