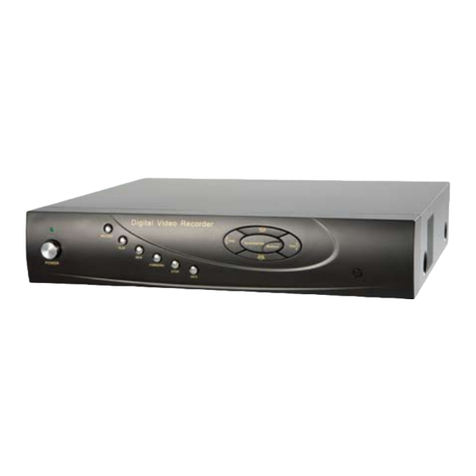
TORCHVIEW CDVR-1608CDRW User manual

User Manual
Digital Video Recorder
CDVR-1608

NOTE : This equipment has been tested and found to comply with the limits for a Class A digital device,
pursuant to part 15 of the FCC Rules. These limits are designed to provide reasonable protection against
harmful interference when the equipment is operated in a commercial environment. This equipment
generates, uses, and can radiate radio frequency energy and, if not installed and used in accordance with
the instruction manual, may cause harmful interference to radio communications. Operation of this
equipment in a residential area is likely to cause harmful interference in which case the user will be
required to correct the interference at his own expense.
WARNING
To reduce Fire or Shock hazard, do not expose the unit to rain or moisture!
Installation should be performed by a qualified service person and should conform to all local codes.
Cautions
ReadBeforeSystemOperation.
Follow these details to prevent personal injury or material
Warning : This sign indicates that the user could die or become seriously wounded if not used
or installed properly.
Caution : This sign indicates that the user could be wounded or could expect property damage
if not used or installed properly.
The lighting flash with arrowhead symbol, within an equilateral triangle, is intended to alert
the user to the presence of uninsulated “dangerous voltage” within the product’s enclosure
that may be of sufficient magnitude to constitute a risk of electric shock to persons.
The exclamation point within an equilateral triangle is intended to alert the user to the
presence of important operating and maintenance(servicing) instructions on the literature
accompanying the appliance.
WARNING
FCC Compliance Statement
!
RISK OF ELECTRIC SHOCK
DO NOT OPEN
CAUTION
CAUTION : TO REDUCE THE RISK OF ELECTRIC SHOCK DO NOT
REMOVE COVER(OR BACK) NO USER-SERVICABLE
PARTS INSIDE. REFER SERVICING TO QUALIFIED
SERVICE PERSONNEL.
!

1. Read Instructions
All the safety and operating instructions should be read before the product is operated.
2. Retain Instruction Manuals
The safety and operating instructions should be retained for future reference.
3. Heed Warnings
All warnings on the product and in the operating instructions should be adhered to.
4. Follow Instructions
All operating and use instructions should be followed.
5. Cleaning
Unplug this product from the wall outlet before cleaning.
Do not use liquid cleaners or aerosol cleaners. Use a damp cloth for cleaning.
6. Attachments
Do not use attachments not recommended by the product manufacturer as they may cause hazards.
7. Water and Moisture
Do no use this product near water - for example, near a bath tub, wash bowl, kitchen sink, or laundry tub; in a wet
basement; or near a swimming pool; and the like.
8. Accessories
Do not place this product on an unstable cart, stand, tripod, bracket, or table. The product may fall, causing serious
injury to a child or adult, and serious damage to the product. Use only with a cart, stand, tripod, bracket, or table
recommended by the manufacturer, or sold with the product. Any mounting of the product should follow the
manufacturer’s instructions, and should use a mounting accessory recommended by the manufacturer.
9. Ventilation
Slots and openings in the cabinet are provided for ventilation and to ensure reliable operation of the product and
to protect it from overheating, and these openings must not be blocked or covered. The openings should never be
blocked by placing the product on a bed, sofa, rug, or other similar surface. This product should not be placed in a
built-in installation such as a bookcase or rack unless proper ventilation is provided or the manufacturer’s
instructions have been adhered to.
10. Power Sources
This product should be operated only from the type of power source indicated on the marking label. If you are not
sure of the type of power supply to your home, consult your product dealer or local power company. For products
intended to operate from battery power, or other sources, refer to the operating instructions.
11. Grounding or Polarization
This product may be equipped with a polarized alternating-current line plug(a plug having one blade wider than
the other).
This plug will fit into the power outlet only one way. This is a safety feature. If you are unable to insert the plug
fully into the outlet, try reversing the plug. If the plug should still fail to fit, contact your electrician to replace your
obsolete outlet.
Do not defeat the safety purpose of the polarized plug.
* Alternate Warnings
This product is equipped with a three-wire grounding-type plug, a plug having a third(grounding) pin. This plug
will only fit into a grounding-type power outlet. This is a safety feature. If you are unable to insert the plug into the
outlet, contact your electrician to replace your obsolete outlet. Do not defeat the safety purpose of the grounding-
type plug.
I
MPORTANT SAFETY INSTRUCTION
S

12. Power-Cord Protection
Power-supply cords should be routed so that they are not likely to be walked on or pinched by items placed
upon or against them, paying particular attention to cards at plugs, convenience receptacles, and the point where
they exit from
13. Protective Attachment Plug
The product is equipped with an attachment plug having overload protection. This is a safety feature. See
instruction Manual for replacement or resetting of protective device. If replacement of the plug is required, be
sure the service technician has used a replacement plug specified by the manufacturer that has the same
overload protection as the original plug.
14. Outdoor Antenna Grounding
If an outside antenna or cable system is connected to the product, be sure the antenna or cable system is
grounded so as to provide some protection against voltage surges and built-up static charges. Article 810 of the
National Electrical Code, ANSI/NFPA 70, provides information with regard to proper grounding of the mast and
supporting structure, grounding of the lead-in wire to an antenna discharge unit, size of grounding conductors,
location of antenna-discharge unit, connection to grounding electrodes, and requirements for the grounding
electrode.
15. Lightning
For added protection for this product during a lightning storm, or when it is left unattended and unused for long
periods of time, unplug it from the wall outlet and disconnect the antenna or cable system. This will prevent
damage to the product due to lightning and power-line surges.
16. Power Lines
An outside antenna system should not be located in the vicinity of overhead power lines or other electric light
or power circuits, or where it can fall into such power lines or circuits. When installing an outside antenna system,
extreme care should be taken to keep from touching such power lines or circuits as contact with them might be
fatal.
17. Overloading
Do not overload wall outlets, extension cords, or integral convenience receptacle as this can result in a risk of
fire or electric shock.
18. Object and Liquid Entry
Never push objects of any kind into this product through openings as they may touch dangerous voltage
points or short-out parts that could result in a fire or electric shock. Never spill liquid of any kind on the product.
19. Servicing
Do not attempt to service this product yourself as opening or removing covers may expose you to dangerous
voltage or other hazards. Refer all servicing to qualified service personnel.
20. Damage Requiring Service
Unplug this product from the wall outlet and refer servicing to qualified service personnel under the following
conditions:
a) When the power-supply cord or plug is damaged.
b) If liquid has been spilled, or objects have fallen into the product.
c) If the product has been exposed to rain or water.
d) If the product does not operate normally by following the operating instructions. Adjust only those controls
that are covered by the operating instructions as an improper adjustment of other controls may result in
damage and will often require extensive work by a qualified technician to restore the product to its normal
operation.
e) If the product has been dropped or damaged in any way and
f) When the product exhibits a distinct change in performance - this indicates a need for service.
Important Safety Instruction
s

21. Replacement Parts
When replacement parts are required, be sure the service technician has used replacement parts specified by
the manufacturer or have the same characteristics as the original part. Unauthorized substitutions may result in
fire, electric shock, or other hazards.
22. Safety Check
Upon completion of any service or repairs to this product ask the service technician to perform safety checks
to determine that the product is in proper operating condition.
23. Wall or Ceiling Mounting
The product should be mounted to a wall or ceiling only as recommended by the manufacturer.
24. Heat
The product should be situated away from heat sources such as radiators, heat registers, stoves, or other
products (including amplifiers) that produce heat the product.
Important Safety Instruction
s

Warning
1. Change the battery after turning off the power of the product.
2. Check the polarity of the lithium battery while changing.
3. Change the battery with the same type which is in the product or with the similar type recommended by
your vendor.
4. Dispose of the changed battery according to the instructions of the battery manufacturer.
• There is danger of explosion when instructions are not followed.
General Warning
Warning
1. Use the power cord, which is supplied or recommended by the supplier.
- Otherwise, it may cause fire.
2. Do not dismantle or assemble the product.
- It may cause malfunction or fire.
3. Enquire from your vendor for repair.
- It may cause electric shock or fire if the repair is not done properly.
4. Do not touch the product with wet hands.
- It may cause malfunction or electric shock.
5. Matters must be ensured to a professional for product installation.
- It may cause malfunction, electric shock or fire.
6. Consult the place of purchase if the need for installation arises.
- Delinquent installation may be the reason for malfunction, electric shock or fire.
7. Ground applies to video products equipped with a 3-wire grounding type plug having a third (grounding)
pin. This plug only fits into a grounding-type power outlet.
- If grounding is not done, it may cause malfunction or electric shock.
8. Ground connection must not touch gas pipe, water pipe or telephone line.
- If grounding is not done properly, it may cause electric shock.
9. Prevent metallic foreign substance from going inside the product.
- It may cause malfunction or electric shock.
10. Do not spray insecticide or flammable spray on the product.
- It may cause fire.
11. Prevent water from entering inside electrical parts.
- Clean with a dry towel. Malfunction or electric shock could result.
Caution
1. The internal fan rotates at high speed and may cause an accident.
2. Do not drop and avoid strong vibration or shock to the product.
- It may cause malfunction.
3. The air inhaler of the top cover and air outlet of the back panel must not be blocked during installation.
- The internal temperature of the product would be greater than allowable and could cause malfunction or
fire.
4. Do not touch the product or the power cord when there is a thunder storm.
- It may cause electric shock.
5. Do not install the product near or on top of heating source.
- The internal temperature of the product would be greater than allowable and could cause malfunction or
fire.
6. Do not install the product on inclined or unstable location or place of vibration.
- It may cause malfunction.
I
MPORTANT SAFEGUARD
S
!
!

Power Connections
Warning
1. Must use the outlet of the grounding to connect the power cord.
- It may cause fire.
2. Do not connect on the middle of power cord or use extension cord.
- It may generate heat or cause fire.
3. Do not touch the power cord with wet hands.
- It may cause electric shock.
4. Keep power cord dry and protect from humidity.
- It may generate heat or cause fire. The power cord is not waterproof.
5. Hold the body of the plug while removing the power plug.
- Do not pull the power cord. Damage to the power cord may generate heat or cause fire.
6. Check the power plug regularly.
- Humidity and moderation in smoking may cause fire.
7. Remove power cord from outlet when product is not used for a long time.
- It may cause short-circuit or electric shock.
Caution
1. Do not turn off the power by removal of the power plug.
To turn off the power, click the power button from the front panel.
When the system stops abnormally, the power button might not work.
Click power button for 5 full seconds to turn power off.
2. Do not cut off the power artificially, or give shock or vibration to unit while the hard disk is activating.
- It may cause hard disk failure or loss of data.
3. To turn on DVR, press POWER button of the DVR(not remote controller) until the front LED lights up.
4. Do not remove power during recording, playback, backup, and etc. It may cause fatal error.
Important Safeguard
s
!
!

1. INTRODUCTION
1.1.DVRComponents……………………........
1.2. Product Description…………….………….
1.2.1. Front Panel…………………………….
1.2.2. Rear Panel………………………….….
1.2.3. Remote Controller…………………….
2. INSTALLATION
2.1.HardDrive…………………………….…….
2.2.StartingtheDVR………………..………….
Cautions&Warnings……………..………..
2.3. Log In & Log Out……..…………………….
3. CONFIGURATION
3.1 Configuration Menu…….…………..……….
3.2. System Setup…………………………..….
3.3.CameraSetup……………………..……….
3.4. Sensor Setup…………………………….….
3.5.NetworkSetup……………………..……….
3.6. Record Setup………………………..………
3.7.RecordScheduler………………..………….
3.8.DisplaySetup…………………………….….
3.9. Device Setup & Information…..…….…….
3.10. Log List……………..……………………….
3.11. Backup & Format…………………………….
Exiting from Setup………………………………
4. OPERATION
4.1. Monitoring……………………………..….
4.1.1. Multi-Screen Display…………………….
4.1.2. Changing Channel…………………….
4.1.3. Freeze Screen………………….…….
4.1.4. Full Screen Display…………………….
4.2. Monitoring Control……………………….
4.2.1. Display……………………………….
4.2.2. Video…………………………..…….
4.2.3. Audio……………………………..….
4.2.4. etc………………………………..…..
4.3. Playback (Search) ……………………….
4.3.1. Time/Date Search…………………….
4.3.2. Event Search…………….……….…
4.3.3. File Search(CD-RW, USB)……...….
4.3.4. Capture…………………………..….
ImageCapture……………..………
VideoClipCopy………………..……
4.4. PTZ Control………………………….……….
4.5. Recording……………………………..…..….
Panic Recording………………………..…..…
Appendix A. Compatible HDD
Appendix B. Trouble Shooting
I
NDEX
1
1
1
1
1
1
1
1
1
1
1
1
1
1
1
1
1
1
1
1
1
1
1
1
1
1
1
1
1
1
1
1
1
1
1
1
1
1
1
1
1
1
1

1.1. DVR Components
1.
I
NTRODUCTION
DVR Unit
Remote Controller
Operation Manual
l
Mouse
Power Cable
Program CD
Rack Mount Grip and Screws
8 Screws(HDD Installation)

1.2. Product Description
1.2.1. Front Panel
1. CD-RW Slot (1 to 16) : Insert CD.
2. Channel Indicator (1 to 16) : Indicates which channels are operating.
3. POWER : Press to turn on/off power. The power indicator will light up when power is on.
4. REC Indicator : The indicator will blink during recording.
NT Indicator : The indicator will light up during network connection.
AR Indicator : The indicator will light up when sensor is triggered.
5. PANIC :Toggle to start/stop panic recording of all channels with high recording quality.
6. MONITOR : Display the Monitoring Control Menu on the screen.
7. PTZ : Enter the PTZ control mode.
8. SETUP : Enter the Setup Mode.
9. ESC : Clear the Monitoring Control Menu.
Return to a higher Category/Group/Field.
Cancel the selected Field button.
10. :Insert and eject CD.
11. Operation Keys :
:Activate a function or complete an entry that you have made during setup.
Display the Monitoring Control Menu on the screen.
:Move between categories and change field values.
12. TAB : Move between menu groups.
13. JOG Shuttle : Change channels during monitoring.
Framebyframereverse/forwardduringPlaybackmode.
14. USB Port : Connection for USB storage device
15. MOUSE Port : Connection for PS2 mouse.
Introduction
③ ④
②
⑤ ⑥ ⑦ ⑧ ⑨ ⑪⑩ ⑫ ⑬⑭
①
⑮

1.2.2. Rear Panel
1. AC POWER Socket : Supports 110V ~ 220V free volt.
2. SENSOR Terminal
* Connect G(Ground) before connecting the sensors.
3. SPOT OUT Connector
- Output connector for Spot Out signal to monitor.
4. VOUT & AOUT Connectors
- Output connector for video(VOUT) and audio(AOUT) signals to monitor.
5. AUDIO INPUT Connectors
- Input connectors for audio signals.
6. VIDEO INPUT Connectors
- Input connectors for video signals.
7. ALARM Output Terminal
- Connect the alarm devices in its corresponding numbers.
8. VGA(Monitor) Port
- Connection to PC monitor.
9. S-Video Connector
- Connection to S-Video jack.
10. RMC Connector
- Connection to remote controller extension cable.
11. MOUSE Port
- Connection to Mouse.
G G 8 7 6 5 4 3 2 1
8 7 6 5 4 3 2 1
Introduction
① ②③④⑤ ⑥
⑮
⑦⑧ ⑨ ⑩ ⑫⑬⑭⑪
16

12. PTZ Connector
- Connection to PTZ camera.
13. LAN Port
- Connection to LAN cable.
14. SW(Dip Switch)
- Adjust the Dip Switch setting according to required functions. The system must be restarted after
adjustments.
* Only PC monitors that support Interlace RGB must be used. Or TVs with RGB jack
(SONY monitors) may be used after connecting RGB and HSYNC to the external SYNC. Switch
between TV↔VGA may be performed only during the Monitoring Mode.
15. TERMINAL
* Lower serial connection jack : For serial remote control.
16. MODEM Port
Introduction
5
4
3
2
1
9
8
7
6
PIN No. Explanation PIN No. Explanation
1 nRS485 5 GND
9 RS485 2,3,4,6,7,8 Not used
Functions OFF Position ON Position
OFF ColorSystem NTSC PAL
Booting CDRW Booting
ON Booting USBBooting
Monitor Output VGA *TVRGB, Composite,
S-Video
5
4
3
2
1
9
8
7
6
PIN No. Explanation PIN No. Explanation
2 RX 5 GND
3 TX 1,4,6,7,8,9 Not used
5
4
3
2
1
9
8
7
6
PIN No. Explanation PIN No. Explanation
2 RX 5 GND
3 TX 1,4,6,7,8,9 Not used

1.2.3. Remote Controller
※ Usage of Numeral Keys. (To input FUZ42 )
☞F : 333 →U : 88 →Z : 9999 →4 : Press 4 until it appears on screen →2 : Press 2
until it appears on screen.
Introduction
OSD OSD On/Off during Monitoring/Full-screen Playback.
PANIC Panic Recording On/Off.
Numeral Keys Select channel or type in characters.
CAPTURE Capture video clip/image to USB Memory.
F/F Remove image distortion during frame by frame advance.
PREVIOUS Move to previous category.
NEXT Move to next category.
Direction Keys Move cursor left/right/up/down.
PTZ control
MENU /
ENTER Enter Menu.
Select/Enable a highlighted category/item.
ESC Stop current operation or return to previous mode.
AUDIO Change audio channel during monitoring/playback.
LOG Enter Log Search mode.
PTZ Enter PTZ control mode.
SEARCH Enter Search(Playback) mode.
SETUP Enter Setup mode.
PAUSE Pause during playback.
Fast reverse playback
Playback in reverse/forward direction
Fast forward playback.
FULL SCR Change to full screen display of one channel.
Playback in slow motion
-/+ SKIP Reverse/forward jump in 5 minute intervals during
playback.
CH Change channels.
DISPLAY Toggle between single and 4 channel display mode.
-/+ ZOOM Adjust zoom of PTZ camera.
Toggle between zoom 2x and normal view during
monitoring.
FREEZE Freeze screen during monitoring
SEQUENCE Automatic sequence display during monitoring.
/ FOCUS Adjust focus of PTZ camera
ID Set
Set ID of remote controller.
Same ID must be applied for the DVR and remote
controller.
☞Press the ID SET button and input the ID using the
numeral keys.
The ID must be set in 3 digits.(If DVR ID is “1” press
“001”)
The ID SET button must remain pressed while
inputting the ID.
PRESET Enter preset controls of PTZ
IRIS Adjust aperture of PTZ camera.

2.1. Installation of Hard Disk Drives
※Compatible Hard Drives : Samsung, Maxtor, Fujitsu, Western Digital
2.1.1. Installation Order.
Unscrew the Brackets from the DVR bottom in order to install Hard Drives.
- Installing one HDD : PRIMARY MASTER
- Installing two HDD : PRIMARY MASTER →SECONDARY MASTER
- Installing three HDD : PRIMARY MASTER →SECONDARY MASTER →PRIMARY SLAVE
- Installing four HDD : PRIMARY MASTER →SECONDARY MASTER →PRIMARY SLAVE →
SECONDARY SLAVE
* Hard Drives must be installed in the DVR according to the above order and adjust the Jumper
Pin of the Hard Drive to the Master or Slave position.
- Fasten 2 screws on each side of the HDD bracket to fix the Hard Drives to the bracket.
2.1.2. Cable Connection.
Connect the Power Plug and IDE Cable to the Hard Drive.
2. I
NSTALLATION
Primary Slave
(Above)
Primary Maste
r
(Below)
Secondary Slave
(Above)
Secondary Maste
r
(Below)
IDE Cable
Power Cable
DVR FRONT
Power Cable
IDE Cable
Bracket 1
Bracket
2
Screw 1
Screw 2
Screw 3
Screw 4

2.2. Starting the DVR
After installing the hard disk, connect the power cord to start the DVR.
When starting the DVR for the first time, formatting of the hard disk will commence automatically and the
DVR will be initialized as follows.
The DVR will perform “S.M.A.R.T.” check of the installed hard disk.
If no problem is detected [S.M.A.R.T. PASS] will be indicated and if a problem is detected [S.M.A.R.T.
FAILURE] will be indicated and a warning will appear on the monitoring screen every 1 minute for a
duration of 5 seconds.
The hard disk capacity indicated may be smaller than the capacity declared by the hard disk producer. This
difference may occur due to the difference in measure units and therefore is not a defect.
If the hard disk detected has not been formatted, recording will start after the formatting is completed.
Installation
※S.M.A.R.T. (Self Monitoring, Analysis and Reporting Technology)
S.M.A.R.T. is a reliability prediction technology to anticipate the failure of a hard disk drive with
sufficient notice to allow a system or user to back up data prior to a drive’s failure.
If the controller detects problems in the disk drive reliability, it will release a warning to the
user. In such a case, the use of the disk drive should be stopped immediately and have it
examined.
※Cautions & Warnings
1. Press the Power button on the DVR until the Power Indicator lights up.
2. The Hard Disk used in this DVR is compatible with the Windows OS by using the FAT32 file
system. However, we cannot guarantee safety against the possibility that the system may
crash with vaccine programs such as Anti-Virus, V3, etc.
3. If the Hard Disk is formatted in the Windows environment, it should be performed in
Windows XP or a higher edition and must use the FAT32 format.
4. Do not remove devices during backup or playback of recorded data. It may cause DVR
malfunctions.

2.3. Log In & Log Out
1. Select USER
Using buttons, select the USER. (ADMIN, USER1
~USER5)
2.Enter the PASSWORD
A Key Panel will appear automatically when the LOGIN screen
popsup.
Enter the Password using the Key Panel
3.LOG OUT
Click the mouse right button or move the cursor to the bottom of the screen to bring up the Menu bar
on to the monitoring screen.
Click the mouse left button on the [LOG OUT] button on the right hand corner of the Menu Bar to escape from
the Administrator Mode.
This will prohibit any other users other than the authorized personnel with proper password to enter
PLAY(Search), PTZ Control, and SETUP
Menu Bar
Installation
※Default value of the Password is set at “0000”.
※Password can be changed in the SYSTEM SETUP menu.
Ke
y
Panel

3.1. Configuration Menu
SYSTEM CAMERA SENSOR
LANGUAGE MOTION DETECTION SENSOR
ID(DVR) MASKING AREA CAMERA LINK
DATE TYPE SENSITIVITY(CAMERA) ALARM LINK
TIME DATE COVERT OPERATION TIME
DST COLOR SETTING TYPE
TRANSPARENCY(GUI) BRIGHTNESS OPERATION MODE
ADMIN PASSWORD CONTRAST RECORDING DWELL TIME
MOUSE SENSITIVITY HUE OUTPUT DWELL TIME(ALARM)
USER(NUMBER) PTZ SETTING
USER PASSWORD ID
USER AUTHORITY DRIVER
COLOR SYSTEM(NTSC/PAL) BAUDRATE
S/W VERSION DATABIT
UPGRADE(SETUP, F/W, BMP) PARITY
FACTORY DEFAULT(RESET) STOPBIT
NETWORK RECORD SCHEDULER
IP TYPE RESOLUTION SCHEDULE
PORT WATERMARK USE CONTINUOUS
IP ADDRESS WATERMARK STRENGTH MOTION
GATEWAY WATERMARK KEY MOTION+SENSOR
SUBNET MASK RECORD TIME STAMP SENSOR
DNS SERVER AUDIO RECORD NONE
SMTP SERVER FPS(RECORDING SPEED) COPY SCHEDULE
MAC ADDRESS QUALITY
E-MAIL SERVER ID
E-MAIL SERVER PASSWORD
E-MAIL SENDER
E-MAIL RECEIVER
PPPOE ID
PPPOE PASSWORD
DVR NAME
EVENT MAIL
3.
C
ONFIGURATION

DISPLAY DEVICE LOG LIST
MULTI-DISPLAY DISK MANAGEMENT EVENTS
SEQUENCEMODE ENDOFDISK POWER
SEQUENCEDWELLTIME FULLDISKALARM SENSOR
VIDEO ADJUSTMENT FULLDISKPRE-ALARM(5%) RECORD
FLICKERCANCEL SMARTFAILURE CAMERA
COLORDIFFUSION DEVICE INFORMATION LAN
VGA DE-INTERLACE DEVICE BACKUP
SPOT OUT SIZE SETUP
SEQUENCEDWELLTIME TEMPERATURE TIME
SENSOR ACTIVATION RAW READ ERROR RATE CHANNELS
RE-ALLOCATED SECTOR COUNT CALENDAR
SEEK ERROR RATE
BACKUP & FORMAT
FORMAT
BACKUP
Configuration

3.2. System Setup
Before starting your DVR for the first time, you should
establish the initial settings. This includes categories
such as Language, DVR ID, Date and Time, DST,
Password, User Authorization.
Click the [SETUP] button on the Menu Bar to
enter SETUP and the [SYSTEM] Setup screen
will appear on the monitor.
CATEGORY DEFAULT
VALUE FUNCTION & OPERATION METHOD
LANGUAGE ENGLISH
•Select GUI(Graphic User Interface) Language
•The display will change immediately according to the selected
language.
•If the new values are not saved when exiting [SETUP], the
settings will return to its previous values.
Turn the mouse wheel to change Language.
ID 0
•Assign an ID number for the DVR
•When using several DVRs, each DVR will be differentiated with
this ID number.
•Input Range : 0~255
Use pop-up Key Panel or turn the mouse wheel to change the
number.
DATE TYPE •Select DATE indication method.(YYYY-MM-DD, MM-DD-YYYY,
DD-MM-YYYY.)
Turn the mouse wheel to change the Date Type.
TIME DATE •Adjust the Time and Date.
•A calendar will appear when the Time & Date Field is selected.
•Date is available from January of the DVR production year to end
of year 2099.
Use the buttons on the calendar to change the Month.
Click on the Date with mouse left button and change the Time
by turning the mouse wheel or clicking the buttons.
DST
NO •Select whether to apply the DST(Daylight Saving Time)
Turn the mouse wheel to select between YES or NO..
TRANSPARENCY 0
•Set the transparency level of the Graphic User Interface(GUI).
•The GUI will appear more transparent with lower input values
•Input Range : 0~10
Turn the mouse wheel to change the input value or use the
pop-up Key Panel.
ADMIN PASSWORD 0000 •Register Password of the DVR Administrator.
•Max. 8 characters(Letters and numerals) can be used.
Use the pop-up Key Panel to change the password.
Configuration

CATEGORY DEFAULT
VALUE FUNCTION & OPERATION METHOD
MOUSE SENSITIVITY 2 •Set the Mouse Sensitivity level.
•Input Range : 1(Slow)~3(Fast)
Turn the mouse wheel to change the input value.
USER
•Assign the number of authorized Users having access to the DVR.
•Max. number of Users : 1~5 persons.
•User Password and Authority Level will need to be assigned for
each Users.
•Register the User Password and Authority Level after selecting the
User.
Turn the mouse wheel to change the User.
USER PASSWORD 0000 •Register the Password of the selected User.
•Max. 8 characters(Letters and numerals) can be used.
Use the pop-up Key Panel to change the password.
USER AUTHORITY
•Assign the Authority Level of the selected User.
•Assign which mode/modes(PLAY, PTZ, RECORD CONTROL, USB)
the User is permitted to access.
Click on the mode or modes the User is permitted to access.
The button will be highlighted in pink when selected.
COLOR SYSTEM NTSC / PAL •Displays the current Color System selected for the DVR.
•Setting values : NTSC, PAL
The DIP Switch in the DVR rear panel should be positioned to
the Color System applicable in your region before starting the
DVR.
S/W VERSION •Displays the installed Software version of the DVR.
UPGRADE
•Upgrade Setup Values, Firmware and BMP Image(GUI) files
: Setup Values
: Firmware
: Image files used in the GUI.
: Upgrade(Download) Firmware, Setup Information,
BMP files to the DVR from a CD or USB memory.
: Copy Firmware, Setup information, BMP files of the
DVR to a CD or USB memory.
: Select the CD-RW or USB.
DVR UPGRADE : Select the Upgrade category(Setup, Firmware,
BMP) and click on IMPORT and click the START
button with the mouse left button.
Copy to CD or USB : Select the Upgrade category and click on
EXPORT and click START.
FACOTRY DEFAULT •All settings will be reset to the initial Factory default values
Click the FACTORY DEFAULT button with the mouse left button.
PRE-VALUE
• All settings in the System Setup will return to its Previous values.
Click the Pre-Value button with the mouse left button.
DEFAULT
• All settings in the System Setup will return to its factory default
values.
Click on the DEFAULT button.
Configuration
Table of contents
Other TORCHVIEW DVR manuals
