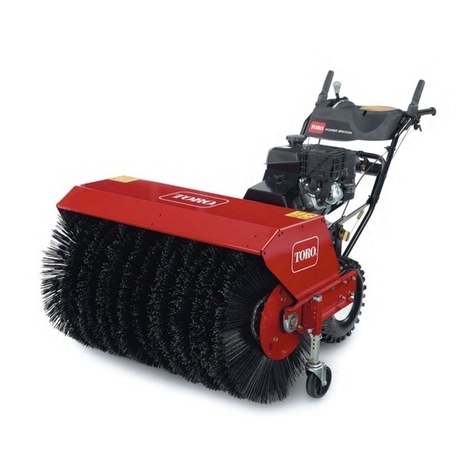
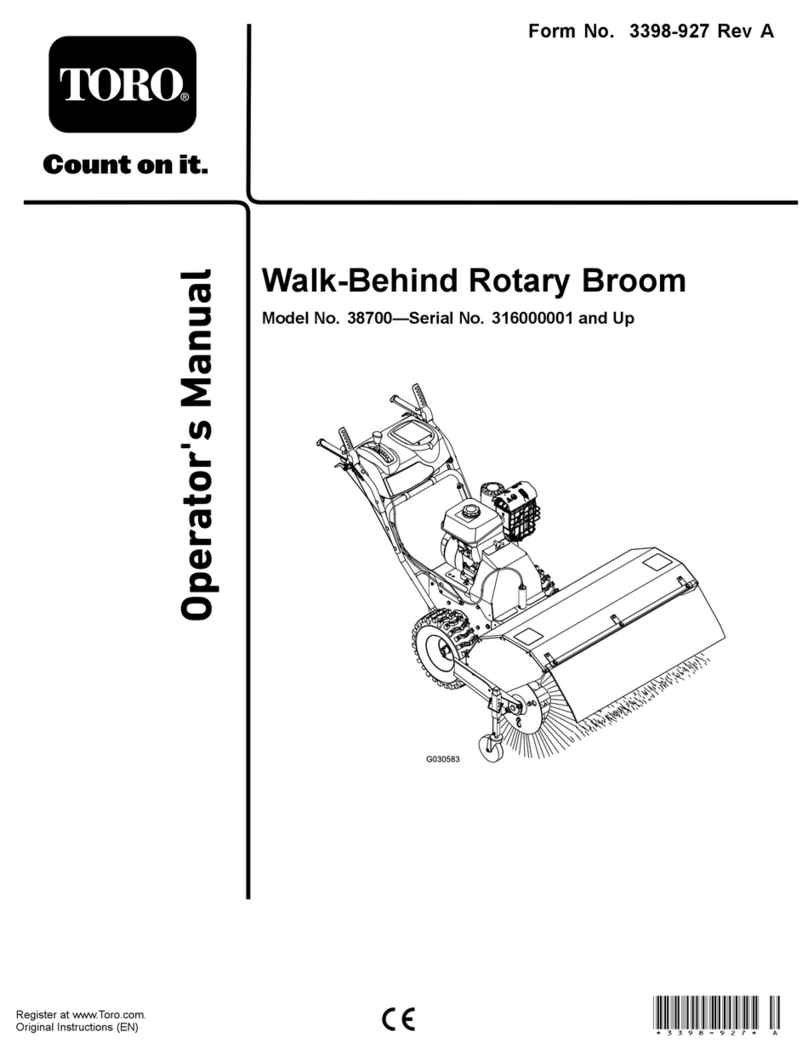
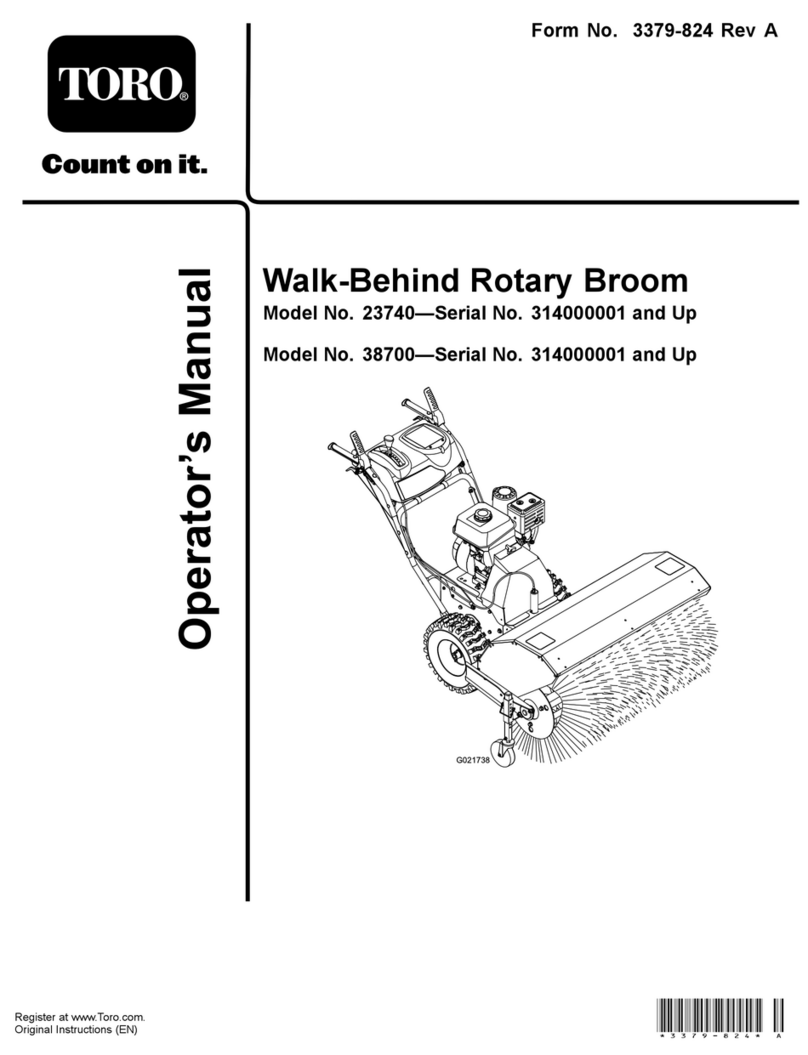
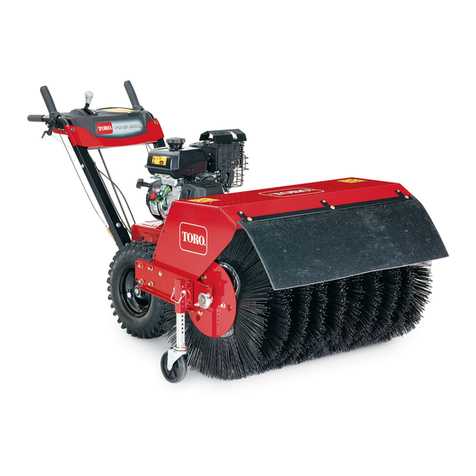
Toro 23740 User manual

FormNo.3378-184RevA
Walk-BehindRotaryBroom
ModelNo.23740—SerialNo.313000001andUp
ModelNo.38700—SerialNo.313000001andUp
G021738
Registeratwww.Toro.com.
OriginalInstructions(EN)*3378-184*A

ReplacementEngineOwner’sManualsmaybeordered
throughtheenginemanufacturer.
Introduction
WARNING
CALIFORNIA
Proposition65Warning
Thisproductcontainsachemicalorchemicals
knowntotheStateofCaliforniatocausecancer,
birthdefects,orreproductiveharm.
Theengineexhaustfromthisproduct
containschemicalsknowntotheStateof
Californiatocausecancer,birthdefects,
orotherreproductiveharm.
Important:Theengineinthisproductisnotequipped
withasparkarrestermufer.Itisaviolationof
CaliforniaPublicResourceCode(CPRC)Section4442
touseoroperatethisengineonanyforest-covered,
brush-covered,orgrass-coveredlandasdenedinCPRC
4126.Otherstatesorfederalareasmayhavesimilarlaws.
Toacquireasparkarresterforyourunit,seeyourEngine
ServiceDealer.
Thismachineisintendedtobeusedbyresidential
homeownersorprofessional,hiredoperators.Itis
designedforremovingsnow,dust,anddirtfrom
pavedsurfaces,suchasdrivewaysandsidewalks,and
othersurfacesfortrafconresidentialorcommercial
properties,aswellasthatchfromgrass.
Readthisinformationcarefullytolearnhowtooperateand
maintainyourmachineproperlyandtoavoidinjuryand
machinedamage.Youareresponsibleforoperatingthe
machineproperlyandsafely.
YoumaycontactTorodirectlyatwww.Toro.comformachine
andaccessoryinformation,helpndingadealer,ortoregister
yourmachine.
Wheneveryouneedservice,genuineToroparts,oradditional
information,contactanAuthorizedServiceDealerorToro
CustomerServiceandhavethemodelandserialnumbersof
yourmachineready.Figure1identiesthelocationofthe
modelandserialnumbersonthemachine.Writethenumbers
inthespaceprovided.
Figure1
1.Modelandserialnumberlocation
ModelNo.
SerialNo.
Thismanualidentiespotentialhazardsandhassafety
messagesidentiedbythesafetyalertsymbol(Figure2),
whichsignalsahazardthatmaycauseseriousinjuryordeath
ifyoudonotfollowtherecommendedprecautions.
Figure2
1.Safetyalertsymbol
Thismanualuses2wordstohighlightinformation.
Importantcallsattentiontospecialmechanicalinformation
andNoteemphasizesgeneralinformationworthyofspecial
attention.
©2013—TheToro®Company
8111LyndaleAvenueSouth
Bloomington,MN554202
Contactusatwww.Toro.com.
PrintedintheUSA
AllRightsReserved

Contents
Introduction..................................................................2
Safety...........................................................................4
Training.................................................................4
Preparation.............................................................4
Operation...............................................................4
ClearingaCloggedBroom........................................5
MaintenanceandStorage..........................................5
SlopeIndicator.......................................................6
SafetyandInstructionalDecals.................................7
ProductOverview..........................................................9
Controls................................................................9
Specications........................................................10
Attachments/Accessories........................................10
Operation....................................................................10
OperatingInstructions............................................10
TransportingtheMachine........................................14
Maintenance.................................................................15
RecommendedMaintenanceSchedule(s)......................15
CheckingtheEngineOilLevel.................................16
CheckingtheTractionCable....................................16
CheckingforLooseHardware..................................16
ChangingtheEngineOil.........................................16
CheckingtheTirePressure......................................16
CheckingtheConditionoftheBelts..........................16
LubricatingtheBroomAngleLockPinandHex
Shaft.................................................................16
CheckingtheSparkPlug..........................................17
CheckingtheBroomCable......................................17
CheckingtheBroomShaftShearPin.........................17
CheckingtheBroomSegments.................................18
AdjustingtheTractionCable....................................18
AdjustingtheBroomDrive......................................18
AdjustingtheWheelClutchCable.............................19
Storage........................................................................19
PreparingtheMachineforStorage............................19
RemovingtheMachinefromStorage.........................20
Troubleshooting...........................................................21
3

Safety
Readandunderstandthecontentsofthismanualbefore
theengineiseverstarted.
Thisisthesafetyalertsymbol.Itisusedtoalertyou
topotentialpersonalinjuryhazards.Obeyallsafety
messagesthatfollowthissymboltoavoidpossibleinjury
ordeath.
Improperlyusingormaintainingthismachinecould
resultininjuryordeath.Toreducethispotential,
complywiththefollowingsafetyinstructions.
Training
•Readtheoperatingandserviceinstructionmanual
carefully.Bethoroughlyfamiliarwiththecontrolsand
theproperuseofthemachine.Knowhowtostopthe
machineanddisengagethecontrolsquickly.
•Neverallowchildrentooperatethemachine.Neverallow
adultstooperatethemachinewithoutproperinstruction.
•Keeptheareaofoperationclearofallpersons,particularly
smallchildren,andpets.
•Exercisecautiontoavoidslippingorfalling,especially
whenoperatinginreverse.
Preparation
•Thoroughlyinspecttheareawherethemachineistobe
usedandremovealldoormats,sleds,boards,wires,and
otherforeignobjects.
•Donotoperatethemachinewithoutwearingappropriate
garments.Wearfootwearwhichwillimprovefootingon
slipperysurfaces.
CAUTION
Thismachineproducessoundlevelsinexcess
of85dBAattheoperator’searandcancause
hearinglossthroughextendedperiodsof
exposure.
Wearhearingprotectionwhenoperatingthis
machine.
•Handlefuelwithcare;itishighlyammable.
–Useanapprovedfuelcontainer.
–Neveraddfueltoarunningorhotengine.
–Fillfueltankoutdoorswithextremecare.Neverll
fueltankindoors.
–Replacegasolinecapssecurelyandwipeupspilled
fuel.
•Neverattempttomakeanyadjustmentswhiletheengine
isrunning(exceptwherespecicallyrecommendedby
manufacturer).
•Letengineandmachineadjusttooutdoortemperatures
beforestartingtoclearsnow.
•Theoperationofanypoweredmachinecanresultin
foreignobjectsbeingthrownintotheeyes.Alwayswear
safetyglassesoreyeshieldsduringoperationorwhile
performinganadjustmentorrepair.
Operation
•Donotputhandsorfeetnearorunderrotatingparts.
Keepclearofthedischargeopeningatalltimes.
•Exerciseextremecautionwhenoperatingonorcrossing
graveldrives,walks,orroads.Stayalertforhidden
hazardsortrafc.
•Afterstrikingaforeignobject,stoptheengine,remove
thewirefromthespark-plug,thoroughlyinspectthe
machineforanydamage,andrepairthedamagebefore
restartingandoperatingthemachine.
•Ifthemachineshouldstarttovibrateabnormally,stopthe
engineandcheckimmediatelyforthecause.Vibrationis
generallyawarningoftrouble.
•Stoptheenginewheneveryouleavetheoperating
position,beforeuncloggingthebroomhousing,and
whenmakinganyrepairs,adjustments,orinspections.
•Whencleaning,repairing,orinspecting,makecertain
therotarybroomandallmovingpartshavestopped.
Disconnectthespark-plugwire,andkeepthewireaway
fromtheplugtopreventaccidentalstarting.
•Donotruntheengineindoors,exceptwhenstartingit
andformovingthemachineinoroutofthebuilding.
Opentheoutsidedoors;exhaustfumesaredangerous.
•Donotclearsnow,dirt,orthatchacrossthefaceof
slopes.Exerciseextremecautionwhenchangingdirection
onslopes.Donotattempttoclearsteepslopes.
•Neveroperatethemachinewithoutproperguards,plates,
orothersafetyprotectivedevicesinplace.
•Neveroperatethemachinenearglassenclosures,
automobiles,windowwells,drop-offs,etc.withoutproper
adjustmentofthesnowdischargeangle.Keepchildren
andpetsaway.
•Donotoverloadthemachinecapacitybyattemptingto
clearsnow,dirt,orthatchattoofastarate.
•Neveroperatethemachineathightransportspeedson
slipperysurfaces.Usecarewhenreversing.
•Neverdirectdischargeatbystandersorallowanyonein
frontofthemachine.
•Disengagepowertotherotarybroomwhenmachineis
transportedornotinuse.
•Useonlyattachmentsandaccessoriesapprovedby
themanufacturerofmachine(suchaswheelweights,
counterweights,cabs,etc.).
•Neveroperatethemachinewithoutgoodvisibilityor
light.Alwaysbesureofyourfooting,andkeeparm
holdonthehandles.Walk;neverrun.
4

•Neveroperatethemachinewithoutgoodvisibilityor
light.
•Takeallpossibleprecautionswhenleavingthemachine
unattended.Shiftintoneutral,settheparkingbrake,stop
theengineandremovethekey.
ClearingaCloggedBroom
WARNING
Therotatingbroomcouldcauseseriousinjury.
Alwaysusecautionwhencleaningthebroom.
Toclearthebroom:
•Parkthemachineonlevelground.Stopengine,wait
forallmovingpartstostop,andremovethesparkplug
wire(s).
•Sharpobjectscanbecomeentangledinbristles.Use
glovesandcautionwhencleaningoutthebroomof
foreignobjects;notbarehands.
MaintenanceandStorage
•Checkallfastenersatfrequentintervalsforproper
tightnesstobesurethemachineisinsafeworking
condition.
•Neverstorethemachinewithfuelinthefueltankinsidea
buildingwhereignitionsourcesarepresentsuchashot
waterandspaceheaters,clothesdryers,etc.Allowthe
enginetocoolbeforestoringinanyenclosure.
•Alwaysrefertoowner’sguideinstructionsforimportant
detailsifthemachineistobestoredforanextended
period.
•Maintainorreplacesafetyandinstructionslabels,as
necessary.
•Whenoperatinginsnowconditions,runthemachinea
fewminutesafterthrowingsnowtopreventfreeze-upof
thecollector/impeller.
5

SlopeIndicator
G01 1841
Figure3
1.Themaximumslopeyoucansafelyoperatethemachineonis10°.Usetheslopeindicatortodeterminethedegreeofslopeof
hillsbeforeoperating.Donotoperatethismachineonaslopegreaterthan10°.Foldalongtheappropriatelinetomatchthe
recommendedslope.
2.Alignthisedgewithaverticalsurface,atree,building,fencepole,etc.
3.Exampleofhowtocompareslopewithfoldededge.
6

SafetyandInstructional
Decals
Important:Safetyandinstructiondecalsarelocated
nearareasofpotentialdanger.Replacedamageddecals.
112-9028
1.Warning—stayawayfrommovingparts;keepallguardsin
place.
115-2903
1.Grease
116-8140
1.Thrownobjecthazard-Do
Notoperatewhenpeople
andpetsareinthearea.
2.Warning-Entanglement
hazard-stayclearof
rotatingbroom.
116-8505
1.Explosion/Firehazard–ReadtheOperator’sManual.Stop
enginebeforellingfueltank.Leave5/8inch(16mm)attop
oftankforfuelexpansion-DoNotoverlltank.
117–2718
106-4525
Reorderpartno.112-6633
1.Fast3.Slow
2.Forwardspeeds4.Reversespeeds
7

116-7370
1.Warning-ReadtheOperator’sManual.DoNotoperatethis
machineunlessyouaretrained.Stayawayfrommoving
parts;keepallguardsinplace.
4.Warning-Stopengineandremovesparkplugbeforeadjusting,
servicing,orcleaningmachineandattachments.Before
leavingtheoperator’sposition,disengagebroom,traction
drive,andstopengine.Lookbehindandtothesidebefore
changingdirections.DoNotcarrypassengers.
2.Thrownobjecthazard-DoNotoperatewhenpeopleandpets
areinthearea;pickupobjectsthatcouldbethrownbybroom.
5.Warning-Entanglementhazard-stayclearofrotatingbroom.
Broombristleswillmeltorburn-keepawayfromextreme
heatorame.DoNotoperateonanyrooforotherelevated
surface.
3.Warning-Wearhearingprotection.6.Warning-DoNotoperateonslopesgreaterthan10degrees.
Useextremecautionwhenoperatingonslopes;operate
acrossslopesnotupanddown.
126–0017
1.Engagetheleftturnlever
toturnleft.
4.EngagethePTOleverto
activatethePTO.
2.Engagethetraction
controllevertoactivate
thetractiondrive.
5.Engagetherightturnlever
toturnright.
3.Engagethebroomangle
levertoadjustthebroom.
8

ProductOverview
G021739
Figure4
1.Wheelclutchlever6.Tractiondrivelever
2.Handle7.Fuelcap
3.Broomanglelever8.Broom
4.Broomdrivelever9.Broomheightadjustment
pin
5.Speedselectorlever
Controls
Determinetheleftandrightsidesofthemachinefromthe
normaloperatingposition.
ChokeControl
Thechokecontrolisthetopleverlocatedontherearleft
handsideoftheengineabovethefuelshut-offvalve.
Thechokeisusedtoaidinstartingacoldengine.Movethe
leverlefttotheOnpositionforacoldstart.Donotruna
warmenginewiththechokeintheOnposition.
ThrottleControl
Thethrottlecontrolislocatedontherearrighthandside
oftheengine.
Thethrottleisusedtocontrolenginespeed.Movingthe
throttlecontroltotheleftwillincreaseenginespeedand
movingitrightwilldecreaseenginespeed.
EngineOn/OffSwitch
Locatedontherighthandsideoftheengine.
RotatetheswitchclockwisetotheOnpositionbeforestarting
theengine.RotatetheswitchcounterclockwisetotheOff
positiontokilltheengine.
FuelShut-OffValve
Thefuelshut-offvalveisthelowerleverlocatedonthe
rearlefthandsideoftheenginebelowthechoke.Thefuel
shut-offvalveshutsofftheowoffuelwhenthemachinewill
notbeusedforafewdays,whenparkinginsideabuilding,
andduringtransporttoandfromthejob.
Movethelevertothelefttoshutofffuel.Movethelever
totherighttoturnonfuel.
WheelClutchLevers
Locatedbelowtherighthandandlefthandhandles.
Thewheelclutchleversallowthedrivetomomentarily
disengagetooneorbothwheelswiththetractiondrivelever
stillengaged.Thisallowseasierturningandmaneuvering
themachine(Figure5).
Squeezingbothwheelclutchleverssimultaneouslydisengages
thedrivetobothwheels(free-wheeling).Thisenablesyouto
manuallymovethemachinebackwardwithoutstoppingto
shiftitintoareversegear.Italsoallowsyoutomaneuver
andtransportthemachinemoreeasilywhentheengineis
notrunning.
Figure5
1.Wheelclutchlever4.Tractiondrivelever
2.Handle5.Speedselectorlever
3.Broomanglelever6.Broomdrivelever
BroomDriveLever
Locatedabovetherighthandhandle(Figure5).
Toengagethebroom,squeezethelevertothehandle.To
disengagethebroom,releasetherighthandlever.
TractionDriveLever
Locatedabovethelefthandhandle(Figure5).
Thetractiondrivelevercontrolstheforwardandreverse
motionofthemachine.Toengagethetractiondrive,squeeze
thelevertothehandle.
9

Note:Holdingdownthetractiondriveleveragainstthe
handleengagesthetractiondrivetobothwheels.
SpeedSelectorLever
Locatedonthemainconsolepanel(Figure5).
Thespeedselectorhas6forwardand2reversesettings.To
changespeeds,releasethetractiondriveleverandshiftthe
speedselectorlevertothedesiredsetting.Theleverlocksina
notchateachspeedsetting.
BroomAngleLever
Locatedontherighthandhandle(Figure5).
Thebroomcanbelockedintothreepositions;straightahead,
orangledtotheleftorright19°.
Specications
Width118cm(46.5inches)
Length185.5cm(73inches)
Height105.5cm(41.5inches)
Weight146.5kg(323lbs)
Enginerpm(noload)Fullspeed:3600±100rpm
Attachments/Accessories
AselectionofToroapprovedattachmentsandaccessoriesis
availableforusewiththemachinetoenhanceandexpand
itscapabilities.ContactyourAuthorizedServiceDealeror
Distributororgotowww.Toro.comforalistofallapproved
attachmentsandaccessories.
Operation
OperatingInstructions
OpentheFuelShut-OffValve
Movethefuelshut-offvalvelocatedbelowthechoke,tothe
righttoturnonfuel.
StartingtheEngine
1.Ontherighthandsideoftheengine,rotatetheengine
On/OffswitchclockwisetotheOnposition.
2.Ontherearlefthandsideoftheengine,movethe
chokelevertothelefttotheOnposition.Onawarm
engine,leavethechokeintheOffposition.
3.PlacethethrottlemidwaybetweentheSlowandFast
positionslocatedonrearrighthandsideoftheengine.
4.Slowlypulltheenginerecoilhandleuntilyoufeel
resistanceandthenstop.Allowtherecoilhandleto
returnandthensharplypullitstraightout.Allowthe
ropetoreturnslowly.
5.Allowtheenginetowarmupforseveralminutes,then
movethechoketowardtheOffposition.
StoppingtheEngine
1.Bringtheunittoafullstop.
2.PlacethethrottlemidwaybetweentheSlowandFast
positions.
3.Allowtheenginetorunforaminimumof15seconds,
thenturntheengineOn/OffswitchtotheOffposition
tostoptheengine.
4.Waitforallmovingpartstostopbeforeleavingthe
operatingposition.
5.Closethefuelshut-offvalvebymovingittotheleft
whenthemachinewillnotbeinuseforafewdays,
whentransporting,orwhentheunitisparkedinsidea
building.
DrivingtheMachine
CAUTION
Ifthetractiondriveisnotproperlyadjusted,the
machinemaymoveinthedirectionoppositeof
whatyouintended,causinginjuryand/orproperty
damage.
Carefullycheckthetractiondriveandadjustit
properly,ifnecessary.
Important:Ifthemachinemoveswhenthetraction
leverisinthereleasedposition,checkthetractioncable
(refertoCheckingtheTractionCable(page16)and
10

AdjustingtheTractionCable(page18))orcontactyour
authorizedTorodealer.
DrivingForward
1.Placethespeedselectorlevertothedesiredforward
position,makingsureitlocksinthenotch(Figure6).
Figure6
Note:Ifthegroundspeedistoofast,debrisorsnow
willpileupinfrontofthebroomcausingthebroom
tobulldozeinsteadofsweep.Thiscandamagethe
bristlesandthedriveline.
2.Slowlysqueezethelefthandtractiondrivelevertothe
handle(Figure7).
Note:Holdingdownthetractiondriveleveragainst
thehandleengagesthetractiondrivetobothwheels.
Figure7
3.Tostopthetractiondrive,releasethetractiondrive
lever.
4.Tomoveforward,engagethetractiondriveandslowly
squeezethelefthandtractionlevertothehandle
(Figure8).Momentarilysqueezingandreleasingthe
leftorrightwheelclutchleverallowsforsteering
adjustmentstokeepthemachinegoinginastraight
line,especiallyindeepsnow.
Toturnright,liftupontherightwheelclutchlever
andsqueezeittowardthehandle.Thisdisengagesthe
drivetotherightwheelwhiletheleftwheelcontinues
driving,andthemachineturnstotheright.
Figure8
Note:Similarly,squeezingtheleftwheelclutchlever
turnsthemachinetotheleft.
Whenyoucompletetheturn,releasethewheelclutch
lever.Thedriveengagesbothwheels(Figure9).
Figure9
5.Tostopthetractiondrive,releasethetractiondrive
lever.
DrivingRearward
1.Placethespeedselectorlevertothedesiredrearward
position,makingsureitlocksinthenotch.
2.Tomoverearward,engagethetractiondriveandslowly
squeezethelefthandtractionlevertothehandle.
Momentarilysqueezingandreleasingtheleftorright
wheelclutchleverallowsforsteeringadjustmentsto
keepthemachinegoinginastraightline.
Toturnright,squeezetherightwheelclutchlever
towardthehandle.Thisdisengagesthedrivetothe
rightwheelwhiletheleftwheelcontinuesdriving,and
themachineturnstotheright.
Note:Similarly,squeezingtheleftwheelclutchlever
turnsthemachinetotheleft.
Squeezingbothwheelclutchleverssimultaneouslydisengages
thedrivetobothwheels.Thisenablesmachinetobemoved
rearwardwithoutstoppingtoshiftitintoareversegear.It
alsoallowsyoutomaneuverandtransportthemachinemore
easilywhentheengineisnotrunning.
11

OperatingtheBroom
DANGER
Whenthemachineisinoperation,contactwith
rotatingormovingpartswillseverelyinjurehands
andfeet.
•Beforeadjusting,cleaning,inspecting,
troubleshooting,orrepairingthemachine,stop
theengineandwaitforallmovingpartstostop.
Disconnectthewirefromthesparkplugand
keepitawayfromtheplugtopreventsomeone
fromaccidentallystartingtheengine.
•Staybehindthehandlesandawayfromthe
broomwhileoperatingthemachine.
•Keepface,hands,feet,andanyotherpartof
yourbodyorclothingawayfromconcealed,
moving,orrotatingparts.
WARNING
Contactwitharotatingbroomcanresultin
seriouspersonalinjuryordeathtotheoperatoror
bystanders.
•Toremoveanobstructionfromthebroom;refer
toClearingaCloggedBroom(page13).
•Donotoperatethemachineifthebroomdrive
leverisnotfunctioningproperly.Contactyour
authorizedTorodealer.
WARNING
Therotatingbroomcanthrowstonesandother
foreignobjects,causingseriouspersonalinjuryto
theoperatorortobystanders.
•Keeptheworkingareaclearandfreeofall
objectsthatthebroomcouldpickupandthrow.
•Keepallchildrenandpetsawayfromthearea
ofoperation.
CAUTION
Whenthebroomisengaged,itmaydrivetheunit
inthereversedirection.Ifthebroomheightis
adjustedtoolow,themachinemaymovemore
forcefullyinthereversedirection,causinginjury
and/orpropertydamage.
Carefullycheckthebroomheightandadjustit
properlyorcontactyourauthorizedTorodealer.
1.SettheenginethrottletotheFastposition.
2.Placethespeedselectorleverintothedesiredposition
andslowlysqueezethelefthandtractiondrivelever.
Important:Makesurethetractiondriveis
engagedbeforeoperatingthebroom;otherwise
thebroommaydrivetheunitinthereverse
direction.
3.Toengagethebroom,slowlysqueezetherighthand
broomlevertothehandle(Figure10).
Figure10
•Iftheengineslowsdownunderaloadorthe
wheelsslip,shiftthemachineintoalowergear.
•Ifthefrontofthemachineridesup,shiftthe
machineintoalowergear.Ifthefrontcontinues
torideup,liftuponthehandles.
4.Tostopthebroom,releasetherighthandlever.
CheckingtheSweepingPath
Abroomsweepswiththetipsofitsbristles.Whentoomuch
downpressureisapplied,thebroomisnolongerusingits
tips;thebroomisnowworkingwiththesidesofthebristles.
Thislimitstheickingactionofthebristles,sweeping
effectiveness,andcandecreasebroomlife.
1.Drivetoaatdustyareaandstopthemachine.
2.Withtheenginerunningmovethethrottlemidway
betweenSlowandFast.Engagethebroomandallow
thebroomtosweepforapproximately30seconds.
3.Disengagethebroomandstoptheengine.
4.Waitforallmovingpartstostopbeforeleavingthe
operatingposition.
5.TurntheengineOn/OffswitchtotheOffposition.
6.Makesuretheareasweptequalsthelengthofthe
broomandamaximumwidthof51-102mm(2-4
inches).
12

Figure11
1.51-102mm(2–4inches)
maximumwidth
3.Sweptarea
2.Lengthofbroom
7.Adjustthebroomheightifnecessary.
AdjustingtheBroomHeight
1.Drivetoaatdustyareaandstopthemachine.
2.Disengagethebroomandstoptheengine.
3.Waitforallmovingpartstostopbeforeleavingthe
operatingposition.
4.TurntheengineOn/OffswitchtotheOffposition.
5.Toadjustthebroomheight,removeandretainthepin
fromtheadjustersleeveandcasterwheeltube.
6.Raiseorlowerthecasterwheeltubetoachievethe
sweepareaasstatedinCheckingtheSweepingPath
(page12).Selectanyholecombinationthatisin
alignmenttoplaceandlatchtheretainingpin;match
thesamepositionontheotherside.
7.Fornetuningadjustments,slidetheadjustersleeve
onepinholeupordownonthecasterwheeltubeto
adjustthebroomheightin3mm(1/8inch)increments
(Figure12).Repeatfortheothercasterwheel.
Figure12
1.Casterwheeltube3.Pin
2.Positionstoachieve3mm
(1/8inch)increments
4.Adjustersleeve
•Toraisethebroomin3mm(1/8inch)increments,
slightlyraisetheadjustersleeveandinsertthepin
intothenextpinholebelowthecurrentholeused.
•Tolowerthebroomin3mm(1/8inch)increments,
slightlylowertheadjustersleeveandinsertthepin
intothenextpinholeabovethecurrentholeused.
8.Oncethedesiredheightisreached,securethepinon
eachcasterwheel.Recheckthesweepingarea.
AdjustingBroomSideAngle
1.Disengagethebroomandstoptheengine.
2.Waitforallmovingpartstostop.
3.Pushtheleverdownusingtherighthandthumb
(Figure5).
4.Squeezetheleftwheelclutchlevertothehandleand
pushthebroomhousingtothedesiredangle;the
broomcanrotate19°totherightorleft,orstraight
ahead.
5.Oncethebroomispositioned,releasethebroomangle
lever.Releasetheleftwheelclutchleverandmakesure
thebroomislockedintoplace.
ClearingaCloggedBroom
WARNING
Therotatingbroomcouldcauseseriousinjury.
Alwaysusecautionwhencleaningthebroom.
•Ifthebroombecomesclogged,stayintheoperating
positionandreleasethelefthandtractiondrivelever.
Whileengagingthebroom,pushdownonthehandlesto
raisethefrontofthemachineafewcentimeters(inches)
offthepavement.Thenliftthehandlesquicklytobump
13

thefrontofthemachineonthepavement.Repeatif
necessary.
•Ifyoucannotunclogthebroombybumpingthefront
ofthemachine:
–Parkthemachineonlevelground.Stoptheengine,
waitforallmovingpartstostop,andremovethe
sparkplugwire(s).
–Sharpobjectscanbecomeentangledinbristles.Use
glovesandcautionwhencleaningoutthebroomof
foreignobjects;notbarehands.
PreventingFreeze-up
•Insnowyandcoldconditions,somecontrolsandmoving
partsmayfreeze.Donotuseexcessiveforcewhen
tryingtooperatefrozencontrols.Ifyouhavedifculty
operatinganycontrolorpart,starttheengineandletit
runforafewminutes.
•Afterusingthemachine,lettheenginerunforafew
minutestopreventmovingpartsfromfreezing.Engage
thebroomtoclearanyremainingsnowfrominsidethe
housing.Stoptheengineandwaitforallmovingpartsto
stop,andremovethesparkplugwire(s).Removeallice,
snow,orotherdebrisfromthemachine.
•Reconnectsparkplugwire(s).Withtheengineswitchin
theOffposition,pulltherecoilstarterhandleseveral
timestopreventtherecoilstarterfromfreezingup.
TransportingtheMachine
WARNING
Loadingthemachineontoatrailerwithoutstrong
enoughorproperlysupportedrampscouldbe
dangerous.Therampscouldcollapsecausingthe
unittofall,whichcouldcauseinjury.
•Useproperrampsthataresecuredtothetruck
ortrailer.
•Keepfeetandlegsoutfromundertheunitwhen
loadingandunloading.
•Ifnecessary,useassistancewhenloading.
Besurethefuelshut-offvalveisclosed.
Useaheavydutytrailertotransportthemachine.Placethe
machineineitheraforwardorreversegear,thenblockthe
wheels.
Securelyfastenthemachinetothetrailerwithstraps,chains,
cables,orropes.
Besurethatthetrailerhasallnecessarylightingandmarking
asrequiredbylaw.
14

Maintenance
Note:Determinetheleftandrightsidesofthemachinefromthenormaloperatingposition.
RecommendedMaintenanceSchedule(s)
MaintenanceService
IntervalMaintenanceProcedure
Aftertherst2hours•Checkthetractioncable.
•Checkthebroomcable.
Aftertherst5hours•Changetheengineoil.
Beforeeachuseordaily
•Checktheengineoillevel.
•Checkforloosehardware.
•Checkthebroomshaftshearpin.
Every50hours•Checkthetirepressure.
•Checktheconditionofthebelts.
Every100hours•Changetheengineoil(morefrequentlyinsevereconditions).
•Lubricatethebroomanglelockpin.
Every160hours•Checkthesparkplug.
Yearly
•Checkthetractioncable.
•Lubricatethehexshaft.
•Checkthebroomcable.
Yearlyorbeforestorage
•Checktheairpressureinthedrivetiresandinatethemto116–137kPa(17–20psi).
•Drainthegasolineandruntheenginetodryoutthefueltankandthecarburetorat
theendoftheseason.
•Haveanauthorizedservicedealerinspectandreplacethetractiondrivebelt,if
necessary.
Important:Youcanndmoreinformationaboutmaintainingandservicingyourmachineatwww.Toro.com.
Important:Refertoyourengineoperator'smanualforadditionalmaintenanceprocedures.Forengineadjustments,
repairs,orwarrantyservicenotcoveredinthismanual,contactanAuthorizedKohlerServicingDealer.
15

CheckingtheEngineOilLevel
ServiceInterval:Beforeeachuseordaily
EngineOilType:Toro4–CyclePremiumEngineOil
1.Turnofftheengineandwaitforallmovingpartsto
stop.Makesuretheunitisonalevelsurface.
2.Checktheoilleveloncetheengineiscold.
3.Cleantheareaaroundthedipstick.Removethedipstick
andwipetheoiloff.Insertthedipstickaccordingto
theenginemanufacturer'srecommendations.Remove
thedipstickandreadtheoillevel.
4.Iftheoillevelislow,wipeofftheareaaroundtheoil
llcap,removethecapandlltotheFullmarkon
thedipstick.Toro4-CyclePremiumEngineOilis
recommended;refertotheEngineOwner'smanualfor
anacceptablealternative.
Note:Donotoverll.
Note:Donotoperatetheenginewiththeoillevelbelowthe
LoworAddmarkonthedipstick,orovertheFullmark.
CheckingtheTractionCable
ServiceInterval:Aftertherst2hours
Yearly
1.Turnofftheengine,waitforallmovingpartstostop,
andremovethesparkplugwire(s).
2.Withthetractionleverdisengaged,checkthepininthe
elongatedslotintheleftsideofthemachineabovethe
tire(Figure13).Thereshouldbeagapof6mm(1/4
inch)fromthefrontoftheslottothefrontedgeof
thepin.Ifadjustmentisnecessary,seeAdjustingthe
TractionCable(page18).
Figure13
1.Pin2.6mm(1/4inch)
CheckingforLooseHardware
ServiceInterval:Beforeeachuseordaily
1.Turnofftheengine,waitforallmovingpartstostop,
andremovethesparkplugwire(s).
2.Visuallyinspectthemachineforanyloosehardwareor
anyotherpossibleproblem.Tightenthehardwareor
correcttheproblembeforeoperating.
ChangingtheEngineOil
ServiceInterval:Aftertherst5hours
Every100hours(morefrequentlyinsevere
conditions).
1.Turnofftheengineandwaitforallmovingpartsto
stop.
2.Disconnectthewirefromthesparkplug.
3.Draintheoilwhiletheengineiswarmfromoperation.
4.Placeapanunderdrainttingandremovetheoildrain
plug.Allowtheoiltodrainandreplacetheoildrain
plug.
5.Cleanaroundtheoilllcapandremovethecap.Fill
tothespeciedcapacityandreplacethecap.Usethe
oilrecommendedintheCheckingtheEngineOilLevel
(page16)section.Donotoverll.
6.Starttheengineandcheckforleaks.Stoptheengine
andrechecktheoillevel.
7.Wipeupanyspilledoilfromtheenginedeckmounting
surfaces.
CheckingtheTirePressure
ServiceInterval:Every50hours
1.Turnofftheengine,waitforallmovingpartstostop,
andleaveengineswitchintheOffposition.
2.Checkthetirepressureinthedrivetires.
3.Inatethedrivetiresto117-138kPa(17-20psi).
CheckingtheConditionofthe
Belts
ServiceInterval:Every50hours
1.Turnofftheengine,waitforallmovingpartstostop,
andremovethesparkplugwire(s).
2.Removethebeltcoverandengineshieldtocheckthe
beltcondition.
LubricatingtheBroomAngle
LockPinandHexShaft
ServiceInterval:Every100hours
Yearly
1.Turnofftheengine,waitforallmovingpartstostop,
andleavetheengineswitchintheOffposition.
16

2.LubricatethebroomanglelockpinttingwithNGLI
grade#2multi-purposegungrease.
Figure14
1.Broomanglelockpin
3.Removethebeltcoverandengineshield.
4.MovethespeedselectorlevertopositionR2.
5.Dipalong,clean,smalltippedpaintbrushin
automotiveengineoilandlightlylubricatethehex
shaft.Rockthemachineforwardandrearwardto
rotatethehexshaft.
Important:Donotgetoilontherubberwheelor
thealuminumfrictiondriveplateasthetraction
drivewillslip(Figure15).
Figure15
1.Aluminumfrictiondrive
plate
2.Hexshaft
6.Movethespeedselectorlevertoposition6.
7.Lubricatetheotherendofthehexshaft.
8.Movethespeedselectorleverforwardandrearward
afewtimes.
9.Installthebeltcoverandengineshield.
CheckingtheSparkPlug
ServiceInterval:Every160hours
Removethesparkplug,checktheconditionandresetthegap,
orreplacewithanewplug.SeeyourEngineOwner'sManual.
CheckingtheBroomCable
ServiceInterval:Aftertherst2hours
Yearly
1.Turnofftheengine,waitforallmovingpartstostop,
andremovethesparkplugwire(s).
2.Removethebeltcoverandengineshield.
3.Withthebroomleverdisengaged,ensurethegap
betweenthebroomclutchassemblyandthetabis3.2
mm(1/8inch).Ifthebroomisnotproperlyadjusted,
seeAdjustingtheBroomDrive(page18).
Figure16
1.Broomclutchassembly3.3.2mm(1/8inch)
2.Tab
CheckingtheBroomShaft
ShearPin
ServiceInterval:Beforeeachuseordaily
1.Movethemachinetoalevelsurface.
2.Turnofftheengine,waitforallmovingpartstostop,
andremovethesparkplugwire(s).
3.Checktheshearpinlocatedonthebroomshafton
eithersideofthegearbox.
17

Figure17
1.Nut2.Shearpin
4.Iftheshearpinisdamaged,removethepinandreplace
withaTororecommendedpin.Securethepinwith
anut.
CheckingtheBroomSegments
1.Movethemachinetoalevelsurface.
2.Turnofftheengine,waitforallmovingpartstostop,
andremovethesparkplugwire(s).
3.Raisethebroombyresettingthecasterpositions.
4.Onbothsidesoftheunit,removeandretaintheouter
bearinghousinghardware.
5.Manuallypullthepowerunitrearwardtoremovethe
broomassemblyfromtheunit.
6.Supportthesplinedshaftoneithersideofthegearbox.
7.Standthebroomcoreassemblyonendsothe
removableendretainerplateisfacingupward.
Figure18
1.Hardware4.Supportshaft
2.Endretainerplate5.Alignmentngers
3.Broomsegment
8.Removeandretainthehardwarefromtheendretainer
plate.
9.Removethedamagedbroomsegment(s).Installthe
newsegment(s)bystaggeringthemetalringalignment
ngersasshowninFigure18.
Important:Damagemayoccurtothebroom
assemblyifthebroomsegmentsarenotproperly
installed.
10.Installthebroomassemblyontotheunit.
Important:Makesurethebearingsetscrewsare
tightenedbeforeoperatingthebroom.
AdjustingtheTractionCable
Ifthemachinedoesnotdriveintheforwardorreversespeeds
oritdriveswhenyoureleasethetractionlever,adjustthe
tractioncable.
Withthetractionleverdisengaged,checkthepininthe
elongatedslotintheleftsideofthemachineabovethetire.
Thereshouldbeagapof6mm(1/4inch)fromthefrontof
theslottothefrontedgeofthepin(CheckingtheTraction
Cable(page16)).
Ifthelefthandtractioncableisnotproperlyadjusted,do
thefollowingsteps:
1.Loosenthejamnut.
2.Loosenortightentheturnbuckletoadjustthepinuntil
itisthepropergapfromthefrontedgeoftheslot.
3.Tightenthejamnut(Figure19).
3
g019016
Figure19
1.Jamnut2.Turnbuckle
AdjustingtheBroomDrive
Ifthebroomcableisnotproperlyadjusted(seeCheckingthe
BroomCable(page17)),dothefollowingsteps:
1.Loosenthejamnut(Figure20).
18

Figure20
1.Jamnut2.Turnbuckle
2.Loosenortightentheturnbucklethatadjuststhe
tensiononthecable(Figure20).
3.Adjusttheturnbuckleuntilthegapbetweenthebroom
clutchassemblyandthetabis3.2mm(1/8inch)
(Figure16).
4.Tightenthejamnut.
5.Ifthebroomcableisproperlyadjustedbutaproblem
remains,contactyourauthorizedservicedealer.
AdjustingtheWheelClutch
Cable
1.Squeezetheleverfully,thencheckthegapbetweenthe
bottomofthehandleandthewheelclutchleverend.
Figure21
Note:Thegapshouldbeapproximatelythethickness
ofapencil(6mmor1/4inch).Ifitisgreater,loosen
thecableclampnut,slidethecablejacketupslightly,
tightenthecableclampnut,andcheckthegapagain.
2.Repeatfortheothercable.
Storage
WARNING
•Gasolinevaporscanexplode.
•Donotstoregasolinemorethan30days.
•Donotstorethemachineinanenclosurenear
anopename.
•Allowtheenginetocoolbeforestoringit.
PreparingtheMachinefor
Storage
1.Onthelastrefuelingoftheyear,addfuelstabilizerto
freshfuelasdirectedbytheenginemanufacturer.
2.Runtheenginefor10minutestodistributethe
conditionedfuelthroughthefuelsystem.
3.Loosenthehoseclampthatsecuresthefuellinetothe
valveandslidethefuellineoffthefuelshutoffvalve.
4.Openthefuelshutoffvalveandallowthefueltodrain
outofthefueltankintoanapprovedfuelcontainer.
5.Installthefuellineontothefuelshutoffvalveand
secureitwithahoseclamp.
6.Runthemachineuntiltheenginestopsfromrunning
outoffuel.
7.Primetheengineandstartitagain.
8.Allowtheenginetorununtilitstops.Whenyoucan
nolongerstarttheengine,itissufcientlydry.
9.Stoptheengineandallowittocool.
10.Removetheignitionkey.
11.Disconnectthesparkplugwire.
12.Removethesparkplug,add1oz.(30ml)ofoilthrough
thesparkplughole,andpullthestarterropeslowly
severaltimestodistributeoilthroughoutthecylinder
topreventcylindercorrosionduringtheoff-season.
13.Looselyinstallthesparkplug.
14.Disposeofanyunusedfuelproperly.Recycleit
accordingtolocalcodes,oruseitinyourautomobile.
Note:Donotstorestabilizedfuelformorethan
90days.
15.Cleanthemachinethoroughly.
16.Touchupchippedsurfaceswithpaintavailablefroman
AuthorizedServiceDealer.Sandaffectedareasbefore
painting,andusearustpreventativetopreventthe
metalpartsfromrusting.
17.Tightenallloosescrews,bolts,andlocknuts.Repairor
replaceanydamagedparts.
18.Coverthemachineandstoreitinaclean,dryplace
outofthereachofchildren.Allowtheenginetocool
beforestoringitinanyenclosure.
19

RemovingtheMachinefrom
Storage
1.Removethesparkplugandspintheenginerapidly
usingthestartertoblowtheexcessoilfromthe
cylinder.
2.Installthesparkplugbyhandandthentorqueitto
20.4N-m(15ft-lb).
3.Connectthesparkplugwire.
4.Performtheannualmaintenanceproceduresasgiven
intheRecommendedMaintenanceSchedule.
20
Other manuals for 23740
1
This manual suits for next models
1
Table of contents
Other Toro Floor Machine manuals
Popular Floor Machine manuals by other brands

Kärcher
Kärcher FP 306 manual

Tornado
Tornado PS Series 98220 Operation & maintenance manual
Schwarze Industries
Schwarze Industries A7 TORNADO SE product manual

Metabo
Metabo W 18 LTX 115 Original instructions

Jon-Don
Jon-Don Prospector PE220 Information & operating instructions

PBU
PBU 08006B Operator's manual
Mytee
Mytee HP100 Grand Prix user manual

Nilfisk-Advance
Nilfisk-Advance Handy 2-in-1 user manual

COMAC
COMAC SIMPLA 55BT Daily maintenance

Tornado
Tornado ExSELLerate Series Dealer Training Guide
Windsor
Windsor 10080480 operating instructions
Advance acoustic
Advance acoustic Advenger 56601000 Instructions for use
