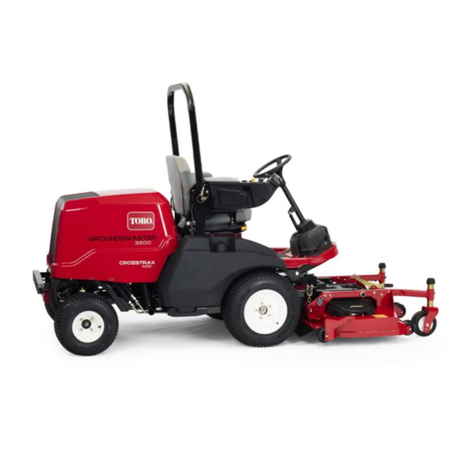
Toro 30487TC User manual

FormNo.3400-560RevA
Groundsmaster®7200and7210
SeriesTractionUnit
ModelNo.30487TC—SerialNo.316000001andUp
ModelNo.30495TC—SerialNo.316000001andUp
Registeratwww.Toro.com.
OriginalInstructions(EN)*3400-560*A

ThisproductcomplieswithallrelevantEuropeandirectives;
fordetails,pleaseseetheseparateproduct-specic
DeclarationofConformity(DOC)sheet.
WARNING
CALIFORNIA
Proposition65Warning
Thisproductcontainsachemicalorchemicals
knowntotheStateofCaliforniatocausecancer,
birthdefects,orreproductiveharm.
Dieselengineexhaustandsomeofits
constituentsareknowntotheStateof
Californiatocausecancer,birthdefects,
andotherreproductiveharm.
ItisaviolationofCaliforniaPublicResourceCode
Section4442or4443touseoroperatetheengineonany
forest-covered,brush-covered,orgrass-coveredlandunless
theengineisequippedwithasparkarrester,asdenedin
Section4442,maintainedineffectiveworkingorderorthe
engineisconstructed,equipped,andmaintainedforthe
preventionofre.
ThissparkignitionsystemcomplieswithCanadianICES-002.
Introduction
Thismachineisaride-on,rotary-bladelawnmowerintended
tobeusedbyprofessional,hiredoperatorsincommercial
applications.Itisprimarilydesignedforcuttinggrass
onwell-maintainedlawnsinparks,sportselds,andon
commercialgrounds.Itisnotdesignedforcuttingbrush,
mowinggrassandothergrowthalongsidehighways,orfor
agriculturaluses.
Readthisinformationcarefullytolearnhowtooperateand
maintainyourproductproperlyandtoavoidinjuryand
productdamage.Youareresponsibleforoperatingthe
productproperlyandsafely.
YoumaycontactTorodirectlyatwww.Toro.comforproduct
safetyandoperationtrainingmaterials,accessoryinformation,
helpndingadealer,ortoregisteryourproduct.
Wheneveryouneedservice,genuineToroparts,oradditional
information,contactanAuthorizedServiceDealerorToro
CustomerServiceandhavethemodelandserialnumbersof
yourproductready.Figure1identiesthelocationofthe
modelandserialnumbersontheproduct.Writethenumbers
inthespaceprovided.
G020872
1
Figure1
1.Modelandserialnumberlocation
ModelNo.
SerialNo.
Thismanualidentiespotentialhazardsandhassafety
messagesidentiedbythesafety-alertsymbol(Figure2),
whichsignalsahazardthatmaycauseseriousinjuryordeath
ifyoudonotfollowtherecommendedprecautions.
Figure2
1.Safety-alertsymbol
Thismanualalsouses2wordstohighlightinformation.
Importantcallsattentiontospecialmechanicalinformation
andNoteemphasizesgeneralinformationworthyofspecial
attention.
©2015—TheToro®Company
8111LyndaleAvenueSouth
Bloomington,MN554202
Contactusatwww.Toro.com.
PrintedintheUSA
AllRightsReserved

Contents
Safety...........................................................................4
GeneralSafety.........................................................4
SoundandVibrationLevelInformation.....................4
SlopeTable.............................................................4
SlopeIndicator.......................................................5
SafetyandInstructionalDecals.................................6
Setup...........................................................................12
1RaisingtheROPS................................................13
2InstallingtheMowerDeck....................................13
3AdjustingtheLeft,FrontCasterWheel....................13
4CheckingtheTirePressure....................................13
5InstallingWeights(forCECompliance)...................14
6CheckingtheFluidLevels.....................................15
7ReadingtheManualsandViewingtheTraining
Materials............................................................15
ProductOverview.........................................................15
Controls...............................................................15
Specications........................................................17
Attachments/Accessories........................................17
BeforeOperation......................................................17
BeforeOperationSafety..........................................17
AddingFuel...........................................................18
CheckingtheEngine-Oil........................................19
CheckingtheCoolingSystem...................................19
CheckingtheHydraulicSystem................................19
UsingtheRolloverProtectionSystem(ROPS)............19
ThinkSafetyFirst...................................................20
UsingtheSafety-InterlockSystem.............................21
PositioningtheSeat................................................22
DuringOperation.....................................................23
DuringOperationSafety.........................................23
OperatingtheParkingBrake....................................24
StartingandStoppingtheEngine..............................25
DrivingtheMachine...............................................25
OperatingtheMower..............................................26
AdjustingtheHeightofCut.....................................27
OperatingTips......................................................27
AfterOperation........................................................28
AfterOperationSafety............................................28
PushingtheMachinebyHand..................................28
LoadingtheMachine..............................................29
TransportingtheMachine........................................30
Maintenance.................................................................31
RecommendedMaintenanceSchedule(s)......................31
DailyMaintenanceChecklist....................................32
PremaintenanceProcedures........................................33
Pre-MaintenanceSafety...........................................33
UnlatchingtheSeat.................................................34
Lubrication...............................................................34
GreasingtheBearingsandBushings..........................34
ServicingtheMower-DeckGearBox
Lubricant...........................................................34
EngineMaintenance..................................................35
EngineSafety.........................................................35
CheckingtheAirCleaner.........................................35
ServicingtheEngine-Oil.........................................36
FuelSystemMaintenance...........................................38
ServicingtheWaterSeparator..................................38
CleaningtheFuelTank............................................38
CheckingtheFuelLinesandConnections..................39
BleedingtheFuelSystem.........................................39
BleedingAirfromtheInjectors................................39
ElectricalSystemMaintenance....................................40
ElectricalSystemSafety...........................................40
ServicingtheBattery...............................................40
StoringtheBattery..................................................40
CheckingtheFuses.................................................40
DriveSystemMaintenance.........................................41
CheckingtheTirePressure......................................41
ReplacingtheCasterWheelsandBearings..................42
CoolingSystemMaintenance......................................42
CoolingSystemSafety.............................................42
CheckingtheCoolingSystem..................................42
CleaningtheRadiator..............................................43
BrakeMaintenance....................................................43
AdjustingtheParking-BrakeInterlockSwitch.............43
BeltMaintenance......................................................44
CheckingtheAlternator-BeltTension........................44
ControlsSystemMaintenance.....................................45
AdjustingtheControl-LeverNeutral-Interlock
Switch...............................................................45
AdjustingtheControl-LeverNeutralReturn...............45
AdjustingtheTractionDriveforNeutral....................46
AdjustingtheMaximumGroundSpeed.....................47
AdjustingtheTracking............................................48
HydraulicSystemMaintenance....................................49
HydraulicSystemSafety..........................................49
CheckingtheHydraulicSystem................................49
ChangingtheHydraulicFluidAndFilter....................50
Cleaning...................................................................51
CleaningUndertheMower......................................51
DisposingofWaste.................................................51
Storage........................................................................51
Machine................................................................51
Engine..................................................................52
3


Safety
ThismachinehasbeendesignedinaccordancewithCEN
standardISOEN5395:2013andANSIB71.4-2012whenthe
properCEKitshavebeeninstalledpertheDeclarationof
Conformity.
GeneralSafety
Thisproductiscapableofamputatinghandsandfeetand
ofthrowingobjects.Alwaysfollowallsafetyinstructionsto
avoidseriouspersonalinjury.
Usingthisproductforpurposesotherthanitsintendeduse
couldprovedangeroustoyouandbystanders.
•ReadandunderstandthecontentsofthisOperator’sManual
beforeyoustarttheengine.Ensurethateveryoneusing
thisproductknowshowtouseitandunderstandsthe
warnings.
•Donotputyourhandsorfeetnearmovingcomponents
ofthemachine.
•Donotoperatethemachinewithoutallguardsandother
safetyprotectivedevicesinplaceandworkingonthe
machine.
•Keepclearofanydischargeopening.Keepbystandersa
safedistancefromthemachine.
•Keepchildrenoutoftheoperatingarea.Neverallow
childrentooperatethemachine.
•Stopthemachineandshutofftheenginebeforeservicing,
fueling,oruncloggingthemachine.
Improperlyusingormaintainingthismachinecanresult
ininjury.Toreducethepotentialforinjury,complywith
thesesafetyinstructionsandalwayspayattentiontothe
safety-alertsymbol,whichmeansCaution,Warning,or
Danger—personalsafetyinstruction.Failuretocomplywith
theseinstructionsmayresultinpersonalinjuryordeath.
Youcanndadditionalitemsofsafetyinformationintheir
respectivesectionsthroughoutthismanual.
SoundandVibrationLevel
Information
SeetheCEKitManual(Model30240)forguaranteed
soundpowers,soundpressurelevels,andvibration
levels.
SlopeTable
Thischartcontainsthemaximumslopethatyoucansafelyoperatethemachineon.
ABC
16Degrees17Degrees18Degrees
2015+Models
30354303533045730456
72inchSDD72inchbase62inchbase60inchSDD
30495TCGM7200CCCB
30487TCGM7210CCCB
Note:Highlightedvaluesshowsthestandardcongurationofthemodel.
4

SlopeIndicator
G01 1841
Figure3
Thispagemaybecopiedforpersonaluse.
1.Themaximumslopeyoucansafelyoperatethemachineonisnotedinthetableabove.Usetheslopecharttodeterminethe
degreeofslopeofhillsbeforeoperating.Donotoperatethismachineonaslopegreaterthanwhatisratedforyour
machine.Foldalongtheappropriatelinetomatchtherecommendedslope.
2.Alignthisedgewithaverticalsurface,atree,building,fencepole,etc.
3.Exampleofhowtocompareslopewithfoldededge.
5

SafetyandInstructionalDecals
Safetydecalsandinstructionsareeasilyvisibletotheoperatorandarelocatednearanyareaofpotential
danger.Replaceanydecalthatisdamagedorlost.
93-6696
1.Storedenergyhazard—readtheOperator'sManual.
93-6697
1.ReadtheOperator's
Manual.
2.AddSAE80w-90(API
GL-5)oilevery50hours.
98-4387
1.Warning—wearhearingprotection.
106-6754
1.Warning—donottouchthehotsurface.
2.Cutting/dismembermenthazard,fanandentanglement
hazard,belt—stayawayfrommovingparts.
106-6755
1.Enginecoolantunder
pressure.
3.Warning—donottouchthe
hotsurface.
2.Explosionhazard—read
theOperator'sManual.
4.Warning—readthe
Operator'sManual.
106-9206
1.Wheeltorquespecications
2.ReadtheOperator'sManual.
107-1866
1.Tippinghazardandslidingorlossofcontrolhazard,
drop-offs—donotturnsharplywhiletravelingfast,instead,
slowdownandturngradually;donotoperatethemachine
neardrop-offs,slopesgreaterthan15degrees,orwater;
keepasafedistancefromdrop-offs.
2.Warning—iftherollbarislowered,donotweartheseat
belt;iftherollbarisraised,weartheseatbelt.
3.Warning—donotusesplitramps;useafullrampswhen
transportingmachine;onlyuserampswithinclinesless
than15degrees.
6

107-3069
1.Warning–thereisnorolloverprotectionwhentherollbaris
down.
2.Toavoidinjuryordeathfromarolloveraccident,keepthe
rollbarintheraisedandlockedpositionandweartheseat
belt.Lowertherollbaronlywhenabsolutelynecessary;do
notweartheseatbeltwhentherollbarisdown.
3.ReadtheOperator'sManual;driveslowlyandcarefully.
110-8253
1.PTO–Off4.Continuous-variable
setting
2.PTO—On5.Slow
3.Fast
110-8254
1.Engine–Stop3.Engine—Start
2.Engine—Run
7

110-9796
1.ReadtheOperator'sManualforinformationonfuses.
117-2718
Manufacturer'sMark
1.Indicatesthebladeisidentiedasapartfromtheoriginal
machinemanufacturer.
BatterySymbols
Someorallofthesesymbolsareonyourbattery
1.Explosionhazard6.Keepbystandersasafe
distancefromthebattery.
2.Nore,opename,or
smoking.
7.Weareyeprotection;
explosivegasescan
causeblindnessandother
injuries.
3.Causticliquid/chemical
burnhazard
8.Batteryacidcancause
blindnessorsevereburns.
4.Weareyeprotection.9.Flusheyesimmediately
withwaterandgetmedical
helpfast.
5.ReadtheOperator's
Manual.
10.Containslead;donot
discard.
106-9290
1.Inputs5.Inseat9.Outputs13.Start
2.Notactive6.Powertakeoff(PTO)10.Powertakeoff(PTO)14.Power
3.Hightemperatureshutdown7.Parkingbrakeoff11.Start
4.Hightemperaturewarning8.Neutral12.Energizetorun(ETR)
8

110-8252
1.ReadtheOperator'sManual.3.Hydraulicoil5.Enginecoolant
2.Parkingbrake4.Fuel6.Engineoil
110-9781
1.Warning—readtheOperator'sManual.
2.Poisonandcausticliquid/chemicalburnhazard—keepchildrenasafedistancefromthebattery.
3.Warning—donottouchthehotsurface.
4.Cutting/dismembermenthazard,fanandentanglementhazard,belt—stayawayfrommovingparts.
5.Hydraulicuidinsystemunderpressure,escapinghydraulicuidpenetratingskinhazard,brokenhydrauliclineshazard—wear
protectivehandprotectionwhenhandlinghydraulicsystemcomponents.
9

120-9195
1.Warning—readtheOperator'sManualbeforeoperatingand
donotoperatethismachineunlessyouaretrained.
8.Warning—wearhearingprotection.
2.Crushing/dismembermenthazardofbystanders—donot
carrypassengers,keepbystandersasafedistancefromthe
machine.
9.Engage
3.Tipping,drop-offhazard—donotoperatenearwaterdrop-offs,
stayasafedistancefromdrop-offs,slowmachinebefore
turning,donotturnathighspeeds.
10.Disengage
4.WearaseatbeltwhenaROPSisinplace;donotwearaseat
beltwhenROPSislowered.
11.Parkingbrake
5.Thrownobjecthazard—keepbystandersasafedistancefrom
themachine;keepalldeectorsandshieldsinplace.
12.Tostarttheengine:clearanydebrisfromtheattachment,
disengagethePTO,movethemotion-controlleverstothe
Neutralposition,engagetheparkingbrake,turntheignition
toRun,andwaitfortheglowpluglighttoturnoff,turnthe
ignitionkeytoStart.
6.Warning—engagetheparkingbrake,stoptheengineand
removetheignitionkeybeforeleavingthemachine.
13.ReadtheOperator'sManual.
7.Cuttinghazardofhandorfoot—removetheignitionkey
andreadtheinstructionsbeforeservicingorperforming
maintenance;keepawayfrommovingparts.
120-9196
1.Forward3.Slow5.Reverse7.ReadtheOperator's
Manualformore
informationonthehydraulic
uid.
2.Fast4.Neutral6.Towvalvelocation;torque
thetowvalvesto5.65to
7.91N∙m(50to70in-lb).
10

127-6519
1.Transportposition2.Heightofcut
11

Setup
LooseParts
Usethechartbelowtoverifythatallpartshavebeenshipped.
ProcedureDescriptionQty.Use
1Nopartsrequired–RaisetheROPS.
2DeckInstallationInstructions1Installthemowerdeck.
3Nopartsrequired–Adjusttheleft,frontcasterwheel.
4Nopartsrequired–Checkthetirepressure.
5Nopartsrequired–Installweights.
6Nopartsrequired–Checkthehydraulicuid,engineoil,
andcoolantlevels.
Operator'sManual1
Engineowner'smanual1
PartsCatalog1
Operatortrainingmaterial1
Enginewarranty1
DeclarationofConformity1
7
DeckInstallationInstructions1
Readthemanualsandviewthe
trainingmaterialsbeforeoperatingthe
machine.Usetheremainingpartsfor
theinstallationofattachments.
12

1
RaisingtheROPS
NoPartsRequired
Procedure
Figure4
2
InstallingtheMowerDeck
Partsneededforthisprocedure:
1DeckInstallationInstructions
Procedure
InstallthedeckusingtheInstallationInstructionsforthatdeck.
3
AdjustingtheLeft,Front
CasterWheel
NoPartsRequired
Procedure
Adjusttheleft,frontcasterwheeltotheoutsideposition
for72-inchdecksandtotheinsidepositionfor60-inchand
62-inchdecks.
4
CheckingtheTirePressure
NoPartsRequired
Procedure
Thetiresareoverinatedforshipping.Releasesomeairto
reducethepressure.Thecorrectairpressureis103kPa(15
psi)inthereartiresand172kPa(25psi)inthecasterwheels.
13

5
InstallingWeights(forCECompliance)
NoPartsRequired
Procedure
Machineswith183cm(72inch)decksinstalledandnootherattachmentsdonotneedaddedweighttomeetCEstandards.
However,youmayneedtopurchaseandinstalladditionalweightdependingonthemowerdecksize/typeandtheattachments
thatyouinstallonthemachine.Thefollowingtableliststhevariousattachmentcongurationsandtheadditionalfront
weightneededforeachmodel:
AttachmentCongurationWeightRequiredwitha
157.5cm(62inch)Base
Deck(30457)
WeightRequiredwitha
183cm(72inch)Base
Deck(30353)
WeightRequiredwitha183
cm(72inch)Side-discharge
(30481)
Groundsmaster7200/7210
TractionUnitwithnoAdded
Attachments
10kg(22lb)0kg(0lb)0kg(0lb)
Groundsmaster7200/7210
TractionUnitandHardCanopy
34kg(75lb)9.5kg(21lb)15kg(33lb)
Groundsmaster7200/7210
TractionUnit,HardCanopy,
andRoadLightKit
32.2kg(71lb)28.5kg(63lb)10kg(22lb)
Groundsmaster7200/7210
TractionUnit,HardCanopy,
RoadLightKit,andJackStand
18kg(40lb)17kg(37lb)10kg(22lb)
Groundsmaster7200/7210
TractionUnit,HardCanopy,
andJackStand
14kg(31lb)10kg(22lb)10kg(22lb)
Groundsmaster7200/7210
TractionUnit,RoadLightKit,
andJackStand
0kg(0lb)0kg(0lb)0kg(0lb)
Groundsmaster7200/7210
TractionUnitandRoadLight
Kit
11.3kg(25lb)0kg(0lb)0kg(0lb)
Groundsmaster7200/7210
TractionUnitandJackStand
0kg(0lb)0kg(0lb)0kg(0lb)
ContactyourAuthorizedToroDistributortoobtaintheappropriatekitsandweightsforyourmachine.
14

6
CheckingtheFluidLevels
NoPartsRequired
Procedure
1.Checkthehydraulicuidlevelbeforestartingthe
engine,refertoHydraulicSystemMaintenance(page
49).
2.Checktheengineoillevelbeforeandafterstartingthe
engine,refertoCheckingtheEngine-OilLevel(page
36).
3.Checkthecoolingsystembeforestartingtheengine;
refertoCheckingtheCoolingSystem(page42).
7
ReadingtheManualsand
ViewingtheTrainingMaterials
Partsneededforthisprocedure:
1Operator'sManual
1Engineowner'smanual
1PartsCatalog
1Operatortrainingmaterial
1Enginewarranty
1DeclarationofConformity
1DeckInstallationInstructions
Procedure
1.Readthemanuals.
2.Viewtheoperatortrainingmaterials.
ProductOverview
1
2
34
5
64
G020877
Figure5
1.Parking-brakelever4.Motion-controllever
2.Fuelcap(bothsides)5.Seat
3.Rollbar6.Seatbelt
Figure6
1.Ignitionswitch5.Oil-pressurewarninglight
2.Engine-coolant-temperature
warninglight
6.Charge-indicatorlight
3.Glow-pluglight7.Throttlelever
4.Power-takeoff(PTO)
switch
8.Hourmeter
Controls
Becomefamiliarwithallthecontrolsbeforeyoustartthe
engineandoperatethemachine(Figure5andFigure6).
Motion-ControlLevers
Themotion-controlleverscontroltheforwardandrearward
motionsaswellastheturningofthemachine.Referto
DrivingtheMachine(page25).
15

Parking-BrakeLever
Wheneveryoushutofftheengine,engagetheparkingbrake
topreventaccidentalmovementofthemachine.Toengage
theparkingbrake,pulltheparking-brakeleverrearward
andup(Figure7).Toreleasetheparkingbrake,pushthe
parking-brakeleverforwardanddown.
G020866
Figure7
1.Parking-brakelever
IgnitionSwitch
Theignitionswitchhas3positions:OFF,ON/PREHEAT,and
START.
ThrottleLever
Thethrottlelevercontrolsthespeedoftheengine,thespeed
oftheblades,and,inconjunctionwithmotion-controllevers,
thegroundspeedofthemachine..Movingthethrottlelever
forwardtowardtheFASTpositionincreasestheenginespeed.
MovingitrearwardtowardtheSLOWpositiondecreasesthe
enginespeed.Alwaysrunthemachinewiththethrottleinthe
FASTpositionwhencuttinggrass.
Power-Takeoff(PTO)Switch
Thepower-takeoff(PTO)switchstartsandstopsthemower
blades.
HourMeter
Thehourmeterrecordsthenumberofhoursthatyouoperate
themachinewiththekeyswitchintheRUNposition.Use
thesetimesforschedulingregularmaintenance.
Glow-PlugLight(OrangeLight)
Theglow-plugindicatorlightilluminateswhenyouturn
theignitionswitchtotheONposition.Itremainslitfor6
seconds.Whenthelightturnsoff,theengineisreadytostart.
Engine-Coolant-TemperatureWarning
Light
Thislightilluminatesandthecuttingbladesstopifthe
engine-coolanttemperatureishigh.Ifyoudonotstopthe
machineandthecoolanttemperaturerisesanother11°C(20°
F),theenginestops.
Important:Ifthemowerdeckshutsdownandthe
temperaturewarninglightison,pushthePTOknob
down,drivetoasafe,atarea,movethethrottleleverto
theSLOWposition,movethemotion-controlleversinto
theNEUTRAL-LOCKposition,andengagetheparking
brake.Idletheengineforseveralminuteswhileitcools
toasafelevel.Stoptheengineandcheckthecooling
system;refertoCheckingtheCoolingSystem(page42).
Charge-IndicatorLight
Thecharge-indicatorlightilluminateswhenthesystem
chargingcircuitmalfunctions.
Oil-Pressure-WarningLight
Theoil-pressurewarninglightilluminateswhentheoil
pressureinenginedropsbelowasafelevel.Iftheoilpressure
islow ,stoptheengineanddeterminethecause.Repairthe
damagebeforestartingtheengineagain.
FuelGauge
Thefuelgauge(Figure8)indicatesthequantityoffuel
remaininginthefueltanks.
Figure8
1.Fuelgauge
16

Specications
Note:Specicationsanddesignaresubjecttochange
withoutnotice.
Length246cm(97inches)
Width(RearWheels)145cm(57inches)
Height(RollBarUp)184cm(72inches)
Height(RollBarDown)122cm(48inches)
Weight,with72inchSDD
(30354or30481)
934kg(2,060lb)
Weight,with60inchSDD
(30456)
900kg(1,985lb)
Weight,with72inchBase
Deck(30353)
876kg(1,932lb)
Weight,with62inchBase
Deck(30457)
855kg(1,884lb)
Attachments/Accessories
AselectionofToroapprovedattachmentsandaccessoriesis
availableforusewiththemachinetoenhanceandexpand
itscapabilities.ContactyourAuthorizedServiceDealeror
Distributororgotowww .Toro.comforalistofallapproved
attachmentsandaccessories.
Operation
Note:Determinetheleftandrightsidesofthemachine
fromthenormaloperatingposition.
BeforeOperation
BeforeOperationSafety
GeneralSafety
•Neverallowchildrenoruntrainedpeopletooperateor
servicethemachine.Localregulationsmayrestrictthe
ageoftheoperator.Theownerisresponsiblefortraining
alloperatorsandmechanics.
•Becomefamiliarwiththesafeoperationoftheequipment,
operatorcontrols,andsafetysigns.Knowhowtostop
themachineandenginequickly.
•Checkthatallsafetydevicesareattachedand
functioningproperly.Thisincludes,butisnotlimitedto,
operator-presencecontrols;safetyswitchesandshields;
therolloverprotectionsystem(ROPS);attachments;and
brakes.Donotoperatethemachineunlessallsafety
devicesareinpositionandfunctioningasintendedby
themanufacturer.
•Alwaysinspectthemachinetoensurethattheblades,
bladebolts,andcuttingassemblyarenotwornor
damaged.Replacewornordamagedbladesandboltsin
setstopreservebalance.
•Inspecttheareawhereyouwillusethemachineand
removeallobjectsthatthemachinecouldpotentially
throw .
•Evaluatetheterraintodeterminetheappropriate
equipmentandanyattachmentsoraccessoriesrequiredto
operatethemachineproperlyandsafely.
17

FuelSafety
DANGER
Incertainconditions,fuelisextremelyammable
andhighlyexplosive.Areorexplosionfromfuel
canburnyouandothersandcandamageproperty.
•Fillthefueltankoutdoors,inanopenarea,when
theengineiscold.Wipeupanyfuelthatspills.
•Neverllthefueltankinsideanenclosedtrailer.
•Neversmokewhenhandlingfuel,andstayaway
fromanopenameorwherefuelfumesmaybe
ignitedbyaspark.
•Storefuelinanapprovedcontainerandkeepit
outofthereachofchildren.Neverbuymore
thana180-daysupplyoffuel.
•Donotoperatethemachinewithouttheentire
exhaustsysteminplaceandinproperworking
condition.
WARNING
Fuelisharmfulorfatalifswallowed.Long-term
exposuretovaporscancauseseriousinjuryand
illness.
•Avoidprolongedbreathingofvapors.
•Keepyourhandsandfaceawayfromthenozzle
andthefuel-tankopening.
•Keepfuelawayfromyoureyesandskin.
•Useonlyanapprovedfuelcontainer.
•Neverremovethefuelcaporaddfueltothefueltank
whiletheengineisrunning.
•Neverllcontainersinsideavehicleoronatruckor
trailerbedwithaplasticliner.Alwaysplacecontainerson
thegroundandawayfromyourvehiclebeforelling.
•Removetheequipmentfromthetruckortrailerandadd
fueltoitwhileitisontheground.Ifthisisnotpossible,
thenaddfuelusingaportablecontainerratherthanfrom
afuel-dispensernozzle.
•Keepthefuel-dispensernozzleincontactwiththerimof
thefueltankorcontaineropeningatalltimesuntilfueling
iscomplete.Donotuseanozzlelock-opendevice.
•Ifyouspillfuelonyourclothing,changeyourclothing
immediately.
•Fillthefueltankuntilthefuellevelis25mm(1inch)
belowthebottomofthellerneck.Donotoverllthe
fueltank.Replacethefuel-tankcapandtightenitsecurely.
AddingFuel
RecommendedFuel
Useonlyclean,freshdieselfuelwithultralow(<15
ppm)sulfurcontentmeetingASTMD975orEN590
specications.Theminimumcetaneratingshouldbe40.
Purchasefuelinquantitiesthatcanbeusedwithin180days
toensurefuelfreshness.
Important:Useofnon-ultralowsulfurfuelcauses
damagetotheengineemissionsystem.
Fueltankcapacity:43.5L(11.5USgallons)
Usesummer-gradedieselfuel(No.2-D)attemperatures
above-7°C(20°F)andwintergrade(No.1-DorNo.
1-D/2-Dblend)belowthattemperature.Useofwinter-grade
fuelatlowertemperaturesprovideslowerashpointand
cold-owcharacteristics,whicheasesstartingandreduces
fuellterplugging.
Useofsummer-gradefuelabove-7°C(20°F)contributes
towardlongerfuel-pumplifeandincreasedpowercompared
towinter-gradefuel.
Important:Donotusekeroseneorgasolineinstead
ofdieselfuel.Failuretoobservethiscautiondamages
theengine.
BiodieselReady
Thismachinecanalsouseabiodieselblendedfuelofup
toB20(20%biodiesel,80%petrodiesel).Thepetrodiesel
portionmustbeultralowsulfur.Observethefollowing
precautions:
•Thebiodieselportionofthefuelmustmeetspecication
ASTMD6751orEN14214.
•TheblendedfuelcompositionshouldmeetASTMD975
orEN590.
•Paintedsurfacesmaybedamagedbybiodieselblends.
•Monitorseals,hoses,gasketsincontactwithfuelasthey
maybedegradedovertime.
•Fuellterpluggingmaybeexpectedforatimeafter
convertingtobiodieselblendedfuel.
•Contactyourdistributorifyouwishmoreinformation
onbiodiesel.
18

FillingtheFuelTank
Important:Thefueltanksareconnected,butthefuel
doesnottransferquicklyfromonetanktotheother.Itis
importantwhenllingthatyouparkonalevelsurface.
Ifyouparkonahill,youmayinadvertentlyoverllthe
tanks.
Important:Donotoverllthefueltanks.
Important:Donotopenthefueltankswhenparkedon
ahill.Thefuelcouldspillout.
Figure9
Note:Ifpossible,llthefueltanksaftereachuse.This
minimizesbuildupofcondensationinsidethefueltank.
CheckingtheEngine-Oil
Beforeyoustarttheengineandusethemachine,check
theoillevelintheenginecrankcase;refertoCheckingthe
Engine-OilLevel(page36).
CheckingtheCoolingSystem
Beforeyoustarttheengineandusethemachine,checkthe
coolingsystem;refertoCheckingtheCoolingSystem(page
42).
CheckingtheHydraulic
System
Beforeyoustarttheengineandusethemachine,checkthe
hydraulicsystem;refertoCheckingtheHydraulicSystem
(page49).
UsingtheRolloverProtection
System(ROPS)
WARNING
Toavoidinjuryordeathfromrollover:keepthe
rollbarintheraisedlockedpositionandusethe
seatbelt.
Ensurethattherearpartoftheseatissecuredwith
theseatlatch.
WARNING
Thereisnorolloverprotectionwhentherollbaris
inthedownposition.
•Lowertherollbaronlywhenabsolutely
necessary.
•Donotweartheseatbeltwhentherollbaris
inthedownposition.
•Driveslowlyandcarefully.
•Raisetherollbarassoonasclearancepermits.
•Checkcarefullyforoverheadclearances(i.e.
branches,doorways,electricalwires)before
drivingunderanyobjectsanddonotcontact
them.
19

LoweringtheROPS
LowertheROPSasshowninFigure11.
Note:Pushthebarforwardtorelievepressureonthepins.
Figure10
Note:SecuretheROPSsothatitdoesnotdamagethehood.
RaisingtheROPS
RaisetheROPSasshowninFigure10.
Figure11
Important:Alwaysusetheseatbeltwhentherollbar
isintheraisedandlockedposition.Donotusetheseat
beltwhentherollbarisintheloweredposition.
ThinkSafetyFirst
Pleasereadallsafetyinstructionsandsymbolsinthesafety
section.Knowingthisinformationcouldhelpyouor
bystandersavoidinjury.
DANGER
Operatingthemachineonwetgrassorsteepslopes
cancauseslidingandlossofcontrol.
•Reducespeedanduseextremecautionon
slopes.
•Donotoperatethemachinenearwater.
20
This manual suits for next models
3
Table of contents
Other Toro Lawn Mower manuals

Toro
Toro 02750 User manual

Toro
Toro 74253 Manual

Toro
Toro TimeCutter 5000C User manual

Toro
Toro 4042 User manual

Toro
Toro 04018 Greensmaster Flex 18 User manual

Toro
Toro 29639 User manual

Toro
Toro Groundsmaster 30344 User manual

Toro
Toro 74437 User manual

Toro
Toro TimeMaster 20975 User manual

Toro
Toro 74582 User manual

Toro
Toro TimeCutter 75730TA User manual

Toro
Toro TimeCutter SS 4225 User manual

Toro
Toro Z593-D Z Master 74264TE User manual

Toro
Toro 74167TE User manual

Toro
Toro 74234 User manual

Toro
Toro 30319 User manual

Toro
Toro 79412 User manual

Toro
Toro Recycler 20331 User manual

Toro
Toro 74806 TimeCutter ZX525 User manual

Toro
Toro 31202 User manual