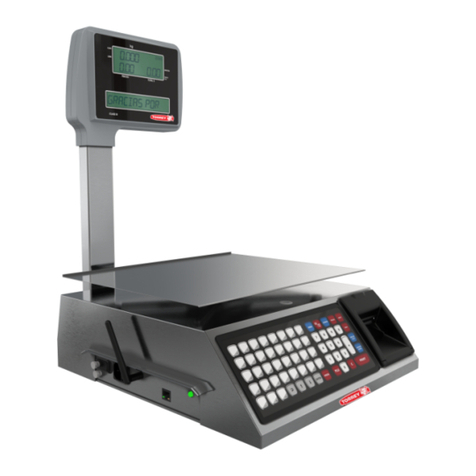
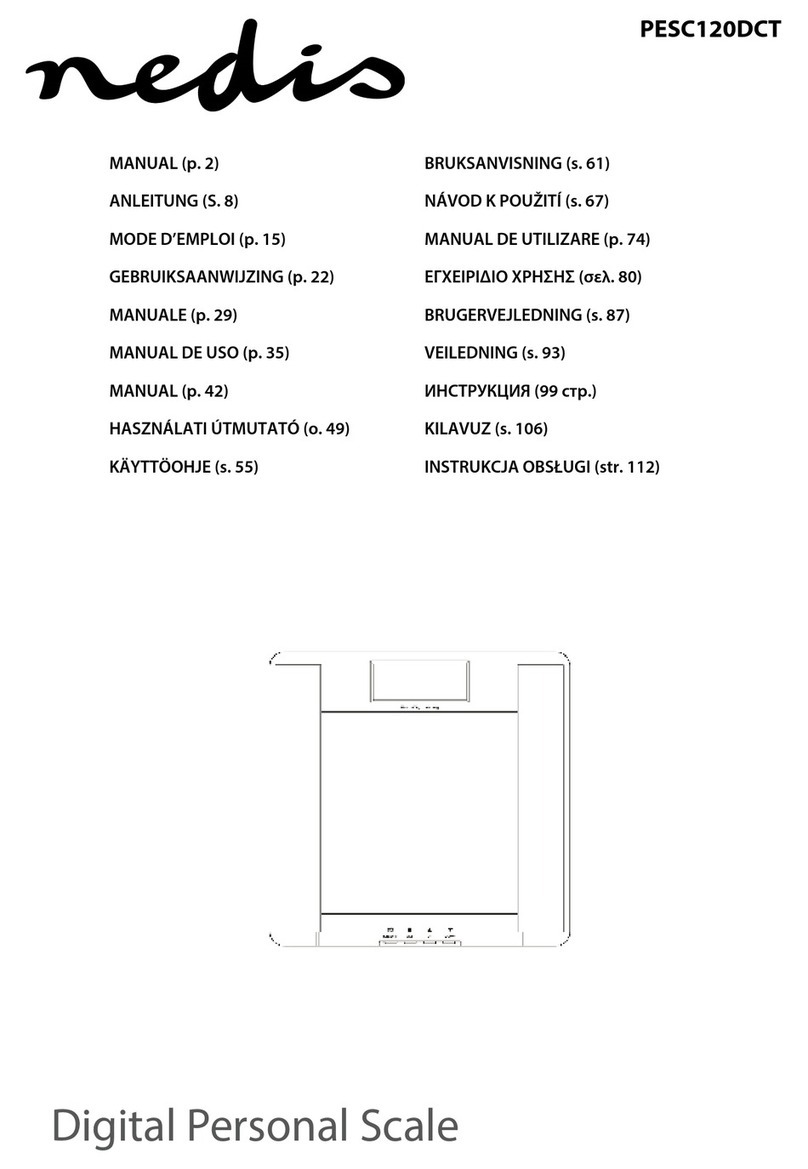
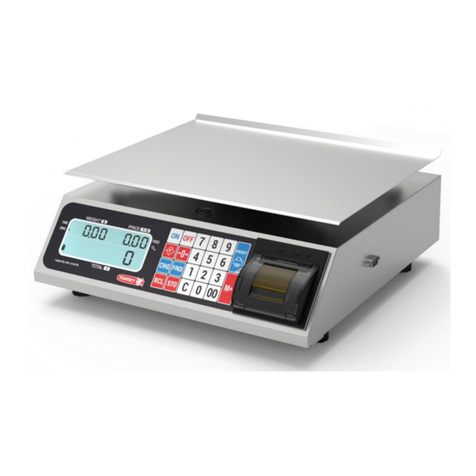
Torrey W-LABEL 40L User manual

TORREY SCALES
W-LABEL SERIES
USER MANUAL
Rev. 0.

- 2 -
INDEX W-LABEL
1. - INTRODUCTION. ............................................................................................................................. 5
2.- TECHNICAL SPECIFICATIONS DESCRIPTION........................................................................5
3. - LABEL WEIGHING SCALE PARTS & THERMAL PAPER ROLL.........................................6
3.2. - TICKET PLACEMENT MODE OF SALE..................................................................................8
4. - USAGE RECOMENDATIONS.........................................................................................................9
4.1.-INFORMATION OF PRODUCT TYPES.......................................................................................9
5. - DISPLAYS DESCRIPTION............................................................................................................10
5.1. - OPERATOR AND CUSTOMER’S DISPLAY. ..........................................................................10
6. - TOUCHPAD DESCRIPTION.........................................................................................................11
7. - ENTERING THE SETUP MENU...................................................................................................14
8. - SETTING OPERATING MODES SELECTING OR TICKETS................................................14
8.1.- WHAT ARE THE PRE-PACKING MODE (LABEL) OR POINT OF SALE (TICKET)
MODE?....................................................................................................................................................14
8.2. - SCALE CONFIGURATION IN PRE-PACK (LABEL) MODE OR POINT OF SALE
(TICKET).................................................................................................................................................15
9.- MISCELLANEOUS PRODUCT CONFIGURATION..................................................................16
10.- FIXED PRICE SETTING.............................................................................................................. 17
11.- KEYBOARD MODE SETTINGS..................................................................................................18
12.-PRODUCTS CONFIGURATION................................................................................................... 19
12.1.- CREATING A PRODUCT. .........................................................................................................19
12.2.- EDIT A PRODUCT......................................................................................................................21
12.3.- DELETE A PRODUCT................................................................................................................ 23
13-RED SETTINGS................................................................................................................................24
13.1.1- WIFI INFO..................................................................................................................................24
13.1.2. ETHERNET INFO...................................................................................................................... 25
13.1.3- NETWORK INFO ADHOC <HOT SPOT>............................................................................. 26
13.2.- TYPE OF CONNECTION CONFIGURATION.......................................................................28
................................................................................................................................................................... 28
13.2.1.- WIFI CONNECTION CONFIGURATION............................................................................ 29
13.2.2.- ETHERNET CONFIGURATION............................................................................................30
13.2.3.- ADHOC <HOT SPOT> CONECTION CONFIGURATION. ..............................................32
14.-PRINTER CONFIGURATION. .....................................................................................................33
14.1.- AUTO PRINT SETTINGS........................................................................................................... 34
14.2.- PRINTER CONTRAST SETTINGS. .........................................................................................35
15-DATE AND TIME SETTINGS........................................................................................................36
15.1.-SEE DATE AND TIME.................................................................................................................36
15.2.- SET DATE..................................................................................................................................... 36
15.3.- SET TIME.....................................................................................................................................37
15.4.-DATE FORMAT SETTINGS...................................................................................................... 38
15.5.- TIME FORMAT SETTINGS...................................................................................................... 38

- 3 -
16.-MEMORY SETTINGS. ...................................................................................................................39
16.1.- DELETE SALES........................................................................................................................... 39
16.2.- DELETE PRODUCTS. ................................................................................................................40
16.2.- DELETE ALL...............................................................................................................................40
17.-LANGUAGE SETTINGS. ............................................................................................................... 41
18.-SCALE INFORMATION. ...............................................................................................................42
19.- SCALE’S OPERATION ................................................................................................................. 43
19.1.- ADJUST TO ZERO......................................................................................................................43
19.2- TARE FUNCTION........................................................................................................................43
19.3.- AGENT SELECTION..................................................................................................................44
................................................................................................................................................................... 44
19.4.- FIXED PRICE SELECTION. .....................................................................................................44
19.5.- PAPER FEED. ..............................................................................................................................45
20.- PLU SELECTION...........................................................................................................................45
21.- NON PLU SALE.............................................................................................................................. 45
22.- NON PLU NON WEIGHTABLE SALE. ...................................................................................... 46
23.- PRODUCT SALE............................................................................................................................ 46
23.1.- PRE –PACKING MODE–WEIGHABLE PRODUCTS SALE.............................................. 46
23.2.- PRE-PACKING MODE –NON WEIGHABLE PRODUCTS SALE. ................................... 47
23.3.- PRE-PACKING MODE –SELL OF SEVERAL WEIGHABLE PRODUCTS..................... 48
23.4.- PRE PACKING MODE–SALE OF NON WEIGHABLE NON PLU PRODUCTS. ............48
23.5.- POINT OF SALE MODE –WEIGHABLE AND NON WEIGHABLE PRODUCTS SALE.
................................................................................................................................................................... 49
................................................................................................................................................................... 49
24.- APPLY DISCOUNTS......................................................................................................................50
25.- RETURNS. .......................................................................................................................................51
25.1 IMMEDIATE RETURN................................................................................................................. 51
25.2 LATER RETURN........................................................................................................................... 52
26.- CHANGE OPERATION (TICKET).............................................................................................. 53
27.- IOS SCALE LINK APP V1.0.0 ......................................................................................................54
27.1.- SET CONNECTION WITH IOS DEVICE................................................................................ 54
27.2.- INITIAL SCALE’S CONFIGURATION ON THE IOS DEVICE. ......................................... 55
27.2.1 GENERAL SETTINGS FROM THE IOS DEVICE................................................................56
27.2.1.1 TORRET’S DISPLAY MESSAGES. ...................................................................................... 56
27.2.1.2 ADITIONAL OPTIONS...........................................................................................................56
27.2.1.3 ADMINISTRATOR AND SUPERVISOR PASSWORDS.................................................... 57
27.2.1.4 .TIME AND DATE FORMATS...............................................................................................57
27.2.2. HEADLINES...............................................................................................................................58
27.2.3 PRINTING FORMAT.................................................................................................................60
27.2.3.1 BARCODE CONFIGURATION.............................................................................................60

- 4 -

- 5 -
1. - INTRODUCTION.
The newest labeling scale W-LABEL offers a weighing method and a very easy way to sell products
precisly. Users will be able to monitor their sales behavior, returns and efectiveness of your workers. It
also has a remote administration system and the capacity to connect to several scales at the same time.
Charasteristics:
Stainless Steel cabinet and plate.
Carbon steel base.
Thermal printer.
Keyboard.
Bubble Level and adjustable feet.
Permanent backlight on both displays.
Display for weight, unit price and total price.
Operator display.
Modes of Pre-packing and Point of Sale.
Prices per lb or piece.
Advertising messages.
Ability to manage up to 20 vendors.
Ethernet and WiFi connection (optional).
Scale Link PC management software.
Applications for Scale Link mobile devices.
Downloadable from AppStore or PlayStore.
Capacity to store up to 500 PLUs
35 PLU Shortcuts.
2.- TECHNICAL SPECIFICATIONS DESCRIPTION.
A table showing the characteristics of the WLABEL Scale in the capacities of 40 lb.
Model
W-LABEL40L
Capacity.
40 lb
Minimum Divition.
0.010 lb
Programmable memories.
500 PLUs
Interface.
Keyboard
Power cord
Included
Power
110/220 VCA 60/50Hz
Max Tare
9,99 lb
Plate’s Dimentions
38cm (L) x 30cm (w)
Max Unit Price
$ 999,99
Max Total Price
$ 9999,99
Temperature of operation
14°F to 104 ºF (-10°C to 40ºC)
Storage Temperature
-4°F to 122 ºF (-20°C to 50ºC)
Net Weight
27.833 lb
27.833 lb
Weight with packaging
37.478 lb
37.478 lb

- 6 -
3. - LABEL WEIGHING SCALE PARTS & THERMAL PAPER ROLL.
Within the scale’s package W-Label you will find the following:
1 Scale W-LABEL.
1 Power Cable.
1 Termic paper roll.
1 rollo con 750 etiquetas térmicas.
1 Torret Display.
1 WiFi antenna (optional).
1 Allen Wrench 3/16”.
1 Allen Wrench 1/8”.
2 screws 10-24 socket head.
3 screws ¼” socket head.
1 torret’s cover base.
1 unpacking guide.
1 Torret’s Instalation Guide.
1 Quick Usage Guide.
Scale’s Parts:
Plate.
Customer’s
Display.
Calibration
Seal.
Power In.
Antenna Input.
Ethernet Connection.
Torret.
Keyboard.
On / OFF Button
Adjustable leveling feet
.
Printer.
Side Door.
Bubble Level.
Label
Roll.
Operator’s
Display.

- 7 -
3.1. - LABELING PRE-PACKING MODE
* Printer Opening:
Pull the release lever on the right side of the scale
toward the front of the scale as shown in the image
on the left.
* Closing the Printer:
Once the roll of labels or tickets has been installed,
lift the lock lever on the front of the scale.
1. - Open the printer.
2. - Place the roll of labels in the roll holder.
3. - Unroll 30cm and remove 6 labels from the roll manually, make sure it passes under the tensioners .
.and through the paper sensor.
4. Wrap the remaining residue of the roll counterclockwise.
5. - Close the printer.

- 8 -
3.2. - TICKET PLACEMENT MODE OF SALE.
* Printer Opening:
Pull the release lever on the right side of the scale
toward the front of the scale as shown in the image on
the left.
* Printer Close:
Once the roll of labels or tickets has been installed, lift
the lock lever on the front of the scale.
1. - Open the printer.
2. - Place the ticket roll in the secondary roll holder.
3. - Unroll 20cm of paper make sure it passes under the tensioner and through the paper sensor.
4. - Allow 5cm of thermal paper to print out of the printer.
5. - Close the printer.

- 9 -
4. - USAGE RECOMENDATIONS.
Avoid installing the scale in unstable places.
Place the scale only on rigid, flat and level surfaces.
Avoid energizing the scale in unregulated outlets.
Avoid placing fans or heaters directed at the scale.
Avoid operating the scale with sharp objects such as knives, razors, pencils, pens, etc.
Use a slightly damp cloth to clean the scale.
Do not strike the scale plate with the object to be weighed, this may damage the load sensor.
Avoid opening the scale yourself as this will invalidate the warranty.
4.1.-INFORMATION OF PRODUCT TYPES.
Product Types.
The W-LABEL scale can handle four types of products: weighable, non-weighable and miscellaneous
products, various non-heavy products.
Weighable Products.
These are products whose unit price is based on 1 lb of their weight and have been programmed
previously on the scale.
Non-Weighable Products.
These are products whose unit price is in function of 1 piece and have been programmed previously in
the scale.
Other Products.
They are products whose unit price is in function of 1 lb of their weight and they have not been
programmed previously in the scale.
Non-Weighable Other Products.
They are products whose unit price is in function of 1 piece and have not been programmed previously in
the scale.

- 10 -
5. - DISPLAYS DESCRIPTION.
The W-LABEL scale consists of the operator display and the customer display both show the same
information to both operator and customer.
5.1. - OPERATOR AND CUSTOMER’S DISPLAY.
These displays are the main interface between the operator, customer and the scale as it is here that
shows the information regarding the current operation, in addition to displaying advertising messages.
1. - Display of weight / quantity. Shows the quantity of product being sold.
2. - Display unit price. Shows the unit price of the selected product.
3. - Display of total price. Shows the total price of the sale.
4.-Message display and PLU name. Displays the name of the selected product as well as the . .
. programmed messages.
5. - Connection indicator active LINK. Indicates whether the scale is connected to a device.
6.-ZERO icon. places the reference to zero.
7. - NET icon. Indicates that the TARE function is activated.
8. - MOTION Indicator. Indicates that there is movement that can alter the reading of the weight to be .
measured.
9. - Fixed Price Indicator. It is activated when the price per kilo of product does not change.
10. - Indicator CAPS. Indicates that the writing is in capital letters.
1
2
2
3
4
5
6
7
8
9
10

- 11 -
6. - TOUCHPAD DESCRIPTION.
This section shows the scale keys as well as the special functions.
Alphanumeric keyboard:
Opens the list of sellers registered and allows to select some to register their
transactions.
Allows the output of a label or a small stretch of thermal paper (ticket).
Activates the Change operation, for more information, see Section
24. - Change Operation, page. 50.
Activates the Fixed Price function (only in Pre-packing mode) for more
Information see section 23.-Sale of Products Page 46.
It allows the entry of discounts and returns (for more information see the
sections: 25.- Application of discounts Page 51.- Returns Page 52.

- 12 -
Enter the configuration menu with the user code. (Default 123456).
It takes the numeric value entered as a PLU number, searches it in the Database
and, if found, displays it on the display. In case of no The beacon will only
emit a beep and will not show anything.
Deletes the entered numeric value.
Print on a label or ticket the weight and price of the products.
It activates the sale of several non-weighable products or sale by pieces for
more information see section 23 - Sale by Pieces.
Pág.46.
Allows you to take a new reference to zero weight.
Activates TARE Function.
(For further information go to section 20.2 –TAR Function Pág. 37).
Returns the view to the previous navigation level, it is disabled when The
minimum navigation level (main display) is reached.
Navigation within menu options (previous).
Navigation within the options of a menu (next).

- 13 -
The alphabetic keyboard when in PRODUCT ENTRY mode (enabled) is used to enter the name of the
product while a sale is being made.
The alphabetic keyboard when in DIRECT ACCESS mode (enabled) is used to enter the PLUs stored in
the internal memory.
Go to section 11 Keyboard Mode Settings Pág. 18.
Change to lowercase letters or vice versa.
Delete previous character.
Space bar.
Displays special symbols that are not on the keyboard.
GO / ENTER.

- 14 -
7. - ENTERING THE SETUP MENU.
This operation will be performed each time the user needs to modify any parameters previously set.
1.- Press the PROG button the word PASS will immediately appear in the
advertising display: At this point, press the 123456 sequence and then press
ENTER to enter the configuration menu.
2.-Once inside the CONFIG menu, press ENTER to enter the different
options of this menu.
The different options in the CONFIGURATION menu are:
1 GENERAL, 2 PRODUCTS, 3 NETWORK, 4 PRINTER, 5 DATE AND
TIME, 6 MEMORY, 7 LANGUAGE, 8 INFORMATION.
Access each of these submenus with the STEERING KEYS and ENTER
Note: in step 1, you automatically jump to the first option in the configuration menu (1GENERAL) press
the RETURN key once to enter the CONFIG root menu or 2 times to exit.
8. - SETTING OPERATING MODES SELECTING OR TICKETS.
The labeling scale WLABEL has two modes of product sales: Pre-packaging mode and Point of Sale
mode.
8.1.- WHAT ARE THE PRE-PACKING MODE (LABEL) OR POINT OF SALE (TICKET)
MODE?.
The pre-packing mode is useful when it is desired to pre-pack containers or trays with a certain amount
of a given product.
The point of sale mode will help you to issue descriptive tickets with the information of the products sold
as well as give the exact change.
To enter the POS or pre-pack modes, you have to configure the scale and install the roll of thermal labels (750) or
the roll of thermal paper according to the instructions in the sections:
3.1.- Labeling Pre-packing Mode.
3.2.- Ticket Placement Mode of Sale.
8.2 Configuration of the Scale in Pre-Pause (Label) or Point of Sale (Ticket).

- 15 -
8.2. - SCALE CONFIGURATION IN PRE-PACK (LABEL) MODE OR POINT OF SALE
(TICKET).
This section shows the steps to configure the WLABEL scale to print labels or tickets.
1.- Enter the GENERAL 1 submenu following the steps described in section 7 entered the setup menu
page. 14.
2. - Enter the 1GENERAL submenu by pressing ENTER
3.-Enter the OPERATION MODE submenu by pressing ENTER
4.-Choose between the two options, TAG for PRE-
PACKING mode or TIKET for POINT OF SALE
mode.
Choose with the DIRECTION ARROWS
Then press ENTER.
5.-When you save the changes, return to the OPERATION MODE menu, to
exit and return to the normal functions of the scale only press the RETURN
key 3 times.
Ticket and label print.

- 16 -
9.- MISCELLANEOUS PRODUCT CONFIGURATION.
The various products are those of which a sale is made without having to be programmed in the scale
previously, by enabling the function of VARIOUS PRODUCTS is allowing to enter products from the
keyboard that normally are not entered in the memory of the scale.
At the time of printing the sale of a product various weighable the predefined description will be that of
"Item lb". For non-passable products, it will be "Item Pza".
1.- Enter the GENERAL 1 submenu following the steps described in section 7 entered the setup menu
p. 14
2.- Enter the submenu by pressing ENTER
3With the drecction arrows choose the option.
MISCELLANEOUS PRODUCTS and press ENTER
4.- with the direction arrows select the option you find more convenient.
Press ENTER this wil change your changes.
5.- Once changes are saved go back to sub-menu Miscellaneous Products, so
you can go back to the main Screen or just press Return 3 times

- 17 -
10.- FIXED PRICE SETTING.
The fixed price setting prevents a product price (PLU) from being modified by the seller during the sales
process.
When the price lock is enabled the scale will ask for the administrator password (123456 by default) to
accept the new price (this price will not be stored in the scale memory).
When the price lock is disabled the scale will allow to change the price without requesting the password.
1.- Enter the GENERAL 1 submenu following the steps described in section 7 entered the setup menu
p.14
2.- Enter the 1GENERAL submenu by pressing ENTER
3.- Use the ARROW keys to select the option
FIXED PRICE and press ENTER.
4.- With the ADDRESS arrows
Select the option that suits you best and
Press ENTER to save the changes.
5.- Saving the changes returns you to the PRICE LOCK submenu, to exit and
return to the normal functions of the scale just press the BACK key 3 times.

- 18 -
11.- KEYBOARD MODE SETTINGS.
The keyboard has two setup options, DIRECT ACCESS mode and PRODUCT INPUT mode.
In the DIRECT ACCESS mode it will not be possible to enter new products during the sales operation.
In PRODUCT ENTRY mode it is possible to enter a new product during the sales operation but they
can’t be stored in the product memory.
1.- Enter the GENERAL 1 submenu following the steps described in section 7 entered the setup menu
p.14
2.- Enter the 1GENERAL submenu by pressing ENTER
3.- Use the ARROW keys to select the option.
KEYBOARD MODE and press ENTER where you will enter the DIRECT
ACCESS, PRODUCT ENTRY.
4.- Use the ADDRESS arrows to select the
option that suits you best.
Press ENTER this will save the changes you’ve
made.
5.- Saving the changes returns you to the FIXED PRICE submenu, to exit
and return to the normal functions of the scale just press the BACK key
3 times.

- 19 -
12.-PRODUCTS CONFIGURATION.
In the “2 PRODUCTS”submenu you can create new products, edit the existing products or delete any of them.
1.- Enter the 2 PRODUCTS submenu following the steps described in section 7 entered the configuration
menu p.14
2.- Using the arrow key select the option
2 PRODUCTS and press ENTER
within this sub-menu you can find the following:
CREATE PRODUCT, EDIT PRODUCT and DELETE PRODUCT.
Choose any of these options with the arrow keys and Press ENTER to select it
12.1.- CREATING A PRODUCT.
1.- To create a new product enter the CREATE PRODUCT option by following
the steps in section 12 product configuration p.19 and then the sequence of this
section.
You will use arrow keys and the ENTER button
2.- Press ENTER
2.1.- Type the name of the
new product and then
press : ENTER
3.- Press Enter
4.- Oprima la
tecla:
ENTER
3.1- Type the Price
less than 999.99 and
press ENTER.
4.1- By default the software adds a
consecutive PLU number but it can
be changed by the user, once
you’ve finished press ENTER

- 20 -
Cancelation: You can cancel a product creation at any time, using the arrow pad
to go to the cancel option.
Once selected customer only will have to press ENTER.
5.- Press ENTER
Choose with the arrows
pad the type of product
and then press ENTER
6.-Press: ENTER.
6.1- The scale by default assigns a new
code for the product, but this can be
changed by the user once he presses
ENTER.
7.- Oprima la tecla:
ENTER.
7.1- Wait a few seconds while the
scale saves changes, and once it’s
done it’ll go back to the sub
menu.
Table of contents
Other Torrey Scale manuals
Torrey
Torrey WLS SERIES User manual
Torrey
Torrey LSQ Series User manual
Torrey
Torrey L-EQ HS Series User manual
Torrey
Torrey LPC HS Series User manual
Torrey
Torrey L-EQ 5/10 User manual

Torrey
Torrey PPC Series User manual

Torrey
Torrey PC Series User manual

Torrey
Torrey CRS Series User manual

Torrey
Torrey CRS Series User manual
Torrey
Torrey EQB-50/100 User manual
Torrey
Torrey QC Series User manual

Torrey
Torrey LSQ Series Owner's manual

Torrey
Torrey L-PC SERIES User manual
Torrey
Torrey WLS User manual

Torrey
Torrey EQB-W Series User manual
Torrey
Torrey FS 250/500 User manual
Torrey
Torrey EQB Series User manual
Torrey
Torrey LSQ Series User manual

Torrey
Torrey PS Series User manual
Torrey
Torrey PC HSP Series User manual

