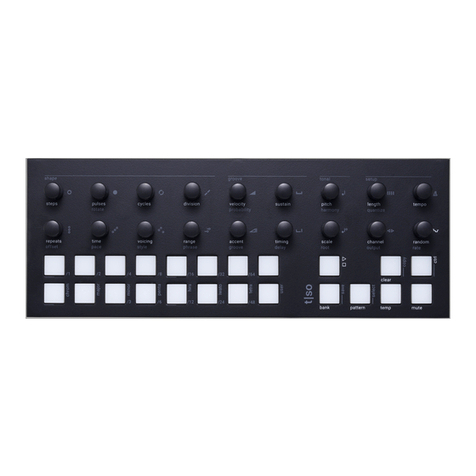
Torso Electronics T-1 User manual

OS
2.0.0
t|so
T-1
A Guidebook
A Notebook
A Reference Book
An Ofcial Reference for the
Torso T-1 Algorithmic
Sequencer

III
The T-1 Sequencer Notebook : Reference & Guide
II The T-1 Sequencer Notebook : Reference & Guide
Getting Started 5
Generic Setup 29
Rhythmic Patterns 47
Rhythmic Variation 77
Melodic Structures 107
Progressions 121
Cycles & Random 141
MIDI & WiFi Connectivity 157
Analog Connectivity 189
System Conguration 203
Index 219
Contents
1
2
3
4
5
6
7
8
9
11
12

Torso T-1 is a 16 track, algorithmic sequencer
that brings a modern twist to hardware pattern
sequencing. T-1 is not in itself an instrument and
does not therefore generate any audio or sound.
This sequencer is different, forgoing layers of
menu diving through multiple screen pages in
favour of hands on touch and feel. The user
interface is immediate with 23 control buttons
and 18 endless rotary / push knobs. Multiple
connectivity options make it an ideal device to
use centrally in a rig or as part of a wider setup.
Integrating with desktop, modular, mobile or
software DAW systems is possible through a
variety of connectivity options. CV, Gate, WiFi
Link, MIDI over USB or direct are all available
onboard. The objective of this unique device is
to build beyond traditional step sequencing with
a focus on generative and evolving pattern
development. T-1 is a exible and powerful
sequencer with it’s strength in bringing the user
experience central in it’s application. The
tweaking and tuning of synth parameters is a
familiar process when designing sounds or
performing live with a synthesizer. These same
principles are applied with T-1 where sequencer
parameters can be changed, tweaked and
adjusted real time. In summary, T-1 brings a
more immersive, creative and fun process to the
fore. The tactile user experience encourages
on-the-y ad libs and live performance as well
as general composition. Expect a more organic
and uid parameter driven approach to the
creation of patterns and arrangements. This
book takes a user perspective in getting the best
from the T-1. It offers a companion guide as well
as a quick reference. Read cover to cover or just
step in and out when needed. Learn and
capture your own knowledge by adding
personal notes. The Torso T-1 Notebook is a
guide that helps you grow towards your
destination while having fun on the journey.
Getting Started
5The T-1 Notebook : Reference & Guide
IV The T-1 Sequencer Notebook : Reference & Guide
1

Getting Started1
6The T-1 Notebook : Reference & Guide 7
The T-1 Notebook : Reference & Guide
Getting Started
1
1.1 Introduction
Torso T-1 is an algorithmic sequencer. It does not generate audio but is
used as a controller for other sound generating instruments such as
hardware or plugin synthesizers.
What makes T-1 Different?
Your Notes Can be written here Here
NOTES
Traditional / Typical Sequencers. Torso T-1 Algorithmic Sequencer
Linear programming process. Algorithmic sequence generation.
Program and play Organic ow and continuous evolution.
Rigid programming workow. Organic user experience.
Preset variations Real-time and live performance
adjustments. Play like an instrument.
Step based approach. Euclidean and algorithmic rhythms and
arpeggiation.
MIDI DIN or USB Interface most
commonly used MIDI through USB. MIDI DIN. WiFi and
Ableton Link, CV and Gate.
USB or Mains Powered USB Powered - Low power usage, ideal
with portable rechargeable battery packs.
Often display screen menu or
application reliant conguration No screen. Control congurable plus
conguration app option.
Focus on sequencing Multiple sequencing options plus on
board modulation
No sound generation No sound generation
Dened track count 16 polyphonic tracks, maximum of 256
patterns and bank storage.
NOTES 1.2 How to Use This Notebook
This book combines a formal reference and notebook, collectively bringing
together a comprehensive guide to the T-1 Sequencer.
Sections are laid out to cover the full workow with walkthroughs, step by
step guides and tips. Some pages carry a wide margin and some are
intentionally blank enabling you to make your own notes.
Conventions used in this book.
(KNOB)Rounded parentheses represent the 16 endless rotary control
knobs. Where necessary, the command action will be presented
before the control and the actual function named in uppercase
inside the parenthesis.
Examples:
‘Press (STEPS)’ or ‘Turn (STEPS)’, ‘Turn (SUSTAIN)’.
[BANK] Square parentheses contain functions that are selectable using
one of the 16 value buttons, the 2 performance buttons or one of
the 5 general control buttons. The command action is presented in
normal, partially capitalised text before the control function which
is labelled uppercase within the parenthesis.
Examples:
‘Press [MUTE]’, ‘Press [CTRL]’, ‘Press [VB1]’ for rst value button.
[CTRL] + (KNOB) Button combinations are indicated with a ‘+’ between commands
when used together. The ‘ctrl’ button is commonly used as
secondary control function which allows access to additional
options. This button is held in conjunction with other buttons and
knobs. Secondary functions are labelled in grey, second row of
knobs and horizontally to the side of the buttons. The primary or
secondary function label name will be used in the descriptions
depending on the instruction context.
Examples:
‘Hold [CTRL] + Turn (OFFSET)’, ‘Hold [CTRL] + Press [SAVE]’
ORANGE ⬛The value buttons are multi-coloured and act as a visual indicator
of the selected function. This is documented within these
instructions by the colour name in uppercase followed by an
appropriately coloured tag.
Value Buttons 1-16
[VBx]
The 16 Value buttons are located bottom left and are numbered 1-
8, left to right - top row, 9-16, left to right - bottom row. These by
default select tracks, but their function will change depending on
the mode selected. The function will be given after the button.
Example:
Press [VB1] Chrom - With respect to scales

8The T-1 Notebook : Reference & Guide 9
The T-1 Notebook : Reference & Guide
T-1 is an algorithmic sequencer and does not, in itself generate any audio.
3.5mm Mini Jack TR Mono
connections for 4 x CV - Control
Voltage and 2 x Gate outputs.
3.5mm Mini Jack connections for
external clock synchronisation
inputs / outputs.
Supply is via the USB-C
Also MIDI via USB.
(cable supplied)
All dimensions include enclosure plus the control knobs, buttons and rubber feet. Weight is 815 grams (1,8 lbs).
T-1 is supplied along with a USB-C to USB-A cable and a 3.5mm to MIDI adapter.
3.5mm Mini Jack CV - Control
Voltage modulation input.
MIDI In, Out, Thru using a 3.5mm
Jack to 5 Pin MIDI adapter type A.
(supplied)
1.4 Hardware Overview
304 mm
11,9 Inch
114 mm
4,5 Inch
39 mm
1,5 Inch
1.3 Power Up
T-1 Sequencer is powered using the USB-C connection located at the rear
of the unit. There is no power switch and T-1 will power on immediately
when power is applied. T-1 requires a minimum of 390mA with 100%
brightness but will operate from 200mA upwards. The T-1 Default
brightness setting is 75% which is adjustable. A 500mA minimum power
source is recommended.
▌ POWERING ON / OFF THE T-1 SEQUENCER
1. Connect the supplied USB-C cable between T-1 Sequencer and a USB
supply. This could be:-
• A portable USB power bank.
• USB Mains supply adapter.
• A powered USB hub.
• A PC or Macbook.
• A tablet or mobile device.
• Another powered device such as an instrument or synth.
2. T-1 will start up and the pads will illuminate ORANGE ⬛.
3. To power the unit off, disconnect the USB-C cable or the supply.
NOTES
USB
PC / Mac
T-1
USB Adapter
Getting Started1
Getting Started
1

11
The T-1 Notebook : Reference & Guide
10 The T-1 Notebook : Reference & Guide
Steps
Euclidean pattern generator - number of steps.
Velocity / Probability
Base velocity of notes. Secondary function adjusts the
note lter based on a chance.
Pitch / Harmony
Keyboard style pitch application and transposition of
notes. Secondary function for harmonic transposition.
Length / Quantize
Track and loop length. Secondary function for
quantization of current pattern with respect to transport.
Top Row 1 - 8
Represent tracks 1-8 and illuminate to visualise
selected function. Functions are dependant on mode.
Play / Stop
Transport control for pattern.
Temp
Hold and turn a parameter to temporarily change its value.
Shape
Groove
Tonal
Setup
Value Buttons
General
Performance Buttons
Pulses / Rotate
Euclidean pattern generator - number of note pulses.
Secondary function sets / shifts starting point of pattern.
Sustain
Note length adjustment.
Scale / Root
Scale of the track. Secondary function sets the root note.
Tempo
Project tempo from 24bpm - 280bpm, default 120bpm.
Bottom Row 9 - 16
Represent tracks 9-16 and illuminate to visualise
selected function. Functions are dependant on mode.
Clear / Copy
Clear tracks, patterns or parameters. Copy using
secondary option.
Mute
Hold along with a value button to mute the selected track.
Cycles
Edit parameter lock automation settings.A cycle
contains a setting for each of T-1 parameters.
Accent / Groove
Adds a velocity variation to notes. Secondary option
introduces a velocity groove character.
Channel / Output
MIDI Channel between 1-16. Secondary function,
‘output’ is not currently implemented.
Ctrl
Hold to access secondary options for other buttons.
Pattern / Select
Selects pattern view. Select pattern with value button.
Silently select pattern when using secondary function.
Repeats / Offset
Number of note repeats added after each pulse.
Secondary function applies velocity ramp for repeats.
Division
Euclidean pattern generator - note interval value of each
step of the pattern.
Timing / Delay
Microtiming asymmetrical stretch across the beat grid.
Secondary function introduces a +/- track ‘delay’ offset.
Random / Rate
Randomization amount of parameters in the sequence.
Secondary function is sequence modulation playback rate.
Bank / Save
Selects bank view. Select bank with value button. Save
bank state using secondary function. Also used as the
Exit / Home function to revert to default mode.
Time / Pace
Adjusts note interval value of repeats. Secondary
function adjusts repeat acceleration / deceleration.
Voicing / Style
Adjusts order of inserted notes in the pitch menu.
Secondary option for arpeggiator style.
Range / Phrase
Range of pitch modulation. Based on LFO’s and shapes.
Secondary function to select modulation shape.
5
7 8
6
4
12
18
24
2
10
14
16
20
22
27
3
11
17
23
25
1
9
13
15
19
21
26
1 9
5
19
20 24 25 26 27
21 22 23
11
3
7 14
2 10
6 12
4 15 1613
8 17 18
T-1
The user interface has a total of 7 control areas consisting of 18 endless rotary / push control knobs
and 23 multi-colour buttons. The knobs are clustered towards 3 specic workow / performance
topics plus conguration setup. The two rows, total of 16 value buttons are used by default for track
selection plus they also act as a visual indicator. The 2 performance buttons, temp and mute, help
control on-the-y changes and variations. The remaining 5 control buttons are used for general
functions including transport control, editing and bank / pattern selection.
Main functions are labelled in black and secondary functions in grey. Secondary functions are
accessed by holding the [CTRL] button in addition to the function. Other button combinations can be
used to access various options. The value buttons are multifunctional and also illuminate, where the
colour acts as a visual indicator when adjusting settings.
Shape
Used to build and layer Euclidean patterns,
create movement and adjust voicing
Value Buttons
Used to access the 16 tracks and illuminate as
visual representation of knob press functions.
Groove
Composition timing and
rhythmic feel
Tonal
Pitch & Scale
Setup
General MIDI & Track
Conguration
General Buttons
Used for the 5 overall control,
editing and transport functions.
Performance Buttons
2 buttons for on-the-y variations
and live performances.
Getting Started1
Getting Started
1

13
The T-1 Notebook : Reference & Guide
12 The T-1 Notebook : Reference & Guide
1.5 First Steps
At this point its good to get hands on and to get creative. While this section
wont go deep into any feature, it will help establish a starting point and build
condence by following a basic workow in using the core T-1 Functions.
Some things should be initially considered prior to setting up T-1. These may
need some thought initially but in future will be a simple and embedded part
of your own set up. The actual outcome will also depend on the synths and
sounds used as the destination.
NOTES
Example Workow.
The workow adopted with T-1 Sequencer will of course develop to t your personal approach. To
get started a typical journey is described below.
S
E
1
2
3
4
5
6
7
8
10
11
12
13
14
9
Connect External Gear
MIDI Channel / CV Cong
Set the Tempo
Select Bank / Pattern
Foundation of Tracks
Rhythmic Pattern Structure
Rhythmic Variation
Melodic Structure
Randomisation
Cycles
Build more tracks
Assemble and Arrange
Save
Develop Progressions
Connect an external sound device. This could be
a synth or instrument, modular gear or DAW.
Set the MIDI ‘Channel’ or congure the CV outs.
Tempo between 24-280 BPM. Tempo is saved
with the bank.
Typical setups would be desktop
hardware via MIDI DIN. PC /
MAC Digital Audio Workstation
via MIDI USB. A modular and
Eurorack system connected by
CV - Control Voltage & gate.
Establish track structures, step
lengths, divisions and the role
for the track i.e. Kick, Synth,
Bass, Pad. This is the basic
foundations which operate
rhythmically.
Build musical passages based
on pitch and tonal
components. Develop
progressions and create
interest through variations
Organic and unpredictability
introduced across almost all
parameters
Cycles are the starting point of
a longer full song and
arrangement. Build more
tracks and patterns and
develop the complete
production
MIDI - CV
Shape - Track Structures
Tonal - Melodic Elements
Randomisation
Arrangements
Select a bank and pattern in which to develop the
musical structure.
Establish tracks and their role for instruments i.e.
Track 1 for Kick Drum, Track 5 for Synth etc
Create a structure of steps and pulses. Lay the
foundation of the pattern.
Enhance a pattern with note lengths, velocity,
groove and timing behaviour. Bring variation and
movement into the arrangement
Add melodic pitch and tonal harmonic elements
in the production where needed.
Unpredictability and musical variations are
introduced with randomisation.
Copy, create or develop more musical passages
within cycles. Build more interesting progressions
and the building block of a full track.
Develop other tracks to contribute to the full
arrangement and song. Build additional patterns.
Develop the component parts, patterns / tracks
and cycles into the full track. Use copy and paste
to help develop sections.
Although auto-save may sort this
Further tonal shaping, cadences and voicing
elements. Create complex melodic variations and
component parts of an arrangement.
ACTION COMMENTSPROCESS
Getting Started1
Getting Started
1

15
The T-1 Notebook : Reference & Guide
14 The T-1 Notebook : Reference & Guide
NOTES NOTES
Step 2 - Scope Out The Idea and Objective
The musical objective could be a pre-prepared plan or a just an ad-lib. This
step doesn't have to be formally documented and may just exist in your
mind. However this is an example of the production considerations needed.
* Destination also refers to the Digitakt and Digitone factory presets
6 Steps To Creating A Drum Beat.
Objective. The objective is to create a simple kick, snare, hat drum loop.
Nothing that will win any awards, but will be a simple yet familiar sequence
to help get to know it’s application in T-1. The sounds will be handled by a
desktop drum synth, in this case Elektron’s Digitakt but could equally be
another device or DAW. The synth is connected by MIDI.
Step 1. Connect the Gear.
MIDI Out
Using the 5 Pin to
3.5mm adapter
MIDI Cong
The destination device must be congured to receive MIDI. Clock can be external from T-1 but
Transport should be off, so that only T-1 controls the sequence. Device tracks and associated MIDI
Channels should match with the sound required.
Track / Channels:-
Track 1, Channel 1 = Kick
Track 2, Channel 2 = Snare
Track 3, Channel 3 = HiHat
Track 4, Channel 4 = Bass
Track / Channels:-
Track 1, Channel 1 = Kick
Track 2, Channel 2 = Snare
Track 3, Channel 3 = HiHat
Track 4, Channel 4 = Bass
MIDI In
Connected to sound
module
Audio Out
Connected from sound module to
mixer, speakers or headphones.
1. Kick
2. Snare
3. HiHat
4. Bass
Linear Track Notes
1 5 9 13 16
T-1 Button Notes
1-16
Sound T-1 Track MIDI Channel Destination
Kick Track 1 Channel 1 Digitakt Track 1 - 37 BD Weird
Snare Track 2 Channel 2 Digitakt Track 1 - 35 SD Buggin
Hi Hat Track 3 Channel 3 Digitakt Track 1 - 5 HH Digit
Bass Track 4 Channel 4 Digitakt Track 1 - 73 Anasine
Bass Filter Track 9 Channel 4 Digitakt CC #74
Getting Started1
Getting Started
1

17
The T-1 Notebook : Reference & Guide
16 The T-1 Notebook : Reference & Guide
NOTES NOTES
Step 3. Creating a Kick Track
The rst track will be the kick drum sequenced from T-1 and playing a
desktop drum synth. This could equally be a DAW. The Snare and HiHat to
follow on tracks 2 and 3 with a Bass stab on track 4.
▌ TRACK 1 - KICK
1. Select Track 1, Press the rst value button [VB1]. The default mode is
track view, if this is not visible, press [BANK] to select the default ‘home’
track view. Value button 1 will be lit ORANGE ⬛.
2. Ensure the track has 16 Steps. Press (STEPS) to view the value
buttons. All should be lit to indicate 16 steps. The lit steps indicate
number of steps selected. Turn (STEPS) to adjust the number.
3. Press (PULSE) to view how many note events are selected. Active
pulse step notes will be lit ORANGE ⬛.
4. Turn (PULSE) to add or remove the number of steps. Turn (PULSE) to
edit while viewing. The euclidean sequencer will automatically distribute
the number of note event pulses equally across the total number of
steps. Add 4 pulses.
5. Ensure the MIDI Channel on T-1 matches the Kick drum channel on the
destination device. Press (CHANNEL) to view the current track’s MIDI
channel. The selected channel will be lit WHITE ⬛. Turn (CHANNEL) to
set the channel to 1, indicated by lit [VB1], if not already set.
6. Press [PLAY] . The play button will ash indicating playback is active.
The kick sound on the connected audio module should be triggered on
the beat. T-1 will loop the 16 step playback.
Adjusting Parameters
When turning a parameter knob the value buttons will temporarily display the current state
across the value buttons. This is default behaviour but can be changed in the T-1 Cong
misc page settings.
Step 4. Creating a Snare Track
The snare will follow similar principles as the kick. Manual pulse note
events can be added as well as the automatic Euclidean sequenced notes.
▌ TRACK 2 - SNARE
1. Select Track 2, Press the second value button [VB2]. The default mode
is track view, if this is not visible, press [BANK] to select the default
‘home’ track view. Value button 2 will be lit ORANGE ⬛.
2. Ensure the track has 16 Steps. Press (STEPS) to view the value
buttons. All should be lit to indicate 16 steps. The lit steps indicate
number of steps selected. Turn (STEPS) to adjust the number.
3. Double Press (PULSE) to view how many note events are selected.
Double tapping the knob will retain the visual button view where single
tap just temporarily displays the button state.
4. Active step notes will be lit ORANGE ⬛. Instead of using the Euclidean
pulse placement set the pulses manually. Tap value buttons [VB5] and
[VB13] to manually place the pulses.
5. Ensure the MIDI Channel on T-1 for track 2 matches the Snare drum
channel on the destination device. Press (CHANNEL) to view the
current track’s MIDI channel. The selected channel will be lit WHITE ⬛.
Turn (CHANNEL) to change channel. Value button [VB2] should be lit
for MIDI channel 2.
6. Press [PLAY] . The play button will ash indicating playback is active.
The kick and snare sounds on the connected audio module should be
triggered on the set pulse beats. T-1 will loop the 16 step playback.
Track buttons will ash when a pulse is triggered.
Getting Started1
Getting Started
1

19
The T-1 Notebook : Reference & Guide
18 The T-1 Notebook : Reference & Guide
NOTES NOTES
Step 5. Creating a Hi Hat Track
To create a natural sounding Hi Hat it is good to also apply a groove to vary
the velocity applied on each pulse.
▌ TRACK 3 - HI HATS
1. Select Track 3, Press the third value button [VB3]. The default mode is
track view, if this is not visible, press [BANK] to select the default ‘home’
track view. Value button 3 will be lit ORANGE ⬛.
2. Ensure the track has 16 Steps, although try other lengths to create
interesting polyrhythms. Press (STEPS) to view the value buttons. All
should be lit to indicate 16 steps. The lit steps indicate number of steps
selected. Turn (STEPS) to adjust the number.
3. Double Press (PULSE) or Turn (PULSE) to view and set how many
pulse note events are populated into the pattern. Active step notes will
be lit ORANGE ⬛. The Euclidean pulse placement with 8 pulses
selected will be spread evenly across the selected steps.
4. Ensure the MIDI Channel on T-1 for track 3 matches the Hi Hat drum
channel on the destination device. Press (CHANNEL) to view the
current track’s MIDI channel. The selected channel will be lit WHITE ⬛.
Turn (CHANNEL) to change channel. Value button [VB3] should be lit
for MIDI channel 3.
5. Press [PLAY]. The play button will ash indicating playback is active.
The kick, snare and hi hat sounds on the connected audio module
should be triggered on the set pulse beats. T-1 will loop the 16 step
playback. Track buttons will ash when a pulse is triggered.
6. It is good to add some variation rather than a xed level on the hats.
Hold [CTRL] + Press & Hold (GROOVE). Tap to select value button
[VB2]. This will select ‘groove’ pattern 2 - Timbales.
7. To further develop the groove variation, Turn (ACCENT) to set the
amount of velocity groove characteristic applied. It’s good to apply a
groove while playing.
Step 6. Creating a Bass Track
Although the Bass could be created in a melodic pattern, this example
keeps the bass line a simple element that helps drive the percussion.
▌ TRACK 4 - BASS
1. Select Track 4, Press the fourth value button [VB4]. The default mode is
track view, if this is not visible, press [BANK] to select the default ‘home’
track view. Value button 4 will be lit ORANGE ⬛.
2. Ensure the track has 16 Steps. Press (STEPS) to view the value
buttons. All should be lit to indicate 16 steps. The lit steps indicate
number of steps selected. Turn (STEPS) to adjust the number.
3. Turn (PULSE) to view and set how many note events are applied.
Active step notes will be lit ORANGE ⬛. Euclidean pulse placement sets
the pulses evenly. Turn until 3 pulses are applied to buttons [VB1],
[VB7], [VB12].
4. Ensure the MIDI Channel on T-1 for track 4 matches the bass or any
other melodic instrument, on the destination device. Press (CHANNEL)
to view the current track’s MIDI channel. The selected channel will be lit
WHITE ⬛. Turn (CHANNEL) to change channel. Value button [VB4]
should be lit for MIDI channel 4.
5. Press [PLAY] . The play button will ash indicating playback is active.
The dened sounds on the connected audio module should be triggered
on the set pulse beats. T-1 will loop the 16 step playback. Track buttons
will ash when a pulse is triggered.
6. This is a more melodic rather than a beat driven track. It is possible to
adjust the note duration using the (SUSTAIN) control if desired.
Getting Started1
Getting Started
1

21
The T-1 Notebook : Reference & Guide
20 The T-1 Notebook : Reference & Guide
NOTES NOTES
Step 2. Scope Out The Idea and Objective
Building on the drum beat a melody could consist of a lead line, pad,
ambient drones, chimes etc. The options are many.
* Destination also refers to the Digitakt and Digitone factory presets
7 Steps To Creating A Melody.
Objective. The objective is to build on the drum beat project and add more
melodic elements. Also to include additional hardware in the process as a
sound source. The melodic sounds will be handled by a desktop FM synth,
in this case Elektron’s Digitone but could equally be another device or DAW.
Step 1. Connect the Gear.
MIDI Out
Using the 5 Pin to
3.5mm adapter
MIDI Cong
The destination device must be congured to receive MIDI. The MIDI IN and Thru connections are used
to ensure a single MIDI network with two devices controlled by T-1. Clock can be external from T-1 but
Transport should be off, so that only T-1 controls the sequence. Device tracks and associated MIDI
Channels should match with the sound required.
Audio Cong
Both sound modules can be connected to a mixer and in turn to monitors or headphones.
Track / Channels:-
Track 1, Channel 1 = Kick
Track 2, Channel 2 = Snare
Track 3, Channel 3 = HiHat
Track 4, Channel 4 = Bass
Track 5, Channel 5 = Lead
Track 6, Channel 6 = Lead
Track 7, Channel 7 = Lead
Track 8, Channel 4 = CC Ctrl
Track / Channels:-
Track 1, Channel 1 = Kick
Track 2, Channel 2 = Snare
Track 3, Channel 3 = HiHat
Track 4, Channel 4 = Bass
Track 5, Channel 5 = Lead
Track 6, Channel 6 = Lead
Track 7, Channel 7 = Lead
Track 8, Channel 4 = CC Ctrl
MIDI In
Connected to drum
sound module
MIDI In
Connected from drum
sound module
MIDI Thru
Connected from drum
to synth module
5. Pluck
6. Piano
7. Chord
9. Bass
Linear Track Notes
1 5 9 13 16
T-1 Button Notes
1-16
Sound T-1 Track MIDI Channel Destination *
Bass Filter Track 9 Channel 4 Digitakt CC #74
Plucky lead Track 5 Channel 5 Digitone Track 1 - Plucky eA
Alt piano lead Track 6 Channel 6 Digitone Track 2 - Epiano VGS JM
Chord stab Track 7 Channel 7 Digitone Track 3 - Autochord SM
Getting Started1
Getting Started
1

23
The T-1 Notebook : Reference & Guide
22 The T-1 Notebook : Reference & Guide
NOTES NOTES
Step 3. Creating a Plucky Lead
Track 5 will be the plucky lead sequenced from T-1 and playing to a
desktop FM Synthesizer. This could equally be a DAW. Other melodic
elements will follow.
▌ TRACK 5 - PLUCKY LEAD
1. Select Track 5, Press the fth value button [VB5]. The default mode is
track view, if this is not visible, press [BANK] to select the default ‘home’
track view. Value button 5 will be lit ORANGE ⬛.
2. Ensure the track has 16 Steps. Press (STEPS) to view the value
buttons. All should be lit to indicate 16 steps. The lit steps indicate
number of steps selected. Turn (STEPS) to adjust the number.
3. Press (PULSE) to view how many note events are selected. Active step
note will be lit ORANGE ⬛. Double press to retain the pulse button view.
4. Turn (PULSE) to add or remove the number of steps. The euclidean
sequencer will automatically distribute the number of note event pulses
equally across the total number of steps. Add 5 pulses.
5. Ensure the MIDI Channel on T-1 matches the plucky lead channel on
the destination device. Press (CHANNEL) to view the current track’s
MIDI channel. The selected channel will be lit WHITE ⬛. Turn
(CHANNEL) to change channel. Set to channel 5, [VB5] lit.
6. Press [PLAY] . The play button will ash indicating playback is active.
The plucky lead sound on the connected audio module should be
triggered on the set beats. T-1 will loop the 16 step playback.
Step 4. Creating an Alternate Piano Lead
The piano lead will be a sound that follows the same pattern as the plucky
lead. This can be played as an alternative or layered together.
▌ TRACK 6 - PIANO
1. Select Track 6, Press the sixth value button [VB6]. The default mode is
track view, if this is not visible, press [BANK] to select the default ‘home’
track view. Value button 6 will be lit ORANGE ⬛.
2. Press & Hold [CTRL] + [COPY] + Tap [VB5]. Value button 5 will be lit
GREEN ⬛. This signies the track has been copied.
3. While still holding [CTRL] + [COPY], press [VB6].Value button 6 will
ash GREEN ⬛. This signies the copied track has been pasted. Track 5
has effectively been replicated onto track 6.
4. Ensure the MIDI Channel on T-1 for track 6 matches the piano channel
on the destination device. Press (CHANNEL) to view the current track’s
MIDI channel. The selected channel will be lit WHITE ⬛. Turn
(CHANNEL) to change channel. Value button [VB6] should be lit for
MIDI channel 6.
5. Press [PLAY] . The play button will ash indicating playback is active.
The track sounds on the connected audio modules should be triggered
on the set pulse beats. T-1 will loop the 16 step playback. Track buttons
will ash when a pulse is triggered.
Getting Started1
Getting Started
1

25
The T-1 Notebook : Reference & Guide
24 The T-1 Notebook : Reference & Guide
NOTES NOTES
Step 5. Creating a Pitch Based Chord Stab
So far all the notes and beats have been xed to set notes. Pitch variations
create a melody that can be expansive or simple loop. There are multiple
methods that can be used to generate chords and melodies. This example
keeps things simple but is a starting point for developing more elaborate
melodies in future.
▌ TRACK 7 - CHORD STAB
1. Select Track 7, Press the seventh value button [VB7]. The default mode
is track view, if this is not visible, press [BANK] to select the default
‘home’ track view. Value button 7 will be lit ORANGE ⬛.
2. Ensure the track has 16 Steps, although try other lengths to create
interesting polyrhythms. Press (STEPS) to view the value buttons. All
should be lit to indicate 16 steps. The lit steps indicate number of steps
selected. Turn (STEPS) to adjust the number.
3. Double Press (PULSE) to view and set how many pulse note events are
populated into the pattern. Active step notes will be lit ORANGE ⬛.
Manually enter note pulses on step [VB1] and [VB7].
4. Ensure the MIDI Channel on T-1 for track 7 matches the chord sound
channel on the destination device. Press (CHANNEL) to view the
current track’s MIDI channel. The selected channel will be lit WHITE ⬛.
Turn (CHANNEL) to change channel. Value button [VB7] should be lit
for MIDI channel 7.
5. Press [PLAY] . The play button will ash indicating playback is active. It
is easier to tweak and adjust by ear on setting some parameters.
6. Double tap (CYCLE). The rst 4 value buttons will be lit. The default
starting point is 4 cycle slots. A ashing value button indicates the
selected cycle. A WHITE ⬛value button indicates the playing cycle. If
no cycle is selected the following changes will affect all cycle slots.
7. Double tap (PITCH). The chromatic keyboard will display on the value
buttons. The root note will be already selected and lit ORANGE ⬛.
8. To add additional notes, Press the value buttons to select notes that
contribute. Only available notes in the scale are lit. Turn (SCALE) to
change the scale if required. Press [VB11] & [VB13] to add to [VB9] and
create a C Major Chord, CEG Triad on the white keyboard notes.
9. Double Press (CYCLE) to return to this view. The rst 4 value buttons
will be lit. The default starting point is 4 cycle slots.
10. While still viewing the (CYCLE) setting, Press [VB2] to select.
11. Turn (VOICING) to change the chord on the selected cycle. The voicing
page will be displayed while adjusting.
12. When the Cycle view returns, A RED ⬛value button will indicate that
the cycle slot has been edited and contains changed values. The
[BANK] button also ashes RED ⬛to indicate edit mode.
13. A cycle can be cleared by Holding [CLEAR] + [VBx] for the cycle
14. By iterating through steps 9-13 chord progressions can be created.
15. Try adding different chords with (PITCH). Also try adjusting (RANGE)
and experiment with (STYLE) and (PHRASE).
16. Press [CTRL] + [SAVE] + [VBx] Value button of the bank followed by
[VBx] value button of the Pattern. Saving regularly throughout
developing a project is a good habit to get into.
17. Other variations of the chord can be created in each cycle slot. It is also
possible to copy cycles, example by holding [CTRL] + [COPY] + [VB1]
to copy and while holding [CTRL] + [COPY], press the destination slot
i.e. [VB2], [VB3] etc.
Getting Started1
Getting Started
1

27
The T-1 Notebook : Reference & Guide
26 The T-1 Notebook : Reference & Guide
NOTES NOTES
Step 6. Control Change Messages
T-1 Can also perform control changes to external parameters on
compatible devices. These CC messages are set on a T-1 CC Track as
opposed to a normal note track. This example controls the lter cutoff for
the bass sound in the Digitakt.
▌ CONTROLLING AN EXTERNAL SYNTH PARAMETER
1. Select a new CC track, Press [CTRL] + [VB9] for Track 9. This will be lit
CYAN ⬛.
2. Set the channel for the Bass sound by holding and turning (CHANNEL).
This should be channel 4, i.e. value button 4 lit.
3. Digitakt lter cutoff is CC#74. Check the actual device you use for the
MIDI Mappings to determine the representation for the specic device.
4. By default, the (VELOCITY) knob represents CC#74. When on Track 9
this parameter can be changed which will transmit the value change to
the destination device.
5. When playing the song arrangement the (VELOCITY) knob will change
the bass lter cutoff value. This example is based on a manual control
action to change the parameter.
Step 7. Mutes for Ad Libs
Muting and unmuting tracks is a technique often used in ad-lib live
performances for improvisation and for developing arrangements on-the-y.
▌ MUTING TO BUILD AN ARRANGEMENT
1. Press [MUTE] + [VBx] where ‘x’ is the selected track. This will mute or
unmute the track.
2. Muting or Unmuting is applied to the track ONLY when the [MUTE]
button is released.
3. Try muting all tracks with the exception of the Kick and Snare tracks 1
and 2. Muted tracks will be lit solid BLUE GREY ⬛, while unmuted
playing tracks will ash in the colour of the track type if selected or white
if not selected.
4. Increase the bass cut off as the song develops and unmute the synth
tracks in order at the end of each bar. Unmute the hi hat track to add
some momentum.
5. Muting and unmuting across a xed length passage can create a live
improvisation, Ideal for live sessions or ad lib jamming.
Getting Started1
Getting Started
1

T-1 brings a new dimension into the world of
audio production and make no mistake is a
unique yet comprehensive device. There are
so many features that may seem less obvious
to producers when comparing with more
traditional sequencers. The overall structure of
T-1 at rst glance, can appear daunting.
However spending a little time to understand
the overall architecture and its terminology,
some common functions and pre-requisite
connections will set a good foundation. For this
reason there are no apologies for taking time to
get intimate with the architecture of the overall
device and in bringing this summary upfront in
this guide. Getting a solid understanding and
taking a holistic view of the T-1 Sequencer’s
structure and features will help enormously in
getting to grips later with the detailed parts of
the device. Think of the three basic elements
when using T-1. Firstly the T-1 device itself
which is setup to control and sequence.
Secondly the destination instrument which T-1
will control and modulate. Typically this will be a
synthesizer, drum machine or sound module or
maybe a mix of many. It could also be a PC / Mac
software instrument. Thirdly, consider the
connection between the devices. For Eurorack
the CV and Triggers are a typical choice, while a
USB connection is more common for PC / Mac
and MIDI DIN for desktop devices. Remember if
using the T-1 USB MIDI connection, this will also
be the power source for the T-1. While a deeper
dive into the detail of specic functions and
features is covered in the latter parts of this
notebook, the overall structural foundation and
common topics are laid out in this section. In
summary, this section is more about structure
than creative pattern development. It is therefore
worth the investment of time and focus in
understanding the hierarchy and the generic
features in order to get the most out of T-1.
Generic Setup
29
The T-1 Notebook : Reference & Guide
28 The T-1 Notebook : Reference & Guide
NOTES
2

Generic Setup 2
31
The T-1 Notebook : Reference & Guide
30 The T-1 Notebook : Reference & Guide
2.1 Glossary of Terms
While you may think this should be hidden at the back of this book, understanding terminology often
used in the context of general audio production topics and specically when using the T-1
sequencer will help unlock it’s power and performance. It makes sense to become familiar early with
these terms to speed up learning and to get the most out of the T-1 user experience and workow.
Generic Setup
2
Ableton link: Ableton are a DAW developer who
introduced the link technology which enables
communication between multiple, separate audio
devices across a WiFi network.
Arpeggiator: A function that automatically
generates ordered sub patterns using a group of
triggered notes.
Beta: A term normally used for pre-release
software versions used for testing purposes.
Bank: An element that acts as a container to help
organise and store the 16 patterns. T-1 has a
maximum of 16 banks available.
Channel: In T-1 the channel refers to the MIDI
communication channel. This ranges from 1-16.
Control Change. A MIDI standard message which
is applied to change parameter settings. Also
called CC.
Control Voltage. An analog signal used to control
parameters and affect their values. Used for
modulation and control, commonly found in
modular rack systems. Also called CV.
Cycle: A cycle is parameter automation that would
be applied to introduce track variations and
changes. A collection of parameter settings are
stored together in a cycle with up to 16 cycles
available in each track
Denmark: Country in the Northern European area
of Scandinavia. It’s capital is Copenhagen. Famous
for innovation, high quality design and mermaids.
Also the home of Torso Electronics, creators of T-1.
Euclidean Rhythm: An algorithm that generates a
note pattern based on mathematical calculations.
In T-1 this uses steps, pulses, rotation / start and
division as the parameters to set.
Eurorack: The most common standard of modular
synthesis which comprises of discrete functions
rack mounted and connected together with CV /
Trigger patch cables. Buchla is another alternative
modular standard.
Gate: An on/off signal that activates a function.
Used interchangeably with ‘trigger’, although gates
usually activate over longer periods for example as
a note on.
LFO: Low frequency oscillator which is a control
signal specically used for modulating parameters.
MIDI: MIDI stands for Musical Instrument Digital
Interface and is a standard protocol used for
communicating between audio equipment. MIDI is
normally applied using USB or using a 5 Pin MIDI
DIN. Both are available in T-1 using the USB-C
connection or the 5 Pin to 3.5mm adapter.
Modulation: The process of controlling and
manipulating one parameter from the control of
another. This typically allows variations and
movement to be added to a function.
Monophonic: A mode which allows only the playing
of one note at a time.
Mute: Muting offers variations that can be created
by silencing tracks and patterns especially useful
when playing live sets.
Note: A musical note generated by the sequencer
pattern steps and associated triggers.
OS: Operating System is the core rmware that
makes T-1 Sequencer work and manages how it
operates.
Parameter: The individual value of a specic
function or control element. A parameter can be
adjusted to affect a pattern and steps operation.
Pattern: This is the backbone and core of a T-1
sequence and contains one set of steps that forms
a melody or beat.
Perform: A mode in T-1 which supports muting and
temporary variations through use of two buttons.
Ideal in a live environment and to introduce
improvisations.
Pitch: The audio frequency variation between notes
that determine its sound within a musical range.
Polyphony: The ability to play multiple notes
simultaneously on an instrument. For example to
play chords.
Polyrhythm: Two or more rhythms running
concurrently in the same cycle but with different
beats or subdivisions
Power Bank: A portable rechargeable battery
device used to power or recharge portable
equipment.
Probability: The determination of whether an action
will occur or not. In a generative sequencer this
can add interest and randomisation.
Program Change. A MIDI standard message which
is applied to change banks or patches of a device.
Also called PC.
Pulse: Used in T-1 Euclidean pattern generation to
trigger a note event. This is generally positioned on
a step but can also be expanded further, for
example by adding note repeats.
Root note: In musical terms this is a single note
used as the starting reference in an harmonic
scale. Typically a root note would be the lowest
note in a chord.
Sequence: The process of creating a series of
actions such as note triggers or parameter
changes to create melodies or drum beats.
Step: A step is a building block in a pattern
structure. A series of steps would form a pattern
where note events i.e. pulses can be selectively
placed to form a melody or beat.
Synchronization: In the context of connected audio
gear, sync or synchronization refers to how the
clock timing is aligned between multiple devices.
Typically one device would lead as a primary clock
and other devices would follow. This is commonly
managed using MIDI or CV Clocks.
T-1: An algorithmic sequencer that generates
patterns and melodies that control other audio
gear in a generative and uid style.
T-1 Cong: A Mac or PC based software tool to
help congure the T-1 Sequencer. Important for
rmware updates and I/O conguration.
Tempo: The speed at which the overall sequence
runs, based on a standard measure of beats per
minute. T-1 operates between 24 - 280 BPM.
Transport: A term often used to refer to the
collective controls for play, stop, record, pause
where available within in systems.
Track: A T-1 Sequencer pattern contains 16 tracks.
Tracks help manage the structure and length of a
sequence. Typically tracks contain steps and
would each be used for individual instruments, e.g.
Drum, Percussion, Bass, Pad etc.
Transpose: To change the pitch for a range of
notes. Notes can be transposed up or down a
dened octave range. Can also refer to adjustment
up or down for a range of notes on a keyboard.
Trigger: An on/off signal that activates a function.
Used interchangeably with ‘gate’, although triggers
usually are shorter pulses for example to trigger a
short drum hit.
Quantization: The alignment of musical elements
to a dened grid or timing structure.
Update: The process of installing the newest
rmware. This brings new features and xes bugs
associated with previous versions.
Velocity: A function which measures how hard a
note is played and modulates sound accordingly.
For example hard played notes may sound louder
than softly played notes on a piano.

2.2 Architecture
33
The T-1 Notebook : Reference & Guide
32 The T-1 Notebook : Reference & Guide
2.3 Functional Relationship
The sequencer engine and the musical parameter settings operate together with dependencies that
help create complex and advanced rhythmic and melodic sequences with an almost endless
number of options.
Think of the rst steps being the creation of rhythmic patterns, mainly generated by the Euclidean
sequencer. These patterns trigger notes.
Develop the pattern even further with advanced variations and multiple modulation options to create
and elevate expressive arrangements.
Build on top with the pitch based features to develop beyond a pure rhythmic pattern into a melodic
sequence and progressions. Go even further towards the generative and organic structures and
build live performances which include randomisation.
Rotate
Rotate
Scale
Time
Timing Offset
Division
Division
Pace
Offset
Probability
Harmony Range
Delay
Tempo
Sustain
Pace
Groove
Rate Root Phrase
Range
Accent
Delay
Pulses
Pulses
Harmony
Repeats
Repeats
Velocity
Pitch Voicing
Timing
Channel
Time
Accent
Random Scale Style
Voicing
Velocity
Sustain
Steps
Steps
Length
C
C
C
Pitch
Bank
1
Pattern
1
Track
1
Cycle
1
Bank
16
Pattern
16
Track
16
Cycle
16
T-1 Sequencer
Bank
Pattern
Track
Cycle
Gate / Trigger Pitch
Velocity
Euclidean EngineNote RepeaterGroove
Rhythmic Pattern
Structure
Melodic Pattern
Structure Progressions
Rhythmic
Variations
Cycles &
Random
Chapter 3
Track
Chapter 5 Chapter 6
Chapter 4
Chapter 7
Retrigger
(Sync)
Note Repeater
Groove
Euclidean Steps
Tonal NotesRandomness Tonal Shaper
Tonal BaseTonal Shaper
GrooveNote Repeater
Each Pattern hosts 16 Tracks
Each Track hosts 16 Cycles
A Cycle is a collection of the T-1 parameter settings
16 Banks are available from within T-1 Sequencer
16 Patterns are available in each Bank
Tempo bound to active Bank
Quantize bound to active Pattern
Length bound to active Track
…
…
…
…
+
Tempo
Quantize
Length
Setup Random
Sequence
Sequencer Engine
Generic Setup 2
Generic Setup
2
?? ? ?
12345678
CR
CR
R
R
R
R
R
R
R
CC
Cycles
C

35
The T-1 Notebook : Reference & Guide
34 The T-1 Notebook : Reference & Guide
2.5 Banks.
Banks are used to organise patterns and are the highest level of order in
the T-1 structure. T-1 has a total of 16 Banks which operate like folders,
each bank storing up to 16 patterns. With a total of 256 patterns available
in T-1, banks simplify the organisation of patterns and their access.
The 16 Banks are represented by the 16 Value buttons and are directly
linked to the associated library of patterns.
Value buttons are numbered left to right, top row 1 - 8, and bottom row 9 - 16.
bank
save
NOTES
Default ‘Home’ view in T-1 at power up or after
pressing [BANK] to the track view. The currently
active track is illuminated ORANGE ⬛for note
tracks or CYAN ⬛for CC tracks.
Hold [BANK] to display bank view. The value
buttons will mainly be lit DARK GREEN ⬛.
While still holding [BANK] after selecting a bank,
the pattern selection page is presented, mainly
illuminated DARK BLUE ⬛.
Hold [BANK] to view the currently active bank and other
available banks, [BANK] will illuminate GREEN ⬛.
The value button of the currently
active bank will illuminate
WHITE ⬛or Bright PINK ⬛
The value button of an edited and saved
bank will illuminate GREEN ⬛.
The value button of an edited but
unsaved bank will illuminate PINK ⬛.
The value button of an empty bank
will illuminate DARK GREEN ⬛.
TRACK View - Default ‘home’ View
BANK View
PATTERN View
Generic Setup 2
Generic Setup
2
NOTES
2.4 Control Overview
T-1 consists of 18 Rotary / Push knobs and 23 pad buttons.
The control knobs are endless encoders with a ‘click’ on rotation
that adjusts the designated parameter. For example 1 click will
change by +/-1BPM with Tempo. White labels indicate the primary
function. Grey text below indicates the secondary function
accessed by using [CTRL] + (Knob).
Pressing a knob will display the designated parameter state as
shown on the illuminated buttons. Also Turn to adjust while
viewing the parameters setting. This behaviour can be changed in
cong settings.
Quickly, double press a control knob to lock the designated
parameter setting display on the value buttons button. This will
release when the same knob is pressed again.
Buttons are pressed to select functions. The colour of the button
illumination will determine the state of the designated function.
Colours will change depending on the context and mode in
currently in operation.
Pressing the [BANK] button in any mode will revert to the ‘home’
tracks view mode. This is an additional function for the banks
button in addition to selecting a bank.
The [CTRL] button is held with other functions in order to access
the secondary function.
The [PLAY] button will play or stop the pattern. The button will
ash white every quarter note when playing. MIDI devices can be
excluded from this command by pressing [CTRL] + [PLAY]. Use
[CLEAR] + [PLAY] to kill any stuck MIDI notes. Button is orange if
a link session is connected and synchronised.
The button illumination state and colour will reect the current
mode. The 16 Value buttons act as visual feedback indicators to
display available options and settings specic to the mode selected.
bank
savectrl

37
The T-1 Notebook : Reference & Guide
36 The T-1 Notebook : Reference & Guide
NOTESNOTES
▌ SAVING A BANK
1. Edited, unsaved banks will illuminate PINK ⬛and in addition, will also
ash if the pattern if playing when holding [BANK].
2. To save a bank. Hold [CTRL] + [BANK] + [VBx], ‘x’ is the bank to save.
3. The bank and value button will ash pink indicating the bank is saved
and then turn green or white if it is the selected bank.
4. Release the buttons once save is complete.
▌ RELOADING FROM A SAVED BANK
1. Hold for 1 second, [BANK] + [VBx], where ‘x’ is the current bank to
reload and is represented by value buttons 1-16.
2. The value button will ash green.
3. The previously saved bank in the slot is reloaded.
4. All banks are reloaded if the T-1 is powered up while holding [BANK].
▌ SELECTING A PATTERN
2. Hold [PATTERN] + [VBx], where ‘x’ is the pattern to select within the
current bank. Value buttons represent patterns.
• Currently selected pattern is WHITE ⬛.
• Available empty pattern slots are DARK BLUE ⬛and edited pattern
slots are illuminated BLUE ⬛.
• The pattern pending play is illuminated WHITE ⬛. This is often also
the currently active pattern.
3. If the sequence is playing, the new pattern will be queued to change at
the end of the current pattern. If the sequence is not playing the pattern
is simply selected for editing.
4. Once the pattern is selected release the [PATTERN] button.
Generic Setup 2
Generic Setup
2
Banks and patterns can be selected within the same process. After
selecting a bank, the pattern selection option is automatically presented.
Bank and pattern numbers are represented by the value buttons 1-16. T-1
will also auto save it’s state but it is good workow practice to manually
save when building and developing sequences.
▌ SELECTING A BANK AND PATTERN
1. Select a bank. Hold [BANK] + [VBx], where ‘x’ is the bank to select.
Banks are represented by the 16 value buttons. Keep [BANK] Held
through steps 1-3 of this process.
• Currently selected, saved bank is WHITE ⬛. If unsaved the button
may be lit Bright PINK ⬛.
• Available saved banks are GREEN ⬛and empty bank slots are
illuminated DARK GREEN ⬛.
2. While still Holding [BANK] + [VBx], where ‘x’ is the pattern to select
within the previously selected bank. Value buttons represent patterns.
• Currently selected pattern is WHITE ⬛.
• Available empty pattern slots are DARK BLUE ⬛and edited pattern
slots are illuminated BLUE ⬛.
• The pattern pending play is illuminated WHITE ⬛. This is often also
the currently active pattern.
3. If the sequence is playing, the new pattern will be queued to change at
the end of the current pattern. If the sequence is not playing the pattern
is simply selected for editing.
4. Once the bank and pattern is selected release the [BANK] button.

39
The T-1 Notebook : Reference & Guide
38 The T-1 Notebook : Reference & Guide
2.7 Clear and Copy
There are two editing options that can be applied to multiple T-1 functions.
Copy can be used to duplicate elements such as banks, tracks and patterns
while clear will reset to an empty or default state. The [CLEAR] button will
be used in conjunction with another function and additionally [CTRL] is
used when accessing [COPY]. Examples are shown for banks.
▌ CLEARING A BANK
1. Hold [CLEAR] + [BANK] + [VBx], where ‘x’ is the existing saved bank to
clear represented by value buttons 1-16. Keep [CLEAR] + [BANK] Held
through the process.
2. The value button will ash. Release [CLEAR] + [BANK] to exit without
clearing at this point.
3. With [CLEAR] + [BANK] still held, press [VBx] again to conrm clear.
4. The selected bank is cleared. Clear will permanently remove the banks
and cannot be undone. Unsaved, empty banks are already empty and
cannot therefore be cleared.
▌ COPY / PASTE A BANK
1. Hold [CTRL] + [COPY] + [BANK] + [VBx], where ‘x’ is the source bank
to copy. Banks 1-16 represented by value buttons.
2. The value button will slowly ash to indicate copy to the clipboard
memory. Keep holding [CTRL] + [COPY] + [BANK].
3. While Holding [CTRL] + [COPY] + [BANK] + Press [VBx], where ‘x’ is
the destination bank into which to paste the previously copied bank.
4. The value button will quickly ash to indicate the bank has been pasted
from the clipboard memory. Multiple pastes are possible.
5. Release the buttons.
Hold [CLEAR] + Target, when using the clear option.
Target is the function to clear.
Hold [CTRL] + [CLEAR] + Target source, to copy.
Still Holding [CTRL] + [CLEAR] + Destination, to paste.
+
NOTES
Generic Setup 2
Generic Setup
2
NOTES
2.6 Tempo
The tempo is measured in Beats Per Minute ranging between 24 BPM and
280 BPM. Tempo is a generic parameter, operating across all patterns and
tracks in a bank. The tempo setting is saved within the bank.
▌ VIEWING THE TEMPO
1. Hold (TEMPO). Double Press (TEMPO) will lock the tempo view.
2. The value buttons will display the tempo status. The tempo setting is
shown as BLUE GREY ⬛on the value buttons and DIMMED BLUE ⬛.
▌ CHANGING THE TEMPO
1. To change tempo in 1 BPM increments. Turn (TEMPO). Each knob click
rotation represents 1 BPM. To view and adjust, Hold & Turn (TEMPO).
2. To change tempo in 16 BPM increments. Hold (TEMPO) + Press [VBx]
where ‘x’ is a value button. The rst value button is set to the minimum
24 BPM state and the last button 280BPM.
3. The value buttons will display the tempo status. The tempo setting is
shown as DIMMED BLUE ⬛and the BLUE GREY ⬛shaded value
buttons.
4. As a quick reset to 120 BPM, Hold (TEMPO) + [VB6].
The value buttons will display
incrementally in shades of white
and blue to represent the tempo.
BLUE GREY ⬛
Tempo Setting DIMMED BLUE ⬛
Granular increments
MIN
24 BPM
MAX
280 BPM
104887224 56 120 136 152
280264216 232184 248200168
Other manuals for T-1
3
Table of contents
Other Torso Electronics Recording Equipment manuals
Popular Recording Equipment manuals by other brands
Martin Audio
Martin Audio Installed System Digital Management Processor Engineer... user manual
YOKOGAWA
YOKOGAWA FX1002 user manual
Drawmer
Drawmer DS201 Operator's manual
DJ-Tech
DJ-Tech CD J-101 user manual
Reloop
Reloop Reloop instruction manual
Solid State Logic
Solid State Logic XLogic Delta XLogic Delta-Link MADI HD Installation and user guide
