Toshiba A5523T Installation guide

Contents/
Getting Ready
Making and
Answering Calls
Character Input
Phone Book
Pair Function
Mail
Hello
Messenger
Camera
EZweb
EZ Navi
EZ・FM
Limit Mode
Simple Mode
Others
Remote Auto Lock/
Troubleshooting
Index
Contents/
Getting Ready
Making and
Answering Calls
Character Input
Phone Book
Pair Function
Mail
Hello
Messenger
Camera
EZweb
EZ Navi
EZ・FM
Limit Mode
Simple Mode
Others
Remote Auto Lock/
Troubleshooting
Index
Basic
Manual
A5523T

The A5523T comes with the Basic Manual and Instruction Manual.
●For learning the basics:
Read the A5523T Basic Manual (this manual).
●For learning details on using each function:
Read the supplied A5523T Instruction Manual.
The following manual is also available on the au homepage.
・Keyword searchable au Online Manual
(http://www.au.kddi.com/manual/index.html)
You can also access the au Online Manual from EZweb.
<EZweb Access>M⇒EZweb ⇒1Top Menu
⇒
auお客さまサポート
(au Customer Support)
⇒
調べる
(Search)
⇒
オンラインマニュアル
(Online Manual)
Introduction
Printed Manuals for the A5523T (Japanese)
Thank you for purchasing the A5523T. Before using your A5523T, be sure to
read the A5523T Basic Manual (this PDF manual) to ensure correct usage.
After you have finished reading this manual, store this PDF manual and the
printed manuals in safe places so you can retrieve them whenever you need
them.
・The typeface and shape/color of fonts used for characters in the sample screens in
this manual may differ from those used for characters in actual screens, or some
characters may be omitted.
NoteNote

1
Cell Phone Etiquette
Etiquette for Cell Phone Use
■The cell phone always emits weak radio waves when power is on.
■Use the cell phone in an enjoyable and safe manner without forgetting to
be considerate of others around you.
●The use of cell phones is not
allowed in some places.
・Do not use the cell phone
while you are driving. Doing
so is both dangerous and
prohibited by law.
・Using a cell phone in an
aircraft is prohibited by law.
Be sure to turn the cell phone
off.
●Radio waves from cell phones
may interfere with medical
electrical equipment.
・Some people close to you in
busy places such as crowded
trains may be using a pace-
maker. Turn the cell phone off
in such places.
・Abide by the rules of hospitals
and other medical institutions
where it is forbidden to use or
carry cell phones.
●Be considerate of where you
use the cell phone and how
loudly you talk.
・Do not make calls from cinemas,
theaters, museums, libraries,
and other similar places. Turn
power off or turn on manner
mode to prevent others around
you from being inconvenienced
by ring tones for incoming
calls or mail.
・Do not use the cell phone in
places where you will be in
the way of others.
・Move to areas where you will
not inconvenience others on
trains or in hotel lobbies.
・Take care to avoid talking in a
loud voice.
・Obtain the permission of other
people before you take their
photos with the cell phone's
camera.
・Do not use the cell phone's
camera for recording information
in bookstores and other
locations where taking photos
is not permitted.
×
OFF
×
×
Manner
mode

2
Mail
You can e-mail to other
cell phones or to a PC.
Hello Messenger
64
Page
53
Page
EZ・FM
You can listen to
the FM radio.
86
Page
You can limit
incoming and
outgoing calls and
c-mail.
You can make
operation even
simpler by
restricting
use to
only
frequently
used
functions.
EZ Navi
Provides useful positional
information services
including EZ Navi Walk
and Safety Navi.
EZweb
You can download
Chaku-Uta®and
access sites.
Simple Mode
Limit Mode
97
Page
82
Page
75
Page
69
Page
90
Page
You can take
photos and movie
clips and then
send them
easily by
e-mail.
Camera
Up to four
members can
exchange text,
photos and sound
in real time using
au cell phones that
support Hello
Messenger.
Cell Phone Basics
Cell Phone Features

3
33
Page
34
Page
16
Page
16
Page
16
Page
ON!
Normally, you should leave the cell phone turned on
Hold downsSfor at least
one second.
If a signal is not being received, you cannot talk on the cell phone
Even in service areas, there are some places where
it is difficult to receive a signal.
Pay attention to the battery level
indicates the battery
level.
When the battery level is low, the cell phone may
not function properly.
To make and receive calls, you need to turn on
power.
indicates the signal
strength.
Manner Mode
You can use manner mode to turn
off the incoming call ring tone and
other tones so as not to
inconvenience other people.
When the standby
screen is displayed,
hold down
vV
for
at least one second.
Voice Memo
When you cannot answer calls,
the cell phone can play an
answering message (Japanese)
and record memos.
When the standby
screen is displayed,
hold downrRfor
at least one second.
I can’t answer.
(Japanese)
Checking the Power, Signal Strength, and Battery Level
Manner Mode and Voice Memo

4
Drive Mode
In Drive Mode, a Japanese message meaning "I'm driving now, so I can't
answer your call." is played when a call is received, telling the caller to
leave a message on the voice memo.
Holding a cell phone, talking on a cell phone, looking at a cell phone
display to send mail or perform some other operation while driving is
against the law in Japan.
(Revised Traffic Control Law, effective November 1, 2004)
Turn off your cell phone or put it in
Drive Mode while driving.
×Looking at mail on
a cell phone display.
When the standby screen is
displayed, pressvvV,
usegGto select Drive Mode,
and then press`@(Select).
×Holding a cell phone in
your hand for talking.
I'm driving.
(Japanese)
Do not use the cell phone while driving!

5
60
If you receive spam:
You can set the mail filters to reject only specific mail or mail indicated
by 未承諾広告※ (Unsolicited Advertisement), which often tends to be
spam.
The following mail filters are available for
rejecting spam:
・未承諾広告フィルター
(Unsolicited Advertisement Filter)
・アドレスフィルター (Address Filters)
-指定拒否設定
(for not receiving specific mail)
-指定受信設定
(for receiving specific mail only)
If you receive a call from an unknown phone number:
in the Incoming History
indicates that there was
a call which rang three
seconds long or shorter.
Danger!
It may be an attempt to get you to return a call to a service with very high
charges.
Incoming call
03-0002-XXXX
Page
32
Page
Spam and One-ring Calls

6
About Disaster Message Board
When a big scale disaster occurs, you can register your safety
information through EZweb. The registered safety information can be
referred from anywhere in Japan through EZweb or Internet.
Registering
the safety
information
Referring
the safety
information
●When a big scale disaster occurs, from au
phone, you can register your safety information
such as your condition or comments to the 災
害用伝言板 (Disaster Message Board) created
on the EZweb.
●After the registration of your safety
information, you can notify by e-mail your
family or acquaintances you have previously
designated that you registered your safety
information on the 災害用伝言板 (Disaster
Message Board).
●You can refer to the safety information of the
person whom you want to know the
information of by entering the phone number
of the person from EZweb or Internet.*
* When you refer to the safety information from
other carriers' cell phone, PHS or PC, you can
refer to it from "http://dengon.ezweb.ne.jp/".
Access
M⇒EZ Menu (EZweb Menu)⇒1Top Menu
⇒ (Disaster Message Board)
http://dengon.ezweb.ne.jp/
災害用伝言板
Disaster Message Board Service

7
災害用伝言板
伝言板トップ
〜サービス提供中〜
安否情報の登録・確認が
できます。
登録
(
ご利用可能地域の
方のみ登録可能です
)
確認
削除
お知らせメール設定
サービス概要
ご利用地域情報
お問合せ
災害対策への取組み
English
登録
災害用伝言板
〜登録〜
被災状況
無事です。
被害があります。
自宅に居ます。
避難所に居ます。
コメント見て
コメント入力(
100
文字まで)
※登録内容確認画面にて、
お客様の携帯電話番号およ
び登録日時が表示されます。
伝言板トップへ
検索する
災害用伝言板
〜確認〜
安否情報を確認したい相
手のau/ツーカー携帯電話
番号を入力して下さい。
090XXXXXXXX
他業者提供の災害用伝言
板は以下からご確認下さ
い。
<ドコモ>
iモード災害用伝言板
<ソフトバンク>
災害用伝言板
<ウィルコム>
災害用伝言板
伝言板トップへ
検索する
Top display of
the Disaster
Message Board
登録 for registration
確認for
reference
Safety information
reference display
Safety information
registration display
We are in
the city
hall.
・The maximum preservation period of the registered information is 72
hours.
・The maximum available number of each registration is 10. When the
number of registration exceeds 10, old information will be overwritten in
order of registration.
・The demonstration of this service can be referred to anytime by pressing
M⇒EZ Menu (EZweb Menu)⇒1Top Menu ⇒
auお客さまサポート
(au Customer Support) ⇒
災害用伝言板(デモ版)
(Disaster Message
Board (Demo Version)).
・To view the Disaster Message Board in English, select English on the top
display of the Disaster Message Board.

Etiquette for Cell Phone Use・・・・・・・・・・・・・・・・・・・・・・・・・・・・・・・・・・・・・・・・・・・・・・・・・・・・・1
Cell Phone Features・・・・・・・・・・・・・・・・・・・・・・・・・・・・・・・・・・・・・・・・・・・・・・・・・・・・・・・・・・・・2
Manner Mode and Voice Memo ・・・・・・・・・・・・・・・・・・・・・・・・・・・・・・・・・・・・・・・・・・・・・・・・・・3
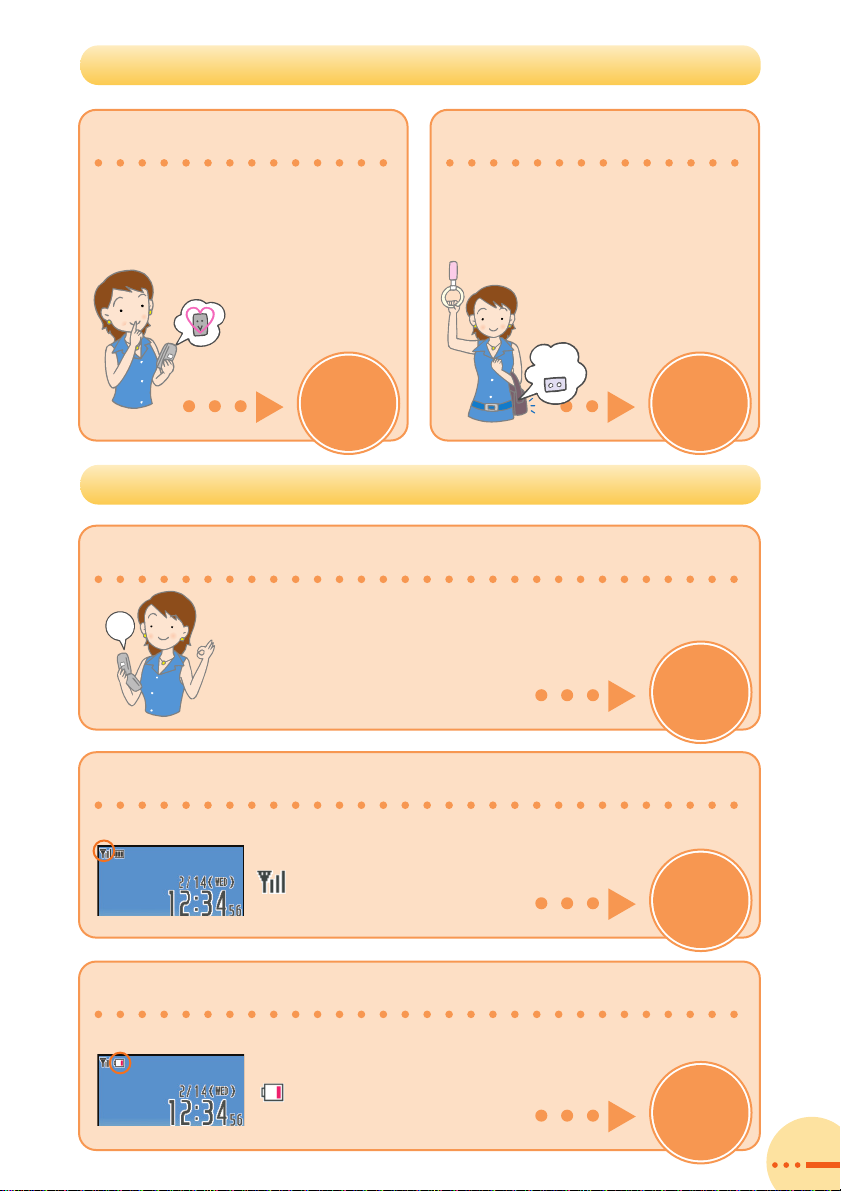
Checking the Power, Signal Strength, and Battery Level・・・・・・・・・・・・・・・・・・・・・・・・・・・・・3
Do not use the cell phone while driving! ・・・・・・・・・・・・・・・・・・・・・・・・・・・・・・・・・・・・・・・・・・・4
Spam and One-ring Calls・・・・・・・・・・・・・・・・・・・・・・・・・・・・・・・・・・・・・・・・・・・・・・・・・・・・・・・・5
Disaster Message Board Service ・・・・・・・・・・・・・・・・・・・・・・・・・・・・・・・・・・・・・・・・・・・・・・・・・6
Checking the Contents of the Box・・・・・・・・・・・・・・・・・・・・・・・・・・・・・・・・・・・・・・・・・・・・・・・10
Names of Parts・・・・・・・・・・・・・・・・・・・・・・・・・・・・・・・・・・・・・・・・・・・・・・・・・・・・・・・・・・・・・・・11
Security Code and Passwords・・・・・・・・・・・・・・・・・・・・・・・・・・・・・・・・・・・・・・・・・・・・・・・・・・12
Charging the Battery Pack ・・・・・・・・・・・・・・・・・・・・・・・・・・・・・・・・・・・・・・・・・・・・・・・・・・・・・13
Learning the Basics ・・・・・・・・・・・・・・・・・・・・・・・・・・・・・・・・・・・・・・・・・・・・・・・・・・・・・・・・・・・14
Turning On Power ・・・・・・・・・・・・・・・・・・・・・・・・・・・・・・・・・・・・・・・・・・・・・・・・・・・・・・・・・・・・16
Configuring Initial Settings ・・・・・・・・・・・・・・・・・・・・・・・・・・・・・・・・・・・・・・・・・・・・・・・・・・・・・17
Switching the Display Language to English・・・・・・・・・・・・・・・・・・・・・・・・・・・・・・・・・・・・・・・18
Viewing the Display ・・・・・・・・・・・・・・・・・・・・・・・・・・・・・・・・・・・・・・・・・・・・・・・・・・・・・・・・・・・20
Using Menus・・・・・・・・・・・・・・・・・・・・・・・・・・・・・・・・・・・・・・・・・・・・・・・・・・・・・・・・・・・・・・・・・22
Initializing E-mail and EZweb・・・・・・・・・・・・・・・・・・・・・・・・・・・・・・・・・・・・・・・・・・・・・・・・・・・25
Checking Your Phone Number and E-mail Address ・・・・・・・・・・・・・・・・・・・・・・・・・・・・・・・25
Changing Your E-mail Address ・・・・・・・・・・・・・・・・・・・・・・・・・・・・・・・・・・・・・・・・・・・・・・・・・26
Using Extra Large Characters ・・・・・・・・・・・・・・・・・・・・・・・・・・・・・・・・・・・・・・・・・・・・・・・・・・28
Making a Call ・・・・・・・・・・・・・・・・・・・・・・・・・・・・・・・・・・・・・・・・・・・・・・・・・・・・・・・・・・・・・・・・29
Making an International Call・・・・・・・・・・・・・・・・・・・・・・・・・・・・・・・・・・・・・・・・・・・・・・・・・・・・29
Answering a Call・・・・・・・・・・・・・・・・・・・・・・・・・・・・・・・・・・・・・・・・・・・・・・・・・・・・・・・・・・・・・・30
Redialing (Outgoing History/Incoming History)・・・・・・・・・・・・・・・・・・・・・・・・・・・・・・・・・・・・31
One-ring Calls・・・・・・・・・・・・・・・・・・・・・・・・・・・・・・・・・・・・・・・・・・・・・・・・・・・・・・・・・・・・・・・・32
Turning On Manner Mode・・・・・・・・・・・・・・・・・・・・・・・・・・・・・・・・・・・・・・・・・・・・・・・・・・・・・・33
Turning On Voice Memo・・・・・・・・・・・・・・・・・・・・・・・・・・・・・・・・・・・・・・・・・・・・・・・・・・・・・・・34
Playing a Voice Memo・・・・・・・・・・・・・・・・・・・・・・・・・・・・・・・・・・・・・・・・・・・・・・・・・・・・・・・・・35
Changing the Incoming Ring Tone ・・・・・・・・・・・・・・・・・・・・・・・・・・・・・・・・・・・・・・・・・・・・・・36
Adjusting the Incoming Ring Tone Volume ・・・・・・・・・・・・・・・・・・・・・・・・・・・・・・・・・・・・・・・38
Adjusting the Earpiece Volume during a Call ・・・・・・・・・・・・・・・・・・・・・・・・・・・・・・・・・・・・・39
Character Entry Modes・・・・・・・・・・・・・・・・・・・・・・・・・・・・・・・・・・・・・・・・・・・・・・・・・・・・・・・・40
Entering Single-byte Alphanumeric Characters ・・・・・・・・・・・・・・・・・・・・・・・・・・・・・・・・・・・40
Entering E-mail Addresses・・・・・・・・・・・・・・・・・・・・・・・・・・・・・・・・・・・・・・・・・・・・・・・・・・・・・42
Entering Pictograms・・・・・・・・・・・・・・・・・・・・・・・・・・・・・・・・・・・・・・・・・・・・・・・・・・・・・・・・・・・44
Saving a Phone Book Entry ・・・・・・・・・・・・・・・・・・・・・・・・・・・・・・・・・・・・・・・・・・・・・・・・・・・・45
Dialing from the Phone Book ・・・・・・・・・・・・・・・・・・・・・・・・・・・・・・・・・・・・・・・・・・・・・・・・・・・47
Editing Phone Book Entries ・・・・・・・・・・・・・・・・・・・・・・・・・・・・・・・・・・・・・・・・・・・・・・・・・・・・48
Saving a Phone Number from the Incoming or Outgoing History ・・・・・・・・・・・・・・・・・・・・49
Registering a Pair Partner ・・・・・・・・・・・・・・・・・・・・・・・・・・・・・・・・・・・・・・・・・・・・・・・・・・・・・50
Making a Call to a Pair Partner ・・・・・・・・・・・・・・・・・・・・・・・・・・・・・・・・・・・・・・・・・・・・・・・・・51
Sending a Mail to a Pair Partner ・・・・・・・・・・・・・・・・・・・・・・・・・・・・・・・・・・・・・・・・・・・・・・・・52
Inviting Members to a Hello Messenger Meeting from the Pair Partner Function・・・・・・・52
Contents
8
Contents
●Pair Function 50
●Introduction
●Cell Phone Etiquette 1
●Cell Phone Basics 2
●Character Input 40
●Getting Ready 10
●Contents 8
●Making and Answering Calls 29
●Phone Book 45

Using E-mail ・・・・・・・・・・・・・・・・・・・・・・・・・・・・・・・・・・・・・・・・・・・・・・・・・・・・・・・・・・・・・・・・・53
Creating and Sending E-mail Messages ・・・・・・・・・・・・・・・・・・・・・・・・・・・・・・・・・・・・・・・・・54
Reading Received E-mail Messages ・・・・・・・・・・・・・・・・・・・・・・・・・・・・・・・・・・・・・・・・・・・・56
Reading an E-mail Message with an Attached Photo or Movie ・・・・・・・・・・・・・・・・・・・・・・58
Replying to Received E-mail Messages・・・・・・・・・・・・・・・・・・・・・・・・・・・・・・・・・・・・・・・・・・59
Rejecting Spam ・・・・・・・・・・・・・・・・・・・・・・・・・・・・・・・・・・・・・・・・・・・・・・・・・・・・・・・・・・・・・・60
Using C-mail ・・・・・・・・・・・・・・・・・・・・・・・・・・・・・・・・・・・・・・・・・・・・・・・・・・・・・・・・・・・・・・・・・61
Creating and Sending C-mail Messages ・・・・・・・・・・・・・・・・・・・・・・・・・・・・・・・・・・・・・・・・・62
Reading Received C-mail Messages ・・・・・・・・・・・・・・・・・・・・・・・・・・・・・・・・・・・・・・・・・・・・63
Displaying Hello Messenger・・・・・・・・・・・・・・・・・・・・・・・・・・・・・・・・・・・・・・・・・・・・・・・・・・・・65
Holding a Meeting ・・・・・・・・・・・・・・・・・・・・・・・・・・・・・・・・・・・・・・・・・・・・・・・・・・・・・・・・・・・・66
Inviting Members to a Meeting・・・・・・・・・・・・・・・・・・・・・・・・・・・・・・・・・・・・・・・・・・・・・・・・・・67
Accepting an Invitation to Join a Meeting・・・・・・・・・・・・・・・・・・・・・・・・・・・・・・・・・・・・・・・・・68
Camera Image Features・・・・・・・・・・・・・・・・・・・・・・・・・・・・・・・・・・・・・・・・・・・・・・・・・・・・・・・69
Photo and Movie Shooting Tips・・・・・・・・・・・・・・・・・・・・・・・・・・・・・・・・・・・・・・・・・・・・・・・・・70
About Photo and Movie Modes ・・・・・・・・・・・・・・・・・・・・・・・・・・・・・・・・・・・・・・・・・・・・・・・・・70
Taking a Photo ・・・・・・・・・・・・・・・・・・・・・・・・・・・・・・・・・・・・・・・・・・・・・・・・・・・・・・・・・・・・・・・71
Recording a Movie・・・・・・・・・・・・・・・・・・・・・・・・・・・・・・・・・・・・・・・・・・・・・・・・・・・・・・・・・・・・72
Attaching Photos or Movies to E-mail Messages ・・・・・・・・・・・・・・・・・・・・・・・・・・・・・・・・・・73
Viewing Photos or Movies・・・・・・・・・・・・・・・・・・・・・・・・・・・・・・・・・・・・・・・・・・・・・・・・・・・・・・74
Accessing Sites ・・・・・・・・・・・・・・・・・・・・・・・・・・・・・・・・・・・・・・・・・・・・・・・・・・・・・・・・・・・・・・76
Bookmarking Frequently Accessed Pages ・・・・・・・・・・・・・・・・・・・・・・・・・・・・・・・・・・・・・・・78
Viewing Bookmarked Pages・・・・・・・・・・・・・・・・・・・・・・・・・・・・・・・・・・・・・・・・・・・・・・・・・・・・79
Checking Charges ・・・・・・・・・・・・・・・・・・・・・・・・・・・・・・・・・・・・・・・・・・・・・・・・・・・・・・・・・・・・79
Downloading Chaku-Uta®・・・・・・・・・・・・・・・・・・・・・・・・・・・・・・・・・・・・・・・・・・・・・・・・・・・・・・80
EZ Navi Features ・・・・・・・・・・・・・・・・・・・・・・・・・・・・・・・・・・・・・・・・・・・・・・・・・・・・・・・・・・・・・82
What You Can Do with Safety Navi・・・・・・・・・・・・・・・・・・・・・・・・・・・・・・・・・・・・・・・・・・・・・・84
Antenna ・・・・・・・・・・・・・・・・・・・・・・・・・・・・・・・・・・・・・・・・・・・・・・・・・・・・・・・・・・・・・・・・・・・・・86
Listening to EZ・FM ・・・・・・・・・・・・・・・・・・・・・・・・・・・・・・・・・・・・・・・・・・・・・・・・・・・・・・・・・・・87
Switching to Background Music Reception or Exiting EZ・FM ・・・・・・・・・・・・・・・・・・・・・・・89
Registering Permitted Members ・・・・・・・・・・・・・・・・・・・・・・・・・・・・・・・・・・・・・・・・・・・・・・・・90
Limiting Calls and C-mail ・・・・・・・・・・・・・・・・・・・・・・・・・・・・・・・・・・・・・・・・・・・・・・・・・・・・・・92
Setting Use Limits ・・・・・・・・・・・・・・・・・・・・・・・・・・・・・・・・・・・・・・・・・・・・・・・・・・・・・・・・・・・・94
Turning Limit Mode On and Off ・・・・・・・・・・・・・・・・・・・・・・・・・・・・・・・・・・・・・・・・・・・・・・・・・96
Entering Simple Mode・・・・・・・・・・・・・・・・・・・・・・・・・・・・・・・・・・・・・・・・・・・・・・・・・・・・・・・・・97
Exiting Simple Mode ・・・・・・・・・・・・・・・・・・・・・・・・・・・・・・・・・・・・・・・・・・・・・・・・・・・・・・・・・・98
Viewing the Display in Simple Mode・・・・・・・・・・・・・・・・・・・・・・・・・・・・・・・・・・・・・・・・・・・・・99
Viewing the Simple Menu ・・・・・・・・・・・・・・・・・・・・・・・・・・・・・・・・・・・・・・・・・・・・・・・・・・・・100
Saving a Phone Book Entry Using Simple Mode ・・・・・・・・・・・・・・・・・・・・・・・・・・・・・・・・102
Creating and Sending E-mail/C-mail Messages in Simple Mode ・・・・・・・・・・・・・・・・・・・104
Taking Photos in Simple Mode・・・・・・・・・・・・・・・・・・・・・・・・・・・・・・・・・・・・・・・・・・・・・・・・106
Viewing Photos in Simple Mode・・・・・・・・・・・・・・・・・・・・・・・・・・・・・・・・・・・・・・・・・・・・・・・107
●Other Functions ・・・・・・・・・・・・・・・・・・・・・・・・・・・・・・・・・・・・・・・・・・・・・・・・・・・・・・・・・・・・・・108
Using the Safety Buzzer・・・・・・・・・・・・・・・・・・・・・・・・・・・・・・・・・・・・・・・・・・・・・・・・・・・・・・108
●In Case You Lose Your A5523T ・・・・・・・・・・・・・・・・・・・・・・・・・・・・・・・・・・・・・・・・・・・・・・・・110
Setting Conditions for Enabling the Remote Auto Lock ・・・・・・・・・・・・・・・・・・・・・・・・・・・110
Remotely Enabling the Auto Lock on Your A5523T ・・・・・・・・・・・・・・・・・・・・・・・・・・・・・・111
●Troubleshooting・・・・・・・・・・・・・・・・・・・・・・・・・・・・・・・・・・・・・・・・・・・・・・・・・・・・・・・・・・・・・・112
●Index ・・・・・・・・・・・・・・・・・・・・・・・・・・・・・・・・・・・・・・・・・・・・・・・・・・・・・・・・・・・・・・・・・・・・・・・・114
Contents
9
●Mail 53
●Hello Messenger 64
●EZweb 75
●EZ Navi 82
●EZ・FM 86
●Limit Mode 90
●Simple Mode 97
●Camera 69

Getting Ready
10
Getting Ready
Checking the Contents of the Box
The box contains the cell phone and accessories.
・Cell phone
・Basic Manual (Japanese)
・
Battery pack
(Installed in the phone)
・Desktop holder
・
Toshibaflat-typestereo
earphone04
・
Instruction Manual (Japanese)
EZナビ
目次
ご利用いただく前に
基本機能
メール
HelloMessenger
カメラ
データフォルダ
EZweb
microSD カード
™
EZアプリ
EZ・FM
赤外線通信
付録/索引
クイックガイド
かんたんモード
各種設定
便利な機能
auのネットワー クサービ ス
A5523TA5523TA5 523T
・Warranty (Japanese)
・
Safety Precautions (Japanese)
・An AC adapter and microSD™memory card are not included. Purchase a common
AC adapter 01 and a commercially available microSD™memory card separately.
NoteNote

Getting Ready
11
Names of Parts
Earpiece
Display
Warp
function key
EZapps key/
Soft key 1
Mail key
Memo key/
Clear key
Keypad,
*key,
#key
Phone book key/
Soft key 2
EZ key
Power key/
End key
Microphone
Send key/
Pair key
From the Front
From the Side
From the Back
Side key 1
Memory card slot
Camera key
Side key 2 Flat-type earphone jack External power terminal
Infrared port Hand strap eyelet
Charge indicator/
Incoming LED
Sub-display
Macro focus switch
Camera(lens)
Mobile light
Speaker
Battery pack/Cover
Power terminal
Built-in antenna

Getting Ready
12
You can use the security code and passwords described below to restrict
use of your A5523T.
Take care not to forget the security code and passwords, because they are
required for performing various operations and using subscription services.
①Using the Answering Service (Voice Mail) and Call Transfer remotely
from a regular phone.
②Making inquiries, applications, and changes while using au Customer
Service Center voice guidance, au web pages, and EZweb.
③Changing various settings from Mail Filter or Other Setup of E-mail Setup.
Security Code
Usage
Examples
Initial
Setting The four-digit number you wrote on your subscription form.
The four-digit number you wrote on your subscription form.
Usage
Examples
Usage
Examples
Initial
Setting
Initial
Setting
Lock No.
Changing various settings of the cell phone, etc.
1234 (four digits)
Limit Mode Password
①Setting/canceling Limit Mode.
②Changing the Limit Mode settings.
12345678 (eight digits)
Usage
Examples
Usage
Examples
Initial
Setting
Initial
Setting
Premium EZ Password
EZ Password
Concluding/canceling subscriptions for EZweb fee-based content.
①Concluding/canceling subscriptions for EZweb fee-based content paid
by using au (au Collective Payment Service).
②Purchasing products from EZweb sites that use au
(au Collective Payment Service).
まとめて 支払い
まとめて 支払い
Navi Password
Usage
Examples
Initial
Setting
Permission to request Auto Position Search registration from an au cell
phone or launch Safety Navi.
Set when Safety Navi is first launched (four digits).
Security Code and Passwords

Getting Ready
13
The battery pack is not fully charged at the time of
purchase.
Be sure to charge the battery pack before using
the cell phone for the first time.
Charging the Battery Pack
100 V AC
power outlet
Power
plug
Common
AC adapter 01 ③
②
④ ①
Charge
indicator
⑤
Desktop holder
Power
terminal
Connector
Bottom of the desktop holder
Cord retainer
Connect the common AC adapter 01 to the desktop holder.
・Check the shape of the connector for the common AC adapter 01 and then plug it
into the power terminal on the bottom of the desktop holder.
1
Fit the common AC adapter 01 cord into the cord retainer.
2
While the A5523T is closed with the battery pack attached,
insert it into the desktop holder as shown in the figure.
4
Confirm that the charge indicator lights.
・Charging: The charge indicator lights.
・Charging finished: The charge indicator goes out.
If you charge the A5523T battery pack while the phone is turned on, it beeps when
charging starts or ends.
5
・Hold the desktop holder while removing the A5523T.
・You can also charge the battery pack by connecting the common AC adapter 01
directly to the A5523T.
NoteNote
Turn the common AC adapter 01's power plug 90 degrees
and connect it to a 100 V AC power outlet.
3
・
An AC adapter is not included. Purchase a common AC adapter 01 separately.

Getting Ready
14
Key Assignments
J
D
L
R
Q
0〜9、
*、#
@
K
C
M
B
S
P
V
U
q
w
e
r
t
y
u
i
o
!0
!1
!2
!3
!4
!5
q
w
e
r
t
y
i
u
o
!0
!1
!2
!3 !4 !5
:EZapps startup
:Display Incoming History
:E-mail
:Voice memo setting/cancel;
character delete; operation cancel
:
Make and answer calls; use the Pair function
:Phone number and character input
:Display Launcher menu
:Phone Book
:Display Outgoing History
:Display EZ menu
:Display Desktop menu
:Power on/off; end call/communication;
cancel operation
:Camera
:Manner mode
:Mobile light on/off
Learning the Basics
・To lock the side keys to prevent unintentional side key (P, V, and U)
operations while your phone is closed, hold down@for at least one second when
the standby screen is displayed. To unlock the side keys, hold down@for at
least one second .
・If you press Qfor at least one second when is displayed on the standby
screen, your cell phone searches for a base station with a good signal.
・You can sound the Safety Buzzer by holding down #for at least one second
when the standby screen is displayed.
See page 108 for information on the Safety Buzzer setting.
NoteNote

Getting Ready
15
Warp Function Key
Use the up, down, left, and right parts of the key to select items and to move
the cursor. Press the center of the key to confirm a selected item.
Soft Keys
When indications such as the following are displayed at the bottom of the
display, you can press the corresponding soft keys to perform the indicated
operations. The soft key indications vary depending on the screen.
If you lose track of where you are or if you make a
mistake...
Perform one of the following operations when you lose track of where you
are or if you make a mistake while operating the cell phone.
gG/fFSelects items, and moves the cursor up, down,
left and right.
`@Confirms the selected item or starts the selected
operation.
Soft key 1
jJPerforms the operation indicated at the bottom
left of the screen.
Center key
`@Performs the operation indicated at the bottom
center of the screen.
Soft key 2
kKPerforms the operation indicated at the bottom
right of the screen.
rRReturns to the previous screen.
sSReturns to the standby screen.

1Hold down Sfor at least
one second.
Check the signal strength.
・You cannot receive or make calls if is displayed.
Check the battery level.
Getting Ready
16
Standby screen
Turning On Power
Strong Medium Weak
Very weak
Out of range
Full Low Very low
(requires charging)
Empty Charging
ON!
Turning Off Power
Hold down Sfor at least one second.

Getting Ready
17
1When the standby screen is
displayed, press @.
2Press 3
設定しない
(Do Not
Setup).
・If you select
設定しない
(Do Not Setup),
the initial settings are as shown below.
Initial menu
Configuring Initial Settings
・Even if you do not configure the initial settings, you can still make and answer calls.
・The initial settings include changing the Lock No., setting the character size, setting
the Notify Call ID, and setting the call ring tone.
・You need to configure initial settings before using the cell phone for the first time
only. Furthermore, you can also change each of the initial settings later.
・After configuring initial settings, you can switch the display language to English (see
page 18).
NoteNote
Lock No. 1234 EZweb Medium-small
Telephone Medium Character Input Medium
E-mail Medium-small Notify Call ID ON
C-mail Medium-small Incoming Call Pattern 1
For Simple Mode Users
For details on Simple Mode (mode to make operation even simpler by restricting use to
only frequently used functions), see "Simple Mode" on page 97.

Getting Ready
18
1When the standby screen is
displayed, press @.
2Use Eto select
機能
(Function) and then
press @(選択 [Select]).
3Press 3
画面表示
(Screen
Setup).
4Press 6Set Language.
You can switch the display language for function names and other items to
English.
Switching the Display Language to English
Table of contents
Other Toshiba Cell Phone manuals

Toshiba
Toshiba 803 User manual

Toshiba
Toshiba TS705 User manual

Toshiba
Toshiba A5517T Installation guide

Toshiba
Toshiba TG01. User manual

Toshiba
Toshiba TS705-G User manual

Toshiba
Toshiba regza T004 User manual

Toshiba
Toshiba A5516T Installation guide

Toshiba
Toshiba SG4-E01 User manual

Toshiba
Toshiba VM4050 User manual

Toshiba
Toshiba TM5-E01 User manual

Toshiba
Toshiba W53T Assembly instructions

Toshiba
Toshiba PABWC001 User manual

Toshiba
Toshiba 803 User manual

Toshiba
Toshiba Portege G710 User manual

Toshiba
Toshiba TX62 User manual

Toshiba
Toshiba TG01. User manual

Toshiba
Toshiba TX80 User manual

Toshiba
Toshiba T-01B User manual

Toshiba
Toshiba PORTEGE G910 User manual

Toshiba
Toshiba TS605 Operating manual