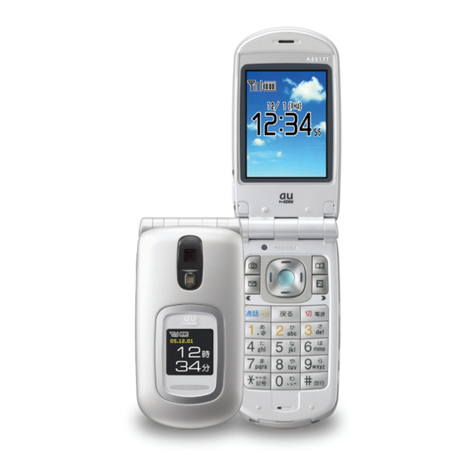
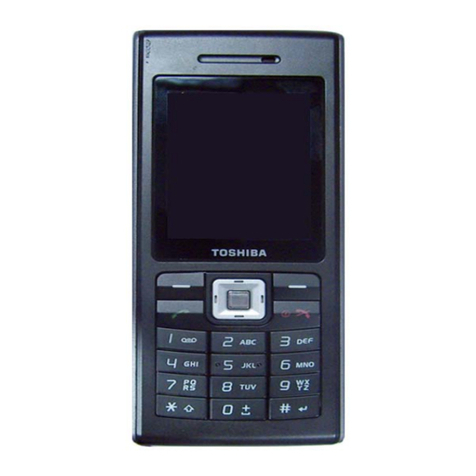
Toshiba A5509T Installation guide

Sales: KDDI CORPORATION・
OKINAWA CELLULAR TELEPHONE COMPANY
Manufactured by:
TOSHIBACORPORATION
February 2005 Edition
Cellphone and PHS operators collect and
recycle unused telephones, batteries and
battery chargers at stores bearing the
logo regardless of brand and
manufacturer to protect the environment
and reuse valuable resources.
For inquiries, call:
au Customer Service Center (General Information)
(toll free)
Pressing "zero" will connect you to an operator,
after calling "157" on your au cellphone.
From regular phones:
(toll free)
From au cellphones:
area code not required
157
0077-7-111
フリーコ ー ル
Character Input
Phone Book
Mail
Camera
EZweb
EZnaviWalk
Limit Mode
Smart Mode
Others/Index
Character Input
Phone Book
Mail
Camera
EZweb
EZnaviWalk
Limit Mode
Smart Mode
Others/Index
Contents/
Getting Ready
Making and
Answering Calls
Basic
Manual
A5509Tかんたんマニュアル(English) M60Y94
C M Y B

Printed Manuals for the A5509T (Japanese)
Thank you for purchasing the A5509T. Before using your A5509T, be sure to
read the A5509T Basic Manual (this PDF manual) to ensure correct usage.
After you have finished reading this manual, store this PDF manual and the
printed manuals in safe places so you can retrieve them whenever you need
them.
・The typeface and shape of fonts used for characters in the sample screens in this
manual may differ from those used for characters in actual screens, or some
characters may be omitted.
NoteNote
The A5509T comes with the Basic Manual and Instruction Manual.
A5509T
Basic Manual
Equivalent to this English PDF
manual.
目次/準備
通話
文字入力
アドレス帳
メール
カメラ
EZweb
EZナビウォーク
制限モード
スマートモード
English
その他/索引
目次/準備
通話
文字入力
アドレス帳
メール
カメラ
EZweb
EZナビウォーク
制限モード
スマートモード
English
その他/索引
A5509T
Instruction Manual
English version is not available.
EZ
アプリ
/
バーコードリーダ
ー
目
次
ご利用いただ
く
前
に
電話
機能
アドレス
帳
メ
ー
ル
カメ
ラ
EZw
eb
EZ
ムー
ビー
EZ
ナビウォー
ク
データフォル
ダ
音
/
画面設
定
プライバシー設
定
セキュリテ
ィ
モー
ド
便利な
機能
制限モード
/
スマートモ ー
ド
文
字
入
力
au
の
ネ
ットワ ーク サ ー ビ
ス
付録
/
索
引
Introduction
The following manuals are also available on the au homepage.
・Keyword searchable au Online Manual
(http://www.au.kddi.com/manual/index.html)
You can also access the au Online Manual from EZweb.
<EZweb Access> M⇒1Top Menu
⇒8
料金・申込・インフォ
(Charges, Applications, and Information)
⇒
auオンラインマニュアル
(au Online Manual)
A5509T_kihon_P000~007 05.2.28 5:15 PM ページ 1

1
■The cell phone always emits weak radio waves when power is on.
■Use the cell phone in an enjoyable and safe manner without forgetting to
be considerate of others around you.
Cell Phone Etiquette
Etiquette for Cell Phone Use
●The use of cell phones is not
allowed in some places
・Do not use the cell phone
while you are driving. Doing
so is both dangerous and
prohibited by law.
・Using a cell phone in an
aircraft is prohibited by law.
Be sure to turn the cell phone
off.
●Radio waves from cell phones
may interfere with medical
electrical equipment
・Some people close to you in
busy places such as crowded
trains may be using a pace-
maker. Turn the cell phone off
in such places.
・Abide by the rules of hospitals
and other medical institutions
where it is forbidden to use or
carry cell phones.
×
OFF
●Be considerate of where you
use the cell phone and how
loudly you talk
・Do not make calls from cinemas,
theaters, museums, libraries,
and other similar places. Turn
power off or turn on manner
mode to prevent others around
you from being inconvenienced
by ring tones for incoming
calls or mail.
・Do not use the cell phone in
places where you will be in
the way of others.
・Move to areas where you will
not inconvenience others on
trains or in hotel lobbies.
・Take care to avoid talking in a
loud voice.
・Obtain the permission of other
people before you take their
photos with the cell phone's
camera.
・Do not use the cell phone's
camera for recording information
in bookstores and other
locations where taking photos
are not permitted.
Manner
mode
A5509T_kihon_P000~007 05.2.17 4:16 PM ページ 1

2
Cell Phone Basics
Cell Phone Features
26
Making/
Answering Calls
Your cell phone is
packed with useful
features such as a
phone book, call
history, and
manner mode.
67
EZweb
You can download
"Chaku-Uta®," wall-
paper, and other
data.
47
Mail
You can send mail
to other cell phones
and personal
computers.
74
EZnaviWalk
A map and voice
information lets you know
your current location and
the route to your
destination.
78,84
Limit Mode/
Smart Mode
You can select a mode that
restricts operation, or a mode
that allows simplified
operation.
You can take
photos and movie
clips and then
send them easily
by e-mail.
59
Camera
Tomorrow's
weather.
Page
Page Page Page
Pages
Page
A5509T_kihon_P000~007 05.2.17 4:16 PM ページ 2

3
Checking the Power, Signal Strength, and Battery Level
11
11
11
30 31
Normally, you should leave the cell phone turned on
Hold down for at least
one second.
If a signal is not being received, you cannot talk on the cell phone
Even in service areas, there are some places where
it is difficult to receive a signal.
Pay attention to the battery level
indicates the battery
level.
When the battery level is low, the cell phone may
not function properly.
ON!
To make and receive calls, you need to turn on
power.
indicates the signal
strength.
Manner Mode
You can use manner mode to turn
off the incoming call ring tone and
other tones so as not to
inconvenience other people.
When the standby
screen is displayed,
hold down (side
key 2) for at least one
second.
ただ今電話に
出ることが
できません
Voice Memo
When you cannot answer calls,
the cell phone can play an
answering message (Japanese)
and record memos.
When the standby
screen is displayed,
hold down for
at least one second.
Page Page
Page
Page
Page
2/14(MON)
2/14(MON)
Manner Mode and Voice Memo
A5509T_kihon_P000~007 05.2.17 4:16 PM ページ 3

4
Do not use the cell phone while driving!
Drive Mode
In Drive Mode, a message that says "ただいま移動中ですので電話に出
ることができません。…
" is played when a call is received, and the cell
phone uses voice memo to record a message.
Holding a cell phone, talking on a cell phone, looking at a cell phone
display to send mail or perform some other operation while driving is
against the law in Japan.
(Revised Traffic Control Law, effective November 1, 2004)
Turn off your cell phone or put it in
Drive Mode while driving.
×Looking at mail on
a cell phone display.
When the standby screen is
displayed, press (side key 2),
use
to select Drive Mode,
and then press (Select).
×Holding a cell phone in
your hand while talking.
ただいま
移動中
です…
A5509T_kihon_P000~007 05.2.17 4:16 PM ページ 4

5
Spam and One-ring Calls
56
If you receive spam:
You can set the mail filters to reject only specific mail or mail indicated
by 未承諾広告※ (unsolicited advertisement), which often tends to be
spam.
The following mail filters are available for
rejecting spam:
・未承諾広告フィルター
(Unsolicited advertisement filter)
・アドレスフィルター (Address filters)
ー指定拒否設定
(for not receiving specific mail)
ー指定受信設定
(for receiving specific mail only)
29
If you receive a call from an unknown phone number:
The red in the Incoming
History indicates that there
was a call which rang three
seconds long or shorter.
Danger!
It may be an attempt to get you to return a call to a service with very high
charges.
Incoming call
03-0002-XXXX
Page
Page
Incom History
01
2/14 16:00
030002XXXX
02
2/13 15:35
030001XXXX
03
2/12 14:48
Tom Daniels
04
2/11 13:30
0900003XXXX
A5509T_kihon_P000~007 05.2.17 4:16 PM ページ 5

Etiquette for Cell Phone Use ⋯⋯⋯⋯⋯⋯⋯⋯⋯⋯⋯⋯⋯⋯⋯⋯⋯⋯⋯⋯⋯⋯⋯⋯⋯⋯1
Cell Phone Features ⋯⋯⋯⋯⋯⋯⋯⋯⋯⋯⋯⋯⋯⋯⋯⋯⋯⋯⋯⋯⋯⋯⋯⋯⋯⋯⋯⋯⋯⋯2
Manner Mode and Voice Memo ⋯⋯⋯⋯⋯⋯⋯⋯⋯⋯⋯⋯⋯⋯⋯⋯⋯⋯⋯⋯⋯⋯⋯⋯⋯3
Checking the Power, Signal Strength, and Battery Level ⋯⋯⋯⋯⋯⋯⋯⋯⋯⋯⋯⋯⋯⋯3
Do not use the cell phone while driving!⋯⋯⋯⋯⋯⋯⋯⋯⋯⋯⋯⋯⋯⋯⋯⋯⋯⋯⋯⋯⋯⋯4
Spam and One-ring Calls ⋯⋯⋯⋯⋯⋯⋯⋯⋯⋯⋯⋯⋯⋯⋯⋯⋯⋯⋯⋯⋯⋯⋯⋯⋯⋯⋯⋯5
Checking the Contents of the Box ⋯⋯⋯⋯⋯⋯⋯⋯⋯⋯⋯⋯⋯⋯⋯⋯⋯⋯⋯⋯⋯⋯⋯⋯8
Names of Parts ⋯⋯⋯⋯⋯⋯⋯⋯⋯⋯⋯⋯⋯⋯⋯⋯⋯⋯⋯⋯⋯⋯⋯⋯⋯⋯⋯⋯⋯⋯⋯⋯9
Charging the Battery Pack ⋯⋯⋯⋯⋯⋯⋯⋯⋯⋯⋯⋯⋯⋯⋯⋯⋯⋯⋯⋯⋯⋯⋯⋯⋯⋯⋯10
Built-in Antenna ⋯⋯⋯⋯⋯⋯⋯⋯⋯⋯⋯⋯⋯⋯⋯⋯⋯⋯⋯⋯⋯⋯⋯⋯⋯⋯⋯⋯⋯⋯⋯11
Turning On Power ⋯⋯⋯⋯⋯⋯⋯⋯⋯⋯⋯⋯⋯⋯⋯⋯⋯⋯⋯⋯⋯⋯⋯⋯⋯⋯⋯⋯⋯⋯11
Learning the Basics⋯⋯⋯⋯⋯⋯⋯⋯⋯⋯⋯⋯⋯⋯⋯⋯⋯⋯⋯⋯⋯⋯⋯⋯⋯⋯⋯⋯⋯⋯12
Configuring Initial Settings ⋯⋯⋯⋯⋯⋯⋯⋯⋯⋯⋯⋯⋯⋯⋯⋯⋯⋯⋯⋯⋯⋯⋯⋯⋯⋯⋯14
Switching the Display Language to English ⋯⋯⋯⋯⋯⋯⋯⋯⋯⋯⋯⋯⋯⋯⋯⋯⋯⋯⋯15
Using Menus⋯⋯⋯⋯⋯⋯⋯⋯⋯⋯⋯⋯⋯⋯⋯⋯⋯⋯⋯⋯⋯⋯⋯⋯⋯⋯⋯⋯⋯⋯⋯⋯⋯16
Indicators ⋯⋯⋯⋯⋯⋯⋯⋯⋯⋯⋯⋯⋯⋯⋯⋯⋯⋯⋯⋯⋯⋯⋯⋯⋯⋯⋯⋯⋯⋯⋯⋯⋯⋯18
Initializing E-mail and EZweb⋯⋯⋯⋯⋯⋯⋯⋯⋯⋯⋯⋯⋯⋯⋯⋯⋯⋯⋯⋯⋯⋯⋯⋯⋯⋯19
Checking Your Phone Number and E-mail Address ⋯⋯⋯⋯⋯⋯⋯⋯⋯⋯⋯⋯⋯⋯⋯⋯20
Changing Your E-mail Address ⋯⋯⋯⋯⋯⋯⋯⋯⋯⋯⋯⋯⋯⋯⋯⋯⋯⋯⋯⋯⋯⋯⋯⋯⋯21
Using Extra Large Characters ⋯⋯⋯⋯⋯⋯⋯⋯⋯⋯⋯⋯⋯⋯⋯⋯⋯⋯⋯⋯⋯⋯⋯⋯⋯23
Personal Identification Numbers and Passwords ⋯⋯⋯⋯⋯⋯⋯⋯⋯⋯⋯⋯⋯⋯⋯⋯⋯25
Making a Call ⋯⋯⋯⋯⋯⋯⋯⋯⋯⋯⋯⋯⋯⋯⋯⋯⋯⋯⋯⋯⋯⋯⋯⋯⋯⋯⋯⋯⋯⋯⋯⋯26
Answering a Call ⋯⋯⋯⋯⋯⋯⋯⋯⋯⋯⋯⋯⋯⋯⋯⋯⋯⋯⋯⋯⋯⋯⋯⋯⋯⋯⋯⋯⋯⋯⋯27
Redialing (Outgoing History/Incoming History) ⋯⋯⋯⋯⋯⋯⋯⋯⋯⋯⋯⋯⋯⋯⋯⋯⋯⋯28
One-ring Calls ⋯⋯⋯⋯⋯⋯⋯⋯⋯⋯⋯⋯⋯⋯⋯⋯⋯⋯⋯⋯⋯⋯⋯⋯⋯⋯⋯⋯⋯⋯⋯⋯29
Turning On Manner Mode ⋯⋯⋯⋯⋯⋯⋯⋯⋯⋯⋯⋯⋯⋯⋯⋯⋯⋯⋯⋯⋯⋯⋯⋯⋯⋯⋯30
Turning On Voice Memo⋯⋯⋯⋯⋯⋯⋯⋯⋯⋯⋯⋯⋯⋯⋯⋯⋯⋯⋯⋯⋯⋯⋯⋯⋯⋯⋯⋯31
Playing a Voice Memo ⋯⋯⋯⋯⋯⋯⋯⋯⋯⋯⋯⋯⋯⋯⋯⋯⋯⋯⋯⋯⋯⋯⋯⋯⋯⋯⋯⋯32
Changing the Incoming Ring Tone ⋯⋯⋯⋯⋯⋯⋯⋯⋯⋯⋯⋯⋯⋯⋯⋯⋯⋯⋯⋯⋯⋯⋯33
Adjusting the Incoming Ring Tone Volume ⋯⋯⋯⋯⋯⋯⋯⋯⋯⋯⋯⋯⋯⋯⋯⋯⋯⋯⋯⋯35
Adjusting the Earpiece Volume during a Call ⋯⋯⋯⋯⋯⋯⋯⋯⋯⋯⋯⋯⋯⋯⋯⋯⋯⋯⋯36
Character Entry Modes ⋯⋯⋯⋯⋯⋯⋯⋯⋯⋯⋯⋯⋯⋯⋯⋯⋯⋯⋯⋯⋯⋯⋯⋯⋯⋯⋯⋯37
Entering Single-byte Alphanumeric Characters ⋯⋯⋯⋯⋯⋯⋯⋯⋯⋯⋯⋯⋯⋯⋯⋯⋯⋯37
Entering E-mail Addresses⋯⋯⋯⋯⋯⋯⋯⋯⋯⋯⋯⋯⋯⋯⋯⋯⋯⋯⋯⋯⋯⋯⋯⋯⋯⋯⋯39
Entering Pictograms ⋯⋯⋯⋯⋯⋯⋯⋯⋯⋯⋯⋯⋯⋯⋯⋯⋯⋯⋯⋯⋯⋯⋯⋯⋯⋯⋯⋯⋯41
Saving a Phone Book Entry ⋯⋯⋯⋯⋯⋯⋯⋯⋯⋯⋯⋯⋯⋯⋯⋯⋯⋯⋯⋯⋯⋯⋯⋯⋯⋯42
Dialing from the Phone Book ⋯⋯⋯⋯⋯⋯⋯⋯⋯⋯⋯⋯⋯⋯⋯⋯⋯⋯⋯⋯⋯⋯⋯⋯⋯⋯44
Editing Phone Book Entries ⋯⋯⋯⋯⋯⋯⋯⋯⋯⋯⋯⋯⋯⋯⋯⋯⋯⋯⋯⋯⋯⋯⋯⋯⋯⋯45
Saving a Phone Number from the Incoming/Outgoing History⋯⋯⋯⋯⋯⋯⋯⋯⋯⋯⋯⋯46
Contents
6
Contents
●Cell Phone Etiquette 1
●Character Input 37
●Cell Phone Basics 2
●Contents 6
●Getting Ready 8
●Making and Answering Calls 26
●Phone Book 42
A5509T_kihon_P000~007 05.2.17 4:16 PM ページ 6

Using E-mail ⋯⋯⋯⋯⋯⋯⋯⋯⋯⋯⋯⋯⋯⋯⋯⋯⋯⋯⋯⋯⋯⋯⋯⋯⋯⋯⋯⋯⋯⋯⋯⋯⋯47
Using C-mail ⋯⋯⋯⋯⋯⋯⋯⋯⋯⋯⋯⋯⋯⋯⋯⋯⋯⋯⋯⋯⋯⋯⋯⋯⋯⋯⋯⋯⋯⋯⋯⋯⋯47
Creating and Sending E-mail Messages ⋯⋯⋯⋯⋯⋯⋯⋯⋯⋯⋯⋯⋯⋯⋯⋯⋯⋯⋯⋯⋯48
Reading Received E-mail Messages ⋯⋯⋯⋯⋯⋯⋯⋯⋯⋯⋯⋯⋯⋯⋯⋯⋯⋯⋯⋯⋯⋯51
Reading an E-mail Message with an Attached Photo ⋯⋯⋯⋯⋯⋯⋯⋯⋯⋯⋯⋯⋯⋯⋯53
Replying to Received E-mail Messages ⋯⋯⋯⋯⋯⋯⋯⋯⋯⋯⋯⋯⋯⋯⋯⋯⋯⋯⋯⋯⋯54
Rejecting Spam ⋯⋯⋯⋯⋯⋯⋯⋯⋯⋯⋯⋯⋯⋯⋯⋯⋯⋯⋯⋯⋯⋯⋯⋯⋯⋯⋯⋯⋯⋯⋯56
Creating and Sending C-mail Messages ⋯⋯⋯⋯⋯⋯⋯⋯⋯⋯⋯⋯⋯⋯⋯⋯⋯⋯⋯⋯⋯57
Reading Received C-mail Messages ⋯⋯⋯⋯⋯⋯⋯⋯⋯⋯⋯⋯⋯⋯⋯⋯⋯⋯⋯⋯⋯⋯58
Camera Image Features⋯⋯⋯⋯⋯⋯⋯⋯⋯⋯⋯⋯⋯⋯⋯⋯⋯⋯⋯⋯⋯⋯⋯⋯⋯⋯⋯⋯59
Photo and Movie Shooting Tips ⋯⋯⋯⋯⋯⋯⋯⋯⋯⋯⋯⋯⋯⋯⋯⋯⋯⋯⋯⋯⋯⋯⋯⋯60
Data Sizes⋯⋯⋯⋯⋯⋯⋯⋯⋯⋯⋯⋯⋯⋯⋯⋯⋯⋯⋯⋯⋯⋯⋯⋯⋯⋯⋯⋯⋯⋯⋯⋯⋯⋯61
Taking a Photo ⋯⋯⋯⋯⋯⋯⋯⋯⋯⋯⋯⋯⋯⋯⋯⋯⋯⋯⋯⋯⋯⋯⋯⋯⋯⋯⋯⋯⋯⋯⋯⋯62
Recording a Movie ⋯⋯⋯⋯⋯⋯⋯⋯⋯⋯⋯⋯⋯⋯⋯⋯⋯⋯⋯⋯⋯⋯⋯⋯⋯⋯⋯⋯⋯⋯63
Viewing Photos/Movies ⋯⋯⋯⋯⋯⋯⋯⋯⋯⋯⋯⋯⋯⋯⋯⋯⋯⋯⋯⋯⋯⋯⋯⋯⋯⋯⋯⋯65
Attaching Photos/Movies to E-mail Messages ⋯⋯⋯⋯⋯⋯⋯⋯⋯⋯⋯⋯⋯⋯⋯⋯⋯⋯66
Photo Mail Service ⋯⋯⋯⋯⋯⋯⋯⋯⋯⋯⋯⋯⋯⋯⋯⋯⋯⋯⋯⋯⋯⋯⋯⋯⋯⋯⋯⋯⋯⋯66
What is EZweb? ⋯⋯⋯⋯⋯⋯⋯⋯⋯⋯⋯⋯⋯⋯⋯⋯⋯⋯⋯⋯⋯⋯⋯⋯⋯⋯⋯⋯⋯⋯⋯67
Accessing Sites ⋯⋯⋯⋯⋯⋯⋯⋯⋯⋯⋯⋯⋯⋯⋯⋯⋯⋯⋯⋯⋯⋯⋯⋯⋯⋯⋯⋯⋯⋯⋯68
Viewing Sites ⋯⋯⋯⋯⋯⋯⋯⋯⋯⋯⋯⋯⋯⋯⋯⋯⋯⋯⋯⋯⋯⋯⋯⋯⋯⋯⋯⋯⋯⋯⋯⋯69
Downloading Chaku-Uta(TM) ⋯⋯⋯⋯⋯⋯⋯⋯⋯⋯⋯⋯⋯⋯⋯⋯⋯⋯⋯⋯⋯⋯⋯⋯⋯70
Bookmarking Frequently Accessed Pages ⋯⋯⋯⋯⋯⋯⋯⋯⋯⋯⋯⋯⋯⋯⋯⋯⋯⋯⋯⋯72
Viewing Bookmarked Pages ⋯⋯⋯⋯⋯⋯⋯⋯⋯⋯⋯⋯⋯⋯⋯⋯⋯⋯⋯⋯⋯⋯⋯⋯⋯⋯73
Checking Charges ⋯⋯⋯⋯⋯⋯⋯⋯⋯⋯⋯⋯⋯⋯⋯⋯⋯⋯⋯⋯⋯⋯⋯⋯⋯⋯⋯⋯⋯⋯73
EZnaviWalk Features ⋯⋯⋯⋯⋯⋯⋯⋯⋯⋯⋯⋯⋯⋯⋯⋯⋯⋯⋯⋯⋯⋯⋯⋯⋯⋯⋯⋯⋯74
Using EZnaviWalk ⋯⋯⋯⋯⋯⋯⋯⋯⋯⋯⋯⋯⋯⋯⋯⋯⋯⋯⋯⋯⋯⋯⋯⋯⋯⋯⋯⋯⋯⋯76
Registering Your Home Location ⋯⋯⋯⋯⋯⋯⋯⋯⋯⋯⋯⋯⋯⋯⋯⋯⋯⋯⋯⋯⋯⋯⋯⋯76
Looking Up the Way Home ⋯⋯⋯⋯⋯⋯⋯⋯⋯⋯⋯⋯⋯⋯⋯⋯⋯⋯⋯⋯⋯⋯⋯⋯⋯⋯77
Changing the Limit Mode Password ⋯⋯⋯⋯⋯⋯⋯⋯⋯⋯⋯⋯⋯⋯⋯⋯⋯⋯⋯⋯⋯⋯78
Setting the Use Limit ⋯⋯⋯⋯⋯⋯⋯⋯⋯⋯⋯⋯⋯⋯⋯⋯⋯⋯⋯⋯⋯⋯⋯⋯⋯⋯⋯⋯⋯80
Turning Limit Mode On and Off ⋯⋯⋯⋯⋯⋯⋯⋯⋯⋯⋯⋯⋯⋯⋯⋯⋯⋯⋯⋯⋯⋯⋯⋯⋯82
Checking the Limit Mode Status of Use ⋯⋯⋯⋯⋯⋯⋯⋯⋯⋯⋯⋯⋯⋯⋯⋯⋯⋯⋯⋯⋯83
Entering Smart Mode ⋯⋯⋯⋯⋯⋯⋯⋯⋯⋯⋯⋯⋯⋯⋯⋯⋯⋯⋯⋯⋯⋯⋯⋯⋯⋯⋯⋯⋯84
Exiting Smart Mode ⋯⋯⋯⋯⋯⋯⋯⋯⋯⋯⋯⋯⋯⋯⋯⋯⋯⋯⋯⋯⋯⋯⋯⋯⋯⋯⋯⋯⋯⋯85
Using the Smart Mode Launcher Menu ⋯⋯⋯⋯⋯⋯⋯⋯⋯⋯⋯⋯⋯⋯⋯⋯⋯⋯⋯⋯⋯86
Saving a Phone Book Entry Using Smart Mode⋯⋯⋯⋯⋯⋯⋯⋯⋯⋯⋯⋯⋯⋯⋯⋯⋯⋯88
One-touch Phone Number Recording ⋯⋯⋯⋯⋯⋯⋯⋯⋯⋯⋯⋯⋯⋯⋯⋯⋯⋯⋯⋯⋯⋯90
One-touch Dialing ⋯⋯⋯⋯⋯⋯⋯⋯⋯⋯⋯⋯⋯⋯⋯⋯⋯⋯⋯⋯⋯⋯⋯⋯⋯⋯⋯⋯⋯⋯91
Creating and Sending E-mail/C-mail Messages in Smart Mode ⋯⋯⋯⋯⋯⋯⋯⋯⋯⋯⋯92
Using the Camera in Smart Mode⋯⋯⋯⋯⋯⋯⋯⋯⋯⋯⋯⋯⋯⋯⋯⋯⋯⋯⋯⋯⋯⋯⋯⋯94
●Other Functions ⋯⋯⋯⋯⋯⋯⋯⋯⋯⋯⋯⋯⋯⋯⋯⋯⋯⋯⋯⋯⋯⋯⋯⋯⋯⋯⋯⋯⋯⋯⋯⋯96
●Troubleshooting ⋯⋯⋯⋯⋯⋯⋯⋯⋯⋯⋯⋯⋯⋯⋯⋯⋯⋯⋯⋯⋯⋯⋯⋯⋯⋯⋯⋯⋯⋯⋯⋯97
●Index ⋯⋯⋯⋯⋯⋯⋯⋯⋯⋯⋯⋯⋯⋯⋯⋯⋯⋯⋯⋯⋯⋯⋯⋯⋯⋯⋯⋯⋯⋯⋯⋯⋯⋯⋯⋯⋯98
Contents
7
●Mail 47
●Camera 59
●EZweb 67
●EZnaviWalk 74
●Limit Mode 78
●Smart Mode 84
A5509T_kihon_P000~007 05.2.17 4:16 PM ページ 7
Checking the Contents of the Box
Getting Ready
8
The box contains the cell phone and accessories.
・Cell phone
・Basic Manual (Japanese)
・Warranty (Japanese)
・Safety Precautions (Japanese)
・
Battery pack (attached to the cell phone)
・Desktop holder ・Toshiba AC adapter 02
目次/準備
通話
文字入力
アドレス帳
メール
カメラ
EZweb
EZナビウォーク
制限モード
スマートモード
English
その他/索引
目次/準備
通話
文字入力
アドレス帳
メール
カメラ
EZweb
EZナビウォーク
制限モード
スマートモード
English
その他/索引
・Instruction Manual (Japanese)
EZ
アプリ
/
バーコードリーダ
ー
目
次
ご利用いただ
く
前
に
電話
機能
アドレス
帳
メ
ー
ル
カメ
ラ
EZw
eb
EZ
ムー
ビー
EZ
ナビウォー
ク
データフォル
ダ
音
/
画面設
定
プライバシー設
定
セキュリテ
ィ
モー
ド
便利な
機能
制限モード
/
スマートモー
ド
文
字
入
力
au
の
ネ
ットワー ク サ ービ
ス
付録
/
索
引
Getting Ready
A5509T_kihon_P008~025 05.2.28 5:16 PM ページ 8

Getting Ready
9
Names of Parts
Earpiece
Display
Warp function key
Camera key/
Soft key 1
Mail key
Memo key/
Clear key
Send key
Keypad,
^key,
-key
Phone book key/Soft key 2
EZ key
Microphone
Power key/End key
Sub display
Speaker
Incoming indicator
(green)
Side key 1
Camera (lens)
Side key 2
Built-in antenna
Battery pack cover
Mobile light
Charge indicator (red)
Application key
(for built-in battery pack)
Flat-type jack for stereo
earphone/microphone and
earphone/microphone with
switch
Macro focus switch
A5509T_kihon_P008~025 05.2.17 4:15 PM ページ 9

The battery pack is not fully charged at the time of
purchase.
Be sure to charge the battery pack before using
the cell phone for the first time.
Getting Ready
10
Charging the Battery Pack
・With its inscription facing up,
insert the connector into the
external power terminal.
②
Charge indicator
④
③
①
Inscription
External power
terminal
Charger contacts
Toshiba AC adapter 02 100 V AC
power outlet
Power plug
Desktop holder
Power terminal
Connector
Inscription
* You can also charge the
battery pack by connecting
the Toshiba AC adapter 02
directly to the A5509T.
Connect the Toshiba AC adapter 02 to the desktop holder.
・With inscription of the connector facing up, connect the Toshiba AC adapter 02 to
the power terminal of the desktop holder.
1
Connect the Toshiba AC adapter 02's power plug to a 100 V
AC power outlet.
2
While the A5509T is closed and the battery pack attached,
insert it into the desktop holder as shown in the figure.
3
Confirm that the charge indicator lights.
4
・Hold the desktop holder while removing the A5509T.
NoteNote
・
Charging: The charge indicator lights red.
・
Charging finished: The charge indicator goes out.
A5509T_kihon_P008~025 05.2.17 4:15 PM ページ 10

The antenna of the A5509T is built into its case.
Getting Ready
11
Built-in Antenna
Turning On Power
・Since the antenna of the A5509T is built into the
case, there is no protruding antenna. Touching or
covering the area around the built-in antenna may
weaken a signal. In particular, do not affix any
stickers or other decorations in the area around the
built-in antenna.
NoteNote
Built-in antenna
ON!ON!
2/14(MON)
Strong Medium Weak
Very weak
Out of range
Full Low Very low
(requires charging)
Empty Charging
Standby screen
1Hold down Sfor at least
one second.
Check the signal strength.
・You cannot receive or make calls if is displayed.
Check the battery level.
Turning Off Power
Hold down Sfor at least one second.
・In rare cases, you may not be able to receive or make calls even though (Out of
range) is not displayed for the signal strength indicator.
NoteNote
A5509T_kihon_P008~025 05.2.17 4:15 PM ページ 11

Getting Ready
12
Learning the Basics
Key Assignment
:Macro focus
switch
H:Incoming History
J:Camera
L:E-mail
Q:
Make and receive calls
0〜9
^、-
:Phone number and
character input
I:Outgoing History
K:Phone Book
M:EZweb
R:Voice memo
setting/delete;
character delete;
operation cancel
S:Power on/off; end
call
P:EZ application
startup
U:Mobile light on/off
T:Manner mode
A5509T_kihon_P008~025 05.2.17 4:15 PM ページ 12

Warp Function Key
Use the up, down, left, and right parts of the key to select items and to move
the cursor. Press the center of the key to confirm a selected item.
Soft Keys
When indications such as the following are displayed at the bottom of the
display, you can press the corresponding soft keys to perform the indicated
operations. The soft key indications vary depending on the screen.
If you lose track of where you are or if you make a
mistake...
Perform one of the following operations when you lose track of where you
are or if you make a mistake while operating the cell phone.
Getting Ready
13
Option
Select
Add
NO Group
/Selects items, and moves the cursor up, down,
left and right.
Confirms the selected item or starts the selected
operation.
Soft key 1 Performs the operation indicated at the bottom
left of the screen.
Center key Performs the operation indicated in the bottom
center of the screen.
Soft key 2 Performs the operation indicated at the bottom
right of the screen.
Returns to the previous screen.
Returns to the standby screen.
A5509T_kihon_P008~025 05.2.17 4:15 PM ページ 13

1When the standby screen is
displayed, press @.
2Press 3
設定しない
(Do Not
Setup).
Getting Ready
14
Configuring Initial Settings
あとで設定する
設定しない
フ
゜
ロフィール
今すぐ設定する
初期設定
基本的な機能の設定を
はじめに行えます
Initial menu
制限モード
電卓機能
セキュリティモード
カレンダー
ボイスレコーダ
アラーム
機能
スマートモード
プロフィール
EZ
ナビウォーク
メモ帳
データフォルダ
Launcher menu
・Even if you do not configure the initial settings, you can still make and answer calls.
・The initial settings include changing the lock number, setting the character size,
setting the Notify Call ID, and setting the call ring tone.
・You need to configure initial settings before using the cell phone for the first time
only. Furthermore, you can also change each of the initial settings later.
・After configuring initial settings, you can switch the display language to English (see
page 15).
・If you select
設定しない
(Do Not Setup), the initial settings are as shown below.
NoteNote
Lock No. 1234 EZWeb Normal
Telephone Normal Character Input Normal
E-mail Normal Notify Call ID ON
C-mail Normal Incoming Call Pattern 1
A5509T_kihon_P008~025 05.2.17 4:15 PM ページ 14

Getting Ready
15
Switching the Display Language to English
1When the standby screen is
displayed, press @.
aThe Launcher menu appears.
2Use Eto select
機能
(Function) and then press
@(選択 [Select]).
3Press 3
画面表示
(Display).
aThe 画面表示 (Display) menu appears.
4Press 5Set Language.
aThe Set Language menu appears.
You can switch the display language for function names and other items to
English.
制限モード
電卓機能
セキュリティモード
カレンダー
ボイスレコーダ
アラーム
データフォルダ
機能
スマートモード
プロフィール
EZ
ナビウォーク
メモ帳
データフォルダ
アクセスサイン
サフ゛テ゛ィスフ゜レイ
照明設定
文字
サイス゛
Set Language
メインテ゛ィスフ゜レイ
画面表示
M3_
各種の画面をお好みの
画面に設定
Japanese
English
Set Language
M35
アフ゜リケーション
音
/ハ゛イフ゛
画面表示
フ゜ライハ゛シー
ユーサ゛ー
補助
時間
/
料金
/
申込
機能
メニュー
M_
通話時間や通話料金に
関する設定
A5509T_kihon_P008~025 05.2.21 10:04 AM ページ 15

Getting Ready
16
Japanese
English
Set Language
M35
Which Do You Use
Alphabet Or
Kanji In Text
Input Mode?
Kanji
Alphabet
5Use Gto select English and
then press @(Select).
6Use Gto select Alphabet and
then press @(Select).
aThe display language is set to English.
Using Menus
Launcher Menu
The Launcher menu provides you with access to various A5509T functions.
The Launcher menu contains the following items.
1When the standby screen is
displayed, press @.
LimitMode
Calculator
Security
Calendar
VoiceRec
Alarm
Function
SmartMode
Profile
EZnaviWalk
Notepad
DataFolder
Voice Recorder
Limit Mode
Calendar
Calculator
Security Mode
Function
Data Folder
Smart Mode
Notepad
Profile
EZnaviWalk
Alarm
LimitMode
Calculator
Security
Calendar
VoiceRec
Alarm
Function
SmartMode
Profile
EZnaviWalk
Notepad
DataFolder
Voice Recorder
Restricted Mode
Calendar
Calculator
Security Mode
Function
Data Folder
Smart Mode
Notepad
Profile
EZnaviWalk
Alarm
Launcher menu
Switching the Display Language to English (continued)
A5509T_kihon_P008~025 05.2.21 10:04 AM ページ 16

Getting Ready
17
Vo Memo/Manner
Sound/Vibrator
Display
Privacy
User Assist
Time/Pay/Apply
Menu
M_
Extra
・If the alert window is displayed on the standby screen, select
Launcher Menu and then press to display the Launcher
menu.
NoteNote
2/14(MON)
Information
Memo 1 Item
Call 1 Item
1
Launcher Menu
Alert Window
2Use Eto select an item.
3Press @(Select).
aThe item selected in the Launcher
menu appears.
VoiceRec
アラーム
DataFolder
Alarm
LimitMode
Calculator
Security
Calendar
SmartMode
Profile
EZnaviWalk
Notepad
Function
Option Menus
An Option menu for performing various related operations will open if you
press Kwhen is displayed in a screen for configuring function
settings, entering characters, or performing other operations.
Option
K(Option)
K(Close)
Option
OK
abAB
Kelly Miller■
Name
Left
20
Symb
Kelly Miller■
Name
Left
20
:
記号
残
24
Close
Select
Cancel Edit
Undo
Paste
Copy/Cut/Etc.
Sign/Opening…
History/Memo…
Loading …
A5509T_kihon_P008~025 05.2.21 10:04 AM ページ 17

Getting Ready
18
Display indicators keep you informed when new e-mail arrives, about the
status of function settings, etc.
Display
Indicators
2/14(MON)
⑥
⑦⑧
①② ③ ⑤④
① ② ③ ④ ⑤
⑥
Sub Display
・The date and time are set automatically.
・The layouts and content of screens appearing in descriptions are only examples for
the purpose of explanation and contain some indicators that cannot appear at the
same time.
NoteNote
Indicator
Description
①Indicates signal strength.
②Indicates battery level.
③
④
Indicates that EZweb is in use.
Indicates a call is in progress.
Indicates an unanswered call.
⑥Indicates the current date and time.
⑦
Indicates that manner mode is turned on.
⑧Indicates that voice memo or manner
mode is turned on.
⑤Indicates received or unread e-mail/
c-mail.
Indicator
Description
①Indicates signal strength.
②Indicates battery level.
③
Indicates that the manner mode is turned on.
⑤
Indicates new mail or an unanswered call.
⑥Indicates the current date and time.
④Indicates that the voice memo or manner
mode is turned on.
A5509T_kihon_P008~025 05.2.23 2:21 PM ページ 18
Table of contents
Other Toshiba Cell Phone manuals

Toshiba
Toshiba T-01B User manual

Toshiba
Toshiba TS 921 User manual

Toshiba
Toshiba TS10 User manual

Toshiba
Toshiba SG4-E01 User manual

Toshiba
Toshiba G500 User manual

Toshiba
Toshiba 803 User manual

Toshiba
Toshiba regza T004 User manual

Toshiba
Toshiba TS705 User manual

Toshiba
Toshiba W45T Installation guide

Toshiba
Toshiba A5517T Installation guide

Toshiba
Toshiba 803 User manual

Toshiba
Toshiba TM5-E01 User manual

Toshiba
Toshiba 2032SP Technical manual

Toshiba
Toshiba Softbank 810T User manual

Toshiba
Toshiba TG01. User manual

Toshiba
Toshiba A5523T Installation guide

Toshiba
Toshiba TX62 User manual

Toshiba
Toshiba PORTEGE G910 User manual

Toshiba
Toshiba TS605 Operating manual

Toshiba
Toshiba W53T Assembly instructions