manuals.online logo
Brands
  1. Home
  2. •
  3. Brands
  4. •
  5. Toshiba
  6. •
  7. Digital Camera
  8. •
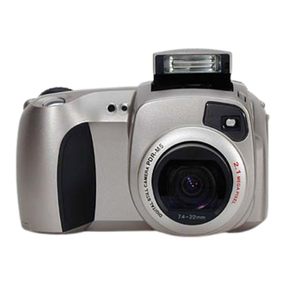
  9. Toshiba PDR-M3 User manual

Toshiba PDR-M3 User manual

TOSHIBA
PDR-M3
DIGITAL
STILL
CAMERA
Introduction
Basic
Photography
Applications
Additional
Information
OWNER’S
MANUAL
To
ensure
that
you
use
the
Toshiba
PDR-M3
Digital
Still
Camera
safely
and
correctly,
read
this
User’s
Guide
carefully
beforehand.
Once
you
have
finished
reading
the
owner's
manual,
keep
it
handy
at
all
times.
To
prevent
fire
or
shock
hazard,
do
not
expose
the
unit
to
rain
or
moisture.
A
CAUTION:
TO
REDUCE
THE
RISK
OF
ELECTRIC
SHOCK.
DO
NOT
REMOVE
COVER
(OR
BACK).
NO
USER-SERVICEABLE
PARTS
INSIDE.
REFER
SERVICING
TO
QUALIFIED
SERVICE
PERSONNEL.
RISQUE
DE
CHOC
ELECTRIQUE
NE
PAS
OUVRIR,
The
graphical
symbols
are
located
on
the
bottom
of
the
case.
This
symbol
is
intended
to
alert
the
user
to
the
presence
of
uninsulated
AN
“dangerous
voltage”
within
the
product's
enclosure
that
may
be
of
sufficient
magnitude
to
constitute
a
risk
of
electric
shock
to
persons.
This
symbol
is
intended
to
alert
the
user
to
the
presence
of
important
operating
A
and
maintenance
(servicing)
instructions
in
the
literature
accompanying
the
appliance.
For
customers
in
the
U.S.A.
DIGITAL
STILL
CAMERA
PDR-M3
Tested
To
Comply
C
With
FCC
Standards
FOR
HOME
OR
OFFICE
USE
FCC
Statement
This
device
complies
with
part
15
of
the
FCC
Rules.
Operation
is
subject
to
the
following
two
conditions:
(1)
This
device
may
not
cause
harmful
interference,
and
(2)
this
device
must
accept
any
interference
received,
including
interference
that
may
cause
undesired
operation.
CAUTION
This
equipment
has
been
tested
and
found
to
comply
with
the
limits
for
a
Class
B
digital
device,
pursuant
to
Part
15
of
the
FCC
Rules.
These
limits
are
designed
to
provide
reasonable
protection
against
harmful
interference
in
a
residential
installation.
2
This
equipment
generates,
uses,
and
can
radiate
radio
frequency
energy
and,
if
not
installed
and
used
in
accordance
with
the
instructions,
may
cause
harmful
interference
to
radio
communications.
However,
there
is
no
guarantee
that
interference
will
not
occur
in
a
particular
installation.
If
this
equipment
does
cause
harmful
interference
to
radio
or
television
reception,
which
can
be
determined
by
turning
the
equipment
off
and
on,
the
user
is
encouraged
to
try
to
correct
the
interference
by
one
or
more
of
the
following
measures:
e
Change
the
direction
of
the
radio
or
TV
antenna.
Move
the
computer
or
the
radio
or
TV. For
example,
if
the
computer
is
to
the
right
of
the
TV,
move
it
to
the
left
of
the
TV.
Or,
move
the
computer
farther
away
from
the
radio
or
TV.
©
Plug
the
computer
into
a
different
outlet.
Don’t
plug
your
radio
or
TV
into
the
same
circuit
as
your
computer.
e
Ensure
that
all
expansion
slots
(on
the
back
or
side
of
the
computer)
are
covered.
Also,
ensure
that
all
metal
retaining
brackets
are
tightly
attached
to
the
computer.
If
these
suggestions
don’t
help,
consult
your
computer
dealer
or
experienced
radio/TV
technician
for
help.
If
you
modify
the
camera
in
any
way,
without
getting
approval
from
Toshiba
Corporation,
your
camera
may
violate
FCC
regulations.
Violation
of
FCC
regulations
may
cause
the
FCC
to
void
your
right
to
use
the
modified
camera.
Only
peripherals
(computer
input
/
output
devices,
terminalis,
printers,
etc.)
certified
to
comply
with
tha
Class
B
limits
may
be
attached
to
the
computer
containing
the
camera.
Operations
with
non-certified
peripherals
are
likely
to
result
in
interference
with
radio
and
TV
reception.
TOSHIBA
AMERICA
INFORMATION
SYSTEMS,
INC.
Imaging
Systems
Division
9740
Irvine
Boulevard,
Irvine,
California
92618-1697
Phone
Number:
(949)583-3000
For
customers
in
Canada
CAUTION
This
Class
B
digital
apparatus
complies
with
Canadian
ICES-003.
Cet
appareil
numérique
de
la
classe
B
est
conforme
4
la
norme
NMB-003
du
Canada.
Bij
dit
produkt
zijn
batterijen
geleverd.
Wanneer
deze
leeg
zijn,
moet
u
ze
niet
weggooien
maar
inleveren
als
KCA
3
2
=
fe]
2
c
O
=
f}
3
Apeay
Bunya
5
AydesBojoug
oseg
Z
AydesBojoud
paoueapy
¢
Warning
...
Contents
..
Using
Your
Camera
Correctly
Using
the
Battery
...
AC
Adapter
....
SmartMedia
Safety
Notes
Preface
..
Nomenclature
...
Using
the
Hand
Strap
....
Using
the
Lens
Cover
...
Charging
the
Battery
..
Loading
the
Battery
...
Connecting
the
AC
Adapter
to
Charge
the
Battery
.
Loading
the
SmartMedia
Loading
the
SmartMedia
.....
Compatible
SmartMedia
Setting
the
Date
and
Time
...
F]
Normal
(Auto)
Mode
.
Tana
Pictures
Using
the
Optical
I}
Viewing
the
Photographed
Image
(Single-Frame
Playback)
EE
Erasing
Unwanted
Images
(Single-Frame
Erase)
............
Switching
Off
(Removing
the
SmartMedia)
.........ssssessee
Adjusting
the
LCD
Monitor
Brightness
Taking
Pictures
Using
the
LCD
Monitor
SET
Button
.
.39
Flash
...
.
39
QUALITY
41
File
Size
......
.
42
Macro
(Close
Up)
Photography
.
Setup
Mode
.......
SHARPNESS
Color
FRAME
No.
BEEP
Self-Timer
Mode
..
Playback
Mode
(Various
Playback
Functions)
...
Playback
Zoom
........
Multi-Frame
Playback
..
(A)
Auto
Play
...
>
Erase
Mode
...
2
Erase
Frame
..
2
Erase
All
............
g
Format
(Initialize)
a
Protect
Mode
(Protecting
Your
Images)
>
Protecting
Single
Frames
and
Removing
the
Protection
..
Q
Removing
Protection
for
All
Frames
AS
Write
Protection
.
3
Manual
Mode
.......
>
Setting
the
White
Balance
=
Exposure
Compensation
.
Setting
the
Flash
Correction
Setting
the
AE
..........
Setting
the
External
Flash
Synchronization
.
Filter
Functions
(Editing
Images
During
Playback)
Soft
Focus
Cross
Fitter
....
System
Expansion
Options
...........ssssscssesssssessssessscssecessneeneerseroeenses
Using
a
TV
to
Take
Pictures
and
View
Images
..
Transferring
Images
to
a
PC
(PC
Mode)
za
Warning
Displays
.
o>
Viewfinder
LED
3
&
Troubleshooting
..
8
=
Specifications
Q
z
Accessories
Guide
.
Glossary
Be
sure
to
read
this
information
in
conjunction
with
Before
You
Use
This
Product
“Safety
Notes”
(=>P.11)
to
ensure
that
you
use
your
camera
correctly.
H
Places
to
Avoid
Do
not
store
or
use
the
camera
in
the
following
types
of
locations:
@
Places
subject
to
strong
vibrations
@
Places
subject
to
strong
magnetic
fields
(such
as
places
near
motors,
transformers
or
magnets)
@
For
long
periods
in
contact
with
chemicals
such
as
pesticides
or
next
to
rubber
or
vinyl
products
H
Do
not
expose
the
camera
to
sand.
The
PDR-MS
is
particularly
adversely
affected
by
sand.
In
sandy
locations
such
as
beaches
or
deserts,
or
in
locations
where
there
is
wind
borne
sand,
ensure
that
the
camera
is
not
exposed
to
sand.
This
can
cause
faults
that
may
be
irreparable.
H
Notes
on
Condensation
Due
to
a
sudden
change
in
temperature,
such
as
the
move
from
a
cold
location
to
a
warm
one,
water
droplets
(condensation)
may
form
on
the
inside
of
the
camera
or
on
the
lens.
When
this
occurs,
switch
the
camera
off
and
wait
an
hour
before
using
the
camera.
Condensation
may
also
form
on
the
SmartMedia
card.
In
this
event,
remove
the
=
SmartMedia
and
wait
a
short
time
before
using
it
again.
W
Cleaning
Your
Camera
©
Use
a
blower
brush
to
remove
dust
from
the
lens
and
LCD
surface
and
then
wipe
lightly
with
a
soft,
dry
cloth.
If
any
soiling
remains,
apply
a
small
amount
of
lens
cleaning
liquid
to
a
piece
of
lens
cleaning
paper
and
wipe
gently.
®
Do
not
scratch
hard
objects
against
the
lens,
LCD
monitor
screen
or
viewfinder
as
these
surfaces
are
easily
damaged.
©
Clean
the
body
of
the
camera
with
a
soft
dry
cloth.
Do
not
use
volatile
substances
such
as
thinners,
benzine
or
insecticide,
as
these
may
react
with
camera
body
and
cause
deformation
or
remove
the
coating.
H
Using
the
Camera
Overseas
When
travelling
overseas,
do
not
place
your
camera
in
the
check-in
baggage.
Baggage
handling
at
airports
may
subject
baggage
to
violent
shocks,
and
the
camera
may
be
damaged
internally
even
when
no
external
damage
is
visible.
Using
the
Battery
Before
you
use
the
camera,
read
the
battery
instructions
and
take
care
to
observe
the
safety
precautions
provided
in
the
instructions.
The
PDR-M3
camera
uses
a
rechargeable
lithium-ion
battery.
Note
the
points
below
when
using
this
battery.
Read
the
“Safety
Notes”
carefully
to
ensure
that
you
use
the
battery
correctly.
*
When
shipped,
the
NP-100
is
not
fully
charged.
Always
charge
the
battery
before
using
it.
E
Battery
Features
@
The
battery
gradually
loses
its
charge
even
when
not
used.
Use
a
battery
that
has
been
charged
recently
(in
the
last
day
or
two)
to
take
pictures.
©
To
maximize
the
battery
life,
switch
the
camera
off
as
often
as
possible
when
it
is
not
being
used.
@
In
cold
locations,
the
number
of
frames
that
can
be
shot
decreases.
Take
along
a
spare
fully
charged
battery.
You
can
also
increase
the
amount
of
power
produced
by
putting
the
battery
in
your
pocket
or
another
warm
place
to
heat
it
and
then
loading
it
into
the
camera
just
before
you
take
a
picture.
If
you
are
using
a
heating
pad,
do
not
place
the
battery
directly
against
the
pad.
i
Charging
the
Battery
@
The
battery
can
be
charged
using
the
PDR-ACM1
AC
Adapter
supplied
with
the
PDR-M3.
The
battery
takes
approximately
7
hours
to
charge.
If
you
use
the
BC-100
Battery
Charger
(sold
separately),
the
battery
can
be
charged
in
approximately
2.5
hours.
@
This
rechargeable
battery
does
not
need
to
be
fully
discharged
or
exhausted
before
being
charged.
@
The
battery
may
feel
warm
after
it
has
been
charged
or
immediately
after
being
used.
This
is
perfectly
normal.
@
The
battery
can
be
charged
at
temperatures
between
0°C
and
+40°C
(+32°F
and
+104°F),
but
should
be
charged
between
+10°C
and
+30°C
(+32°F
and
+86°F)
to
obtain
maximum
battery
performance.
®
Do
not
recharge
a
fully
charged
battery.
Battery
Life
At
normal
temperatures,
this
battery
can
be
used
at
least
300
times.
If
the
battery
runs
out
quickly,
this
indicates
that
the
battery
has
reached
the
end
of
its
effective
life
and
should
be
replaced.
W
To
ensure
that
you
obtain
optimum
battery
performance:
@
Always
keep
the
battery
contacts
clean.
©
Store
the
battery
in
a
cool,
dry
place.
Storing
the
battery
for
long
periods
in
a
hot
location
can
shorten
the
battery
life.
If
the
battery
is
used
for
a
long
period,
the
camera
body
and
the
battery
itself
will
become
warm.
This
is
normal
and
is
not
a
malfunction.
Use
the
AC
adapter
supplied
with
the
camera
if
you
are
taking
picture
or
viewing
images
for
a
long
period
of
time.
C
Adapter
Use
only
the
PDR-ACM1
AC
Adapter
(supplied)
with
your
PDR-M3
Digital
Still
Camera.
The
use
of
an
AC
adapter
other
than
the
PDR-ACM1
could
result
in
damage
to
your
PDR-
M3
Digital
Still
Camera.
@
For
indoor
use
only.
©
Firmly
push
the
connection
cord
plug
into
the
DC
IN
socket
on
the
camera.
©
Before
removing
the
connection
cord
from
the
camera's
DC
IN
socket,
switch
the
camera
off
and
grasp
the
plug
as
you
pull
it
out.
(Do
not
pull
on
the
cord.)
®
Do
not
use
this
camera
with
devices
other
than
those
specified
for
use
with
this
camera.
©
The
camera
may
at
times
become
warm
during
use.
This
is
normal
and
does
not
indicate
a
fault.
©
Do
not
use
the
camera
in
very
hot
and
humid
locations.
®
Do
not
drop
the
camera
or
subject
it
to
strong
impacts.
®
Buzzing
or
whirring
noises
may
come
from
inside
the
camera.
This
is
normal
and
does
not
indicate
a
fault.
©
Do
not
use
the
camera
near
a
radio
as
it
could
interfere
with
radio
signal
reception.
©
Ensure
that
you
do
not
touch
the
AC
adapter
against
any
other
metal
object
as
this
could
cause
a
short
circuit.
©
Do
not
plug
the
AC
adapter
into
the
DIGITAL
socket
as
this
could
damage
your
camera.
®
Do
not
plug
in
the
AC
adapter
while
you
are
using
the
battery.
Switch
the
camera
off
first.
©
Do
not
load
the
battery
while
you
are
using
the
AC
adapter.
Switch
the
camera
off
first.
e
If
you
disconnect
the
AC
adapter
while
there
is
no
battery
loaded
in
the
camera,
the
date
and
time
information
will
be
lost.
In
this
event,
reset
the
date
and
time.
(™pP.25)
©
If
you
plug
in
the
AC
adapter
when
there
is
no
battery
loaded
in
the
camera,
the
viewfinder
lamp
may
flash
red.
This
does
not
indicate
a
fault,
however.
The
SmartMedia
card
supplied
with
your
PDR-M3
camera
is
a
new
image
recording
medium
developed
especially
for
use
in
digital
cameras.
Each
SmartMedia
card
contains
a
built-in
semiconductor
memory
chip
(NAND
flash
memory)
which
is
used
for
storing
digital
image
data.
Because
the
data
is
stored
electronically,
the
stored
image
data
can
be
erased
from
the
card
and
new
data
recorded.
Storing
Data
In
the
situations
listed
below,
recorded
data
may
be
erased
(destroyed).
Please
note
that
Toshiba
Corporation
accepts
no
responsibility
whatsoever
for
the
loss
(destruction)
of
recorded
data.
*
When
the
SmartMedia
is
used
incorrectly
by
the
owner
or
a
third
party
*
When
the
SmartMedia
is
exposed
to
static
electricity
or
electrical
noise
*
When
the
SmartMedia
cover
is
opened
or
the
SmartMedia
removed
and
the
camera
is
then
switched
off
during
data
recording,
during
data
erasing
(SmartMedia
formatting)
or
during
frame
advance
when
images
are
being
played
back.
Back
up
important
data
onto
another
medium
(MO
disk,
floppy
disk,
hard
disk,
etc.).
H
Handling
SmartMedia
©
When
inserting
the
card
into
the
camera,
hold
the
SmartMedia
straight
as
you
push
it
in.
©
Never
remove
the
SmartMedia
or
switch
the
camera
off
during
data
recording,
during
data
erasing
(SmartMedia
formatting)
or
during
frame
advance
when
images
are
being
played
back.
These
actions
could
result
in
damage
to
the
SmartMedia.
@
Use
only
the
SmartMedia
specified
for
use
with
the
PDR-M3.
The
use
of
other
SmartMedia
could
damage
the
camera.
@
SmartMedia
are
precision
electronic
devices.
Do
not
bend,
drop,
or
subject
SmartMedia
to
excessive
shocks.
®
Do
not
use
or
store
SmartMedia
in
environments
likely
to
be
affected
by
strong
static
electricity
or
electrical
noise.
©
Do
not
use
or
store
SmartMedia
in
very
hot,
humid
or
corrosive
environments.
@
Take
care
not
to
touch
the
SmartMedia’s
contact
area
or
allow
the
area
to
become
soiled.
Use
a
dry
lint-free
cloth
to
wipe
away
any
soiling
that
does
occur.
©
To
avoid
damage
caused
by
static
electricity,
always
use
the
special
static-free
case
provided
during
transportation
or
storage,
or
keep
the
SmartMedia
in
a
storage
case
if
available.
®
Do
not
carry
SmartMedia
in
locations
such
as
a
trouser
pocket.
This
could
subject
the
SmartMedia
to
excessive
force
when
you
sit
down,
thereby
damaging
the
SmartMedia.
©
The
SmartMedia
may
feel
warm
when
it
is
removed
from
the
camera
after
extended
periods
of
picture
taking
or
image
viewing.
This
is
normal
and
does
not
indicate
a
fault.
©
inserting
a
SmartMedia
that
is
charged
with
static
electricity
into
your
camera
may
result
in
a
camera
malfunction.
if
this
occurs,
switch
the
camera
off
and
then
on
again.
g
@
Affix
the
label
onto
the
designated
area
of
the
card.
Do
not
use
third-party
labels
as
this
can
lead
to
problems
when
the
card
is
inserted
or
removed.
@
When
you
attach
the
label,
take
care
that
it
does
not
cover
any
of
the
write-protect
area.
H
Using
SmartMedia
with
a
PC
@
If
you
intend
to
take
photos
using
a
SmartMedia
that
has
been
used
on
a
PC,
format
the
SmartMedia
on
your
camera.
When
you
format
a
SmartMedia
in
the
camera,
a
folder
(directory)
called
“IM01TOSH”
is
automatically
created.
Image
data
is
then
recorded
in
this
folder.
@
Do
not
change
or
delete
the
folder
(directory)
names
or
file
names
on
the
SmartMedia
from
your
PC
as
this
will
make
it
impossible
to
use
the
SmartMedia
in
your
camera.
è
Always
use
the
camera
to
erase
image
data
on
a
SmartMedia.
@
To
edit
image
data,
copy
the
image
data
to
the
computer's
hard
disk
and
then
edit
the
copied
data.
©
To
record
or
erase
image
data
on
a
SmartMedia
card
from
your
PC,
or
to
read
images
recorded
on
the
SmartMedia
using
your
PDR-M3
camera
from
your
PC,
use
the
PICTURE
SHUTTLE
Data
Transfer
Software
provided
with
the
Interface
kit.
W
Write
Protection
=
©
Affix
a
write-protect
sticker
over
the
write-protect
area
on the
SmartMedia
prevent
recording
of
data
to
or
the
erasure
of
data
from
the
SmartMedia.
@
When
attaching
the
sticker,
ensure
that
it
is
within
the
write-protect
area
and
that
it
is
firmly
stuck
flush
to
the
card.
Do
not
use
third-party
labels
as
this
can
lead
to
problems
when
the
card
is
inserted
or
removed.
@
The
write
protection
may
not
function
if
the
write-protect
sticker
becomes
soiled.
Use
a
soft
dry
cloth
to
wipe
away
any
soiling.
i
SmartMedia
Specifications
Type
Image
memory
card
for
digital
cameras
(SmartMedia)
2MB,
4MB,
8MB,
16MB,
(32MB)
Type
of
memory
NAND
flash
memory
Operating
voltage
3.3V
Operating
conditions
Temperature:
0°C
to
40°C;
Humidity:
80%
or
less
(condensation
free)
Dimensions
37mm
x0.76mm
x
45mm
(1.45in.
x
0.03in.
X
1.77in.)
(WxH
x
D)
Accessories
Anti-static
case
(1),
labels
(2),
write-protect
stickers
(4)
Safety
precautions
Please
read
these
safety
precautions
carefully
before
using.
These
instructions
contain
valuable
information
on
safe
and
proper
use
that
will
prevent
harm
and
damage
to
the
operator
and
other
persons.
Make
sure
you
fully
understand
the
following
contents
(displays)
before
proceeding
to
the
main
manual.
E
Display
definitions
Display
Meaning
A
WARNING
|
This
indicates
improper
use
may
cause
grave
bodily
harm,
ZN
CAUTION
This
indicates
improper
use
may
cause
bodily
injury*'
or
property
damage.
“1:
Injury
meaning
treatment
not
requiring
hospitalization,
or
prolonged
treatment.
ÆA
WARNING
When
a
fault
arises,
switch
the
camera
off
and
then
remove
the
battery
and
disconnect
the
AC
adapter.
Continued
use
of
the
camera
when
it
is
emitting
smoke,
emitting
any
Co
unusual
odor,
or
is
in
any
other
abnormal
state
can
cause
a
fire
or
electric
shock.
Unplug
fom
power
®@
Contact
your
dealer.
Socket.
Do
not
use
in
areas
near
water.
This
could
cause
fire
or
electric
shock.
EN
Please
take
special
care
during
rain,
snow,
on
the
beach
or
near
the
Ng)
shore.
D,
®
Contact
your
dealer.
Keep
dry
ÆA
WARNING
2
Do
not
place
the
camera
on
an
unstable
surface.
Do
not
place
objects
on
the
camera.
This
can
cause
the
camera
to
fall
or
tip
over
and
cause
injury.
Never
attempt
to
modify
or
disassemble
the
camera.
(Never
open
the
casing.)
Do
not
use
the
camera
when
it
has
been
dropped
or
the
casing
BO
is
damaged.
This
can
cause
a
fire
or
electric
shock.
A
Do
not
i
@
Contact
your
dealer.
pocscen
Do
not
use
the
camera
in
the
bath
or
shower.
This
can
cause
a
fire
or
electric
shock.
(NS
Do
not
use
in
the
bath
or
shower.
Never
attempt
to
take
pictures
while
in
motion.
Do
not
use
the
camera
while
you
are
walking
or
operating
a
moving
car
or
other
vehicle.
This
can
result
in
your
falling
down
or
being
involved
in
a
traffic
accident.
Do
not
touch
Power
or
TV
antenna
cords
during
a
thunderstorm.
This
can
cause
an
electric
shock
due
to
induced
current
from
the
lightning
discharge.
S
S
Use
only
the
batteries
or
AC
adapter
specified
for
use
with
this
camera.
The
use
of
other
power
sources
can
cause
a
fire.
ÆA
CAUTIONS
Do
not
use
or
leave
this
camera
in
locations
severely
affected
by
oil
fumes,
steam,
humidity
or
dust.
This
can
cause
a
fire
or
electric
shock.
Do
not
leave
this
camera
in
places
subject
to
extremely
high
temperatures.
Do
not
leave
the
camera
in
locations
such
as
a
sealed
vehicle
or
in
direct
sunlight.
This
can
cause
a
fire.
12
ÆA
CAUTIONS
Do
not
allow
foreign
matters
such
as
paper-clips,
etc.
to
enter
the
unit
and
do
not
spill
liquid
such
as
coffee
over
the
unit.
This
could
cause
electric
shock
and
defects.
Should
any
foreign
matter
comes
in
the
unit,
turn
the
power
off,
remove
the
batteries
and
contact
your
dealer.
Do
not
look
at
the
sun
through
the
camera
finder.
This
may
cause
soreness
of
the
eyes.
Do
not
move
the
camera
while
the
AC
adapter
is
stili
connected.
This
can
damage
the
power
cord
or
cable
and
cause
a
fire
or
electric
shock.
Do
not
apply
severe
impacts
to
the
LCD
screen.
if
applied,
the
glass
on
the
screen
may
be
shatter
and
the
intemal
fluid
may
come
out.
if
the
fluid
enters
your
eyes
or
spills
on
your
body
or
clothing,
immediately
rinse
with
fresh
water.
When
the
fluid
enters
your
eyes,
immediately
consult
a
physician
to
receive
treatment.
©
OO)
SO
Do
not
cover
or
wrap
the
camera
or
the
AC
adapter
in
a
cloth
or
quilt.
This
can
cause
heat
to
build
up
and
distort
the
casing
or
cause
a
fire.
Remove
the
battery
and
disconnect
the
AC
adapter
when
you
are
cleaning
the
camera
or
if
you
intend
to
leave
the
camera
unused
for
a
long
period.
Failure
to
do
so
can
cause
a
fire
or
electric
shock.
Do
not
use
the
flash
close
to
anyone's
eyes.
This
can
cause
temporary
damage
to
the
person's
eyesight.
13
AJA
You
must
read
the
separate
“Safety
Notes”
and
instructions
provided
with
the
NP-100
before
using
your
PDR-M3
camera.
W
Test
Shots
Prior
to
Photography
‘
For
particularly
important
photographs
(such
as
weddings
and
overseas
trips),
always
take
a
test
photograph
to
check
that
the
camera
is
functioning
normally.
*
Toshiba
Corporation
cannot
accept
liability
for
any
incidental
losses
(such
as
the
costs
of
photography
or
the
loss
of
income
from
photography)
incurred
as
a
result
of
faults
with
this
product.
H
Copyright
Images
recorded
using
your
digital
camera
system
cannot
be
used
in
ways
that
infringe
copyright
laws
without
the
consent
of
the
owner,
unless
intended
only
for
personal
use.
Note
that
some
restrictions
apply
to
the
photographing
of
stage
performances,
entertainments
and
exhibits,
even
when
intended
purely
for
personal
use.
Users
are
also
asked
to
note
that
the
transfer
of
memory
cards
containing
images
or
data
protected
under
copyright
laws
is
only
permissible
within
the
restrictions
imposed
by
those
copyright
laws.
E
Handling
Your
Digital
Camera
This
camera
contains
precision
electronic
components.
To
ensure
that
images
are
recorded
correctly,
do
not
subject
the
camera
to
impacts
or
shocks
while
an
image
is
being
recorded.
Wi
Trademark
Information
e
IBM
PC/AT
is
a
registered
trademark
of
Intemational
Business
Machines
Corp.
of
the
USA.
@
Macintosh
is
a
trademark
of
Apple
Computer,
Inc.
@
MS-DOS
and
Windows
are
registered
trademarks
of
the
Microsoft
Corporation
of
the
U.S.
registered
in
the
USA
and
other
countries.
Windows
is
an
abbreviated
term
referring
to
the
Microsoft
Windows
Operating
System.
@
SmartMedia
is
a
trademark
of
Toshiba
Corporation.
@
Other
company
or
product
names
are
trademarks
or
registered
trademarks
of
the
respective
companies.
Accessories
Check
the
items
shown
below
before
using
your
camera.
@NP-100
Rechargeable
Battery
(1)
Supplied
with
Operating
Instructions
(1)
@
Sample
Image
Memory
Card
(Smart
Media)
(4MB,
3.3V)
(1)
Supplied
with:
*
Anti-static
case
(1)
*
Index
labels
(1set)
e
Write-protect
stickers
(1set)
@
Hand
Strap
(1)
@
PDR-ACM1
AC
Adapter
(1)
*The
shape
of
the
plug
on
the
AC
adapter
depends
on
the
country
use.
@
Video
Cable
(approx.
1.5m
(4.9
ft.),
mini-plug
(3.5mm
dia.)
to
pin-plug
cable)
(1)
@
Interface
Set
(1)
*
CD-ROM
(Image
Expert
for
Windows,
Data
Transfer
Software
PICTURE
SHUTTLE/EZtouch
for
Macintosh)
(1)
e
Serial
Cable
for
IBM
PC/AT
Compatible
Computer
(1)
*
Serial
Cable
for
Macintosh
Computer
(1)
*
Noise
suppression
core
(1)
+
Install
Manual
for
Windows
and
Macintosh
(1set)
@
Owner's
Manual
(this
manual)
(1)
Main
Features
@
1.5
mitlion-pixel
CCD
for
high-quality
images
@
1.8-inch
LCD
monitor
@
Wide-angle
lens
with
macro
capability
@
Easy-to-use
3X
zoom
lens
with
auto
focus
@
Automatic
flash
with
flash
control
sensor
@
SmartMedia
compatible
@
Selectable
quality
and
image
size
(no.
of
pixels)
@
PC
mode
for
downloading
images
to
computers
@
Automatic
time/date
recording
@
Filter
function
allows
easy
access
to
simple
image
effects
(soft
focus
and
cross
filter)
wherever
you
are
@
Manual
settings
for
beautiful
close-up
shots
and
perfect
pictures
against
evening
backgrounds
@
Compatible
with
Exif
version
2.1
so
that
images
can
be
used
directly
on
most
PC-based
image
processing
software
*
The
PDR-FLP1
Floppy
Disk
Adapter
makes
using
the
PDR-M3
with
a
PC
even
easier.
Shutter
button
aa
Flash
control
sensor
._—__
Strap
mount
Self-timer
lamp
Viewfinder
window
~—
DC
IN
5V
(power
input)
socket
VIDEO
OUT
(video
output)
socket
=
DIGITAL
(digital
input/output)
socket
Viewfinder
LED
Viewfinder
a?
/
SET
button
i
/
POWER
switch
Eyesight
£
/
ME
adjustment
lever
ao
VA
NU/EXE
(execute)
button*
LS
Direction(»
4a
Y),
y4
Zoom
button
and
indicator*
Mode
dial
Lens
LCD
monitor
——
<
2AF
SmartMedia
cover
DISP
(display)
button
Tripod
mount
a
_
A
Strap
mount
SmartMedia
cover
release
SmartMedia
holder
Battery
cover
*Shown
as
(MENU/EXE),
<®),
etc.
on
the
LCD
monitor.
16
Pe
Sa
o
Protect
mode
y
f
PS
Setup
mode
—————
>
Seur
p:
Erase
mode
Self-Timer
note
9
i
—
Playback
mode
Manual
mode
Normal
(Auto)
mode
[
Setu
]:
Setup
mode
(™P45)
In
this
mode,
you
can
set
the
sharpness,
color,
frame
number
memory,
buzzer
tone
and
date
and
time
settings.
[
©)
}:
Self-Timer
mode
(=>P49)
This
mode
allows
you
to
take
pictures
using
a
10-second
timer.
[
@&
}:
Manual
mode
(=>P60)
Manual
mode
allows
you
to
check
the
photographed
image
before
it
is
recorded.
This
mode
also
allows
you
to
select
the
white
balance,
brightness
(exposure),
flash
brightness,
auto
exposure
(AE)
and
external
flash
synchronization
settings.
Normal
(Auto)
mode
(=>P26)
This
is
a
simple
and
convenient
photography
mode
in
which
the
camera
automatically
controls
the
exposure
(a
combination
of
shutter
speed
and
aperture
setting)
to
suit
the
shooting
conditions.
This
mode
is
ideal
for
general
photography
where
you
are
not
trying
to
achieve
any
particular
effect.
Playback
mode
(™P30,
50)
In
addition
to
normal
single-frame
playback,
Playback
mode
allows
multi-
frame
playback,
automatic
playback
and
playback
zoom.
Erase
mode
(™P31,
54)
In
Erase
mode,
you
can
erase
one
frame,
erase
all
frames
or
format
(initialize)
a
SmartMedia
card.
Protect
mode
(™P57)
Protect
mode
allows
you
to
protect
one
frame
and
to
remove
the
protection
from
one
frame
or
ail
the
frames.
PC
mode
(™
P74)
You
can
use
PC
mode
to
transfer
your
images
to
a
personal
computer.
1?
Use
the
hand
strap
to
avoid
dropping
the
camera
when
you
are
taking
photographs.
Attaching
the
Hand
Strap
{l
:
Pass
the
end
of
the
strap
through
the
strap
mount
on
the
camera.
Pass
the
end
of
the
loop
of
thin
cord
through
the
strap
mount.
Pass
the
strap
through
the
loop
and
pull.
Pass
the
other
end
of
the
strap
through
the
loop
of
thin
cord
and
pull
the
strap
tight.
Using
the
Hand
Strap
Wear
the
strap
around
your
wrist.
To
avoid
dropping
the
camera
while
shooting,
loop
the
hand
strap
over
your
wrist
and
then
hold
the
camera
by
the
grip.
Use
the
lens
cover
to
protect
the
lens.
Attaching
the
Lens
Cover
A
Attach
the
lens
cover
to
the
{l
i
strap
mount.
Thread
the
end
of
the
lens
cover
cord
through
the
strap
mount.
Pull
the
lens
cover
through.
Push
the
lens
cover
through
the
lens
cover
cord
loop
formed
in
step
Í
and
then
pull
the
loop
tight.
Fit
the
lens
cover
onto
the
lens.
Before
you
take
a
picture,
remove
the
lens
cover.
VIMPORTANT
Note
that
the
lens
extends
if
you
switch
the
camera
on
in
a
photography
mode
(Normal,
Manual
or
Self
Timer)
or
switch
to
a
photography
mode
from
one
of
the
other
modes.
Always
remove
the
lens
cover
beforehand.
19
To
use
your
PDR-M3
Digital
Camera,
you
need
an
NP-100
rechargeable
battery
(included)
or
the
PDR-ACM1
AC
Adapter
(included).
Loading
the
Battery
Use
the
procedure
below
to
load
the
NP-100
rechargeable
battery
into
the
camera.
Open
the
battery
cover.
@
Slide
the
battery
cover
outwards.
@
Open
the
battery
cover.
Insert
the
battery.
@
Insert
the
battery
with
the
arrow
[Y]
on
the
end
pointing
downwards.
®
Push
the
battery
in
until
it
stops.
Close
the
battery
cover.
Check
that
the
battery
cover
is
firmly
closed.
IMPORTANT
‘
The
battery
is
not
fully
charged
at
shipment.
You
must
charge
the
battery
before
you
use
it.
-
When
replacing
the
battery,
always
switch
the
camera
off
beforehand.
-
If
you
remove
the
battery
without
switching
the
camera
off,
the
date
and
time
revert
to
the
default
settings.
(=P.25)
+
Check
the
date
and
time
settings
after
you
replace
the
battery.
(=»P.25)
:
Refer
also
to
“Battery”
(=P.7)
and
to
the
instructions
provided
with
the
NP-100.

Other manuals for PDR-M3

1

Other Toshiba Digital Camera manuals

Toshiba BU302MG User manual

Toshiba

Toshiba BU302MG User manual

Toshiba PDRM5 - PDR M5_duplicate Web Camera Mounting instructions

Toshiba

Toshiba PDRM5 - PDR M5_duplicate Web Camera Mounting instructions

Toshiba PDR-M1 User manual

Toshiba

Toshiba PDR-M1 User manual

Toshiba PDR-M11 User manual

Toshiba

Toshiba PDR-M11 User manual

Toshiba IK-M50H User manual

Toshiba

Toshiba IK-M50H User manual

Toshiba IK-HR1D User manual

Toshiba

Toshiba IK-HR1D User manual

Toshiba BU406M User manual

Toshiba

Toshiba BU406M User manual

Toshiba PDR-3320 User manual

Toshiba

Toshiba PDR-3320 User manual

Toshiba PDR-2300 User manual

Toshiba

Toshiba PDR-2300 User manual

Toshiba Sora PDR-T10 User manual

Toshiba

Toshiba Sora PDR-T10 User manual

Toshiba IK-WB01A User manual

Toshiba

Toshiba IK-WB01A User manual

Toshiba BU238M User manual

Toshiba

Toshiba BU238M User manual

Toshiba PDR-3320 Mounting instructions

Toshiba

Toshiba PDR-3320 Mounting instructions

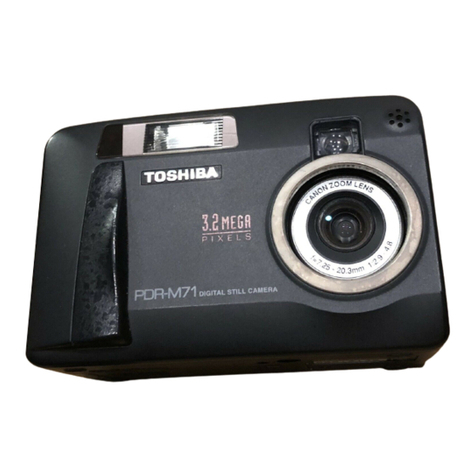
Toshiba PDR-M71 User manual

Toshiba

Toshiba PDR-M71 User manual

Toshiba PDR-M65 User manual

Toshiba

Toshiba PDR-M65 User manual

Toshiba PDR-2 User manual

Toshiba

Toshiba PDR-2 User manual

Toshiba PDR-M81 User manual

Toshiba

Toshiba PDR-M81 User manual

Toshiba PDR-3300 - 3.2MP Digital Camera User manual

Toshiba

Toshiba PDR-3300 - 3.2MP Digital Camera User manual

Toshiba PDR-M21 Mounting instructions

Toshiba

Toshiba PDR-M21 Mounting instructions

Toshiba PDR-M60 User manual

Toshiba

Toshiba PDR-M60 User manual

Toshiba PDR-M25 - 2MP Digital Camera User manual

Toshiba

Toshiba PDR-M25 - 2MP Digital Camera User manual

Toshiba PDR-M61 Mounting instructions

Toshiba

Toshiba PDR-M61 Mounting instructions

Toshiba PDR-M81 Mounting instructions

Toshiba

Toshiba PDR-M81 Mounting instructions

Toshiba PDR-M3 User manual

Toshiba

Toshiba PDR-M3 User manual

Popular Digital Camera manuals by other brands

Vivitar Vivicam 3305 user manual

Vivitar

Vivitar Vivicam 3305 user manual

Nikon Z 7 user manual

Nikon

Nikon Z 7 user manual

Canon CANON EOS 1100D instruction manual

Canon

Canon CANON EOS 1100D instruction manual

Sony DSC-N1 Read this first

Sony

Sony DSC-N1 Read this first

GE C1440W Bruksanvisning

GE

GE C1440W Bruksanvisning

Brickhouse Security BKC-1080DVR user guide

Brickhouse Security

Brickhouse Security BKC-1080DVR user guide

Pentax Optio S10 operating manual

Pentax

Pentax Optio S10 operating manual

HP SW450 quick start guide

HP

HP SW450 quick start guide

Canon PowerShot A450 Basic user's guide

Canon

Canon PowerShot A450 Basic user's guide

Olympus C - 2 5 0 0 L Brochure & specs

Olympus

Olympus C - 2 5 0 0 L Brochure & specs

Canon IXUS850 IS System map

Canon

Canon IXUS850 IS System map

Sanyo VPC-E2100 instruction manual

Sanyo

Sanyo VPC-E2100 instruction manual

Kobian CyperPix E450V user guide

Kobian

Kobian CyperPix E450V user guide

Technaxx TX-164 user manual

Technaxx

Technaxx TX-164 user manual

Andor Technology iKon-XL SO quick start guide

Andor Technology

Andor Technology iKon-XL SO quick start guide

Pentax SP1000 user guide

Pentax

Pentax SP1000 user guide

Sony ZV-E10 quick start guide

Sony

Sony ZV-E10 quick start guide

Sony Cyber-shot DSC-RX100 instruction manual

Sony

Sony Cyber-shot DSC-RX100 instruction manual

manuals.online logo
manuals.online logoBrands
  • About & Mission
  • Contact us
  • Privacy Policy
  • Terms and Conditions

Copyright 2025 Manuals.Online. All Rights Reserved.