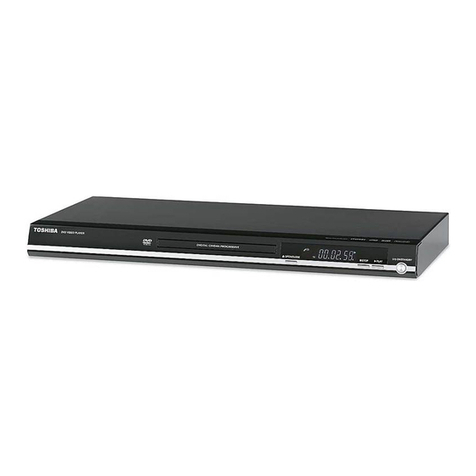
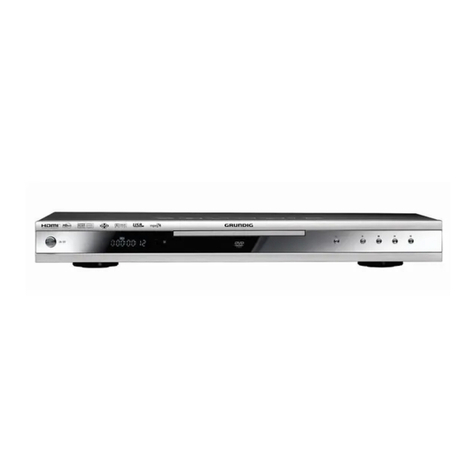
Toshiba SD-25VLSR User manual

Oct.,2004 O
SERVICE MANUAL
DVD VIDEO PLAYER &
VHS VIDEO CASSETTE
RECORDER
FILE NO. 810-200447
SD-25VLSR

64
04/07 U
BˉÂÓχ„ÌËÚÓÙÓÌ Ë DVD-ÔÓË„˚‚‡ÚÂθ
Video Recorder/DVD Video Player
åÓ‰Âθ SD-25VLSR êÛÍÓ‚Ó‰ÒÚ‚Ó ÔÓ ÍÔÎÛ‡Ú‡ˆËË
íÓθÍÓ ‰Îfl ‰ËÒÍÓ‚ Ò Â„ËÓ̇θÌ˚ÏË ÍÓ‰‡ÏË
5
/
ALL
PAL
MODEL
SD-25VLSR
USER GUIDE
Region
5
/
ALL
discs only
êìCCKàâ
ENGLIS
DIGITAL VIDEO
2
Precautions
Thank you for purchasing this DVD/VCR.
The DVD/VCR can play back both DVD discs and Audio CDs.
• Use only discs marked with the following.
DVD
[8 cm d sc/12 cm d sc]
Video CDs/Audio CDs
[8 cm d sc/12 cm d sc]
CLASS 1
LASER PRODUCT
DIGITAL VIDEO
Important Warning
CAUTION:
A DVD/VCR IS A CLASS 1 LASER PRODUCT. HOWEVER THIS DVD/VCR USES A VISIBLE LASER BEAM
WHICH COULD CAUSE HAZARDOUS RADIATION EXPOSURE IF DIRECTED. BE SURE TO OPERATE
THE PLAYER CORRECTLY AS INSTRUCTED.
T E FOLLOWING CAUTION LABEL IS LOCATED ON T E REAR PANEL OF T E DVD/VCR.
WHEN THIS DVD/VCR IS PLUGGED INTO THE WALL OUTLET, DO NOT PLACE YOUR EYES CLOSE TO
THE OPENING OF THE DISC TRAY AND OTHER OPENINGS TO LOOK INTO THE INSIDE OF THIS DVD/
VCR.
USE OF CONTROLS OR ADJUSTMENTS OR PERFORMANCE OF PROCEDURES OTHER THAN THOSE
SPECIFIED HEREIN MAY RESULT IN HAZARDOUS RADIATION EXPOSURE.
DO NOT OPEN COVERS AND DO NOT REPAIR YOURSELF. REFER SERVICING TO QUALIFIED PER-
SONNEL.
WARNING:
TO REDUCE THE RISK OF FIRE OR ELECTRIC SHOCK, DO NOT EXPOSE THIS EQUIPMENT TO RAIN
OR MOISTURE.
TO REDUCE THE RISK OF FIRE OR ELECTRIC SHOCK, AND ANNOYING INTERFERENCE, USE THE
RECOMMENDED ACCESSORIES ONLY.
ENGLIS
3
ENGLIS
Precaut ons
Video Tape
Video ead Drum
Moisture Condensation
If the unit is suddenly moved from a cold place to a warm place, do
not operate it for two or three hours.
What is moisture condensation
When cold water s poured nto a glass, for example, water vapour n
the a r w ll condense w ll form on the surface of the glass. Th s s called
mo sture condensat on.
Moisture will condense on the unit in the following cases;
•When you move th s un t from a cold place to a warm place.
•After heat ng a cold room or under extremely hum d cond t ons.
If you experience the above conditions;
"Plug" the ma ns lead nto an AC outlet, set the ON/STANDBY button to
ON and leave at the room temperature unt l mo sture condensat on
d sappears.
Depend ng on the surround ng cond tons, th s may take two or three hours.
• To prevent njur es do not nsert your hand nto the
cassette load ng slot.
Watch out for toddlers who often love to mtate the
behav or of adults. In some cases, toys nserted nto
the cassette load ng slot have resulted n expensve
repa rs.
• Do not place the unt near applances wh ch may
cause electromagnetc nterference such as loudspeak-
ers, amplfers, electr c motors, moble phone, etc.
Magnet c felds may affect p cture or sound qualty of
v deo record ngs.
• Avo d extreme mo sture and dust.
• Leave repa rs to a qual f ed serv ce techn c an.
• Avo d locat ons subjected to extreme heat and cold.
• Avo d placng to place the un t on any surfaces that
may be subjected to v brat ons or shocks.
• Do not nsert f ngers or any other objects nto the
cassette load ng slot. Also, when clean ng the un t,
never spray cleaner or furn ture wax d rectly on the un t
hous ng.
• Do not place flower vases on top or next to the unt.
Water sp lled nto the un t could cause ser ous damages.
In case of water damage, do not unplug the power
cord from ts wall outlet and call for qual f ed serv ce
mmed ately.
• When you leave your home for a long per od of tme,
unplug the power cord for safety reasons.
•Cleaning Precautions
For clean ng the VCR, we recommend a m ld soap
solut on and a sl ghtly mo stened soft cloth as t s used
for furn ture. To avo d electr cal shocks, unplug the
power cord from ts wall outlet before cleanng. Be
espec ally careful when clean ng plast c components.
• To protect the unt dur ng a thunder storm, unplug the
power cord and dsconnect the antenna.

4
SOME DOS AND DON'TS ON T E SAFE USE OF EQUIPMENT
Th s equ pment has been desgned and manufactured to meet nternatonal safety stand-
ards but, l ke any electr cal equpment, care must be taken f you are to obtan the best
results and safety s to be assured. So, please read the po nts below for your own safety.
They are of a general nature, ntended to help you w th all your electronc consumer prod-
ucts and some po nts may not apply to the goods you have just purchased.
**************
DO read the operat ng nstruct ons before you attempt to use the equpment.
DO ensure that all electr cal connect ons ( nclud ng the mans plug, extens on leads and
nter- connect ons between the peces of equ pment) are properly made and n accordance
w th the manufacturer's nstructons. Sw tch off and w thdraw the ma ns plug before makng
or chang ng connect ons.
DO consult your dealer f you are ever n doubt about the nstallaton, operat on or safety of
your equ pment.
DO be careful w th glass panels or doors on equ pment.
**************
DON'T remove any f xed cover as th s may expose dangerous voltages.
DON'T obstruct the vent lat on open ngs of the equpment w th tems such as newspapers,
tablecloths, curta ns, etc. Overheat ng wll cause damage and shorten the l fe of the equpment.
DON'T allow electr cal equ pment to be exposed to dr ppng or splash ng, or objects flled
w th l quds, such as vases, to be placed on the equ pment.
DON'T place hot objects or naked flame sources such as l ghted candles or n ghtl ghts on,
or close to equ pment. H gh temperatures can melt plastc and lead to f res.
DON'T use makesh ft stands and NEVER f x legs w th wood screws - to ensure
complete safety always f t the manufacturer's approved stand or legs w th the fx ngs pro-
v ded accord ng to the nstruct ons.
DON'T use equ pment such as personal stereos or rad os so that you are d stracted from
the requ rements of traff c safety. It s llegal to watch telev son wh lst dr v ng.
DON'T l sten to headphones at h gh volume, as such use can permanently damage your
hear ng.
DON'T leave equ pment sw tched on when t s unattended unless t s spec f cally stated
that t s desgned for unattended operat on or has a stand-by mode. Swtch off us ng the
sw tch on the equ pment and make sure that your famly know how to do th s. Specal
arrangements may need to be made for nf rm or hand capped people.
DON'T cont nue to operate the equ pment f you are n any doubt about t workng
normally, or f t s damaged n any way -sw tch off, wthdraw the ma ns plug and consult
your dealer.
ABOVE ALL
---NEVER let anyone especially children push anything into holes, slots or any other
opening in the case - this could result in a fatal electrical shock;
---NEVER guess or take chances with electrical equipment of any kind
---it is better to be safe than sorry! *************
Precaut ons
5
ENGLIS
Features
Video Cassette Recorder
• Hgh Qual ty (HQ) Images
• On-Screen D splays (OSD)
• Ncam H -F Stereo Audo Re-
cord ng and Playback
• CATV Tuner w th Hyperband
• 80 Memores for Presets
• Automatc TV Stat on Presett ng
• 30 Mnutes Back-Up n case of
Power Fa lure
• 6 Rotary Heads (4 Vdeo Heads
2 H -F Aud o Heads)
• Long Play
• Tmer Record ng of up to 8 Pro-
grams per Month
• One- Touch Tmer Recordng
(OTR)
• Vdeo Index Search System
• Slow Mot on
• NTSC V deo Cassette Tape Play-
back on PAL TV
• Real-Tme Tape Counter w th
ZERO RETURN-Functon
• Auto Vdeo Head Clean ng Sys-
tem
• Dg tal AUTO Trackng (ATR
Funct on)
• Repeat
• On-Screen Dsplay n 2 Lan-
guages
• AV-Front Input Jacks
• 2 Scart Sockets for Premere
• CE Symbol Guaranteeng
Compl ance to Currently
Effectve European Standards
DVD Player
• Dg tal Aud o Jack (Coax al)
• Mult -Language
• Mult -Angle
• Repeat Playback
• Memory/Random Playback
• Zoom
• Vdeo Aspect Rat o
• Parental Control
• 3 Scenes Memory
• Dg tal output for Dolby Dg tal
and DTS
• Playback of DVD, Vdeo-CD and
Aud o-CD
• PAL & NTSC DVDs Playback
• A-B Repeat Playback
• MP3/WMA/JPEG CD Playback*
* Ths product ncorporates copyrght protecton technology that s protected by method clams of certan U.S.
patents and other ntellectual property r ghts owned by Macrov s on Corporat on and other r ghts owners.
Use of th s copyr ght protect on technology must be author zed by Macrov s on Corporat on or other r ghts
owners and s ntended for home and other l m ted v ew ng uses only unless otherw se author zed by
Macrov s on Corporat on or other r ghts owners. Reverse eng neer ng or d sassembly s proh b ted.
Consumers should note that not all hgh defnt on televson sets are fully compat ble wth th s product and may
cause art facts to be d splayed n the p cture. In case of 525 or 625 progress ve scan p cture problems, t s
recommended that the user sw tch the connecton to the “STANDARD DEFINITION” output. If there are ques-
t ons regardng our TV set compatblty wth th s model 525p and 625p DVD player, please contact our customer
serv ce center.
* Manufactured under l cense from Dolby Laborator es. “Dolby” and the double-D symbol are trademarks of
Dolby Laborator es.
* “DTS” and “DTS Dg tal Out” are trademarks of Dgtal Theater Systems, Inc.
* Unauthorzed record ng of copyrghted televson programs, flms, vdeo cassettes and other materals may
nfr nge the r ghts of copyr ght owners and be contrary to copyr ght laws.
6
Contents
Precaut ons ......................................................2
Features ...........................................................5
Contents...........................................................6
Parts and funct ons ..........................................7
D splay .............................................................8
Remote control.................................................9
Bas c connect ons ..........................................11
Playback connect on ......................................12
Before using your unit
Record ng a TV Program ............................... 30
One-Touch Tmer Record ng (OTR) ............... 32
Tmer Recordng............................................. 33
Recording
Advanced function of VCR section
Load ng and Unload ng a Cassette Tape....... 24
Cassette tape playback.................................. 25
Spec al playback ............................................ 26
Repeat playback ............................................ 27
Counter D splay.............................................. 28
Vdeo Index Search System........................... 29
Tape playback operation
Sett ng the TV to the AV-Channel................... 14
Sett ng the On-screen language .................... 15
Sound system select on ................................. 16
Clock sett ng................................................... 17
Automat c TV stat on presett ng ..................... 18
Mapp ng TV stat ons ...................................... 19
Manual TV staton presett ng ......................... 22
Setting up the VCR section
D sc ................................................................ 39
Play ng a d sc................................................. 40
Zoom ng/Locat on desred scene ................... 43
Mark ng des red scenes ................................. 44
Repeat playback/A-B Repeat playback.......... 45
Program playback/Random playback
(VCD/CD) ....................................................... 46
Chang ng angles/Ttle select on/DVD menu... 47
Chang ng soundtrack language/Sett ng
surround sound .............................................. 48
Subt tles/Karaoke playback............................ 49
D sc status/To turn off the PBC ...................... 50
MP3/WMA/JPEG operat on............................ 51
Disc playback operation
Custom z ng the functon settngs .................. 54
Temporary d sablng of rat ng level by
DVD d sc ........................................................ 59
Language code l st ......................................... 60
Advanced function of DVD section
Problems and troubleshoot ng ....................... 61
Vdeo head clean ng....................................... 62
Spec f cat ons ................................................. 63
Additional information
Stereo Record ng and Playback..................... 35
Colour system select on ................................. 37
Dupl cat ng a Vdeo Tape ............................... 38
7
ENGLIS
SCART-socket
(for VCR/DECODER) (L2)
Parts and functions
Front
Rear
AC power cord
DVD COAXIAL DIGITAL AUDIO OUT jack
RF IN jack
DVD AUDIO (L/R) OUT jacks
RF OUT jack
SCART-socket
(for TV-RGB/Compos te) (L1)
POWER button
AUDIO (L/R)/VIDEO IN jacks(L3)
CHANNEL MM
MM
M/??
??
? buttons FF (Fast Forward) button
Remote sensor
VCR nd cator REW (Rew nd) button
DVD nd cator
REC button
PLAY button
STOP button
OPEN/CLOSE button
D sc tray
VCR/DVD mode selector button
Cassette Load ng Slot
EJECT button
D splay wndow
COMPONENT VIDEO OUT(Y/PB/PR) jacks

8
No. D splay
VCR mode
Display
VCR
DVD
CD
10 : 00
01 : 00
2
L1/L2/L3
TRK
REC
CH 2
Playback (l ghts) / Auto resume (flashes)
St ll p cture
DVD dsc s nserted.
CD s nserted.
Clock dsplay (colon[ : ] flashes)
Counter dsplay by hour/m nute at VCR/DVD / by mnute/second at CD
Track number dsplay for CD
TV channel poston dsplay
External nput d splay
Tmer record ng dsplay
V deo tape s n the un t
Track d splay for CD
Normal record ng d splay (flashes dur ng One-touch Tmer Recordng - OTR)
Note:
Some dscs may be dsplayed wrong or e.g. chapter number, playback t me, etc. may not be dsplayed.
Display window
1
2
3
4
5
6
7
8
9
10
1 2 3
78
9
10
4
6
5
Descr pt on
9
ENGLIS
VCR Select to operate VCR 15
DVD Select to operate DVD 40
Power on/off 15
0-9 D rect channel selecton of TV 18,30,32
Input sett ng 17,19,20,33,43,46
Enter a secur ty code 58,59
AUX Scart Input or AV-Front nput 12,34,38
OPEN/CLOSE Open or Close the tray 40,41,59
CLOCK COUNTER
Change the front Dsplay mode 28
ANGLE Change playback angle of a DVD d sc 47
COUNTER RESET Reset the counter to 00:00 28
TV/VCR Sw tch to TV only at Scart connect on 31
AUDIO SELECT Sw tches sound between mono and stereo 36
AUDIO Change soundtrack language of DVD 48
SUBTITLE Set Subt tle of a DVD d sc 49
ATR Auto track ng 26
MARKER Index(DVD) 44
ZOOM Zoom (for DVD playback) 43
A-B PRT
Repeat playback between A and B (DVD/CD)
45
PLAY MODE Select playback mode 45,46
SL/LP Sets the tape speed for record ng 30,32
TIMER REC T mer record ng On/Off 32,34
REC/OTR Record ng/OTR 30,32,38
RETURN Remove DVD set up menu 54,59
DISPLAY D splay VCR or DVD operat on status 28,31,50
PLAY Playback 25~27,40~42
REW Rew nd/Revew playback 25,26,42
FWD
Fast Forward/Forward search playback
25,26,42
SLOW Slowmot on playback 26,42
STOP Stop 25,30,40,41
PAUSE/STILL St ll p cture/Recordng pause on/off 26,30,38,41,42
INDEX –/+ Search for the INDEX mark of a tape 29
SKIP /
Sk p chapter to forward or reverse d recton
42
TOP MENU Select ttle of a DVD dsc 47,52,53
SETUP/VCR MENU
D splay menu of setup 15~23,54
/ / / Cursor buttons
CH +/– Select channel of the VCR 18,30,32,38
MENU Select menu of a DVD dsc 47,53
JUMP Jump to desred scene 43
ZERO RETURN
Stop the tape when the counter reaches 00:00
28
SET –/+ Manual trackng 26
ENTER Enter nformat on n the menu
Select opt on n the menu
INSTANT SKIP Sk p the unwanted short mater al of a tape 26
CANCEL Delete Tmer program 34
Cancel nput data n the settng mode 18,19,21,43,44,46
PROGRAM Confrmat on of Tmer-Record ng 34
ONE TOUCH REPEAT
Sk p back about 10 seconds of DVD playback
42
BLANK SEARCH Fnd unrecorded area on a tape 31
Page
Remote control
10
Remote control
123
Replace the compartment
cover.
Install two "R03/AAA" batter es
(suppl ed),
pay ng attent on to the
polar ty d agram n the battery
compartment.
Sl de the battery compartment
cover n the drecton of the
arrow.
ow to install the batteries
Use micro batteries type UM-4 (R03/AAA-Size).
These batter es are offered as carbon / znc-type or as alkalne-type. You may use both, but do not m x types. The
alkal ne type lasts longer compared to the carbon / znc type but s more expens ve.
Note: Flat, weak batter es wll leak. Corrosive electrolyte wll damage the remote control handset.
Leak proof batter es wll not leak mmed ately when they are flat. As long as the handset s stll workng, there s
no danger of leakage. To prevent damage, remove the batter es f you do not use the handset for several
months.
Damage because of leakage is not covered by the guarantee.
Distance of Remote
Control Operation
Effect ve angle:
approx. 60°
approx.
5m
Po nt the remote
control d rectly at the
remote sensor.
If br ght sunl ght
d rectly beams
onto the un t
front.
If an obstacle s
placed between the
un t and the handset.
The remote control handset w ll not work properly n the follow ng cases:
If the batter es have not
been nstalled accord ng to
the r polar t es.
If the batter es are
weak.
11
ENGLIS
Basic connections
Connect your DVD/VCR to your home's antenna and to your TV-set as shown n the llustrat on.
When you have f n shed these connect ons you connect your DVD/VCR to the 110~240 V / 50 Hz ma ns.
In add t on to the coax al cable connect on, connect also w th scart cable. The p cture and sound w ll be transmtted
best through the scart cable. In th s case, the TV need not be tuned to the v deo recorder. The AV-channel also need
not be tuned. The v deo recorder swtch the telev son to v deo operat on through the scart cable automat cally. The
stereo-playback s poss ble n only case through a scart cable!
Connect a TV with the Scart socket
If your TV-set does not sw tch to vdeo-playback operat on automat cally, please
turn your TV's v deo sw tch to VIDEO pos t on manually.
TV
AC power cord 110-240V/50 Hz
DVD/VCR
Antenna-Input
To Scart socket RF-Input (from
house antenna)
TV Scart Socket (L1)
RF-Output (to TV)
Antenna
Suppl ed Coax al cable
Scart cable (not suppl ed)
VCR/DECODER Scart Socket (L2)

12
SCART-cable (not suppl ed)
If a Satell te Rece ver s used, we recommend the follow ng conf gurat on:
Connection to a Satellite Receiver
Playback connection
The exact arrangement you use to nterconnect var ous v deo and aud o components to the DVD/VCR s dependent
on the model and features of each component. Check the Owner's Manual prov ded wth each component for the
locat on of SCART socket.
Connection to a Decoder (for Premiere Programs)
Decoder
RF-Output
SCART-cable (not suppl ed)
Cable TV-
connect on
TV-un t
SCART-cable (not suppl ed)
DVD/VCR
To record from Satell te Rece ver press AUX on the remote control of DVD/VCR. "L1" w ll appear on the front
d splay. Select the des red TV-program at Satell te Rece ver.
Satell te
Antenna
Satellite
Receiver
DVD/VCR TV
SCART-cable (not
suppl ed)
CLOCK SET
SYSTEM SETUP
LANGUAGE/üáúIK
RF OUT [K]
AV2 [DEC]
SELECT : /
ENTER
: ENTER
MENU
EXIT
:
Note: Make sure that AV - mode n SYSTEM SETUP - menu has been set
to DEC .
If you set to [AV], the output s gnal from the decoder w ll be seen on the TV
wh le the DVD/VCR s turned off.
13
ENGLIS
Connect to an AV Amplifier with built-in digital surround
If you are us ng an Amplf er wth a bult- n d gtal surround as follows, you can enjoy the var ous audo systems such as Dolby
D gtal and DTS by us ng the Coaxal D gtal Output.
Use this connection to connect an:
• AV amplifier with built-in *Dolby Digital decoder
• AV amplifier with built-in *DTS decoder
TV
TV
Playback connect on
Coax al d g tal cable (not suppl ed)
AV Amplfer wth
bu lt- n var ous
decoder as above
DVD/VCR
To Audo (L) Input
To Audo (R) Input
AUDIO Cord (suppl ed)
Stereo Ampl fer
DVD/VCR
Aud o (R) Output
Component v deo cable (not suppl ed)
Aud o (L) Output
Component
v deo nput
Component video outputs/inputs
PROGRESSIVE outputs/inputs
Some TVs or mon tors are equ pped w th component vdeo nputs that are capable of reproducng a progress vely scanned
v deo sgnal. Connect ng to these nputs allows you to v ew the hghest qual ty pctures w th less flcker.
INTERLACED outputs/inputs
Some TVs or mon tors are equ pped w th component vdeo nputs. Connectng to these nputs allows you to enjoy the hghest
qual ty DVD pcture playback.
Connecting to an audio system and TV equipped with component video inputs
If the TV has the Component
nput, connect the DVD vdeo
player w th the Component
lead. When us ng the
Component lead, do not
connect the yellow v deo lead.
Note:
In connecting to a TV that are not capable of reproducing a progressively scanned video signal using the component
sockets, do not select “Progressive” in “Output” menu. If you do it, the component video outputs does not feed the
correct signals and you can not see any picture (see page 58).
Notes:
• Actual labels for component v deo nputs may vary depend ng on the TV manufacturer. (ex. Y, R-Y, B-Y or Y, CB, CR)
• In some TVs or mon tors, the colour levels of the playback pcture may be reduced sl ghtly or the tnt may change. In such a
case, adjust the TV or montor for opt mum performance.
TV
Interlaced nputs
Progress ve nputs
See Output select on (P.58).
Component
Progress ve
On-screen
d splay
• Make the follow ng settng
SCART-Socket
(for TV-RGB/Compos te) Coax al dg tal Aud o Output
SCART-cable (not suppl ed) To SCART
nput
Notes:
• The COAXIAL jack s useful only for DVD secton.
• DTS aud o wll be output only from the COAXIAL output. To hear DTS aud o, DTS-Decoder s necessary.
When play ng DTS-encoded CDs, only nose w ll be heard from the speakers or analogue stereo outputs.
• Some DTS decoders wh ch do not support DVD-DTS nterface may not work properly w th the unt.
Component (Y) Output
Component (PB) Output
Component (PR) Output
14
TEST
Setting the TV to the AV-Channel
VCR
We recommend that televson and DVD/VCR are be ng connected w th a scart cable.
In ths case, the settng of AV-channel s not necessary. P cture and sound of v deo cassette wll be transm tted to
telev s on through the scart cable automat cally. Please read the next page.
In case of no scart cable connection,
you must set the television to the AV-
channel. Pay attention to the following
notice:
A built-in TV-broadcast in DVD/VCR can
do the video playback through the sup-
plied antenna cable. This broadcast is
sent on U F, channel 60. To receive this
broadcast, you must tune your televi-
sion to channel 60 in U F-band.(see
step 2)
In case a broadcast has already sent
to channel 60 in your area or you con-
nect a additional equipment (e.g. Sat-
ellite receiver) with a coaxial cable
(without a scart cable), you must tune
the sending channel in DVD/VCR (see
step 3). In your television store the both
equipment (the DVD/VCR and the sat-
ellite receiver) to 2 different program
positions.
Example: Your satellite receiver is sent
to channel 60. You tune the DVD/VCR
to channel 64 (see step 3).
(If your DVD/VCR is also sent to chan-
nel 60, the interference will occur.)
In your television store the channel 60
to e.g. program position 3 and store the
channel 64 to e.g. program position 4.
Note that the program position 4 must
be suitable for video-playback espe-
cially. Please see the owner's manual
for your television. If the playback pic-
ture is often distored, you must select
the other program position for DVD/
VCR.
Preparation
• Turn on the TV.
• Make sure the power of DVD/VCR has been turned off.
Sw tch your telev son to the program pos t on on wh ch the
v deo playback s seen. Start the channel search of your
telev s on unt l “TEST” appears. Store ths tunng n telev -
s on l ke also the case of the recept on for normal telev-
s on-channels you would store.
If you want to use your DVD/VCR,
sw tch your telev son to th s program
pos t on.
If there s nterference n the pcture (you see 2 programs
s multaneously or what s called Ghosts), change the send-
ng channel n DVD/VCR. To do th s, go back to the step 1.
Use C ANNEL button on the DVD/VCR to change the
number next to the rF:. Then return to step 2 and tune the
telev s on newly.
3
1
2
4
Press ON/STANDBY on the DVD/VCR and keep pressng
t untl the dsplay shows rF:. The number next to rF: s the
channel n UHF-band to whch you must tune your TV-set.
Note:
If you receve one TV-program on channel 59, 60 or 61, the nterference can be occurred to the bult-n TV channel
n DVD/VCR. If you use a scart cable for the transmsson of p cture and sound, you can cut off the bu lt-n TV-
program. Then the v deo playback through the suppl ed antenna cable s not poss ble any more. Press C ANNEL
repeatedly (at step 1) unt l OFF w ll appear.(OFF appears after 69 or before 23)
Press ON/STANDBY on the DVD/VCR to turn off the
DVD/VCR.
3
TEST
1,4
15
ENGLIS
HACTPOâKA óACOB
RF OUT
[K]
AV2 [AV]
ìCTAHOBKA CàCTEMõ
: MENU
: ENTER
:
LANGUAGE/üáúIK
BBOÑ
Bõ êATú
BõïOÑ
áÄèàëú èé íÄâåÖêì
ÄÇíé èéÇíéê
Çõäã
ìCTAHOBKA BM
ìCTAHOBKA C
àCTEMõ
ìCTAHOBKA KAHAãA
BBOÑ
Bõ êATú
BõïOÑ: MENU
: ENTER
:
Setting the On-screen language
3
1
2
4
SELECT : OK: ENTER
LANGUAGE/
ü3úIK
ENGLISH
PìCCKàâ
Turn on your TV and select the AV-
Program position, on which you have
already set your DVD/VCR. (it will hap-
pen automatically by Scart-cable con-
nection). So you can follow up the all
setting on TV screen.
Notes:
•If the unit does not operate properly,
or No key operation (by the unit and/
or the remote control): Static elec-
tricity, etc., may affect the player's
operation. Disconnect the AC power
cord once, then connect it again.
• If no buttons are pressed for more than
60 seconds, the MENU screen wll re-
turn to normal TV-operat on automat -
cally.
Preparation:
• Press the button to turn on the DVD/VCR.
• Press VCR to select the VCR mode. (The VCR ndcator w ll lght.)
You can choose from two different languages (English or Rus-
sian) for the on-screen displays.
Press VCR MENU. Press
or
to select the “
ìCTAHOBKA
CàCTEMõ
” menu, then press
ENTER.
If you use the un t for the f rst
t me and press VCR MENU, n-
stead of the man menu screen
on the r ght the “LANGUAGE”
set up menu screen n step 3
may appear.
Press or to select the
“LANGUAGE” opt on, then press
ENTER.
Press or to select the
des red language: Englsh or
Russ an (êìëëäàâ), then
press ENTER.
Press VCR MENU repeatedly unt l the TV p cture appears on
the screen.

16
LANGUAGE/üáúIK
AV2 [AV]
[G]
LANGUAGE/üáúIK
AV2 [AV]
[K]
Preparation:
•Turn ON the TV and set to the v deo nput mode.
•
Press VCR to select the VCR mode. (The VCR ndcator w ll lght.)
Sound system selection
1Press VCR MENU.
Press or to select
SYSTEM SETUP, then press
ENTER.
2Press or to select RF
OUT.
3Press / or ENTER to se-
lect the Sound System [G], [K]
or [I] accord ng to your TV set.
Set the Sound System according to
your TV set or residential area.
4Press VCR MENU to return to the normal screen.
17
ENGLIS
LANGUAGE/üáúIK
AV2 [AV]
[K]
4
Clock setting
2
3
1
5
6
CLOCK SET
DAY SAT
30
MONTH
YEAR
TIME
10
2004
11:30
SELECT :
SET :
OK
: ENTER
EXIT
: MENU
/ 0—9
7
VCR
Your DVD/VCR is fitted with a 24 hour
clock.
You must set the date and time for
timer recordings.
Note:
In case of a power fa lure, the clock w ll
cont nue to operate for another 30 m n-
utes w th quartz-controlled prec son. To
nd cate that the power fa lure has lasted
for an excessve per od of t me "--:--" w ll
appear on the dsplay. In ths case read-
just t me and date.
Preparation:
•Turn ON the TV and set to the v deo nput mode.
•
Press VCR to select the VCR mode. (The VCR ndcator w ll lght.)
Example: Sett ng the clock to "11:30" October, 30 (SAT), 2004.
Press VCR MENU. The VCR menu screen w ll appear.
If the clock s not set, SYSTEM SETUP menu of step 3 w ll appear
automat cally.
Press or to select SYS-
TEM SETUP, then press EN-
TER.
Press or to select CLOCK
SET, then press ENTER.
Press or repeatedly or 10
number buttons unt l “30” ap-
pears. Then press .
Set the month, year, hour and
minute as n step 4.
Then press ENTER.
• In case of an erroneous nput
press to go back to before
step and enter aga n.
Press VCR MENU repeatedly unt l the TV p cture appears on
the screen.
The clock w ll beg n operat on.
CLOCK SET
DAY FRI
30
MONTH
YEAR
TIME
1
2004
0:00
SELECT :
SET :
OK
: ENTER
EXIT
: MENU
/ 0—9
18
3
Automatic TV station presetting
2
1
4
Your DVD/VCR has one built-in tuner
to receive the broadcast. Before you
record one TV-Broadcast, you must
set and preset the whole of the broad-
casts. This DVD/VCR can preset up
to 80 broadcast.
Automatic station presetting
All stat ons w ll preset n sequence ava lable n your area.
Preparation:
• Turn ON the TV and set to the vdeo nput mode.
• Press VCR to select the VCR mode. (The VCR ndcator wll l ght.)
Press VCR MENU.
Press or to select
CHANNEL SETUP. Then
press ENTER.
Press or to select AUTO
TUNING.
Press ENTER.
The DVD/VCR wll beg n search ng and settng w th early stored
channel, the number s ncreased by one nto memory all the broad-
castng channels avalable n you area (VHF-L, VHF-H, UHF). Whle
settng channels, AUTO TUNING appears. When the sett ng f n-
shed, the CHANNEL MAPPING menu w ll appear.
Press VCR MENU repeatedly unt l the TV pcture appears on
the screen.
Note: To cancel skpp ng select the sk pped channel us ng 10
number buttons, then press CANCEL. The channel No. dose not
bl nk any longer, and the channel No. now may be selected aga n
us ng C +/–.
To skip a channel position
Unwanted channels can be skpped so that they cannot be called up
by press ng
C
+/–. Select the 29, then press CANCEL.
Th s chan-
nel’s number wll be flashng. That way you can cancel further chan-
nel one after the other.
Notes:
• TV recept on nterference or power fa l-
ure may result n Automat c stat on pre-
sett ng malfunct ons. In such a case
repeat the sett ng procedure from the
beg nn ng.
However, you cannot receve the nec-
essary broadcast yet, try to preset the
broadcast manually. (See page 22.)
• When the un t s n the aux lary nput
mode, you cannot preset channels.
19
ENGLIS
A, B, C, ... X, Y, Z 0, 1, 2, ... 7, 8, 9
–
+
/
•
1
2
3
4
5
Mapping TV stations
Preparation:
• Turn ON the TV and set to the v deo nput mode.
• Press VCR to select the VCR mode. (The VCR nd cator w ll
l ght.)
Example: MTV s ass gned to stat on No. 10, but the code “MTV” w ll
not be d splayed and w ll also not appear n the table.
Select the “CHANNEL MAPPING” n Menu-screen n the same
way as the step 1 ~ 2 on page 18. Then press ENTER.
Press / or / repeat-
edly untl the staton number
pos t on now to be named w ll
bl nk.
• If you want to turn over the
page when the bl nkng spot s
n the left or r ght edge of on-
screen, press or repeat-
edly unt l the next page's 12
stat ons appears.
Press “1” of 10 number but-
tons. The f rst d splay l ne w ll
change to “CHANGE BROAD-
CAST NAME”.
Press or repeatedly untl
the desred character appears.
Then press . Use or
to select the next character.
Then press . Up to four char-
acters can be used to create a
stat on name. The character
“ ” stands for a space.Then
press ENTER.
Each press of w ll change the screen d splay as follows.
Press VCR MENU repeatedly unt l the TV p cture appears on
the screen.
Changing TV station names
For a number of TV stations (such as
MTV) no name code will be displayed
because these TV stations do not
provide the necessary information.
You can enter the respective names
yourself. Moreover, unwanted station
codes can be changed by the user.
Note:
When a wrong character s entered,
press CANCEL and enter the correct
character.

20
Mapp ng TV statons
▲▼
▲▼
▲▼
Press VCR MENU. Press ▲ / ▼ to select the CHANNEL SETUP,
then press ENTER.
1
2Press ▲ / ▼ to select the CHANNEL MAPPING, then press
the ENTER.
3Press ▲ / ▼ or / to select
the TV stat on to be moved.
4Press 2 of 10 number
buttons to select the MOVE
CHANNEL opton.
EXAMPLE : Move the TV staton from poston 4 to poston 6.
TO MOVE T E TV STATION TO ANOT ER C ANNEL
POSITION
5Press ▲ / ▼ or / to select
the pos t on number to wh ch
the selected TV staton s to be
moved, then press ENTER.
Press VCR MENU to return to
the normal screen.
NOTE:
“WAIT” wll bl nk on the screen whlst the
stat on s beng moved.
21
ENGLIS
CHANGE NAME
CHANNEL MAPPING
1
26 9
[12]
3
4
5
7
8
10
11
SELECT
SKIP
EXIT
MOVE
:
:
:
:
:
CANCEL
1
2
MENU
CH TUNING
AUTO TUNING
CHANNEL SETUP
CHANNEL MAPPING
SELECT :
ENTER
:
EXIT
:ENTER
MENU
4
5
1
2
3
CHANGE NAME
CHANNEL MAPPING
1
26 9
12
3
4
5
7
8
10
11
SELECT
SKIP
EXIT
MOVE
:
:
:
:
:
CANCEL
1
2
MENU
Mapp ng TV stat ons
Preparation:
• Turn ON the TV and set to the vdeo nput mode.
• Press VCR to select the VCR mode. (The VCR nd cator w ll l ght.)
Press VCR MENU. Press or
to select CHANNEL SETUP.
Then press ENTER.
Press or to select CHAN-
NEL MAPPING. Then press
ENTER.
Press / or / repeat-
edly unt l the TV stat on to be
sk pped bl nks.
Then press CANCEL.
The number before the canceled
channel (e.g. 12) w ll be
bracketed.
Canceling the skip function:
Press / or / repeat-
edly unt l the sk pped TV stat on
bl nks, then press CANCEL.The
brackets w ll d sappear.
Press VCR MENU repeatedly unt l the TV p cture appears on
the screen.
Skipping unwanted TV stations
(Skip those TV stations that are not
wanted to be selected by pressing the
C +/–)
22
CH TUNING
AUTO TUNING
CHANNEL SETUP
CHANNEL MAPPING
SELECT :
ENTER
: ENTER
MENU
EXIT
:
Manual TV station presetting
1
2
4
CH 1
D/K
ENTER
OK
:MENU
EXIT :
DEC OFF
SELECT :
The Auto C Memory function (See
page 18) memorizes all broadcasts to
the suitable C positions by where
you done this function.
owever one broadcast may not be
memorized depend on the bad receiv-
ing condition. In case of these broad-
cast, use this tuning function.
Note:
Occasonally, the auto search m ght catch
a weak s gnal and stop. If the TV staton
s gnal s weak, you shouldn't store th s
stat on.
In that case restart the auto search us-
ng or .
Manual station presetting
You act vate the auto search funct on unt l your preferred stat on s
tuned n. Then you memor ze ths stat on nto the chosen channel
memory. For each stat on you repeat th s procedure.
Preparation:
• Turn ON the TV and set to the v deo nput mode.
• Press VCR to select the VCR mode. (The VCR nd cator w ll lght.)
Example: Preset one stat on on program pos t on 5.
Press VCR MENU.
Press or to select CHAN-
NEL SETUP. Then press EN-
TER.
Press or to select CH
TUNING. Then press ENTER.
DEC OFF wll bl nk. Press EN-
TER. DEC OFF does not bl nk
anymore. SEARCH w ll appear.
Note:
If you w sh to store the PRE-
MIERE manually, the decoder
must have been connected as
on the lower of p.12.
Dur ng DEC OFF s bl nk ng, press .
DEC ON w ll bl nk now.
Press ENTER.
3
CH 1
ENTER
OK
:MENU
EXIT :
DEC OFF
D/K
SELECT :
B/G w ll bl nk. Press or to
select [ B/G ], [ D/K ] or [ I ]. Then
press ENTER.
23
ENGLIS
5
CH 1
SEARCH : / F. TUNE :
MENU
EXIT :
DEC OFF
D/K
6
8
9
7
CH 1
D/K
ENTER
OK : MENU
DEC OFF
SEARCH : / F. TUNE :
EXIT :
(“ 1 ” change to “ ”). Press
or repeatedly unt l the
stat on you want appears. Only
n case of rece vng of the weak
broadcast (dr ft ng p cture),
search dose not stop. If you
want to stop, press / or
/ .
Press (r sng frequency) or (fall ng frequency) once. The
search starts. It stops at each broadcast automat cally
Manual TV staton presettng
Please wa t unt l OK :ENTER
appears. It may take a few sec-
onds.
Then press ENTER.
In the next step, the program
pos t on on wh ch th s stat on
should be stored w ll be set.
Press or repeatedly untl
“5” d splayed.
Or enter 5 w th 10 number
buttons. Then press ENTER.
Repeat the steps 3 and 7 to preset other TV stat ons.
Press VCR MENU repeatedly unt l the TV p cture appears on
the screen.
The Fine Tuning adjustment
Under a normal rece v ng cond t on, the
stat on-search w ll stops automatcally at
the best rece v ng pos t on. That pcture
w ll appear w thout d sturbance.
Ths rece vng pos ton wll be memor zed
automatcally. The Fne Tunng cannot be
memor zed add t onally.
In rare case of bad rece vng cond t on,
the stat on-search mght not stop at the
best rece v ng pos t on. That pcture wll
appear w th d sturbance, e.g. wav ng
l nes.
Only n th s rare case, use the F ne
Tunng to tune the concerned stat on
manually and exactly.
In step 6, press or untl the stat on
s adjusted to best pos ton. Then press
ENTER.
CH 5
ENTER
OK : MENU
DEC OFF
CH : EXIT :
/0 9
D/K

24
Loading and Unloading a Cassette Tape
Erase prevent on tab
Screwdr ver
Adhes ve tape
Erase prevent on tab
12
VCR
VCR
8+4
Use only video cassette tapes marked .
Loading
Push the center of the tape unt l t s automat cally
nserted. Insert the cassette tape w th ts labeled s de fac ng up and
the erase prevent on tab pos toned at your left. An n-
verted cassette tape cannot be nserted.
Automatic power ON
When you nsert a cassette tape the DVD/VCR power w ll turn ON automat cally.
Automatic playback
When load ng a cassette tape w thout an erase prevent on tab, playback w ll start automat cally.
Unloading
Press EJECT on the DVD/VCR. Even f a tape
s be ng played, press th s button only once. Remove the cassette tape.
Automatic tape eject
Th s VCR w ll automat cally rew nd the tape when the tape has ended. And when the tape s rew nded to ts beg nnng,
the cassette tape w ll be ejected automat cally.
To prevent accidental erasure
Remove the erase prevent on tab w th a screw-
dr ver.
To record again
Cover the hole w th a p ece of adhes ve tape.
25
ENGLIS
To rewind the tape or forward it rapidly
To stop playback
1
2
Notes:
• Th s VCR selects the playback tape
speed SP or LP automatcally.
•If a color tape s of poor qual ty, the
p cture may turn black and wh te. In
th s event, set the COLOUR SYSTEM
to “PAL” or “MESECAM” n the COL-
OUR SYSTEM menu (see page 37).
VCR
VCR
Cassette tape playback
Preparation:
• Turn ON the TV and set to the vdeo nput mode.
• Press VCR to select the VCR mode. (The VCR ndcator wll l ght.)
Load a prerecorded tape
(When load ng a cassette tape
w thout the erase preventon
tab, playback w ll start auto-
mat cally).
To start playback
Press PLAY.
Playback w ll start.
If the cassette has not loaded
yet, w ll blnk for 4 seconds.
To rewind the tape:
Press REW.To forward the tape:
Press FWD.
To stop the tape-w ndng, press STOP. To sw tch to playback d rectly
(w thout STOP), press PLAY.
Forward/Reverse picture search mode
When the tape s beng wnded, you can sw tch to pcture search mode
(see next page). To do th s, press REW or FWD and hold t down. The un t
w ll resume the tape wndng as soon as the button s released.
NTSC video cassette playback
When us ng a pre-recorded NTSC v deo cassette tape, the connected TV
set must operate w th a 60 Hz vert cal frequency. Otherw se the on-
screen pcture w ll be affected by vert cal roll ng. Even f your VCR set s
capable of process ng NTSC v deo s gnals, the p cture may be shortened
vert cally (appearance of black bars at the top and at the bottom of the TV
screen). The dubb ng of a NTSC v deo cassette tape to a standard PAL
VCR s not possble.
Press STOP.
Stop the playback or recordng w th STOP.
26
Special playback
VCR
VCR
VCR
Picture Search
Reverse picture search function
Press REW x 1 or x 2 dur ng the playback.
Forward picture search function
Press FWD x 1 or x 2 dur ng the playback.
To return to playback: Press PLAY.
Still Picture
Press PAUSE/STILL dur ng playback. To resume normal playback:
Press PLAY.
Slow Motion
Dur ng playback press SLOW.
You can change the slow speed by the add t onal press ng of
SLOW.
To return to playback: Press PLAY.
Slow tracking and vertical lock adjustment
If no se bars appear n the p cture dur ng slow mot on, press the
SET + or – to reduce the no se bars.
If the st ll p cture j tters excess vely, press SET + or – to stablze
the st ll p cture.
Frame by Frame picture
Dur ng playback, press PAUSE/STILL one by one: The pcture
advances frame by frame.
To return to playback: Press PLAY.
Adjusting tracking condition
Automatic tracking adjustment
Whenever you nsert a tape and start playback, automat c track ng
starts work ng and cont nuously analyzes the s gnal to enable
opt mum pcture qualty durng playback.
Manual tracking adjustment
If automat c track ng cannot elmnate noses well durng
playback, press SET + or SET – to el m nate the noses. “MANUAL
TR.” w ll appear. Press t br efly for a f ne adjustment, or press and
hold for a coarse adjustment.
To return to automat c trackng, press ATR.
Notes:
•
The aud o output s muted dur ng spe-
c al playback.
• Durng p cture search mode there w ll
be nose bars whch are caused by the
system.
• The Spec al Playback w ll automat -
cally change to playback after approx.
5 m nutes to protect the v deo tape
aga nst excessve wear.
For example: 1 press: 30 seconds of tape
2 press: 60 seconds of tape
3 press: 90 seconds of tape
Instant skip
Press INSTANT SKIP durng playback. The DVD/VCR wll search
forward through approxmately 30 seconds of the tape (e.g. unwanted
commerc al tme) for each press of INSTANT SKIP (max mum sx
presses) and then resume normal playback.
27
ENGLIS
1
4
3
2
Repeat playback
Note:
If the un t s turned off or starts record ng,
the repeat mode s canceled.
Normal repeat playback
The ent re v deo tape w ll be played unt l ts end. The tape wll then
automat cally rewnd to the beg nnng and the playback w ll be re-
peated.
Then press ENTER
to select
[ON] or [OFF].
If [ON] s selected, the playback
w ll be repeated endlessly.
Press VCR MENU unt l the menu screen s cleared.
To start the playback, press PLAY.
The playback wll be repeated endlessly.
To cancel normal repeat mode:
Follow the above step 2, then press ENTER to select the OFF
pos t on. Press VCR MENU to return to the TV.
Press VCR MENU. Press
or to select AUTO RE-
PEAT.

28
VCR
8+4
VCR
VCR
Counter Display
2
1
3
CH 2
12:00 SUN
00:04:38 SP
B/G
CH 2
12:00 SUN
00:00:00 SP
B/G
ZERO RETURN function
This function makes tape-rewinding
stop at the counter 00:00:00 position
automatically.
Notes:
• When you load a v deo cassette, the
d splay nd cat on changes to "00:00".
• The counter dsplay does not functon
on non-recorded (blank) sectons of the
tape. When you rewnd, fast forward or
play tapes through blank sectons, the
counter dsplay stops.
Preparation
• Turn ON the TV and set to the v deo nput mode.
• Press VCR to select the VCR mode. (The VCR nd cator w ll l ght.)
Press DISPLAY.
The counter d splay shows
the
tape runn ng t me
dur ng playback
or record ng.
The Recorder w ll nd cate REC
dur ng record ng for tself.
Press COUNTER RESET
at
the des red tape pos t on.
The
counter d splay w ll be reset to
the “00:00:00” pos t on (e.g.
the beg nn ng of record ng).
Press STOP when playback or
record ng s f n shed.
Press ZERO RETURN.
The tape w ll be rew nded or fast
forwarded and automatcally
stop at the “00:00:00” pos t on.
The CLOCK/COUNTER-button
Press CLOCK/COUNTER dur ng the playback. The clock and tape
counter alternate w th each other n the d splay.
Note:
You can set the tape counter to 00:00:00 w th COUNTER RESET
anyt me. Therefore, the counter dsplay can also ndcate 00:00:00,
even when the tape counter does not reach ts beg nn ng yet. Even
f the tape counter nd cates 00:00:00, t can be rewnded moreover.
If the tape was rewnded over the pont of 00:00:00, the m nus mark
(–) appears n the counter dsplay. Although the tape counter seems
to forward when you press REW, n fact the tape s be ng rewnded.
When the tape reaches the beg nn ng, the tape-rew nd ng stops
automat cally.
CH 2
12:00 SUN
00:36:25 SP
B/G
29
ENGLIS
2
1
2
1
CH 2
INDEX
REC
VCR
REC
VCR
+3
INDEX NO. (up to 9)
or s dsplayed
Whenever a recording is begun an
invisible index mark is recorded on
the
tape. These index marks are all
identical,
and each mark means: " ere
starts a new recording". Every DVD/
VCR equipped with the Video Index
Search System (VISS) can locate
these marks at the beginning of any
recording.
Notes:
• When you record an INDEX mark at
the very beg nnng of the tape, the mark
may not be found.
• Dur ng INDEX search, the tape may
stop and beg n to play at a sl ghtly
d fferent locaton.
• INDEX may not funct on properly w th
old or worn out v deo tapes.
• INDEX marks may not be found f t s
extremely close to the po nt where the
search began.
• In record ng, f you stop recordng tem-
porar ly, the INDEX mark s not re-
corded on the tape.
Start playback and wa t unt l the
end of the TV commerc al s
reached, then press STOP.
Press REC/OTR once. When the “INDEX” on-screen nd caton
goes off, STOP may be pressed. Th s short record ng process
w ll be suff c ent to set an ndex mark.
Th s w ll result n about 10 seconds of the TV commerc als to be
overwr tten by another recordng. Due to the system the end of
th s recordng wll be followed by a recordng gap (no se sgnal)
of approx. 5 seconds.
Recording several Index Marks
Due to the system only one ndex mark w ll be recorded at the
beg nn ng of a record ng. If you ntend to set several ndex marks
dur ng a s ngle record ng, follow the procedure below:
Video Index Search System
Example: Index ng of TV commercals.
At the po nt of the record ng
where an ndex mark s to be set
press PAUSE/STILL. The un t
w ll sw tch to the record ng pause
mode.
Press C +/– repeatedly to
sw tch back to the or g nal TV
program.
Press PAUSE/STILL to
resume record ng.
Index Search
Press INDEX + or – durng stop or
play mode.
For Succeed ng programs:
Press INDEX +.
For Preced ng programs:
Press INDEX –.
(Add t onal press ncreases the IN-
DEX NO. up to 9.)
When the INDEX + or – s pressed,
the unt starts search ng the INDEX
NO. selected and fnds the port on,
then playback starts automat cally.
To stop the Index Search, press
STOP.
30
REC
VCR
VCR
REC
VCR
Recording a TV Program
4
1
2
3
CH 29
INDEX
VCR
VCR
Notes:
• S nce the DVD/VCR has a bu lt-n TV
tuner the TV set may be turned off when
record ng. The TV set may only be used
to check for accurate program adjust-
ments or to mon tor record ngs.
• If you wsh to watch the DVD playback
dur ng the recordng on VCR, press
DVD to change to DVD mode and per-
form the DVD playback (see page 40).
Preparation
• Turn ON the TV and set to the vdeo nput mode.
• Press VCR to select the VCR mode. (The VCR ndcator wll
l ght.)
Load a blank cassette tape wth the erase
prevent on tab ntact. (The DVD/VCR w ll auto-
mat cally turn on.)
Select the program(e.g.29) you want to record w th C +/– or 10
number buttons.
1~9 : e.g. 5 = press “5”
10~80 : e.g. 29 = press “2” and “9”.
If a record ng n Long Play mode s
ntended, press SP/LP to d splay
“LP”.
Press REC/OTR to start record ng.
If the erase prevent on tab s removed, the tape wll eject when REC/
OTR s pressed for record ng.(see p.24)
To Stop Recording
Press STOP.
To Stop Recording Temporarily
To stop a record ng for a short
per od of t me press PAUSE/
STILL. Press th s button aga n f
you want to resume the recordng.
Attention:
A safety c rcut turns the pause mode off automat cally after 5
m nutes, and the DVD/VCR w ll stop the record ng mode.
00:00:00 LP
31
ENGLIS
VCR
Record ng a TV Program
1
2
3
“VCR” ndcator goes on.
“VCR” ndcator goes off.
“VCR” ndcator goes on.
Recording with a SCART Cable:
You can record a program using the TV
receiver of the DVD/VCR and at the same
time watch another program on the TV set
using its receiver. As the DVD/VCR auto-
matically switches the TV set the following
points should be observed:
Auto Rewind Feature
The DVD/VCR w ll automat cally rew nd when
the tape has ended (except durng OTR and
TIMER REC). It w ll also eject the cassette
tape.
Press TV/VCR unt l “VCR” appears on the dsplay. Select the program
on the DVD/VCR you want to record. Ths program can be watched on
the screen and recorded by the DVD/VCR.
Wh le the VCR s record ng press TV/VCR unt l the “VCR” nd cator on the
d splay goes off. The TV set now d splays the program of ts bu lt-n
rece vng module. Select the TV channel you want to watch on the TV set.
Although the TV set now shows another program the DVD/VCR w ll
cont nue recordng the prev ously selected program.
Us ng TV/VCR you can swtch the TV screen between the DVD/VCR
p cture and the TV pcture. If the “VCR” nd cator s lt on the d splay, you
w ll watch the DVD/VCR pcture. Th s has no trouble on the recordng.
To Display VCR operation Status
Press DISPLAY. The clock, day of the week and more nformatons w ll be
nd cated.
To cancel the indicating: Press DISPLAY unt l all nd cator dsappear.
REC
4-+
8+4
To find unrecorded (blank) areas on a tape
The DVD/VCR searches for blank sect ons of tape n the d recton of fast-
forward ng and automatcally stops the tape when one s found.
Press BLANK SEARC . The tape automat cally stops at a blank secton
of tape.
<Example when a blank section of tape is successfully located>
<Example when a blank section of tape cannot be successfully lo-
cated>
When the DVD/VCR searches for blank sect ons on an overwrtten tape, t
stops at the end of the newly recorded sect on. To locate a blank secton,
play the tape f rst to check the content and then press BLANK SEARC
aga n.
Recorded Unrecorded (blank)
Current locat on on the tape Fast forwardFast forward
New record ng
(overwr t ng) Recorded earl er Unrecorded (blank)
Current locat on on the tape
Fast forwardFast forward
CH 80
23:59 MON
01:36:58 SP
L CH
HI-FI
B/G
Deck-status
here: Stop
T me
Day of the week
Ind caton for
H -F -playback
or stereo-
recept on
(d splayed
only for
approx. 4
seconds.)
Program
number or
Scart nput
(AV1,AV2 or
AV3)
****
Ind caton for the selected
playback sound (e.g.: L CH
= Left Channel)
(d splayed
only for approx. 4 seconds.)
Tape speed
*
Stat on's name
Cassette n
Un t
Stand of Tape counter
Sound
system
32
One-Touch Timer Recording (OTR)
3
4
OTR 1 : 30
CH 29
“REC” w ll keep bl nk ng
n the d splay.
VCR
1
2
VCR
CH 29
OTR 0:30
INDEX
REC
VCR
The one-touch timer recording feature
provides a simple and convenient way
to make a timed recording.
Note:
If the tape supply has not suffced for OTR
record ng, the clock symbol ( ) wll blnk
at the tape-end and then VCR mode w ll
change to DVD mode.
In th s case, press TIMER REC to cancel
the bl nk or press EJECT on the DVD/
VCR to remove the cassette tape.
Preparation
• Turn ON the TV and set to the vdeo nput mode.
• Press VCR to select the VCR mode. (The VCR ndcator wll
l ght.)
Load a blank cassette tape w th the erase
prevent on tab ntact. (The DVD/VCR w ll
automat cally turn on.)
Select the program(e.g.29) you want to record w th C +/– or 10
number buttons.
1~9 : e.g. 5 = press “5”
10~80 : e.g. 29 = press “2” and “9”.
If a recordng n Long Play mode
s ntended, press SP/LP to d s-
play "LP".
Press REC/OTR tw ce. The record ng w ll start and stop after 30
m nutes. Each addtonal press of
REC/OTR w ll ncrease the record-
ng tme for another 30 m nutes up
to a max mum of 6 hours (See table
below).
If REC/OTR s pressed once dur ng the recordng, the rema n-
ng t me appears on the screen. When pressed aga n, the re-
cord ng t me s extended to the nearest 30-m nute nterval.
To Extend the Recording Time
Press REC/OTR repeatedly unt l the
des red t me appears on the d splay.
To stop the OTR
Press STOP.
00:00:00 LP
2:00
5:00 4:00 3:00
1:30
Record ng 0:30 1:00
6:00
33
ENGLIS
2
4
1
3
TIMER REC SET
DATE 23 MON
11:30
--:--
3
START
END
CH
SELECT :
SET :
EXIT
: MENU
SP
SPEED
/ 0–9
23 MON
13:00
1
LP
OK : ENTER
14:30
TIMER REC SET
DATE
START
END
CH
SELECT :
SET :
EXIT : MENU
SPEED
--:--
--:-------- --
--:--
--:-- --
------ --:--
--:-- --
------ --:--
--:-- --
------ --:--
--:-------- --
--:--
--:-------- --
--:--
--:-------- --
--:--
--:-------- --
/ ENTER
SELECT :
EXIT : MENU
-
-
-
-
-
-
-
-
....to be continued to next page
Timer-Recording
Timer recording can be programmed
on the TV-screen with the remote con-
trol. The built-in timer allows automatic
unattended recording of up to 8 pro-
grams within 1 month.
Note:
In the event of a power falure the data of
the automat c record ng w ll be ma ntaned
n the bu lt-n memory for about 30 m n-
utes. Also, the clock w ll cont nue to run for
th s per od of t me. Thereafter the data wll
be deleted. When the power resumes, the
t me d splay w ll change to “
--
:
--
” that the
t mer sett ng wll have to be set.
Preparation
• Turn ON the TV and set to the v deo nput mode.
• Press VCR to select the VCR mode. (The VCR ndcator w ll lght.)
• Load a v deo cassette w th the erase prevent on tab ntact. Make
sure w th DISPLAY that the t me and date are correct.(see page
31).
Example: T mer record ng for channel 1, 13:00 to 14:30 w th Tape
speed LP on t mer program number 1.
Press VCR MENU. Press or
to select TIMER REC SET.
Then press ENTER.
Each l ne stands for one pro-
gram of the 8 memor es. Select
one l ne w th or . Then
press ENTER.
Set the des red date w th or
or 10 number buttons.
Then press to accept t.
Set the Starting time (13:00),
ending time (14:30), channel
(1) and Tape speed (LP) n the
same way as the step 3.
• In case of an erroneous nput
press to go back to before
step and enter aga n.
34
T mer-Record ng
5
1
2
4
3
TIMER REC SET
DATE
WKL-WED
11:30
--:--
2
START
END
CH
SELECT :
SET :
EXIT
: MENU
SP
SPEED
/ 0—9
--:--
--:-------- --
--:--
--:-------- --
--:--
--:-------- --
--:--
--:-------- --
--:--
--:-------- --
25 WED
12:15 13:00 4
23 MON
13:00 14:30 1
-
-
-
-
-
LP
SP
SELECT : / ENTER
--:--
--:-------- -- -
EXIT
: MENU
6
Press ENTER to accept them.
To enter other pro-
grams, repeat steps
2 through 5.
• To return to the
normal screen,
press VCR MENU
tw ce.
MON-SAT = everyday from
Monday to Saturday
WKL-SAT = each Saturday
Press TIMER REC. The clock symbol ( ) w ll
appear on the d splay and the DVD/VCR stands by
for record ng. At the same t me, VCR mode w ll
change to DVD mode automat cally. You can use
DVD even f the VCR s n the Tmer record ng mode.
If you do not use the DVD, turn the power off.
• If the clock symbol ( ) bl nks n the dsplay n
sp te of the press ng of TIMER REC, the cassette
may not have been loaded yet. (see page 24)
• If the cassette s ejected n spte of the pressng
of TIMER REC, the erase prevent on tab of the
cassette may have been removed. (see page 24)
Notes:
• In case of the t mer record ng from the scart socket,
proceed as follows: In step 4 press o r repeatedly
unt l the "CH" l ne bl nks. Then press AUX repeatedly
unt l “AV1” or “AV2” or “AV3” appears.
• If the clock symbol ( ) bl nks when the t mer record ng
ended, the TV program has not been completely
recorded because of an nsuff c ent tape supply. Press
TIMER REC to cancel the t mer program or press
EJECT on the DVD/VCR to remove the cassette tape.
• Dur ng t mer record ng standby mode, the VCR mode
cannot be selected. To use the VCR, press TIMER
REC at frst, then press VCR to change to VCR mode.
After you use the VCR, press TIMER REC aga n to put
the VCR nto t mer record ng standby mode.
Timer Recording Special Case
Weekly (e.g. WKL-TUE: each Tuesday) or daily (e.g.
MON-SAT: Monday to Saturday) Timer recording
Follow the procedure for tmer record ng on both pages
before. At pcture 3 press or repeatedly untl the
des red settng appears. Then press . When you
press or repeatedly, the nd cator at DATE w ll
change as follows, n case today s Fr day.
In case of Timer programs-overlapping
Do not overlap t mer programs as port ons of the
confl ct ng programs w ll be lost. The f rst record ng
t me has pr or ty over the next record ng t me as
shown n the d agram below.
Notes:
•
The da ly/weekly record ng can be made cont nuously unt l
the record ng s canceled or the tape reaches the end.
• Dur ng tmer record ng the automat c rew ndng mecha-
n sm does not funct on.
Confirmation / Cancellation of the Timer
Recording
If the T mer has been act vated, now press TIMER
REC to deact vate the Tmer. The clock symbol ( )
w ll d sappear. Then press VCR to change to VCR
mode.
Press PROGRAM. All the 8 T mer memor es w ll
appear.
To cancel Timer program: Press or to select
the wrtten lne. Then press CANCEL. Th s l ne s
now canceled.
Press VCR MENU (or PROGRAM) repeatedly unt l
the TV-p cture appears.
One month later
m nus one day
SUN-SAT 25 FRI ..... 24 SUN WKL-FRI
MON-SAT MON-FRI WKL-THU.....WKL-SAT
8 : 00 11 : 00
9 : 00 10 : 00
Program 1
Program 2
Program 3
Prog.1
Deleted Parts
Non Recorded Port on Parts
Prog.2 Prog.3
Record ng
Control Sett ngs
35
ENGLIS
NICAM OFF
NICAM M1/2
NICAM M1
NICAM ST
1
2
Stereo Recording and Playback
This DVD/VCR is capable of recording
sound in i-Fi system. The recording
will be performed automatically.
NICAM STEREO broadcasts are
recorded in its original sound system
regardless of the setting. If you wish
to record NICAM programmes, select
NICAM
“
AUTO
”
as follows.
And, this DVD/VCR can also receive
and record German A2 stereo pro-
gram. The tape recording is always
both in i-Fi and in MONO on the
standard longitudinal track. In case of
bilingual TV programs always the two
audio channels will be recorded.
Note:
When l sten ng to a stereo broadcast or
play ng back a tape H-F recorded n
stereo, you have to connect the DVD/
VCR w th the stereo aud o system or the
stereo TV. The sound wh ch s output
from the RF OUT jack s monaural.
Preparation:
• Turn ON the TV and set to the v deo nput mode.
• Press VCR to select the VCR mode. (The VCR nd cator w ll l ght.)
NICAM stereo sound reception:
Press VCR MENU. Press or
to select VCR SETUP.
Then press ENTER.
Press or to select NICAM.
Then press / or ENTER to
select [AUTO].
Press VCR MENU repeatedly unt l the TV pcture appears.
NICAM programmes are divided into 4 types as shown
below.
NICAM STEREO broadcast
“NICAM ST” llum nates when a NICAM
STEREO broadcast s gnal s rece ved.
NICAM MONO A broadcast
“NICAM M1” llum nates when a NICAM
MONO A broadcast s gnal s rece ved.
NICAM MONO A B broadcast
“NICAM M1/2” llumnates when a NICAM
MONO A and MONO B broadcast s gnal s
rece ved.
NICAM OFF
It w ll be dsplayed for the NICAM s gnal
when the “NICAM [OFF]” s selected n
menu screen.
COLOUR SYSTEM
VCR SETUP
SELECT
:
ENTER
: ENTER
MENU
/
EXIT
:
[ AUTO]
NICAM [AUTO]
3

36
Stereo Record ng and Playback
Playback
Use AUDIO SELECT to select under stereo/mono or blngual
playback. See the table below for more nformat on.
Bilingual playback
performed as follows:
On-screen indications
(for 4 sec.) Stereo playback
performed in:
S multaneously
both languages
from H -F track
(M xed sounds)
Or g nal sound
track (Sub sound)
One's mother
tongue dubb ng
(Ma n sound)
One's mother
tongue dubb ng
(Ma n sound)
Stereo
Mono
R ght channel
s gnal output from
both loudspeakers
Left channel s gnal
output from both
loudspeakers
STEREO
BILINGUAL
Note:
When playng H -F cassette tapes re-
corded on another VCR, the sound out-
put may be dstorted. Th s s normal and
no nd cat on of a unt malfuncton. Try to
m n m ze sound d stort ons by us ng
SET +/– or change to MONO by press ng
of AUDIO SELECT.
German A2 stereo sound reception:
Stereo program indication
It w ll be d splayed for approx. 4
seconds when stereo programs
are be ng rece ved.
Bilingual program indica-
tion
It w ll be d splayed for approx.
4 seconds when blngual pro-
grams are be ng rece ved.
LCH
HI-FI
RCH
HI-FI
MONO
STEREO
HI-FI
37
ENGLIS
Preparation:
• Turn ON the TV and set to the v deo nput mode.
• Press VCR to select the VCR mode. (The VCR nd cator w ll l ght.)
COLOUR SYSTEM
VCR SETUP
SELECT
:
ENTER
: ENTER
MENU
/
EXIT
:
[MESECAM]
NICAM [AUTO]
COLOUR SYSTEM
VCR SETUP
SELECT
:
ENTER
: ENTER
MENU
/
EXIT
:
[ AUTO]
[AUTO]
NICAM
Colour system selection
1Press VCR MENU.
Press or to select VCR SETUP.
Then press ENTER.
Press or to select COLOUR
SYSTEM.
2
Press / or ENTER to select
[AUTO], [MESECAM] or [PAL] Color
system usually used n AUTO
pos t on. But when you play back the
tape recorded n the MESECAM
color system, select the MESECAM
pos t on.
3
This unit can playback also tapes
recorded on MESECAM .
In case you playback such a tape,
set to MESECAM as follows.
38
CLOCK SET
SYSTEM SETUP
LANGUAGE/üáúIK
RF OUT [K]
AV2 [ AV]
SELECT : /
ENTER
: ENTER
MENU
EXIT
:
5
1
2
3
4
• Select the “AV2” n menu
screen n the same way as
the step 1~2 on page 15.
Then press ENTER to select
AV mode.
TV-Scart socket
VCR/DECODER
SCART socket (not suppled)
Record ng unt
TV
VCR
Press AUX on the recordng
un t repeatedly unt l L3
appears.
Playback un t
SD-25VLSR
OR
Playback on
camera
Playback un t
(not suppl ed)
Record ng unt (not
suppl ed)
1
2
3
Duplicating a Video Tape
When you try to connect with a cable, make sure the power of both units have been turned off.
Connect the recording unit with the TV. Therefore you can just watch what the recording unit is recording.
Load a blank cassette tape w th the erase prevent on tab
ntact nto the record ng DVD/VCR. Load the prev ously
recorded cassette tape nto the playback VCR or a v deo
camera.
Use AUX o r C +/– of the record ng DVD/VCR to select the
“L1”, “L2” or “L3” nstead of the preset channel.
L1 = TV-RGB/Compos te Scart Socket
L2 = VCR/DECODER Scart Socket
L3 = Front AV jacks
Press REC/OTR and then PAUSE/STILL of Record ng
un t.
Press PLAY-button and then PAUSE/STILL-button of Play-
back un t. Now you can see the st ll p cture of the scene that
you w sh to duplcate.
Press PAUSE/STILL of both unts smultaneously to start
the dupl catng.
Note:
Before start ng the dupl catng process, select the proper
tape speed us ng SP/LP. For a pre-recorded tape the
correct tape speed w ll be set automat cally durng
playback.
Duplicating a disc material onto a video tape
You can record disc material in DVD, Video CD, Audio CD, etc. onto a video tape with this DVD/VCR only.
If the DVD disc has a Copy-guard feature, the duplicating is not possible. A symbol mark “ ” will appear
on the screen for approx. 4 seconds. See page 40 for more information about the DVD playback.
Preparation:
• Load a cassette tape w th the erase prevent on tab
ntact.
• Select the tape speed n the VCR mode. (see P.30)
• Load a dsc you wsh to duplcate.
Press DVD to select the DVD mode. (The DVD nd -
cator w ll l ght)
Press PLAY to start the d sc playback.
Dur ng d sc playback, press REC/OTR.
Note:
You can set the dupl catng t me us ng the OTR-funct on.
At step 3 above press REC/OTR repeatedly unt l the
des red dupl cat ng t me appears on the screen.(P.32)
Connection with second Video recorder or Video camera
(not
suppl ed)
39
ENGLIS
Disc
The reg on number of ths un t s 5. If regon numbers, whch stand for the r playable area, are prnted on your DVD
v deo dsc and you do not f nd
5
or
ALL
, dsc playback w ll not be allowed by the player. (In ths case, the unt wll
d splay a message on-screen.)
Playable Discs
The loaded Dsc (DVD, Vdeo-CD, Audo-CD, SVCD and MP3/WMA/JPEG-CD) w ll be recognzed automatcally.
The su table D sc-formats are: DVD, DVD-R/RW (v deo format only), CD-R and CD-RW.
Some CD-R/RW dscs may be ncompatble.
Do not play DVD-ROM, DVD-Aud o, CDV, CD-G or Photo CD to prevent accdental erasure of prerecorded materal.
Some DVDs are copy protected and forb d dubb ng on to v deo tape. P cture D stort on w ll occur. Ths s not a defect
of th s un t.
Title
When two or more mov es are recorded on a d sc,
the d sc s d v ded nto two or more sect ons. Each
sect on s called a “TITLE”.
Chapter
The t tles can be subd v ded nto many sect ons.
Each sect on s called a “CHAPTER”.
Track
An Aud o CD can conta n several tems.
These are ass gned to tracks.
On handling Discs
• Do not touch the playback s de of the d sc.
• Do not attach paper or tape to d scs.
Removing Disc from Case
Be sure to hold the edge of d sc. Do not touch the surface of the d sc.
P ck up the d sc gently from the case.
• Do not scratch the d sc.
• Do not get d rt on the surface of the d sc.
• Do not st ck a label or adhes ve tape on the d sc.
• Do not drop or bend the d sc.
On Storing Discs
• Store the d sc n the case to avo d r sk of scratches, d rt or damage.
• Do not leave d sc exposed to d rect sunl ght or n hot or hum d places.
On Cleaning Discs
F ngerpr nts and dust on the d sc cause p cture and sound deter orat on.
Wpe the dsc from the center outwards wth a soft cloth. Always keep the
d sc clean.
• If you cannot w pe off the dust wth a soft cloth, wpe the dsc lghtly wth a
sl ghtly mo stened soft cloth and f n sh w th a dry cloth.
• Do not use any type of solvent such as th nner, benz ne, commerc ally
ava lable cleaners or ant stat c spray for v nyl LPs. It may damage the d sc.
CHAPTER 1
TITLE 1 TITLE 2
DVD DISC
CHAPTER 2 CHAPTER 2 CHAPTER 3CHAPTER 1
TRACK 1 TRACK 2 TRACK 3 TRACK 4 TRACK 5
Aud o-CD
Playback s de

40
Press STOP to end playback.
Resuming facility
• The un t records the stopped pont,
depend ng on the dsc. “ ”
appears on the screen. Press
PLAY
to resume playback (from
the scene po nt).
• If you press STOP agan or unload
the d sc (“ ” appears on the
screen.), the un t wll clear the
stopped po nt.
Press ON/STANDBY (I / ), then press DVD to
select the DVD mode.
The DVD/VCR turns on and the DVD
ndcator lghts.
“Read ng” d splay w ll change to
“No D sc”.
(If DVD dsc has already loaded,
playback w ll start automat cally.)
Press OPEN/CLOSE or PLAY on the unit.
The d sc tray closes automatcally.
On the TV-screen, “ ” changes to
“Read ng” and then playback
commences.
• A menu screen wll appear on the TV screen, f
the d sc has a menu feature.
Press C/D or B/A to select ttle, then press
ENTER. Ttle s selected and play commences.
Press OPEN/CLOSE.
The d sc tray opens.
Place the disc on the disc tray.
W th the playback
s de down
Basic playback
4
25
To start playback in the stop mode
Press PLAY.
OR
Reading
Th s sect on shows you the bas cs on how to play a d sc.
3
Preparations:
• When you want to vew a dsc, turn on the TV and
select the correspond ng v deo nput connected to the
DVD/VCR. Ths may nclude vdeo or component vdeo
nputs whch are exclusve to DVD playback.
• When you want to enjoy the sound of d scs from the aud o system, turn on the aud o system and select the
nput connected to the DVD/VCR.
1
No Disc
• There are two d fferent dsc s zes. Place the dsc
n the correct gude on the dsc tray. If the dsc s
out of the gu de, t may damage the dsc and
cause the DVD to malfunct on.
• Do not place a d sc whch s unplayable n ths
DVD.
Playing a disc
CAUTION
Keep your f ngers well clear of the dsc tray as t s clos ng.
Neglect ng to do so may cause ser ous personal njury.
PLAY
PLAY
41
ENGLIS
To remove the disc
Press OPEN/CLOSE.
Remove the d sc after the d sc tray
opens completely.
Be sure to press OPEN/CLOSE to close the d sc
tray after you remove the d sc.
To pause playback (still mode)
Press PAUSE/STILL dur ng playback.
To resume normal playback,
press PLAY.
• The sound s muted dur ng st ll
mode.
To stop playback
Press STOP.
Notes:
• If a non-compat ble d sc s loaded, “Incorrect D sc”, “Reg on Code Error” or “Parental Error” w ll appear on the
TV screen accord ng to the type of loaded d sc. In th s case, check your d sc aga n (see pages 39 and 58).
• Some d scs may take a m nute or so to start playback.
• When you set a s ngle-faced d sc label downwards ( e. the wrong way up) and press OPEN/CLOSE or PLAY
on the un t, “Read ng” w ll appear on the dsplay for 30 seconds and then “Incorrect D sc” wll cont nue to be
dsplayed.
• Some d scs may not work the resum ng fac l ty.
• Resum ng cannot funct on when you play a PBC-featured Vdeo CD whle the PBC s on. To turn off the PBC, see
page 50.
• Some playback operat ons of DVDs may be ntent onally f xed by software producers. S nce th s un t plays
DVDs accord ng to the d sc contents the software producers des gned, some playback features may not be
ava lable. Also refer to the nstruct ons suppled wth the DVDs.
• Do not move the un t dur ng playback. Do ng so may damage the d sc.
• Use OPEN/CLOSE to open and close the d sc tray. Do not push the d sc tray wh le t s mov ng. Do ng so may
cause the un t to malfunct on.
• Do not push up on the d sc tray or put any objects other than d scs on the d sc tray. Do ng so may cause the
un t to malfunct on.
• In many nstances, a menu screen w ll appear after playback of a mov e s completed. Prolonged d splay of an
on-screen menu may damage your telev s on set, permanently etch ng that mage onto ts screen. To avo d
th s, be sure to press ON/STANDBY (I / ) on your remote control once the mov e s completed.
• There may be a sl ght delay between you press ng the button and the funct on act vat ng.
To obtain a higher quality picture
Occas onally, some p cture nose not usually vsble durng a normal broadcast may appear on the TV screen
wh le play ng a DVD v deo d sc because the h gh resolut on p ctures on these d scs nclude a lot of
nformat on. Wh le the amount of no se depends on the TV you use wth ths unt, you should generally reduce
the sharpness adjustment on your TV when vewng DVD vdeo dscs.
Screen saver function
The screen saver operates when you leave the un t n
DVD stop mode for approx. f ve mnutes.
The screen w ll repeatedly get dark gradually and back
to normal.
Play ng a dsc
42
Press SKIP or repeatedly to display the chapter or track number you want.
Playback starts from the selected chapter or track.
To locate succeed ng chapters or
tracks.
Notes:
• Some d scs may not work wth the one touch repeat
funct on.
• Some funct ons may be unavalable due to the d sc
conf gurat on.
• Depend ng on the playback status, one touch repeat may
not sk p back as ntended.
To resume normal playback
Press PLAY.
Note:
The sound s muted durng slow-mot on playback.
To resume normal playback
Press PLAY.
Notes:
• The DVD/VCR mutes sound and subttles dur ng reverse
and forward scan of DVD/VCD v deo dscs. However, ths
un t plays sound dur ng fast forward or fast reverse play of
aud o CDs.
• The playback speed may d ffer depend ng on the d sc.
Press SLOW during playback.
Each t me you press the button, the
slow-mot on speed changes.
Press PAUSE/STILL during still playback.
Each t me you press the PAUSE/
STILL button, the pcture advances
one frame.
Playing in slow-motion
Play ng a dsc
You can play dscs at var ous speeds.
Playing frame by frame
PLAY
PLAY
PLAY
Playing in fast reverse or fast forward directions
Press REW or FWD during playback.
REW: Fast reverse playback
FWD: Fast forward playback
Each t me you press the REW or
FWD button, the playback speed
changes.
To resume normal playback
Press PLAY.
Note:
The sound s muted durng frame by frame playback.
Playback starts from the beg nnng of the
current chapter or track.
When you press tw ce n qu ck successons,
playback starts from the beg nnng of the
preced ng chapter or track.
• A “Proh bt on” symbol may appear at the upper left of the screen. Th s symbol means e ther the feature you tr ed s not
avalable on the dsc, or the DVD can not access the feature at ths tme. Th s does not ndcate a problem w th the DVD.
• The un t s capable of holdng a st ll v deo mage or On screen d splay mage on your telev s on screen ndef n tely. If you leave
the st ll v deo mage or On screen d splay mage d splayed on your TV for an extended per od of t me, you r sk permanent
damage to your telev son screen. Project on televs ons are very susceptble.
Notes:
Locating a chapter or track
FWD
REW
Press ONE TOUC REPEAT during playback.
The playback sk ps back about 10 seconds and starts
play ng agan.
If you press ONE TOUC REPEAT agan after the
sk ppng back, t skps back a further 10 seconds.
One touch repeat
43
ENGLIS
Press ZOOM during playback.
The centre part of the mage w ll be
zoomed n.
Each press of ZOOM w ll change the
ZOOM as follows.
Zooming
1
2
Th s unt wll allow you to zoom n on the frame mage. You
can then make select ons by swtchng the pos ton of the
frame.
1
Press / / /
to view a different part of
the frame.
You may move the frame from the
centre pos ton to UP, DOWN, LEFT or
RIGHT d recton.
3
Notes:
• You can select the Pause, Slow or Search playback n the zoom
mode.
• Some d scs may not respond to zoom feature.
In the zoom mode press ZOOM repeatedly to
return to a 1:1 view ( Off).
Locating desired scene
Use the t tle, chapter and t me recorded on the dsc to locate
the des red pont to play back.
To check the t tle, chapter and tme, press DISPLAY.
1
4
2
3
Note:
In case of the V deo CD playback wth PBC, the Search (Jump)
funct on does not work. To turn off PBC, see page 50.
Press JUMP during playback or stop mode.
Press or to select the “Time”, “Title” or
“Chapter”.
Press Number buttons (0–9) to change the
number.
• If you nput a wrong number, press
CANCEL.
• Refer to the package suppl ed wth
the d sc to check the numbers.
Press ENTER. Playback starts.
• When you change the t tle,
playback starts from Chapter 1
of the selected t tle.
• Some d scs may not work n the
above operat on.
DVD (x 1.3)
V deo CD/
JPEG CD
1
(x 1.3)
1(x 1.5)
2
(x 1.5)
2(x 2.0)
3
(x 2.0)
3
Note:
In case of the V deo CD recorded wth
PAL colour system, 3 (x 2.0)
zoom ng does not work.
Zooming/Locating desired scene

44
Marking the scenes Returning to the scenes
1
Press MARKER during playback or stop mode.
2
1
3
The un t stores the ponts that you want to watch aga n up to 3 ponts. You can resume playback from each scene.
2
3
Notes:
Some d scs may not work wth the mark ng operaton.
The mark ng s cancelled when you
open the d sc tray or
turn the power off.
Some subt tles recorded around the marker may fa l to
appear.
•
•
•
To cancel the Marker
Follow the above steps 1~2, then press CANCEL.
Press MARKER during playback.
Press MARKER to remove this display.
Press ENTER.
Playback starts from the marked
scene.
Press or to select the Marker 1-3.
Select the blank Marker using or .
Then press ENTER at the desired scene.
• Repeat th s procedure to set
the other 2 scenes.
Marking desired scenes
45
ENGLIS
Press A-B RPT again.
The end po nt s selected. Playback
starts at the po nt that you selected.
Playback stops at the end po nt, re-
turns to Pont A automat cally, then
starts aga n.
Repeat playback
1
Press PLAY MODE during playback or stop
mode.
Press PLAY MODE again to make the screen
disappear.
3
A-B Repeat playback
1
Press A-B RPT during playback.
The start po nt s selected.
A-B repeat playback allows you to repeat mater al between
two selected po nts.
2
2
A
Notes:
• In A-B Repeat mode, subttles near the A or B locatons may
not be d splayed.
• You can not set the A-B Repeat for the scenes that nclude
mult ple angles.
• A-B Repeat playback does not work when Repeat playback s
act vated.
• You may not be able to set A-B Repeat, durng certa n scenes
of the DVD.
• A-B Repeat does not work wth an nteract ve DVD, MP3/WMA/
JPEG CD.
• A-B Repeat s prohb ted when PBC s on.
To resume normal playback
Press A-B RPT aga n.
“
Off
” appears on the screen.
AB
Repeat Off
/Enter/Play Mode
Notes:
• Some d scs may not work wth the repeat operat on.
• In case of V deo CD w th PBC, repeat funct ons are proh b-
ted durng playback.
[DVD]
Press / or ENTER once or twice to select
“Chapter” or “Title”.
The unt automat cally starts repeat
playback after f nsh ng the current
t tle or chapter.
[Audio CD, Video CD, MP3/WMA CD]
Press to select “Repeat”.
Press / or ENTER once or twice to select
“Track” or “All”.
The un t automat cally starts repeat
playback after f n sh ng the current
track.
• If you set the repeat mode dur ng stop mode,
press PLAY to start Repeat playback.
To resume normal playback
Select Repeat : “Off” n step 2.
Repeat playback/A-B Repeat playback
46
Random playback
Program playback
Press PLAY MODE during stop mode.
1
Press / / / to select “Program
Playback”
and press ENTER.
The programs you selected wll start to playback n
the order.
• In case of JPEG f le, press SKIP to cont nue
the program playback.
• To resume normal playback, select Play Mode:
“Off” n step 2.
4
You can arrange the playback order of tracks or f les on the dsc. And also the un t selects tracks or f les at random and playback
them. These feature works for Aud o CD, Vdeo CD and MP3/WMA/JPEG CD.
2
Repeat
1
2
3
4
5
6
7
8
9
10
11
12
Clear Program Playback
Play Mode
:
Program
:
/Enter/0 9/Cancel/Play Mode
Off
3
Program Playback
23 5 8 11
31
16912
17
4710
Repeat
Play Mode
:
Program
:
Off
/Enter/0 9/Cancel/Play Mode
Clear
Press / to select Play Mode, then press
/ or ENTER to select “Random”.
1
Press PLAY
.
The Random Playback w ll start.
3
2
Clear Program Playback
23
5811
31
16912
17
4710
Repeat
Play Mode
:
Program
/Enter/0 9/Cancel/Play Mode
:
Off
Note:
In play ng back the Vdeo CD w th PBC, you can not set
Random playback.
Notes:
• In play ng back the Vdeo CD w th PBC, you can not set
Program playback.
• The program s cancelled when you open the dsc tray or
turn the power off.
PLAY
■To change the program
1. In the program mode, press / / / to select the
track number.
2. Press Number buttons (0–9) to select the track number
to be replaced.
■To clear the program one by one
In the program mode, press / / / to select the
track number. Then press CANCEL.
■To clear all the programs
In the program mode, press / / / to select
“Clear”. Then press ENTER.
Press / to select Play Mode, then press
/ or ENTER to select “Program”.
Press / or / to select the program-
ming position. Use Numbered buttons (0–9) to
input the track or file numbers.
• To program others, repeat step 3.
• If you nput a wrong number, press
CANCEL.
Press PLAY MODE during playback or stop
mode.
• If you set “Random” dur ng playback mode,
Random playback w ll begn after the track that s
currently be ng played has ended.
• To resume normal playback, select Play Mode:
“Off” n step 2.
Program playback/Random playback (VCD/CD)
47
ENGLIS
Press MENU during playback.
The DVD menu appears on the screen.
• Press MENU aga n to resume
playback at the scene when you
pressed MENU.
Press / / / to select the desired title.
Press ANGLE during playback.
The current angle w ll appear.
When play ng back a d sc recorded w th mult -angle fac lty, you can change the angle that you are vew ng the scene from.
1
1/9
Press ANGLE repeatedly until the desired angle
is selected.
2
Note:
Depend ng on the DVD, you may not be able to change the
angles even f mult-angles are recorded on the DVD.
Title selection
Two or more t tles are recorded on some dscs. If the ttle menu s recorded on the d sc, you can select the desred ttle.
1
Press ENTER or PLAY.
The playback of the selected t tle wll
start.
3
Note:
Depend ng on the DVD, you may not be able to select the ttle.
Depend ng on the DVD, a “ttle menu” may s mply be called a
“menu” or “t tle” n the nstructons suppl ed wth the d sc.
2
DVD menu
Press / / / to select the desired item.
Some DVDs allow you to select the d sc contents usng the menu.
When you play back these DVDs, you can select the subt tle language and sound-track language, etc. usng the menu.
1
Press ENTER.
The menu cont nues to another
screen. Repeat steps 2 and 3 to set
the tem completely.
3
2
PLAY
Press TOP MENU during playback.
T tle menu appears on the screen.
Note:
Depend ng on the DVD, you may not be able to resume playback
from the scene po nt when you pressed the MENU button.
Changing angles/Title selection/DVD menu
Changing angles

48
Press AUDIO repeatedly until the desired lan-
guage is selected.
•The on screen d splay wll dsappear after a few
seconds.
Changing soundtrack language/Setting surround sound
Press or to select “On”.
•The on screen d splay wll dsappear after a few
seconds.
1
Changing soundtrack language
1
2
Press AUDIO during playback.
The current soundtrack language w ll
appear.
You can select the language when you play a mult lngual dsc.
Notes:
• If the des red language s not heard after press ng the
button several t mes, the language s not recorded on
the d sc.
• Chang ng soundtrack language s cancelled when you
open the d sc tray. The nt al default language or avalable
language w ll be heard f the dsc s played back agan.
In case of Video CD playback
Aud o type changes as follows each tme you press AUDIO.
Setting surround sound
Th s DVD/VCR equ pped wth a “SPATIALIZER VIRTUAL SURROUND”. It can produce the effect of be ng n a cnema or
a concert hall.
Certa n audo features of ths product manufactured under
a l cense from Desper Products, Inc.,
Spat al zer
® and the
c rcle-n-square devce are trademarks owned by Desper
Products, Inc.
2
To cancel Surround mode:
Follow the left steps 1~2, then press or to select
the “Off” pos ton.
Note:
The “SPATIALIZER VIRTUAL SURROUND” s effectve only
for the sound of d sc.
2/8 Rus Dolby D gtal
Spat alzer Off
During disc playback press AUDIO.
49
ENGLIS
Press SUBTITLE repeatedly during playback
until your desired language appears.
1/8 Eng
During DVD KARAOKE disc playback, press
AUDIO.
2
On : The pr mary vocal s output
when t s recorded on the dsc.
Off : The pr mary vocal s not output.
Press or to select “On” or “Off”.
You can turn the vocal on or off recorded on the DVD
KARAOKE.
Notes:
• The vocal output feature s used durng playback of Dolby
D gtal (mult -channel) recorded DVD KARAOKE dscs. Th s
feature allows you to turn off vocal audo tracks, or restore
them for background accompan ment.
• When playng Karaoke, connect approprate audo equpment
such as an amplf er to the DVD/VCR.
1
3
Press or until the KARAOKE symbol ( )
appears.
• If you play non-Karaoke dsc, the KARAOKE
symbol ( ) does not appear.
When play ng back a dsc recorded w th subt tles, you can
select the subt tle language or turn the subttle off.
To turn off the subtitle, press SUBTITLE until
“Off” appears.
• The on screen d splay wll d sappear after a
few seconds.
1
Notes:
• Depend ng on the DVD, you may not be able to change
subt tles, or to turn subttles on or off.
• Wh le play ng a DVD, the subt tle may change when you
open or close the d sc tray.
• In some cases, a selected subt tle language may not be
changed mmedately.
Off
Subtitles Karaoke playback
2
• The on screen d splay wll d sappear after a
few seconds.
Subtitles/Karaoke playback
50
With each press of DISPLAY, the status of the disc
will appear on the screen and change as follows.
[DVD]
To make status d splay d sappear, press DISPLAY
aga n.
[Video CD]
When you playback the CD d sc, the status d splay
w ll appear on the screen and cont nue d splay ng.
00:34:56 01:12:33
00:34:56 01:12:33
1/9
Ttle 1/99
1/8
1/32
Chapter 1/999
EngDolby D g tal
Eng
00:12 04:32
00:12 04:32
Track –/–
PBC
34:56 71:33
Track 11/99
To make status d splay d sappear, press DISPLAY
aga n.
[Audio CD]
Disc status To turn off the PBC
Press number button 1 in the stop mode, then
press ENTER.
1
Disc status/To turn off the PBC
51
ENGLIS
Th s player can play back the MP3/WMA/JPEG-data whch has been recorded on CD-R or CD-RW. To produce the MP3/WMA/
JPEG-data, you need a Wndows-PC w th CD-RW dr ve and a MP3/WMA/JPEG-encod ng Software (not suppled). The Apple-
HFS-System can not be played.
MP3/WMA/JPEG CD information
Limitations on MP3/WMA/JPEG CD playback
• MP3/WMA/JPEG CD s the dsc that s standardzed by ISO9660, ts fle name must nclude 3-d g ts exten-
s on letters, “mp3”, “wma”, “jpg”.
• MP3/WMA/JPEG CD must be correspond to the ISO standardzed fles.
• Ths un t can read 200 f les per d sc. If one d rectory has more than 200 fles, t reads up to 200 fles, the
rema n ng f les w ll be om tted.
• The unt s able to recognze up to a maxmum of 50 drectores per dsc.
• MP3/WMA/JPEG CDs cannot be used for the purpose of recordng.
• If the CD has both audo tracks and MP3/WMA/JPEG fles, only audo tracks are played.
• It may take more than one mnute for ths unt to read MP3/WMA/JPEG fles dependng on ts structure.
• Musc recorded by “Jol et Recordng Spec f cat on” can be played back, the f le name s dsplayed (w th n 16
letters) on the screen. Long f le names w ll be condensed.
• The musc fles recorded by “Herarchcal Fle System” (HFS) cannot be played.
Limitations on display
• The maxmum number for dsplay s 16 letters.
Avalable letters for dsplay are the followng:
cap tal or small alphabets of A through Z, numbers of 0 through 9, and _ (under score).
• Other letters than those above are replaced n hyphen.
Notes on MP3/WMA/JPEG files
To play back MP3/WMA/JPEG CD n the recorded order,
1.Use MP3/WMA/JPEG software that records data alphabet cally or numercally.
2.Name each f le ncludng two-dgt or three-dgt number (ex. “01” “02” or “001” “002”).
3.Refra n from makng too many sub-folders.
CAUTION:
• Some MP3/WMA/JPEG CDs can not be played back dependng on the recordng condtons.
• The CD-R/RW that has no musc data or non MP3/WMA/JPEG f les can not be played back.
Standard, sampling frequency, and the bit rate:
MP3 CD
MPEG-1 Aud o
32kHz, 44.1kHz, 48kHz
32kbps ~ 320kbps (constant b t rate or var able b t rate)
The recommend recordng settng for a h gh-qual ty sound s 44.1kHz of samplng frequency and 128kbps of
constant b t rate.
WMA CD
WMA vers on 7, and 8
32kHz, 48kbps
44.1kHz, 48kbps ~ 192kbps
48kHz, 128kbps ~ 192kbps
The f le recorded by mono, 48kHz, 48 kbps s not ava lable to th s un t.
MP3/WMA/JPEG operation

52
MP3/WMA CD playback
Notes:
• Dur ng MP3/WMA/JPEG-Playback, you can not use SEARCH,
A-B Repeat funct ons.
• You can use Repeat (Track or All), Random funct ons and
Program playback for MP3/WMA/JPEG CD Playback (see
pages 45 and 46).
• In the case of a CD contan ng a mxture of MP3, WMA and
JPEG f les, the fles are played back by selectng them from
the f le menu.
Place a disc on which MP3 or WMA files have
been recorded onto the disc tray.
1
A file menu screen will appear on the screen.
Press / or ENTER to select folder.
1
-
/72
--:--
/0-9/Enter/Play Mode
2
3
4
5
Japan
CD-R
Bay Br dge
CLOSE MY EYES
DIVE TO BLUE
Honey
8
9
10
11
12
flower
L es and Truth-
w nter fall
Ra n
Strawberry
6
BLUE EYES
13
Welcome party
7
Blurry Eyes
14
Tha land
Pops
2
Press / / / or Number buttons (0–9) to
select the desired file.
• In case the folder ncludes more than 15 f les, press
or to d splay next f le l st.
• When PLAY has been pressed after d splayng the
f le menu, or when the d sc tray has been closed
us ng PLAY, playback beg ns automat cally start ng
from the f rst f le. In th s case, f the f rst fle s an
MP3/WMA f le, only MP3/WMA f les are played back
n order. If the f rst fle s a JPEG f le, the frst JPEG
f le s played back.
3
/0-9/Enter/Play Mode
1
-
/72
2
3
4
5
Japan
CD-R
Bay Br dge
CLOSE MY EYES
DIVE TO BLUE
Honey
8
9
10
11
12
flower
L es and Truth-
w nter fall
Ra n
Strawberry
6
BLUE EYES
13
Welcome party
7
Blurry Eyes
14
Tha land
Pops
--:--
/0-9/Enter/Play Mode
15
-
/72
16
Mother
CD-R
Hold Your Last
Pops
--:--
Press ENTER.
The selected f le starts play ng back.
4
Press STOP to end playback.
• The un t records the stopped po nt. “ ” appears on
the screen. Press PLAY to resume playback (from
the scene po nt).
• If you press STOP agan or unload the d sc, the un t
w ll clear the stopped po nt.
Operat on
Med a type
Folder
F le number
Elapsed t me
: Ind cates MP3-fle
/0-9/Enter/Play Mode/DVD Menu
: Ind cates WMA-fle
: Ind cates JPEG-fle
About file menu
Notes:
• The p cture menu s dsplayed when the FUJICOLOR CD
or the Kodak P cture CD are played. To d splay the fle
menu, press TOP MENU.
• In the case of a CD conta n ng a mxture of MP3, WMA and
JPEG f les, the fles are played back by select ng them from
the f le menu.
• MP3 or WMA fle on the Kodak Pcture CD s not recog-
n zed on ths un t.
STOP
5
W ndows Meda, and the W ndows logo are trademarks,
or reg stered trademarks of M crosoft Corporat on n the
Un ted States and/or other countr es.
MP3/WMA/JPEG operat on
53
ENGLIS
The sl de show enables you to v ew p ctures (f les) one
after another automat cally.
Preparation:
• Set “JPEG Interval” settng to “5 Seconds”, “10 Sec-
onds” or “15 Seconds” see page 57.
Place a disc on which JPEG files have been
recorded onto the tray.
1
A file menu screen will appear on the screen.
Press / to select folder.
1
-
/36
2
3
4
5
P c-1
CD-R
P c-2
P c-3
P c-4
P c-5
8
9
10
11
12
P c-8
P c-9
P c-10
P c-11
P c-12
6
P c-6
13
P c-13
7
P c-7
14
P c-14
Collect on
/0-9/Enter/Play Mode/DVD Menu
2
Press / / / or Number buttons (0–9) to
select the desired file.
To d splay a p cture menu, press MENU.
(To return to a f le menu, press TOP MENU.)
Press / or / to select the desred fle.
3
Press ENTER. The selected picture appears
on the screen.
Rotating an image
You can rotate an mage by 90 degrees by press-
ng ANGLE dur ng playback of the mage.
“”, “ ”, “ ” or “ ” appears
br efly on the screen.
4
Press STOP to end playback.
The f le menu appears on the screen.
If you want to watch the other f le, repeat steps
3 ~ 4.
5
JPEG CD playback
Select your desired starting file for the slide
show in the step 3 as left.
2
Press ENTER to start slide show from the
selected file.
• If you press PAUSE dur ng the slde show, the sl de
show stops temporary. “ 4 ” appears br efly on the
p cture.
If the p cture appears ups de down or s deways,
press ANGLE repeatedly untl t’s rght s de up.
“”, “ ”, “ ” or “ ” appears br efly
on the screen.
Press PLAY or SKIP aga n to resume the sl de
show.
• When the sl de show playback f n shed the f le l st
appears.
• To stop the slde show, press STOP. The fle l st ap-
pears.
Slide show playback
1
STOP
• To dsplay next l st, press SKIP / .
• When PLAY has been pressed after d splayng
the f le menu, or when the d sc tray has been
closed after press ng PLAY, playback begns
automat cally start ng from the f rst f le. In th s
case, f the f rst f le s a JPEG f le, the f rst JPEG
f le s played back. If the f rst f le s an MP3/
WMA f le, only MP3/WMA f les are played back
n order.
MP3/WMA/JPEG operat on
54
Setting procedure
Press SETUP during stop mode.
The follow ng on-screen dsplay
appears.
1
2
3
To make SETUP screen disappear, press
SETUP or RETURN.
5
You can change the default sett ngs to custom ze performance to your preference.
/Enter/Setup/Return
Language P cture Parental OtherSound
•
Repeat steps 3 and 4 to change
other sett ngs.
• To select another operat on, go
back to step 2.
Press or to select the desired section, then
press or ENTER.
Press or to select the desired option.
4
Change the selection using / / / or EN-
TER, by referring to the corresponding pages
56~58.
Customizing the function settings
55
ENGLIS
Section
Language
Picture
Sound
Parental
Other
Option
Menu
Subtitle
Audio
E.B.L.
Tv Screen
Display
JPEG Interval
Select Files
Dialogue
Password
Parental
OSD Language
Output
Details
To select the language of “Menu”, “Subt tle” and
“Aud o” f the r languages are recorded onto the
d sc more than one language.
To select On or Off for E.B.L. (Enhanced Black
Level).
To select a p cture s ze accord ng to the aspect
rat o of your TV.
To turn on or de-actvate the operatonal status d s-
play on the screen.
To select a preferred settng for the slde show play-
back.
To select a preferred f le type for play ng back a CD
conta n ng a m xture of f le types.
To select On or Off for DRC (Dynam c Range Con-
trol).
Input 4-d g t password to set the parental level.
To select a preferred parental level for the parental
sett ng.
To select a preferred language for on screen d splay.
To select a preferred v deo output s gnal of “RGB”,
“Component” or “Progress ve”.
Page
56
56
56
57
57
57
57
58
58
Setting details
Custom zng the functon settngs

56
Setting details
Language P cture Parental OtherSound
Menu
Subt tle
Aud o
Russ an
Automat c
Russ an
/Enter/Setup/Return
Engl sh
Russ an
Other
Menu, Subtitle, Audio
You can select the language of “Menu”, “Subt tle” and
“Aud o” f more than one languages are recorded onto
the d sc.
English, Russian:
The selected language w ll be heard or seen.
Other:
Other language can be selected (see the
“Language code l st” on page 60).
Automatic: (Subtitle)
• The un t wll automat cally select the same
language n the AUDIO sett ng.
• When the un t selects the same language as
the AUDIO, the subt tles wll not appear dur ng
playback.
• When you do not use the same language as
the AUDIO, the subt tles wll appear dur ng
playback.
Off: (Subtitle)
Subt tles do not appear.
Original: (Audio)
The un t wll select the frst pr or ty language of
each d sc.
Note:
If the selected language s not recorded on the d sc, the
f rst-prorty language s selected.
Tv Screen
Display 4:3
/Enter/Setup/Return
Language Picture Parental OtherSound
On
JPE Interval
Select Files All
Off
On
E.B.L.
E.B.L.
To select the black level of playback p ctures, set your
preference and mon tor’s ablty.
On: Enhanced grey scale (0 IRE cut off)
Off: Standard grey scale (7.5 IRE cut off)
Tv Screen
You have the follow ng screen szes to choose from:
4:3
Letter box:
Select th s mode when connect ng to a convent onal
TV. When play ng back a w de screen-DVD d sc, t
d splays the wde p cture w th black bands at the top
and bottom of screen.
4:3
Pan scan:
It d splays the wde pcture on the whole screen w th
left and r ght edges automatcally cut off.
16:9
Wide:
Select th s mode when connect ng to a wde-screen
TV. A w de screen p cture s dsplayed full s ze.
Note:
If the DVD d sc s not formatted n the pan & scan style,
t dsplays 4:3 style.
Language Picture
Custom zng the functon settngs
57
ENGLIS
JPEG Interval
You can contnuously play back all JPEG f les automat -
cally.
After the settng below, start playng the d sc on wh ch
JPEG f les have been recorded.
Off:
Plays back one f le at a tme.
5 Seconds:
Plays back mages n the form of a slde show at
5 second ntervals.
10 Seconds:
Plays back mages n the form of a slde show at
10 second ntervals.
15 Seconds:
Plays back mages n the form of a slde show n
15 second ntervals.
Select Files
When play ng back a CD conta nng a m xture of MP3,
WMA and JPEG fles, only MP3/WMA or JPEG f les can
be d splayed on the fle menu.
Display
On screen d splay can be sw tched on or off when you
press the buttons.
On: On screen dsplays appear when you press
the buttons (factory sett ng).
Off: On screen dsplays do not appear when you
press any buttons.
All:
D splays all fles.
Music Only:
D splays only MP3/WMA f les.
Pictures Only:
D splays only JPEG fles.
D alogue
On : DRC(TV)
Off : DRC(Std)
/Enter/Setup/Return
Language P cture Parental OtherSound
Off
On : Loud sound such as explos on or sm lar
s toned down slghtly when played back.
Th s makes t sutable for when t s
connected to a stereo.
Off : It plays back at the record ng level on the
d sc.
Notes:
• Th s functon works only dur ng playback of Dolby Dg tal
recorded d scs.
• The level of Dynam c Range Reducton may d ffer
depend ng on DVD vdeo d sc.
Sound
Dialogue
DRC (Dynam c Range Control) enables you to control
the dynam c range so as to ach eve a sutable sound for
your equ pment.
Custom zng the functon settngs
58
Parental control setting
Some d scs are spec f ed not su table for ch ldren.
Such d scs can be l mted not to play back w th the un t.
1) Press or to select “Parental”, then press
or unt l the level you requre appears.
• Level Off: The parental control settng does not
funct on.
• Level 8: All DVD software can be played back.
• Level 1: DVD software for adults cannot be
played back.
Select from the level 1 to level 8. The lmtat on wll
be more severe as the level number s lower.
2) Press or to select “Password”.
Press Number buttons (0–9) to nput a 4-dg t
password. Be sure to remember th s number!
• If you nput a wrong number, press CANCEL.
3) Press ENTER to store the password.
Note: Now the rat ng s locked and the settng can
not be changed unless you enter the correct pass
word.
OSD Language
You can select the language of On Screen D splay.
English, Russian:
The selected language w ll be seen.
To change the parental level
1) Press or to select “Password”.
2) Press Number buttons (0–9) to enter the password
you have stored.
3) Press ENTER.
• The ratng s now unlocked.
4) Press or to select “Parental”, then press
or to change the parental level.
5) Press or to select “Password”, then press
Number buttons (0–9) to enter the password.
Note: You can change the password f you want.
6) Press ENTER.
Now the parental level s changed and locked.
Language P cture Parental OtherSound
OSD Language
Output Engl sh
RGB
/Enter/Setup/Return
Engl sh
Russ an
Language
Password
Parental
Picture Parental Other
Off
0 9/Cancel
/Enter/Setup/Return
Sound
Parental Other
Note:
If each setup (pages 56~58) has been completed, the unit
can always be worked under the same conditions (espe-
cially with DVD discs).
Each setup will be retained in the memory even if you turn
the power off.
If you forget the password...
1. Press OPEN/CLOSE to open the d sc tray.
2. Remove the d sc.
3. Press OPEN/CLOSE aga n to close the dsc tray.
“No D sc” appears on the screen.
4. Wh le hold ng STOP down on the front panel, press 7
on the remote control. “PASSWORD CLEAR” appears
on the screen.
5. Enter a new password aga n.
Output
You can select the v deo output sgnal of the DVD/VCR
to the TV from “RGB”, “Component” or “Progress ve”.
RGB:
Select when connect ng to an RGB or composte
TV.
Component:
Select when connect ng to a TV equpped wth
component v deo nputs but progressve scan s
not compat ble.
Progressive:
Select when connect ng to a TV equpped wth
component v deo nputs, progressve scan
compat ble.
Warning:
Once “Progress ve” s selected when connectng to a
TV progress ve scan ncompatble, no mage w ll be
seen on the v deo dsplay.
In th s case, you must reset the unt by pressng the
STOP button on the front panel for f ve seconds. The
v deo output wll be restored to “RGB” settng, and a
p cture wll once agan be seen on a convent onal
analog d splay. (You may need to make the Scart
connect on f you connect a TV, progressve scan
ncompatble, wth component lead only.)
Notes:
• Some d scs may not be played back wth the progres-
s ve scannng mode correctly because of the dsc
character stcs or recordng cond t on.
• Once Progress ve scan on, all other vdeo outputs are
d sabled except component vdeo outputs.
Notes:
• Depend ng on the dscs, the un t cannot l mt playback.
• Some d scs may not be encoded wth spec f c ratng
level nformaton though ts dsc jacket says “adult.”
For those d scs, the age restrct on wll not work.
Setting details
Custom zng the functon settngs
59
ENGLIS
Depend ng on the DVD d sc, the d sc may try to temporar ly cancel the rat ng level that you have set.
It s up to you to dec de whether to cancel the rat ng level or not.
Load a DVD disc and press PLAY or OPEN/
CLOSE on the unit, see page 40.
Th s temporary cancellaton of ratng level wll be kept unt l the
d sc s ejected.
When the d sc s ejected, the org nal rat ng level wll be set agan
automat cally.
Playback will commence if the entered pass-
word was correct.
If the DVD disc has been designed to temporarily
cancel the Rating level, the screen which follows
the “Reading” screen will change, depending on
which disc is played. If you select “YES” with the
ENTER key, “Your disc exceeds the parental
control level#.” screen will then appear.
If you wish to cancel the set rating level temporar-
ily, select “Parental Control Level” with
or
,
then press ENTER. If the 4-digit password at step
2 on page 58 has been set, the password entering
screen will appear as shown in step 4.
Alternatively, if the password has not been set,
playback will commence. If you don’t know (or have
forgotten) the password, select “Cancel Picture”.
The setting screen will disappear. Press OPEN/
CLOSE to remove the disc.
Enter the password with Number buttons (0–9).
Then press ENTER.
If you nterrupt the enter ng, press
RETURN.
Your d sc exceeds
the parental control level#.
Parental Control Level
Cancel P cture
/Enter/Return
Please enter the
4 d gt password
9/
Cancel
/ReturnEnter/0
-
PLAY
Reading
Note:
14
2
3
5
Temporary disabling of rating level by DVD disc

60
Abkhaz an 1112 Fj 1620 L ngala 2224 S nghalese 2919
Afar 1111 F nnsh 1619 L thuanan 2230 Slovak 2921
Afr kaans 1116 French 1628 Macedon an 2321 Slovenan 2922
Alban an 2927 Fr san 1635 Malagasy 2317 Somal 2925
Amhar c 1123 Gal can 1722 Malay 2329 Span sh 1529
Arab c 1128 Georg an 2111 Malayalam 2322 Sundanese 2931
Armen an 1835 German 1415 Maltese 2330 Swah l 2933
Assamese 1129 Greek 1522 Maor 2319 Swed sh 2932
Aymara 1135 Greenland c 2122 Marath 2328 Tagalog 3022
Azerba jan 1136 Guaran 1724 Moldav an 2325 Taj k 3017
Bashk r 1211 Gujarat 1731 Mongol an 2324 Tam l 3011
Basque 1531 Hausa 1811 Nauru 2411 Tatar 3030
Bengal ; Bangla 1224 Hebrew 1933 Nepal 2415 Telugu 3015
Bhutan 1436 H nd 1819 Norweg an 2425 Tha 3018
B har 1218 Hungaran 1831 Or ya 2528 Tbetan 1225
Breton 1228 Iceland c 1929 Panjab 2611 Tgrnya 3019
Bulgar an 1217 Indones an 1924 Pashto, Pushto 2629 Tonga 3025
Burmese 2335 Interlngua 1911 Pers an 1611 Turk sh 3028
Byeloruss an 1215 Ir sh 1711 Pol sh 2622 Turkmen 3021
Cambod an 2123 Ital an 1930 Portuguese 2630 Tw 3033
Catalan 1311 Japanese 2011 Quechua 2731 Ukra n an 3121
Ch nese 3618 Javanese 2033
Rhaeto-Romance
2823 Urdu 3128
Cors can 1325 Kannada 2124 Roman an 2825 Uzbek 3136
Croat an 1828 Kashm r 2129 Russ an 2831 V etnamese 3219
Czech 1329 Kazakh 2121 Samoan 2923 Volapük 3225
Dan sh 1411 K rghz 2135 Sanskr t 2911 Welsh 1335
Dutch 2422 Korean 2125 Scots Gael c 1714 Wolof 3325
Engl sh 1524 Kurd sh 2131 Serb an 2928 Xhosa 3418
Esperanto 1525 Laoth an 2225 Serbo-Croat an 2918 Ydd sh 2019
Eston an 1530 Lat n 2211 Shona 2924 Yoruba 3525
Faroese 1625 Latv an, Lettsh 2232 S ndh 2914 Zulu 3631
Language Name Code Language Name Code Language Name Code Language Name Code
Enter the appropr ate code number for the n t al sett ngs “Menu”, “Subt tle” and/or “Aud o” (see page 56).
Language code list
61
ENGLIS
SYMPTOMS POSSIBLE SOLUTIONS
•Make sure the power cord s plugged n.
•Try another AC outlet.
•Power s off, check fuse or crcut breaker.
•Unplug un t, then plug t back n.
•Select the DVD or VCR mode before operat ng.
DVD/VCR does not operate.
Problems and troubleshooting
Use the followng check l st for troubleshootng when you have problems wth your un t. Consult your local dealer
or serv ce outlet f problems pers st.
Be sure all connect ons are properly made when us ng w th other un ts.
DVD/VCR
PAGE
–
–
–
–
15,40
The remote control does not
funct on.
• A m at the remote control at the remote sensor.
• Operate w th n Approx. 5 Meters or reduce the l ght n the room.
• Clear the path of the beam.
• The batteres are weak. Replace the batteres.
• Check the batter es are nserted correctly.
• Check the frequency code s set correctly.
10
DVD
No pcture.
•
Antenna connect on s not correct or antenna cable s d sconnected.
• The vdeo channel s not n the correct pos t on or the TV s not
set to the v deo channel.
• Check the unt s connected correctly.
• The vdeo nput selector of the TV s not set to VIDEO. Set to
VIDEO (or equvalent).
• Channel s set to the external mode.
No sound. • Check the unt s connected correctly.
• Check the nput selector of the ampl f er s set properly.
• The unt s n the Spec al playback mode.
11
14
11~13
–
–
11~13
–
26,42
•Select proper language n the menu optons.
D splay s not shown n your
language. 58
Playback doesn’t start. • No d sc s nserted.
• The dsc may be d rty. Clean up the dsc.
• The un t cannot play DVD-ROMs, etc.
Stopp ng playback, slow-mot on
play, repeat play, or memory play,
etc. cannot be performed. • Some d scs may not do some of the functons.
40
39
39
–
No se bars on screen.
• Trackng adjustment beyond range of automat c trackng c rcu t.
Try Manual trackng adjustment.
• V deo heads are drty.
• The tape s worn or damaged.
VCR
•The erase prevent on tab of the vdeo cassette s broken off.
•The un t s n the external nput mode.
TV record ng does not work. 24
Tmer recordng does not work. • The tme s not set correctly.
• The recordng start/end tme s not set correctly.
• The TIMER REC has not been pressed ( s not lt).
17
33
34
26
62
–
62
No subt tle. • Some dscs have no subt tles.
• Subt tles are cleared. Press SUBTITLE.
Angle cannot be changed. • Mult-angles are not recorded on the DVD dsc.
• The functon s prohbted wth the unt or the dsc.
appears on the screen.
–
49
47
42
SYMPTOMS POSSIBLE SOLUTIONS PAGE
Problems and troubleshoot ng/Video head cleaning
Good P cture Snowy P cture
No 4:3 (16:9) p cture. • The setup does not match your TV.
No on-screen d splay. • Select D splay On.
56
57
No surround sound. • The setup does not match your stereo system.
The un t or remote operaton key
s not funct on ng. • Turn off the unt and unplug the AC power cord for several
m nutes, then replug t.
13
Playback does not start when the
t tle s selected. • Check the Parental control sett ng.
Aud o soundtrack and/or subt tle
language s not changed when
you play back a DVD. • Mult l ngual language s not recorded on the DVD d sc.
15
58
56
Video ead Clogging
The v deo heads record and playback p ctures and sound on
the v deo tape. In the event that they become d rty you won't
be able to do a perfect record ng and the playback p cture w ll
be extremely snowy. Also, keep n m nd that a poor tape
qual ty and a damaged cassette may contrbute to the rap d
accumulat on of d rt on the heads.
Automatic ead Cleaning System
The Automat c Head Clean ng System cleans the v deo heads automat cally when a cassette s nserted and ejected
to prevent d rt from accumulat ng on the heads. However, manual head clean ng s needed f the p cture on playback
s st ll unclear although the p cture on program s normal. Th s fa lure s gn f es that the head s gettng d rty and can
occur when play ng poor qual ty or damaged tapes. If the heads requ re clean ng, use a h gh qual ty head-clean ng
cassette or have them cleaned profess onally.
Attention:
V deo heads may eventually wear out and should be replaced when they fal to produce clear pctures even after
hav ng been carefully cleaned.
Video head cleaning
63
ENGLIS
GENERAL
Power supply:
Power consumpt on:
We ght:
D mens ons:
Input Level:
Output Level:
H -F Frequency Response:
H -F Dynam c Range:
VCR section
Vdeo system:
Vdeo Head:
Aud o Track:
Channel coverage:
RF Channel Output:
F.FWD/REW Tme at 25˚C:
DVD section
S gnal system:
Appl cable d sc:
Aud o character st cs
Frequency response:
S/N Rat o:
Harmon c d stort on:
Wow and flutter:
Output:
P ckup:
ACCESSORIES:
AC 110~240V 50Hz
Operat on: 21W
Stand by: 5W
4.0 kg
W dth : 430 mm
He ght: 99 mm
Depth : 251 mm
SCART-socket:
Aud o IN jack: 500 mV, 50 k Ω
SCART-socket:
Aud o OUT jack: 500 mV, 1 k Ω
20Hz to 20,000Hz
More than 75dB
PAL/MESECAM
4 Rotary Heads
H -F Sound - 2 Tracks / MONO Sound - 1 Track
E2-E12, X-Z+2, S1-S41, E21-E69
UHF channel 60 (23 to 69)
Approx. 1m nute and 48 seconds (w th E-180 Cassette Tape)
PAL
DVD (12cm, 8cm), CD (12cm, 8cm)
DVD: 4Hz - 22KHz
CD: 4Hz - 20KHz
90dB
0.06%
Below Measurable Level
Aud o : (RCA) – 12dB, 1 k Ω
D g tal Aud o : 0.5Vp-p, 75 Ω
CD : Wavelength: 775 - 805 nm
Max mum output power: 0.5 mW
DVD : Wavelength: 640 - 660 nm
Max mum output power: 1.0 mW
Remote control x 1
75 Ω Coax al Cable x 1
Aud o RCA Cable x 1
Battery (UM-4) x 2
Specifications
VIDEO: 1 Vp-p, 75 Ω
AUDIO: 500 mV, 50 k Ω
VIDEO: 1 Vp-p, 75 Ω
AUDIO: 500 mV, 1 k Ω
Design and specifications are subject to change without notice.

CAUTION:
DVD PLAYER IS A CLASS 1 LASER PRODUCT. HOWEVER THIS PLAYER USES A VISIBLE LASER
BEAM WHICH COULD CAUSE HAZARDOUS RADIATION EXPOSURE IF DIRECTED. BE SURE TO
OPERATE THE PLAYER CORRECTLY AS INSTRUCTED.
THE FOLLOWING CAUTION LABEL IS LOCATED ON THE REAR PANEL OF THE PLAYER.
WHEN THIS PLAYER IS PLUGGED TO THE WALL OUTLET, DO NOT PLACE YOUR EYES CLOSE
TO THE OPENING OF THE DISC TRAY AND OTHER OPENINGS TO LOOK INTO THE INSIDE OF
THIS PLAYER.
USE OF CONTROLS OR ADJUSTMENTS OR PERFORMANCE OF PROCEDURES OTHER THAN
THOSE SPECIFIED HEREIN MAY RESULT IN HAZARDOUS RADIATION EXPOSURE.
DO NOT OPEN COVERS AND DO NOT REPAIR YOURSELF. REFER SERVICING TO QUALIFIED
PERSONNEL.
IMPORTANT WARNING
Please include the following informations when you order parts. (Particularly the VERSION LETTER.)
1. MODEL NUMBER and VERSION LETTER.
The MODEL NUMBER can be found on the back of each product and the VERSION LETTER can be
found at the end of the SERIAL NUMBER.
2. PART NO. and DESCRIPTION
You can find it in your SERVICE MANUAL.
HOW TO ORDER PARTS
SERVICING NOTICES ON CHECKING
As for the places which need special attentions,
they are indicated with the labels or seals on the
cabinet, chassis and parts. Make sure to keep the
indications and notices in the operation manual.
PERFORM A SAFETY CHECK AFTER
SERVICING
4.
Confirm that the screws, parts and wiring which
were removed in order to service are put in the
original positions, or whether there are the
portions which are deteriorated around the
serviced places serviced or not. Check the
insulation between the antenna terminal or
external metal and the AC cord plug blades.
And be sure the safety of that.
2. USE THE DESIGNATED PARTS
The parts in this equipment have the specific
characters of incombustibility and withstand
voltage for safety. Therefore, the part which is
replaced should be used the part which has
the same character.
Especially as to the important parts for safety
which is indicated in the circuit diagram or the
table of parts as a mark, the designated
parts must be used.
1. KEEP THE NOTICES 3. PUT PARTS AND WIRES IN THE
ORIGINAL POSITION AFTER
ASSEMBLING OR WIRING
There are parts which use the insulation
material such as a tube or tape for safety, or
which are assembled in the condition that
these do not contact with the printed board.
The inside wiring is designed not to get closer
to the pyrogenic parts and high voltage parts.
Therefore, put these parts in the original
positions.
A1-1
(Printed on the Rear Panel)
CLASS 1
LASER PRODUCT

The laser diode used for a pickup head may be destroyed with external static electricity.
Moreover, even if it is operating normally after repair, when static electricity discharge is
received at the time of repair, a life of product may become short.
Please perform the following measure against static electricity, be careful of destruction of a
laser diode enough at the time of repair, and work.
• It works on the desk which performed measures against static electricity, such as conductive
mat.
• Soldering iron with ground wire or ceramic type is used.
• A worker needs to use a ground conductive wrist strap for body.
PREPARATION OF SERVICING
A1-2
Before removing Pick Up PCB and DVD PCB connector, make the short circuit on the position as
shown Fig. 1 using a soldering. If you remove the DVD Deck with no soldering, the Laser may be
damaged.
WHEN REPLACING DVD DECK
[ When the removal of the DVD Deck ]
[ When the installation of the DVD Deck ]
Remove all the soldering on the short circuit position after the connection of Pick Up PCB and DVD
PCB connector.
NOTE
Fig. 1 Make the short circuit
using a soldering.
Pick Up PCB
Use the Pb Free solder and the exclusive soldering iron.
Manual soldering conditions
• Soldering temperature: 320 ±20˚C
• Soldering time: Within 3 seconds
• Soldering combination: Sn-3.0Ag-0.5Cu
When Soldering/Removing of solder, use the drawing equipment over the Pick Up Unit to prevent the
Flux smoke from it.
•
•
•

TAPE REMOVAL METHOD AT NO POWER SUPPLY
Fig. 1
Fig. 2
PARENTAL CONTROL - RATING LEVEL
4 DIGIT PASSWORD CANCELLATION
If the stored 4 digit password in the Rating Level menu needs to be cancelled, please follow the steps below.
Turn Unit ON.
Press and hold the '7' key on the remote control unit.
Simultaneously press and hold the 'STOP' key on the front panel.
Hold both keys for more than 3 seconds.
The On Screen Display message 'PASSWORD CLEAR' will appear.
The 4 digit password has now been cleared
1.
2.
3.
4.
5.
6.
Remove the Top Cabinet, Front Cabinet and DVD Block. (Refer to item 1 of the
DISASSEMBLY INSTRUCTIONS.)
Remove the screw 1of the Deck Chassis and remove the Loading Motor. (Refer to Fig. 2)
Rotate the Pinch Roller Cam in the direction of the arrow by hand to slacken the Video Tape.
Rotate the Clutch Ass'y either of the derections to wind the Video Tape in the Cassette Case.
Repeat the above step 3~4. Then take out the Video Cassette from the Deck Chassis. Be careful not to
scratch on the tape.
1.
2.
3.
4.
5.
Main Cam Clutch Ass'y
Main Chassis (Front Side)
Loading Motor
Capstan DD Unit
Pinch Roller Cam
Screw 1
A1-3
1.
2.
3.
Remove the Top and Front Cabinet. (Refer to item 1 of the DISASSEMBLY INSTRUCTIONS.)
Rotate the Main Gear in the direction of the arrow by hand.
(Refer to Fig. 1)
Draw the Tray.
DISC REMOVAL METHOD AT NO POWER SUPPLY
Fig. 1
DVD DeckMain Gear
Table of contents
Other Toshiba DVD Player manuals

Toshiba
Toshiba SD5300 User manual

Toshiba
Toshiba HD-A3KC User manual

Toshiba
Toshiba SD 3755 User manual

Toshiba
Toshiba SD-K625 User manual

Toshiba
Toshiba SD-K510 User manual

Toshiba
Toshiba SD-3006 User manual

Toshiba
Toshiba SD3005KB User manual

Toshiba
Toshiba SD-3860SC User manual

Toshiba
Toshiba SD5300 User manual

Toshiba
Toshiba SD5010KB User manual

Toshiba
Toshiba SD-4900 User manual

Toshiba
Toshiba SD-520ESE User manual

Toshiba
Toshiba SD-K740 User manual

Toshiba
Toshiba SD-9000 User manual

Toshiba
Toshiba SD7200KU User manual

Toshiba
Toshiba SD-V290 User manual

Toshiba
Toshiba SD-5970SU User manual

Toshiba
Toshiba SD-2200 User manual

Toshiba
Toshiba SD-4990SU User manual

Toshiba
Toshiba SD-5970SU User manual