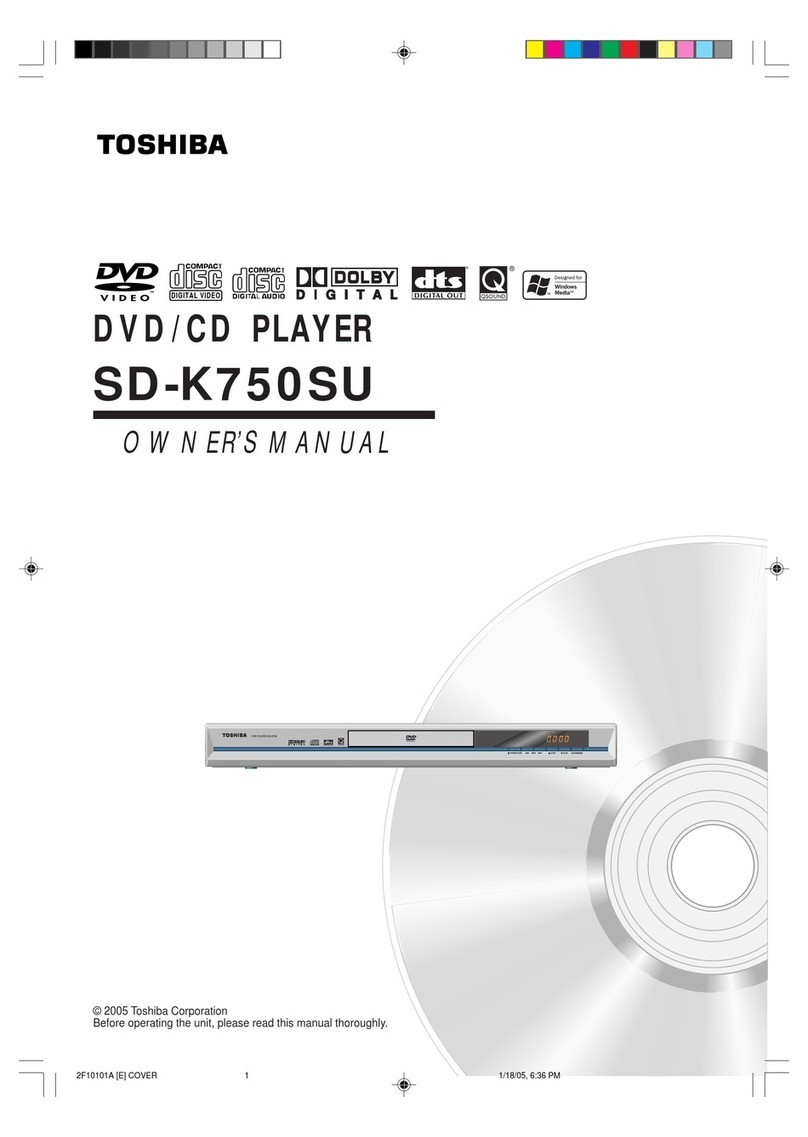
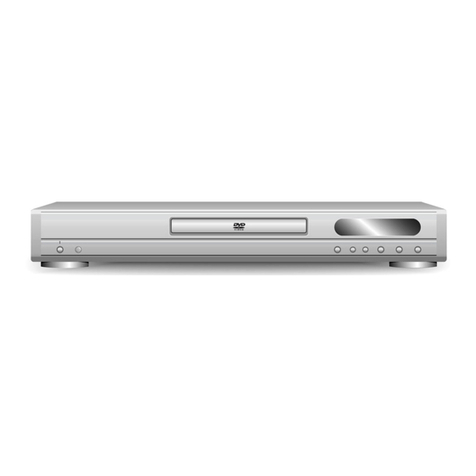
Toshiba SD800KY User manual

DVD PLAYER
SD800KY
DIGITAL VIDEO
2
11
16
19
29
36
Introduction
Connections
Basic playback
Advanced playback
Function setup
Others
©2009Toshiba Corporation
OWNER’S MANUAL

2
Introduction
SAFETYPRECAUTIONS
The symbol is intended to alert the user to the presence
of uninsulated "dangerous voltage" within the product's
enclosurethatmaybeofsufficientmagnitudetoconstitute
a risk of electric shock to persons.
The exclamation point within the equilateral triangle is
intended to alert the user to the presence of important
operatingandmaintenance(servicing)instructionsinthis
owner’smanual.
CAUTION:VISIBLE LASER RADIATION WHEN
OPEN. DO NOT STARE INTO BEAM.
AVIS
WARNING:TO REDUCETHE RISK OF ELECTRIC
SHOCK, DO NOT REMOVE COVER (OR BACK).
NO USER-SERVICEABLE PARTS INSIDE. REFER
SERVICINGTO QUALIFIED SERVICE PERSONNEL.
Location of the required label
Therating plateand thesafety cautionare on
therear ofthe unit.
WARNING: Theapparatus shall not beexposed to drippingor splashing and thatno objects filledwith liquid, such as
vases,shall be placed on theapparatus.
CAUTION: ThisDigitalVideo Disc Playeremploysa Laser System.
To ensure proper use of this product, please read this owner’s manual carefully and retain for future
reference.Shouldtheunitrequire maintenance, contact an authorized service location.
Useofcontrols or adjustments or performanceofprocedures other than those specifiedhereinmay result
inhazardousradiationexposure.
To preventdirect exposureto laserbeam, do not try to openthe enclosure.
Visibleandinvisiblelaserradiationwhenopenandinterlocksdefeated.
DONOTSTARE INTOBEAM.
WARNINGS: • The main plug is used as disconnect device and it should remain readily operable during intended
used. In order to disconnect the apparatus from the mains completely, the main plug should be
disconnected from the mains socket outlet completely.
• ThemainsplugofapparatusshouldnotbeobstructedORshouldbeeasilyaccessedduringintended
use.
• Minimum 10 cm (4 inches) distances around the apparatus for sufficient ventilations.
• Theventilationshouldnotbeimpededbycoveringtheventilationopeningswithitemssuchasnewspaper,
table-cloths,curtains,etc.
• Nonakedflamesources suchaslighted candlesshouldbeplacedontheapparatus.
• The use of apparatus in moderate climates.
WARNING: TOREDUCETHE RISK OF FIRE OR ELECTRIC SHOCK,DO NOTEXPOSETHIS APPLIANCETORAIN OR MOISTURE.
DANGEROUS HIGHVOLTAGES ARE PRESENT INSIDETHE ENCLOSURE. DO NOT OPENTHE CABINET.REFER
SERVICINGTO QUALIFIED PERSONNEL ONLY.
Thesymbol for Class
(Double lnsulation) CLASS 1
LASER PRODUCT

3
Introduction
1. Read these instructions.
2. Keep these instructions.
3. Read all warnings.
4. Follow all instructions.
5. Do not use this appliance near water.
6. Clean only with a dry cloth.
7. Do not block any of the ventilation openings. Install in accordance with the manufacturer's instructions.
8. Do not install near any heat sources such as radiators, heat registers, stoves, or other apparatus (including
amplifiers) that produce heat.
9. Protect the power cord from being walked on or pinched particularly at plugs, convenience receptacles, and the
point where they exit from the apparatus.
10. Only use attachments/accessories specified by the manufacturer.
11. Use only with the cart, stand, tripod, bracket, or table specified by the manufacturer,
or sold with the apparatus. When a cart is used, use caution when moving the cart/
apparatus combination to avoid injury from tip-over.
12. Unplug this apparatus during lightning storms or when unused for long periods of
time.
13. Refer all servicing to qualified service personnel. Servicing is required when the apparatus has been damaged in
any way, such as the power-supply cord or plug is damaged, liquid has been spilled or objects have fallen into the
apparatus, the apparatus has been exposed to rain or moisture, does not operate normally, or has been dropped.
14. Do not overload wall outlets; extension cords, or integral convenience receptacles as this can result in a risk of fire
or electric shock.
15. Never expose the apparatus to dripping or splashing or place items such as vases, aquariums, any other item filled
with liquid, or candles on top of the unit.
16. Keep your fingers well clear of the disc tray as it is closing. Neglecting to do so may cause serious personal injury.
17. Do not place anything on top of this unit.
18. Do not place the apparatus on amplifiers or equipment that may produce heat.
19. Never block or cover the slots or openings in the unit.
Never place the unit:
• on a bed, sofa, rug or similar surface;
• too close to drapes, curtains, or walls; or
• in a confined space such as a bookcase, built-in cabinet, or any other place with poor ventilation.
The slots and openings are provided to protect the unit from overheating and to help maintain reliable operation.
20. Do not use a cracked, deformed, or repaired disc. These discs are easily broken and may cause serious personal
injury and apparatus malfunction.
21. Ifthe apparatus shouldemit smoke or anunusual odor, immediatelydisconnect the power cordfrom the walloutlet.
Wait until the smoke or smell stops, then ask your dealer for a check and repair. Neglecting to do so may cause fire.
22. During thunderstorms, do not touch the connecting cables or the apparatus.
23. Warning: To prevent spread of fire, keep candles or other open flames away from this product at all times.
ADDITIONALSAFETYINSTRUCTIONS
Portable Cart Warning
IMPORTANTSAFETYINSTRUCTIONS

4
Introduction
Precautions
Notes on moisture condensation
Moisture condensation damages the DVD player. Please
read the following carefully.
Moisturecondensationoccurs,forexample,whenyoupour
a cold drink into a glass on a warm day. Drops of water
formonthe outside of theglass.In thesame way, moisture
may condense on the optical pick-up lens inside this unit,
one of the most crucial internal parts of the DVD player.
Moisture condensation occurs during the following
cases.
When you bring the DVD player directly from a cold
place to a warm place.
When you use the DVD player in a room where you
just turned on the heater, or a place where the cold
wind from the air conditioner directly hits the unit.
In summer, when you use the DVD player in a hot and
humid place just after you move the unit from an air
conditioned room.
When you use the DVD player in a humid place.
Donotuse the DVDplayerwhen moisture condensation
may occur.
If you use the DVD player in such a situation, it may
damage discs and internal parts. Remove the disc,
connect the power cord of the DVD player to the wall
outlet, turn on the DVD player, and leave it for two or
three hours. After two or three hours, the DVD player
willhavewarmedupandevaporatedanymoisture.Keep
the DVD player connected to the wall outlet and
moisture condensation will seldom occur.
Notes on handling
When shipping the DVD player, the original shipping
carton and packing materials come in handy. For
maximumprotection, repack the unitas it was originally
packed at the factory. Take care not to give it a shock
or shake when carrying.
Do not use volatile liquids, such as insect spray, near
the DVD player.Do not leave rubber or plastic products
in contact with the DVD player for a long time.They will
leave marks on the finish.
Thetop and rear panelsof the DVD playermaybecome
warm after a long period of use. This is not a
malfunction.
When the DVD player is not in use, be sure to remove
the disc and turn off the power.
If you do not use the DVD player for a long period, the
unit may not function properly in the future. Turn on
and use the DVD player occasionally.
Notes on locating
Place the DVD player on a level surface. Do not use it
on a shaky or unstable surface such as a wobbling
table or inclined stand.The loaded disc may come off
the proper position and cause damage to the DVD
player.
When you place this DVD player near a TV, radio, or
VCR, the playback picture may become poor and the
sound may be distorted. In this case, place the DVD
player away from the TV, radio, or VCR.
Notes on cleaning
Use a soft, dry cloth for cleaning.
For stubborn dirt, soak the cloth in a weak detergent
solution, wring well and wipe.Use a dry cloth to wipe it
dry.
Do not use any type of solvent, such as thinners and
benzene, as they may damage the surface of the DVD
player.
If you use a chemical saturated cloth to clean the unit,
follow that product’s instructions.
Inspection and Maintenance
This DVD player is a high technology, precision device. If
the optical pick-up lens and disc drive parts become dirty
or worn down, the picture quality may be reduced. To
avoid reduction in picture quality, it is recommended that
regular inspection and maintenance (cleaning or parts
replacement)be performed every 1,000hours of use. For
furtherdetails, contactyournearest consumer electronics
dealer.
5
Introduction
Notes on Discs
Playback side
DVD
Title 1 Title 2
Chapter 1 Chapter 2 Chapter 1 Chapter 2 Chapter 3
Structure of disc contents
Normally, DVDs are divided into titles, and the titles are
sub-dividedinto chapters.VIDEO CDsand audio CDs are
divided into tracks.
DVD
VIDEO CD/audio CD
Each title, chapter or track is assigned a number, which is
called “title number”, “chapter number” or “track number”
respectively.
There may be discs that do not have these numbers.
Notes on copyright
The unauthorizedrecording,use, distribution, or revision of
copyrightedmaterials including, withoutlimitation,television
programs, videotapes, and DVDs, is prohibited under the
Copyright Laws of the United States and other countries,
andmaysubject you to civilandcriminal liability.
Thisproduct incorporates copyright protection technology
that is protected by method claims of certain U.S.patents
andotherintellectualproperty rightsownedbyMacrovision
Corporationand other rightsowners.Use ofthis copyright
protection technology must be authorized by Macrovision
Corporation, and is intended for home and other limited
viewing uses only unless otherwise authorized by
Macrovision Corporation. Reverse engineering or
disassembly is prohibited.
On handling discs
Do not touch the playback side of the disc.
Do not attach paper or tape to discs.
On cleaning discs
Fingerprints and dust on the disc cause picture and
sound deterioration. Wipe the disc from the center
outwards with a soft cloth.Always keep the disc clean.
If you cannot wipe off the dust with a soft cloth, wipe
the disc lightly with a slightly moistened soft cloth and
finish with a dry cloth.
Donot use any type of solventsuch asthinner,benzine,
commercially available cleaners or antistatic spray for
vinyl LPs.It may damage the disc.
On storing discs
Do not store discs in a place subject to direct sunlight
or near heat sources.
Do not store discs in places subject to moisture and
dust such as a bathroom or near a humidifier.
Store discs vertically in a case. Stacking or placing
objects on discs outside of their case may cause
warping.
Track 1 Track 2 Track 3 Track 4 Track 5
VIDEO CD/audio CD

6
Introduction
DIGITAL VIDEO
SUPER VIDEO
Notes on Discs (continued)
DVDs
Disc Mark
Contents
Disc
Size Maximum
playback time
VIDEO
CDs
Approx. 4 hours
(single sided disc)
Approx.8 hours
(double sided disc)
Approx.80 minutes
(single sided disc)
Approx.160 minutes
(double sided disc)
Approx.74 minutes
Approx.20 minutes
8 cm
12 cm
8 cm
12 cm
Audio
+
video
(moving
pictures)
Audio
+
video
(moving
pictures)
Audio
CDs
Approx.74 minutes
Approx.20 minutes
8 cm
(CD
single)
12 cm
Audio
SUPER
VIDEO
CDs
DivX®
35 min.
10 min.
8 cm
12 cm
Audio
+
video
(moving
pictures)
Audio
+
video
(moving
pictures)
It depends on DivX
®
quality
8 cm
12 cm
About this owner’s manual
Thisowner’smanual explains the basic instructionsof this
DVD player. Some DVDs are produced in a manner that
allows specific or limited operation during playback. As
such, the DVD player may not respond to all operating
commands.This is not a defect in the DVD player. Refer
to instruction notes of discs.
“ ” may appear on the TV screen during operation.
A “ ” means that the operation is not permitted by the
DVD player or the disc.
Notes on region numbers
The region number of this DVD player is 4. If region
numbers, which stand for their playable area, are printed
on your DVD and you do not find 4or , disc
playback will not be allowed by the player. (In this case,
the DVD player will display a message on-screen).
On VIDEO CDs
This DVD player supports VIDEO CDs equipped with the
PBC (Version 2.0) function. (PBC is the abbreviation of
Playback Control.)You can enjoy two playback variations
depending on types of discs.
• VIDEOCDnot equipped with PBCfunction(Version1.1)
Sound and movie can be played on this DVD player in
the same way as an audio CD.
• VIDEO CD equipped with PBC function (Version 2.0)
In addition to operation of a VIDEO CD not equipped
with the PBC function, you can enjoy playback of
interactive software with search function by using the
menu displayed on the TV screen (Menu Playback).
Some of the functions described in this owner’s manual
may not work with some discs.
Playable discs
This DVD player can play the following discs.
• You cannot play discs other than those listed above.
• You cannot playDVD-RAMdiscsor non-standardized discs,
etc., even if they may be labeled as above.
• This DVD player uses the NTSC/PAL colour system, and
cannot play DVDs recorded in any other colour system
(SECAM, etc.).
Because of problems and errors that can occur during the
creation of DVD and CD software and/or the manufacture of
DVDand CDdiscs,Toshiba cannot assurethatthis DVDplayer
willsuccessfully playevery discbearingtheDVDandCD logos.
If you happen to experience any difficulty playing a DVD and/
orCD discon thisDVDplayer,please contactToshibaCustomer
Service.
isatrademarkofDVDFormat/LogoLicensingCorporation.
The following discs are also available.
DVD±R/±RW andDVD-ROMdiscs of DVD format
CD-R/CD-RW discs of CD-DA,VideoCD,MP3 or JPEG
format
Official DivX®Certified product
Playsallversions of DivX®video (including DivX®6) with
standard playback of DivX®media files
Some of these discs may be incompatible.
About
The iconsonthe headingbarshowtheplayable
discs for the function described under that heading.
DVD
: You can use this function with DVD video discs.
: You can use this function with Video CDs.
CD
: You can use this function with Audio CDs/CD-R/RW
CDs.

7
Introduction
Table of Contents
Introduction
SAFETY PRECAUTIONS ........................... 2
IMPORTANT SAFETY INSTRUCTIONS .... 3
Precautions ............................................... 4
Notes on Discs .......................................... 5
Noteson regionnumbers ................................... 6
Table of Contents...................................... 7
Identification of Controls......................... 8
Frontpanel .......................................................... 8
Rearpanel .......................................................... 8
DVD display ........................................................ 8
Remotecontrol.................................................... 9
Loading batteries ............................................... 10
Operating with theremote control ...................... 10
Connections
Connecting to aTV ................................. 11
Connecting to aTV (Using the phono type jacks)11
Connectingto a display(Using a HDMITM cable) 12
Connecting to Optional Equipment ....... 13
Connecting to an amplifier equipped with a
Dolby®Digitaldecoder .........................................14
Connecting to an amplifier equipped with
DolbySurround ProLogic ................................ 14
Connecting to an amplifier equipped with a
DTS®decoder.................................................. 15
Connectingtoan amplifier equippedwithanMPEG2
audiodecoder .................................................. 15
Connecting to an amplifier equipped with a
digital audioinput .............................................. 15
Basic playback
Playing a Disc ......................................... 16
Basic playback ................................................ 16
Variable Speed Playback ........................ 17
Playing in fast reverse or fast forward directions.. 17
Playingframe byframe .................................... 17
Playingin slow-motion...................................... 17
Resumingplayback fromthe samelocation ..... 17
Locating a Desired Section.................... 18
Locatinga titleusing the top menu..................... 18
Locating a specific chapter or track.................. 18
Advanced playback
Accessinga SpecificLocationDirectly ...........
19
Locatinga specifictitle/chapter/time ................... 19
Repeating a Specific Segment................. 20
Repeatinga specificsegment ............................ 20
Playing in a Varied Order......................... 20
Playing titles, chapters or tracks in a varied order .. 20
Playing in a Favourite Order.................... 21
Settingtitles, chaptersor tracksin afavourite order .. 21
Zooming a Picture .................................... 22
Zoominga picture............................................... 22
Selecting the Sound Enhancement (E.A.M.) ....
22
Selectingthe sound enhancement...................... 22
Selecting the Picture Enhancement (E.P.M.) .... 23
Selectingthe picture enhancement..................... 23
Selecting Subtitles ................................... 23
Selectinga subtitle language .............................. 23
Selecting the Camera Angle .................... 24
Changingthe camera angle................................ 24
Selecting a Language ............................... 24
Selectinga playbackaudio setting ..................... 24
On-screen Display Operation .................. 25
On-screendisplay operation .............................. 25
Playing MP3 Files ..................................... 26
PlayingMP3 files................................................ 26
Viewing JPEG Files .................................. 27
Viewing JPEG files ............................................ 27
Viewinga thumbnail view ................................... 27
Playing DivX®/MPEG-4 Files .................... 28
Playing DivX®/MPEG-4files............................... 28
Function setup
Customizing the Function Settings ........ 29
Setting procedure ............................................... 29
Settingdetails..................................................... 29
Others
Table of Languages................................... 36
Before Calling Service Personnel ........... 37
Specifications ........................................... 38

8
Introduction
Identification of Controls
See the page in for details.
Front panel
Rear panel
DVD display
The indicators vary depending on the kinds of discs you play.
Bad disc
• During playback:
Example • During playback:
Example
Some discs may only
display chapter numbers. Some discs may only
display track numbers. Some discs may only
display track numbers.
No disc
Audio CDVIDEO CDDVD VIDEO
Bad disc LOAD/CLOSE Power off
OPEN
10
16
8
HDMI indicator
16
HDMI SELECT
12
16
16
12
16
HDMI OUT
Power Cord
12
HDMI OUT
jack
11
11
14 15
VIDEO
ANALOG
COAXIALDIGITAL
R
L
HDMI OUT
Chapter/Track
number Indicator
Multifunctional indicator
(indicates operating
status or messages, etc.)
Picture
• During thumbnail
viewing

9
Introduction
Identification of Controls (continued)
The instructions in this manual describe the functions on the remote control. See the page in for details.
Remote control
* MENU button
Use the MENU button to display the menu included on
many DVDs.To operate a menu, follow the instructions
in “Locating a title using the top menu.”
18
* RETURN button
Return to menu display forVCD (2.0) discs with menu.
16
19
22
23
24
17
18
17
18
18
20
19
21
29
16
19
17 23
24
16
16
18
1718
25
16
25 16
16 20
22
HDMI button
12

10
Introduction
Open the cover.
Insert batteries (R03/AAA size).
Make sure to match the + and – on the batteries
to the marks inside the battery compartment.
Caution
Never throw batteries into a fire.
Notes
• Be sure to use R03/AAA size batteries.
• Dispose of batteries in a designated disposal area.
• Batteriesshould always be disposed of withtheenvironment
in mind. Always dispose of batteries in accordance with
applicablelaws and regulations.
• If the remote control does not operate correctly, or if the
operating range becomes reduced, replace both batteries
with new ones.
• When necessary to replace batteries in the remote control,
alwaysreplaceboth batterieswith newones. Nevermixbattery
types or use new and used batteries in combination.
• Alwaysremove batteries from remotecontrolif they are dead
or if the remote control is not to be used for an extended
period of time.This will prevent battery acid from leaking into
thebatterycompartment.
• Battery shall not be exposed to excessive heat such as
sunshine, fire or the like.
Operating with the remote control
Point the remote control at the remote
sensor and press the buttons.
Distance: About7m(23feet)fromthe frontofthe remote
sensor
Angle: About 30° in each direction of the front of
the remote sensor
* Do not expose the remote sensor of the DVD player
to a strong light source such as direct sunlight or
other illumination.If you do so, you may not be able
to operate the DVD player via the remote control.
Notes on the remote control
• Direct the remote control at the remote sensor of the DVD
player.
• Whenusing the remote control, pressthebuttons at intervals
of about 1 second to ensure the correct mode of operation.
• Do not drop or give the remote control a shock.
• Do not leave the remote control near an extremely hot or
humid place.
• Do not spill water or put anything wet on the remote control.
• Do not open the remote control.
2
Loading batteries
1
Identification of Controls (continued)

11
Connections
Connections
Connecting to aTV (Using the phono type jacks)
Notes
• Refer to the owner’s manual of the connected TV as well.
• When you connect the DVD player to yourTV, be sure to turn off the power and unplug both units from the wall outlet
before making any connections.
• If your television set has one audio input, connect the left and right audio outputs of the DVD player to a Y cable
adapter (not supplied) and then connect to your TV.
• Connect the DVD player directly to your TV. If you connect the DVD player to a VCR, TV/VCR combination or video
selector, the playback picture may be distorted as DVDs are copy protected.
• Analogue audio out will not have sound if DTS playback is selected.
Connecting to a TV
Connect the DVD player to yourTV.
Normal TV
To audio
input To video
input
(yellow)
ToVIDEO
OUT
(yellow)
To 2ch AUDIO OUT
(R:red, L:white)
Audio/Video cables (supplied)
VIDEO
HDMIOUT ANALOG
COAXIALDIGITAL
R
L
• Makethefollowingsetting.
On-screen display Select: Page
“Off”,
“PCM” or
“Bitstream”
“DigitalOutput”
“Video Out” Composite
HDMI
32
33

12
Connections
About HDMI
HDMI(HighDefinition Multimedia Interface) supports both video
andaudio on a single digitalconnectionforuse with DVDplayers,
DTV, set-top boxes, and other AV devices.HDMI was developed
to provide the technologies of High Bandwidth Digital Content
Protection (HDCP) as well as Digital Visual Interface (DVI) in
one specification. HDCP is used to protect digital content
transmitted and received by DVI-compliant or HDMI-compliant
displays.
HDMI has the capability to support standard, enhanced, or
high-definition video plus standard to multi-channel surround-
sound audio. HDMI features included uncompressed digital
video,abandwidth of up to 2.2 gigabytesper second (with HDTV
signals),oneconnector(insteadof severalcables andconnectors),
andcommunication betweenthe AVsource and AVdevicessuch
as DTVs.
HDMI, the HDMI logo and High-Definition Multimedia Interface
are trademarks or registered trademarks of HDMI licensing
LLC.
576p/480p, 720p, 1080i and 1080p are signals created with
this DVD Player from original 576i/480i signal.The resolution
of the picture may not be increased even if they are selected.
HDMIindicator Videooutput signal
illuminates“ • 1080i” 1080i(interlaced)
illuminates“ • 720p” 720p (progressive)
illuminates“•576p/480p” 576p/480p(progressive)
Press
Press
Press
Switching the video quality (HDMI mode) using the
HDMI button on the remote control or the HDMI
SELECT button on the front panel.
Press HDMI button on the remote control or HDMI SELECT
button on the front panel to receive a suitable video quality in
STOP mode.The video quality is required to match your TV
having HDMI feature and suitable quality. Please also check
yourTV owner’s manual.
Press this button to change the output signals as below.See
the HDMI indicator and select the appropriate output signal.
illuminates“ • 1080p” 1080p(progressive)
Press
illuminates“•576p/480p,
•720p,•1080i and•1080p”
Auto
Press
Notes
• Refer to the owner’s manual of the connected TV as well.
• Whenyou connect theDVDplayertoyourTV, besureto turnoff
thepowerandunplugbothunits fromthewall outletbeforemaking
anyconnections.
• If you have a HDMI (with HDCP) equipped monitor or display,
you can connect it to this player using a HDMI cable.
• The HDMI connector outputs uncompressed digital video, as
well as almost every kind of digital audio that the player is
compatible with, including DVD-Video, Video CD/Super VCD,
CD, MP3 and DivX®.
• This unit has been designed to be compliant with HDMI (High
Definition Multimedia Interface) depending on the component
you have connected. Using a HDMI connection may result in
unreliablesignal transfers.
• Because HDMI is an evolving technology, it is possible that
some devices with an HDMI input may not operate properly
with this DVD player.
• Whenusing HDMIcable, do notconnect tootheranalogue video
outputs.
• No sound will be output from the HDMI cable if the digital out
is not set to PCM.
• HDMI output is only available when the Video Out is set to
“HDMI”. Otherwise the HDMI button is invalid.
• Makethefollowingsetting.
On-screendisplay Select:
Page
“PCM”
“DigitalOutput”
HDMI
“Video Out”
32
33
Connecting to a display (Using a HDMITM cable)
HDMI-compatible display
HDMI Cable
To HDMI
Output
(not supplied)
VIDEO
HDMIOUT ANALOG
COAXIALDIGITAL
R
L
Available output signals are below:
• Auto
• 576p/480p(progressive)
• 720p (progressive)
• 1080i (interlaced)
• 1080p (progressive)

13
Connections
Connections
Notes
• DONOT connect theCOAXIALDIGITAL AUDIO OUTjackof the DVDplayerto theAC-3RFinput of a DolbyDigital Receiver. This
input on your A/V Receiver is reserved for Laserdisc use only and is incompatible with the COAXIAL DIGITAL AUDIO OUT jack
of the DVD player.
• Connectthe COAXIAL DIGITAL AUDIOOUT jack of theDVDplayertothe“DIGITAL(COAXIAL)”input of a Receiveror Processor.
• Refer to the owner’s manual of the connected equipment as well.
• Whenyouconnect the DVDplayerto other equipment, be sure to turn off the powerand unplug all of the equipment from the wall
outlet before making any connections.
• The output sound of the DVD player has a wide dynamic range.Be sure to adjust the receiver’s volume to a moderate listening
level. Otherwise, the speakers may be damaged by a sudden high volume sound.
• Turn off the amplifier before you connect or disconnect the DVD player’s power cord. If you leave the amplifier power on, the
speakersmaybe damaged.
• For connection to yourTV, see “Connecting to aTV”.
• Thissection uses the following referencemarks.
:Front speaker
:Rear speaker
:Sub woofer
:Centerspeaker
:Signalflow
Connecting to Optional Equipment
You can enjoy high quality dynamic sounds by connecting the DVD player to optional audio equipment.
Warning
• When you are connecting (via the COAXIAL DIGITAL
AUDIO OUT jack)anAVdecoder that does not haveDolby
Digital,DigitalTheater Systems (DTS)or MPEG2 decoding
function, be sure to set “Digital Output” to “PCM” from the
on-screen displays. Otherwise, high volume sound may
damage your hearing as well as the speakers.
• Whenplaying DTS-encoded discs (DVDsand audio CDs),
excessivenoise maybe outputfrom theanalogaudio output
jacks. To avoid possible damage to the audio system, you
shouldtakeproper precautionswhenthe analogaudiooutput
jacks of the DVD player are connected to an amplification
system. To enjoy DTS Digital Surround™ playback, an
external 5.1 channel DTS Digital Surround™ decoder
system must be connected to the COAXIAL DIGITAL
AUDIO OUT jack of the DVD player.
* Settings for HDMI output format are performed using the HDMI button on the remote control or HDMI SELECT button
on the front panel.
Notes
•
Composite (Video) will not have JPEG pictures output when HD JPEG Mode is on
32
, except 480p/576p video
resolution mode.You may view photos (JPEG ) through HDMI connection.
• If Auto is selected, it follows preference HDMI aspect ratio of TV.
Content of the output for each output jack is shown in the following table and differ depending on the On-Screen
Display Setting:
"Video Out" HDMI Output HDMI Video HDMI Video
Setting Setting * Output Output Output Output
Composite Invalid - Composite - Composite
480/576p 480p/576p Composite 480p/576p Composite
720p 720p Composite 720p -
1080i 1080i Composite 1080i -
1080p 1080p Composite 1080p -
HDMI
On-Screen Display Setting
HD JPEG Mode: On
Content of output for each
output jack during JPEG playback
Content of output for
each output jack
HD JPEG Mode: Off

14
Connections
Dolby Surround Pro Logic
You can enjoythe dynamic realistic sound of Dolby Surround Pro Logic byconnecting
an amplifier and speaker system (right and left front speakers, a center speaker,
and one or two rear speakers).
With an amplifier equipped with Dolby Digital
Connectthe equipment thesame wayas describedin“Connecting to anamplifier
equipped with a Dolby® Digital decoder.” Refer to that amplifier’s owner’s manual
and set the amplifier so you can enjoy Dolby Surround Pro Logic sound.
With an amplifier not equipped with Dolby Digital
Connect the equipment as follows.
* Connect one or two rear speakers.
The output sound from the rear speakers will
be monaural even if you connect two rear
speakers.
• Makethefollowingsetting.
On-screendisplay Select:
Page
“DigitalOutput” “PCM” or
“Bitstream”
33
Connecting to an amplifier equipped with Dolby Surround Pro Logic
Audiocable(notsupplied)
Connecting to Optional Equipment (Continued)
Dolby Digital
Dolby Digital is the surround sound technology used in theaters showing the latest
movies, and is now available to reproduce this realistic effect in the home.You can
enjoy motion picture and live concert DVDs with this dynamic realistic sound by
connecting the DVD player to a 6 channel amplifier equipped with a Dolby Digital
decoderor DolbyDigital processor.Ifyou havea DolbySurround ProLogicdecoder,
you will obtain the full benefit of Pro Logic from the same DVD movies that provide
full 5.1-channel Dolby Digital soundtracks, as well as from titles with the Dolby
Surround mark.
• Use DVDs encoded via the Dolby
Digital recording system.
• Make the following setting.
On-screendisplay Select:
Page
“PCM” or
“Bitstream”
“DigitalOutput”
Connecting to an amplifier equipped with a Dolby®Digital decoder
75 ΩΩ
ΩΩ
Ωcoaxial cable (not supplied)
33
ManufacturedunderlicensefromDolby
Laboratories.Dolby and thedouble-D
symbol are trademarks of Dolby
Laboratories.
To COAXIAL
DIGITAL
AUDIO OUT
To COAXIAL
type digital
audio input
Amplifier equipped with a
Dolby Digital decoder
To wall
outlet
VIDEO
ANALOG
COAXIALDIGITAL
R
L
To ANALOG
AUDIO OUT
To audio
input
Amplifier equipped with
Dolby Surround Pro Logic
To wall
outlet
VIDEO
ANALOG
COAXIALDIGITAL
R
L

15
Connections
Connections
2 channel digital stereo
You can enjoy the dynamic sound of 2 channel digital stereo by connecting an
amplifier equipped with a digital audio input and speaker system (right and left front
speakers).
75 ΩΩ
ΩΩ
Ωcoaxial cable (not supplied)
• Make the following setting.
On-screendisplay Select:
Page
“PCM”
“DigitalOutput”
MPEG2 sound
You can enjoy motion picture and live concert DVDs with dynamic realistic sound
by connecting an amplifier equipped with an MPEG2 audio decoder or MPEG2
audio processor.
• UseDVDsencoded via the MPEG2
recording system.
• Make the following setting.
On-screendisplay Select:
Page
“PCM” or
“Bitstream”
“DigitalOutput”
Connecting to an amplifier equipped with an MPEG2 audio decoder
Connecting to an amplifier equipped with a digital audio input
75 ΩΩ
ΩΩ
Ωcoaxial cable (not supplied)
33
33
DigitalTheater Systems (DTS)
DTS is a high quality surround technology used in theaters and now available for
home use, on DVDs or audio CDs.
If you have a DTS decoder or processor, you can obtain the full benefit of 5.1
channel DTS encoded sound tracks on DVDs or audio CDs.
• Use DVDs or audio CDs encoded
via the DTS recording system.
• Make the following setting.
On-screendisplay Select:
Page
“DigitalOutput” “Bitstream”
75 ΩΩ
ΩΩ
Ωcoaxial cable (not supplied)
33
Connecting to an amplifier equipped with a DTS®decoder
Manufactured under license under U.S.
Patent #: 5,451,942 & other U.S. and
worldwidepatentsissued&pending.DTS
and DTS Digital Out are registered
trademarks and the DTS logos and
Symbol are trademarks of DTS, Inc. ©
1996-2008DTS,Inc.AllRightsReserved.
To COAXIAL
DIGITAL
AUDIO OUT
To COAXIAL
type digital
audio input
Amplifier equipped with a
DTS decoder
To wall
outlet
VIDEO
ANALOG
COAXIALDIGITAL
R
L
To COAXIAL
DIGITAL
AUDIO OUT
To COAXIAL
type digital
audio input
Amplifier equipped with an
MEPG2 audio decoder
To wall
outlet
VIDEO
ANALOG
COAXIALDIGITAL
R
L
Amplifierequipped with
a digital audio input
To COAXIAL
type digital
audio input
To COAXIAL
DIGITAL
AUDIO OUT
To wall
outlet
VIDEO
ANALOG
COAXIALDIGITAL
R
L

16
Basic playback
To turn the power off
Press ON/STANDBY on the front panel or POWER
button on the remote control to turn the unit off.
Notes
• Donot movetheDVDplayerduringplayback.Doingso maydamage
thedisc.
• Use the OPEN/CLOSE button to open and close the disc tray.
Do not push the disc tray while it is moving. Doing so may cause
theDVDplayerto malfunction.
• Do not push up on the disc tray or put any objects other than
discs on the disc tray. Doing so may cause the DVD player to
malfunction.
• In many instances, a menu screen will appear after playback of
amovie is completed. Prolonged displayof anon-screen menumay
damageyour televisionset, permanentlyetching thatimage ontoits
screen. To avoid this, be sure to press the STOP button on your
remotecontrol once the movie is completed.
Playing a Disc
This section shows you the basics on how to play a disc.
CAUTION
Keep your fingers well clear of the disc tray as it is closing.
Neglecting to do so may cause serious personal injury.
Preparations
• When you want to view a disc, turn on the TV and select the
video input connected to the DVD player.
• When you want to enjoy the sound of discs from the audio
system,turn ontheaudio systemandselect theinputconnected
to the DVD player.
Notes
• If the disc tray is holding a disc you have already played,
playback will begin from the location where you last stopped.
Forresuming playback, see
17
.
• SomevideoCDare recordedwithPBC(Playback Control),amenu
with recorded contents may appear on theTV if you have turned
the PBC on.You can make your selection according to its PBC
menu.Press thePBC buttonon the remote control to turn PBC on
or off anytime during Video CD playback.When switching from
PBCoff toPBC onmode, playbackwill startfrom the beginning of
the disc.To turn on the menu display again, press the RETURN
button.
To pause playback (still mode)
Press PAUSE/STEP during playback.
To resume normal playback, press the
PLAY button.
• The sound is muted during still mode.
To stop playback
PressSTOP.
To remove the disc
PressOPEN/CLOSE.
Remove the disc after the disc tray
opens completely.
To start playback in the stop mode
PressPLAY.
To obtain a higher quality picture
Occasionally, some picture noise not usually visible during
a normal broadcast may appear on the TV screen while
playing a DVD because the high resolution pictures on these
discs include a lot of information.While the amount of noise
depends on the TV you use with this DVD player, you should
generally reduce the sharpness adjustment on yourTV when
viewingDVDs.
If you insert a DVD that contains a top menu, a
menu may appear. Use / / / to select the
title you want to view, then press ENTER to start
playback.
• You may need to press the TOP MENU or MENU
buttontodisplaydisc menu (depending on the actual
DVD.)
Press the ON/STANDBY button on the
front panel or the POWER button on the
remote control.
The DVD player turns on.
Press OPEN/CLOSE.
The disc tray opens.
Place the disc on the disc tray.
Withtheplaybackside
down
• There are two different disc sizes. Place the disc in
the correct guide on the disc tray.If the disc is out of
theguide, it maydamagethe disc and cause theDVD
player to malfunction.
• Do not place a disc which is unplayable in this DVD
player.
Press OPEN/CLOSE to close the disc tray.
Playback starts.
1
2
3
4
Basic playback
Be sure to press the OPEN/CLOSE
button to close the disc tray after you
remove the disc.
Automatic Power Off function
Ifthe DVDplayeris stopped, or the screen saverisengaged
for approximately 20 minutes, the DVD player will
automatically turn itself off.
POWER

17
Basic playback
Playing in fast reverse or fast forward directions
Press REV or FWD during playback.
REV: Fast reverse playback
FWD: Fast forward playback
EachtimeyoupresstheREVor FWD
button, the playback speed changes.
To resume normal playback
PressPLAY.
Notes
• The DVD player mutes sound and subtitles during reverse
and forward scan of DVDs.
• The playback speed may differ depending on the disc.
Playing in slow-motion
Press SLOW during playback.
Each time you press the SLOW
button, the slow-motion speed
changes in the following sequence:
To resume normal playback
PressPLAY.
Notes
• The sound is muted during slow-motion playback.
• 3 speeds are available.
Press PAUSE/STEP during still playback.
Eachtimeyoupress the PAUSE/STEP
button, the picture advances one
frame.
To resume normal playback
PressPLAY.
Note: The sound is muted during frame by frame playback.
Playing frame by frame
Resumingplayback fromthesame location
Notes
• There may be a difference in the location where playback
resumes depending on the disc.
• Settings you changed using the on-screen displays while
the DVD player keeps a location in the memory may function
only after the memory is cleared.
• Resuming playback does not work forVCD with PBC on.
Press STOP at the location where you
want to interrupt playback.
The DVD player memorizes the
location where playback is stopped.
Press PLAY.
The DVD player resumes playback
from the location where you stopped
playback.
1
2
Variable Speed Playback
You can play discs at various speeds, and resume playback from the location where you stopped playback.

18
Basic playback
Locating a specific chapter or track
Press SKIP or repeatedly to access
the chapter or track number you want.
Playbackstarts from theselected chapter or track.
To locate succeeding chapters or tracks.
Playback starts from the beginning of the
current chapter or track.
When you press twice in quick
successions, playback starts from the
beginningofthepreceding chapter or track.
Note
Some titles may not display chapter numbers.
Normally, DVDs are divided into titles, and the titles are sub-divided into chapters.VIDEO CDs and audio CDs are divided into
tracks.You can quickly locate any specific title, chapter, or track.
Locating a title using the top menu
PressTOP MENU.
The top menu appears on the TV
screen.
e.g.
Press / / / to select the title you
want.
Ifthe titles inthetopmenu are assigned
a number, you can directly locate a
specifictitlebypressing its designated
numberwiththenumberbuttons.
Press ENTER.
Playback starts from chapter 1 of the
selected title.
1
2
3
Notes
• The instructions above describe basic procedures which may
vary depending on the contents of the DVD. If different
instructions appear on theTVscreen, followthose instructions.
• Ifyoudisplaythe top menu duringplayback and press theTOP
MENU button again without selecting any title, the DVD player
may resume playback from the point where you first pressed
theTOPMENUbutton(depending on the actual DVD.)
• This method of locating a title is available only on a disc that
contains a top menu.
• Instruction notes of discs may refer to the button that displays
the top menu as TITLE button.
Locating a Desired Section
To start playback from the beginning regardless of the location where you stopped playback.
1 Press STOP twice.
The DVD player deletes the memory of the location.
2 Press PLAY.
Playbackstartsfrom the beginning of thecurrenttitle.
Playbackstartsfrom the beginning of thedisc.
Playback starts from the beginning of the current track.
• If you want to return to the
beginning of a DVD, open
and close the disc tray once
with the OPEN/CLOSE
button before pressing the
PLAY button.

19
Advanced playback
Accessing a Specific Location Directly
PressT.
Press / to highlight theTitle/Chapter/
Track/Time.
Press / to select a section you want to
locate.
1
2
e.g.When you want to locate a chapter.
SEARCH
T
1
2
Track
Time
Disc Time
00:00:00
00:00:00
1
00:00:00
e.g.
Or
Press the number buttons to enter title,
chapter (track) number or time.
Press ENTER.
Playback starts from the selected
section.
3
Notes
• Pressing the CLEAR button resets the numbers. To clear
the display, press the T button several times.
• For VCD with PBC on, accessing tracks using number
buttons does not work.
To set and play favourite bookmark during playback
1.Press T twice, the display of Bookmark appears, then
press ENTER to mark the desired scene.
2. Press ENTER to play the favourite bookmark.
To set other bookmarks.
Follow step 1 and move through the menu by pressing
the or button.
PressT again to remove this display.
To cancel the Bookmark
Followstep1,thenpress the CLEAR button to cancel the
bookmark.Movethroughthemenubypressingthe or
buttonto cancel other bookmarks.
Notes
• Some discs may not work with marking operation.
• The marking is cancelled when you open the disc tray or turn
the power off.
• Some subtitles recorded around the marker may fail to
appear.
Bookmark
Accessing chapters/tracks using number
buttons:
For chapter/track numbers 10 to 19, press +10 once
and the number 10 appears then enter the second digit.
PressENTER.
For chapter/track numbers 20 to 29, press +10 twice
and the number 20 appears then enter the second digit.
PressENTER.
For example, if you want to select chapter/track 25, first
press +10 twice then press the number button “5”.Then
press ENTER.
Accessing the time using number buttons:
Just enter 2 digits in order.
The first two numbers you entered represent hours.
The second two numbers you entered represent
minutes.
The third two numbers you entered represent seconds.
SEARCH
T
Locating a specific title/chapter/time

20
Advanced playback
Repeating a Specific Segment
You can specify a desired segment and repeat it.
To resume normal playback
Press A-B RPT until RepAB Off is displayed.
Notes
• Some discs may not permit A-B repeat operation.
• You cannot set the A-B repeat function for a segment that
includesmultiplecameraangles.
• You can specifyasegmentonly within the current title or track
(VIDEOCD).
• There may be a slight difference between point A and the
location where playback actually resumes depending on the
disc.
Press A-B RPT at the beginning of the
segment (point A) you want to play
repeatedly.
Press A-B RPT again at the end of the
segment (point B).
The DVD player automatically returns to
point A and starts repeat playback of the
selectedsegment (A-B).
2
1
A-B RPT
Playing in a Varied Order
You can play titles, chapters within a title, or tracks in a varied order.
For Audio CD, please see “Playing MP3 files”
26
.
Press PLAY MODE.
Press / button to select desired
featuresandthenpressENTERbutton
to toggle desired mode.
1
e.g.
PLAY MODE
Press PLAY.
Press the PLAY button, the DVD
player starts playback in the selected
mode.
To resume normal playback
Press ENTER until the Off/Normal is displayed.
Note
Some discs may not permit these operations.
2
RepA-
RepA-B
RepABOff
A-B RPT
A-B RPT
Shuffle: Playbacksin random order.
PBC: Playbacks in PBC On mode (VCD only).
Chapter: Repeatsthecurrent chapter.
Title: Repeats the current title.
Single: Repeats the current track.
All: Repeats the entire disc.
Off: Resumesnormalplayback.
Normal
Shuffle
Mode Normal
Repeat
Chapter
Title
Single
PBC
(
VCD onl
y)
Play Mode
:Off
Repeatinga specific segment
Playing titles, chapters or tracks in a varied order
Table of contents
Other Toshiba DVD Player manuals

Toshiba
Toshiba SD-K760 User manual

Toshiba
Toshiba E-2-15 ESE-R User manual

Toshiba
Toshiba SD-9000 User manual

Toshiba
Toshiba SD-3750 User manual

Toshiba
Toshiba SD-5970SU User manual

Toshiba
Toshiba SD-110EB User manual

Toshiba
Toshiba SD-V320SCA User manual

Toshiba
Toshiba SD5300KC User manual

Toshiba
Toshiba SD 3755 User manual

Toshiba
Toshiba HD-EP10 User manual

Toshiba
Toshiba SD-1200 User manual

Toshiba
Toshiba SD-2705U User manual

Toshiba
Toshiba SD-780KY User manual

Toshiba
Toshiba SD7300 User manual

Toshiba
Toshiba SD-2107 User manual

Toshiba
Toshiba SD 2800 User manual

Toshiba
Toshiba SD-3980 User manual

Toshiba
Toshiba SD-210EB User manual

Toshiba
Toshiba SD-150ESB User manual

Toshiba
Toshiba SD-6200N User manual