I
NOTE: This Video Cassette Recorder
is
compatible with any Video Cassette Recorder bearing
the
m
mark
.
The
VCR
is
designed toexpandyour opportunitiesfor homeviewing
and not for
any
usage
which
mightviolate the
copy
right laws
.
!
Save the original shipping carton and packing materials; they will come inhandy
if
you ever
have to ship your VCR
.
For maximum protection. repackthe set as
it
was originally
packed
at
the factory
.
TABLE
OF
CONTENTS
CONNECT THE ANTENNA
.................................................
3
CONNECT THETELEVISION
...............................................
3
............................................
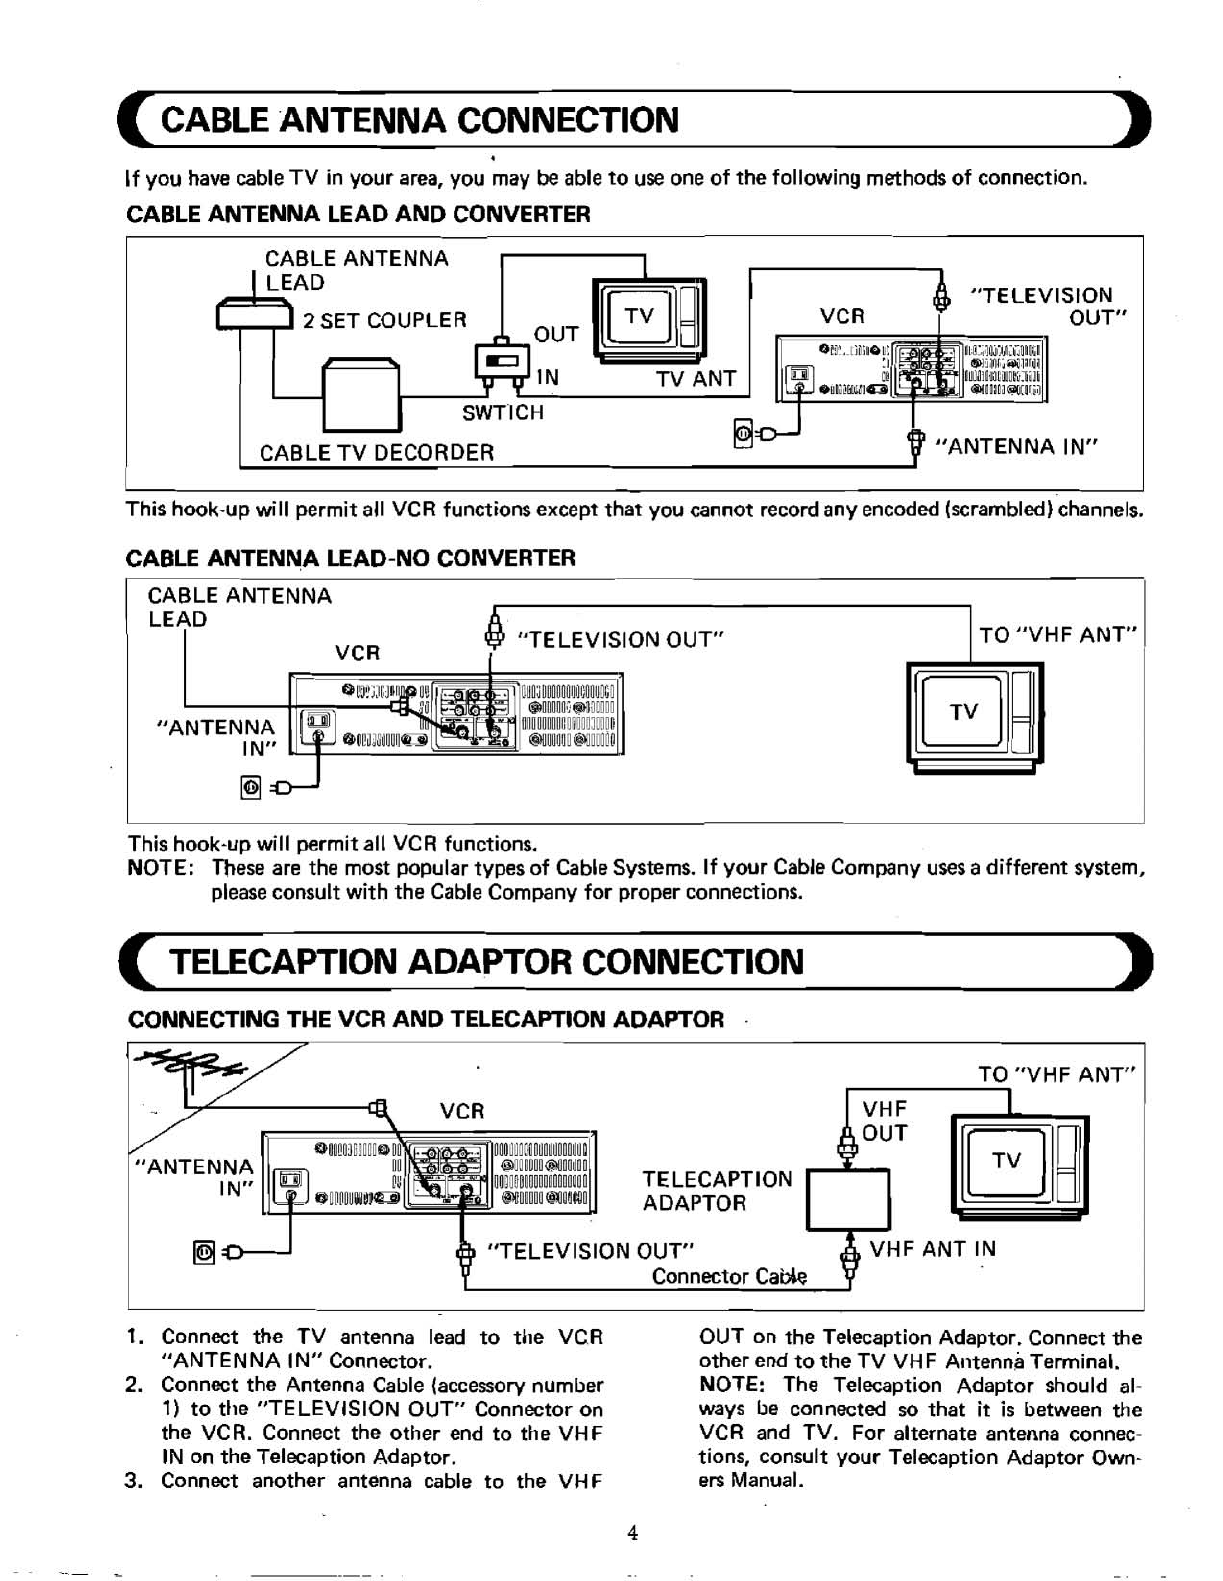
CABLE ANTENNA CONNECTION
4
TELECAPTION ADAPTOR CONNECTION
.....................................
4
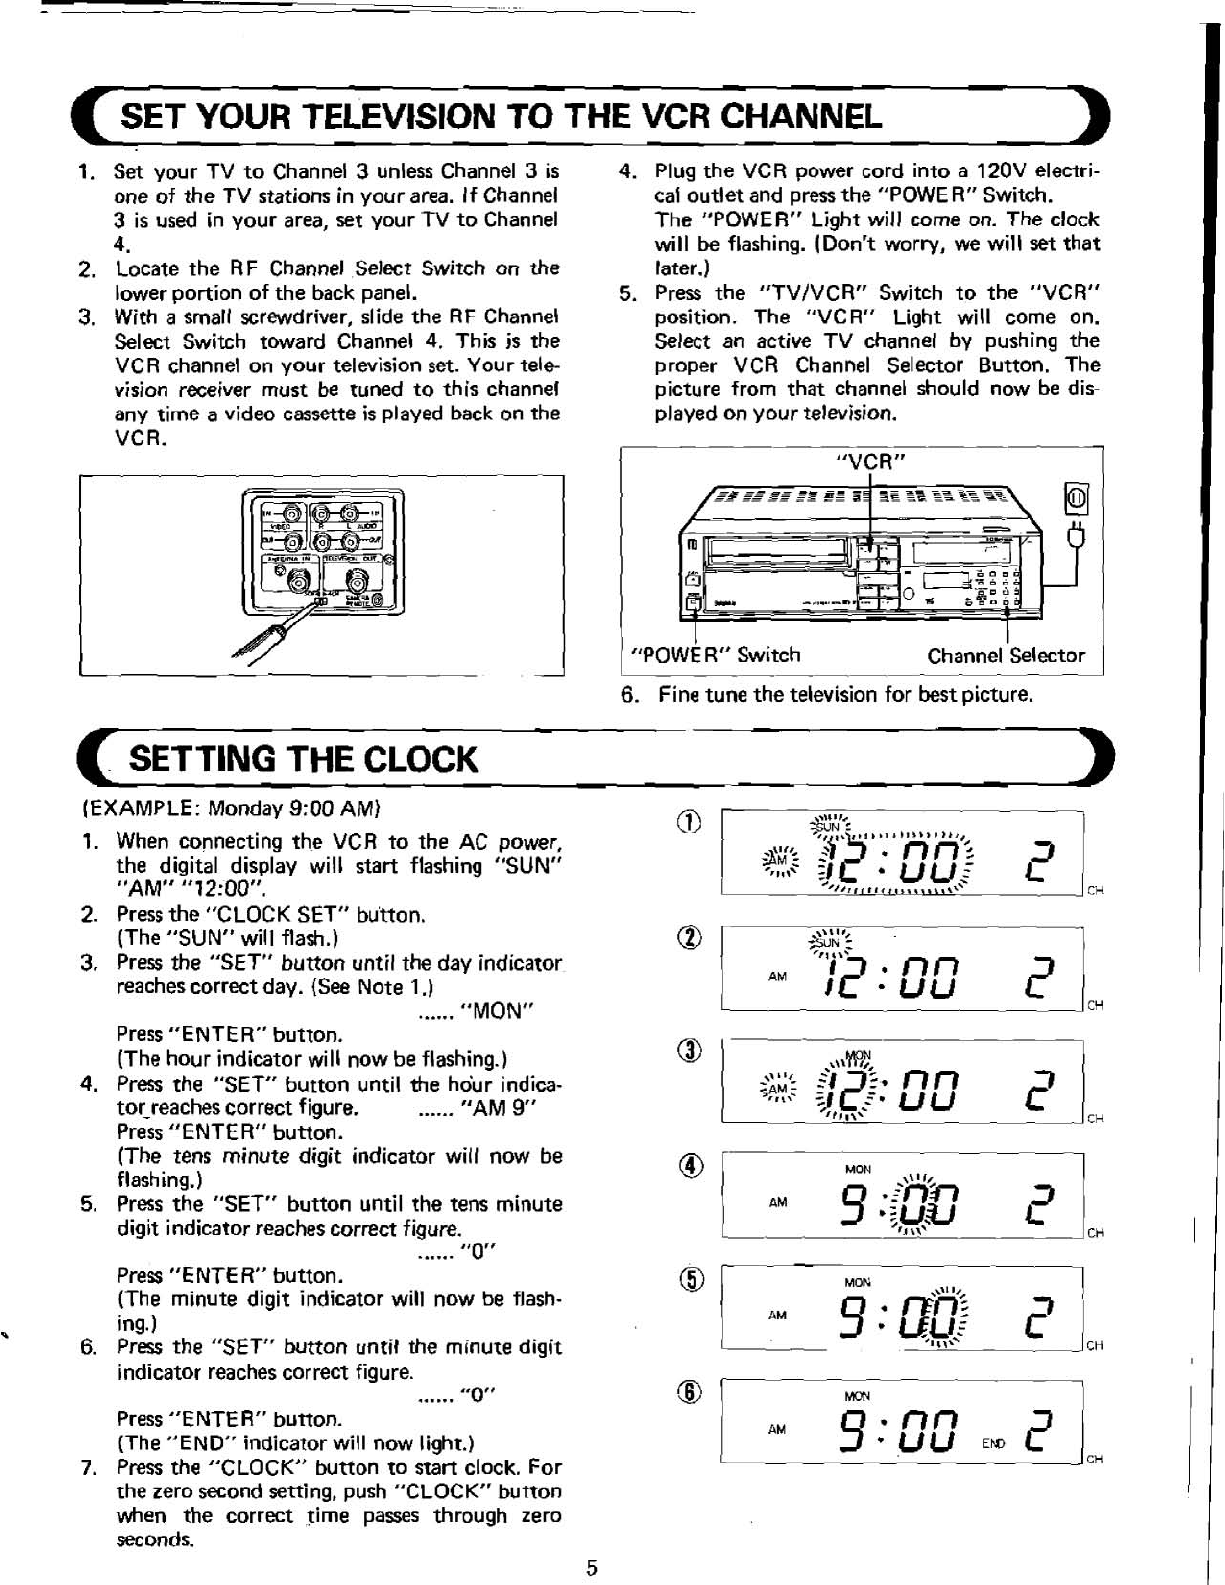
..............................
SET YOUR TELEVlSlON TO THE VCR CHANNEL
5
SETTING THE CLOCK
..................................................
-5-6
SYNTHESI'ZER TUNER (Autotuningsystem)
.................................
6-0
............................
MAKINGA SAMPLE RECORDING AND PLAYBACK
0
...................................
PLAYBACKWITH TV EQUIPPEDWITH VIR B
...........................................
GET FAMILIARWITH YOUR VCR
8
IDENTIFICATION AND OPERATION
OF
CONTROLS
........................
9-20
AUDIO DUBBING
.........................................................
21
EDITING RECORDING
.......................
...
.......................
21
.....................
RECORDING ONE PROGRAM WHILE VIEWING ANOTHER
22
VCR TO VCR DUBBING
...................................................
22
USING ACAMERA WITH THE VCR
.........................................
23
PROGRAMMABLE TIMER
..............................................
24-27
..............................
CONFlRMlNG THAT PROGRAM(S)ARE PRESET
27
..............................
TOCANCEL PREVIOUSLY TIMED PROGRAM{S)
27
USING THE "PICTURE SEARCH" (CUEAND REVIEW) FEATURES
..:............
28
USING THE "AUTO FINDHFEATURE
.......................................
29
USING THE "MEMORY" FEATURE
.........................................
29
.........................
USING THE TAPE "COUNTERIPLAY TIME" FEATURE
30
..............................................
TIME/TAPE COUNTER CHART
30
HOW TO INSTALL BATTERIES INTHE REMOTE CONTROL UNIT
...............
31
REMOTE CONTROL OPERATION RANGE
...................................
31
.........................
USING THE REMOTE CONTROL SPECIAL FEATURES
32
.
FORWARDSLOW
........................................................
32
...............................................
DOUBLE SPEED PLAYBACK
32
VAR
lABLE "SEARCH"
(5-20
times normal
playback)
...........................
32
I
SPECIAL FEATURE: "BETA hi-fi" SOUND
SYSTEM
............................
331
WHAT IS"BETA hi-fi"?
....................................................
33
"BETA
hi-fi"
RECORDINGIPLAYBACK CONNECTIONS
..........................
34
HOWTO OPERATE SWITCHES TO RECORD A TAPE WlTH
"BETA hi-fi" SOUND
.....................................................
35
.
HOW TO OPERATE SWITCHESTO PLAYBACK A TAPE PRE-RECORDEDWlTH
1
"BETA
hi-fi"
SOUND
.....................................................
36
1
.........................................................
DEWWARNING
37
OPERATING HINTS
......................................................
37
TROUBLESHOOTING
.................................................
38-39
SPECIFICATIONS
........................................................
40