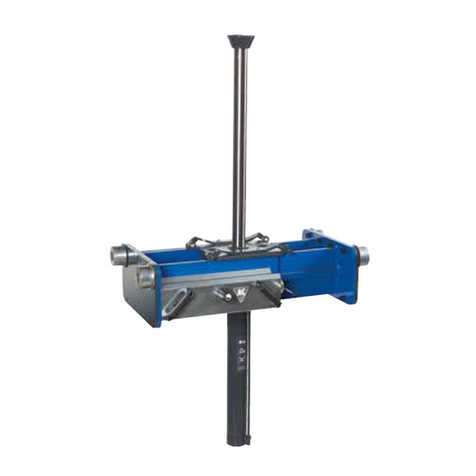
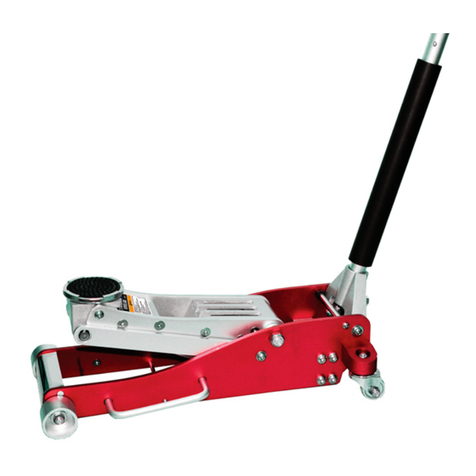
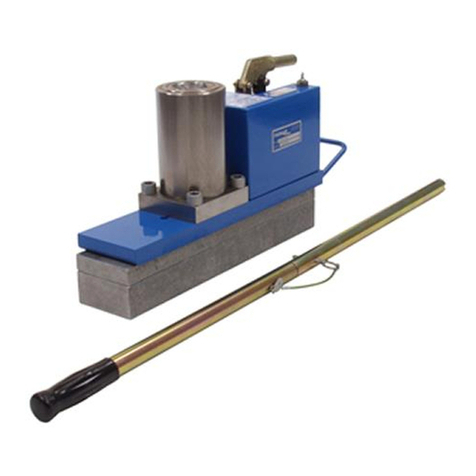
Total Source KRIM0001 User manual

OPERATING MANUAL
MACHINE JACK
KRIM0001 KRIM0002 KRIM0003
Original operating
manual
05/2021 – V01

2/36
© 05-2021. TVH
®
and TotalSource
®
are registered trademarks. TVH Parts Holding NV, Brabantstraat 15, B-8790 Waregem. All rights reserved.
No part of this publication may be reproduced or communicated in any form or by any means, electronic or mechanical, including copying,
recording or use in an information storage or retrieval system, without prior and explicit permission of TVH Parts Holding NV. Printing errors
reserved. Photographs and illustrations are included for reference purposes only.
Responsible editor: TVH Parts Holding NV, Brabantstraat 15, BE-8790 Waregem
TVH is a supplier of after-market spare parts and accessories that are suitable for the maintenance and repair of OEM equipment.

3/36
www.tvh.com/machinejack_rv01
BG Bulgarian Можете да намерите това ръководство на Вашия език чрез линка, посочен по–
долу.
CS Czech Tento návod najdete ve svém jazyce prostřednictvím odkazu níže.
DA Danish Du kan finde denne vejledning på dit sprog via nedenstående link.
DE German Sie finden diese Bedienungsanleitung in Ihrer Sprache unter folgendem Link.
EL Greek Μπορείτε να βρείτε αυτό το εγχειρίδιο στη γλώσσα σας έσω του παρακάτω
συνδέσου.
EN English You can find this manual in your language via below link.
ES Spanish Encontrarás este manual en su propio idioma a través del siguiente enlace.
ET Estonian Oma emakeelse juhendi leiate allolevalt lingilt.
FI Finnish Löydät tämän manuaalin omalla kielelläsi alla olevan linkin takaa.
FR French Vous trouverez ce manuel dans votre langue via le lien ci-dessous.
GA Irish Tá an lámhleabhar seo ar fáil i do theanga tríd an nasc thíos.
HR Croatian Ovaj prirucnik mozete pronaci na svom jeziku putem donjeg linka.
HU Hungarian Ez a kézikönyv az Ön nyelvén az alábbi link alatt található.
IS Icelandic Hægt er að finna þessa handbók á þínu tungumáli á tenglinum hér að neðan.
IT Italian Cliccando sul link sottostante troverai il manuale nella tua lingua.
LT Lithuanian Šį vadovlėlį savo kalba rasite spustelėję žemiau esančią nuorodą.
LV Latvian Rokasgrāmatu latviešu valodā Jūs varat atrast izmantojot zemāk esošo saiti.
MT Maltese Tista’ ssib dan il-manwal bil-lingwa tiegħek permezz tal-link ta’ hawn taħt.
NL Dutch Je vindt deze handleiding in jouw taal via onderstaande link.
NO Norwegian Du finner denne håndboken på ditt språk via linken nedenfor.
PL Polish Niniejsza instrukcja obsługi dostępna jest w Twoim języku za pośrednictwem
poniższego linku.
PT Portuguese Pode encontrar este manual no seu idioma através do link abaixo.
RO Romanian Putei găsi acest manual în limba dvs. prin link-ul de mai jos.
SK Slovak Manuál vo vašom jazyku môžete nájst v priloženom vysvietenom riadku.
SL Slovenian Ta priročnik najdete v svojem jeziku preko spodnje povezave.
SV Swedish Du kan hitta denna manual på ditt språk via länken nedan.
TR Turkish Bu kılavuzu aşağıdaki bağlantıdan kendi dilinizde bulabilirsiniz.

4/36
Thank you for using our product. For your safety and to ensure a correct operation, we would
like to bring to your attention some aspects of this manual:
• This booklet provides useful instructions for the correct operation and maintenance of
the product. It is therefore necessary to pay the utmost attention to all of the paragraphs
which illustrate the most simple and secure way to operate and use this product.
• This booklet must be considered an integral part of the machine and must be included
with the deed of sale.
• Neither this publication, nor part of it, can be reproduced without written authorisation on
the part of the manufacturer.
• All of the information reported herein is based on data available at the moment of printing;
the manufacturer reserves the right to carry out modifications to its own products at any
moment, without notice and without incurring in any sanction. It is therefore suggested to
always check for possible updates.
The person responsible for the use of the product must make sure that all of the safety rules
in force in the country of its use are applied, to guarantee that the equipment is used in
conformity with the use for which it is destined and to avoid any dangerous situations for the
user.
In this manual, the following warning signs are used to warn you about dangers and risks:
Informative, be careful.
Warning, can lead to injury and damage if instructions aren’t followed.
Danger, can lead to serious or fatal injury and serious damage if instructions
aren’t followed.
The following conventions are used in this manual:
For KRIM0001
1
26
5
3
4
1Top
2 Right
3Front
4 Bottom
5 Left
6 Back

5/36
For KRIM0002
1
26
5
3
4
1Top
2 Right
3Front
4 Bottom
5 Left
6 Back
For KRIM0003
1
2
3
6
5
4
1Top
2 Right
3Front
4 Bottom
5 Left
6 Back

6/36
TABLE OF CONTENTS
1. INTRODUCTION..................................................................................... 7
2. DESCRIPTION....................................................................................... 9
2.1. Technical data .......................................................................................9
2.2. Main components of the product................................................................10
2.3. Type plate. . . . . . . . . . . . . . . . . . . . . . . . . . . . . . . . . . . . . . . . . . . . . . . . . . . . . . . . . . . . . . . . . . . . . . . . . . . . . . . . . . . . . . . . . . . .11
3. SAFETY INSTRUCTIONS.........................................................................12
3.1. Explanation of the safety decals ................................................................12
3.2. General safety instructions ......................................................................12
4. TRANSPORT AND STORAGE ....................................................................14
5. ASSEMBLY AND INSTALLATION ...............................................................15
5.1. Packing list..........................................................................................15
5.2. Safety instructions.................................................................................15
5.3. Assembly of the product..........................................................................15
6. OPERATION.........................................................................................16
6.1. Safety instructions for operating the product ................................................16
6.2. Operating instructions ............................................................................16
7. MAINTENANCE ....................................................................................19
7.1. Safety instructions for the repair of the product .............................................19
7.2. Maintenance schedule............................................................................19
7.3. Maintenance instructions ........................................................................19
8. TROUBLESHOOTING .............................................................................22
9. FINAL DECOMMISSIONING AND DISPOSAL ................................................23
10. ANNEXES ...........................................................................................24
10.1. CE-certificate.......................................................................................24
10.2. Spare parts list .....................................................................................30

7/36
1. INTRODUCTION
This manual contains all the necessary information on the installation and operation of the
machine jack.
Some of the maintenance operations should only be carried out by professional technicians.
If you require this information and the maintenance steps, please contact your dealer.
Also included in this manual are a number of safety instructions to create a safe working
environment.
This machine jack is a manually operated machine jack designed to lift a vehicle.
The machine jack can be used to lift either the side or the end of the vehicle. However, make
sure that one side of the vehicle is always in firm contact with the floor.
Please read the manual thoroughly and observe the safety procedures before putting the
unit into operation. The operator and all persons who come into contact with the equipment
should read it carefully and regularly and have access to it at all times.
Keep this manual near the equipment and in a safe place for future reference!
Contact your dealer for any further questions or concerns you may have.
We guarantee a long period of trouble free operation if the unit is operated and maintained
correctly.
We hope you will enjoy working with your machine jack.
If you wish to use these machine jack in extreme conditions such as extreme heat,
extreme cold, extreme drought, etc. Please contact your dealer to discuss whether
this product is suitable for the activities you wish to undertake with the machine jack.

8/36
The machine jack may be unsafe if adequate maintenance is neglected. Therefore,
adequate maintenance facilities, trained personnel and procedures should be
provided.
Maintenance and inspection shall be performed in conformity with the following
practices:
1. A scheduled planned maintenance, lubrication and inspection system should be
followed (see maintenance instructions chapter7).
2. Only qualified and authorised personnel shall be permitted to maintain, repair,
adjust and inspect the machine jack.
3. Modifications and additions which affect capacity and safe operation shall not
be performed by the customer or user without the manufacturer’s prior written
approval. Capacity, operation and maintenance plates or decals shall be changed
accordingly.
4. If modifications are made without written approval of the manufacturer, warranty
will no longer apply.
Any person in charge of putting the machine into operation, the operation itself or
the maintenance of the machine is urged to carefully read and observe the following
instructions.
Make sure that the operators of this product are familiar with the safety instructions
and follow all the procedures. Neglecting these instructions can risk injury or death.

9/36
2. DESCRIPTION
2.1. Technical data
Always check the type plate for the correct information.
For KRIM0001
Type Machine jack
Lifting capacity (kg) 5000
Minimum lifting height with foot (mm) (H1) 25
Maximum lifting height with foot (mm) (H2) 230
Minimum lifting height with saddle (mm) (H3) 368
Maximum lifting height with saddle (mm) (H4) 573
Width of the base (mm) (B1) 140
Length of base (mm) (H3) 200
Weight (kg) 25
Material Steel
For KRIM0002
Type Machine jack
Lifting capacity (kg) 10000
Minimum lifting height with foot (mm) (H1) 30
Maximum lifting height with foot (mm) (H2) 260
Minimum lifting height with saddle (mm) (H3) 420
Maximum lifting height with saddle (mm) (H4) 650
Width of the base (mm) (B1) 170
Length of base (mm) (H3) 200
Weight (kg) 35
Material Steel

10/36
For KRIM0003
Type Machine jack
Lifting capacity (kg) 25000
Minimum lifting height with foot (mm) (H1) 55
Maximum lifting height with foot (mm) (H2) 280
Minimum lifting height with saddle (mm) (H3) 515
Maximum lifting height with saddle (mm) (H4) 735
Width of the base (mm) (B1) 210
Length of base (mm) (H3) 325
Weight (kg) 102
Material Steel
2.2. Main components of the product
For KRIM0001– KRIM0002
1
3
5
2
4
N° Component
1Grip handle
2Lever
3 Saddle
4Reservoir for hydraulic oil
5Lifting foot
H4
H1
H2
B1
H3

11/36
For KRIM0003
1
3
4
5
2
6
7
N° Component
1Lever
2 Saddle
3 Handle
4Reservoir for hydraulic oil
5 Wheels
6Lifting foot
7Safety decal
2.3. Type plate
Capacity
Manufactured outside the EU for:
TVH PARTS NV
Brabantstraat 15 • 8790 Waregem • Belgium
xxx kg
Net weight xx kg
Serial n° xxxxxx
Type xxxxxx
Height xxx mm
Year of manufacturing xxxx
3
2
1
4
5
6
7 8
N° Explanation
1Type of product
2Serial number
3Capacity of the product (kg)
4Weight of the product (kg)
5Height (mm)
6Year of manufacture
7Name and address of the manufacturer
8 CElogo

12/36
3. SAFETY INSTRUCTIONS
3.1. Explanation of the safety decals
If the decals are damaged or missing, please replace them.
5
2
4
1
3
N° Explanation Reference
1The wheels must be locked
before using the jack
166TA4350
2The jack shall be placed in its
intended position under the
vehicle
3The vehicle must stand on a
flat, stable surface
4Read the manual before use
5 CE-certified
3.2. General safety instructions
• Inspect before every use. Examine the machine jack for cracks or damage before
each use. Do not use if even a minor crack, bend or other damage/deformation is
found. Discard the machine jack if damaged or deformed.
• The person responsible for the use of the product must make sure that all of the
safety rules in force in the country of its use are applied, to guarantee that the
equipment is used in conformity with the use for which it is destined and to avoid
any dangerous situation for the user.
• Do not operate the product unless you are of age.
• TVH Parts Holding NV cannot anticipate each possible circumstance that may
result in danger. Therefore the warnings given in this publication and which appear
on the equipment are not exhaustive.
In the event that equipment, procedures, work methods or working techniques are
used that are not specifically advised by the company TVH Parts Holding NV, it is
necessary to make sure that there is no danger to the operator or other people.
• Study, understand and follow all instructions before operating this equipment.
• Do not exceed the rated capacity, be aware of dynamic loading.
• The machine jack may only be used for vertical lifting processes on a horizontal,
flat and load-bearing surface in well-lit areas.
• The machine jack is only intended for lifting and not for supporting the vehicle.
Therefore always use correctly installed and dimensioned, approved supporting
stands under the vehicle, immediately after the jack has lifted the vehicle, and
before starting to work on the vehicle. Always support the lift truck by means of a
pair of support stands.
• Never crawl under the vehicle until the support stands are correctly positioned, as
this could result in injury or death.
• Use extreme caution when lifting vehicles from the sides. Always make sure that
the height between the floor and the bottom of the raised tyre is never more than
one fourth (1/4th) of the vehicle’s tread width. If this value is exceeded, the vehicle
could reach a point of instability and tip over, or the angle of the frame could cause
the jack to kick out and drop the load.

13/36
• When tilting the vehicle, the minimum distance to walls or other fixed objects must
be no less than 0.5 m.
• Bystanders who are not working on the vehicle must keep a minimum distance of
0.5 mfrom the vehicle.
• The vehicle must not be tilted if this can cause engine fuel, battery acid or other
liquids to flow out of the vehicle.
• There must be no persons in the vehicle during lifting.
• The user must not move the machine jack when it is loaded.
• Never carry out maintenance on a loaded machine jack.
• Do not drive the vehicle off the jack or attempt to move the vehicle at any time when
it is supported by the jack.
• To work safely on the machine, you should always use support stands or blocks to
secure the machine after lifting it.
• Wear safety gloves and safety shoes.

14/36
4. TRANSPORT AND STORAGE
The machine jack must always be stored level, in a dry and temperature-controlled
environment.
Transport the jack to the work area by lifting it up and carrying it.
1. How to lift and carry the jack
1. Determine the lifting points on the jack. The jack should be lifted using both the lifting
point at the toe end and at the rear frame end.
Never lift the jack by the pump handle. The pump handle can’t carry sufficient
weight. This will cause the pump handle to slide out of its socket and the jack to
fall.
2. Lift and carry the jack. If possible, have someone help you lift and carry the jack.
DO NOT attempt to lift the jack if you suffer any physical condition that prevents
you from lifting the jack safely.
When the jack is not in use, store it with the saddle fully lowered.

15/36
5. ASSEMBLY AND INSTALLATION
5.1. Packing list
Description Amount Reference
Handle 1 145TA1625 +
145TA1626
Jack 1 Contact your
dealer
Spare parts list 1
Operating manual 1 166TA7665
5.2. Safety instructions
Wear safety gloves and safety shoes when assembling the forklift jack.
5.3. Assembly of the product
Insert the handle into the handle sleeve and tighten it firmly by turning it clockwise.

16/36
6. OPERATION
6.1. Safety instructions for operating the product
• Keep the work area well illuminated.
• Make sure that the machine jack make a firm contact with the ground.
• When the machine jack is in use make sure that no persons are in the vicinity of the
machine jack or lie down underneath the vehicle to prevent serious injuries.
• Please consult the vehicle’s manual before starting the work. The lifting points of
the vehicle are indicated there.
• A damaged or malfunctioning product must never be used. If damage or
malfunctions are discovered during pre-operation inspection or function tests,
theproduct must be tagged and removed from service.
• Use the machine jack only on hard level surfaces. Uneven or sloped surfaces
create dangerous working conditions and dangerously obstruct the function of the
machine jack.
• Only when the person who has safely placed the machine jack gives the sign that
the installation has been completed, work on the vehicle can commence.
• Bystanders who are not working on the vehicle must keep a minimum distance of
0.5m from the vehicle.
• When the machine jack is in proper position, set the vehicle’s parking brake or
emergency brake.
• Do not support human load.
• Do not support animal load.
• Use wheel chocks on all unlifted wheels to make sure the vehicle is stable.
• Never use the machine jack in a stand-alone way! Always use correctly installed
and dimensioned, approved support stands under the vehicle, immediately after
the jack has lifted the vehicle, and before starting to work on the vehicle.
• Turn the vehicle ignition off.
6.2. Operating instructions
Carry out the daily maintenance check listed in chapter7.
1. Lifting
1. Apply the emergency brake on your vehicle and turn
each non-lifted wheel in the opposite direction to prevent
unintended vehicle movements;
2. Make sure the lifting arm is completely lowered, and place the
machine jack under the jack support area of the vehicle.
3. Inspect the positioning of the head cap beneath the support
area, and make sure it is centred and properly engaging the
support area.

17/36
4. Continue pumping the handle until the vehicle is lifted to the
desired height. Pay attention to the head cap position as the
vehicle is being raised, to ensure that the support area can’t
slip off or lift from the head cap.
5. Immediately after transferring the load, place the support
stands (always used in pairs!) under the machine.
The support stands should be spaced as far apart as
possible!
If you place the support stands too close together,
thevehicle has a greater chance of falling over.

18/36
2. Lowering
1. Raise the vehicle a little bit higher to clear the support stands.
2. Remove the undercarriage carefully.
3. Slowly turn the handle counterclockwise to lower the load,
butno more than half a turn.
4. Remove the jack. Fully lower the saddle and push the handle
sleeve down. This to reduce exposure of the piston to prevent
rust and pollution.

19/36
7. MAINTENANCE
7.1. Safety instructions for the repair of the product
If you need the hydraulic diagram, please contact your dealer.
Some of the maintenance operations should only be carried out by professional
technicians.
If you require this information as well as the maintenance steps, please contact your
dealer.
• Wear safety gloves and shoes.
• Do not attempt to repair the product unless you are trained and authorised to do
so.
• Repairs to the product may only be made by a qualified service technician and
according to the manufacturer’s instructions.
• Bystanders who are not working on the vehicle must keep a minimum distance of
0.5m from the vehicle.
• Never carry out maintenance on a loaded jack.
• No modifications or alterations to this machine jack shall be made without the
prior written approval of the original manufacturer, its authorised representative,
or a successor thereof which may affect capacity, stability or safety requirements
of the machine jack but not limited to these examples.
7.2. Maintenance schedule
Task 2H D W M 6M Y
1. Inspect for damage or cracks
2. Cleaning
3. Lubrication
4. Changing oil
2H: every 2hours, D: daily, W: weekly, M: monthly, 6M: every 6months, Y: yearly
7.3. Maintenance instructions
Only use a good grade hydraulic jack oil. Avoid mixing different types of oil and
NEVER use brake fluid, turbine oil, transmission fluid, engine oil or glycerin.
Improper fluid can cause a failure of the jack and can lead to sudden and immediate
loss of load!
1. Inspect for damage or cracks
A daily check of the jack can limit wear to a minimum:
• Check the wheels (only for REF136TA1204) and axles for blockages.
• Ensure that the instruction manual is complete, legible and available for reference.
• Make sure that all decals are legible and in place.
• Check the entire device for damage, corrosion or cracks in structural components.
This maintenance may be carried out by the operator.

20/36
2. Cleaning
• Clean as needed and wipe with an oily cloth.
• When you use a high-pressure cleaner, do not direct the jet onto the bearings and
seals, otherwise the grease will be washed out and the lifespan of the machine will be
shortened.
• Never use sandpaper or abrasive material on the jack!
This maintenance may be carried out by the operator.
3. Lubrication
A periodic coating of lubricating oil on pivot points will help to prevent rust and assure that
the pump assemblies move freely.
This maintenance may be carried out by the operator.
Lubrication points
Please see the picture below for the pivot points that need a periodic coating of lubrication.
Use a non-abrasive grease to lubricate the mechanical parts. We recommend
REF107TA8448 as it is water-repellent and resistant to weather influences.
4. Changing oil
For the best performance, replace the complete fluid supply at least once a year.
• Make sure the saddle is fully lowered.
• Remove the oil filter plug.
• Lay the jack on its side.
• Now drain the fluid.
• When the reservoir is empty fill this with oil until it’s just below the rim of the oil filter hole.
• Reinstall the oil filter plug. For the best results you can use REF107TA7212, hydraulic oil
ZS15.
• Check if there is no air in the pump (see pump air bleeding instructions).
This maintenance may be carried out by the operator.
This manual suits for next models
2
Table of contents
Other Total Source Jack manuals
