Totoku LV33E1 User manual

Graphics card LV33E1
User's Manual
グラフィックスカード LV33E1
取扱説明書


ENGLISH
- 1 -
Graphics Card LV33E1
User's Manual

- 2 -
ENGLISH
FCC Information
FCC (U.S. Federal Communications Commission)
This equipment has been tested and found to comply with the limits for a Class A digital
device, pursuant to part 15 of the FCC Rules. These limits are designed to provide
reasonable protection against harmful interference in a residential installation. This
equipment generates, uses, and can radiate radio frequency energy, and if not installed
and used in accordance with the instructions, may cause harmful interference to radio
communications. However, there is no guarantee that interference will not occur in a
particular installation. If this equipment does cause unacceptable interference to radio or
television reception, which can be determined by turning the equipment off and on, the
user is encouraged to try to correct the interference by one or more of the following
measures:
- Reorient or relocate the receiving antenna.
- Increase the separation between the equipment and receiver.
- Connect the equipment into an outlet on a circuit different from that to which the
receiver is connected.
- Consult your dealer or an experienced radio/TV technician for help.
FCC Warning
To assure continued FCC compliance, the user must use a grounded power supply cord
and the provided shielded video interface cable with bonded ferrite cores. Also, any
unauthorized changes or modications to this monitor would void the user's authority to
operate this device.
Responsible Party Located within the United States
Totoku North America, Inc.
1425 Greenway Dr., Ste. 565
Irving, TX 75038, U.S.A
Tel: (469)-442-0122
CE Certication
This device complies with the requirements of the EMC directive 89/336/
EEC "Electromagnetic Compatibility."
Warning
- When using at 240V in United States, supply must be from center-
tapped, 240V, single phase circuit.
- Concerning disposal of waste, please consult the dealer you have purchased this
device from.

ENGLISH
- 3 -
Content
Introduction ............................................................................................................4
Package contents .................................................................................................4
Hardware requirements ........................................................................................4
Safety precautions ................................................................................................4
Hardware installation .............................................................................................5
Disconnecting the power cables ...........................................................................5
Inserting the graphics card....................................................................................5
Connecting the displays........................................................................................6
Connecting the power cables................................................................................7
Software installation and setup ............................................................................8
Installing software .................................................................................................8
Conguring display settings..................................................................................8
Q&A .......................................................................................................................11
Prior to installation ..............................................................................................11
Installation...........................................................................................................11
Uninstallation ......................................................................................................12
Driver setup.........................................................................................................13
Miscellaneous .....................................................................................................13
Technical specication ........................................................................................14
Graphics card LV33E1 ........................................................................................14
Triple-head cable ................................................................................................15
Analog output resolution .....................................................................................15
Pin array for the analog mini D-sub 15-pin connector.........................................15
After-sale service..................................................................................................16
Repair .................................................................................................................16
Driver upgrade ....................................................................................................16
Disposing of the product .....................................................................................16
* Company names and product names are brand names or registered brand names.

- 4 -
ENGLISH
Introduction
This manual provides step-by-step instructions on how to use the graphics card LV33E1
along with supported TOTOKU LCD's.
Package contents
Conrm that the package contains the following items:
Graphics card ...........................................1
Triple-head cable......................................1
(With a DVI-Dsub adapter attached to one of the heads)
Low-prole bracket ...................................1
Washer .....................................................1
Washer securing screw ............................1
Screw driver..............................................1
Driver CD..................................................1
User's Manual...........................................1
Hardware requirements
● PC/AT compatible computer with a processor equivalent to or higher than Intel Pentium
4 or AMD Athlon (This card cannot be used on a server computer.)
● PCI Express x16 compatible slot
● Microsoft Windows XP
● Minimum system memory: 256MB (Recommended: 512MB or more)
● Minimum hard disk space: 20MB
● CD-ROM Drive
● TOTOKU LCD Display(s) (ME/CCL series)
Safety precautions
Please take the following precautions for your safety in using this product:
● Do not try to repair or alter the product. It could cause re, an electric shock, and/or
other injuries.
● If any abnormality is detected, such as odor, noise, and overheat, turn off the power
and unplug it immediately. Otherwise, it could cause re and/or an electric shock.
● Do not touch the product with wet hands. It could cause an electric shock.
● This product is easily damaged by static electricity. Be careful when installing, storing,
and handling.
● Do not touch the electric terminals directly.
● Keep this product away from magnetized places and objects.
● Do not leave this product on the oor. If you accidentally step on it, you could get
injured or it could damage the product.

ENGLISH
- 5 -
Hardware installation
Notices
Please read the following notices before installing the graphics card:
● Make sure that the operating system is installed properly.
● Uninstall any currently installed display drivers such as Pivot.
● Log in as a user with administrative privileges to install the driver.
● Remove all currently installed old graphics cards.
● Disable the on-board graphic controller on the computer's motherboard if any. Contact
the computer manufacturer on how to disable it.
● Proper operation of this graphics card is not guaranteed when used with other graphics
cards for multi-display. If an error occurs, see Q&A in this manual.
Disconnecting the power cables
Disconnect power cables of the computer and other peripheral devices from the wall outlet.
Inserting the graphics card
1Remove the computer cover. (See the user manual for your computer.)
Caution: ESD (Electrostatic Discharge) Breakdown
Static electricity could damage delicate components of the computer and the graphics
card. Discharge static electricity prior to installation, for example, by touching metal
parts of the computer. Do not touch electric parts or terminals.
2Remove any currently installed graphics card if any or remove a bracket from the slot.
Caution: Burn
Internal parts may be hot if the computer has been turned on previously.
3Insert the graphics card in a PCI Express x16 slot (see the table below) rmly and
evenly. Make sure it does not touch any internal parts of the computer.
LV33E1 Slot Shape
AGP
Yes PCI Express x16
PCI Express x1
PCI 32bit
PCI 64bit
Caution: Ventilation
Ensure the proper airow for cooling the graphics card, for example, by leaving the
adjacent slot unoccupied. Keep the computer's internal cables away from the cooling
fan; keep anything that could get caught in the fan away. (E.g., labels are easy to
peel off when heated.)
Important: If the computer is used without the fan working, it could cause a failure.

- 6 -
ENGLISH
4Secure the bracket on LV33E1 to the computer frame.
Note: When the bracket is not properly secured, the DVI cable cannot be inserted all
the way in. If necessary, use the supplied low-prole bracket.
5Put the cover back on the computer.
Connecting the displays
Follow the instructions below to connect LV33E1 and three displays using the supplied
triple-head cable.
Connector Destination Labeled Triple-head cable Con-
nector
Analog mini
D-sub
(DVI-Dsub
adapter)
Color navigation
display 3/NAV
KX-20
DVI 1 First high-resolution
display 1/IMG1
DVI 2 Second high-
resolution display 2/IMG2
Note: The boot screen appears only on the color navigation display that is connected to
the analog mini D-sub connector.
1Connect the KX-20 connector of the triple-head cable to LV33E1 as follows:
1. Temporarily secure the washer to the bracket on LV33E1 with the washer securing
screw using the screw driver.
2. Connect the KX-20 connector of the triple-head cable rmly to the bracket with the
washer in between.
3. Fasten the 2 screws on the KX-20 connector using the supplied screw driver.
4. Fasten the washer securing screw using the screw driver.

ENGLISH
- 7 -
2Connect the other ends of the triple-head cable to three displays as follows:
• Connect an analog cable between a color navigation display and the DVI-Dsub
adapter that is attached to one of the heads of the triple-head cable and fasten the
screws on the connectors.
• Connect DVI cables between high-resolution displays and the other two DVI heads
of the triple-head cable and fasten the screws on the connectors.
Do not connect/disconnect the analog and DVI cables while the display and the
computer are turned on. It could cause a graphics card failure.
Caution
Connecting the power cables
Plug all power cables of the computer, the displays and peripherals to the wall outlets.

- 8 -
ENGLISH
Software installation and setup
Follow the instructions below for software installation and display setup. See Q&A if any
trouble occurs.
Installing software
1Turn on the displays and start up the computer in VGA mode.
2 Conrm that the VGA boot screen, followed by the Windows startup screen, appears
on the navigation display.
3Log into Windows as a user with administrative privileges.
4When the Found New Hardware Wizard starts up, one of the following messages
appears. Cancel it properly according to the message.
• Welcome to the Found New Hardware Wizard: If this message appears, click "Cancel."
• Hardware Installation: If this message appears, click "Stop Installation" and "Finish."
5Insert the driver CD in the CD-ROM drive on the computer.
6Run DriverCD/Setup.exe on the CD and follow the on-screen instructions to install the
display driver. One of the following messages may appear in the course of installation:
• Digital Signature Not Found: If this message appears, click "Yes."
• Hardware Installation: If this message appears, click "Continue Anyway."
Note: The display may black out during installation. Please wait for a moment.
7Restart the computer.
Conguring display settings
Follow the instructions below after restarting the computer.
1Log into Windows as a user with administrative privileges.
2 Conrm that the Matrox PowerDesk icon is added to the taskbar.
3Set display resolution, color, and the multi-display setup by following the instructions
below.
1) Click the Matrox PowerDesk icon on the taskbar.
Note: The display driver includes a software to congure display settings.
Therefore, the Display Properties dialog box will not be used to set up LV33E1.
2) A pop-up menu appears. Select Multi-Display Setup>Matrox AURORA VX3mpTM
LV33E1.

ENGLISH
- 9 -
3) If the following message appears, click "OK."
4) The Matrox PowerDesk-SE dialog box appears. Set the dialog box as follows:
1. Select a multi-display setup in the Multi-display setup section.
Note:
• In stretched mode, two displays that are connected to the same are combined
into one desktop.
• In independent mode, two displays are independent of each other.

- 10 -
ENGLISH
2. Set the display rotation, resolution, and color palette for the navigation display in
the Navigation Console Settings section.
Display rotation Display resolution Color palette
0 degrees
(For portrait orientation,
select an appropriate display
rotation angle from 90
degrees and 270 degrees
according to the display's
capability.)
800 x 600 at 60Hz
32-bit color
(800 x 600 at 75Hz)
(800 x 600 at 85Hz)
1024 x 768 at 60Hz
(1024 x 768 at 75Hz)
(1024 x 768 at 85Hz)
1280 x 1024 at 60Hz
(1280 x 1024 at 75Hz)
(1280 x 1024 at 85Hz)
1600 x 1200 at 60Hz
(1600 x 1200 at 75Hz)
(1600 x 1200 at 85Hz)
Note: The resolutions in parentheses will be listed in the Display resolution list.
However, they may not be available on LCD's.
3. Set the display rotation, resolution, and color palette for the two high-resolution
displays in the Twin Imaging Displays Settings section.
Orientation ME315L, CCL316, ME351i, CCL350i, ME355i2
Portrait
Display rotation 0 degrees
Display resolution 1536 x 2048 at 30Hz
Color palette 32-bit color
Landscape
Display rotation 0 degrees
Display resolution 2048 x 1536 at 30Hz
Color palette 32-bit color
Note: The two high-resolution displays cannot have different settings, regardless
of their display modes (stretched/independent).
4. Click "Apply" for the settings to take effect. If all three displays are properly set,
click "OK" to the conrmation message.
Note: If any of the screens go blank for a several seconds and come back on
with the original resolution settings, check if the resolutions are proper for the
display by referring to their specications.
5. Click "OK" and close the PowerDesk-SE dialog box.
4Display settings are congured. Remove the driver CD from the CD-ROM drive.

ENGLISH
- 11 -
Q&A
Prior to installation
What are the supported operating systems?
Windows XP.
How many displays can LV33E1 take?
3 displays (one analog D-sub 15 mini + two DVI's) per card, requiring one PCI
Express x16 slot.
What are the TOTOKU displays that support the DVI terminal?
ME315L, CCL316, ME351i, CCL350i and ME355i2.
What are the TOTOKU displays that support the analog D-sub terminal?
Supporting display Max. resolution and refresh rate
CV515S, CV515F, CV525S 1024 x 768 at 60Hz
CCL182p, CV730X, CV183R 1280 x 1024 at 60Hz
CCL202p, CCL212, CCL204 1600 x 1200 at 60Hz
What are the supported resolutions?
Two 3MP screens (1536 x 2048 or 2048 x 1536) and a maximum of 2MP (1600 x
1200 or 1200 x 1600) screen.
Is a multi-display setup possible using multiple graphics cards?
Yes, however the proper operation of LV33E1 is not guaranteed when other graphics
cards are used.
Which slot should LV33E1 be inserted into?
PCI Express x16 slot only. If necessary, use the supplied low-prole bracket.
Does LV33E1 support OpenGL?
Yes, however, there are some restrictions. Please check the performance on your
system.
Installation
Which display driver should I use?
Use the supplied driver or the designated customized driver for TOTOKU displays. The
proper operation of LV33E1 is not guaranteed when other display drivers are used.
The VGA boot screen (POST) does not appear at startup.
Check for the followings:
● The display is not turned on or the signal cable is not connected properly.
● The display is not connected to the right card: There is output from the on-board
VGA adapter or another graphics card to which the display is not connected (The
system BIOS is set to AGP primary or on-board VGA primary.).
● Other graphics cards, including the on-board VGA, are interfering.
● There is no navigation display connected to the 3/NAV connector on the triple-head
cable.
● There is a DVI cable connected between the navigation display and the 3/NAV
connector.

- 12 -
ENGLISH
Can I overwrite the current display driver with the new one?
No. Make sure to uninstall the existing driver once and install the (new) driver to
update the driver, add/remove a card, or change slots.
The new LV33E1 doesn't get detected as new hardware.
Check for the followings:
● LV33E1 is not inserted all the way into the slot.
● An older version of the display driver is currently installed. If so, uninstall the old one
rst and then install the latest display driver.
● Another coexisting graphics card is interfering. If so, remove it.
● Though it seems that the wizard does not detect LV33E1, there is a chance that it is
detected as "[!] Video Controller (VGA compatible)" in the Other devices section in
the Device Manager. In that case, install the driver from there.
I tried to install the display driver for LV33E1, but LV33E1 doesn't get recognized.
Check if LV33E1 is inserted all the way into the slot and a proper graphics card and/or
a display driver is installed. If another graphics card coexists, remove it.
I can't install the display driver when another graphics card coexists.
Remove another card that is already set up, insert LV33E1, install and setup the
display driver. Put another card back into the slot where it was inserted.
The computer freezes at the Windows startup screen when restarting after the driver
is installed.
This can happen when another graphics card coexists. Remove the card once. Insert
LV33E1 only, install and setup the display driver, and remove it. Insert another card
only into another slot, install and setup the display driver. Put LV33E1 back into the
slot where it was inserted.
I added another graphics card after setting up LV33E1. But the computer freezes at
the Windows startup screen.
Remove LV33E1 once. Insert another card into another slot, install and set up a driver.
Put LV33E1 back into the slot where it was inserted.
The screen goes blank during driver installation.
Wait for a while.
Any other measures for multi-display related problems?
Try the followings:
● Use the CMOS switch if the computer has one.
● Share one IRQ with all graphics cards.
● Install one card at a time.
● Update the computer motherboard BIOS.
● Use the latest chip set driver on the computer.
● Use the latest driver for another graphics card as well.
● Disable the on-board VGA, for example, in the system BIOS settings.
● Change the driver version.
Uninstallation
How can I uninstall the software for LV33E1?
Select Control Panel>Add/Remove Programs from the Start menu and delete
"Matrox PowerDesk-SE" and "Matrox Driver."

ENGLISH
- 13 -
Driver setup
I can't select the predened resolution.
Check the followings:
● Is the Display Properties used to set up? Use the Matrox PowerDesk program to
setup the display settings. Run the program by clicking the icon on the taskbar.
● Was a display connected when the computer was turned on? Start up the computer
with a supported display being connected.
● Is the old display driver still active? Remove the old driver and install the new one.
Can I set different orientations and/or different resolutions on the two high-resolution
displays (DVI outputs)?
No.
One of the high-resolution displays on LV33E1 doesn't work.
Check the multi-display mode setting on the Display Properties>Settings(tab). Make
sure the display is connected and it is not set to "Single Display Mode."
Miscellaneous
What is the display driver version?
Version 2.3.3.1 as of May 2007

- 14 -
ENGLISH
Technical specication
Graphics card LV33E1
GPU Matrox Parhelia LX
Video memory 128MB DDR SDRAM
Card type PCI Express x16 (Low-prole design)
BUS PCI Express x16
Operating system Windows XP
Video outputs 3
Output connector
(via triple-head cable)
DVI-I (x2) and analog* (x1)
(*: For the pin array, see the table on the next page.)
Dimensions (W x H) 69 x 173 mm (w/o bracket)
Max. power consumption 25W
Resolution
Analog mini D-sub: See the table on the next page for
the analog output resolution.
DVI-I: 1536 x 2048 at 30Hz, 2048 x 1536 at 30Hz
69 mm
173 mm

ENGLISH
- 15 -
Triple-head cable
Analog output resolution
Display rotation Display resolution Color palette
0 degrees
(For portrait orientation, select
an appropriate display rotation
angle from 90 degrees and
270 degrees according to the
display's capability.)
800 x 600 at 60Hz
32-bit color
(800 x 600 at 75Hz)
(800 x 600 at 85Hz)
1024 x 768 at 60Hz
(1024 x 768 at 75Hz)
(1024 x 768 at 85Hz)
1280 x 1024 at 60Hz
(1280 x 1024 at 75Hz)
(1280 x 1024 at 85Hz)
1600 x 1200 at 60Hz
(1600 x 1200 at 75Hz)
(1600 x 1200 at 85Hz)
Note: The resolutions in parentheses will be listed in the Display resolution list.
However, they may not be available on LCD's.
Pin array for the analog mini D-sub 15-pin connector
Connector # Signal # Signal
1 RED 9 NC
2 GREEN 10 SYNC RETURN
3BLUE 11 ID 0
4 ID 2 12 DI 1 or DDC DATA
5 GND 13 HSYNC
6 RED SHIELD 14 VSYNC
7 GREEN SHIELD 15 ID 3 or DDC CLOCK
8 GLUE SHIELD

TOTOKU
Graphics Card LV33E1 User's Manual
May 2007 Edition PZZ11-1242A
Notes for this user's manual
• No part of this manual, whether partly or wholly, may be reproduced or copied without authorization.
• The content of this manual is subject to change without notice.
• Although this manual has been prepared carefully, please let us know if you nd any errors,
omissions, or ambiguous explanations.
ENGLISH - 16 -
After-sale service
Repair
1. Read this manual carefully and check if the problem solves.
2. If the problem remains, stop using the card, unplug it, and consult your dealer.
3. Do not try to repair yourself. It is very dangerous.
4. Use the original box and packing material to pack the product for shipping.
Driver upgrade
Contact your dealer.
Disposing of the product
Do not dispose of this product in domestic waste. The related national/local laws and
regulations may apply. Consult your dealer for more information.
◆For more information on TOTOKU products, visit our web site at
www.totoku.com/display/

日本語
- 1 -
グラフィックス カード LV33E1
取扱説明書

- 2 -
日本語
目 次
はじめに ........................................................................................................................................................................ 3
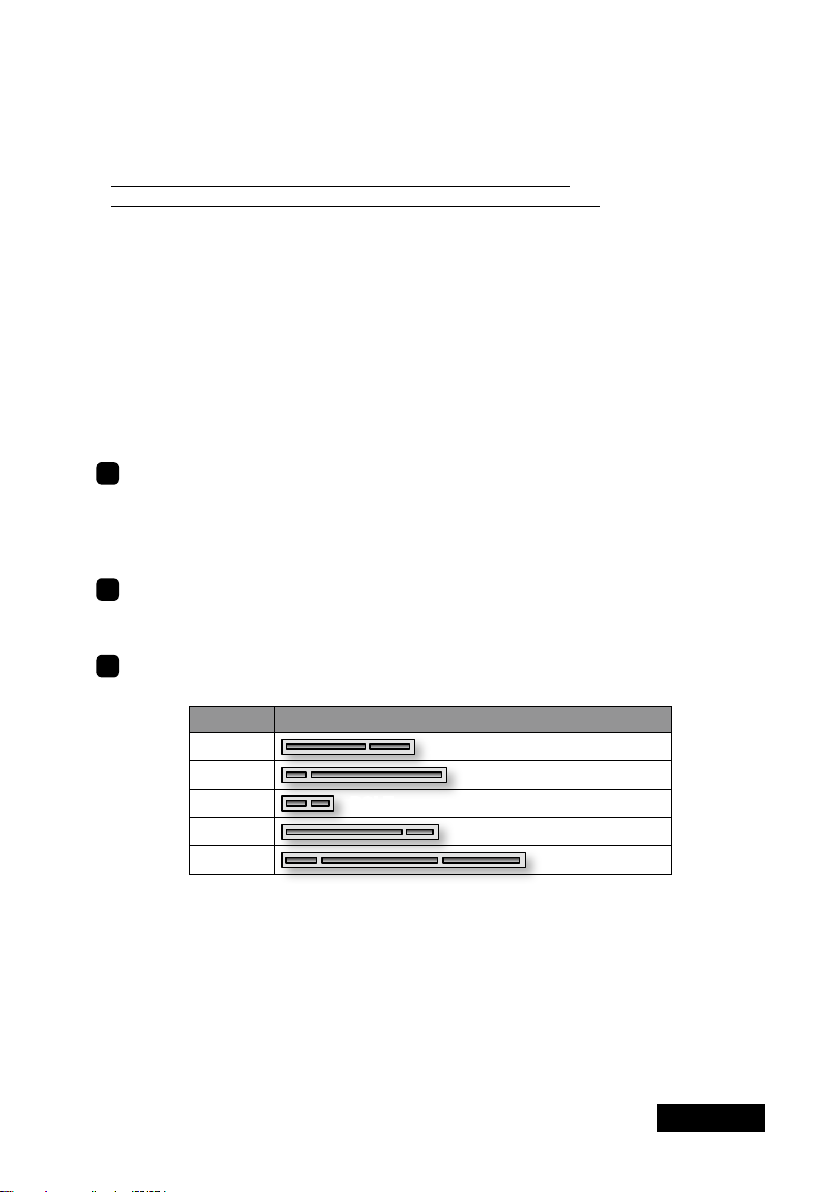
パッケージ コンテンツ ...............................................................................................................................................................................3
システム要件 ......................................................................................................................................................................................................3
安全にお使いいただくために ..............................................................................................................................................................3
ハードウェアのインストールとディスプレイ接続 ........................................................................................... 4
電源コードの取り外し ................................................................................................................................................................................4
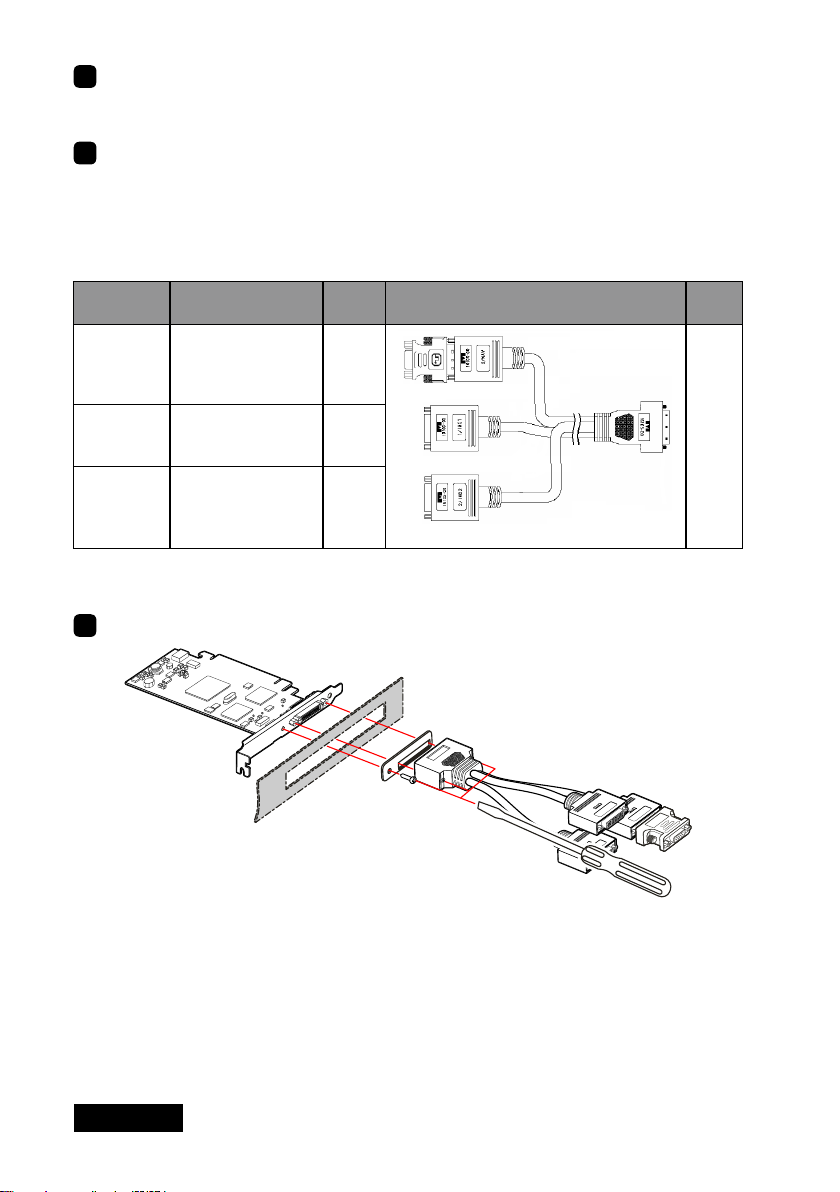
グラフィックス カードの取り付け ......................................................................................................................................................4
ディスプレイの接続 .....................................................................................................................................................................................5
電源コードの接続 .........................................................................................................................................................................................6
ソフトウェアのインストールと表示設定 ........................................................................................................... 7
ソフトウェアのインストール ...................................................................................................................................................................7
表示設定 ............................................................................................................................................................................................................7
Q & A ........................................................................................................................................................................ 10
導入前 ................................................................................................................................................................................................................10
ソフトウェアのインストール ...............................................................................................................................................................10
ソフトウェアのアンインストール ....................................................................................................................................................12
表示設定 .........................................................................................................................................................................................................12
その他 .................................................................................................................................................................................................................12
技術仕様 ................................................................................................................................................................... 13
グラフィックス カード LV33E1 .........................................................................................................................................................13
分岐ケーブル ................................................................................................................................................................................................14
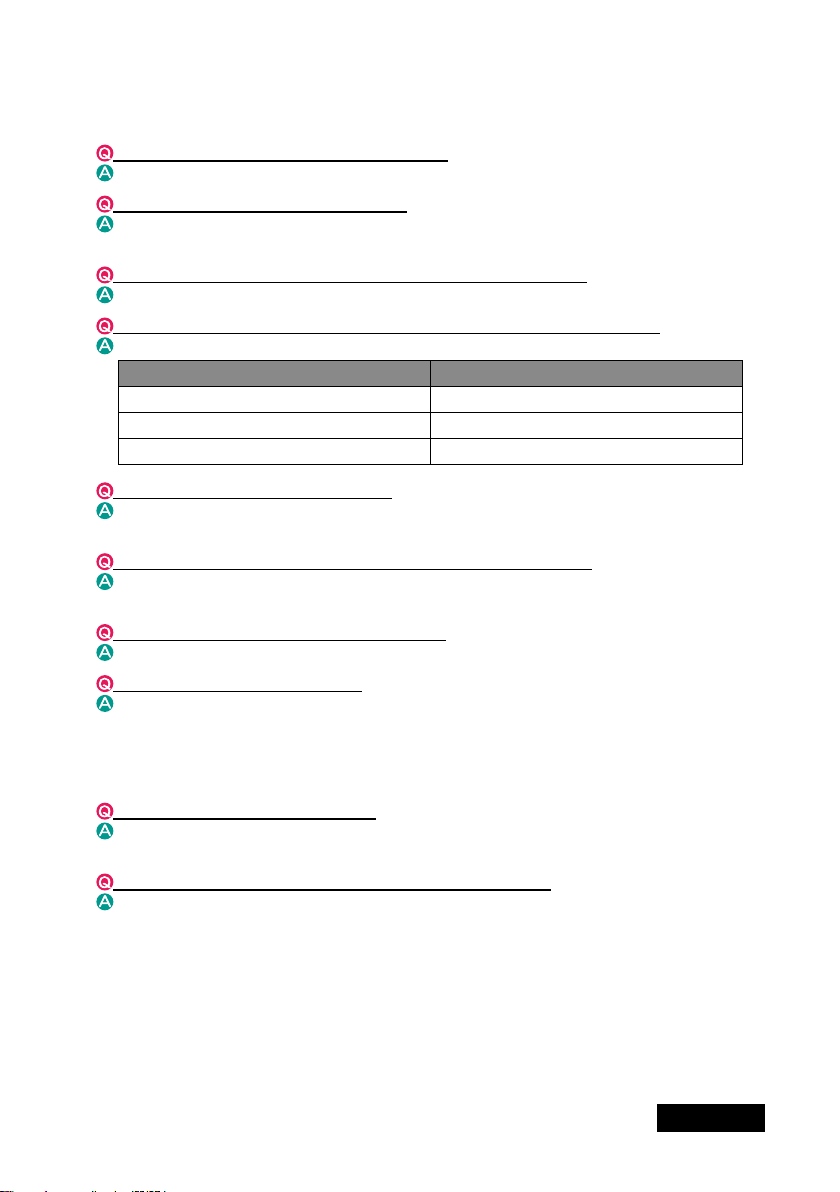
アナログ出力解像度 .............................................................................................................................................................................14
アナログ ミニ D-sub ピン コネクタのピン配列 .................................................................................................................14
保証とアフターサービス ....................................................................................................................................... 15
保証期間 .........................................................................................................................................................................................................15
修理を依頼されるときは ...................................................................................................................................................................15
サポートを依頼されるときは ..........................................................................................................................................................15
アフターサービスのお問い合わせ窓口 ....................................................................................................................................15
ドライバのアップグレードについて ..............................................................................................................................................16
廃棄について ................................................................................................................................................................................................16
* 本書に記載されている会社名および商品名は、 各社の登録商標または商標です。
注意
この製品は、 情報処理装置等電波障害自主規制協議会 (VCCI) の基準に基づく
クラスA情報処理装置です。 この装置を家庭環境で使用すると電波妨害を引き起
こすことがあります。 この場合には使用者が適切な対策を講ずるよう要求されるこ
とがあります。
Table of contents
Languages:
Other Totoku Video Card manuals
Popular Video Card manuals by other brands

EVGA
EVGA GeForce GTX 680 SC w/Backplate specification

EVGA
EVGA GeForce GTX 465 SuperClocked Specifications

AMD
AMD ATI Radeon HD 3600 Series user guide

Gainward
Gainward GeForce GTX 670 2GB brochure

Gainward
Gainward GTS250 1024MB brochure

ATI Technologies
ATI Technologies FIRE GL X1-256 Quick installation guide