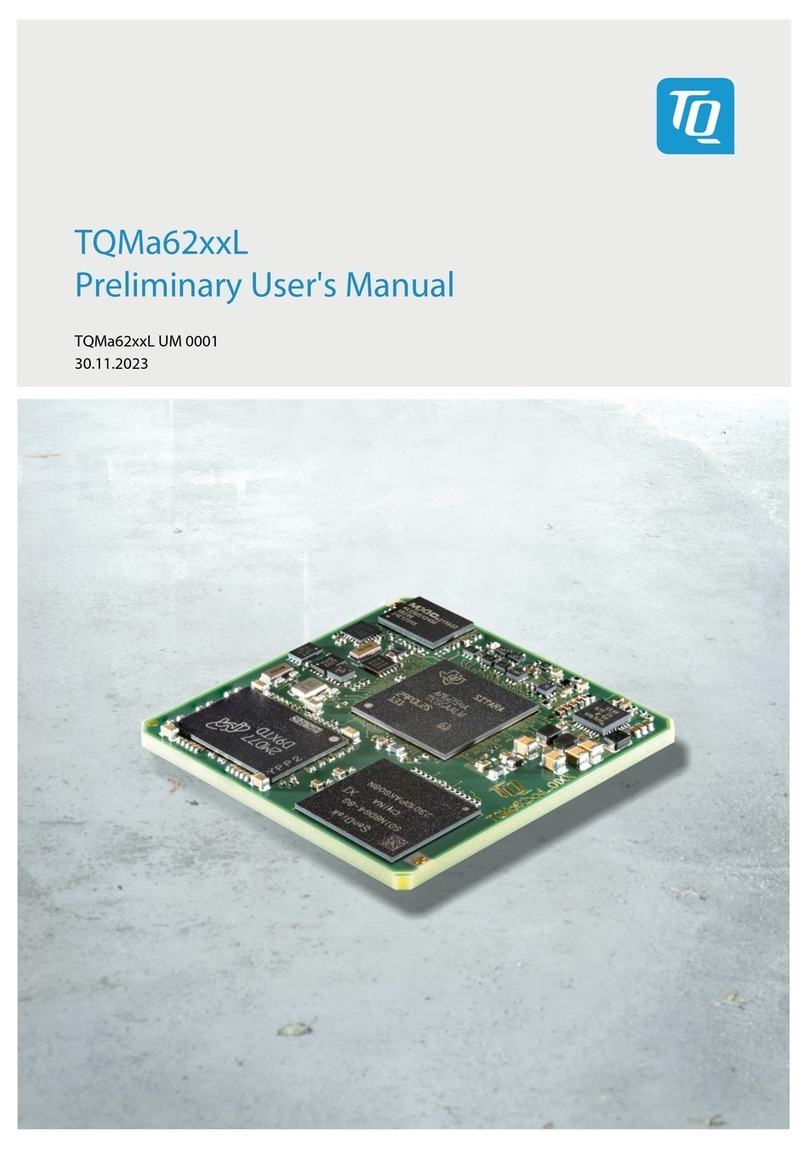
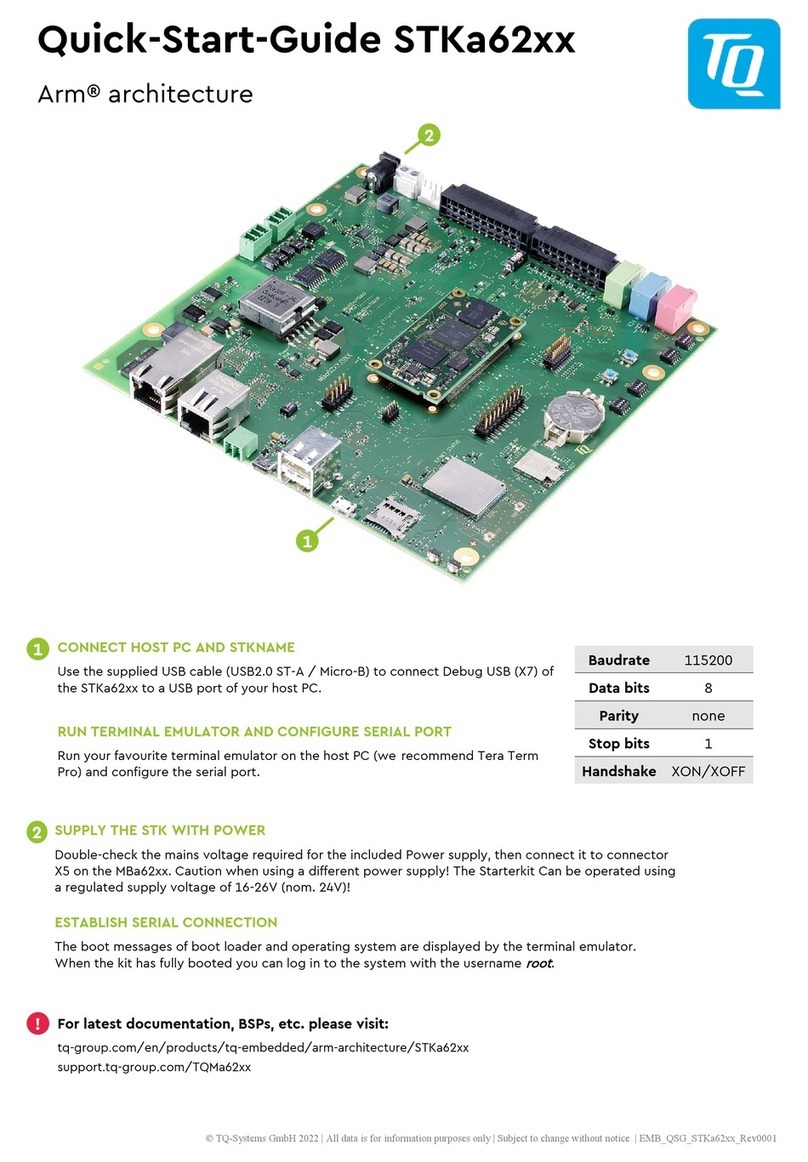
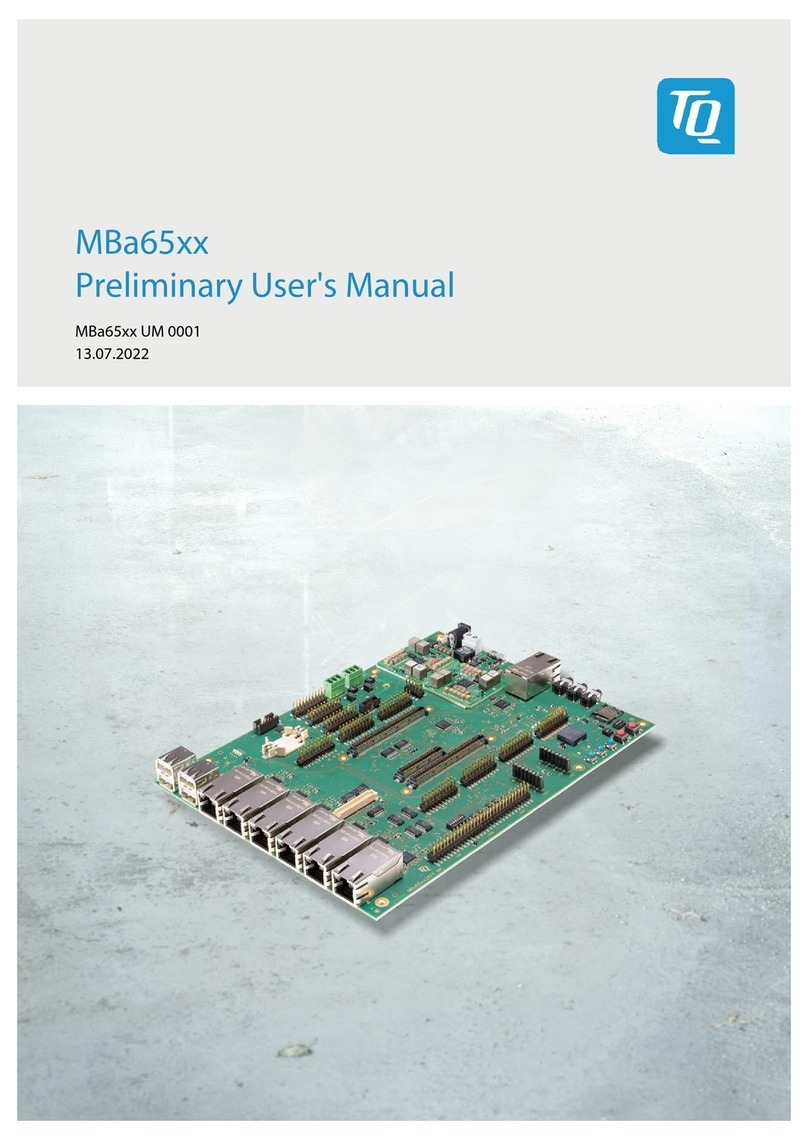
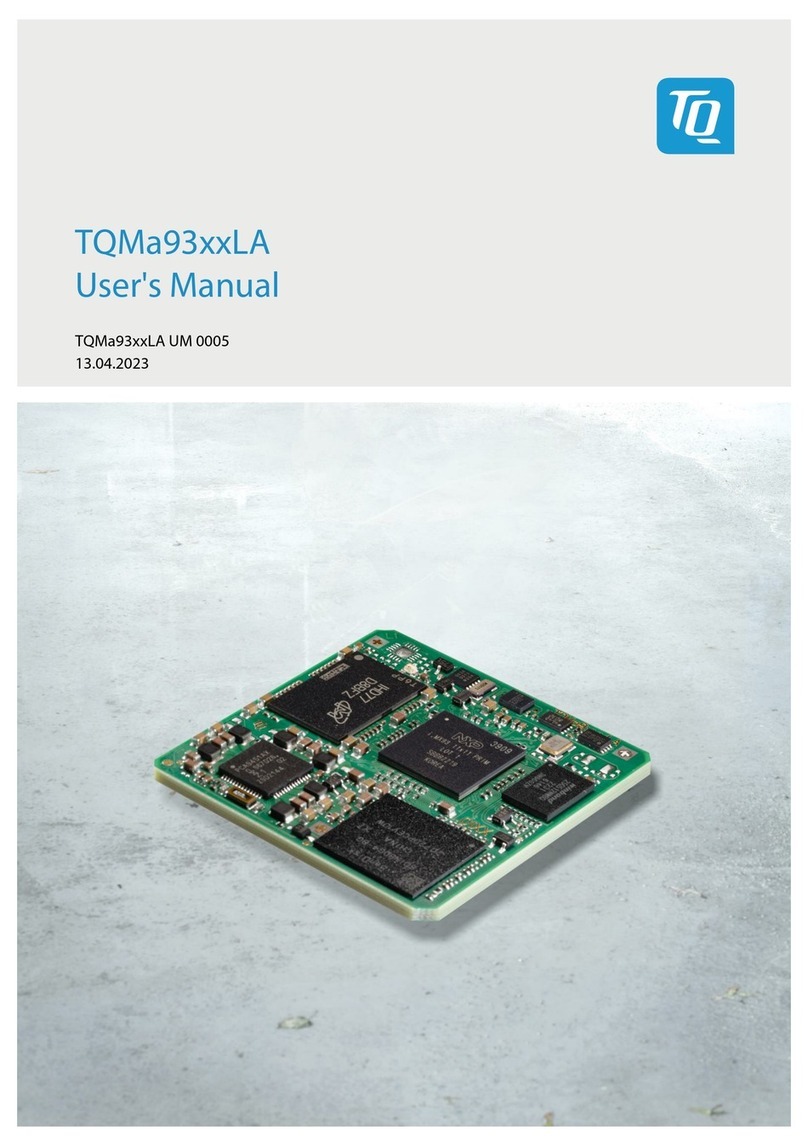
TQ STK-MBa28 User manual

STK-MBa28
User's Manual
STK-MBa28 UM 102
11.11.2011

User's Manual l STK-MBa28 UM 102 l © 2011 by TQ-Group
Page i
Table of contents
1. ABOUT THIS MANUAL...................................................................................................................... 1
1.1 Copyright and licence expenses................................................................................................... 1
1.2 Registered trademarks..................................................................................................................... 1
1.3 Disclaimer ............................................................................................................................................ 1
1.4 Imprint.................................................................................................................................................. 1
1.5 Symbols and typographic conventions ..................................................................................... 2
1.6 Tips on safety...................................................................................................................................... 3
1.7 Handling and ESD tips..................................................................................................................... 3
1.8 Naming of signals.............................................................................................................................. 4
1.9 Further applicable documents / presumed knowledge ....................................................... 4
1.10 Acronyms and definitions............................................................................................................... 5
2. BRIEF DESCRIPTION .......................................................................................................................... 7
3. TECHNICAL DATA.............................................................................................................................. 7
3.1 System architecture and system functionality......................................................................... 7
3.1.1 Block diagram..................................................................................................................................... 7
3.1.2 Technical data electronics .............................................................................................................. 7
3.1.2.1 External interfaces............................................................................................................................. 8
3.1.2.2 Internal interfaces ............................................................................................................................. 8
3.1.2.3 User's interfaces................................................................................................................................. 8
3.1.2.4 System components......................................................................................................................... 8
3.1.3 Technical data mechanics, design ............................................................................................... 8
4. ELECTRONICS SPECIFICATION.......................................................................................................9
4.1 External interfaces............................................................................................................................. 9
4.1.1 Function specification ...................................................................................................................10
4.1.1.1 Ethernet 1 (X26A) ............................................................................................................................10
4.1.1.2 Ethernet 2 (X26B).............................................................................................................................11
4.1.1.3 RS485 (X32A) ....................................................................................................................................11
4.1.1.4 RS232 (X32B).....................................................................................................................................12
4.1.1.5 CAN 1/ CAN 2 (X1A) ........................................................................................................................12
4.1.1.6 GPIO (X1B) .........................................................................................................................................13
4.1.1.7 USB 2.0 Hi-Speed host (X12A) .....................................................................................................15
4.1.1.8 USB 2.0 Hi-Speed host (X12B)......................................................................................................15
4.1.1.9 Audio output right (X27) and left (X28), microphone input (X13)...................................16
4.1.1.10 SD card (X4).......................................................................................................................................16
4.1.1.11 Power-in (X6) ....................................................................................................................................16

User's Manual l STK-MBa28 UM 102 l © 2011 by TQ-Group
Page ii
Table of contents (continued)
4.1.2 Electrical characteristics ................................................................................................................17
4.1.2.1 Ethernet 1 (X26A) ............................................................................................................................17
4.1.2.2 Ethernet 2 (X26B).............................................................................................................................17
4.1.2.3 RS485 (X32A) ....................................................................................................................................17
4.1.2.4 RS232 (X32B).....................................................................................................................................17
4.1.2.5 CAN 1/ CAN 2 (X1A) ........................................................................................................................17
4.1.2.6 GPIO (X1B) .........................................................................................................................................18
4.1.2.7 USB 2.0 Hi-Speed host (X12A) .....................................................................................................19
4.1.2.8 USB 2.0 Hi-Speed host (X12B)......................................................................................................19
4.1.2.9 Audio output right (X27) left (X28), microphone input (X13)............................................19
4.1.2.10 SD card (X4).......................................................................................................................................19
4.1.2.11 Power-in (X6) ....................................................................................................................................20
4.1.3 Plug connectors and pin assignments......................................................................................21
4.1.3.1 Ethernet 1 / 2 (X26A/B)..................................................................................................................21
4.1.3.2 RS485 (X32A) ....................................................................................................................................23
4.1.3.3 RS232 (X32B).....................................................................................................................................24
4.1.3.4 CAN 1/ CAN 2 (X1A) ........................................................................................................................25
4.1.3.5 GPIO (X1B) .........................................................................................................................................26
4.1.3.6 USB 2.0 Hi-Speed host (X12A) .....................................................................................................27
4.1.3.7 USB 2.0 Hi-Speed host (X12B)......................................................................................................28
4.1.3.8 Audio output right (X27), left (X28) ...........................................................................................29
4.1.3.9 Microphone input (X13)................................................................................................................30
4.1.3.10 SD card (X4).......................................................................................................................................31
4.1.3.11 Power-in (X6) ....................................................................................................................................32
4.2 Internal interfaces ...........................................................................................................................33
4.2.1 Function specification ...................................................................................................................35
4.2.1.1 Module interfaces (X11, X17).......................................................................................................35
4.2.1.2 JTAG (X16) .........................................................................................................................................35
4.2.1.3 LCD (X22, X23)..................................................................................................................................36
4.2.1.4 LCD backlight (X5, X21, X24)........................................................................................................37
4.2.1.5 Touchscreen (X2, X8, X20) ............................................................................................................38
4.2.1.6 LVDS display (X9).............................................................................................................................39
4.2.1.7 Power-on (X19) ................................................................................................................................40
4.2.1.8 Accumulator connector (X7)........................................................................................................40
4.2.1.9 Starterkit interfaces (X10, X14, X15)...........................................................................................40

User's Manual l STK-MBa28 UM 102 l © 2011 by TQ-Group
Page iii
Table of contents (continued)
4.2.2 Electrical characteristics ................................................................................................................41
4.2.2.1 Module interface (X11, X17).........................................................................................................41
4.2.2.2 Power-on............................................................................................................................................41
4.2.2.3 Accumulator connector (X7)........................................................................................................41
4.2.2.4 JTAG (X16) .........................................................................................................................................41
4.2.2.5 LCD (X22, X23)..................................................................................................................................41
4.2.2.6 LCD backlight (X5, X21, X24)........................................................................................................42
4.2.2.6.1 Backlight power supply (X5)........................................................................................................42
4.2.2.6.2 LED driver (X21, X24)......................................................................................................................42
4.2.2.7 Touchscreen (X2, X8, X20) ............................................................................................................42
4.2.2.8 LVDS display (X9).............................................................................................................................42
4.2.2.9 Starterkit interfaces (X10, X14, X15)...........................................................................................42
4.2.3 Plug connector and pin assignment .........................................................................................42
4.2.3.1 Receptacle for module...................................................................................................................42
4.2.3.2 JTAG (X16) .........................................................................................................................................45
4.2.3.3 LCD (X22, X23)..................................................................................................................................45
4.2.3.4 LCD backlight (X5, X21, X24)........................................................................................................47
4.2.3.5 Touchscreen (X2, X8, X20) ............................................................................................................48
4.2.3.6 LVDS display (X9).............................................................................................................................49
4.2.3.7 Power-on (X19) ................................................................................................................................50
4.2.3.8 Accumulator connector (X7)........................................................................................................50
4.2.3.9 Starterkit interfaces (X10, X14, X15)...........................................................................................51
4.2.3.9.1 Starterkit interface (X10) ...............................................................................................................51
4.2.3.9.2 Starterkit interface (X14) ...............................................................................................................52
4.2.3.9.3 Starterkit interface (X15) ...............................................................................................................53
4.3 User's interfaces...............................................................................................................................54
4.3.1 Buzzer (N10)......................................................................................................................................54
4.3.2 Reset push button (S2) ..................................................................................................................54
4.3.3 Status-LEDs external (V77)............................................................................................................55
4.3.4 Status-LEDs internal (V22, V24, V25, V46) ................................................................................56
4.3.5 DIP switches (S1, S3, S4, S5)..........................................................................................................56
4.4 System Components......................................................................................................................58
4.4.1 Temperature sensor (D10)............................................................................................................58
4.4.2 IC address allocation.....................................................................................................................58
4.4.3 Internal power supply....................................................................................................................58
4.4.4 Voltage supervision and reset.....................................................................................................59

User's Manual l STK-MBa28 UM 102 l © 2011 by TQ-Group
Page iv
Table of contents (continued)
5. SOFTWARE-SPECIFICATION..........................................................................................................59
6. MECHANICS SPECIFICATION........................................................................................................60
6.1 Construction .....................................................................................................................................60
6.1.1 PCB outlines STK-MBa28...............................................................................................................60
6.1.2 STK-MBa28 top view.......................................................................................................................61
6.1.3 STK-MBa28 bottom view...............................................................................................................62
6.2 Requirements for the superior system .....................................................................................63
6.2.1 Protection against external effects............................................................................................63
6.2.2 Thermal management...................................................................................................................63
7. SAFETY REQUIREMENTS AND PROTECTIVE REGULATIONS................................................64
7.1 EMC requirements ..........................................................................................................................64
7.2 Operational safety and personal security................................................................................64
8. CLIMATIC AND OPERATIONAL CONDITIONS..........................................................................65
8.1 Protection against external effects............................................................................................65
8.2 Reliability and product life ...........................................................................................................65
8.3 Displays ..............................................................................................................................................65
8.4 Environment protection................................................................................................................66
8.5 RoHS compliance ............................................................................................................................66
8.6 WEEE regulation ..............................................................................................................................66
8.7 Accumulator .....................................................................................................................................66
9. APPENDIX ..........................................................................................................................................67
9.1 References.........................................................................................................................................67

User's Manual l STK-MBa28 UM 102 l © 2011 by TQ-Group
Page
v
Table directory
Table 1: Terms and conventions............................................................................................................. 2
Table 2: Acronyms....................................................................................................................................... 5
Table 3: LAN8720A modes......................................................................................................................10
Table 4: Mapping of the GPIOs..............................................................................................................14
Table 5: Electrical characteristics of the GPIs ....................................................................................18
Table 6: Electrical characteristics of the GPOs..................................................................................18
Table 7: Electrical characteristics of the power supply..................................................................20
Table 8: Overview of the function groups of the power supply.................................................20
Table 9: Plug connector Ethernet 1/2 (X26A/B) ...............................................................................21
Table 10: Pin assignment plug connector Ethernet 1/2 (X26A/B) ................................................21
Table 11: Plug connector RS485 (X32A)................................................................................................23
Table 12: Pin assignment plug connector RS485 (X32A).................................................................23
Table 13: Plug connector RS232 (X32B) ................................................................................................24
Table 14: Pin assignment plug connector RS232 (X32B).................................................................24
Table 15: Plug connector CAN 1 and CAN 2 (X1A).............................................................................25
Table 16: Pin assignment plug connector CAN 1 and CAN 2 (X1A) .............................................25
Table 17: Plug connector GPIO (X1B).....................................................................................................26
Table 18: Pin assignment plug connector GPIO (X1B)......................................................................26
Table 19: Plug connector USB host (X12A)..........................................................................................27
Table 20: Pin assignment plug connector USB host (X12A) ...........................................................27
Table 21: Plug connector USB (X12B) ....................................................................................................28
Table 22: Pin assignment plug connector USB host (X12B)............................................................28
Table 23: Plug connector audio output right (X27) and left (X28)................................................29
Table 24: Pin assignment plug connector audio output right (X27) and left (X28).................29
Table 25: Plug connector microphone (X13).......................................................................................30
Table 26: Pin assignment plug connector microphone (X13)........................................................30
Table 27: Plug connector SD card (X4)..................................................................................................31
Table 28: Pin assignment plug connector SD card (X4)...................................................................31
Table 29: Plug connector power-in (X6) ...............................................................................................32
Table 30: Pin assignment plug connector power-in (X6) ................................................................32
Table 31: LCD bus signals (X22, X23) .....................................................................................................36
Table 32: Touchscreen plug connector (X2, X8, X20) .......................................................................38
Table 33: Allocation of RGB signals on LVDS lines.............................................................................39
Table 34: Receptacle for module.............................................................................................................42
Table 35: Pin assignment STK-MBa28 – TQMa28 (X17 – (X1))........................................................43
Table 36: Pin assignment STK-MBa28 – TQMa28 (X11 – (X2))........................................................44

User's Manual l STK-MBa28 UM 102 l © 2011 by TQ-Group
Page vi
Table directory (continued)
Table 37: Plug connector JTAG (X16).....................................................................................................45
Table 38: Pin assignment plug connector JTAG (X16)......................................................................45
Table 39: Plug connector LCD (X22, X23).............................................................................................45
Table 40: Pin assignment plug connector LCD (X22, X23)..............................................................46
Table 41: Plug connector LCD backlight (X5)......................................................................................47
Table 42: Pin assignment plug connector LCD backlight (X5).......................................................47
Table 43: Plug connector LCD backlight (X21, X24)..........................................................................47
Table 44: Pin assignment plug connector LCD backlight (X21, X24)...........................................47
Table 45: Plug connector touchscreen (X2).........................................................................................48
Table 46: Pin assignment plug connector touchscreen (X2)..........................................................48
Table 47: Plug connector touchscreen (X8).........................................................................................48
Table 48: Plug connector touchscreen (X20) ......................................................................................48
Table 49: Pin assignment plug connector touchscreen (X8, X20) ................................................48
Table 50: Plug connector LVDS display (X9)........................................................................................49
Table 51: Pin assignment plug connector LVDS display (X9).........................................................49
Table 52: Plug connector power-on (X19) ...........................................................................................50
Table 53: Pin assignment plug connector power-on (X19) ............................................................50
Table 54: Plug connector accumulator (X7) ........................................................................................50
Table 55: Pin assignment plug connector accumulator (X7) .........................................................50
Table 56: Plug connector Starterkit interface (X10)...........................................................................51
Table 57: Plug connector pin assignment Starterkit interface (X10) ...........................................51
Table 58: Plug connector Starterkit interface (X14)...........................................................................52
Table 59: Plug connector pin assignment Starterkit interface (X14) ...........................................52
Table 60: Plug connector Starterkit interface (X15)...........................................................................53
Table 61: Plug connector pin assignment Starterkit interface (X15) ...........................................53
Table 62: Reset push button (S2) ............................................................................................................54
Table 63: External status LEDs (V77) ......................................................................................................55
Table 64: Overview external LEDs...........................................................................................................55
Table 65: Overview internal LEDs ...........................................................................................................56
Table 66: DIP switch S1 ..............................................................................................................................56
Table 67: DIP switch S3 ..............................................................................................................................56
Table 68: DIP switch S4 ..............................................................................................................................57
Table 69: DIP switch S5 ..............................................................................................................................57
Table 70: Boot mode options...................................................................................................................57
Table 71: IC address allocation...............................................................................................................58
Table 72: Internal power supply..............................................................................................................58
Table 73: Reset trigger level and voltage supervision......................................................................59
Table 74: Further applicable documents..............................................................................................67

User's Manual l STK-MBa28 UM 102 l © 2011 by TQ-Group
Page vii
Illustration directory
Illustration 1: STK-MBa28 block diagram ............................................................................................ 7
Illustration 2: External interfaces of the STK-MBa28 ........................................................................ 9
Illustration 3: Ethernet 1, block diagram ...........................................................................................10
Illustration 4: Ethernet 2, block diagram ...........................................................................................11
Illustration 5: RS485 block diagram ....................................................................................................11
Illustration 6: RS232 block diagram ....................................................................................................12
Illustration 7: CAN block diagram........................................................................................................12
Illustration 8: GPIO block diagram.......................................................................................................13
Illustration 9: USB host block diagram...............................................................................................15
Illustration 10: USB OTG block diagram...............................................................................................15
Illustration 11: Audio block diagram.....................................................................................................16
Illustration 12: SD card block diagram .................................................................................................16
Illustration 13: Power-in block diagram...............................................................................................16
Illustration 14: Wiring of X26...................................................................................................................22
Illustration 15: Wiring of X32A ................................................................................................................23
Illustration 16: Wiring of X32B.................................................................................................................24
Illustration 17: Wiring of X1A...................................................................................................................25
Illustration 18: Wiring of X1B...................................................................................................................26
Illustration 19: Wiring of X12A ................................................................................................................27
Illustration 20: Wiring of X12B.................................................................................................................28
Illustration 21: Wiring of X27 and X28..................................................................................................29
Illustration 22: Wiring of X13...................................................................................................................30
Illustration 23: Wiring of X4 .....................................................................................................................31
Illustration 24: Wiring of X6 .....................................................................................................................32
Illustration 25: Internal and external interfaces top side................................................................33
Illustration 26: Internal and external interfaces bottom side........................................................34
Illustration 27: LCD block diagram ........................................................................................................36
Illustration 28: LCD backlight block diagram .....................................................................................37
Illustration 29: Touchscreen block diagram .......................................................................................38
Illustration 30: LVDS display block diagram .......................................................................................39
Illustration 31: Power-on block diagram .............................................................................................40
Illustration 32: Pinout of X21, X24..........................................................................................................47
Illustration 33: Buzzer block diagram ...................................................................................................54
Illustration 34: LED block diagram.........................................................................................................55
Illustration 35: Internal power supply block diagram......................................................................58
Illustration 36: Voltage supervision / reset block diagram.............................................................59
Illustration 37: PCB outlines STK-MBa28..............................................................................................60
Illustration 38: STK-MBa28 top view .....................................................................................................61
Illustration 39: STK-MBa28 bottom view .............................................................................................62

User's Manual l STK-MBa28 UM 102 l © 2011 by TQ-Group
Page viii
Revision history
Rev. Date Name Pos. Modification
100 23.05.2011 Petz Document created
101 14.07.2011 Petz Illustration 34
Table 33
Table 35
Replaced
Order code revised
Pin assignment revised
102 11.11.2011 Petz All Completely revised

User's Manual l STK-MBa28 UM 102 l © 2011 by TQ-Group
Page 1
1. ABOUT THIS MANUAL
1.1 Copyright and licence expenses
Copyright protected © 2011 by TQ-Systems GmbH. This User’s Manual may not be copied,
reproduced, translated, changed or distributed, completely or partially in electronic, machine
readable, or in any other form without the written consent of TQ-Systems GmbH. The drivers
and utilities for the used components as well as the BIOS are subject to the copyrights of the
respective manufacturers. The licence conditions of the respective manufacturer are to be
adhered to. Bootloader-licence expenses are paid by TQ-Systems and are included in the price.
Licence expenses for the operating system and applications are not taken into consideration and
must be separately calculated / declared.
1.2 Registered trademarks
TQ-Systems GmbH aims to adhere to the copyrights of all the graphics and texts used in all
publications, and strives to use original or license-free graphics and texts. All the brand names
and trademarks mentioned in the publication, including those protected by a third party, unless
specified otherwise in writing, are subjected to the specifications of the current copyright laws
and the proprietary laws of the present registered proprietor without any limitation. One should
conclude that brand and trademarks are rightly protected by of a third party.
1.3 Disclaimer
TQ-Systems GmbH does not guarantee that the information in this manual is up-to-date, correct,
complete or of good quality. Nor does TQ-Systems assume guarantee for further usage of the
information. Liability claims against TQ-Systems GmbH, referring to material or non-material
related damages caused, due to usage or non-usage of the information given in the manual,
or due to usage of erroneous or incomplete information, are exempted, as long as there is no
proven intentional or negligent fault of TQ-Systems GmbH. TQ-Systems GmbH explicitly reserves
the rights to change or add to the contents of this manual or parts of it without special
notification.
1.4 Imprint
TQ-Systems GmbH
Gut Delling, Mühlstraße 2
82229 Seefeld
Tel: +49 (0) 8153 9308–0
Fax: +49 (0) 8153 9308–134
Email: info@tqs.de
Web: http://www.tq-group.com/

User's Manual l STK-MBa28 UM 102 l © 2011 by TQ-Group
Page 2
1.5 Symbols and typographic conventions
Table 1: Terms and conventions
Symbol Meaning
This symbol represents the handling of electrostatic-sensitive modules and /
or components. These components are often damaged / destroyed by the
transmission of a voltage higher than about 50 V.
A human body usually only experiences electrostatic discharges above
approximately 3,000 V.
This symbol indicates the possible use of voltages higher than 24 V.
Please note the relevant statutory regulations in this regard.
Non-compliance with these regulations can lead to serious damage to your
health and also cause damage / destruction of the component.
This symbol indicates a possible source of danger. Acting against the
procedure described can lead to possible damage to your health and / or
cause damage / destruction of the material used.
This symbol represents important details or aspects for working with TQ-
products.
Command A font with fixed-width is used to denote commands, file names, or menu
items.

User's Manual l STK-MBa28 UM 102 l © 2011 by TQ-Group
Page 3
1.6 Tips on safety
Improper or incorrect handling of the product can substantially reduce its life span.
1.7 Handling and ESD tips
General handling of your TQ-products
The TQ-product may only be used and serviced by certified personnel who
have taken note of the information, the safety regulations in this document
and all related rules and regulations.
A general rule is: do not touch the TQ-product during operation. This is
especially important when switching on, changing jumper settings or
connecting other devices without ensuring beforehand that the power
supply of the system has been switched off.
Violation of this guideline may result in damage / destruction of the module
and be dangerous to your health.
Improper handling of your TQ-product would render the guarantee invalid.
Proper ESD handling
The electronic components of your TQ-product are sensitive to electrostatic
discharge (ESD).
Always wear antistatic clothing, use ESD-safe tools, packing materials etc.,
and operate your TQ-product in an ESD-safe environment. Especially when
you switch modules on, change jumper settings, or connect other devices.

User's Manual l STK-MBa28 UM 102 l © 2011 by TQ-Group
Page 4
1.8 Naming of signals
A hash mark (#) at the end of the signal name indicates a low-active signal.
Example: RESET#
If a signal can switch between two functions and if this is noted in the name of the signal, the
low-active function is marked with a hash mark # and shown at the end.
Example: C / D#
If a signal has multiple functions, the individual functions are separated by slashes when they are
important for the wiring.
The identification of the individual functions follows the above conventions.
Example: WE2# / OE#
1.9 Further applicable documents / presumed knowledge
• Specifications and manual of the used modules:
These documents describe the service, functionality and special characteristics of the
used module (incl. BIOS).
• Specifications of the used components:
The manufacturer's specifications of the used components, for example CompactFlash
cards, are to be taken note of.
They contain, if applicable, additional information that must be taken note of for safe
and reliable operation.
These documents are stored at TQ-Systems.
• Chip errata:
It is the user's responsibility to make sure all errata published by the manufacturer of
each component are taken note of.
The manufacturer’s advice should be followed.
• Software behaviour:
No warranty can be given, nor responsibility taken for any unexpected software
behaviour due to deficient components.
• General expertise:
Expertise in electrical engineering / computer engineering is required for the
installation and the use of the device.

User's Manual l STK-MBa28 UM 102 l © 2011 by TQ-Group
Page 5
1.10 Acronyms and definitions
The following acronyms and abbreviations are used in this document:
Table 2: Acronyms
Acronym Meaning
AC Alternating Current
AD Address/Data
AD Air Discharge
ADC Analog/Digital Converter
ARM® Advanced RISC Machine
BIOS Basic Input/Output System
CAN Controller Area Network
CD Card Detect
CD Contact Discharge
CPU Central Processing Unit
DC Direct Current
DIN Deutsche Industrie Norm
DIP Dual In-line Package
DUART Dual Universal Asynchronous Receiver/Transmitter
EEPROM Electrically Erasable Programmable Read-Only Memory (Byte-wise re-writable)
EGB Elektrostatisch Gefährdete Bauelemente
EMC Electromagnetic Compatibility
eMMC Embedded MultiMediaCard (Flash)
EN Europäische Norm
ESD Electrostatic Discharge
FET Field Effect Transistor
FFC Flat Flex Cable
GPI General Purpose Input
GPIO General Purpose Input/Output
GPO General Purpose Output
I/O Input/Output
I/P Input/Power
IEEE Institute of Electrical and Electronics Engineers
IP00 Ingress Protection 00
IC Inter-Integrated Circuit
IS Inter Integrated Circuit Sound
JTAG Joint Test Action Group

User's Manual l STK-MBa28 UM 102 l © 2011 by TQ-Group
Page 6
Table 2: Acronyms (continued)
Acronym Meaning
LCD Liquid Crystal Display
LED Light Emitting Diode
LS Low Speed (USB: 1.5 Mbit/s)
LSB Least Significant Bit
LVDS Low Voltage Differential Signal
MB Main board
MMC Multimedia Card
MOZI Module extractor (Modulzieher)
NC Not Connected
O/P Output/Power
OTG On-The-Go
PCB Printed Circuit Board
PD Pull-Down (Resistor)
PHY Physical (Interface)
PU Pull-Up (Resistor)
PWM Pulse Width Modulation
RCA Radio Corporation of America
RFU Reserved for Future Use
RGB Red Green Blue
RJ Registered Jack
RS232 Recommended Standard (serielle Schnittstelle)
RTC Real-Time Clock
RoHS Restriction of (the use of certain) Hazardous Substances
SD Secure Digital
SDHC Secure Digital High Capacity
SPDIF Sony-Philips Digital Interface Format
SPS Speicherprogrammierbare Steuerung ÖProgrammable Logic Controller (PLC)
STK Starterkit
THD+N Total Harmonic Distortion + Noise
UART Universal Asynchronous Receiver/Transmitter
USB Universal Serial Bus
VGA Video Graphics Array (640 × 480)
WEEE Waste Electrical and Electronic Equipment
WP Write-Protection

User's Manual l STK-MBa28 UM 102 l © 2011 by TQ-Group
Page 7
2. BRIEF DESCRIPTION
The STK-MBa28 is designed to be driven by the TQ-module TQMa28, which is based on the
Freescale ARM-CPU MCIMX287 (i.MX28). In combination with a module and a display with
touchscreen it offers PC core functionalities and standard interfaces.
By using the functionalities of the Starterkit STK-MBa28 this main board forms together with the
TQMa28 a modular system to develop own product ideas.
3. TECHNICAL DATA
3.1 System architecture and system functionality
3.1.1 Block diagram
TQMa28
Ethernet
transceiver
LAN8720A
2 x CAN
D-sub 9-pin
USB Host
type A
(OTG capable)
SD card
24 V GPIORS485
80-pin plug connector
tyco 5177986-3
80-pin plug connector
tyco 5177986-3
USB Host
type A
RS232Ethernet 1
High-Side
VN808CM-E
I²C
expander
PCA9554
RS232
SP3222E
RS485
SP491E
CAN
transceiver
MCP2551
Audio codec
SGTL5000
Buzzer
HP / Line out
2 x Cinch (stereo)
Microphone
3.5 mm phone jack LCD LVDS
connector
Backlight
driver
LT3518
LED
backlight
External lithium
accumulator
Temperature
sensor
LM73CIMK-0
LVDS
transmitter
SN75LVDS83B
Opto
coupler
LCD_Bus
I2C 1
VCC_BATTERY
Touch
Ethernet 2
RJ45
SD_Card
I2S
CAN 0
CAN 1
Ethernet
Ethernet
Opto
coupler
driver
Opto
coupler
D-sub 9-pin D-sub 9-pin D-sub 15-pin
transceiver transceiver
JTAG
Boot
configuration
LRADC
I2C 1
Internal
expansion
connector 1
Internal
expansion
connector 3
Internal
expansion
connector 2
UART 0
UART 3
RJ45
CAN
transceiver
MCP2551
Ethernet
transceiver
LAN8720A
I2C 1
I2C 1
I²C
expander
PCA9554
Illustration 1: STK-MBa28 block diagram
3.1.2 Technical data electronics
The interfaces and system components listed in the following are implemented on the
STK-MBa28. Due to the fact that the STK-MBa28 can be installed in a casing the interfaces are
divided into external and internal interfaces.

User's Manual l STK-MBa28 UM 102 l © 2011 by TQ-Group
Page 8
3.1.2.1 External interfaces
• 2 × Ethernet 10/100 Mbit
• 1 × RS485
• 1 × RS232
• 2 × CAN
• 1 × USB 2.0 Hi-Speed host interface
• 1 × USB 2.0 Hi- Speed host interface (On-the-Go capable)
• 1 × GPIO (8 × OUT / 4 × IN)
• 1 × SD card
• 2 × Audio output
• 1 × Microphone input
• 1 × Power supply
3.1.2.2 Internal interfaces
• 1 × TQMa28
• 1 × JTAG
• 2 × LCD (model dependent)
• 2 × LCD backlight (model dependent)
• 3 × touchscreen (model dependent)
• 1 × LCD via LVDS (optional)
• 1 × Power-on push button
• 3 × Headers for specific extensions
• Connector for accumulator
3.1.2.3 User's interfaces
• 1 × Reset push button
• 3 × Status LED (external) User-LED 1, User-LED 2, Power-LED
• 4 × Status LED (internal) Reset-LED, USB_OC-LED 1, USB_OC-LED 2, front Power-LED
• 4 × DIP switch
• Buzzer
3.1.2.4 System components
• Temperature sensor
• Internal power supply
• Voltage supervision and reset concept
• IC bus
3.1.3 Technical data mechanics, design
Dimensions PCB (W × D × H): 175 × 120 × 2 mm
Overall dimensions (W × D × H): 175 × 130 × 32 mm (app.)
Weight: 248 g

User's Manual l STK-MBa28 UM 102 l © 2011 by TQ-Group
Page 9
4. ELECTRONICS SPECIFICATION
4.1 External interfaces
Illustration 2: External interfaces of the STK-MBa28

User's Manual l STK-MBa28 UM 102 l © 2011 by TQ-Group
Page 10
4.1.1 Function specification
4.1.1.1 Ethernet 1 (X26A)
The TQMa28 directly drives the Ethernet 1 interface. The SMSC LAN8720A is used as PHY.
IEEE1588 frames are supported. The 1588-signals are accessible at plug connector X10
(see 4.2.3.9.1).
TQMa28 - X2
ENET0_TXD0
ENET0_TXD1
LAN8720A
TXD0
TXD1
RST#
ENET0_TX_EN TXEN
ENET0_RXD0 RXD0/MODE0
ENET0_RXD1 RXD1/MODE1
ENET0_RX_EN CRS_DV/MODE2
CLKIN
ENET_CLK
ENET_FEC_RESET_B#
LED1
LED2#
MBa28 – X26A
RJ45
LED
LED
TX
RX
ENET_MDIO
ENET_MDC MDC
MDIO 10 k
3.3 V
PHYAD0
Illustration 3: Ethernet 1, block diagram
The LAN8720A offers the following modes:
Table 3: LAN8720A modes
Mode [0…2] Function Remark
000 10BASE-T Half-duplex, autonegotiation off
001 10BASE-T Full-duplex, autonegotiation off
010 10BASE-TX Half-duplex, autonegotiation off
011 100BASE-TX Full-duplex, autonegotiation off
100 100BASE-TX Half-duplex start, autonegotiation on
101 100BASE-TX Repeater mode, half-duplex start, autonegotiation on
110 Power down Information in data sheet
111 ALL capable No determination, autonegotiation on,
mode is preset in hardware
This table does not replace the data sheet of the LAN8720A.

User's Manual l STK-MBa28 UM 102 l © 2011 by TQ-Group
Page 11
4.1.1.2 Ethernet 2 (X26B)
The TQMa28 directly drives the Ethernet 2 interface. The SMSC LAN8720A is used as PHY.
TQMa28 - X2
ENET1_TXD0
ENET1_TXD1
LAN8720A
TXD0
TXD1
RST#
ENET1_TX_EN TXEN
ENET1_RXD0 RXD0/MODE0
ENET1_RXD1 RXD1/MODE1
ENET1_RX_EN CRS_DV/MODE2
CLKIN
ENET_CLK
ENET_FEC_RESET_B#
LED1
LED2#
MBa28 – X26A
RJ45
LED
LED
TX
RX
ENET_MDIO
ENET_MDC MDC
MDIO
10 kPHYAD0
Illustration 4: Ethernet 2, block diagram
4.1.1.3 RS485 (X32A)
The AUART0 of the TQMa28 drives the RS485 interface of the STK-MBa28. The optocouplers
Avago HCPL0631 and HCPL0601 are used for galvanic separation. The Recom RSS-0505/HP
serves as the power supply for the galvanically separated part of the RS485 interface.
The Exar SP491EEN-L is used as RS485 transceiver.
120 R
galvanic
separation SP491E MBa28 – X32A
D-Sub 9
Y/Z
A/B
TQMa28 - X1
AUART0_RTS
AUART0_RxD
AUART0_TxD
S3-4
S3-3
120 R
HCPL0631
HCPL0601
RSS-0505/HP
DE
DI
RO
RE#
n.a.
Illustration 5: RS485 block diagram
The RS485 signals can be terminated with 120 Ω with either DIP switch S3 or cable-sided by
bridging pins 8 / 9 (RxD) and 1 / 7 (TxD). Details can be found in Table 67 on page 56.
Table of contents
Other TQ Computer Hardware manuals
Popular Computer Hardware manuals by other brands
Renesas
Renesas PROM Programming Adapter PCA7408 user manual
Texas Instruments
Texas Instruments AN-1646 user guide
Renesas
Renesas M16C/64 user manual
ST
ST X-NUCLEO-DRP1M1 user manual

Baracoda
Baracoda USB Plug user guide
American Dynamics
American Dynamics MegaPower II AD1996R Installation and operating instructions
National Instruments
National Instruments PXI manual

GOWIN
GOWIN GW1NSR Series user guide
StarTech.com
StarTech.com SM22BU31C3R quick start guide

Middle Atlantic Products
Middle Atlantic Products ESSEX FANTOP-138DC instruction sheet
JETWAY
JETWAY MI225 Series user manual
Xilinx
Xilinx LogiCORE IP MAC v8.5 user guide
