TravelGo HD User manual


TABLE OF CONTENTS
Welcome…………………………………………………………. 2
TravelGo Chair Components……………………………......... 3
Shipping Contents…………………………………………….… 4
Specifications………………………………………………….....5
Installation and Use……………………………………………...6
Charger and Battery……………………………………………..8
Main Operational Functions…………………………………….9
Troubleshooting and Maintenance…………………………….11
Warranty Information…………………………………………....12
1

Welcome
Dear Users,
First and foremost, thank you very much for choosing TravelGo Canada! You will not
be disappointed. This power wheelchair is suitable for driving at lower speeds, with
better road conditions and less slope. This manual is to assist you in your operation
and maintenance of a TravelGo Chair. Please read it entirely, prior to operation.
After reading the manual, if you have any questions or concerns, please feel free to
contact us.
Do not attempt to charge or operate this vehicle until you have attained adequate
knowledge of its features and controls, and you have been trained in safe riding
techniques. Failure to do so could result in serious injury or death and/or damage to
the vehicle and/or denial of warranty coverage. Once you have finished reading this
manual, it is recommended that you practice operating the TravelGo Chair in a
private place, rather than public, until you are comfortable with its operation.
In our constant efforts to improve and upgrade our products, your TravelGo Chair
may incorporate updated components and/or features that are not specifically
covered by this version of the Owner’s Manual. If you are not clear on how to
operate or make use of any components or features, TravelGo for clarification.
Product design, features, and specifications are subject to change without notice.
We strongly believe that your new TravelGo Chair will provide with the independence
and convenience that you have been looking for!
How to Read this Manual:
A “WARNING!” label indicates that failure to abide by the following instructions may
result in serious personal injury or death to the rider or others, as well as damage to
equipment.
A “CAUTION!” label indicates that failure to abide by the following instructions may
result in damage to your TravelGo and related equipment and/or legal consequences
and/or fines and/or denial of warranty coverage.
A “Note:” label indicates information that is especially useful but does not have
safety consequences.
2

TravelGo Chair Components
3

Shipping Contents
Upon receipt of your TravelGo Chair, please open the packaging to ensure the
following is included, the TravelGo Chair, one lithium-ion battery, a charger, and a
manual.
4

SPECIFICATIONS
TravelGo HD Powerchair
TravelGo S Powerchair
Product Weight
55 Lbs
53 Lbs
Armrest Height From Ground
29″
27″
Batteries Type & Weight
1 Lithium-ion 2.2kg
1 Lithium-ion 2.2kg
Brakes
Electro-Magnetic
Electro-Magnetic
Dimensions (Length – Width – Height)
Folded: 14″L – 22″W – 38″H
Unfolded: 38″L – 22″W – 38″H
Folded: 14″L – 20″W – 36″H,
Unfolded: 34″L – 23″W – 37″H
Frame Material
Aluminum
Aluminum
Front Wheels (Diameter – Width)
Diameter 7″ – Width 2″
Diameter 7.3″ – Width 1.7″
Ground Clearance (Footrest To Ground)
Pulled In: 3.3″, Pulled Out: 3.1″
Pulled In: 3.3″, Pulled Out: 3.1″
Joystick Height From Ground
30″
28″
Maximum User Weight Capacity
350 Lbs.
245 Lbs.
Maximum Speed (Adjustable)
6.5 km/h
6.5 km/h
Motor
Two 150 Watt Brushless HUB
Two 150 Watt Brushless HUB
Rear Wheels (Diameter)
12″
12″
Seat & Backrest Material
Comfort fabric
Comfort fabric
Seat Height From Ground
20″
18″
Seat Size (Width – Depth)
18.9″ Depth 14.6″ Width
18″ Depth 14″ Width
Travel Distance
22 kms
22 kms
Turning Radius
31″
31″
5

Installation and Use
1. The TravelGo Chair ships upright; carefully open the top of the box then turn
the box on the side for easier removal of the contents.
Note: It is recommended to complete this process with two individuals.
1. Unfold the TravelGo Chair: Place the chair on the ground, hold the top cross
bar in one hand, and the cushion with the other. Open firmly until the
TravelGoChair is fully open.
2. Attach the Joystick: Slide the controller into the open splot on the arm of the
TravelGo Chair. Tighten knob located under the arm rest to secure the
joystick.
3. Fasten the Lock: Once the TravelGo Chair has been opened, there is a
U-shaped lock on the back. Push down on the lock to ensure the chair is
locked and will not fold or unfold.
WARNING!: Prior to operating the TravelGo Chair, the lock should be
checked regularly to ensure the safety of the user and the TravelGo Chair.
6

4. Adjust the kickstand: Adjust the kickstand leg to the position shown in the
figure below.
5. Ensure that your TravelGo Chair is not in free wheel mode. The two red
levers should be facing away from the TravelGo Chair.
1. Ensure joystick power control is set to off prior to getting in the TravelGo
Chair.
2. Once sitting comfortably, turn on and enjoy.
7

Charger and Battery
The TravelGo Chair is designed to be low maintenance with long-term use of the Lithium Ion
Battery.
CAUTION!: The charger that is sent to you with the TravelGo Chair is the only charger that
should be used to charge the chair.
For optimal battery use:
- Fully charge the battery for more than 12 hours.
- Charge the battery at least once every three months.
- If the TravelGo Powerchair will not be used for a longer period of time, charge the
battery until full and remove from scooter.
Charging Steps:
1. Ensure the charging jack is clean and dry.
2. Turn off the TravelGoChair.
3. Plug the charger's output plug into the charging port on the bottom of the joystick by
lining up the three pins.
WARNING! Make sure the charger plug is fully plugged in the charging port of
TravelGo Chair.
4. When the charger’s light is green, the battery has been charged.
5. Pull out the charger's output plug from the charging port.
8

Main Operational Functions
Joystick
Joystick Display
1. Battery charge level display
2. Power on and off button
3. Horn
4. Speedometer level display
5. Increase speed
6. Decrease speed
7. Joystick Control
Power On/Off TravelGo Chair
Power On:
1. Ensure TravelGo Chair is in drive mode.
2. User must be seated in chair prior to turning chair on.
3. Press power button.
4. When fully powered on, chair will emit a light beeping noise and battery and speed
levels will be visible.
Power Off:
1. User must remain seated until chair is fully powered off.
2. Press power button.
3. When powered off, chair will emit a light beeping noise and battery and speed levels
will no longer be visible.
4. At this point, it is safe to get off the chair.
Adjustment of Driving Speed
According to the user's habits and environment, the user can adjust the maximum speed of
the TravelGo Chair. The currently selected maximum speed will be displayed on the 5-speed
9

speedometer when the chair is powered on. The speed buttons can be used to increase or
decrease speed.
The speed is divided into five increments: Level 1: 20% of the maximum speed, Level 2:
40% of the maximum speed, Level 3: 60% of the maximum speed, Level 4: 80% of the
maximum speed, and Level 5: 100% of the maximum speed.
WARNING! Do not push speed buttons too quickly as a gradual increase is recommended
to ensure safety.
Horn Use
By pressing the horn button on the joystick, a beep noise will occur until released.
Note: Use horn during operation to alert others of your presence to ensure your own safety
and the safety of others.
Battery Charge Level Display
The battery charge level display is used to show that the power of the electric wheelchair is
turned on, and this display also shows the current predicted value of the remaining battery
power. When all LEDs are on, the battery is fully charged. If the battery charge level display
is yellow, your battery needs to be charged. If only the red LED is on, the battery is
extremely low, your chair needs to be charged as soon as possible.
CAUTION! It is best practice to ensure your chair is fully charged before any
journey.
Joystick Use
The direction of the power wheelchair is determined by the joystick.
- Steer right, left, backward or forward
Note: The speed of the TravelGo Chair is also determined by the speed in which you use
the joystick. If moved quickly, the chair will respond quickly. If moved slowly, the chair will
respond slowly.
WARNING! To ensure complete safety, always power off the TravelGo Chair when not in
motion. This will ensure that the joystick control cannot cause unexpected movement of the
power wheelchair.
Armrests
In order to fold the armrests up or down, read the following instructions:
1. Move the small plastic handle on the side of the armrest downwards.
10

2. Hold the armrest and lift up.
CAUTION! Ensure the armrest is locked prior to operation.
Troubleshooting and Maintenance
A. PROBLEM: The Power Won't Turn On
POSSIBLE REASONS:
1. The Battery is not properly connected.
2. The Joystick is not connected to the CPU.
3. The Battery power is too low.
POSSIBLE SOLUTIONS:
1. Connect or Reconnect the Battery.
2. If previous disconnected, reconnect the Joystick to the CPU.
3. Charge the Battery.
4. Turn on the electric power switch located at the bottom of the battery
(as shown in the picture below).
3. Charge the Battery.
B. PROBLEM: All 5 Lights Flashing on Joystick Speed Indicator Panel
POSSIBLE REASONS:
1. The joystick can't deliver signals to the control model (CPU.)
POSSIBLE SOLUTIONS:
1. Replace CPU.
C. PROBLEM: Chair Loses Power When Joystick Throttle Pushed
POSSIBLE REASONS:
1. Short circuit between the Joystick, CPU and Battery.
2. Faulty BMS (Battery Management System) or lithium cell inside Battery pack.
POSSIBLE SOLUTIONS:
11

1. Check for tears in the Joystick wiring. Replace the Joystick or CPU depending on your
findings.
2. Replace the Battery.
D. PROBLEM: Driving distance is reduced/shortened.
POSSIBLE REASONS:
1. Battery at cold temperature.
2. Heavy driving on sloped surfaces (inclines/hills)
POSSIBLE SOLUTIONS:
1. None, this is normal characteristics of a lithium Battery. The Battery charge will dis-
sipate quicker in the cold.
2. None, power consumption is increased on uneven pavement and slopes.
E. PROBLEM: Charger light doesn't go on.
POSSIBLE REASONS:
1. The charger is not plugged in to a wall outlet, or wall outlet has no electricity.
2. The charger cable that plugs into outlet is loosely connected to the charger base.
POSSIBLE SOLUTIONS:
1. Plug in the Charger, or check wall outlet for electricity.
2. Check the Charger cable connections.
F. PROBLEM: Charger light is always Green.
POSSIBLE REASONS:
1. If you are charging the Battery "On-Board", the Battery is not plugged in to the
chair, or the connection is loose.
2. If you are charging the Battery "Off-Board", the Charger is not connected to the
Battery (directly), or the connection is loose.
POSSIBLE SOLUTIONS:
1. Check the connection of the Battery square plug to the chair's Power Input square
plug. See Page 8 "Charger and Battery" section.
2. Check the connection of the Battery circular plug to the Charger plug.
G. PROBLEM: Charging time is shortened.
POSSIBLE REASONS:
1. The Battery capacity has decreased.
POSSIBLE SOLUTIONS:
1. Replace the Battery.
For any problems not listed, please email or call to speak to a service team member. Do not
disconnect any wires at all, unless instructed to do so by a technician. Ensure you are with
the chair and all applicable components when calling. We will not be able to help you if you
are not with the chair. Please also have your order information, the name that the chair was
12

purchased under, and/or your serial number ready. We can’t help you without this
information.
Warranty Information
All of our models come with a 3 year warranty for your peace of mind.
3 Year Warranty
Main Frame
1 Year Warranty
Motor
Control System (CPU)
6 Months Warranty
Battery/Cables
90 Day Limited Warranty
On the wearing parts, such as the rubber tires, armrest
padding,joystick button covers, joystick control knob
30 Day Limited Warranty
Soft goods, such as seat cushion and backrest padding.
Please notify us immediately if you are having trouble with your TravelGo Powerchair, or if
the wheelchair has stopped functioning completely. We will provide technical assistance to
help you troubleshoot the issue. If we cannot resolve the issue through technical support, we
will ship you any required replacement parts still under warranty. We will notify you if a part
needed to fix the issue is no longer covered under warranty.
Replacement parts will be shipped out through Canada Post Courier.
Any service and labor fees to replace parts under warranty must be paid by the user.
Due to its innovative design, most warranty parts can be easily replaced by the customer, a
family member, relative or friend using the tool kit that comes with your chair.
The customer is responsible for any fees or charges (both labour and/or service) occurring
from having replacement parts swapped out on the TravelGo Powerchair. Each TravelGo
Powerchair comes with a tool kit. Most replacement parts can easily be swapped out using
the tool kit by the TravelGo customer, or their friend or family members.
The warranty only covers NON-DELIBERATE Damage. Any damage caused by improper
usage, or normal wear and tear is not covered. Warranty is non-transferable.
13
This manual suits for next models
1
Table of contents
Popular Wheelchair manuals by other brands
AccessRec
AccessRec WaterWheels Instruction, Maintenance and Safety Manual

Harvest Healthcare
Harvest Healthcare HMS300B user manual

Sunrise
Sunrise BREEZY P10 user guide

Aspire
Aspire Metro user manual
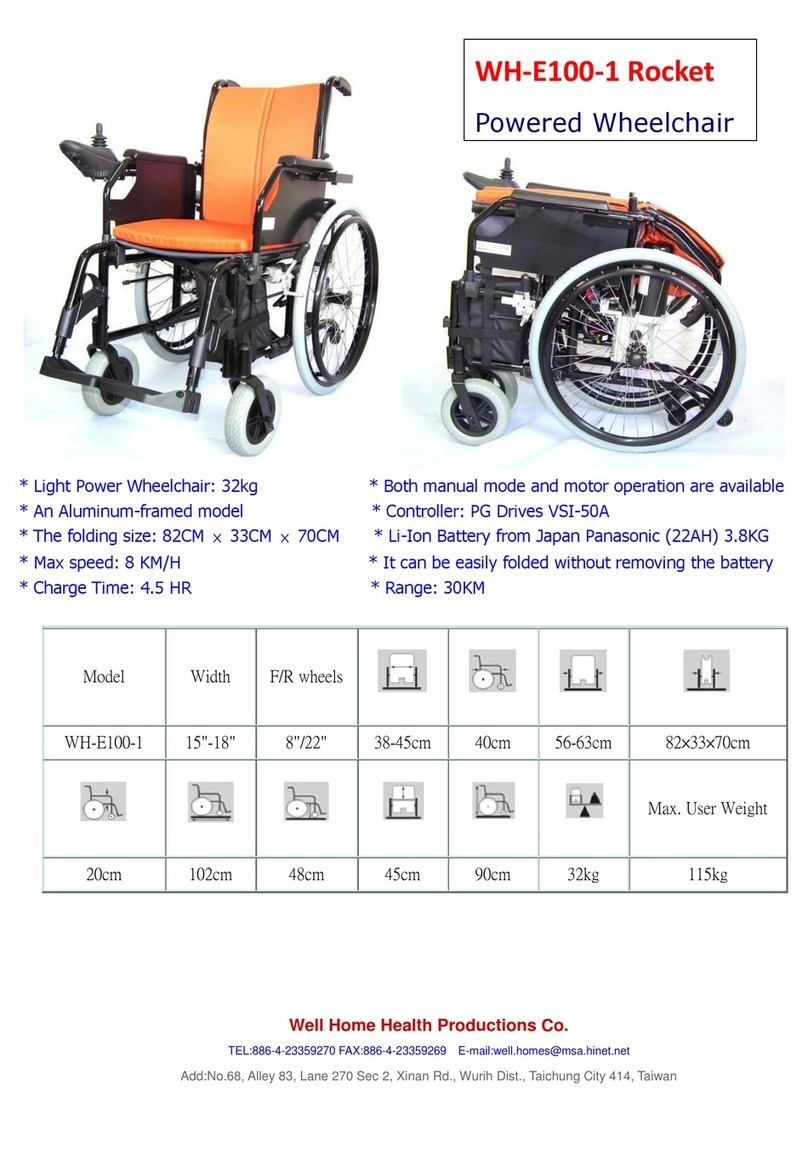
Well Home Health Productions
Well Home Health Productions WH-E100-1 Rocket user manual

Otto Bock
Otto Bock ParaGolfer Instructions for use


