Trendy Pooches Designs Pawfect Bathing System User manual
Introducing the revolutionary new Pawfect Bathing System. Designed by
groomers for groomers and the self-serve dog wash market.
Features
•Aesthetically pleasing in even the smartest of salons.
•Clear indicators of selections.
•Auto timer to ensure water or shampoo can’t be left running.
•Timer function for self-serve operation.
•Low voltage microchip control for accuracy and safety.
•Automatic dilution of shampoo.
Benefits
•Cuts washing time by up to 50%.
•Ensures correct dilution of concentrate shampoos.
•Reduces shampoo usage by eliminating wastage.
•User friendly interface.
•Gets shampoo right into the coat without pre-soaking.
•Ensures no cross contamination of shampoo and conditioner.
This system was originally developed for the self-serve market and has been tested for 12 months in
this busy environment. It has proved to be a major time and money saving unit that will benefit any
busy salon where time is of the essence.
Please call on 07860945067
Or email sales@pawfect-systems.com
Web address: www.pawfect-systems.com

Pawfect Bathing System Manual
Welcome to the Pawfect Bathing System. All users and installers are advised to read this
manual thoroughly prior to use. The Pawfect Bathing system will operate flawlessly providing
these instructions are followed and as such any deviance from the manual either when
installing or when in operation will render the guarantee void.
The Pawfect bathing system is suitable for many water systems and listed below are the
systems that it has so far been tested on successfully.
Connection to the Bathing system is via a 15mm single pipe. The water system should deliver
blended water at a maximum temperature of 36 degrees C. and at 7 litre/per minute or over.
The installer should ensure that a hard stop of water is acceptable to the water system and
will not cause damage to the heating unit.
In all cases a thermostatic mixer valve will need to be purchased and fitted prior to
connection to the unit.
Suitable systems
Suitable systems are ones that we have personally tested our unit on and had satisfactory
results. This does not negate other systems but we do not guarantee the units on systems
that we have not tested.
•Pressurized hot water system.
•Combination boiler.
•Open vented system combined with twin end shower pump.
•Under sink water heater (30 ltrs).
Electric shower systems have not yet been successfully tested due to the safety features of
these systems and the low output volume. We do not recommend this unit be attached to an
electric shower unit as it may cause damage to the shower or supply insufficient pressure for
our unit to operate.

Water connections for each system.
*Please refer to schematic diagrams at back of manual. *
Pressurized system. Figure 1
This system can be recognised by the cylinder which is attached directly to a mains water inlet
pipe. They are usually covered with a white or cream plastic casing with a flat top and
complicated pipe arrangement running down the sides. There will be a small valve at ¾ height
that has a pipe running downwards to a plastic open fitting. They may be marked as Indirect
Unvented Cylinder or direct unvented cylinder and have a safety label attached. There will be
no water storage tank above the cylinder or in the loft.
Connection to this type of system is via a Thermostatic mixer valve. The mixer valve must be
connected to the outlet of the cylinder on the hot side and the inlet to the cylinder on the cold
side. The branch off for the cold pipe must be after the combination/pressure reducing valve
and before the cylinder connection. The pipe from the TMV must be run in the largest bore
possible towards the Pawfect bathing system unit. The connection to the unit is in15mm so it
is advisable to run a 15mm pipe for at least the last metre and fit a full-bore isolation valve to
terminate the pipe prior to the unit. This method gives the best possible water flow to the unit
and ensures ease of maintenance in future.
Combination boiler
Combination boilers heat the hot water as it is required. Turn a hot tap on and the boiler fires
up and delivers water to that tap.
Connection to this type of boiler will require a hot and cold feed taking from the boiler, one
from the hot feed from the boiler and one from the cold feed going into the boiler. Connections
should be made as close to the boiler as possible to minimise pressure difference. These pipes
can be run to a 15mm TMV in the vicinity of the boiler then the single outlet from the TMV can
be taken to the bathing system unit. Pipework can be run in 15mm throughout.
Open vented systems
The open vented system will have a copper lagged cylinder usually in a cupboard. The feed for
the cylinder comes from above, usually in a loft space, in the form of a large header tank which
stores cold water. These systems do not give good shower pressure and regulating the
temperature can be very haphazard. They also suffer from pressure variance when other
outlets are opened on the same system
In this type of system, we recommend a shower pump be installed which will feed to a TMV
and then on to the unit. Both hot and cold will need to be pumped so a cold feed will be
required, taken from the existing header tank or better still an additional header tank
positioned alongside the existing tank. The 2 outlets from the pump should be run to a TMV
positioned at least 2 mts from the pump. The outlet from the TMV should be run directly to
the bathing system. Use larger bore pipe where possible until 2 mts before the unit.

Under sink hot water heater.
This system comprises of a water heater which is usually placed under a kitchen sink and is fed
by the cold main. It is very like an unvented cylinder but much smaller. The drawback to this
system is amount of heated water that can be drawn before it is exhausted. In our tests, we
found that it was sufficient for 2 medium size dog washes before the water ran cold. The
recovery time did allow a further wash within 25 minutes.
Connection to these units are via a TMV which should be close to the heater. A single 15mm
pipe can be installed to the Pawfect bathing system.
Other systems.
The above are the systems that the bathing system has been successfully tested on. Other
systems may be satisfactory but we cannot verify their suitability at this time. We are
constantly trying to improve the bathing system and its usability for all groomers. Should you
have a hot water system other than the ones listed then please email our technical department
who will attempt to address the situation.
Safety warning.
It should be noted that any installation that involves adjustment to a domestic or commercial
water system should only be attempted by a qualified plumber. We recommend contacting
your local plumbing service prior to purchasing the unit so that they can assess the suitability
of your water system.
Electrical connection
The Pawfect Bathing system is electrically operated for switching and timing. A 12 volt power
supply is supplied which has a maximum reach of 1 metre. The power supply is a 3 pin plug
type that must be housed within a water proof housing when in the proximity of the bath. We
recommend that the socket be at least 90cm above the unit to avoid any accidental spray.
Safety warning.
It should be noted that any installation that involves adjustment to a domestic or commercial
electrical system should only be attempted by a qualified electrician. We recommend
contacting your local electrician prior to purchasing the unit so that they can assess the
suitability of your electrical system.

Installation of the Pawfect bathing system
Mounting the box
Choice a suitable location for the Pawfect bathing system box. This should be close enough to
the bath or shower tray to allow the user to move the shower head to any part of the
washing area without putting stretch on the shower hose. The unit is supplied with a 1.5mtr
hose. Should a longer hose be required we can supply a 2mtr hose at additional cost or your
local plumbing supplier should be able to supply one. The required hose is a full-bore hose
for low pressure systems and not a standard hose.
The unit should be mounted where there is no obstruction for the user and the user should
be able to see and reach the unit at all times when in use.
The box will arrive with the front cover loose.
Lift the front cover being aware that the wires attached to this should not have strain put on
them.
Place front cover in a safe place for retrieval later.
Identify the mounting holes in the corners of the box. Offer the box to its chosen location and
mark the wall through the mounting holes.
Place box in a safe place.
Drill the wall at the marks to accept suitable fixings.
Retrieve the box and screw it to the wall through the mounting holes.
Piping the water supply.
The water enters the box through the right side. Identify the incoming pipe.
The water supply pipe should have a full flow isolation valve of the lever type.
Flush out pipework into a suitable container for at least 2 minutes prior to connection.
We recommend that an inline filter be installed after this valve to reduce the chance of
debris entering the system.
Run a 15mm pipe from the valve/filter to the incoming pipe of the system. A flexible pipe
may be used providing it is a large bore type.
Fitting the shower hose/head.
Attach the shower hose to the unit via the 1/2-inch threaded fitting on the left side of the box
and using the rubber washers provided.
Attach the shower head to the other end of this pipe and using the rubber washers provided.

Check for leaks.
Place shower head in bath/shower and secure so that should water emit from it the
surrounding area will remain dry.
Turn valve to allow water to enter the system. At this point the water will be stopped at the
first valve. Check for leaks regularly whilst the front cover is open. Ensure that no leaks emit
from the first joints inside the box.
No water should be emitted from the shower head.
Attach product pipes
The unit is supplied with 8 mtr of 5mm reinforced plastic pipe. Cut pipe into suitable lengths
to reach to the bottom of the soap bottles. Place each cut part onto the barbed connections
on the lower left side of the unit. These are a push fit and should not require any clips.
Place other ends of pipe into shampoo ensuring the open end is submerged. The pipe is off
suitable strength to be made straight. Should you find the pipe rising then attach suitable
weights ensuring the inlet hole is not obstructed.
Fitting front cover part 1
Offer the front cover to the box and locate the wiring plugs that are attached to the valves
marked A. Gently connect this plug to the socket on the PCB on the outside edge marked A.
Locate the supply socket in the box marked B. Gently insert into the socket on the PCB about
mid-way across the board marked B. Please refer to Fig 5 for clarity.
Priming the shampoo
Have an assistant support the front cover whilst you plug in the power supply lead to the
socket below the income pipe.
Turn on Power.
The unit will Make an audible sound.
Ensure that the shower head is still in an appropriate place. Press Start/Rinse button.
The unit will beep 5 times and the valve will open allowing clean water to flow into the
shower. Check for leaks on all internal pipework paying particular attention to the output
pipe prior to exit of the box.
When satisfied of water soundness, Press button 1. The unit will beep and after 5 seconds
shampoo will be drawn up from bottle 1. This may take several minutes but once shampoo is
at the unit the system will be primed and ready to go on the first wash.
Repeat for buttons 2, 3, and 4.

Once all shampoos are primed, press the illuminated shampoo button to turn the shampoo
off. Allow 1 minute to clear the system of shampoo before turning the rinse water of by
pressing the illuminated rinse water button.
Should the water stop flowing whilst priming the shampoo the system has timed out. To
reset simply press rinse water again to continue. If the soap light continues t flash press this
also until it illuminates solid.
Fitting front cover part 2
Once satisfied that there are no leaks within the unit the front cover may now be fitted.
Offer the front cover to the box and ensure that all wires remain in the box and are not
trapped.
Screw in the corner screws ensuring the box sits within its seal.
Final Checks
Ensure all wires and pipes do not produce a trip or snag hazard to people or dogs.
Ensure no leakage from external pipework.
Your unit is now ready for use.

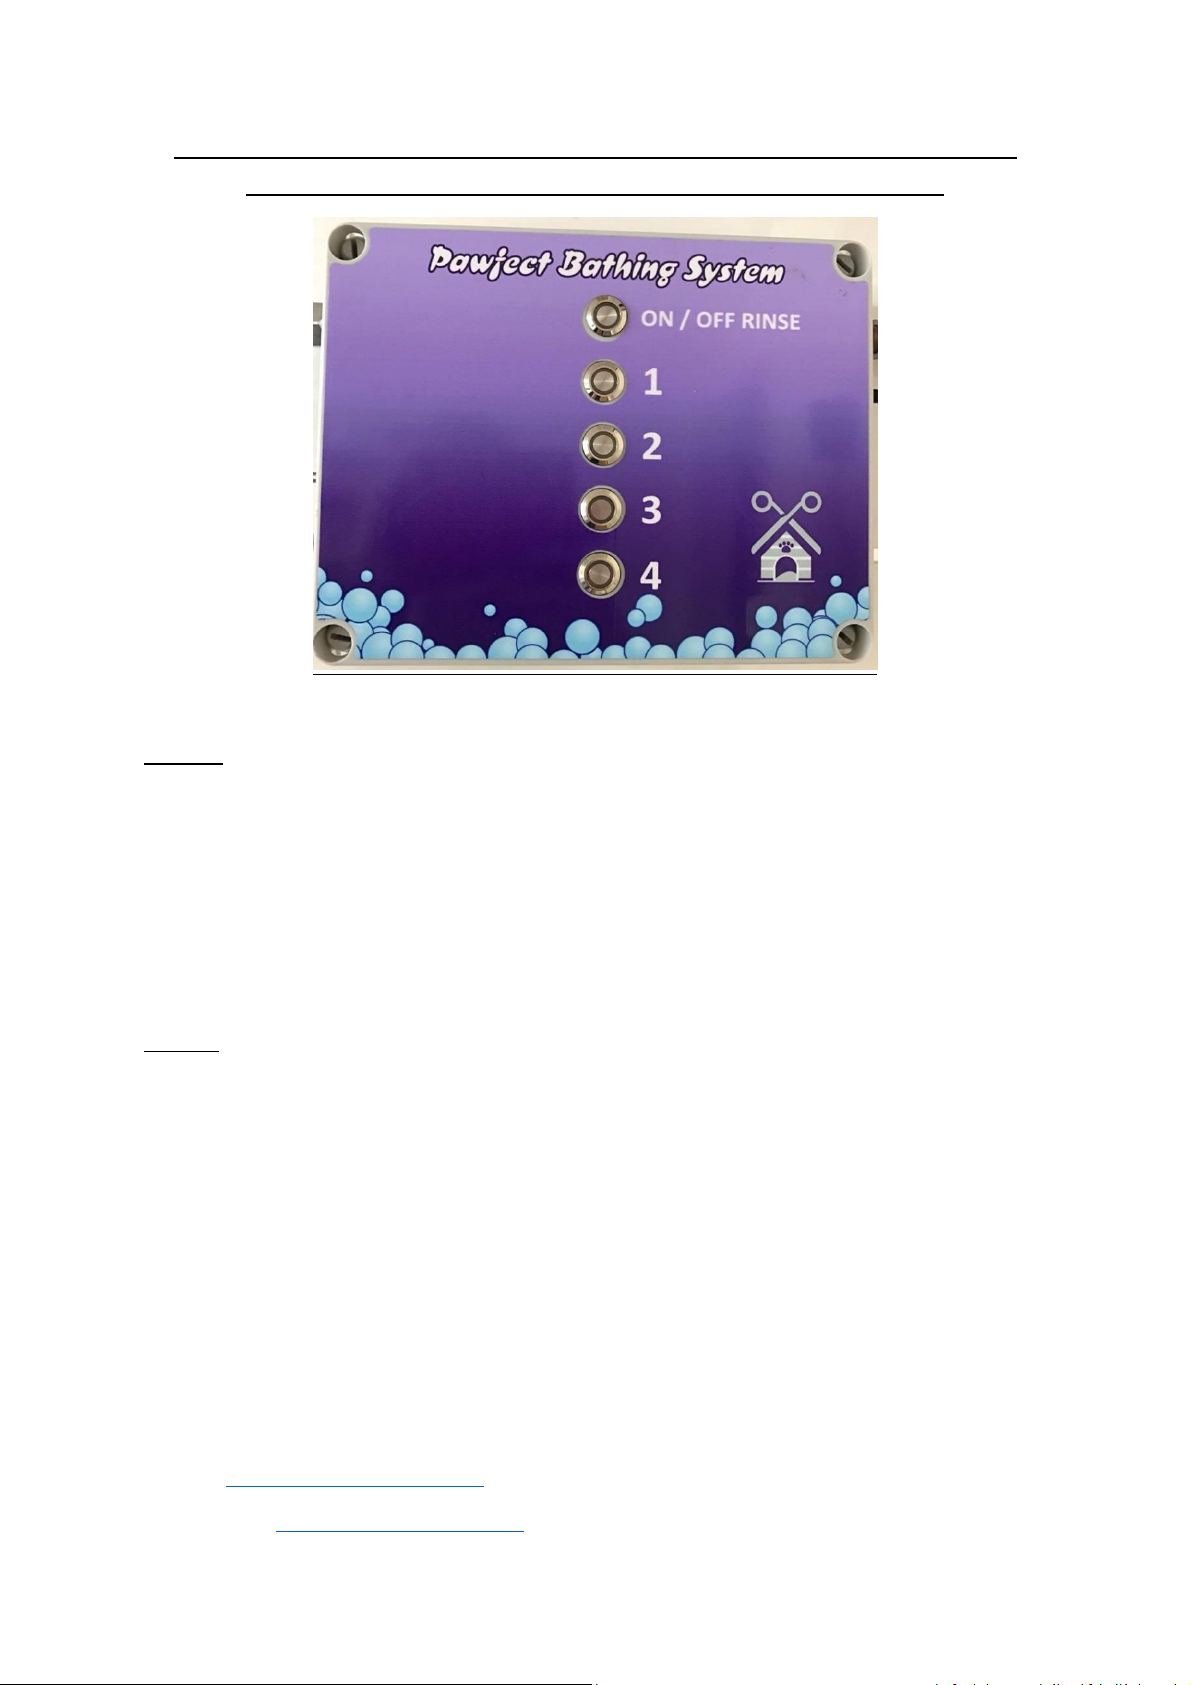
Operating instructions
Please note the layout of the buttons on the unit.
Ensure power is switched on, indicated by the Rinse/start button flashing.
Press Rinse start. The unit emits a beep for 5 seconds prior to switching on.
Press the required button to select shampoo. There is no need to pre-rinse the dog.
Ensure the water is the correct temperature prior to spraying it on the animal.
Spray all over whilst agitating with the other hand. The spray will push the shampoo mix into
the coat but the agitation will loosen any hard lumps of mud/dirt.
Once thoroughly washed press the selected (illuminated button) shampoo again to return to
rinse water.
Rinse thoroughly with rinse water.
If another product is required i.e. flea shampoo or conditioner, then select that product. This
will turn off the first product and 5 seconds later release the second product.
Once thoroughly rinsed, turn off rinse water by pressing rinse/water start button. The water
will stop flowing and the light will return to flashing indicating a ready state.
Should the water stop flowing mid wash then the unit has timed out. Simply press the start
button to start the water again. If the shampoo button continues to flash then press the
shampoo button until it illuminates solid.
Should the unit be left running and no button is pressed within 5 minutes then the unit goes
to standby. This is a safety feature that will not allow the unit to inadvertently pass water
whilst the system is not being used for its purpose, hereby saving wastage of water and
shampoo.
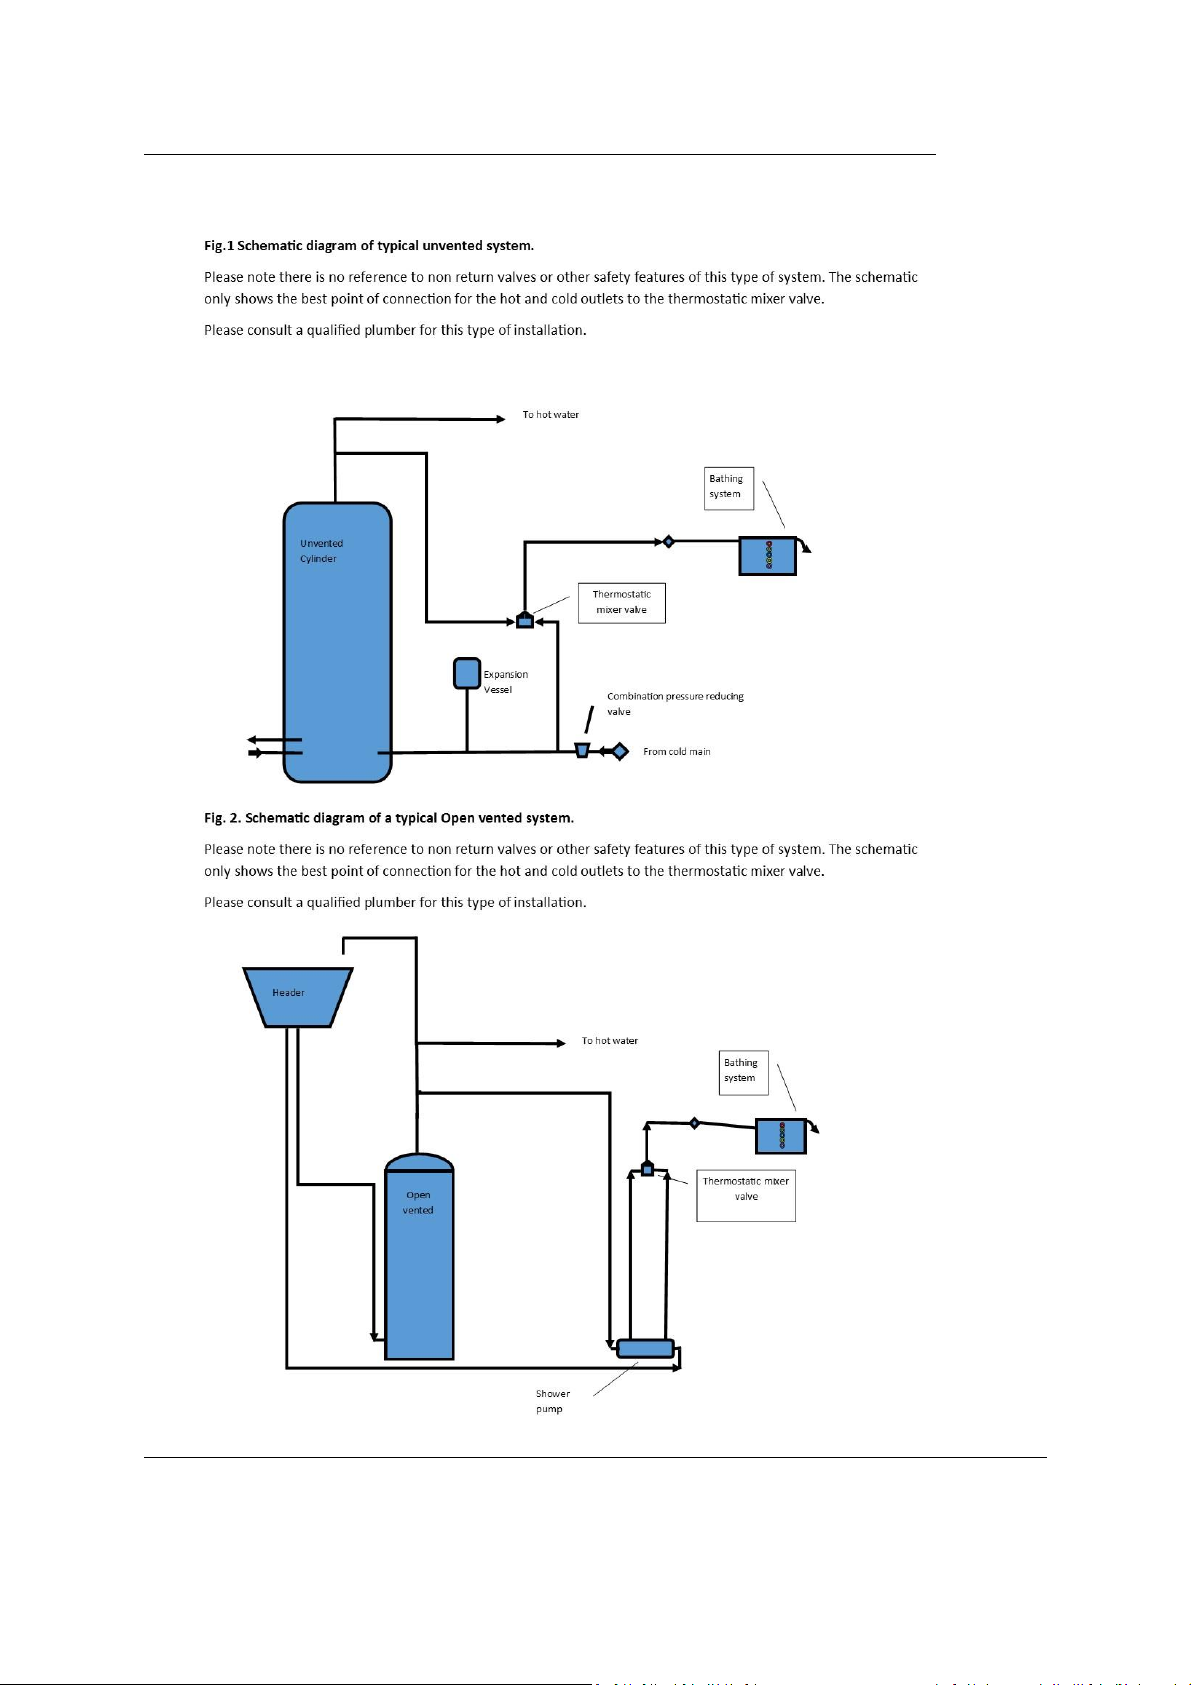
Schematic Drawings of suitable water systems for use with Pawfect Bathing System.


The above diagrams are not designed to show the correct procedure for fitting the hot water
system and no reference has been made to safety devices or operational devices that should
be incorporated in a water system. Please note that the schematics have been included to
clarify the best connection positions to the water system. For further information, you are
advised to consult a qualified plumber.
Perfect Systems accept no liability for loss due to incorrect fitting of the system or for
unqualified tampering of the water system.
Fig 5. Photographs of wiring for clarity
Circuit board showing position of pins Cable A and B to connect to pins A and B
Warranty
The Pawfect Bathing System is Warrantied against defect caused by manufacture or parts
failure for a period of 12 months from date of purchase. Please register your warranty on
receipt by email quoting date of purchase, name of company, address of company,
installation address.
This warranty excludes damage or malfunction caused by incorrect fitting or accidental
damage.
Your statutory rights are not affected by this warranty.
Table of contents


