60min e 90min).
2. Alarm: Per impostare Alarm1 e Alarm 2.
3.Time:
- Set Time/Date: Impostazione data/ora,
- Auto Update: Aggiornamento data e ora automatico da sorgente
oppure Off.Si consiglia di tenerlo impostato “Aggiornamento da DAB”
per evitare spostamenti continui d’orario.
- Set 12/ 24 hour: Impostazione formato ora 12/24 ore,
- Set data format: Impostazione formato data.
4. Backlight:
- Timeout: Regolazione tempo illuminazione display (ON,10sec, 20sec,
30sec., 45sec, 60sec, 90sec, 120sec, 180sec.)
- On level: Regolazione livello High (alto),medium (medio), low (basso).
- Dim level: Regolazione Dimmer High (alto),medium (medio), low
(basso).
5. Language: E’possibile scegliere la lingua dei menù;sono disponibili Inglese
(default), Italiano, Deutsch, Francais, Nederlands, Espanol, Dansk.
6. Factory Reset (Ripristino valori di fabbrica): permette di ripristinare le
impostazioni di fabbrica dell’apparecchio.
7. SW version (Versione del software): permette di visualizzare la versione del
software dell’apparecchio.
Radio FM
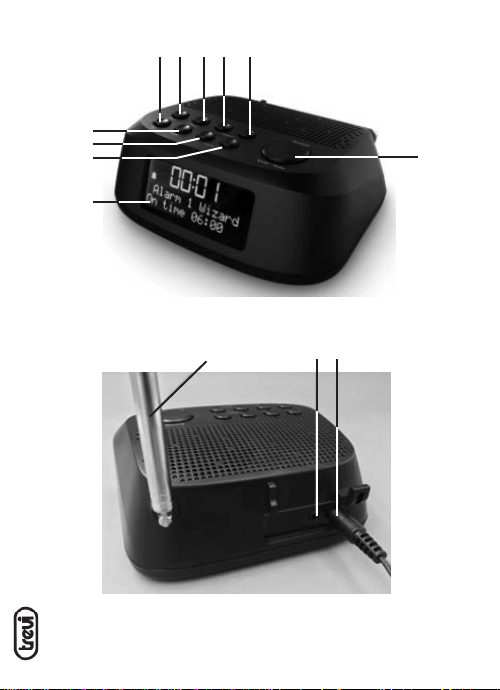
1. Regolare l’estensione dell’antenna e l’angolo per ottenere la migliore ricezione;
2. Premere il tasto accensione/Stand-by (1) per accendere l’unità;
3. Premere ripetutamente il tasto MODE (8) e selezionare la modalità FM.
Scansione automatica:
4. Tenere premuto per qualche secondo il tasto SNOOZE/ENTER/SCAN (7) per
avviare la scansione e memorizzazione automatica delle stazioni;
5. Premere il tasto PRESET (3);
6. Premere il tasto SELECT < (4) o SELECT > (5) per selezionare una stazione radio
memorizzata; premere il tasto SNOOZE/ENTER/SCAN (7) per confermare.
Nota: La sensibilità della scansione automatica è regolabile nel Menu.
Scansione manuale e memorizzazione:
1. Tenere premuto per qualche secondo il tasto SELECT < (4) o SELECT > (5) per
sintonizzarsi sulla stazione radio successiva o precedente;
2. Per memorizzare una stazione radio:
- Portarsi sulla frequenza da memorizzare,tenere premuto per qualche
secondo il tasto PRESET (3);
- Premere i tasti SELECT < (4) o SELECT > (5) per selezionare il numero dove
memorizzare la stazione;
- Premere SNOOZE/ENTER/SCAN (7) per confermare.
Italiano