LENCO CRW-1 User manual

MODEL: CRW-1
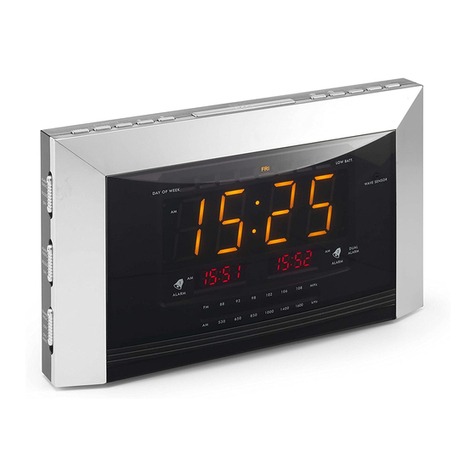
User manual Wellness Clock Radio
Gebruiksaanwijzin Welzijnswekkerradio
Benutzerhandbuch Wellness-Radiowecker
Mode d’emploi Radioréveil bien-être
Manual del usuario Radioreloj de bienestar

------------------------------------------------54
------------------------------------------------ 41
----------------------------------------------- 28
2
Index
English--------------------------------------------------------------------------------------------03
Nederlands---------------------------------------------------------------------------------------15
Deutsch--------------------------------------------
Français-------------------------------------------
Español -------------------------------------------

3
Box content
1x ain unit
1x User manual
1x AC/DC adaptor
Note: if some parts are missing please contact your dealer as soon as possible.
Instruction and warnin s
Read the safety warnings carefully and only use the articles as described in these instructions
to avoid accidental injury or damage.
Keep these instructions for future reference.
If you pass this product on to another person, be sure to give them these instructions:
This symbol warns you of the danger of injury.
This symbol warns you of the danger of injury caused by electricity.
The term DANGER warns you of potential severe injury and danger to life
The term WARNING warns you of injury and severe material damage.
The term CAUTION warns you of minor injury or material Damage.
This indicates additional information.
Safety warnin s
Intended use
• The well-being alarm clock is designed for home use. It is not suitable for commercial use.
•
The well-being alarm clock should only be used in dry indoor areas
• Only use the product under moderate climatic conditions.
• The well-being alarm clock is exclusively intended to be used with mains electricity. Back-up
batteries can be inserted to ensure settings are saved in case of a power cut.
DANGER to children
Children are not aware of the hazards that can be caused by handling electrical
appliances in correctly. Never allow children to use electrical appliances without
supervision.
Swallowing batteries can be fatal. Keep the batteries and the clock out of the reach of
infants. If a battery has been swallowed, seek medical advice immediately.
Keep children away from packing material. There is a risk of suffocation!
DANGER due to electricity
Only connect the appliance to a properly installed wall socket which complies with

4
the requirements listed in the section “Technical specifications”.
You can only disconnect this appliance by removing the mains adapter. The socket
must be easily accessible to ensure that the appliance can be unplugged quickly if
necessary.
The appliance must not be allowed to get wet, as this could cause an electric shock.
Don not submerse the appliance in any liquid and protect it from drops and
splashes of water.
Do not use the appliance in humid areas(such as the bath-room) or near any bodies
of water (such as a pool or bathtub). Do not put any liquid-filled containers on or
directly next to the appliance (such as vases or coffee cups).
Do not touch the appliance or mains adapter with wet hands.
Never open or remove any part of the casing. There are live electrical parts inside
the appliance that could cause an electric shock.
Never insert any objects into the appliance’s openings. You could touch a live
electrical part.
Keep the mains adapter away from sources of heat and sharp edges.
Do not use the alarm clock or the mains adapter if either of them are visibly
damaged or have been dropped.
Unplug the mains adapter,…
…if you notice a fault,
…if you do not intend to use the appliance for any length of time,
…before cleaning the appliance and
…during thunderstorms.
Always pull the mains adapter, not the connection cable.
Do not make any modifications to the product.
Only have repairs to the product carried out by a specialist workshop or the
customer care service. Never change the connection cable yourself. Repairs carried
out by non-professionals could cause severe dangers for user.
WARNING-risk of injury or fire
Lay the connection cable in such a way that nobody can trip over it.
Batteries must not be charged, taken apart, thrown into fire or short-circuited.
If a battery has leaked, avoid contact with skin, eyes or mucous membranes. If necessary,
rinse the affected areas with water and consult a doctor immediately.
Do not put any naked flames, such as a lit candle, on or directly next to the appliance.
To ensure that the appliance has adequate ventilation, there must be at least 10 cm of
empty space all around the appliance. Do not put the appliance in closed cupboards or
on shelves that do not provide sufficient ventilation. Do not cover the appliance’s vents
with newspapers, table cloths or curtains, etc. Do not place the appliance on a soft
surface, such as a bed, sofa or blanket.
CAUTION-material dama e
Do not set up the appliance in the immediate vicinity of a magnetic field (e.g. near a TV
or speakers).
5
Protect the batteries from excessive heat. Remove the batteries from the alarm clock
when they are flat or if you do not intend to use the product for any length of time. This
will avoid damage that can be caused by leakage.
Always replace all batteries at once. Do not use different types or brands of battery or
batteries with different capacities.
When inserting the battery, ensure that the polarity is correct (+/-).
If necessary, clean the contacts on the battery and appliance before inserting a battery.
Risk of overheating!
Protect the appliance from knocks, falls, dust, humidity, direct sunlight and extreme
temperatures. Also maintain an adequate distance from sources of heat, such as hobs
and ovens.
Only use original accessories.
Never use caustic chemicals, or aggressive or abrasive cleaning products for cleaning.
Some varnishes, synthetic substances or types of furniture polish may react adversely
with the material of the non-slip feet and soften them. To avoid unwanted traces on
furniture, place a non-slip mat underneath the article if necessary.

6
At a lance (features)

7
VOLUME-/+
Set volume
Tunin </>
Tune radio
LCD BACKLIGHT DIM
(OFF/DIM/LIGHT)
Set display illumination
RAINBOW LIGHT DIM
(OFF/DIM/LIGHT)
Set mood light
POWER
Turn radio on/off
MELODY
Choose nature sound
1/2/3
ocean/forest/stream
ALARM
Choose alarm
MELODY/RADIO/BUZZ
Nature sounds/radio/neutral alarm
Operational controls around the
circumference
ALAR
ELODY /RADIO /BUZZ
VOLU E
POWER
TUNING
ELODY
RAINBOW LIGHT
DI OFF/DI /LIGHT
LCD BACKLIGHT DI
OFF/DI /LIGHT
Top
TI E SET HOUR
ALAR SET IN
SNOOZE
SLEEP ALAR ON/OFF
Bottom
Battery compartment
ains adapter
connection

8
TIME SET Set time
ALARM SET Set and show alarm time
SNOOZE Pause alarm for approx. 5 minutes/ Press to show clock time
in radio play mode (not alarm activated )
SLEEP Set sleep timer
ALARM ON/OFF Turn alarm function on/off
Stop alarm sounding
MIN Set minutes
HOUR Set hours
First time use
Unpackin
DANGER to children-Fatal risk of suffocation/ Choking
• Keep children away from packing material.
Dispose of it immediately.
△ Take all parts out of their packaging and make sure they are not damaged.
Insertin back-up batteries
The back-up batteries ensure that the set time and alarm time are saved in the case of a power
cut or if the appliance is unplugged from the mains. The display is completely turned off during
this time. The back-up batteries are not included!
Back-up batteries are not essential for operation. Operation using solely
batteries-without connecting the appliance to the mains-is not possible.
The battery compartment is on the bottom of the alarm clock.
1. Press the locking tab in the direction of the arrow
and
remove the battery compartment lid.
2. Insert the batteries as illustrated. Ensure that the polarity is
correct (+/-).
3.
Place the lid back on the battery compartment.
Settin up and connectin the alarm clock
1. Place the alarm clock on a solid and level surface.
2. Unfold the F cable antenna completely. Attach the end as high as possible against a wall or
a shelf using sticky tape, for example.

9
3. Insert the connection cable’s small connector plug into the
alarm clock’s connection socket.
4.
Plug the mains adapter into an easily accessible socket. 0:00
will be displayed. The correct time must now be set.
If you cannot see the display clearly, turn the display illumination on.
Turnin display illumination on/off
△ Set the LCD BACKLIGHT DIM switch to …
…LIGHT to light up the display.
…DIM to dim the display illumination.
…OFF to turn illumination off.

10
Settin the time
1. Press TIME SET button, the clock is blinking
△ Press HOUR to set the hours.
Pressing the button once will change the time by one hour. If you press and hold the
button, the hours will change until you let go.
△ Press MINUTE to set the minutes.
Pressing the button once will change the time by one minute. If you press and hold the
button, the minutes will change until you let go.
2. Press the TIME SET button to confirm.
Turnin the mood li ht on/off
While it is switched on, the mood light runs through the colours of the rainbow.
△ Set the RAINBOW LIGHT DIM switch to…
…LIGHT to turn the mood light on.
…DIM to dim the mood light.
…OFF to turn the mood light off.
If you have set an alarm, the mood lighting will switch on with the alarm, even if you
have switched it to OFF.
Turnin the radio on/off
1. To turn the radio on press POWER. The frequency currently tuned in will be shown on the
display.
2. To change the frequency turn the TUNING dial left or right using < or >.
3. To set the volume turn the VOLU E dial left or right using – or +.
△ To turn the radio off press POWER again.
If you want to check clock time while radio is on (not alarm activated situation), press
SNOOZE.
Settin an alarm
Settin the alarm time
1. Press ALAR SET button, AL TI E “7:00” is blinking.
△ Press HOUR to set the hours.
Pressing the button once will change the alarm time by one hour. If you press and hold the
button, the hours will change until you let go.
△ Press MINUTE to set the minutes.
Pressing the button once will change the alarm time by one minute. If you press and hold
the button, the minutes will change until you let go.
2. Press the ALAR SET button to confirm.
Choosin an alarm

11
Set the volume level that you would like to wake you. The alarm will sound quietly and
become increasingly louder until it reaches the set volume level.
Please note: If you have turned the volume down com
pletely, you will not hear the
radio at the set alarm time; the nature sounds and neutral alarm will retain the normal
volume.
You can choose which alarm you would like:
△ Set the ALARM switch to…
…MELODY to choose one of three nature sounds.
△ Set the MELODY switch to …
…1 for ocean sounds.
…2 for forest sounds.
…3 for stream sounds.
△ Set the ALARM switch to…
…RADIO to choose the radio.
…BUZZ to choose a neutral alarm.
Turnin the alarm function on/off/Stoppin the alarm
△ Press ALARM ON/OFF to turn the alarm function on. The alarm symbol appears in the
display. The chosen alarm will sound at the set time, becoming increasingly louder, for
approx. 1 hour. The dimmed mood light will also turn on (provided it was not already on).
△ To pause the alarm for approx. 5 minutes, press SNOOZE. SNOOZE will be displayed. The
alarm will sound again after approx. 5 minutes. You can pause the alarm as often as you like
for one hour. Following this, the alarm will only sound again the next day at the set alarm
time.
△ Press…
…ALARM ON/OFF once to stop the alarm sounding. The alarm symbol will still appear in the
display. The alarm will sound again the next day at the set alarm time.
…ALARM ON/OFF twice to stop the alarm sounding and to turn off the alarm function. The alarm
symbol will disappear from the display. If you would like the alarm to sound again at the
same time the next day, press ALARM ON/OFF again and the alarm symbol will reappear.
Settin the sleep timer
The sleep timer automatically turns the radio off after a chosen time period-90/60/30 or 10
minutes.
△ Press SLEEP quickly and repeatedly until the time is shown that you would like to set.
The radio turns on automatically as soon as you press SLEEP.
Repeatedly pressing the button will show the sleep timer settings-from 90 minutes
downwards-briefly in the display. The display will then show the frequency again and a small

12
SLEEP sign.
△ To turn the sleep timer function off, press SLEEP repeatedly until the SLEEP sign disappears
from the display.
△ To turn the radio off during the sleep timer period chosen, press POWER.
Fault/Remedy
Not working
Is the mains adapter plugged in properly?
Wrong time displayed
Have back-up batteries been inserted?
If there has been a power cut, all settings will be lost.
Alarm clock does not
work or goes off at the
wrong time enough?
Has the alarm been set properly the alarm function
switched on (alarm symbol in display)?
Is the radio tuned in? Has the volume been set high?
Have back-up batteries been inserted?
If there has been a power cut, all settings will be lost.
Radio switches off
suddenly
Was the sleep timer on? Press POWER to turn the radio
back on.
Cleanin
DANGER-risk of electric shock
• Unplug the mains adapter before cleaning the appliance.
•
The appliance and mains adapter must not come into contact with water. Also protect
both from drops and splashes of water.
CAUTION-material damage
Never use caustic chemicals, or aggressive or abrasive products for cleaning.
△
Clean the casing as required with a soft, dry cloth.
Technical specifications
odel: CRW-1
ains adapter: Input:100-240V~50/60Hz
Output: 6V DC 500mA
Back-up batteries: 2x AAA (U -4) x 2 Batteries
ax. power output: 0.5W R S
Frequency ranger: F 87.5-108 Hz
Light source: LED (not replaceable)
Ambient temperature: +10 to+40°C
Power supply adaptor (For EU Only)

13
anufacturer: AQUILSTAR PRECISION INDUSTRIAL (SHENZHEN) CO., LTD.
odel number:ASUC30E-060050
Adaptor type: ALTERNATIVE ADAPTOR
anufacturer: CHOU SEN ELECTRONICS (SHEN ZHEN) CO., LTD.
odel number: CS6D060050FGF
Use only ori inal AC adaptor
Use only the power supply listed in the user instructions
Service and support
1. Guarantee
Lenco offers service and warranty in accordance with the European law, which means that in
case of repairs (both during and after the warranty period) you should contact your local
dealer.
Important note: It is not possible to send products that need repairs to Lenco directly.
Important note: If this unit is opened or accessed by a non-official service center in any way,
the warranty expires.
This device is not suitable for professional use. In case of professional use, all warranty
obligations of the manufacturer will be voided.
2. Disclaimer
Updates to Firmware and/or hardware components are made regularly. Therefore some of
the instruction, specifications and pictures in this documentation may differ slightly from
your particular situation. All items described in this guide for illustration purposes only and
may not apply to particular situation. No legal right or entitlements may be obtained from
the description made in this manual.
3. Disposal of the Old Device
This symbol indicates that the relevant electrical product or battery should
not be disposed of as general household waste in Europe. To ensure the
correct waste treatment of the product and battery, please dispose them in
accordance to any applicable local laws of requirement for disposal of
electrical equipment or batteries. In so doing, you will help to conserve
natural resources and improve standards of environmental protection in
treatment and disposal of electrical waste (Waste Electrical and Electronic
Equipment Directive).

14
4. CE Markin
Products with the CE marking comply with the E C Directive
(2004/108/EC) and the Low Voltage Directive (2006/95/EC) issued by the
Commission of the European Community.
Hereby, Lenco Benelux BV, Thermiekstraat 1a, 6361 HB Nuth, The Netherlands, declares that
this product is in compliance with the essential requirements and other relevant provisions
of Directive 1999/5/EC.
The declaration of conformity may be consulted via tech[email protected]
5. Service
For more information and helpdesk support, please visit www.lenco.com
Lenco Benelux BV, Thermiekstraat 1a, 6361 HB, The Netherlands.

15
Inhoud van de doos
1 x Hoofdapparaat
1 x Gebruiksaanwijzing
1 x lichtnetadapter
Opmerking: als er onderdelen ontbreken, neem dan zo snel mogelijk contract op met uw dealer.
Instructies en Waarschuwingen
Lees de veilgheidswaarschuwingen zorgvuldig door en gebruik alleen de in deze
gebruiksaanwijzing omschreven artikelen, om onvoorziene verwondingen of schade te
voorkomen.
ewaar deze gebruiksaanwijzing om ze in de toekomst te kunnen raadplegen.
Als u het product doorgeeft aan een andere persoon, zorg er dan voor dat u ook deze
gebruiksaanwijzing doorgeeft:
Dit symbool waarschuwt u voor het gevaar op letsel.
Dit symbool waarschuwt u voor het gevaar op letsel die door elektriciteit worden
veroorzaakt.
De term GEVAAR waarschuwt u voor mogelijke ernstig letsel en levensgevaar
De term WAARSCH WING waarschuwt u voor letsel en ernstige materiaële schade.
De term LET OP waarschuwt u voor lichte verwondingen of materiaële schade.
Dit geeft aanvullende informatie aan.
Veiligheidswaarschuwingen
Bedoeld gebruik
• De welzijnswekkerradio is ontworpen voor thuisgebruik. Hij is niet geschikt voor
commercieel gebruik.
•
De welzijnswekkerradio mag alleen in droge ruimtes binnenshuis worden gebruikt
• Gebruik het apparaat alleen onder gematigde klimatologische omstandigheden.
• De welzijnswekkerradio is uitsluitend bestemd om met het lichtnet te worden gebruikt. Er
kunnen back-upbatterijen worden geplaatst, om ervoor te zorgen dat in het geval van
stroomuitval de instellingen bewaard blijven.
GEVAAR voor kinderen
Kinderen zijn zich niet bewust van de gevaren die kunnen worden veroorzaakt door het
onjuist omgaan met elektrische apparaten. Laat kinderen nooit zonder toezicht gebruik
maken van elektrische apparaten.

16
Het inslikken van batterijen kan fataal zijn. Houd de batterijen en de wekker buiten het
bereik van jonge kinderen. Als er een batterij wordt ingeslikt, raadpleeg dan
onmiddellijk een arts.
Houd kinderen uit de buurt van verpakkingsmateriaal. Er bestaat verstikkingsgevaar!
GEVAAR als gevolg van elektriciteit
Sluit het apparaat alleen aan op een juist geïnstalleerd stopcontact dat voldoet aan
de eisen die worden genoemd in het hoofdstuk “Technische specificaties”.
U kunt dit apparaat alleen van het lichtnet ontkoppelen door de lichtnetadapter uit
het stopcontact te halen. Het stopcontact moet gemakkelijk bereikbaar blijven, om
te verzekeren dat het apparaat indien nodig snel kan worden ontkoppeld.
Laat het apparaat niet nat worden, omdat dit elektrische schokken kan veroorzaken.
Dompel het apparaat niet onder in enige vloeistof en bescherm het tegen druppels
en waterspatten.
Gebruik het apparaat niet in vochtige ruimten (zoals de badkamer) of in de buurt
van water (bijvoorbeeld een zwembad of badkuip). Plaats geen voorwerpen met
vloeistof op of direct naast het toestel (zoals vazen of koffiekopjes).
Raak het apparaat of de lichtnetadapter niet met natte handen aan.
Open of verwijder nooit enig deel van de behuizing. Er bevinden zich elektrische
onderdelen in het apparaat waar spanning op staat, die elektrische schokken kan
veroorzaken.
Steek nooit enige voorwerpen door de openingen van het apparaat. Het is mogelijk
dat u een elektrisch onderdeel waar spanning op staat aanraakt.
Houd de lichtnetadapter uit de buurt van warmtebronnen en scherpe randen.
Gebruik de wekkerradio of de lichtnetadapter niet als één van beide zichtbaar is
beschadigd of is gevallen.
Haal de lichtnetadapter uit het stopcontact…
…als u een storing opmerkt,
…als u het apparaat gedurende langere tijd niet wilt gebruiken,
...voor het reinigen van het apparaat; en
...tijdens onweer.
Trek altijd aan de netadapter en niet aan de aansluitkabel.
reng geen modificaties aan het apparaat aan.
Laat reparaties aan het apparaat uitsluitend door een specialistische werkplaats of
door de klantenservice uitvoeren. Vervang nooit zelf de aansluitkabel. Reparaties
die op ondeskundige wijze worden uitgevoerd kunnen ernstige gevaren voor de
gebruiker veroorzaken.
WAARSCH WING - risico op letsel of brand
Leg het netsnoer zodanig neer dat er niemand over kan struikelen.

17
atterijen mogen niet worden opgeladen, uit elkaar worden gehaald, in vuur worden
gegooid of worden kortgesloten.
Als een batterij lekt, voorkom dan contact met de huid, ogen of slijmvliezen. Spoel de
getroffen gebieden indien nodig met water en raadpleeg onmiddellijk een arts.
Plaats geen open vlammen, zoals brandende kaarsen, op of direct naast het apparaat.
Zorg ervoor dat er tenminste 10 cm vrije ruimte rond het apparaat is zodat het apparaat
voldoende ventilatie heeft. Plaats het apparaat niet in een gesloten kast of op een plank
met onvoldoende ruimte voor ventilatie. edek de ventilatieopeningen van het
apparaat niet met kranten, tafelkleden, gordijnen enz. Plaats het apparaat niet op een
zachte ondergrond, zoals een bed, bank of deken.
LET OP-materiaële schade
Plaats het apparaat niet in de directe omgeving van een magnetisch veld (bijv. in de
buurt van een TV of luidsprekers).
escherm de batterijen tegen overmatige warmte. Verwijder de batterijen uit de
wekkerradio wanneer ze leeg zijn of als u van plan bent het apparaat gedurende enige
tijd niet te gebruiken. Dit voorkomt schade die door lekkage wordt veroorzaakt.
Vervang altijd alle batterijen ineens. Gebruik geen verschillende soorten of merken
batterijen of batterijen met verschillende capaciteiten.
Let bij het plaatsen van de batterijen opde juiste polariteit (+/-).
Reinig indien nodig, voor het plaatsen van de batterijen, de contacten op de batterijen
en het apparaat. Risico op oververhitting!
escherm het apparaat tegen klappen, vallen, stof, vocht, direct zonlicht en extreme
temperaturen. Houd ook voldoende afstand tussen het apparaat en warmtebronnen,
zoals kookplaten en ovens.
Gebruik alleen originele accessoires.
Gebruik voor het reinigen nooit bijtende chemicaliën of agressieve of schurende
schoonmaakmiddelen.
Sommige lakken, synthetische stoffen of soorten meubelwas kunnen een nadelige
uitwerking hebben op het materiaal van de antislip-voetjes en het zacht maken. Plaats
indien nodig een antislipmat onder het apparaat om ongewenste sporen op meubilair te
vermijden.

18
In een oogopslag (functies)
FM-draadantenne
Lichnetadapter
Scherm
Aansluitkabel

19
Bedieningsorganen aan de
buitenrand
ALARM
MELODIE/RADIO/ZOEMER
VOLUME
IN-/UITSCHAKELEN
AFSTEMMEN
MELODIE
DIMMEN REGENBOOGVERLICHTING
UIT/DIM/LICHT
DIMMEN LCD ACHTERGRONDVERLICHTING
UIT/DIM/LICHT
Bovenkant
TIJDINSTELLING
UREN
INSTELLEN ALARM
MIN
SLUIMER
SLAAP ALARM AAN/UIT
Onderkant
Batterijvak
Aansl iting
lichtnetadapter

20
VOL ME -/+ Volume instellen
Afstemmen </> Radio afstemmen
DIMMEN LCD
ACHTERGRONDVERLICHTING
IT/DIM/LICHT
Schermverlichting instellen
DIMMEN
REGENBOOGVERLICHTING
IT/DIM/LICHT
Sfeerverlichting instellen
IN-/ ITSCHAKELEN De radio in-/uitschakelen
MELODIE Kies natuurgeluid
1/2/3 oceaan/bos/rivier
ALARM Kies alarm
MELODIE/RADIO/ZOEMER Natuurgeluiden/radio/neutraal alarm
TIJDINSTELLING Het instellen van de tijd
INSTELLEN ALARM De alarmtijd instellen en tonen
SL IMER Pauzeer het alarm gedurende ongeveer 5 minuten/druk er in de
afspeelstand voor de radio op om de tijd te tonen (niet door het
alarm geactiveerd)
SLAAP Slaaptimer instellen
ALARM AAN/ IT Alarmfunctie in-/uitschakelen
Het alarm stoppen
MIN Minuten instellen
REN Uren instellen
Het eerste gebruik
itpakken
GEVAAR voor kinderen – Fataal verstikkingsgevaar
• Houd kinderen uit de buurt van verpakkingsmateriaal.
Gooi het onmiddellijk weg.
△ Haal alle onderdelen uit de verpakking en controleer of ze niet zijn beschadigd.
Back-up batterijen plaatsen
De back-up batterijen zorgen ervoor dat de ingestelde tijd en alarmtijd in het geval van
stroomuitval of als de stekker van het apparaat uit het stopcontact wordt gehaald, bewaard
blijven. Het scherm wordt tijdens deze periode volledig uitgeschakeld. De back-up batterijen zijn
niet inbegrepen!
Other manuals for CRW-1
2
Table of contents
Languages:
Other LENCO Clock Radio manuals