TrickleStar TS2301 User manual

User Manual
TS2301 Wi-Fi Electric Water Heater Controller

2
Table of Contents
1 Welcome! 3
2 Overview 4
- What is in the System? 4
- Water Heater Controller User Interfaces 5
3 Using the Water Heater Controller 6
- Understanding the LED Indicators and Power Button 7
4 Using the Portal 8
- Understanding the Icons 9
- Using the Icons on the Left Column 10
- On the Dashboard Page (Home Page) 11
- On the Devices Page 12
- On the Schedules Page 14
- On the Settings Page 15
- On the Sensors Page 17
- On the Services Page 18
- On the Vacation Page 19
- On the 3rd Party Integration Page 20
5 Using the App 21
- Using the Icons at the Bottom Row 22
- Tapping on Schedules Icon 23
- Tapping on Info Icon 24
- Using Menu 25
6 Maintenance 26
- Factory Reset 26
- Wi-Fi Network Reset 26
- Firmware Update 27
- Cleaning the Water Heater Controller 28
- Troubleshooting 29
7 Feature List 31

3
Welcome!
Thank you for choosing the
TrickleStar TS2301 Wi-Fi Electric Water Heater Controller.
We
are your smart partner in maximizing savings for your electric water heater. You can now remotely
control your water heating timing and condition from anywhere.
You can also monitor the energy
usage from a summarized report.
If you have any inquiries about
TrickleStar products or need technical support, visit our website for
tutorials, videos and Frequently
Asked Questions (FAQ). You can also contact us by email or phone.
Instruction V
ideos
If you want to see the Installation Instructions
as videos, visit our
YouTube channel:
https://www
.youtube.com/user/TrickleStarUS/
Website: www.tricklestar.com
Email: customer.service@tricklestar.com
Toll Free: 1-888-700-1098

4
Overview
What is in the System?
Congratulations on the purchase of your new TrickleStar Wi-Fi Electric Water Heater Controller.
This Water Heater Controller offers a wide range of options to monitor and control your water
heater, via:
- the Water Heater Controller
- the TrickleStar Portal (Portal)
- the TrickleStar App (App) on your smartphone.
This User Manual will guide you through the Water Heater Controller features using the Water
Heater Controller, Portal and App. You can check the list of features and the location from which
to perform the features by referring to “Feature List” from pages 31 to 34.
Water Heater
Controller
Portal App
John
Note: If you have not installed your Water Heater Controller, refer to the Installation Guide.

5
Water Heater Controller User Interfaces
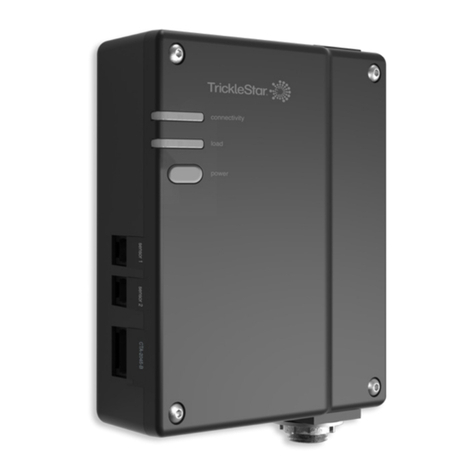
sensor 1sensor 2CTA-2045-B
connectivity
load
power
connectivity
indicator
load
indicator
power button
sensor 1 port
sensor 2 port
CTA-2045-B port
Fig 5-A

6
Using the Water Heater Controller
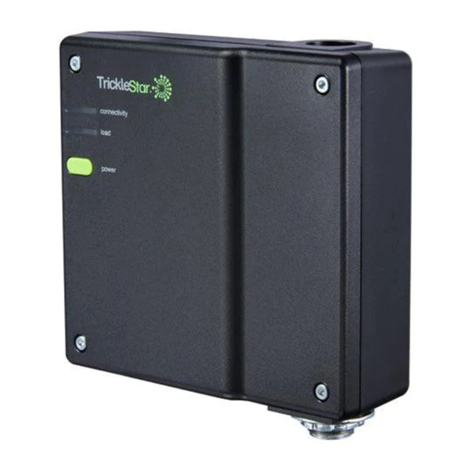
The Water Heater Controller comes with a minimalist design. It only has two LED indicators and a
power button on the front panel with two sensor ports and a CTA-2045-B port on the side panel. As
such, you need to use the TrickleStar Portal or TrickleStar App to perform the features. You can check
the list of features which the Water Heater Controller can perform by referring to “Feature List” from
pages 31 to 34.
However, you can check the LED indicators to obtain information on the Water Heater Controller. You
can also use the power button to manually turn on or off your water heater.

7
If you do not have access to the Portal or App but you want to turn on your water heater
Press the power button to turn on or off the water heater manually.
power
connectivity
load
connectivity indicator
load indicator
power button
Understanding the LED Indicators and Power Button
The LED indicators provide the following information:
Indicators Status Information
connectivity Does not light up There is no power to the Water Heater Controller.
Lights up in green The Water Heater Controller is connected to Wi-Fi but
there is no demand response activity.
Lights up in blue The Water Heater Controller is connected to Wi-Fi and
there is demand response activity.
Flashes in green The Water Heater Controller has not been connected to
Wi-Fi via the Portal or there is a connectivity error.
load Does not light up The load is off or there is no power to the water heater.
Lights up in red The Load is on.
Flashes in red An error has been detected, and the load is off as a
protective measure.
Fig 7-A

8
The Portal supports the entire set of features, other than those requiring manual setting on the
Water Heater Controller. You can follow the step-by-step instructions on the Portal easily. You can
also check the list of features which the Portal can perform by referring to “Feature List” from pages
31 to 34.
Using the Portal
Note: If you have not created a Portal account, create one at: portal.tricklestar.com
John
Fig 8-A

9
Understanding the Icons
Most icons in the portal have their name.
For example: The Dashboard icon with its names shown close
to the icon itself.
If the icon does not have its name shown, move your cursor to
the icon and the name will be shown. For example: Move your
cursor to the Control icon and the name of “Control” will be
shown.
If the name is not shown when you move your cursor to the
icon, click on the icon and you will see the name or be directed
to the function. For example: Click on the Settings icon and
click on “Settings”, you will be directed to “General Settings”
where you can change the settings for Message, Power and
Other.
Click on the Messages icon and you will be directed to
“Messages”.
Click on the Name at the top right corner and click on
“Account”, you will be directed to “Account Settings” where you
can change your account details, account password or delete
your account.
Click on the Name at the top right corner and click on “Sharing”,
you will be directed to “Site Management and Sharing” where
you can view all your Sites and their corresponding Devices,
add new delegation or add new site ownership transfer.
Note:
• If you do not understand any of the information or setting, move your cursor to , and the
explanation will be shown.
• When you move your cursor to the icon or , it may take a few seconds for the icon name and
explanation to be shown.

10
John
Using the Icons on the Left Column
You can select the icons on the left column to perform specic tasks as follows:
Select this Icon To
Show the basic settings for your connected devices
and to change the settings.
Show your connected devices so that you can select
and change the settings for the device.
Update your vacation details and to enable/disable the
vacation schedule for your connected devices.
Integrate with Amazon Alexa or Google Home.
Fig 10-A

12
On the Devices Page
1. Select “Devices” to show your connected devices.
2. Click on the device that you want to change the settings.
3. Select the category and function as shown in the table below.
John
1
2
John
3
Fig 12-A
Fig 12-B
3

13
Select To
Control Control the water heater in real time.
Energy Usage Check the power usage and power cost for a specic period.
Schedules Show your daily/weekly schedule and to add/edit/delete a scheduled
event.
Settings Change the Safety Minimum Low Temperature Setpoint, enable/
disable Boost and timer settings.
Sensors Show information for the connected sensors.
Services Change the settings for Alerts and Reminders.
Mode Turn on/off the water heater
Boost Turn on the water heater for a specic duration. When Boost is
activated, schedules will not execute.
Note: You can also check the list of features which the Portal can perform by referring to “Feature
List” from pages 31 to 34.

14
On the Schedules Page
1. Click on to add a new schedule or load the default schedule. You will need to specify the
schedule’s applicable day(s), time, and water heater mode – on or off.
2. Click on any existing schedule to edit or delete it.
1
2
Fig 14-A

15
On the Settings Page
1. Set the safety minimum temperature setpoint to turn on the water heater. If the measured
temperature falls to or goes below this setpoint, the water heater will automatically turn on and a
notication will be sent to the TrickleStar App. The water heater will remain on until the measured
temperature rises above this setpoint. All schedule or manual override using the Portal/App/
Power button is not allowed.
2. Enable or disable the Boost function on the Water Heater Controller and set the duration for it. If
enabled, Boost can be activated from the Portal or App’s control page. When Boost is activated,
no schedule will be executed throughout the boost duration. However, manual override using the
Portal/App/Power button is allowed.
1
Fig 15-A
2

16
3. Rename your Water Heater Controller here.
4. Click to re-congure your Wi-Fi network if the Wi-Fi password has been changed or if you want to
connect the Water Heater Controller to another Wi-Fi network.
5. Set the time zone of your Water Heater Controller. You can also use the time zone specied in
General Settings.
3
4
5
Fig 16-A

17
On the Sensors Page
1. Check the status of the temperature sensor and ood sensor. The temperature sensor displays the
actual temperature measured at the water heater’s water inlet. The ood sensor shows if there is
water leak detected. If water leak is detected, the water heater will automatically turn off and water
leak icon will be displayed on the Portal and App’s Control page. A notication will also be sent to the
TrickleStar App.
1
Fig 17-A
Fig 17-B

18
On the Services Page
1. Set the temperature setpoint for low temperature alert. A notication will be sent to the TrickleStar
App if the measured temperature falls below this setpoint. You can select a separate value or use the
same temperature setpoint as the safety minimum temperature setpoint specied in the Water Heater
Controller settings page.
2. Set a maintenance reminder to check on your water heater system. Select the duration and a
notication will be sent to the TrickleStar App on the date shown.
1
2
Fig 18-A
Fig 18-B

19
Note: You can also check the list of features which the Portal can perform by referring to “Feature
List” from pages 31 to 34.
On the Vacation Page
1. Select “Vacation” to update your vacation schedule for your connected devices.
2. Update your vacation details and enable/disable the vacation schedule.
John
12
Fig 19-A

20
On the 3rd Party Integration Page
Note: You can also check the list of features which the Portal can perform by referring to “Feature List”
from pages 31 to 34.
1. Select “3rd Party Integration” to integrate with the Amazon Alexa, or Google Home.
2. Click “Congure” accordingly to integrate with your preferred 3rd party system.
1
2
Fig 20-A
Other manuals for TS2301
2
This manual suits for next models
1
Table of contents
Other TrickleStar Controllers manuals
Popular Controllers manuals by other brands

PANHANS
PANHANS Ultimo-Touch 300 Operation manual

Murphy
Murphy Centurion Configurable Controller CE-05171N Installation and operation manual

Epson
Epson RC700 manual

Wilo
Wilo Control MR-Lift Installation and operating instructions

Bosch
Bosch CRC200 quick start guide

FIBARO
FIBARO FIBEFGWCEU-201-B operating manual