manuals.online logo
Brands
  1. Home
  2. •
  3. Brands
  4. •
  5. Triplett
  6. •
  7. Measuring Instrument
  8. •
  9. Triplett 360PL User manual

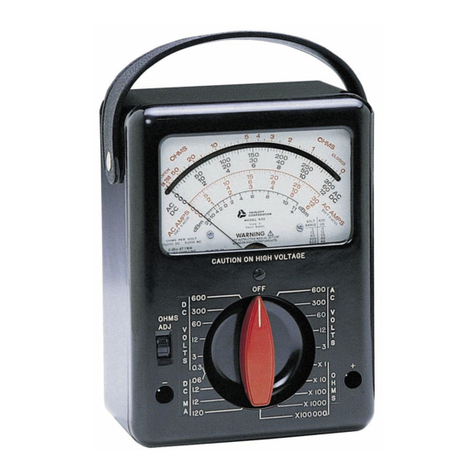
Triplett 360PL User manual

Other Triplett Measuring Instrument manuals

Triplett 614395003647 User manual

Triplett

Triplett 614395003647 User manual

Triplett RHT01 User manual

Triplett

Triplett RHT01 User manual

Triplett CM400 User manual

Triplett

Triplett CM400 User manual

Triplett The Hound 2 User manual

Triplett

Triplett The Hound 2 User manual

Triplett AM250 User manual

Triplett

Triplett AM250 User manual

Triplett CM1000 User manual

Triplett

Triplett CM1000 User manual

Triplett TMP230 User manual

Triplett

Triplett TMP230 User manual

Triplett MS245 User manual

Triplett

Triplett MS245 User manual

Triplett TA150 User manual

Triplett

Triplett TA150 User manual

Triplett GSM120 User manual

Triplett

Triplett GSM120 User manual

Triplett RHT22 User manual

Triplett

Triplett RHT22 User manual

Triplett TA200 User manual

Triplett

Triplett TA200 User manual

Triplett 9200B User manual

Triplett

Triplett 9200B User manual

Triplett AM320-NIST User manual

Triplett

Triplett AM320-NIST User manual

Triplett AM320 User manual

Triplett

Triplett AM320 User manual

Triplett CM1070 User manual

Triplett

Triplett CM1070 User manual

Triplett EM300 User manual

Triplett

Triplett EM300 User manual

Triplett CM450-NIST User manual

Triplett

Triplett CM450-NIST User manual

Triplett 630-NA User manual

Triplett

Triplett 630-NA User manual

Triplett HS10 User manual

Triplett

Triplett HS10 User manual

Triplett SL600-KIT User manual

Triplett

Triplett SL600-KIT User manual

Triplett MS300 User manual

Triplett

Triplett MS300 User manual

Triplett EPC175 User manual

Triplett

Triplett EPC175 User manual

Triplett PR600 User manual

Triplett

Triplett PR600 User manual

Popular Measuring Instrument manuals by other brands

Powerfix Profi 278296 Operation and safety notes

Powerfix Profi

Powerfix Profi 278296 Operation and safety notes

Test Equipment Depot GVT-427B user manual

Test Equipment Depot

Test Equipment Depot GVT-427B user manual

Fieldpiece ACH Operator's manual

Fieldpiece

Fieldpiece ACH Operator's manual

FLYSURFER VIRON3 user manual

FLYSURFER

FLYSURFER VIRON3 user manual

GMW TG uni 1 operating manual

GMW

GMW TG uni 1 operating manual

Downeaster Wind & Weather Medallion Series instruction manual

Downeaster

Downeaster Wind & Weather Medallion Series instruction manual

Hanna Instruments HI96725C instruction manual

Hanna Instruments

Hanna Instruments HI96725C instruction manual

Nokeval KMR260 quick guide

Nokeval

Nokeval KMR260 quick guide

HOKUYO AUTOMATIC UBG-05LN instruction manual

HOKUYO AUTOMATIC

HOKUYO AUTOMATIC UBG-05LN instruction manual

Fluke 96000 Series Operator's manual

Fluke

Fluke 96000 Series Operator's manual

Test Products International SP565 user manual

Test Products International

Test Products International SP565 user manual

General Sleep Zmachine Insight+ DT-200 Service manual

General Sleep

General Sleep Zmachine Insight+ DT-200 Service manual

Sensa Core Lacto Spark user manual

Sensa Core

Sensa Core Lacto Spark user manual

VOLTCRAFT UTS-1980 operating instructions

VOLTCRAFT

VOLTCRAFT UTS-1980 operating instructions

EBCHQ 94915 Operation manual

EBCHQ

EBCHQ 94915 Operation manual

Balluff BIP LD2-T017-01-EP-S4 Series user guide

Balluff

Balluff BIP LD2-T017-01-EP-S4 Series user guide

Pulsar IMP Lite Series instruction manual

Pulsar

Pulsar IMP Lite Series instruction manual

ETCR 6800 user manual

ETCR

ETCR 6800 user manual

manuals.online logo
manuals.online logoBrands
  • About & Mission
  • Contact us
  • Privacy Policy
  • Terms and Conditions

Copyright 2025 Manuals.Online. All Rights Reserved.

www.SteamPoweredRadio.Com
MODEL
630-PL
Volt-Ohm-Milliammeter
The Triplett Electrical Instrument
Company
Bluffton, Ohio
www.SteamPoweredRadio.Com
2
FOREWORD
With your
purchase
of
a Model
630-PL
Volt-Ohm-Milliammeler, you
have
made
a worthwhile investment, not only in a fine instrument,
but
backed
up
by
a company which
has
been
making instruments for more
than
hall
a century. The Triplett Company stands behind your
630-PL
and
will
give
all possible
assistance
in its use
and
maintenance.
TRIPLETT
WARRANTY
AND
CONDITIONS
OF
SALE
The Triplett Electrical Instrument Company
warrants
instruments manufactured by
ii
lo
be
free from defective material or factory workmanship
and
agrees
to repair
or replace such instruments which
under
normal
use
and
service, disclose the
defect lo
be
the fault
of
our
manufacturing. Our obligation
under
this warranty is
limited to repairing or replacing
any
instrument or test equipment which proves to
be
defective, when returned to
us
transportation prepaid, within ninety
(90)
days
lrom the
date
of
otiginal purchase.
This
warranty
does not
apply
to
any
ol
our
products which
have
been
repaired
or
altered by unauthorized persons or service stations in
any
way
so
as,
in
our
judgment, to injure their stability or reliability or which
have
been
subject to misuse,
negligence or accident or which
have
had
the serial
number
altered, effaced, or
removed. Neither does this
warranty
apply
to
any
of
our
products which
have
been
connected, installed, or
adjusted
otherwise
than
in
accordance
with the instructions
lumished by us. Accessories including all vacuum tubes
and
batteries not
of
our
manulacture
used
with this product
are
not covered by this warranty.
· The Triplett Electrical Instrument Company reserves the right to discontinue models
al
any
time, or
change
specifications or design, w.ithout notice
and
without incurring
any
obligation.
Upon acceptance
of
the material covered by this invoice the
purchaser
agrees
to
assume all liability
for
any
damages
and
bodily injury which may result from the
use
or misuse
of
the material
by
the
purchaser, his employees, or others,
and
that
The Triplett Electrical Instrument Company shall
incur
no liability
for
direct or
consequential
damage
of
any
k
in
d.
Parts will
be
made
available
for a maximum period
of
five
(5)
years
after
the
manufacture
of
this equipment
has
been
discontinued. Parts include all materials,
charts, instructions, diagrams, accessories, et cetera, whic~
were
furnished in the
standard
or special models.
This warranty
and
conditicns
of
sale
are
in lieu
of
all others expressed or implied
and
no representative
or
person is authorized to assume for us
any
other liability
in co-:.:1ection with the
sale
ol
our
products.
The
Tr
iplett Electrical Instrument
Company
Bluffton, Ohio
Printed
in
Part
o.
84-89-011764-15
(For
abov erial
o.
29,5
00
and
after
April
30,
1963)
TABLE
OF CONTENTS 3
Page
Familiarization . . . . . . . . . . . . . . . . . . . . . . . . . . . .
..........
•• • 4
Operation
Measuring
DC
Volts . . . . . .. . . . . . . . . .. . . . . . . . . . . . . . . . . 6
Measuring
AC
Volts
.................
........
..
......
8
Measuring
DC
Resistance
...
.........................
10
Measuring
DC
Current .
....
.
......
...............
.
...
12
Measuring Output Volts
(DB)
........................
14
Operation Chart
...............
.
...
.
.............
...
.
16
Measuring Capacity
..........
..
........
.
..
........
.
..
18
Additional Measurements
Measuring Kilovolts
...
. .
...
..
...
.
......
...
......
.....
20
Measuring High
DC
Current
.......
...........
.
.......
21
Accessories . . . . . . . . . .. . . . . . . . . . . . . . . . . . . . . . . . . . . . ••••• •
21
Additional Applications
....
..
..........................
22
Maintenance
......
.
....
.....
........
..
......
..
...
•••••
25
Interior View-Parts Location
.................
..
....
...
26
Replaceable Parts
....
...
...........................
•• .
27
Circuit Diagram
.....
.....
.
...
....
.............
....
. •. •
28
Data
DB
Chart
........
...
..........
......................
29
EIA
Condenser Color Code
....
.
...
......
..
...........
30
EIA
Resistor
and
Speaker Color Code
..........
......
.
31
EIA
Wiring Color Code .
...
..
.....
...
......
.
......
....
31
EIA
Transformer Color Code
..
.
.................
..
...
32
www.SteamPoweredRadio.Com
4 ,FAMILIARIZATION
The Model
630-PL
Volt-Ohm-Milliammeter is a rugged
long scale multi-range instrument in a compact portable case.
Remove the test leads
from
the small envelope
and
notice
the two alligator clips enclosed. The clips slide over the ends
of
the test prods
and
make very handy connectors.
Plug the small ends
of
the test leads into the panel jacks
marked
COM
and
V-n-A. The jacks
and
plugs
are
espe-
cially made
for
trouble-free, low resistance connections.
Scales
Notice there
are
five
scales on the meter. The top scale
(red) is used when measuring ohms. This scale is marked
from
0
to
lK
(at left side). With the switch knob turned
to
nx
1,
the ohms scale is
read
just
as
it is marked. With the
switch knob turned
to
nX
10,
the numbers on ohms scale must
all be multiplied
by
10.
Likewise
nx
lK
and
OX
lO0K
mean
to
multiply
by
1000
and
100,000
respectively.
The second scale
from
the top (black) is used to
read
all
DC
currents
and
voltages. The third
from
the top (red) is
used
for
all
AC
voltages except the 3 volt
range-the
latter
is
read
on the bottom red scale (marked 3
at
full
scale).
The lowest scale (black) is used
for
all decibel measure-
men
ts.
Notice the chart near the lower right
hand
corner
of
the dial. This is used in conjunction with the
DB
scale
as
explained on
page
14.
P
anel
Just below the meter is a small plastic screw. This is
rotated with a small coin or screw driver to adjust the meter
pointer
to
zero. This need
be
adjusted only occasionally
but
for
best accuracy the pointer should always
be
on zero
before making a measurement.
The large knob in the lower center
of
the panel is used
to
select
aH
ranges. The markings
are
self explanatory.
Left
of
the knob is a recessed n
ADJ
control used when
making resistance measurements.
To
the right
of
the knob is a recessed switch used
for
reversing polarity on
DC
ranges.
Observe the jacks
and
note carefully the marking
for
5
each.
You
will use the
COM
and
V-n-A, jacks
for
most
measurements. The polarity reversing switch must
be
in the
"
DC+,
n,
ACV"
position !or all ohm
and
ACV
measurements.
P RO TE C TI O
N:
A one ampere {use
Is
incorporated in the
ohm
circuits
for
protectinq the
ohm
circuit when it is accidentally placed across high voltage. A
spare fuse is attached
to
unit inside the tester.
Accuracy
Your
630-PL
is accurate
to
within 3%
of
full
scale
reading on all
DC
ranges except the
5000
volt range which
1s
within 5%, 4% on all
AC
ranges except
5000
volts which
is
5%,
and
3%
of
the scale length on all resistance ranges.
Precision, non-aging resistors insure lasting accuracy.
All
units
are
calibrated
at
77°
F.
AC
ranges
are
calibrated on a
60
cycle sine wave.
In
choosing ranges always endeavor
to
have the readings
fall
in the upper (or right hand) half
of
the scale
for
greatest accuracy.
Ranges
The following ranges
are
self contained in your
630-PL:
DC
Volts
2.5-10-50-250-1000-5000
at
20,000
Ohms
AC
Volts
DC
Microamperes
DC
Milliamperes
DC
Amperes
Ohms
Megohms
Output Volts(AC)
Decibels
per
Volt
/
0-.250
at
10,000
Ohms per volt
0-3-10-50-250-1000-5000
at
5,000
Ohms
per
Volt
0-100
at
250
Mv.
0-10-100-1000
at
250
Mv.
0-10
at
250
Mv.
0-1000-10,000
.....
(
4.4-44
at
center scale)
0-1-100
. .. .
(4400-440,000
at
center scale)
0-3-10-50-250-1000
at
5,000
Ohms per
Volt
-20
to
+
11,
21,
35,
49,
61,
75
on
600
Ohm line
Your
630-PL
is well constructed but like
any
instrument
should
be
handled carefully.
You
will also want
to
keep the
panel clean
as
cleanliness
and
carefulness go
hand
in hand.
www.SteamPoweredRadio.Com
6
OPERATION
Measuring
DC
Volts (Fig.
1)
Rotate the selector switch
to
the appropriate range
for
DC
volts. Always start with the highest range
if
in doubt
as
to
the approximate voltage.
In
choosing ranges, endeavor
to
have the readings
fall
in the upper, or right hand, half
of
the scale
for
greatest
accuracy.
Plug the black test lead into the
COM
jack
and
the red
lead into the V-n-A jack
as
shown in Figure
1.
CAUTION:
When measuring up
to
5000
volts set the
selector switch on the
5000
/
1000
range, plug the red lead
into the jack marked
5000
DCV,
and
leave the black lead
in C
OM.
Connect the test prods
ACROSS
the voltage source. The
red lead is positive. Where polarity is difficult
to
determine,
the meter may read backwards.
No
damage
will
be done if
this occurs. Simply reverse the polarity switch.
The V-n-A jack will
be
positive when the polarity switch
is
in the "DC+ " position.
Read all
DC
voltages on the top black meter scale.
Notice that the scales are not all marked exactly the same
as
the range indicated by the knob position. Thus
0-2.5
volts
is
read on the
0-250
scale
(i.
e.
+ by
100)
on all readings,
the
0-1000
range is read on the
0-10
scale by adding two
zeros,
and
the
0-5000
range
is
read on the 0-
50
scale by
adding two zeros.
The high sensitivity
of
20,000
ohms per volt
will
allow
you
to
take measurements in low current circuits such
as
grid
and
discriminator circuits.
Voltages
as
low
as
.
005
volts, (.
250
volts
full
sc~e
al
10
,
000
ohms per volt)
may be re
ad
by
using
100
uA
DC
current range. Simply place the r
ange
selector
in the
100
uA position
and
read
the voltage on the
0-250
scale (divi
de
by
1000
for
volts).
CA
UTI
O
N:
For max
imum
safety do not handle tester or leads when connected
to
high
volta
ges.
M
ake
certain
that
no co
ndensers
are
ch
a
rge
d to
a
high
volta
ge.
NOTE:
To measure above
1000
volts, the red le
ad
must be plugg
ed
in o the
5000
DCV
jack
and
selector switch set on the 5000/1
000
D
CV
r
an
ge.
For handy operation chart see
pages
16
and
17.
50
DC
0
5f
c°v°
~
0
,i.
A
OUT
Q
PUT
DC-
COM-
V-Il:A
0
Figure I- Measuring
DC
Volts
1
www.SteamPoweredRadio.Com
8
OPERATION
Measuring
AC
Volts
{Fi
g.
2)
Rotate the Selector switch
to
the appropriate range
for
AC
volts
and
set the polarity switch
to
ACV.
Always start
with the highest range
if
in
doubt
as
to
the approximate
voltage.
In choosing ranges, endeavor
to
have the readings fall
in the upper, or right hand, half
of
the scale
for
greatest
accuracy.
Plug the black test lead into the
COM
jack
and
the red
lead into the V-n-A jack
as
shown in Figure
2.
CAUTION:
When measuring
up
to
5000
volts set the
selector switch on the 5000/1000 range, plug the red lead
into the jack marked
5000
ACV,
and
leave the black
lead
in
COM.
Connect the test prods ACROSS the voltage source.
As
there is no polarity on
AC,
the red
and
black leads may
be
interchanged without causing the meter to
read
backwards.
Use
the two lower red scales
for
AC
volt readings. Note
that the bottom scale is
to
be
used
ONLY
for
one range,
namely the
0-3.
When using the
0-1000
AC
volt range,
read
on the
0-10
scale
by
adding two zeros. When on the
5000
volt range
use the
0-50
scale
by
adding two zeros.
W
i
ih
the special design
of
the two diodes in a modified
full
wave bridge circuit, the
630-PL
gives a wide frequency
response usable
from
10
c p s
to
500
Kc.
CAUTION:
For maximum safety do not handle tester
or leads when connected
to
high voltages.
NOTE:
To
measure above
1000
volts, red lead must
be
plugged into the
5000
ACV
jack
and
the selector switch set
on the 5000/1000
ACV
range.
For
handy operation
chart
see pages
16
and
17.
i~
0
5fc°v°
"f<
0 l'A
OUT
Q
PUT
=:JII
Figure 2-Measuring
AC
Volts
9
www.SteamPoweredRadio.Com
10
OPERATION
Measuring
DC
Resistance (Fig.
3)
Rotate the selector switch to the appropriate range
for
ohms determined
from
the following chart:
To
Read Set Switch
to
0-100
□
-
ohms
.......
..
..
...
.
..........
nX
1
0-10,000
...............
..............
nx
10
0-1
Meg. .
................
....
......
.
nX
lK
0-100
Meg
...........................
nX
l00K
Set the polarity switch to n.
Plug the black test lead into the
COM
jack
and
the red
lead into the V-n-A jack
as
shown in Figure
3.
Short the test prods together
and
adjust
then
ADJ
knob
until the meter pointer reads 0 on the top red (n) scale.
(The 0
for
the ohms scale
is
at
the extreme right side
of
the scale
.)
Connect the test prods across the resistor
as
shown. If
the resistor is wired in a circuit, disconnect one end
of
the
resistor before taking the reading.
Each time
an
ohm range is changed, it is well
to
check
the 0 setting
as
outlined in
paragraph
4 above.
The basic scale 0-lK
(0-1000)
is used
for
reading on all
ohm ranges. Simply multiply the scale numbers
by
1,
10,
1000,
or
100,000
as
in
dicated
by
the selector switch setting.
It
should
be
kept in mind that in the measurement
of
resistance a current is passed through the unknown resistor.
Generally this current is so small
as
to
be
negligible.
How-
ever on the
0-1000
range fairly high current is employed.
CAUTION
: On
XI
ohm position reading approximately center scale
(4.4
ohms)
the current drain
from
the
J.S
volt battery is
170
MA.
It
is
desirable to
make
a
practice
of
usinq one
of
the hiqher ohm ranges
for
general continuity or circuit
testing. This will give you much longer battery life.
NOTE:
In
the ohms circuit the battery polarity
at
the leads is
as
indicat
ed
.
The red lead is positive.
Since the scale
of
an ohmmeter is non-linear, the accuracy
of
the readinq
cannot
be
expressed
as
a
per
cent
of
full scale. Ohmmeter accuracy is generally
referred to a linear scale such
as
the
DC
volt scale. Thus
±3%
ohmmeter
accuracy means
an
allowable
±
l.S divisions on the
DC
scale. For example 2
ohms could read
from
about
1.75
to 2
.3
ohms
and
be
within tolerance.
NOTE
:
Do
not touch
any
metal parts
of
the circuit when using the high ohm
ranges.
It
is not dangerous but your body resistance
can
cause
serious error.
,
For
handy operation
chart
see pages
16
and
17.
500
DC
0
5000
~
~V
*A
0 A
UNKNOWN
RESISTOR
OUT
Q
PUT
Figure 3-Measuring
DC
Resistance
11
www.SteamPoweredRadio.Com
12
OPERATION
Measuring
DC
Cu
rre
nt
(Fig.
4)
Rotate the selector switch
to
the appropriate range
for
DC
current. Always start with the highest range if
in
doubt
as
to
the approximate current.
In
choosing ranges, endeavor
to
have the readings
fall
in the upper, or right hand, half
of
the scale
for
greatesi
accuracy.
Plug the black test lead into the
COM
jack
and
the red
lead into the V-0-A jack
as
shown in Figure
4.
Connect the test prods in
SERIES
with the circuit to
be
measured.
Do
not test directly across
any
potential circuits
as
this may burn out the instrument
and
shunt. The red
lead
is
positive. Where polarity
is
difficult
to
determine, the
meter may read backwards.
No
damage will
be
done if
this occurs. Simply reverse the polarity switch.
Read all current ranges (including microamperes,
mil-
liamperes,
and
amperes) on the upper black scale. When on
the
10
Ma.
range use the
0-10
scale
and
read direct. On the
100
Ma.
range again use the
0-10
scale by adding one zero.
CAUTION:
Turn
off
the power before connecting the
meter to the circuit.
Do
not handle tester or leads in high
voltage circuits.
In
using the
100
microampere range, the meter may read
differently than calculations would indicate. This
is
some-
times caused in low current circuits by a slight leakage of
voltage due to moisture. Other times a slight potential
is
generated
by
soldering or joining
of
dissimilar metals. Even
the proximity
of
fumes or liquid acids
an
d alkalies m
ay
react
with the metal parts
of
the circuit
an
d generate slight cur-
ren
ts.
The fingers should not
be
permitted to touch the metal
par
ts
of
the prods or circuit
as
body resistance c
an
also up-
set some circuits.
For
handy operation chart see pages
16
and
17.
500
DC
0
5000
"!(
AC
V
0
p.A
OUT
Q
PUT
OPEN
CIRCUIT
RED
Figure 4- Measuring
DC
Current
13
www.SteamPoweredRadio.Com
14
OPERATION
Measuring
Output
Volts
(DB)
(Fig.
5)
Output
is
generally measured in units called the decibel,
a terminology used
to
indicate power levels in amplifiers or
telephone work.
Do
not confuse the
DB
with the
VU
(Volume
Unit).
The
VU
is
based on
.001
watt dissipated in a
600
ohm line
and
is measured with a meter having special ballistic charac-
teristics.
Rotate the selector switch
to
the appropriate
AC
volt
range
and
set the polarity switch
to
ACV.
Refer
to
the small
chart on the meter dial
for
the range
to
use. Always start
with the highest range
if
in doubt
as
to
the approximate
number
of
decibels.
Normally it is recommended
to
measure output by plug-
ging the black lead into the
COM
jack
and
the red lead
into the
OUTPUT
jack
as
shown in Figure
5.
Oftentimes a
DC
voltage is present in the circuit where
output
is
to
be
measured. The extra jack marked
OUTPUT
with a
.1
mfd
condenser in series is provided
to
block the
DC.
The
condenser impedance is generally disregarded
in
most measurements. Where no
DC
is present, this output
voltage can
be
read
accurately by using the
630-PL
as
a
regular
AC
voltmeter
(i.
e.
by plugging the red lead into the
V-n-A
jack instead
of
OUTPUT.)
Connect the test prods across the plate circuit or speaker
voice
coil.
Read all
DB
ranges on the bottom black scale us
in
g the
small chart on the meter dial. For example, when the selector
switch is set on the 3
AC
volt range, the
DB
scale is direct
rea
ding. When on the
10
AC
volt range,
add
10
to
reading
on the
DB
scale, thus with the meter reading
-2,
the
ap-
proximate
DB
reading
is
+ 8
DB.
For a reference level
of
.
006
watt in
500
ohms, subtract
(+
)7
DB
from
the reading
to
obtain the absolute value
of
decibels.
For
handy operation
chart
see pages
16
and
17.
500
DC
0
5000
:1
ACV
•A-A
0
Jl.A
OUT
Q
PUT
600
OHM
LINE
When using the
5000
AC
voltage range
for
output measurements
ii
i1
necesaary to
::>l
ace
a condenser capable
of
withstandini
this high voltage extemal to the
tuter
and
connected
in
series to the
5000
AC
volt fack
mun
g the
COM
lack to complete the
circuit.
This
e'ICtemal
condenser
is
not a furnished
part
of
the equipment.
Figure
5-Measuring
Output
Volts
(DB)
15
www.SteamPoweredRadio.Com
16
To
Measure
DC
VOLTS
0-.250
0-
2.5
0-10
0-50
0-250
0-
100
0
0-
00
0
AC
VOLTS
0-3
0-
10
0-
50
0-
250
0-
1000
0-
5000
DC
CURRENT
0-
100
Ua
DC
0-10
Ma
DC
0-100
Ma
DC
0-
1000
Ma
DC
0-10
AMPS
DC
OHMS
0-1000
0-
10,000
0-1
Meg
0-100
Meg
DECIBELS
-20
to
+11
-10
to
+21
+4
to
+35
+18
to
+49
+30
to
+61
+44
to
+1s
OPERATION
CHART
Set Switch
To
Selector Polarity
Plug
Red*
Test Lead
In Jack Marked Read
On Each
Scale
Div. Equals
100
p.
A
2.5
DCV
10
DCV
50
DCV
250
DCV
1000/5000
DCV
1000/5000
DCV
3
ACV
10
ACV
50
ACV
250
ACV
1000/5000
ACV
1000
/
5000
ACV
100
µ.a
10
DCMA
100
DCMA
1000
DCMA
10
AMP
nxl
nXlO
nXIK
nXlO0K
3
ACV
10
ACV
50
ACV
250
ACV
1000/5000
ACV
1000/5000
ACV
either
either
either
either
either
either
either
V-n-A
V-n-A
V-n-A
V-n-A
V-n-A
V-n-A
5000
DCV
BLACK
SCALE
0-250
DC---;-1000
0-
250
DC---;-100
0-
10
DCXI
0-
50
DCXl
0-
250
DCXl
0-
10
DCXlO0
0-
50
DCXlO0
0.005
0.05
0.2
1.0
5.0
20
.0
100.0
Vo
lt
Volt
Volt
Volt
Volts
Volts
Volts
- - -
-----
--
---------1--------
ACV
ACV
ACV
ACV
ACV
ACV
either
either
either
either
either
n
n
n
n
ACV
ACV
ACV
ACV
ACV
ACV
V-l-A
V-p-A
V,h-A
V-n-A
V-n-A
5000
ACV
V-n-A
V-n-A
V-n-A
V-n-A
V-n-A
V-n-A
V-n-A
V-n-A
V-n-A
t
O4tput
O1
1J
put
Output
Output
Output
5000
ACV
RED
SCALE
0-3V
ACXl
0-
10
ACXl
0-
50
ACXl
0-
250
ACXl
0-
10
ACXlO0
0-
50
ACXlO0
BLACK
SCALE
0-10
DCXlO
0-
10
DCXl
0-
10
DCXlO
0-10
DCXlO0
0-
10
DCXl
0.
05
0.2
1.0
5.0
20.0
100.00
2.0
0.2
2.0
20
.0
0.2
Volt
Volt
Volt
Volts
Volts
Volts
µ.a
Ma
Ma
Ma
Amp
Each Scale Division
Equals
(in
ohms}
RED
SCALE
I
0-4
I
4-5
I
5-10
I
10-20
I
?.0-50
I
50-200
OX !
OXIO
j .
I I
.2
I
.5
I
1 I
5
I
~-
I 1 I 2 I s I
10
I
so
I
soo
I
100
I
200
I
500
I
lK
I
SK
I
SOK
OXIK
OXIOOK
I
lOK
I
20K
I
SOK
I
IOOK
I
SOOK
I
SMea
BLACK
SCALE
DB
plus
0
DB
plus
10
DB
plus
24
DB
plus
38
DB
plus
50
DB
plus
64
*
Black test lead
plugged in
"COM"
jack
for
all
measurements
17