Technique 1: “Strength” Method: Disconnect both
ends of the resistive heating element from all other
connections. Ground one of the heating element
wires to earth ground. The ground of an electrical
outlet can be used. A plumbing, cable TV, or tele-
phone ground can also be used. If necessary, use
a jumper wire to make this connection (this jumper
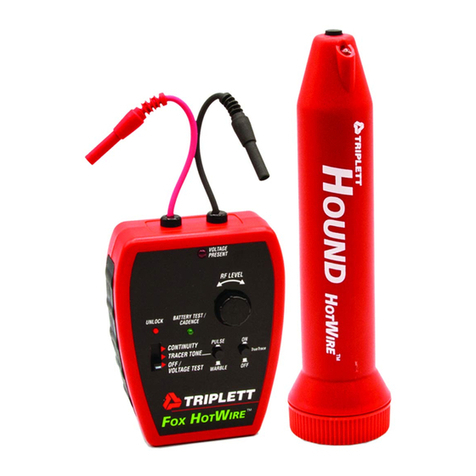
can be hundreds of feet long). Connect the FOX
(set to TONE mode) to the ends of the heating ele-
ment wires (one of which is grounded). Polarity is
not important. Holding down the power button on
a HOUND 2, test the ground connection. The
ground wire should emit little or no FOX TONE.
Move the HOUND 2 over the surface of the ceiling
(within an inch of the surface), listening for the
TONE. The grounded side of the resistance wire
will not produce a TONE......the “live” side will.
Move the HOUND 2 across the ceiling, listening
for an abrupt change in TONE level from the
HOUND 2. The point at which the change occurs
is in line with the location of the break. To identify
the location more precisely, and determine the ser-
pentine pattern in the area in question, unscrew
the probe tip from the HOUND 2, and cover all of
the HOUND 2’s case, except the end to which the
probe was attached, with aluminum foil. Press the
power button of the HOUND 2, through the foil,
and place the exposed end of the HOUND 2 against
the ceiling, on the “live” side of the heater wire. By
following the path of the loudest signal, trace the
heater wire across the ceiling, and note where the
level changes abruptly........ this is the location of
the break.
Technique 2: “Null” Method (This method is only
useful if the OPEN is located in a straight run of
the heater wire): Disconnect both ends of the re-
sistive heating element from all other connections.
Connect the clips of the FOX to the ends of the
heating element. Polarity is not important. Hold-
ing down the power button on a HOUND 2, test
the connections. Both of the FOX clips should emit
a TONE signal. Move the HOUND 2 across the ceil-
ing, listening for sudden drop in TONE level from
the HOUND 2. The drop in level is the “null”. The
TONE level will be strong on either side of the null.
Follow the path of the null across the surface of
the ceiling by moving the HOUND 2 back and forth
slightly while moving across the ceiling. At the lo-
cation of the OPEN, the null will change direction
(jog) from the established path, often by about 45
degrees. The null will pass over the location of the
OPEN, and again change direction, returning to a
path that parallels, but is offset from, the original
path. The OPEN is located at the midpoint of the
null path in the jog between the parallel (but off-
set) null paths.
To understand these techniques, and their appli-
cation, it is suggested that the user experiment with
the tracing techniques using a large piece of card-
board (at least 3' x 3') and some wire. Use of re-
sistance wire is not necessary.... any wire will work.
Layout a serpentine pattern on the cardboard, zig
zagging the wire back and forth, and holding it
down with masking tape. Bring the ends of the wire
off of the cardboard several feet, and attach them
to the clips on the FOX. Create an OPEN in the
wire by snipping the wire at a location of your
choice. Apply technique 1 and 2, and familiarize
yourself with the test method.
HINTS:
The HOUND 2 works by capacitively sensing the
electrostatic field radiated by wires carrying a sig-
nal (tone). The greater the radiated field, the bet-
ter the HOUND 2’s ability to locate a wire. Any-
thing that reduces the intensity of the field will
impair the HOUND 2’s effectiveness in locating a
wire.
In general, several things affect field intensity . . .
shielding, signal (tone) amplitude on the wire, and
wire dress. In instances where a system is shielded
(shielded wires, metal junction boxes, metal con-
duit, etc.), the effectiveness of the HOUND 2 is
impaired. In multi-wire cables, grounded wires,
or wires connected to low impedance circuits, ad-
jacent to the target wire can act as shields, reduc-
ing the HOUND 2’s ability to sense properly.
Spreading the wires apart will reduce the shield-
ing effect and allow the HOUND 2 to work better.
Defects in a cable or wires, such as shorts or
opens, will reduce the signal amplitude and hence
the HOUND 2’s ability to locate the target wire.
Terminating a wire or line in a low impedance also
reduces signal amplitude and the HOUND 2’s lo-
cating ability. It is also possible for wire dress to
cause nullification of the field. This may happen
with tightly twisted pairs or wires.
If the target wire is connected to other wires and
circuits, for example, to switches, lights, relays,
transformers, etc., the FOX TONE will pass through
these devices and out onto other wires connected
to these devices..... making tracing of the target
wire very difficult, if not impossible.
The HOUND 2 will not trace wires through a metal
conduit. It can, however, identify the wires after
they exit from the conduit.
84-732 Rev A 9/01
ONE YEAR LIMITED WARRANTY
The Triplett Corporation warrants instruments and test equipment manufac-
tured by it to be free from defective material or workmanship and agrees to
repair or replace such products which, under normal use and service, disclose
the defect to be the fault of our manufacturing, with no charge within one year
of the date of original purchase for parts and labor. If we are unable to repair or
replace the product, we will make a refund of the purchase price. Consult the
Instruction Manual for instructions regarding the proper use and servicing of
instruments and test equipment. Our obligation under this warranty is limited
to repairing, replacing, or making refund on any instrument or test equipment
which proves to be defective within one year from the date of original pur-
chase.
This warranty does not apply to any of our products which have been repaired
or altered by unauthorized persons in any way so as, in our sole judgment, to
injure their stability or reliability, or which have been subject to misuse, abuse,
misapplication, negligence, accident or which have had the serial numbers al-
tered, defaced, or removed. Accessories, including batteries and fuses, not of
our manufacture used with this product are not covered by this warranty.
To register a claim under the provisions of this warranty, return the instrument
or test equipment to Triplett Corporation, Service Department, One Triplett Drive,
Bluffton, Ohio 45817, transportation prepaid. Upon our inspection of the prod-
uct, we will advise you as to the disposition of your claim.
ALL WARRANTIES IMPLIED BY LAW ARE HEREBY LIMITED TO A PERIOD OF
ONE YEAR FROM DATE OF PURCHASE, AND THE PROVISIONS OF THE WAR-
RANTY ARE EXPRESSLY IN LIEU OF ANY OTHER WARRANTIES EXPRESSED
OR IMPLIED.
The purchaser agrees to assume all liability for any damages and bodily injury
which may result from the use or misuse of the product by the purchaser, his
employees, or others, and the remedies provided for in this warranty are ex-
pressly in lieu of any other liability Triplett Corporation may have, including
incidental or consequential damages.
Some states (USA ONLY) do not allow the exclusion or limitation of incidental
or consequential damages, so the above limitation or exclusion may not apply
to you. No representative of Triplett Corporation or any other person is autho-
rized to extend the liability of Triplett Corporation in connection with the sale of
its products beyond the terms hereof.
Triplett Corporation reserves the right to discontinue models at any time, or
change specifications, price or design, without notice and without incurring
any obligation.
This warranty gives you specific legal rights, and you may have other rights
which vary from state to state.
If the LINE/LINE connection is being used, both
alligator clips should have about the same signal
on them.... although it will be noted that neither of
the signals are as strong as the signal produced
by the LINE/GROUND connection.
Tracing Wires in Walls, etc.
With the HOUND 2’s Power Button depressed,
bring the HOUND 2 near the suspect wire/cable.
The FOX signal can often be heard a foot or more
away from the wire. If searching for wires in walls,
move the HOUND 2 along the surface of the wall,
noting the location of the strongest TONE pickup.
Using the HOUND 2, trace the wire through the
wall by following the strongest TONE pickup.
If the end of the wire/cable is exposed, for example,
in a junction or wall box, use the HOUND 2 to de-
termine if the FOX TONE is present. If so, you may
have found the cable you are looking for. You may
find that several cables in different junction boxes
produce similar strength TONEs. This phenomenon
is caused by crosstalk.... or “bleeding” of the TONE
signal into other wires or cables in proximity to
the target wire. Sometimes, the junction box con-
tains several different wires/cables, which due to
size constraints of the box itself, cannot be sepa-
rated apart far enough to identify the wire/cable
with the TONE signal on it. To assist in identifying
the target wire, use the “Remote Tone Kill” tech-
nique.
The FOX supports the use of the Remote Tone Kill
test method. When the wire or wires (pair) that
the FOX is connected to, are shorted out, locally
or remotely, the TONE signal from the FOX is
“killed”.
In situations where it is difficult to identify the tar-
get wire, because of crosstalk from other wires,
the target wire can be identified by shorting the
TONE to ground (if the LINE/GROUND connection
is being used) or shorting out the wire pair with
the TONE on it (if the LINE/LINE connection is be-
ing used). If you have found the correct wire(s),
the TONE will be completely killed. If the TONE is
still heard, but reduced somewhat in level, you have
not found the target wire(s). This method is not
foolproof, and experimentation, common sense,
and experience must be used to apply it properly.
However, in many instances, it will provide trace
verification. A caution..... if you are at a location
where the only wire is not the target wire, but it
has a signal on it due to crosstalk.... it may appear
that you have killed the FOX TONE when you short
out the wire. To make sure, leave the short on the
wire in question, and go back to FOX, and test the
alligator clips with the HOUND 2. If the TONE is
still there, you have not shorted the target wire.
Note: Even with the FOX’s alligator clips shorted
out, the case of the FOX unit will still radiate some
TONE. Do not confuse this with the TONE coming
from the alligator clips. Perform a few experiments
by shorting out the clips and probing the FOX with
the HOUND 2 so you know what to expect.
Tracing Wires within a Cable:
When searching for specific wires within a bundle
or cable, it is necessary to separate the individual
wires apart from each other at the end of the cable
opposite the FOX location. Probe the wires with
the HOUND 2, attempting to identify the wire with
the strongest TONE on it. Adjust the HOUND 2’s
VOLUME control as necessary. It is not necessary
to pierce the insulation of the wire. The wire with
the strongest TONE is the target wire. In some
cases, crosstalk into the other wires will make it
difficult to determine which wire has the strongest
TONE on it. Use the Remote Tone Kill method, pre-
viously described, to identify the target wire.
If tracing a pair of wires, such as those used for a
telephone line, a lineman’s talkset (also called a
“handset”, “buttset”, or “craftset”) can be used to
positively identify the pair. Connect the suspect pair
to the talkset. If you have located the target pair,
the FOX TONE will be heard, strong and clear, in
the earpiece of the talkset.
Other Applications:
In general, the FOX and HOUND 2 cannot be used
to trace wires buried underground or in concrete.
This is because the moisture content of the earth
or of concrete allows the surface to be electrically
conductive, causing it to act as a shield around
the buried wire. If the moisture content of the soil
or concrete is extremely low, it might be possible
to trace a wire close to the surface. This can only
be determined by experimentation at the installa-
tion site.
The FOX and HOUND 2 have been used to locate
OPENS in resistive heating elements embedded in
plaster walls and/or ceilings. It is best to have a
layout of the serpentine pattern of the heating wire.
If the layout is not known, it is best if the user has
knowledge of typical layout patterns. This will aid
greatly in finding the OPEN.
Various techniques have been tried experimentally,
but two basic techniques usually give the best re-
sults.
General Rules for Effective Tracing:
1) Do what works best. Try both LINE/GROUND
and LINE/LINE tracing.
2) Separate wires when possible.
3) Move wires away form shielding when
possible.
4) Un-terminate wire if necessary.
5) Turn off noise sources to reduce buzzing
THE HOUND 2 AND ACCESSORIES:
The Hound 2 Probe 3236
The Fox 3380
The Hound 3390
Fox & Hound Kit (includes case) 3385-K
Fox & Hound 2 Kit (includes case) 3245-K
LAN Fox & Hound Kit (includes case) 3249-K
LAN Fox & Hound 2 Kit (includes case) 3248-K
F&H Carrying Case 10-3983
***WARNING***
The FOX and HOUND 2 are designed to work on
non-energized (except telephone lines) wires or
cables. Attempting to test energized wires may
damage the FOX and HOUND 2, cause user injury,
or both.
