Triplett 1101-A User manual

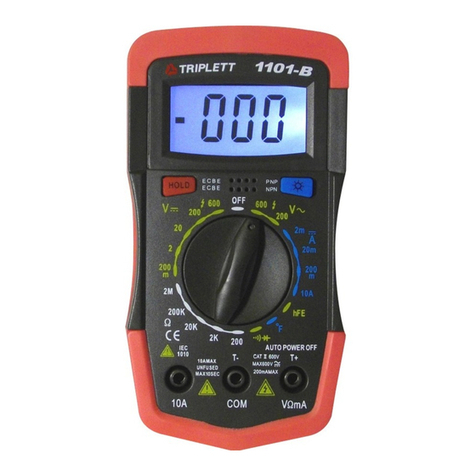
TRIPLETT MODEL 1101-A
1

COMPACT, DIGITAL MULTIMETER
WITH BACKLIT DISPLAY &
TEMPERATURE TEST
2
1. Introduction
2. Safety Rules and Warnings
3. International Symbols
4. Product Features
5. Specifications
6. Front Panel
7. Measurement Procedures
8. Backlight and Hold
9. Maintenance
10. Warranty Information
The Triplett Model 1101-A is a 3 1/2 digit, handheld Digital Multimeter with a
backlit LCD display. At its core is an LSI (Large Scale Integration) integrated
circuit which uses dual slope A/D conversion for stability and accuracy. The meter
can measure AC and DC Voltage and Current, Resistance, Temperature, Transistor
gain, and perform a Diode and Continuity Test. Overload protection makes the
meter resistant to damage from accidental overloads.
84-848
CONTENTS
1: INTRODUCTION
2: SAFETY RULES & WARNINGS

WARNING!!!
This meter is NOT to be used to measure High Energy circuits (power
circuitry fused at greater than 4KW, such as distribution circuits,
power entrance circuits, etc.) or circuits classified by CE as
CATEGORY III (CAT III).
2.1 Read all instructions in this manual before using this meter.
2.2 Prior to using the meter in any situation which could result in injury
to the user, in order to verify that the meter is functional and
producing a valid reading, test the meter on a circuit(s) known to have
potentials equivalent to the potential that is to be measured. For
example, before using the meter to determine if an AC power line is
energized with 120VAC, test the meter on a line known to be
energized with 120VAC.
2.3 Do not use this meter with its battery cover open, its rear case open,
or with parts removed. Doing so may damage the meter and/or injure
the user.
2.4 When using this meter in schools and workshops, responsible teachers
or skilled personnel must control the usage of this meter.
2.5 Follow the recommendations of any Trade Organizations or
Regulatory Agencies whose scope encompasses the use of this meter.
2.6 Do not open this meter for maintenance without first disconnecting
the test leads from all external circuitry.
2.7 Repairs and maintenance must only be carried out by qualified service
personnel or qualified electricians / technicians who know the dangers
of, and the safety rules applicable to this type of equipment.
2.8 Always set the meter to the appropriate range or mode before
connecting it to the circuitry to be tested.
2.9 Check the condition of the test leads before making a measurement.
Do not use the test leads if there is damaged insulation or exposed
metal.
2.10 Make sure test leads are properly inserted and seated in the meter's
input jacks. A loose test lead may cause the user to believe that no
hazard exists, when in fact, dangerous voltages or currents may be
present.
2.11 Do not touch the tips of the test leads when making a measurement.
Do not touch live circuitry when making a measurement.
2.12 Before using the meter, examine both the meter and the test leads for
damage. Do not use the meter if damage (damaged insulation,
exposed metal, cracked case, burnt smell, etc.) is evident.
3

2.13 Insert the test leads in the jacks specified in the instructions for
performing particular tests. Inserting the test leads in incorrect jacks
can damage the meter and/or injure the user.
2.14 Do not exceed the maximum voltage or current limitations of the
meter (see product specifications). Doing so may damage the meter
and/or injure the user.
2.15 Do not apply voltage or current to the input of the meter when it is set
to any of the Ohms Ω ranges. Doing so may damage the meter and/or
injure the user.
2.16 Do not apply voltage or current to the input of the meter when it is set
to the Diode Test / Continuity Beeper mode . Doing so
may damage the meter and/or injure the user.
2.17 Do not attempt to measure a voltage source with the test leads
plugged into the meter's 10A jack. Doing so may damage the meter
and/or injure the user.
2.18 Do not rotate the Function switch with the test leads connected to the
circuitry to be tested. Doing so may damage the meter or the
circuitry, and/or injure the user.
2.19 Replace fuses only with exact or equivalent fuses. Do not "bridge"
fuses out of circuit. Doing so may damage the meter and/or injure the
user.
2.20 Do not apply voltages to the input of the meter which are elevated
above the earth ground potential by more than 600VDC / AC peak.
Doing so may damage the meter and/or injure the user.
2.21 Do not continue to use meter when the "low power" symbol is
displayed. The displayed reading may be in error and lead the user to
believe that no hazard exists, when in fact, dangerous voltages or
currents may be present.
2.22 Use caution when working with voltages above 25 volts AC or 35
volts DC. Such voltages may cause a life threatening electrical shock.
2.23 This meter is not for use by children.
2.24 Do not use this meter to make measurements in adverse environments
such as rain, snow, fog, or locations with steam, explosive gases or
dusts. Doing so may damage the meter and/or injure the user.
2.25 Do not use meter in condensing atmospheres. That is, do not use
meter in conditions where ambient temperature and humidity could
cause condensation of water inside of meter. Doing so may cause
injury to the user.
2.26 Do not use the meter if either the meter or the test leads are wet, either
from exposure to the weather, or after cleaning the case of the meter.
Doing so may cause injury to the user.
2.27 Do not attempt immediate use of the meter when bringing it from a
cold environment to a warm environment. Condensation of water,
inside and outside of the meter, may produce dangerous measuring
4

5
conditions. Allow the meter to warm to room temperature before
using.
2.28 Do not modify the meter. Changing the design may make the meter
unsafe and may result in injury to the user.
2.29 Use caution when attempting to evaluate if a dangerous voltage is
present. The meter will not read AC voltage if it is set to DC, nor will
it read DC if it is set to AC. For example, if the meter is set to
200VDC, it will not measure a dangerous AC voltage, even if the
probes are inserted into a household AC wall outlet.
2.30 Do not touch the metallic portion of one test lead if the other test lead
is connected to a live circuit. The current from the live circuit may
pass through the meter and appear on the unconnected test lead.
Failure to observe this warning may result in user injury.
2.31 Remove the battery when the meter may be left unused for longer
than 1 month. Chemical leakage from the battery could damage the
meter, leading to user injury.
2.32 Do not use the meter if there is evidence of chemical leakage from the
battery. Leakage could damage meter and lead to injury of user.
2.33 Do not attempt to use meter when no display is present on LCD.
Doing so may damage the meter and/or injure the user.
2.34 Do not attempt to measure voltages on capacitors holding dangerous
charges. These charges may be of lethal potential, and may have
enough energy to cause damage to the meter, or injury to the user.
These capacitors can store electricity, even when the circuitry which
they are in has been disconnected from its power source.
2.35 Do not use this meter to measure voltages or currents in industrial
applications where High Energy circuitry is used. High Energy
circuitry is usually regarded as any circuitry capable of supplying
over 4000 watts to a load before a safety device (like a fuse) interrupts
the circuit. See product specifications for Category rating of this
meter.
2.36 Do not use this meter to measure current in circuits whose open
circuit voltage exceeds 500V AC/DC. The meter's fuses are rated at
500V max.
2.37 Always replace the meter's internal fuse with an exact replacement.
Do not substitute a 250V fuse for a 500V fuse.
2.38 When you use the meter to check a high-voltage circuit, do not try to
connect both test leads at once. Instead, clip one probe to the neutral
or ground lead of the circuit (usually a bare, green, or white wire in
AC wiring circuits) using the insulated slip-on Alligator Clips. Then
probe for voltages with the other test lead. This helps prevent you
from accidentally touching a hot wire, since you need to concentrate
on only one test lead.
2.39 If there is any doubt about the condition of the meter (i.e. safe vs
unsafe), remove the meter from service and secure it in a location that
will prevent its unintentional use.
2.40 Do not use the meter if it does not appear to work correctly on all
ranges and in all modes.
2.41 Do not use the meter if it has undergone long-term storage under
unfavorable conditions.
2.42 Do not use the meter if it may have been damaged in transport.
2.43 Always connect one of the meter’s alligator clips to the low side of a
power circuit first. Never clamp onto a hot wire first, (usually red,
black, or blue in AC wiring circuits.) If you clamp onto a hot wire
first, and touch the other probe, you could receive a shock.
2.44 To avoid damage to the meter and possible user injury, disconnect test
leads from test points before changing the function/range.
2.45 Avoid usage near strong magnetic fields (magnets, loudspeakers,
transformers, motors, coils, relays, contactors, electromagnets, etc.).
The meter may display readings that are in error, causing the user to
misinterpret the hazards present. For example, the meter may indicate
a low voltage when high voltages are actually present.
2.46 Avoid usage near strong electrostatic fields (high voltage power lines,
televisions, computer monitors, etc.). The meter may display readings
that are in error, causing the user to misinterpret the hazards present.
For example, the meter may indicate a low voltage when high
voltages are actually present.
2.47 Avoid usage near strong RF fields (radio or television transmitters,
walkie talkies, cellular phones, etc.). The meter may display readings
that are in error, causing the user to misinterpret the hazards present.
For example, the meter may indicate a low voltage when high
voltages are actually present.
2.48 The LCD can be damaged by prolonged exposure to intense sunlight
or to high temperatures. Avoid using or storing the meter under such
conditions.
2.49 When replacing the battery, dispose of the depleted battery in
accordance with any prevailing safety or environmental regulations.
6
3: INTERNATIONAL SYMBOLS

The following International Symbols are used throughout this manual and on the
case of the meter to identify, caution, or warn the user of important product
limitations or important operational procedures that must be followed to ensure
safe usage of the product.
WARNING!!!
Read Instruction Manual for Cautions and Warnings
HIGH VOLTAGE: A dangerous voltage may be present. Use
caution and follow instructions and warnings to avoid electric shock.
Failure to do so may result in user injury.
GROUND: The voltage rating associated with this symbol identifies
the maximum allowable voltage that may be applied between the
identified terminal(s) and earth ground.
~AC: Alternating Current
DC: Direct Current
FUSE: For continued safety, replace only with exact or equivalent
fuses.
DOUBLE INSULATION: This meter uses Double Insulated
construction. Do not alter the construction and use care not to degrade
the insulation when replacing fuses and battery.
7

4: PRODUCT FEATURES
4.1 20 Measurement Ranges
4.2 0.5" (12mm) high LCD display
4.3 3 1/2 digit resolution (2000 counts)
4.4 Backlit LCD display
4.5 Protective shock absorbing "boot"
4.6 Diode Test
4.7 Continuity Beeper
4.8 Transistor Gain Test
4.9 Temperature Measurement
4.10 Fused µA / mA ranges
4.11 Overload protection
4.12 CAT I (600VDC, 750VAC), CAT II (300V AC/DC) on
Voltage Ranges
8

9
5.1 Display: .............................. 0.5" (12mm) high LCD
5.2 Display Resolution: ........... 2000 counts, 0000 to 1999
5.3 Overrange Indication: ........ First digit displays "1",
remaining digits are blank
5.4 Measurement Rate: ............ 2 to 3 measurements per second
5.5 Low Power Annunciator: ...
5.6 Case Dimensions: .............. 5.4 x 3.1 x 1.6 inches (L x W x H)
(including boot)
5.7 Weight with battery: ......… 0.55 lbs.
(including boot)
5.8 Power Source: .................. 9 volt battery
5.9a Overvoltage Category: ..... Category II (CAT II) IEC 1010, 300V
(Installation Category) AC/DC. For measuring local level,
appliances, portable equipment, etc. For
applications where transient voltages
are not present, or are of low amplitude.
Not for use in high energy industrial
installation measurement. Not for use on
circuitry where source capability exceeds
4KW.
5.9b Overvoltage Category: .. Category I (CAT I) IEC 1010, 600VDC,
600VAC. For measuring in low power
consumer electronics where transient
voltages are not present. Not for use in high
energy industrial installation measurement.
Not for use on circuitry where source
capability exceeds 4KW.
Applies to
Voltage
Measurement
Only
5: SPECIFICATIONS
Applies to
Voltage
Measurement
Only
5.10 Fuses: ............ mA Jack: 300mA / 500V, 5 x 20mm: 3207-130
10A Jack: UNFUSED
5.11 Supplied Accessories: ... Boot: 10-4271
Test Leads: 79-760
Temperature Probe: 79-795
Instruction Manual: 84-848

Note:
a) The following accuracy specifications are valid at 23 degrees C,
+/- 5 degrees C, Relative Humidity less than 75%
b) The specifications are in the form " +/- (x % of reading + dgt)" where dgt is
"Least Significant DIGIT".
DC Voltage
Range Resolution Accuracy
200mV 0.1mV
2000mV 1mV
20V 10mV
200V 100mV
± (0.5% rdg + 2 digits)
500V 1V ± (0.8% rdg + 2 digits)
Input Impedance: All ranges are 10MΩ
Overload Protection: 500Vrms
AC Voltage
Range Resolution Accuracy
200V 100mV
500V 1V
± (1.2% rdg + 10 digits)
Input Impedance: All ranges are approx. 5MΩ
Frequency: 40Hz to 400Hz
Overload Protection: 200mV is 230V (AC or DC Current).
All other ranges are 500Vrms.
Display: Average Value (RMS of Sine Wave)
DC Current
Range Resolution Accuracy
2000µA 1µA
20mA 10µA
± (1.0% rdg + 2 digits)
200mA 100µA ± (1.2% rdg + 2 digits)
10A 10mA ± (2.0% rdg + 5 digits)
Overload Protection: 0.3A / 500V fuse, 10A range is unfused.
Max. Current Input: 10A (10 seconds max, 15 minute cool down)
Burden Voltage: 300mV max
10

Resistance
Range Resolution Accuracy
200Ω0.1Ω± (0.8% rdg + 5 digits)
2000Ω1Ω
20KΩ10Ω
200KΩ100Ω
± (0.8% rdg + 2 digits)
20MΩ10KΩ± (1.0% rdg + 5 digits)
Open Circuit Voltage: Less than 3V on all ranges
Overload Protection: All ranges 500Vrms (AC or DC Current).
Temperature
Range Resolution Accuracy
-40°F to 302°F ± (1.0% rdg + 5 digits)
303°F to 1832°F 1 degree Fahrenheit ± (1.5% rdg + 15 digits)
Overload Protection: 500Vrms
Thermocouple: K-Type
Note: The provided thermocouple is only intended to measure
Temperatures up to 300 degrees F. Exceeding this
temperature may damage the probe.
Diode Test and Continuity Beeper
Displays relative
reading in mV,
not actual diode voltage
Test current about 1mA.
Open circuit voltage about 2.8V
Beeper sounds if
meter displays <70.
(Approx. 30Ω)
Test current about 1mA.
Open circuit voltage about 2.8V
Transistor hFE test
hFE Can measure NPN or PNP
transistor hFE. Range: 0-1000 ß
Base current about
10µA,Vce about 2.8V
11

6: FRONT PANEL
1) Backlit LCD Display
2) Backlight and Hold button
3) Rotary Function / Range Selector Switch
4) Transistor Test Jack
5) COM Jack: Common (black) jack for all measurements
6) 10A Jack: Input for currents from 200mA to 10A
7) V/Ω/mA / F Jack: Input for Voltage, Ohms, µA, mA,
and Temperature
12

7.1 DC Voltage Measurement:
7: MEASUREMENT PROCEDURES
WARNING!
If the magnitude of the voltage to be measured is unknown, always start
by setting the meter to the highest range, and then to lower ranges,
until a satisfactory reading is obtained.
Do not rotate the RANGE switch with the input applied to the meter.
If the input voltage is higher than 500VDC, or exceeds the limitations
of a CAT I 600V measurement, do not attempt to measure!
WARNING!
This meter will display voltages that exceed the maximum voltage that
can safely be applied to the meter. The fact that the meter displays the
voltages does not mean that it is safe to measure these voltages.
7.1.1 Connect the black test lead to the COM jack and the red test lead to
the V/Ω/mA / F jack.
7.1.2 Set the RANGE switch to a Vposition. If the magnitude of the
voltage is unknown, set the RANGE switch to the 500 position. If the
input voltage is higher than 500VDC, or exceeds the limitations of a
CAT I 600V measurement, do not attempt to measure!
7.1.3 With power disconnected from the circuit to be measured, connect the
test probes to the measurement points. Apply power to the circuit.
The LCD will display the DC voltage.
7.1.4 If the display indicates overrange, i.e. "1- - -", remove power from the
circuit, disconnect the test probes, and rotate the RANGE switch to
the next higher position. Reconnect the test probes, reapply power,
and read the voltage on the LCD display. If the RANGE switch is
already at the highest position (i.e. 500 VDC), the input voltage
exceeds the measurement capability of the meter and should not be
measured.
7.1.5 If the displayed value is less than "200" (decimal point not shown), a
more accurate reading may be obtained by setting the RANGE switch
to a lower range. Remove power from the circuit, disconnect the test
13

probes, and rotate the RANGE switch to the next lower position.
Reconnect the test probes, reapply power, and read the voltage on the
LCD display. If the RANGE switch is already on the lowest position
(i.e. 200mV DC), no greater measurement resolution can be obtained.
7.2 AC Voltage Measurement:
WARNING!
If the magnitude of the voltage to be measured is unknown, always start
by setting the meter to the highest range, and then to lower ranges,
until a satisfactory reading is obtained.
Do not rotate the RANGE switch with the input applied to the meter.
If the input voltage is higher than 500VAC, or exceeds the limitations
of a CAT I 600V measurement, do not attempt to measure!
WARNING!
This meter will display voltages that exceed the maximum voltage that
can safely be applied to the meter. The fact that the meter displays the
voltages does not mean that it is safe to measure these voltages.
7.2.1 Connect the black test lead to the COM jack and the red test lead to
the V/Ω/mA / F jack.
7.2.2 Set the RANGE switch to a V ~position. If the magnitude of
the voltage is unknown, set the RANGE switch to the
500 position. If the input voltage is higher than 500VAC, do not
attempt to measure!
7.2.3 With power disconnected from the circuit to be measured, connect the
test probes to the measurement points. Apply power to the circuit.
The LCD will display the AC voltage.
7.2.4 If the display indicates overrange, i.e. "1- - -", remove power from the
circuit, disconnect the test probes, and rotate the RANGE switch to
the next higher position. Reconnect the test probes, reapply power,
and read the voltage on the LCD display. If the RANGE switch is
already at the highest position (i.e. 500VAC), the input voltage
exceeds the measurement capability of the meter and should not be
measured.
14

7.2.5 If the displayed value is less than "200" (decimal point not shown), a
more accurate reading may be obtained by setting the RANGE switch
to a lower range. Remove power from the circuit, disconnect the test
probes, and rotate the RANGE switch to the next lower position.
Reconnect the test probes, reapply power, and read the voltage on the
LCD display. If the RANGE switch is already on the lowest position
(i.e. 200V AC), no greater measurement resolution can be obtained.
7.3 DC Current Measurement:
WARNING!
If the magnitude of the current to be measured is unknown, always start
by setting the meter to the highest range, and then to lower ranges,
until a satisfactory reading is obtained.
Do not rotate the RANGE switch with the input applied to the meter.
If the input current is higher than 10A, do not attempt to measure! If
the input current is between 5A and 10A, limit the measuring time to 10
seconds, and allow 15 minutes for the meter to cool down between
measurements. Do not attempt to measure current in a circuit whose
o
p
en circuit volta
g
e exceeds 500V.
7.3.1 Connect the black test lead to the COM jack. Connect the red test
lead to the 10A jack unless it is known that the input current is less
than 200mA. If the current is less than 200mA, connect the red test
lead to the V/Ω/mA / F jack.
7.3.2 If the red test lead is inserted into the 10A jack, set the RANGE
switch to the 10 A position. With power removed from the
circuit to be tested, connect the test leads of the meter in series with
the circuit. Apply power to the circuit. The LCD will display the DC
current.
7.3.3 If the red test lead is inserted into the V/ Ω/mA / F jack, set the
RANGE switch to the 200m A position. With power removed
from the circuit to be tested, connect the test leads of the meter in
series with the circuit. Apply power to the circuit. The LCD will
display the DC current.
7.3.4 If the display indicates overrange, i.e. "1- - -", remove power from the
circuit, disconnect the test probes, and rotate the RANGE switch to
the next higher position. Reconnect the test probes, reapply power,
and read the current on the LCD display. If the meter is already set to
15

measure 10A, the current being tested exceeds the measurement
capability of the meter and cannot be measured.
7.3.5 If the displayed value is less than "200" (decimal point not shown), a
more accurate reading may be obtained by setting the RANGE switch
to a lower range. Remove power from the circuit, disconnect the test
probes, and rotate the RANGE switch to the next lower position (and,
if necessary, move the red test lead from the 10A jack to the V/Ω/mA
/ F jack). Reconnect the test probes, reapply power, and read the
voltage on the LCD display. If the RANGE switch is already on the
lowest position (i.e. 2000 uA), no greater measurement resolution can
be obtained.
7.4 Resistance Measurement:
WARNING!
Do not apply voltage or current to the meter when it is set
to any of the Ohms Ωranges!
7.4.1 Connect the black test lead to the COM jack, and the red test lead to
the V/Ω/mA / F jack.
7.4.2 Set the RANGE switch to the Ωposition that is appropriate for the
device or circuit to be measured. The LCD display will indicate
overrange (i.e. "1 - - -").
7.4.3 Connect the test leads to the device or circuit being measured.
Observe correct polarity if appropriate.
7.4.4 If the display indicates overrange, i.e. "1- - -", rotate the RANGE
switch to the next higher position and observe the reading on the LCD
display. If the RANGE switch is already at the highest position (i.e.
20M Ohms), the resistance exceeds the value measurable by the
meter.
7.4.5 If the displayed value is less than "200" (decimal point not shown), a
more accurate reading may be obtained by setting the RANGE switch
to a lower range. Rotate the RANGE switch to the next lower
position and observe the reading on the LCD display. If the RANGE
switch is already on the lowest position (i.e. 200 Ohms), no greater
measurement resolution can be obtained.
Note: On the 20Ωrange. The displayed value must be less than "20" to obtain
areading on a lower range.
16

7.5 Continuity Beeper:
WARNING!
Do not apply voltage or current to the meter when it is set
to the Diode Test / Continuity Beeper mode .
7.5.1 Connect the black test lead to the COM jack and the red test lead to
the V/Ω/mA / F jack.
7.5.2 Set the RANGE switch to the range.
7.5.3 Connect the test probes to the device or circuit to be tested.
7.5.4 If the resistance of the device or circuit is less than approximately 30
Ohms, the continuity beeper will sound.
Note: The reading displayed on the LCD is not an accurate indication of the
resistance of the device or circuit being measured.
7.6 Diode Test:
WARNING!
Do not apply voltage or current to the meter when it is set
to the Diode Test / Continuity Beeper mode .
7.6.1 Connect the black test lead to the COM jack and the red test lead to
the V/Ω/mA / F jack.
7.6.2 Set the RANGE switch to the range.
7.6.3 Connect the test probes to the device or circuit to be tested. To test a
simple diode, connect the red test probe to the Anode of the diode and
the black test lead to the Cathode ("banded" end) of the diode. The
LCD will indicate the relative voltage drop of the diode. Reverse the
connections of the test probes to the diode. The LCD should indicate
overrange ("1 - - -"). If the Continuity Beeper sounds when the leads
17

are connected in either direction to the diode, the diode is probably
shorted.
Note: The reading displayed on the LCD is not an accurate indication of the
voltage drop of the device or circuit being measured.
7.7 Temperature Test:
WARNING!
Do not apply voltage or current to the meter when it is set to the
Temperature measurement mode.
Do not attempt to measure the temperature of an electrically "live" surface.
User injury may result.
The provided thermocouple is only intended to measure temperatures
up to 300 degrees F. Exceeding this temperature may damage the probe.
7.7.1 Connect the black lead of thermocouple probe to the COM jack and
the red lead of thermocouple probe to the V/Ω/mA / F jack.
7.7.2 Set the RANGE switch to the degree Frange.
7.7.3 Press the tip of the thermocouple probe against the surface to be
measured. The tip may also be immersed in non-corrosive liquids.
7.8 Transistor Gain Test:
7.8.1 Set the RANGE switch to the hFE position.
7.8.2 Insert the transistor whose gain is to be measured into the test socket.
Observe the correct polarity (NPN vs PNP) and pinout (E (Emitter), B
(Base), C (Collector).
Notes:
1) The Transistor Gain Test does not indicate if a transistor is "good" or "bad".
It only tests for gain assuming that the transistor is good.
2) For safety purposes, the contacts in the test socket are recessed down into the
socket. This may cause difficulty when attempting to measure the gain of
transistors removed from a circuit board. To test transistors with short leads,
solder a small length of solid wire to each lead before inserting into test socket.
18

8: BACKLIGHT AND HOLD
8.1 Backlight:
The 1101-A incorporates a light green LED backlight into the LCD
assembly. Since the backlight uses more power than anything else in
the meter, an anti-tease function on the button prevents accidental
turn-on, and a 20 second time-out prevents extended battery drain.
To turn on backlight, press and hold the Backlight / Hold button for
about 3 seconds, until the backlight comes on. Release the button. The
backlight will stay on for about 20 seconds and then turn itself off.
8.2 Hold:
A Hold feature is incorporated into the 1101-A. It is a momentary
Hold feature that only holds a reading as long as the associated button
is kept depressed. Since the button that performs Hold is also the
Backlight button, if the Hold feature is engaged for longer than 3
seconds, the Backlight will turn on.
To activate the Hold feature, press and hold the Backlight / Hold
button. The Hold annunciator will appear in the LCD display for as
long as the button is held depressed.
19

9: MAINTENANCE
9.1 Battery and Fuse Replacement:
9.1.1 On the back of the case, remove the rubber bumpers that cover the
case screws. Remove the screws.
9.1.2 Gently open case, starting at the bottom where the screws were
removed.
9.1.3 When the back of the case is removed, remove the depleted battery or
damaged fuse, replace, and reassemble the meter.
20
Table of contents
Other Triplett Multimeter manuals

Triplett
Triplett 9005-A User manual

Triplett
Triplett 1101-B User manual

Triplett
Triplett 630 Type 5 User manual

Triplett
Triplett 9045 User manual

Triplett
Triplett MM200-NIST User manual

Triplett
Triplett 9065 User manual

Triplett
Triplett 1101-NIST User manual

Triplett
Triplett 3303 User manual

Triplett
Triplett 9007-A User manual

Triplett
Triplett CM24 User manual

Triplett
Triplett 9015-A User manual

Triplett
Triplett 1201 User manual

Triplett
Triplett MM200 User manual

Triplett
Triplett MM350 User manual

Triplett
Triplett 1101-B User manual

Triplett
Triplett 2103 User manual

Triplett
Triplett 60 User manual

Triplett
Triplett 2202 User manual

Triplett
Triplett MM650 User manual

Triplett
Triplett 310-TEL 4 User manual