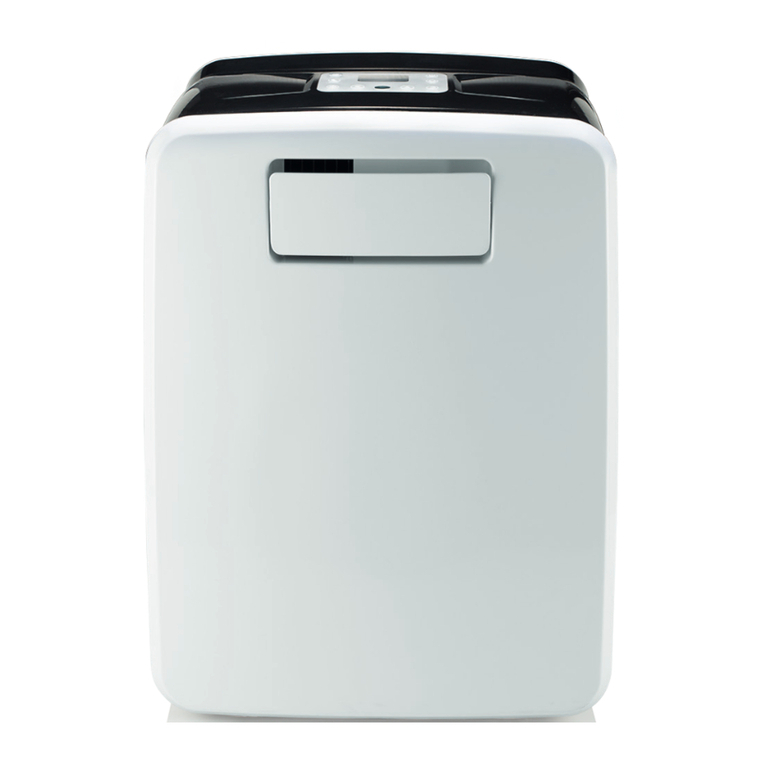
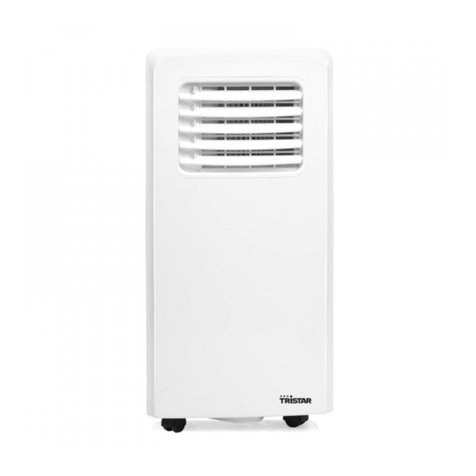
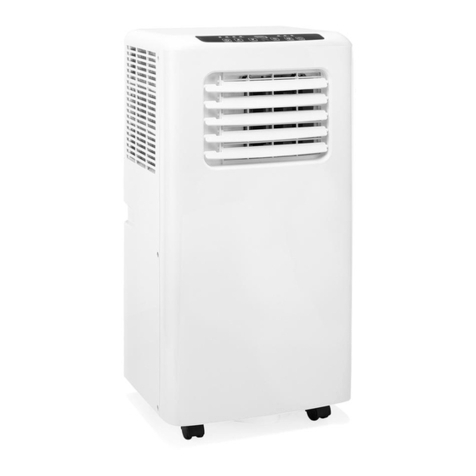
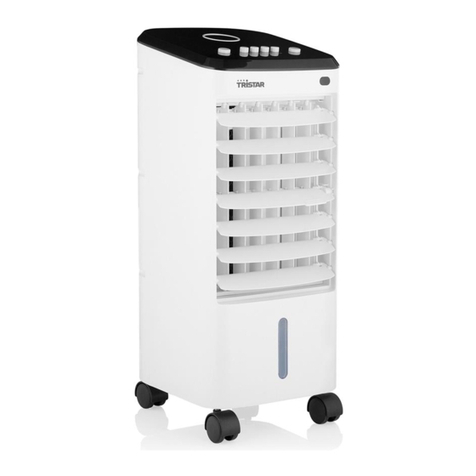
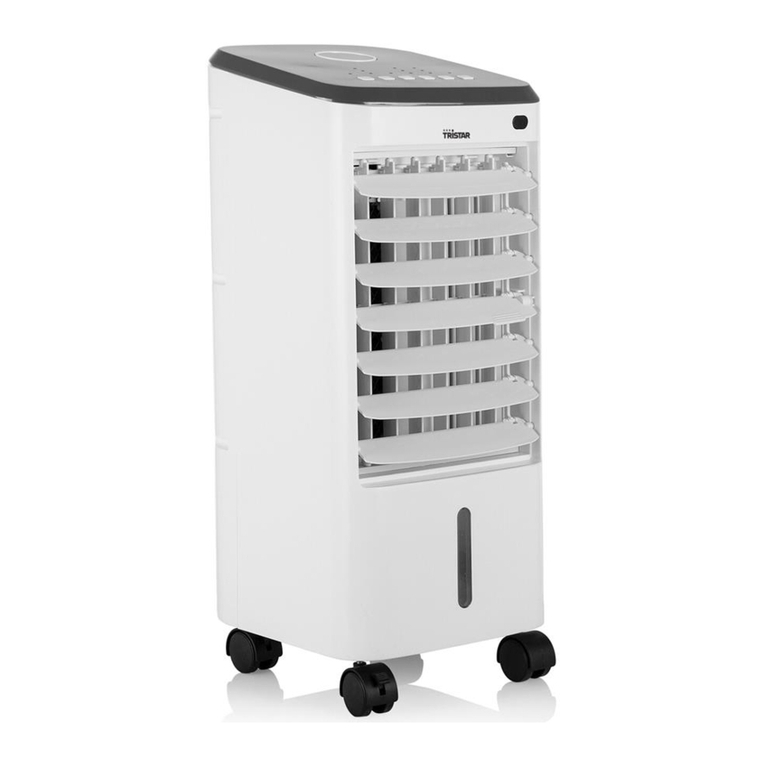
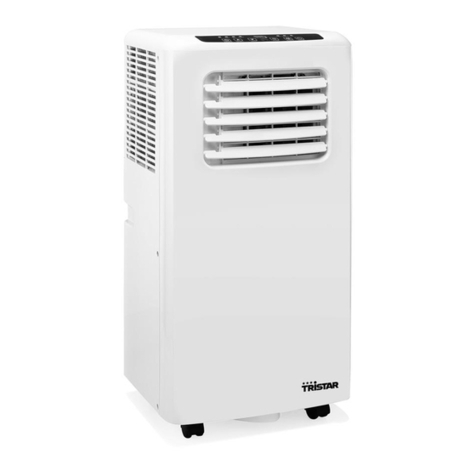
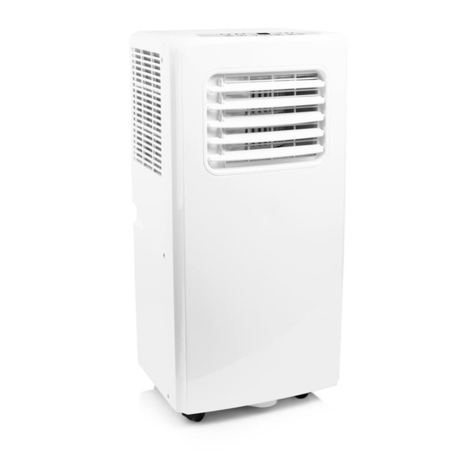
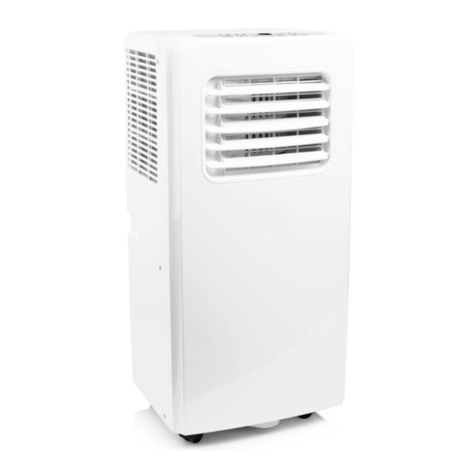
TriStar AC-5498 User manual

AC-5498
Instruction manual
Gebruiksaanwijzing
Mode d’emploi
Bedienungsanleitung
Manual de usuario
Manual de utilizador
Instrukcja obsługi
Manuale utente
SV Bruksanvisning
CS Návod k použití
SK Návod k použitíu

2

AC-5498
3
Instruction manual EN
Dear customer,
Congratulations and thank you for purchasing this high quality
product. Please read the instruction manual carefully so that you will
be able to make the best possible use of the appliance. This manual
includes all the necessary instructions and advice for using, cleaning
and maintaining the appliance. If you follow these instructions you will
be guaranteed of an excellent result, it saves you time and will avoid
problems. We hope you will have a great deal of pleasure from using
this appliance.
An answer to all your questions
Tips and tricks on how to use your product
Order spare parts for your product online
Register for software updates for your product
SAfety inStruCtionS
•Please read the instruction manual carefully before using the
device.Pleasekeeptheseinstructions,theguaranteecerticate,
the sales receipt and, if possible, the carton with the inner
packaging.
•This appliance is not intended to be used by persons (including
children) with reduced physical, sensory or mental capabilities, or
lack of experience and knowledge, unless they have been given
supervision or instructions concerning the use of the appliance by a
person that is responsible for their safety.
•By ignoring the safety instructions the manufacturer can not be hold
responsible for the damage.
•To protect children against the dangers of electrical appliances,
please make sure that you never leave the appliance unattended.
Therefore you have to select a storage place for the appliance
where children are not able to grab it. Make sure that the cable is
not hanging in a downward position.
•The appliance must be placed on a stable, level surface.
•Allrepairsshouldbemadebyacompetentqualiedrepairservice(*).
•Make sure that the appliance is stored in a dry environment.
•Check if the voltage of the appliance corresponds to the main
voltage of your home. Rated voltage: AC220-240V 50Hz. The
socket must be at least 16A or 10 A slow-protected.
•This appliance complies with all standards regarding
electromagneticelds(EMF).Ifhandledproperlyandaccording
to the instructions in this user manual, the appliance is safe to use
basedonscienticevidenceavailabletoday.
•Never move the appliance by pulling the cord and make sure the
cord can not become entangled.
•To protect yourself against an electric shock, do not immerse the
cord, plug or appliance in the water or any other liquid.
•Do not use this appliance with a damaged cord or plug or when the
appliance has malfunctions, or has been damaged in any manner.
To avoid a hazard make sure that a damaged cord or plug will be
replacedbyanCompetentqualiedrepairservice(*).Donotrepair
this appliance yourself.
•The use of accessories that are not recommended by the
manufacturer can cause injuries and will invalidate any warranty
that you may have.

1
2
7
7
3
4
10
14
12
11
16
13
4
•Unplug the appliance from the socket when changing the spare
parts or for maintenance.
•Children should be supervised to ensure that they do not play with
the appliance.
•The appliance can be used by children aged from 8 years and
above and persons with reduced physical, sensory or mental
capabilities or lack of experience and knowledge if they have been
given supervision or instruction concerning use of the appliance in
a safe way and understand the hazards involved. Children shall not
play with the appliance. Cleaning and user maintenance shall not
be made by children unless they are older than 8 and supervised.
•Do not use this appliance outdoors.
* Competent qualied repair service: after sales department of the
producer or importer or any person who is qualied, approved
and competent to perform this kind of repairs in order to avoid all
danger. In any case you should return the appliance to this repair
service.
PArtS deSCriPtion
1. Control Panel
2. Handle
3. Water tank
4. Air outlet
5. Airlters
6. Exhaustairoutlet
7. Air inlet
8. Cable storage
9. Drainage point
10.Hose
11.Connection for hose
12.Cover
13.Window spacer
14.Drain tube
15.Carbonlter
16.Remote control

7
7
8
9
6
5
5
15
17
24
23
22
18
33
32
31 28
27
26
30
25
29
19
20
21
34
35
4038
39
36
37
AC-5498
Gebruiksaanwijzing / Instruction manual EN / Mode d’emploi FR / Bedienungsanleitung DE / Manual de usuario ES / Manual de
utilizador PT / Instrukcja obsługi PL / Manuale utente IT / Bruksanvisning SV / Návod k použití CS / Návod k použitíe SK
5
Instruction manual EN
Control PAnel
17.On/Off (power) button
18.Mode (function) button
19.Temperature up button
20.Temperature down button
21.Speed (ventilation) button
22.Timer operation indicator
23.Sleep function button.
24.Display window
25.Automatic mode indicator
26.Cooling mode indicator
27.Fanmodeindicator
28.High ventilation indicator
29.Medium ventilation indicator
30.Low ventilation indicator
31.Timer mode indicator
32.Sleep operation indicator
33.Water full indicator
remote Control
Placethebatteryintheremotebehindtheapontheback.Pointthe
remote at the device and select the desired functions on the remote control.
34.Display
35.On/off button
36.Temperature setting button
37.Timer function button.
38.Sleep function button.
39.Functionbutton:cooling,ventilationorautomatically.
40.Fanspeedcontrol.

6
Before the firSt uSe
Whenxedormoved,thedevicecannotbesethorizontallyordeclined
to more then 45° or upside-down. The refrigerant circuit is checked for
leak tightness.
SPeCifiCAtionS
Cooling capacity: 12000BTU / 3,5 KW
Power/Ampere consumption: 1340W / 6.14A
Air Volume (max speed): 480 M³/H
Power supply: 220~240V, 50 Hz
Timer: 1~ 24 hours
Working temperature: 18~32 °C
Before uSe
•Placetheapplianceonaatstablesurfaceandholdatleast30
cm. free space around it. Make sure the unit is placed in a upright
position.
•Let the unit, after transport, wait for more than 4 hours befure it is
plugged in into the walloutlet. Prevent the cabinet to get wet.
•Make sure the power cable to the power plug is not curled up on
the back of the device, it can be too hot. Place the plug always into
a grounded outlet.
•Never place the appliance near any heat sources or direct sunlight.
inStAllAtion of the CArBon filter
1. Removetheairlterframefromtheunit.
2. Separatethelterholderfromthelterframe.
3. Removethecarbonlterfromitsplasticbag.
4. Insertthecarbonlterintothelterframe.
5. Fixthelterbyreassemblingthexerontothelterframe.
6. Re-tthelterframeinsidetheunit.
•The air conditioning system cools the air in the room where unit
is placed. The absorbed heat of the conditioned air, should be
removed to outside the room where the unit is placed.

AC-5498
Gebruiksaanwijzing / Instruction manual EN / Mode d’emploi FR / Bedienungsanleitung DE / Manual de usuario ES / Manual de
utilizador PT / Instrukcja obsługi PL / Manuale utente IT / Bruksanvisning SV / Návod k použití CS / Návod k použitíe SK
7
Instruction manual EN
•During cooling of hot air condenswater will be created. Much of the
condensation will be transported with the warm air to outside. At
high humidity not all the condense will be transported with the warm
air to the outside, the water tank must regularly be emptied.
•Inthechapter"CondensateDrain"isthisdenedstepbystep.
•There are several ways to transport warm air out of the room:
•Attach the hose in the warm air outlet of the device. Hang the hose
out the window or a door. The cooling capacity will not be optimal
becauseofwarmoutsideairwillowintothetocoolarea.
•Placethewindowspacerintheopensectionofthewindow.Insert
the hose into the connection for the hose. The cool capacity is
optimal. Provide a maximum distance of 36 cm. the device to the
windows or exterior wall.
•Drill a hole of 152 mm. diameter in the outer wall and enter the
tubing through the hole. The cool capacity is now optimal. Place the
wall cover on the outside of the wall. When the appliance is out of
use, the cover can be placed on the hole.
•Makesurethatthehoseisnotkinkedorthattheairowisobstructed.
•Never extend the hose.
drAinAge
•During cooling of hot air, condensation can be created. Much of the
condensation will be transported with the warm air outside. At high
humidity not all the condense will be transported with the warm air
to the outside, the water tank must regularly be emptied.
•Ifthecondensationtankisfull,thewaterfullindicatorlightonthecontrol
panel will light and a sound goes off, the machine stops automatically.
The condensate tank has a maximum capacity of 1.7 liter.

8
•Turn the knob condensate drain off the spout. Place a container
under the spout and pull the rubber plug from the spout. The water
owsout,whenthebowlisfull,inserttheplug,emptythesumpand
drain the rest of the water.
•Ifthecondensationmustberemovedcontinuously,placethe
condensation drain hose on the spout. Do remove the rubber plug.
The condensate drain hose can be extended with another hose (not
supplied).Itcanbeconnectedtoadrainorbeledoutside.Make
sure this hose does not go up.
uSe
•Always place the plug into a grounded socket.
•PressON/OFFbutton,theunitwillworkincoolmodewithlowfan
speed, the pre-setting temperature is 24°C.
•Indicatorsofthefunctionsinprogresscomeonatthesametime.
*NOTE!Thedisplaywindowshowstheambientroomtemperature
from 0oC to 50oC
•Toturntheunitoff,pressON/OFFbuttonagain.
Setting mode/funCtion
•PressMODEbuttontoselectrequiredworkingmode:cooling,orfan.
•Sign of your selected mode comes on.
Setting temPerAture
•Press 'Temperature up' or 'Temperature down' button to regulate
the temperature you desired.
•The display window will show the temperature you set as you press
'Temperature up' or 'Temperature down' button. Otherwise, it will
always show the ambient temperature.
•The pre-setting temperature of this machine is: 24°C for cooling.
Setting VentilAtion SPeed
PressSPEEDbuttontochoosetheventilationspeedyouneed,highor
low. The sign of high or low ventilation will light on at the same time.
Setting timer
•PressTIMERbuttontosettheoperatinghoursyoudesired(1to24
hours, the sign of timer will light on). When the set time has been
reached, the machine will turn off automatically. The display window
willshowthehour(s)yousetasyoupressTIMERbutton.Ifthe
timer button is not pressed, the unit will work continuously.
•By pressing the timer but without turning on the other functions, you
canPRE-SETthetimeforthemachinetowork.Forexample,ifyou
press the timer to '2', the unit will work automatically after 2 hours.
SleeP funCtion
•Incoolingmode,bypressingtheSLEEPbutton,theset
temperature will increase 1oC at the 1st hour, another 1 oC at the
second hour, then keeps at that temperature.
•Insleepmode,theventilationwillkeepatlowspeed.Re-pressthe
SLEEPbutton,thesettingtemperatureandventilationspeedwill
return to the pre-selected one.
•TheunitwillshutdownautomaticallyaftertheSLEEPfunction
running for 12 hours.
•Please note, the sleep function is not available while the machine
isworkinginventilation,dehumidicationorautomode.Only
available in the Cooling mode.

AC-5498
Gebruiksaanwijzing / Instruction manual EN / Mode d’emploi FR / Bedienungsanleitung DE / Manual de usuario ES / Manual de
utilizador PT / Instrukcja obsługi PL / Manuale utente IT / Bruksanvisning SV / Návod k použití CS / Návod k použitíe SK
9
Instruction manual EN
•WhenthemachineisinSleepingfunction,theFanSpeedwould
turn to be LOW speed.
Self-diAgnoSiS
Thismachineisequippedwithself-diagnosisfunction.Ifsomethingis
wronginthemachine,theLEDwillshowtheword“E1”or“E2”.Asthis
time, please call your service centre.
effiCienCy BooSting
Thisunitisequippedwith“energyefciencyboosting”function,by
addingthewatertothewatertankasbelow,theenergyefciencycan
be elevated greatly, save energy for the earth, save money for you.
1. Open the door for the water tank
2. Take out the water tank
3. Unscrewthetapforthetapforthetankandllupthetankwith
clean water
notiCe
•To prolong the compressor's life, after switch-off of the unit, please
wait for 3 minutes (at least) before re-switch.
•The cooling system will switch off if the ambient temperature is
lower than the set one. The ventilation, however, keeps working on
thesetlevel.Iftheambienttemperaturerisesabovetheselected
level, the cooling will return to work.
CleAning And mAintenAnCe
•Always remove the plug from the socket when the device is cleaned.
•Clean the outside with a damp cloth. Never use harsh and abrasive
cleaners, steel wool or a scouring pad as this will damage the
device. Do not immerse in water or other liquid.
•Removeltersfromthedeviceandcleanitwithwarmsoapy
water,lettheltersdrycompletelybeforebeingreplaced.Turnthe
appliancewithoutlters.Iftheunitisstoredaftertheseason,drain
the condensate water and put the cord on the cord storage area.
fAult CheCK liSt
the Air Conditioner doeS not run
Is the air conditioner plugged in?
Is there a power failure?
Is the comp / ‘full water’ indicator ashing?
Is the room temperature below the set temperature?
the mAChine SeemS to do little
Is there direct sunshine ? (Please put down the curtain.)
Are too many windows or doors open?

10
Are there too many people in the room?
Is there something in the room producing lots of heat?
Is the lter dusty, contaminated?
Is the air intake or output blocked up?
Is the room temperature below your selected temperature?
too noiSy
Is the machine positioned unevenly so as to create vibration?
Is the oor underneath the machine uneven?
If so, it is possible the overheat protection of the compressor is on.
Just wait for the temperature to drop.
guArAntee
•This product is guaranteed for 24 months granted. Your warranty
is valid if the product is used in accordance to the instructions and
forthepurposeforwhichitwascreated.Inaddition,theoriginal
purchase (invoice, sales slip or receipt) is to be submitted with the
date of purchase, the name of the retailer and the item number of
the product.
•Forthedetailedwarrantyconditions,pleaserefertoourservice
website: www.service.tristar.eu
guidelineS for ProteCtion of
the enVironment
This appliance should not be put into the domestic garbage
at the end of its durability, but must be offered at a central
point for the recycling of electric and electronic domestic appliances.
This symbol on the appliance, instruction manual and packaging
puts your attention to this important issue. The materials used in this
appliance can be recycled. By recycling used domestic appliances you
contribute an important push to the protection of our environment. Ask
your local authorities for information regarding the point of recollection.
PACKAging
The packaging is 100% recyclable, return the packaging separated.
ProduCt
ThisdeviceisequippedwithamarkaccordingtotheEuropean
Directive2012/19/EUonWasteElectricalandElectronicEquipment
(WEEE).Byensuringthatthisproductwillbecorrectlyprocessedinto
waste, it will help prevent possible negative consequences for the
environment and human health.
eC deClArAtion of Conformity
This device is designed, manufactured and marketed in accordance
withthesafetyobjectivesoftheLowVoltageDirective"No2006/95/
EC",theprotectionrequirementsoftheEMCDirective2004/108/
EC"ElectromagneticCompatibility"andtherequirementofDirective
93/68/EEC.

AC-5498
11
Gebruiksaanwijzing
Geachte klant,
Gefeliciteerd met de aankoop van dit kwaliteitsproduct. Lees de
gebruiksaanwijzing zorgvuldig door zodat u optimaal gebruik kunt
maken van dit apparaat. In deze handleiding vindt u alle benodigde
aanwijzingen en adviezen voor het gebruik, schoonmaak en
onderhoud van het apparaat. Als u deze aanwijzingen volgt, heeft u
altijd een uitstekend resultaat, bespaart u tijd en kunt u problemen
voorkomen. Wij hopen dat u dit apparaat met plezier zult gebruiken.
Antwoord op al uw vragen
Tips voor het gebruik van uw product
Bestel alle onderdelen van uw product online
Registreer voor software updates van uw product
VeiligheidSVoorSChriften
•Lees de gebruiksaanwijzing aandachtig door voordat u het
apparaat voor het eerst gebruikt. Bewaar de gebruiksaanwijzing,
hetgarantiecerticaat,deverkoopbonenindienmogelijkde
kartonnen doos met de binnenste verpakking om deze indien nodig
later te kunnen raadplegen.
•Dit apparaat is niet bedoeld voor gebruik door personen
(waaronder kinderen) met verminderde lichamelijke, zintuiglijke
of geestelijke vermogens, of die gebrek aan ervaring of kennis
hebben, tenzij iemand die verantwoordelijk is voor hun veiligheid
toezicht op hen houdt of hun heeft uitgelegd hoe het apparaat dient
te worden gebruikt.
•Als de veiligheidsinstructies niet worden opgevolgd, kan de
fabrikant niet verantwoordelijk worden gesteld voor schade die daar
eventueel het gevolg van is.
•Om kinderen te beschermen tegen de gevaren van elektrische
apparatuur mag u ze nooit zonder toezicht bij het apparaat laten.
Selecteer daarom een plek voor uw apparaat op dusdanige wijze
dat kinderen er niet bij kunnen. Zorg ervoor dat het snoer niet naar
beneden hangt.
•Het apparaat moet worden geplaatst op een stabiele, vlakke
ondergrond.
•Reparaties dienen te geschieden door een bekwame
gekwaliceerdedienst(*).
•Zorg dat het apparaat opgeborgen wordt op een droge plaats.
•Controleer of het voltage dat wordt aangegeven op het apparaat,
overeenkomt met de plaatselijke netspanning voordat u het
apparaat aansluit. Voltage: 220V-240V 50Hz. De contactdoos moet
met ten minste 16 A of 10 A traag beveiligd zijn.
•Dit apparaat voldoet aan alle richtlijnen met betrekking tot
elektromagnetischevelden(EMV).Mitshetapparaatopdejuiste
wijze en volgens de instructies in deze gebruiksaanwijzing wordt
gebruikt, is het veilig te gebruiken volgens het nu beschikbare
wetenschappelijke bewijs.
•Verplaats het apparaat nooit door aan het snoer te trekken en zorg
ervoor dat het snoer nergens in verstrikt kan raken.
•Dompel het snoer, de stekker en/of het apparaat nooit in het
water of een andere vloeistof, dit om u te beschermen tegen een
elektrische schok.
•Gebruik het apparaat niet indien de stekker, het netsnoer of het

1
2
7
7
3
4
10
14
12
11
16
13
12
apparaatzelfbeschadigdis.Indienhetnetsnoerbeschadigdis,
moetuhetlatenvervangendooreenbekwamegekwaliceerde
dienst(*)omgevaartevoorkomen.
•Gebruik nooit accessoires die niet aanbevolen worden door de
fabrikant. Deze kunnen gevaar opleveren voor de gebruiker en
schade toebrengen aan het apparaat.
•Haal de stekker uit het stopcontact als u toebehoren wisselt en voor
onderhoudswerkzaamheden.
•Kinderen dienen onder toezicht te staan om te voorkomen dat ze
met het apparaat spelen.
•Dit apparaat kan worden gebruikt door kinderen van 8 jaar en
ouder en personen met beperkte fysieke, zintuigelijke of mentale
vermogens, of gebrek aan ervaring en kennis, als ze onder toezicht
staan, of instructies hebben ontvangen over het op een veilige
wijze gebruiken van het apparaat, en op de hoogte zijn van de
mogelijke gevaren. Kinderen mogen niet met het apparaat spelen.
Reiniging en onderhoud dienen niet te worden uitgevoerd door
kinderen, tenzij zij ouder dan 8 zijn, en onder toezicht staan.
•Gebruik het apparaat nooit buitenshuis.
* Bekwame gekwaliceerde dienst: after-sales dienst van de
fabrikant of de invoerder, die erkend en bevoegd is om dergelijke
herstellingen te doen zodat elk gevaar vermeden wordt. Gelieve
het toestel bij problemen naar deze dienst terug te brengen.
onderdelenBeSChrijVing
1. Bedieningspaneel
2. Handvat
3. Watertank
4. Uitblaas rooster
5. Luchtlters
6. Warme lucht uitgang
7. Lucht inlaat
8. Snoer opslag
9. Condenswater aftapdop
10.Slang
11.Aansluiting voor slang
12.Afdekking
13.Raamopvulstuk
14.Condenswater afvoerslang
15.Carbonlter
16.Afstandsbediening

7
7
8
9
6
5
5
15
34
35
4038
39
36
37
17
24
23
22
18
33
32
31 28
27
26
30
25
29
19
20
21
AC-5498
Gebruiksaanwijzing NL
Gebruiksaanwijzing / Instruction manual EN / Mode d’emploi FR / Bedienungsanleitung DE / Manual de usuario ES / Manual de
utilizador PT / Instrukcja obsługi PL / Manuale utente IT / Bruksanvisning SV / Návod k použití CS / Návod k použitíe SK
13
BedieningSPAneel
17.Aan/uit knop
18.Functiesknop
19.Temperatuur instelling hoger
20.Temperatuur instelling lager
21.Snelheid ventilatie knop
22.Timer functie knop
23.Slaap functie toets.
24.Display
25.Automatische modus indicator
26.Koelmodus indicator
27.Ventilatormodus indicator
28.Veel ventilatie indicator
29.Medium ventilatie indicatielampje
30.Weinig ventilatie indicator
31.Timermodus indicator
32.Slaap functie indicator
33.Waterreservoir vol indicatie lampje
AfStAndSBediening
Plaats de batterij in de afstandsbediening achter het klepje aan de
achterzijde. Richt de afstandsbediening op het apparaat en selecteer
de gewenste functies op de afstandsbediening.
34.Display
35.Aan/uit toets
36.Temperatuur instellingstoetsen.
37.Timer functie toets
38.Slaap functie toets
39.Functietoets,koelen,ventilatieofautomatisch.
40.Fansnelheidstoets

14
Voor het eerSte geBruiK
Het apparaat mag wanneer het wordt geplaatst of verplaatst niet
horizontaal, in een hoek van meer dan 45° of ondersteboven gehouden
worden. Het koelcircuit wordt gecontroleerd op lekken.
SPeCifiCAtieS
Koelcapaciteit: 12000BTU / 3,5 KW
Vermogen-/Stroomverbruik: 1340W / 6.14A
Luchtvolume (max. snelheid): 480 M³/H
Voeding: 220~240V, 50 Hz
Timer: 1-24 uur
Werktemperatuur: 18~32 °C
eerSte geBruiK
•Plaats het apparaat op een vlakke stabiele ondergrond en houd
minimaal 30 cm. vrije ruimte rondom het apparaat. Zorg ervoor dat
het apparaat goed recht wordt geplaatst.
•Laat het apparaat, na transport, eerst minimaal 4 uur staan
alvorens de stekker in het stopcontact wordt geplaatst. Voorkom
dat de behuizing van het apparaat nat wordt.
•Zorg dat de stroomkabel met de stekker niet wordt opgerold aan de
achterkant van het apparaat, deze kan te warm worden. Paats de
stekker altijd in een geaard stopcontact.
•Plaats het apparaat nooit naast warmte bronnen of in direct
zonlicht.
PlAAtSen VAn het CArBonfilter
1.Verwijderhetbovensteluchtlteruithetapparaat.
2.Verwijderhetroostervanhetlter.
3.Opendeverpakkingvanhetmeegeleverdecarbonlter(nr.18).
4.Plaatshetcarbonltertegenhetplasticlteraan.
5.Plaatshetroosterterugophetlter.
6.Plaatshetlterteruginhetapparaat.
•Het airconditioning systeem koelt de lucht in de ruimte waar deze
geplaatst is af. De warmte die aan deze lucht onttrokken is dient
naar buiten te worden afgevoerd.

AC-5498
Gebruiksaanwijzing NL
Gebruiksaanwijzing / Instruction manual EN / Mode d’emploi FR / Bedienungsanleitung DE / Manual de usuario ES / Manual de
utilizador PT / Instrukcja obsługi PL / Manuale utente IT / Bruksanvisning SV / Návod k použití CS / Návod k použitíe SK
15
•Bijhetafkoelenvanwarmeluchtontstaatcondenswater.Eengroot
deel van het condenswater wordt met de warme lucht mee naar
buiten afgevoerd. Bij een hoge luchtvochtigheid zal niet al het
condenswater worden afgevoerd naar buiten en zal geregeld het
condenswater reservoir moeten worden geleegd.
•Inhethoofdstuk“Condenswateraftappen”wordtditstapvoorstap
omschreven.
•Erzijndiversemanierenomdewarmeluchtnaarbuitenaftevoeren:
•Draai de slang in de warme lucht uitgang van het apparaat. Hang
de slang uit het raam of een buitendeur. De koelcapaciteit zal niet
optimaal zijn omdat er warme buiten lucht in de te koelen ruimte
kan blijven stromen.
•Plaats het raamopvulstuk in het openstaande gedeelte van
het raam. Plaats de slang in de aansluiting voor de slang De
koelcapacitieit is optimaal. Zorg voor een maximale afstand van 36
cm. van het apparaat tot aan het raam cq. buitenmuur.
•Boor een gat met een diameter van 152 mm in de buitenwand en
voer de buis door het gat. De koelcapaciteit is nu optimaal. Plaats de
wandbedekking aan de buitenkant van de wand. Als het apparaat buiten
gebruik is, kan de wandbedekking over het gat worden geplaatst.
•Zorg ervoor dat de slang niet wordt geknikt of dat de lucht uitstroom
wordt belemmerd.
•Verleng nooit de meegeleverde slang.
CondenSwAter AftAPPen
•Bijhetafkoelenvanwarmeluchtontstaatcondenswater.Eengroot
deel van het condenswater wordt met de warme lucht mee naar
buiten afgevoerd. Bij een hoge luchtvochtigheid zal niet al het
condenswater worden afgevoerd naar buiten en zal geregeld het
condenswater reservoir moeten worden geleegd.
•Indienhetcondenswaterreservoirvolis,gaathetwaterreservoir
vol indicatie lampje op het bedieningspaneel branden en geeft
een geluidssignaal af, het apparaat stopt automatisch. Het
condenswater reservoir heeft een maximale inhoud van 1.7 liter.

16
Draai de condenswateraftapknop eraf. Plaats een opvangbak onder de
tuit en trek de rubberen plug uit de tuit. Het water stroomt eruit, indien
de opvangbak vol is, plaats dan de plug terug, leeg de opvangbak en
tap de rest van het water af.
•Indienhetcondenswatercontinuedienttewordenafgevoerd,
plaats dan de condenswater afvoerslang op de tuit. Verwijder wel
eerst de rubberen plug. De condenswater afvoerslang kan met een
andere slang (niet bijgeleverd) worden verlengt. Deze kan worden
aangesloten op een afvoer of naar buiten worden geleid. Zorg dat
deze slang niet omhoog loopt.
geBruiK
•Steek de stekker altijd in een geaard stopcontact.
•DrukopdeAAN/UIT-knop.Hetapparaatzalindekoelmoduswerken
met lage ventilatiesnelheid. De vooringestelde temperatuur is 24 °C.
•Indicatielampjesvandewerkzamefunctieszullenophetzelfde
ogenblikgaanbranden.*OPMERKING!Hetweergaveschermtoont
de omgevingstemperatuur van de ruimte van 0°C tot 50°C
•Schakelhetapparaatuit,doornogmaalsopdeAAN/UIT-knopte
drukken.
de moduS/funCtie inStellen
•Druk op de MODUS-knop om de vereiste werkmodus te selecteren:
koelen of ventilator.
•Erwordteensymboolvandegeselecteerdemodusweergegeven.
de temPerAtuur inStellen
•Druk op de 'temperatuur omhoog' of 'temperatuur omlaag' knop om
de gewenste temperatuur in te stellen.
•Het display zal de ingestelde temperatuur tonen wanneer u op de
'temperatuur omhoog' of 'temperatuur omlaag' knop drukt. Verder
wordt altijd de omgevingstemperatuur getoond.
•De vooraf ingestelde temperatuur van dit apparaat is: 24°C voor koelen
de VentilAtieSnelheid inStellen
DrukopdeSNELHEID-knopomdebenodigdeventilatiesnelheidte
selecteren (hoog of laag). Het symbool voor hoge of lage ventilatie zal
oplichten.
de timer inStellen
•DrukopdeTIMER-knopomdegewenstewerkingsuren(1tot24
uur, het timer-symbool zal oplichten) in te stellen. Als de ingestelde
tijd is bereikt, zal het apparaat automatisch uitschakelen. Het
weergavevenster zal het ingestelde uur/de ingestelde uren tonen
wanneer er op timer wordt gedrukt.
•DooropdeTIMERtedrukkenzonderdeanderefunctiesinte
schakelen, kunt u de tijd dat de machine werkt voor-instellen.
Bij voorbeeld, wanneer u de timer op '2' zet, zal het apparaat
automatisch gaan werken na 2 uur.
SlAAP-funCtie
•Indekoelmoduszaldeingesteldetemperatuur,nadateropde
SLAAP-knop is gedrukt, het eerste uur met 1°C toenemen en het
tweede uur met nogmaals 1°C, en vervolgens zal deze temperatuur
behouden blijven.

AC-5498
Gebruiksaanwijzing NL
Gebruiksaanwijzing / Instruction manual EN / Mode d’emploi FR / Bedienungsanleitung DE / Manual de usuario ES / Manual de
utilizador PT / Instrukcja obsługi PL / Manuale utente IT / Bruksanvisning SV / Návod k použití CS / Návod k použitíe SK
17
•De ventilatie zal in de slaapmodus een lage snelheid aanhouden. Druk
opnieuw op de SLAAP-knop, zodat de ingestelde temperatuur en
ventilatiesnelheid terugkeren naar de voorgeselecteerde waarden.
•Het apparaat zal automatisch uitschakelen, nadat de SLAAP-
functie 12 uur actief is geweest.
•Houd er rekening mee dat de slaap-functie niet beschikbaar is
als het apparaat in de ventilatie-, ontvochtigings- of automatische
modus werkzaam is. Uitsluitend beschikbaar in de Koelmodus.
•Als het apparaat zich in de Slaap-functie bevindt, zal de
ventilatorsnelheidzichindeLAGEsnelheidbevinden.
ZelfdiAgnoSe
Dit apparaat is uitgerust met een zelfdiagnose-functie. Als er iets mis is
inhetapparaat,gevendeLED-lampjeshetwoord“E1”of“E2”.Neem
in dit geval contact op met de klantenservice.
Stimulering VAn de effiCientie
Ditapparaatisuitgerustmeteen“stimulerenenergie-efciëntie”functie.
Door water toe te voegen aan het waterreservoir, zoals hieronder wordt
vermeld,zaldeenergie-efciëntieaanzienlijktoenemen,waardoorer
wordt bespaard op het milieu en de portemonnee.
1. Open het luik van het waterreservoir.
2. Verwijder het waterreservoir.
3. Draai de tap voor het reservoir los en vul het reservoir met schoon.
water
let oP
•Om de levensduur van de compressor te verlengen dient u nadat u
het apparaat hebt uitgezet tenminste 3 minuten te wachten voor u
het apparaat weer inschakelt.
•Het koelsysteem zal uitschakelen wanneer de
omgevingstemperatuur lager is dan de ingestelde temperatuur.
De ventilatie zal echter blijven werken op het ingestelde niveau.
Wanneer de omgevingstemmperatuur boven de ingestelde waarde
komt zal de koeling weer in werking treden.
reiniging en onderhoud
•Verwijder altijd de stekker uit het stopcontact als het apparaat wordt
gereinigd.
•De buitenkant reinigen met een vochtige doek. Gebruik nooit
agressieve en schurende schoonmaakmiddelen, een schuurspons
of staalwol; dit beschadigt het apparaat. Dompel het apparaat niet
onder in water of in een andere vloeistof.
•Verwijderdeltersuithetapparaatenreinigdezeineenlauw
warmsopje,laatdeltersgoeddrogenvoordatdezeworden
teruggeplaatst.Schakelhetapparaatnooitaanzonderlters.
Indienhetapparaatnahetseizoenwordtopgeborgen,tapdanhet
condeswater af en plaats het snoer op de snoeropslag ruimte.
ProBlemen en oPloSSingen
de AirConditioning doet het niet
Zit de stekker van de airconditioning in het stopcontact?
Is er een stroomstoring?
Knippert de comp / 'full water' indicator?
Is de kamertemperatuur lager dan de ingestelde temperatuur?

18
de mAChine lijKt weinig te doen
Is er sprake van direct zonlicht? (Doe dan het gordijn dicht.)
Staan er te veel ramen en deuren open?
Zijn er te veel mensen in de kamer?
Is er iets in de kamer wat erg veel warmte produceert?
de mAChine lijKt nietS te doen
Is het lter stofg of vervuild?
Is de luchtinlaat of -uitlaat verstopt?
Is de kamertemperatuur lager dan de ingestelde temperatuur?
te lAwAAiig
Staat de machine niet waterpas zodat hij gaat vibreren?
Is de vloer onder de machine ongelijk?
de ComPreSSor looPt niet
In dat geval is het mogelijk dat de oververhittingsbeveiliging is
ingeschakeld. Wacht tot de temperatuur zakt.
gArAntieVoorwAArden
•Op dit product wordt een garantie van 24 maanden verleend.
Uw garantie is geldig wanneer het product is gebruikt in
overeenstemming met de gebruiksaanwijzing en voor het doel
waarvoor het gemaakt is. Tevens dient de originele aankoopbon
(factuur, kassabon of kwitantie) overlegd te worden met daarop de
aankoopdatum, de naam van de retailer en het artikelnummer van
het product.
•Voor uitgebreide garantievoorwaarden verwijzen wij u naar onze
servicewebsite: www.service.tristar.eu
AAnwijZingen ter BeSCherming
VAn het milieu
Dit product mag aan het einde van zijn levensduur niet bij
het normale huisafval worden gedeponeerd, maar dient
bij een speciaal inzamelpunt voor het hergebruik van elektrische
en elektronische apparaten te worden aangeboden. Het symbool
op artikel, gebruiksaanwijzing en verpakking attendeert u hierop.
De gebruikte grondstoffen zijn geschikt voor hergebruik. Met het
hergebruik van gebruikte apparaten of grondstoffen levert u een
belangrijkebijdrageaandebeschermingvanonsmilieu.Informeerbij
uw lokale overheid naar het bedoelde inzamelpunt.
VerPAKKing
Het verpakkingsmateriaal is 100% recyclebaar, lever het
verpakkingsmateriaal gescheiden in.
ProduCt
DitapparaatisvoorzienvanhetmerktekenvolgensdeEuropese
richtlijn2012/19/EUinzakeafgedankteelektrischeenelektronische
apparaten(WEEE).Doorervoortezorgendatditproductopde
juiste manier als afval wordt verwerkt, helpt u mogelijk negatieve
consequenties voor het milieu en de menselijke gezondheid te
voorkomen.
eC-ConformiteitSVerKlAring
Dit apparaat is ontworpen, vervaardigd en in de handel gebracht
in overeenstemming met de veiligheidsdoeleinden van de
“laagspanningsrichtlijn”nr.2006/95/EC,debeschermingsvoorschriften
vandeEMC-richtlijn2004/108/EC“Elektromagnetischecompatibiliteit”
endevereistevanrichtlijn93/68/EG.

AC-5498
19
Mode d’emploi FR
Cher client,
Félicitations et merci d'avoir acheté ce produit de haute qualité. Veuillez
lire ce manuel d'instructions avec attention pour pouvoir proter du
meilleur de cet appareil. Ce manuel contient toutes les instructions et
avis nécessaires pour l'utilisation, le nettoyage et l'entretien de l'appareil.
Si vous suivez ces instructions, vous avez la garantie d'un excellent
résultat, ceci vous économisera du temps et des soucis. Nous espérons
que vous éprouverez beaucoup de plaisir en utilisant cet appareil.
Une réponse à toutes vos questions
Conseils et astuces pour l’utilisation de votre produit
Commandez des pièces de rechange en ligne pour votre
produit
Inscrivez-vousauxmisesàjourdelogicieldevotreproduit
inStruCtionS de SéCurité imPortAnteS
•Veuillez lire attentivement la notice d’emploi avant l’utilisation de
l’appareil.Veuillezconservercettenotice,lecerticatdegarantie,le
ticket de caisse et si possible, le carton avec l’emballage intérieur.
•Cet appareil n’est pas destiné à être utilisé par ces personnes (y
comprislesenfants)ayantdesdifcultésphysiques,sensorielles
ou mentales, ou sans expérience et connaissance, à moins de leur
en donner la responsabilité ou d'être informés sur l'utilisation de
l'appareil par une personne responsable de leur sécurité.
•Le fabricant ne sera pas tenu responsable de tous dommages si
les consignes de sécurité ne sont pas respectées.
•Pour protéger les enfants des dangers des appareils électriques,
veillez à ne jamais laisser les appareils sans surveillance. Par
conséquent, il faudra choisir un lieu de rangement pour l’appareil
inaccessible aux enfants. Veillez à ce que le cordon ne pende pas.
•L’appareil doit être posé sur une surface stable et nivelée.
•Toutes les réparations doivent être effectuées par un Centre de
réparationqualiéagréé(*).
•Veillez à ce que l’appareil soit rangé dans un lieu sec.
•Vériezsilatensiondel'appareilcorrespondàlatensiondu
secteur de votre domicile. Tension nominale : 220-240V CA 50Hz.
La prise doit être d’au moins 16A ou 10A et à fusible lent.
•Cet appareil est conforme à toutes les normes des champs
électromagnétiques(EMF).L’appareilestsansdangeràl’utilisation
selonlespreuvesscientiquesdisponiblesàcejour,àcondition
de manipulation correcte et en respectant les consignes de cette
notice d’emploi.
•Ne jamais déplacer l’appareil en tirant sur le cordon et veillez à ce
que ce dernier ne devienne pas entortillé.
•Ne pas immerger le cordon, la prise ou l'appareil dans de l'eau ou
autreliquideandevouséviterunchocélectrique.
•Ne pas utiliser cet appareil avec un cordon ou une prise
endommagés ou s’il ne fonctionne pas correctement, ou a subi des
dégâtsquelconques.And’évitertousdangers,veillezàcequ’un
cordon ou prise endommagés soient remplacés par un technicien
agréé(*).Neréparezpasvous-mêmecetappareil.
•L’utilisation d’accessoires qui ne sont pas recommandés par le
fabricant peut entrainer des blessures et annulera toutes garanties
en votre possession.
•Débranchez l’appareil de la prise lors du changement de pièces ou
pour l’entretien.

1
2
7
7
3
4
10
14
12
11
16
13
20
•Les enfants doivent être supervisés pour être sûr qu’ils ne jouent
pas avec l’appareil.
•L’appareil peut être utilisé par des enfants âgés de 8 ans et
plus et par les personnes ayant des capacités physiques,
sensorielles ou mentales réduites ou qui manquent d’expérience
ou de connaissances si elles sont supervisées ou instruites pour
l’utilisation de l’appareil en toute sécurité et si elles comprennent
les dangers en rapport. Les enfants ne doivent pas jouer avec
l’appareil. Le nettoyage et l’entretien utilisateur ne doivent pas être
accomplis par des enfants à moins qu’ils aient plus de 8 ans et ne
soient supervisés.
•Ne pas utiliser cet appareil à l’extérieur.
* Centre de réparation qualié agréé : Service après vente du
fabricant ou de l’importateur ou tout autre personne qualiée, agréé
et apte à effectuer ce type de réparation an d’éviter tous dangers.
L'appareil doit, dans tous les cas, être renvoyé à ce Centre de
réparation.
deSCriPtion deS PièCeS
1. Panneau de contrôle
2. Poignée
3. Réservoir d’eau
4. Sortie d’air
5. Filtresàair
6. Sortie d’échappement d’air
7. Entréed’air
8. Rangement du cordon
9. Point de vidange
10.Tube
11.Branchement du tuyau
12.Bouchon de Protection
13.Entretoisedelafenêtre
14.Tube d’écoulement
15.Filtreaucharbon
16.Télécommande
Table of contents
Languages:
Other TriStar Air Conditioner manuals

TriStar
TriStar AT-5450 User manual

TriStar
TriStar AC-5492 User manual

TriStar
TriStar AT-5445 User manual

TriStar
TriStar AC-5560 User manual
TriStar
TriStar AC-5564CH User manual

TriStar
TriStar AT-5464BS User manual

TriStar
TriStar AC-5474 User manual

TriStar
TriStar AT-5451 User manual

TriStar
TriStar AT-5468 User manual

TriStar
TriStar AC-5560 User manual

TriStar
TriStar AT-5461 User manual

TriStar
TriStar AC-5477 User manual

TriStar
TriStar AC-5493 User manual

TriStar
TriStar PD-8779 User manual

TriStar
TriStar AC-5517 User manual

TriStar
TriStar AT-5464 User manual

TriStar
TriStar AC 5670 User manual
TriStar
TriStar AC-5552 User manual

TriStar
TriStar AC-5474 User manual
TriStar
TriStar AC-5474 User manual