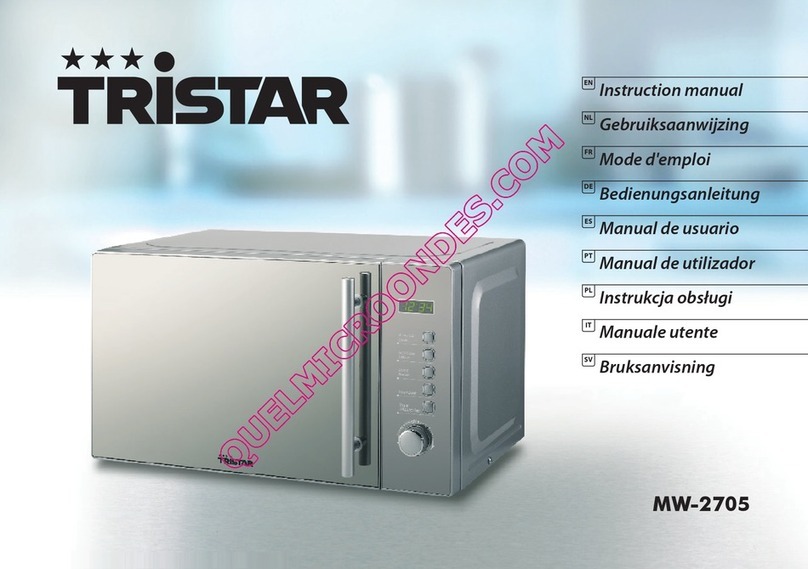
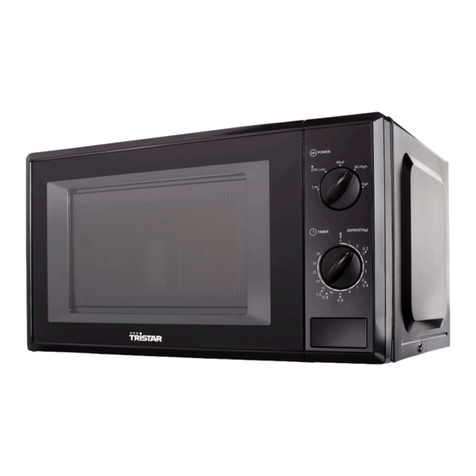
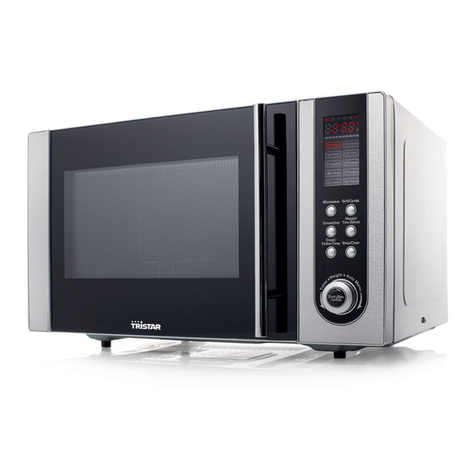
TriStar MW-2705 User manual

EN
NL
FR
DE
ES
PT
PL
IT
CS
SV
SK
Instruction manual
Gebruiksaanwijzing
Mode d'emploi
Bedienungsanleitung
Manual de usuario
Manual de utilizador
Instrukcja obsługi
Manuale utente
Návod na použití
Bruksanvisning
Návod na použitie
MW-2705

2

3
EN
Microwave-grill
THE MICROWAVE
A microwave is mainly used for quickly heating, preparing and defrosting food
like vegetables, meat, sh and potatoes. In addition, it is suitable for preparing
ready-to-eat meals or a glass or bottle of (baby)milk. Using the microwave
function will accelerate the defrosting, preparing and heating process.
How does a microwave work?
• The microwave works through electromagnetic microwaves, which
are sent by a high voltage system. These microwaves have a frequency
of 2450MHz and are not ionizing. This means they do not damage
the molecules. The microwaves turn the water within the food into
heat. Besides water, also fat molecules within the food are eective to
transform radiation energy into heat.
• The microwaves are going directly through tableware, which allows the
food to heat up quickly. Vitamins and natural avours will be preserved.
• Because the microwaves remain within the device, the heating is in
some parts more intense than in others. For this reason, the microwave
is generally equipped with a glass turntable. Due to the rotating
motion, the turntable enables the energy to be divided more equally.
IMPORTANT SAFETY INSTRUCTIONS
• To reduce the risk of re, electric shock, injury
to persons or exposure to excessive microwave
oven energy when using your appliance, follow
basic precautions, including the following:
• Liquids and other foods must not be heated in
sealed containers since they are liable to explode.
• It is hazardous for anyone other than a
competent person to carry out any service or
repair operation that involves the removal of a
cover which gives protection against exposure
to microwave energy.
• Only allow children to use the oven without
supervision when adequate instructions have
been given so that the child is able to use the
oven in a safe way and understand the hazards of
improper use.
• Only use utensils suitable for use in microwave
ovens.
• The oven should be cleaned regularly and any
remaining food should be removed.
• Read and follow the specic: "PRECAUTIONS
TO AVOID POSSIBLE EXPOSURE TO EXCESSIVE
MICROWAVE ENERGY".
• When heating food in plastic or paper
containers, keep an eye on the oven due to the
possibility of ignition.
• If smoke is observed, switch o or unplug the
appliance and keep the door closed in order to
stie any ames.
• Do not overcook food.
• Do not use the oven cavity for storage
purposes. Do not store items, such as bread,
cookies, etc. inside the oven.
• Remove wire twist-ties and metal handles from
paper or plastic containers/bags before placing
them in the oven.
• Install or locate this oven only in accordance
with the installation instructions provided.
• Eggs in the shell and whole hard-boiled eggs
should not be heated in microwave ovens
since they may explode, even after microwave
heating has ended.
• Use this appliance only for its intended uses

4
Instruction manual
as described in manual. Do not use corrosive
chemicals or vapors in this appliance. This oven
is especially designed to heat. It is not designed
for industrial or laboratory use.
• If the supply cord is damaged, it must be replaced
by the manufacturer, its service agent or similarly
qualied persons in order to avoid a hazard.
• Do not store or use this appliance outdoors.
• Do not use this oven near water, in a wet
basement or near a swimming pool.
• The temperature of accessible surfaces may
be high when the appliance is operating. The
surfaces are liable to get hot during use. Keep
cord away from heated surface, and do not
cover any events on the oven.
• Do not let cord hang over edge of table or counter.
• Failure to maintain the oven in a clean
condition could lead to deterioration of
the surface that could adversely aect the
life of the appliance and possibly result in a
hazardous situation.
• The contents of feeding bottles and baby
food jars shall be stirred or shaken and the
temperature checked before consumption, in
order to avoid burns.
• Microwave heating of beverages can result in
delayed eruptive boiling, therefore care must
be taken when handling the container.
• The appliance is not intended for use by
persons (including children) with reduced
physical , sensory or mental capabilities, or
lack of experience and knowledge, unless they
have been given supervision or instruction
concerning use of the appliance by a person
responsible for their safety.
• Children should be supervised to ensure that
they do not play with the appliance.
• The appliances are not intended to be
operated by means of an external timer or
separate remote-control system.
• Accessible parts may become hot during use.
Young children should be kept away. Steam
cleaner may not be used for cleaning.
• Do not use harsh abrasive cleaners or sharp
metal scrapers to clean the oven door glass
since they can scratch the surface, which may
result in shattering of the glass.
• The rear surface of appliance shall be placed
against a wall.
• Never use the microwave without the turntable
shaft, turntable ring assembly and the glass
turntable.
• Make sure food and containers of food are
always placed on the glass tray for cooking.
• The appliance can be used by children aged
from 8 years and above and persons with
reduced physical, sensory or mental capabilities
or lack of experience and knowledge if they
have been given supervision or instruction
concerning use of the appliance in a safe way
and understand the hazards involved. Children
shall not play with the appliance. Cleaning and
user maintenance shall not be made by children
unless they are older than 8 and supervised.
5
EN
• Keep the appliance and its cord out of reach of
children less than 8 years.
• If smoke s emitted, switch o or unplug the
appliance and keep the door closed in order to
stie any ames.
• This appliance is intended to be used in
household and similar applications such as:
a. Sta kitchen areas in shops, oces and other
working environments.
b. By clients in hotels, motels and other residential
type environments.
c. Bed and breakfast type environments
d. Farm houses
• Accessible parts may become hot during use.
Young children should be kept away.
• Steam cleaner is not to be used.
• During use the appliance becomes hot. Care
should be taken to avoid touching heating
elements inside the oven.
• Only use the temperature probe recommended
for this oven.(for ovens provided with a facility
to use a temperature-sensing probe.)
• WARNING: The appliance and its accessible
parts become hot during use. Care should be
taken to avoid touching heating elements.
Children less than 8 years of age shall be kept
away unless continuously supervised.
• The microwave oven must be operated with
the decorative door open. (for ovens with a
decorative door.)
• Surface may get hot during use.
Precautions to avoid possible exposure to excessive
microwave energy
• Do not attempt to operate this oven with the
door open since this can result in harmful
exposure to microwave energy. It is important
not to break or tamper with the safety interlocks.
• Do not place any object between the oven
front face and the door or allow soil or cleaner
residue to accumulate on sealing surfaces.
• If the door or door seals are damaged, the oven
must not be operated until it has been repaired
by a competent person.
• If the apparatus is not maintained in a
good state of cleanliness, its surface could
be degraded and aect the lifespan of the
apparatus and lead to a dangerous situation.
To reduce the risk of injury to persons grounding installation
• Touching some of the internal components can
cause serious personal injury or death. Do not
disassemble this appliance.
• Electric Shock Hazard Improper use of the
grounding can result in electric shock. Do not
plug into an outlet until appliance is properly
installed and grounded.
• Consult a qualied electrician or serviceman if
the grounding instructions are not completely
understood or if doubt exists as to whether
the appliance is properly grounded. If it is
necessary to use an extension cord , use only a
3-wire extension cord.
• A short power-supply cord is provided to
reduce the risks resulting from becoming
Microwave-grill

6
1
5
6
7
7
234
8
entangled in or tripping over a longer cord.
• If a long cord set or extension cord is used
the marked electrical rating of the cord set or
extension cord should be at least as great as
the electrical rating of the appliance.
• The long cord should be arranged so that it
will not drape over the counter top or tabletop
where it can be pulled on by children or
tripped over unintentionally.
Which materials are not suitable for placing in the
microwave?
Not all materials can be placed in a microwave.
Below shows which materials are not suitable:
• Cookware made of porcelain and ceramics
• Non-heat-resistant bowls
• Metal bowls
• Metal racks (except the supplied rack)
• Aluminium foil
• Flammable material such as plastic, paper,
plastic, textile, wood, owers or other
ammable material.
• The packaging of sealed packaged foods can
easily burst, which may cause re.
• Keep warm packages. These can be ignited.
• Metal locking strips
• Pillows lled with grain, cherry pits or gel.
• Sealed bowls and eggs. Eggs may burst due to
the pressure.
If you’re not sure, you can test the material in question
by following the procedure below.
1.Fill a microwave-safe container with 1 cup of cold
water (250ml) along with the utensil in question.
2.Cook on maximum power for 1 minute.
3.Carefully feel the utensil. If the empty utensil is
warm, do not use it for
microwave cooking.
4.Do not exceed 1 minute cooking time.
PARTS DESCRIPTION
1. Control panel
2. Turntable shaft
3. Turntable ring assembly
4. Turntable Glass tray
5. Observation window
6. Door assembly
7. Safety interlock system
8. Grill rack
Instruction manual

7
EN
INSTALLATION AND CONNECTION
• Remove all packing material and accessories. Examine the oven for any
damage such as dents or a broken door. Do not install if the oven is
damaged.
• Remove any protective lm, found on the microwave oven cabinet surface.
• Do not remove the light brown Mica cover that is attached to the oven
cavity to protect the magnetron.
• Select a level surface that provide enough open space for the intake
and/or outlet vents.
• The minimum installation height is 85cm.
• The rear surface of appliance shall be placed against a wall. Leave a
minimum clearance of 30 cm above the oven, a minimum clearance of
20 cm is required between the oven and any adjacent walls.
• Do not remove the legs from the bottom of the oven.
• Blocking the intake and/or outlet openings can damage the oven.
• Place the oven as far away from radios and TV as possible. Operation of
microwave oven may cause interference to your radio or TV reception.
• Plug your oven into a standard household outlet. Be sure the voltage and the
frequency is the same as the voltage and the frequency on the rating label.
• Do not install the oven over a stove or other heat-producing appliance.
If installed near or over a heat source, the oven could be damaged and
the warranty would be void.
OPERATION INSTRUCTION
This microwave oven uses modern electronic control to adjust cooking
parameters to meet your needs better for cooking.
1. Clock Setting
When the microwave oven is electried,the oven will display "0:00", buzzer
will ring once.
1. Press "CLOCK/PRE-SET", the hour gure ash;
2. Turn " " to adjust the hour gures, the input time should be within 0--23.
3. Press "CLOCK/PRE-SET", the minute gures will ash.
4. Turn " " to adjust the minute gures, the input time should be within 0--59.
5. Press "CLOCK/PRE-SET" to nish clock setting. ":" will ash.
Note:
1. If the clock is not set, it would not function when powered.
2. During the process of clock setting, if no oppreation in 1 minute, the
oven will go back to the previous status automatically.
2. Microwave Cooking
1. Press the "Micro./Grill/Combi." key once, and "P100" display.
2. Press "Micro./Grill/Combi." for times or turn " " to select the
microwave power "P100", "P80", "P50", "P30", "P10" will display in order.
3. Press "START/+30SEC./CONFIRM " to conrm.
4. Turn " " to adjust the cooking time. (The time setting should be
0:05- 95:00.)
5. Press "START/+30SEC./CONFIRM" to start cooking.
NOTE: The step quantities for the adjustment time of the coding switch
are as followed.
0---1 min : 5 seconds
1---5 min : 10 seconds
5---10 min : 30 seconds
10---30 min : 1 minute
30---95 min : 5 minutes
Microwave-grill

8
Microwave Power Chart
Microwave Power 100% 80% 50% 30% 10%
Display P100 P80 P50 P30 P10
3. Grill Cooking
1. Press the "Micro./Grill/Combi." key once, and "P100" display.
2. Press " Micro./Grill/Combi." for times or turn " " to select the grill power .
3. Press "START/+30SEC./CONFIRM " to conrm when the LED display "G".
4. Turn " " to adjust the grill time. (The time setting should be 0:05- 95:00.)
5. Press "START/+30SEC./CONFIRM" to start cooking.
Note: If half the grill time passes, the oven sounds twice, and this is
normal. In order to have a better eect of grilling food, you should turn the
food over, close the door, and then press" START/+30 SEC/CONFIRM" to
continue cooking. If no operation, it will continue working.
4. Combination Cooking
1. Press the "Micro./Grill/Combi." key once, and "P100" display.
2. Press "Micro./Grill/Combi." for times or turn " " to select the
combination power "C-1(55%microwave+45%grill)" and
"C-2(36%microwave+64%grill)" will display in order.
3. Press "START/+30SEC./CONFIRM" to conrm.
4. Turn " " to adjust the cooking time. (The time setting should be
0:05- 95:00.)
5. Press "START/+30SEC./CONFIRM" to start cooking.
5. Speedy Cooking
1. In waiting state, press "START/+30SEC./CONFIRM" key to cook with
100% power level for 30 seconds. Each press on the same key can
increase 30 seconds. The maximum cooking time is 95 minutes.
2. During the microwave, grill and combination cooking and time defrost
process, press "START/+30SEC./CONFIRM" to increase the cooking time.
3. In waiting states, turn " " left to choose the cooking time directly. After
choosing the time, press "START/+30SEC./CONFIRM" to start cooking.
The microwave power is 100%.
Note: Under the states of auto menu and weight defrost, cooking time
cannot be increased by pressing "START/+30SEC./CONFIRM"
6. Defrost By Weight
1. Press "W.T./TIME DEFROST" once, the screen will display "dEF1".
2. Turn " " to select the food weight. The range of weight is 100-2000g.
3. Press "START/+30SEC./CONFIRM" key to start defrosting.
7. Defrost By Time
1. Press "W.T./TIME DEFROST" twice, the screen will display "dEF2".
2. Turn " " to select the cooking time.
3. Press "START/+30SEC./CONFIRM " key to start defrosting.
Note: The defrost power is P30. And it will not change.
8. Multi-Stage Cooking
Two stages can be maximumly set. If one stages is defrosting, it should be
put in the rst stage. The buzzer will ring once after each stage and the
next stage will begin.
Note: Auto menu cannot be set as one of the multi-stage.
Example: if you want to defrost the food for 5 minutes, then to cook with
80% microwave power for 7 minutes. The steps are as following:
1. Press "W.T./TIME DEFROST" twice, the screen will display "dEF2";
2. Turn " " to adjust the defrost time of 5 minutes;
3. Press "Micro./Grill/Combi." once;
4. Turn " " to choose 80% microwave power till "P80" display;
5. Press "START/+30SEC./CONFIRM" to conrm;
6. Turn " " to adjust the cooking time of 7 minutes;
7. Press "START/+30SEC./CONFIRM" to start cooking.
9. Pre-set Function
1. Set the clock rst. (Consult the instruction of clock setting.)
Instruction manual

9
EN
2. Input the cooking program. Two stages can be set at most. Defrosting
should not be set in preset function.
Example: if you want to cook with 80% microwave power for 7 minutes.
a. Press "Micro./Grill/Combi." once;
b. Turn " " to choose 80% microwave power till "P80" display;
c. Press "START/+30SEC./CONFIRM" to conrm;
d. Turn " " to adjust the cooking time of 7 minutes;
After the above steps, please do not press " START/+30SEC./CONFIRM ".
Then do as following:
3. Press "CLOCK/PRE-SET". The hour gures ash;
4. Turn " " to adjust the hour gures, the input time should be within 0--23.
5. Press "CLOCK/PRE-SET", the minute gures will ash.
6. Turn " " to adjust the minute gures, the input time should be within 0--59.
7. Press "START/+30SEC./CONFIRM" to nish setting. ":" will light, buzzer
will ring twice when the time arrives, then cooking will start automatically.
Note: Clock must be set rst. Otherwise, pre-set function will not work.
10. Auto Menu
1. In waiting states, turn " " right to choose the menu from "A-1" to "A-8";
2. Press "START/+30SEC./CONFIRM " to conrm the menu you choose;
3. Turn " " to choose th food weight;
4. Press "START/+30SEC./CONFIRM" to start cooking;
5. After cooking nish, the buzzer sounds ve times.
Auto Menu
Menu Weight(g) Display Power
A-1 REHEAT
200 200
100 %
400 400
600 600
Menu Weight(g) Display Power
A-2 VEGETABLE
200 200
100 %300 300
400 400
A-3 FISH
250 250
80 %
350 350
450 450
A-4 MEAT
250 250
100 %
350 350
450 450
A-5 PASTA 50 (with water 450 ml) 50 80 %
100 (with water 800 ml) 100
A-6 POTATO
200 200
100 %400 400
600 600
A-7
PIZZA 200 200 100 %
400 400
A-8
SOUP 200 200 80 %
400 400
11. Lock-out Function for Children
• Lock: In waiting state, press "STOP/CLEAR" for 3 seconds, there will be a long
"beep" denoting entering the children-lock state and screen will display " ".
• Lock quitting: In locked state, press "STOP/CLEAR" for 3 seconds, there
will be a long "beep" denoting that the lock is released.
Microwave-grill

10
12. Inquiring Function
1. In cooking states of microwave,grill and combination, press " Micro./
Grill/Combi.", the current power will be displayed for 3 seconds.
2. In pre-set state, press " CLOCK/PRE-SET " to inquire the time for delay
start cooking. The pre-set time will ash for 3 seconds, then the oven
will turn back to the clock display.
3. During cooking state, press "CLOCK/PRE-SET" to check the current time.
It will be displayed for 3 seconds.
13. Specication
1. The buzzer will sound once when turning the knob at the beginning;
2. "START/+30SEC./CONFIRM" must be pressed to continue cooking if the
door is opened during cooking;
3. Once the cooking programme has been set , "START/+30SEC./CONFIRM"
is not pressed in 1 minute. The current time will be displayed. The
setting will be cancelled.
4. The buzzer sounds once by ecient press, inecient press will be no
response.
5. The buzzer will sound ve times to remind you when cooking is nished.
CLEANING
• Before cleaning, unplug the appliance and wait for the appliance to
cool down.
• Clean the inside of the appliance with a damp cloth. Never use harsh and
abrasive cleaners, scouring pad or steel wool, which damages the device.
• Clean the accessories in the usual way in soapy water.
• The door frame and seal and neighboring parts must be cleaned
carefully with a damp cloth when they are dirty.
• Never immerse the device in water or any other liquid. The device in
not dishwasher proof.
• Do not use harsh abrasive cleaners or sharp metal scrapers to clean the
oven door glass since they can scratch the surface, which may result in
shattering of the glass.
TROUBLE SHOOTING
Normal
Microwave oven interfering
TV reception.
Radio and TV reception may be interfered
when microwave oven operating. It
is similar to the interference of small
electrical appliances, like mixer, vacuum
cleaner, and electric fan. This is normal.
Dim oven light. In low power microwave cooking, oven
light may become dim. This is normal.
Steam accumulating on door,
hot air out of vents.
In cooking, steam may come out of food.
Most will get out from vents. But some
may accumulate on cool place like oven
door. This is normal.
Oven started accidentally
with no food in.
It is forbidden to run the unit without any
food inside. It is very dangerous.
GUARANTEE
• Tristar is not liable for damages occurred through:
o In case the appliance has fallen.
o In case the appliance has been technically changed by the owner or
another third party.
o In case of improper use of the appliance.
o In case of normal wear of the appliance.
• By executing repairs the original warranty period of 2 years will not
be extended, nor the right to a complied new warranty. This warranty
Instruction manual

11
EN
is only legal on European soil. This warranty does not overrule the
European directive 1944/44CE.
• Always keep your receipt, without this receipt you can not claim any
form of warranty whatsoever.
• Damage caused by not following the instruction manual will lead to a void
of warranty, if this results in consequential damages Tristar will not be liable.
• Tristar will not be liable for material damage or personal injury caused
by improper use or if the safety instructions are not properly executed.
• Cleaning, as mentioned in this manual, is the only necessary
maintenance for this appliance.
• When the appliance should be repaired, make sure that this will be
performed by an authorized company.
• This appliance may not be amended or changed.
• If problems arise during the 2 years from the date of purchase, which
are covered by the factory warranty, you can go back to the point of
purchase to replace it for a new one.
• For questions or compliances please contact your retailer“point of purchase.”
• This appliance is covered with a 24 month guarantee starting on the
date of purchase (receipt).
• Only material or manufacturing defects are included in this warranty.
• If you wish to make a claim please return the entire machine in the
original packaging to your dealer together with the receipt.
• Damage to accessories does not mean automatic free replacement of
the whole appliance. In such cases please contact our hotline. Broken
glass or breakage of plastic parts are always subject to a charge.
• Defects to consumables or parts subject to wearing, as well as cleaning,
maintenance or the replacement of these parts are not covered by the
guarantee and hence are to be paid!
• The guarantee lapses in case of unauthorized tampering.
• After the expiry of the guarantee repairs can be carried by the competent
dealer or repair service against the payment of the ensuing costs.
GUIDELINES FOR PROTECTION OF THE
ENVIRONMENT
This appliance should not be put into the domestic garbage at the end
of its durability, but must be oered at a central point for the recycling of electric
and electronic domestic appliances.This symbol on the appliance, instruction
manual and packaging puts your attention to this important issue.The materials
used in this appliance can be recycled. By recycling used domestic appliances
you contribute an important push to the protection of our environment. Ask
your local authorities for information regarding the point of recollection.
Packaging
The packaging is 100% recyclable, return the packaging separated.
Product
This device is equipped with a mark according to the European Directive
2002/96/EC on Waste Electrical and Electronic Equipment (WEEE). By
ensuring that this product will be correctly processed into waste, it will
help prevent possible negative consequences for the environment and
human health.
EC declaration of conformity
This device is designed, manufactured and marketed in accordance with
the safety objectives of the LowVoltage Directive "No 2006/95/EC", the
protection requirements of the EMC Directive 2004/108/EC "Electromagnetic
Compatibility" and the requirement of Directive 93/68/EEC.
Microwave-grill

12
Gebruiksaanwijzing
DE MAGNETRON
De magnetron wordt gebruikt voor het snel opwarmen, bereiden en ontdooien
van etenswaren als groenten, vlees, vis en aardappeltjes. Ook kan er bijvoorbeeld
een kant-en-klaar maaltijd of een glas (babyesje) melk worden bereid. Een
magnetron versnelt het ontdooien, bereiden en opwarmen van voedsel.
Magnetrons zijn gebruiksvriendelijk, goedkoop en geschikt voor iedereen.
Hoe werkt een magnetron?
• Een magnetron werkt door middel van elektromagnetische
microgolven die worden uitgezonden door een hoogvoltagesysteem.
Deze microgolven hebben een frequentie van 2450MHz en zijn niet
ioniserend. Dat wil zeggen dat ze moleculen niet beschadigen. De
microgolven zetten vervolgens het water dat in het voedsel aanwezig
is om in warmte. Naast water zijn ook de vetmoleculen in het voedsel
eectief voor het omzetten van de stralingsenergie in warmte.
• De microgolven gaan door het servies heen, waardoor het eten snel
warm wordt. Vitaminen en natuurlijke smaakstoen blijven bewaard bij
het bereiden van etenswaren in de magnetron.
• Omdat de golven binnen de ruimte van de magnetron blijven, is de
opwarming op sommige plekken heviger dan op andere. Om deze
reden is de magnetron meestal voorzien van een draaiplateau, zodat
de energie gelijkmatiger over alle delen van het op te warmen voedsel
verdeeld wordt. De energie van de microgolven wordt verdeeld door
de draaiende beweging van het draaiplateau.
BELANGRIJKE VEILIGHEIDSINSTRUCTIES
• Volg de veiligheidsinstructies om het risico van
brand, een elektrische schok, persoonlijk letsel
of blootstelling aan te hoge magnetronstraling
bij het gebruik van uw apparaat te vermijden.
• Vloeistoen en andere etenswaren mogen niet
worden verwarmd in verzegelde containers
omdat deze kunnen ontploen.
• Het is gevaarlijk voor iemand anders dan een
bevoegd persoon om onderhoud of reparaties
uit te voeren en de behuizing te verwijderen. De
behuizing biedt bescherming tegen blootstellen
aan microgolven.
• Laat kinderen de magnetron alleen zonder
toezicht gebruiken als ze voldoende
aanwijzingen hebben gekregen, zodat het
kind in staat is om de magnetron veilig te
gebruiken en de gevaren van onjuist gebruik
kan begrijpen.
• Gebruik alleen keukengerei dat geschikt is voor
gebruik in de magnetron.
• De magnetron moet regelmatig worden
schoongemaakt en achtergebleven
voedselresten moeten worden verwijderd.
• Lees de onderstaande aanwijzingen door
en volg deze op: "voorzorgsmaatregelen
om mogelijke blootstelling aan overmatige
microgolfenergie te voorkomen."
• Let op de magnetron bij het verwarmen van
voedsel in plastic of papieren containers, de
mogelijkheid bestaat dat het materiaal vlam vat.
• Als er rook wordt waargenomen, het apparaat
uitschakelen en de stekker uit het stopcontact
verwijderen. De deur gesloten houden om de
vlam te smoren.
• Voedsel niet te lang doorkoken.
• De magnetron niet gebruiken om voedsel te
bewaren. Bewaar geen voedsel zoals brood,

13
EN
Magnetron met Grillfunctie
koekjes, enz. in de magnetron.
• Verwijder metalen sluitingen en metalen
handgrepen van papieren of plastic containers/
zakken voordat u ze in de magnetron plaatst.
• Installeer deze magnetron alleen in
overeenstemming met de meegeleverde
installatie-instructies.
• Eieren in de schaal en hardgekookte eieren
mogen niet in de magnetron worden
opgewarmd, omdat ze kunnen ontploen, zelfs
nadat ze zijn verwarmd in de magnetron.
• Gebruik dit apparaat alleen voor het beoogde
gebruik zoals beschreven is in de handleiding.
Gebruik geen bijtende chemicaliën of gassen
in dit apparaat. Deze magnetron is speciaal
ontworpen om voedsel te verwarmen. Het is
niet ontworpen voor industrieel gebruik of
gebruik in een laboratorium.
• Als het netsnoer beschadigd is, moet het
worden vervangen door de fabrikant zelf, zijn
dealer of andere gekwaliceerde personen om
gevaar te vermijden.
• Bewaar of gebruik dit apparaat niet buiten.
• Gebruik deze magnetron niet in de buurt van
water, in een vochtige kelder of bij een zwembad.
• De temperatuur van aanraakbare oppervlakken
kan hoog zijn als het apparaat wordt
gebruikt. Houd het snoer uit de buurt van
warme oppervlakken en voorkom dat de
ventilatieopeningen worden afgedekt.
• Laat het snoer niet over de rand van tafel of het
aanrecht hangen.
• Als de magnetron niet schoon wordt
gehouden, kan dit leiden tot aantasting van
de behuizing wat een nadelige invloed kan
hebben op de levensduur van het apparaat en
kan resulteren in gevaarlijke situaties.
• De inhoud van zuigessen en potjes
babyvoeding moet worden geroerd of geschud
en controleer de temperatuur vóór consumptie
om brandwonden te voorkomen.
• Verwarmen van dranken in de magnetron
kan leiden tot vertraagde kookexplosie dus
voorzichtigheid is geboden bij het uitnemen
van de vloeistofhouder.
• Het apparaat is niet bedoeld voor gebruik door
personen (inclusief kinderen) met verminderde
lichamelijke, zintuiglijke of geestelijke vermogens,
of een gebrek aan ervaring en kennis, tenzij
ze onder toezicht staan of instructies hebben
gekregen over het gebruik van het apparaat door
een persoon die verantwoordelijk is voor hun
veiligheid.
• Volwassen moeten voorkomen dat kinderen
zonder toezicht met het apparaat gaan spelen.
• Het apparaat is niet bedoeld om te worden
bediend door middel van een aparte timer of
afstandsbedieningsysteem.
• Toegankelijke onderdelen kunnen heet worden
tijdens gebruik. Jonge kinderen uit de buurt
houden. Geen stoomreiniger gebruiken voor
het reinigen.
• Gebruik geen agressieve schuurmiddelen of
scherpe metalen schrapers om het glas van de

14
Gebruiksaanwijzing
magnetrondeur schoon te maken.
• De achterkant van het apparaat moet tegen
een muur worden geplaatst.
• De magnetron nooit gebruiken zonder de
draaitafel as, draaitafelring en de glazen draaitafel.
• Zorg ervoor dat voedsel en verpakkingen
van voedingsmiddelen altijd op het glazen
draaiplateau voor het koken worden geplaatst.
• Het toestel kan door kinderen in de leeftijd van
8 jaar en ouder en personen met verminderde
lichamelijke, zintuiglijke of geestelijke
vermogens of gebrek aan ervaring en kennis,
worden gebruikt als ze onder toezicht staan
of instructie over het veilig gebruik van het
toestel hebben gekregen en de mogelijke
gevaren begrijpen. Kinderen mogen niet met
het apparaat spelen. Reiniging en onderhoud
door de gebruiker mogen niet door kinderen
worden uigevoerd, tenzij zij ouder dan 8 jaar
zijn en onder toezicht staan.
• Houd het toestel en het netsnoer buiten bereik
van kinderen jonger dan 8 jaar.
• Als het toestel rook afgeeft, schakel het uit of trek
de stekker uit het stopcontact en houd de deur
dicht om eventuele vlammen te doven.
• Dit apparaat is bedoeld om in huishoudelijke
en soortgelijke toepassingen te worden
gebruikt zoals:
oPersoneelskeukens in winkels, kantoren en
andere werkomgevingen.
oDoor klanten in hotels, motels en andere type
residentiële omgevingen.
oBed & breakfast gelegenheden
oBoerderijen
• De toegankelijke delen kunnen tijdens het
gebruik heet worden. Jonge kinderen moeten
uit de buurt worden gehouden.
• Een stoomreiniger mag niet worden gebruikt.
• Tijdens het gebruik wordt het apparaat heet.
Voorzichtigheid is geboden om het aanraken
van de verwarmingselementen in de oven te
voorkomen.
• Gebruik alleen de temperatuursonde
aanbevolen voor deze oven (voor ovens
voorzien van een inrichting om een
temperatuursonde te gebruiken).
• WAARSCHUWING: Het toestel en de
toegankelijke delen worden heet tijdens het
gebruik. Voorzichtigheid is geboden om het
aanraken van de verwarmingselementen te
voorkomen. Kinderen jonger dan 8 jaar moeten
uit de buurt worden gehouden tenzij zij onder
voortdurend toezicht staan.
• De magnetron moet worden bediend met de
decoratieve deur open. (voor ovens met een
decoratieve deur.)
• Het oppervlak kan tijdens het gebruik heet
worden.
Voorzorgsmaatregelen om mogelijke blootstelling aan
bovenmatige microgolfenergie te voorkomen
• Probeer niet om deze magnetron te bedienen
met de deur open, omdat dit kan leiden tot
schadelijke blootstelling aan microstraling. Het

15
EN
is belangrijk dat het veiligheidslot niet wordt
beschadigd of gedemonteerd.
• Plaats geen voorwerpen tussen de voorkant
van de magnetron en de deur en laat geen vuil
of resten van reinigingsmiddelen ophopen op
de afdichtingen.
• Als de deur of de afdichtingen beschadigd zijn,
mag de magnetron niet worden gebruikt totdat
het is gerepareerd door een bevoegd technicus.
• Als het apparaat niet in schone conditie
wordt gehouden, kan het oppervlak worden
aangetast, de levensduur beperken en
gevaarlijke situatie veroorzaken.
Het apparaat om veiligheidsredenen op een geaard
stopcontact aansluiten
• Het aanraken van interne onderdelen
kan ernstige verwondingen of de dood
veroorzaken. Het apparaat niet demonteren.
• Gevaar voor elektrische schokken. Onjuist
gebruik van de aarding kan leiden tot elektrische
schokken. Het apparaat niet aanzetten voordat
het correct is geïnstalleerd en geaard.
• Raadpleeg een elektricien of servicemonteur
als de instructies voor aarding niet helemaal
duidelijk zijn of als er twijfel bestaat over de
vraag of het apparaat correct is geaard. Indien
een verlengsnoer noodzakelijk is, uitsluitend
een drie-aderige snoer gebruiken.
• Een korte stroomkabel is meegeleverd om
de risico's als gevolg van verstrikt raken of
struikelen over een langer snoer te verminderen.
• Als er een lang snoer of verlengsnoer wordt
gebruikt, moet de aangegeven elektrische
spanning op het snoer of het verlengsnoer
minimaal gelijk zijn aan de spanning van het
apparaat.
• Het snoer moet zodanig worden gelegd dat
het niet over het werkblad of tafel ligt waar
kinderen er aan kunnen trekken of waar er
gemakkelijk over gestruikeld kan worden.
Welke materialen zijn niet geschikt voor de magnetron?
Niet alle materialen kunnen in een magnetron
worden gebruikt. De hieronder getoonde
materialen zijn niet geschikt:
• Kookgerei gemaakt van porselein en keramiek
• Niet-hittebestendige schalen
• Metalen schalen
• Metalen rekken (met uitzondering van het
bijgeleverde rek)
• Aluminium folie
• Ontvlambaar materiaal zoals plastic, papier, textiel,
hout, bloemen of andere brandbare materialen.
• De verpakking van verzegelde levensmiddelen kan
gemakkelijk barsten, wat brand kan veroorzaken.
• Verpakkingen die voedsel warm houden. Deze
kunnen gaan branden.
• Metalen vergrendelaars
• Kussentjes gevuld met graan, kersenpitten of gel.
• Gesloten kommen en eieren. Eieren kunnen
barsten door de druk.
Magnetron met Grillfunctie

16
Gebruiksaanwijzing
1
5
6
7
7
234
8
Als u niet zeker bent, kunt u het materiaal in kwestie
testen aan de hand van de onderstaande procedure.
1.Vul een magnetronbestendige houder met
1 kopje koud water (250ml)
samen met het kookgerei in kwestie.
2.Kook op maximaal vermogen gedurende 1 minuut.
3.Raak voorzicht aan. Als het kookgerei warm is,
gebruik het dan niet in de magnetron.
4.De kooktijd van 1 minuut niet overschrijden.
BESCHRIJVING VAN ONDERDELEN
1. Bedieningspaneel
2. As van draaiplateau
3. Ring van draaiplateau
4. Glazen draaiplateau
5. Kijkvenster
6. Deur
7. Veiligheidssysteem
8. Rooster
INSTALLEREN EN AANSLUITEN
• Verwijder al het verpakkingsmateriaal en accessoires. Controleer de
magnetron voor mogelijke schade zoals deuken of een kapotte deur.
Niet installeren als de magnetron is beschadigd.
• Verwijder eventuele beschermfolie aangebracht op de behuizing van
de magnetron.
• De lichtbruine Mica-kap, aangebracht op de binnenruimte van de
magnetron om de magnetron te bescherming, niet verwijderen.
• Kies een vlakke ondergrond die voldoende open ruimte heeft voor de
ventilatieopeningen.
• De minimale installatiehoogte is 85 cm.
• De achterzijde van het apparaat moet tegen een muur worden
geplaatst. Laat een minimale afstand van 30 cm boven de oven vrij en
een minimale vrije ruimte van 20 cm tussen de oven en aangrenzende
muren is vereist.
• Verwijder de pootjes aan de onderkant van de oven niet.
• Het blokkeren van de inlaat- en/of uitlaatopeningen kan de magnetron
beschadigen.
• Plaats de magnetron zo ver mogelijk uit de buurt van radio en TV.
Gebruik van de magnetron kan storingen veroorzaken bij radio- of
TV-ontvangst.

17
EN
• Sluit uw magnetron aan op een standaard stopcontact. Zorg ervoor
dat de spanning en de frequentie hetzelfde zijn als de spanning en de
frequentie op het typeplaatje.
• Plaats de magnetron niet op een kachel of ander warmteopwekkend
apparaat. Als het apparaat vlakbij of boven een warmtebron wordt geplaatst,
kan de magnetron worden beschadigd en de garantie zou vervallen.
GEBRUIKSAANWIJZING
Deze magnetron maakt gebruik van moderne elektronische bediening
voor het aanpassen van de kookparameters, waardoor in uw behoeften
voor beter koken wordt voorzien.
1. Instellen van de klok
Wanneer de magnetron van stroom wordt voorzien, zal de oven "0:00”
weergeven en zoemt de zoemer één keer.
1. Druk“KLOK/VOORINST”; de urenaanduiding knippert;
2. Draai de knop " " om het juiste uur in te stellen. De ingevoerde tijd
dient in het bereik van 0--23 te zijn.
3. Druk“KLOK/VOORINST”, de minutenaanduiding knippert.
4. Draai de knop " " om het juiste aantal minuten in te stellen, de
ingevoerde tijd dient in het bereik van 0--59 te zijn.
5. Druk“KLOK/VOORINST”om het instellen van de klok te voltooien. ":" knippert.
Opmerking:
1. Als de klok niet is ingesteld, werkt hij niet als hij wordt ingeschakeld.
2. Als er tijdens het instellen van de klok gedurende 1 minuut geen toets
wordt gedrukt, keert de oven automatisch terug naar de vorige stand.
2. Bereiden met de magnetron
1. Druk eenmaal de toets“Micro./Grill/Combi.”, er wordt "P100" weergegeven.
2. Druk de toets "Micro./Grill/Combi." verschillende keren of draai de knop
" " om het vermogen van de magnetron te kiezen. Achtereenvolgens
worden "P100", "P80", "P50", "P30", "P10" weergegeven.
3. Druk de toets“START/+30SEC./BEVESTIG" om de invoer te bevestigen.
4. Draai de knop “ " om de bereidingstijd in te stellen. (De tijdinstelling
dient binnen het bereik van 0:05- 95:00 te zijn.)
5. Druk de toets“START/+30SEC./BEVESTIG" om het bereiden te starten.
Opmerking: de stappen van de instelknop voor het aanpassen van de
kooktijd zijn als volgt:
0---1 min : 5 seconden
1---5 min : 10 seconden
5---10 min : 30 seconden
10---30 min : 1 minuut
30---95 min : 5 minuten
Vermogenstabel magnetron
Vermogen magnetron 100% 80% 50% 30% 10%
Weergave op het scherm P100 P80 P50 P30 P10
3. Bereiden met de grill
1. Druk eenmaal de toets“Micro./Grill/Combi.”, er wordt "P100" weergegeven.
2. Druk verschillende keren“Micro./Grill/Combi." of draai de knop " " om
het vermogen voor de grill in te stellen.
3. Druk zodra“G”wordt weergegeven de toets“START/+30SEC./BEVESTIG"
om de invoer te bevestigen.
4. Draai“ “ om de grilltijd in te stellen. (De tijdinstelling dient binnen het
bereik van 0:05- 95:00 te zijn.)
5. Druk de toets“START/+30SEC./BEVESTIG" om het bereiden te starten.
Opmerking: Als de helft van de grilltijd is verstreken, zoemt de oven twee
Magnetron met Grillfunctie

18
Gebruiksaanwijzing
keer. Dit is normaal. Om een beter resultaat te krijgen bij het grillen van
levensmiddelen, dienen de levensmiddelen om te draaien. Sluit daarna de
deur en druk“START/+30SEC./BEVESTIG" om het bereiden te vervolgen.
Als er geen toetsen worden bediend, blijft hij werken.
4. Bereiden met de combinatiestand
1. Druk eenmaal de toets“Micro./Grill/Combi.”, er wordt "P100" weergegeven.
2. Druk verschillende keren“Micro./Grill/Combi." of draai de knop " " om
het vermogen voor de combinatie in te stellen. Achtereenvolgens
worden“C-1 (55% magnetron + 45% grill)" en“C-2 (36% magnetron +
64% grill)" weergegeven.
3. Druk de toets“START/+30SEC./BEVESTIG" om de invoer te bevestigen.
4. Draai de knop “ " om de bereidingstijd in te stellen. (De tijdinstelling
dient binnen het bereik van 0:05- 95:00 te zijn.)
5. Druk de toets“START/+30SEC./BEVESTIG" om het bereiden te starten.
5. Snel bereiden
1. Druk in de wachtstand de toets "START/+30SEC./BEVESTIG" om
gedurende 30 seconden op 100% vermogen te bereiden. Iedere
druk op de toets verlengt de tijdsduur met 30 seconden. De maximale
bereidingstijd is 95 minuten.
2. Druk tijdens bereiding met magnetron, grill of de combinatie en
tijdens ontdooien op tijd de knop“START/+30SEC./BEVESTIG" om de
bereidingstijd te verlengen.
3. Draai in de wachtstand de knop“ " naar links om direct de bereidingstijd
in te stellen. Druk na het instellen van de tijd "START/+30SEC./BEVESTIG"
om de bereiding te starten. Het vermogen van de magnetron is 100%.
Opmerking: In de standen auto menu en ontdooien op gewicht
kan de bereidingstijd niet worden verlengd door het drukken van
"START/+30SEC./BEVESTIG”
6. Ontdooien op gewicht
1. Druk eenmaal“W.T./TIJD ONTD.”, het scherm geeft "dEF1”weer.
2. Draai de knop “ " om het gewicht van de levensmiddelen in te stellen.
Het gewichtsbereik is 100-2000g.
3. Druk de toets“START/+30SEC./BEVESTIG" om het ontdooien te starten.
7. Ontdooien op tijd
1. Druk eenmaal“W.T./TIJD ONTD.”, het scherm geeft “dEF2” weer.
2. Draai“ " om de bereidingstijd in te stellen.
3) Druk de toets“START/+30SEC./BEVESTIG" om het ontdooien te starten.
Opmerking: Het vermogen voor ontdooien is P30. Dit kan niet worden
gewijzigd.
8. Bereiden in verschillende fasen
Er kunnen maximaal twee fasen worden ingesteld. Als één van de fasen
ontdooien is, dan dient dit de eerste fase te zijn. Na iedere fase klinkt de
zoemer eenmaal en de volgende fase wordt gestart.
Opmerking: Het auto menu kan niet worden ingesteld als onderdeel van
het bereiden in fasen.
Voorbeeld: als u levensmiddelen gedurende 5 minuten wilt ontdooien en
ze vervolgens gedurende 7 minuten met 80% magnetronvermogen wilt
bereiden. De stappen zijn als volgt:
1. Druk eenmaal“W.T./TIJD ONTD.”, het scherm geeft “dEF2” weer;
2. Draai de knop “ " om de ontdooitijd in te stellen op 5 minuten;
3. Druk eenmaal“Micro./Grill/Combi.";
4. Draai de knop “ " totdat "P80" wordt weergegeven, om het
magnetronvermogen in te stellen op 80%;
5. Druk de toets“START/+30SEC./BEVESTIG" om de invoer te bevestigen;
6. Draai de knop “ " om de bereidingstijd in te stellen op 7 minuten;
7. Druk de toets“START/+30SEC./BEVESTIG" om het bereiden te starten.

19
EN
9. Functie voorinstelling
1. Stel eerst de klok in. (Raadpleeg de aanwijzingen voor het instellen van
de klok.)
2. Voer het bereidingsprogramma in. Er kunnen maximaal twee fasen
worden ingesteld. U moet geen ontdooien instellen met de functie
voorinstelling.
Voorbeeld: gedurende 7 minuten met 80% magnetronvermogen wilt bereiden.
a. Druk eenmaal “Micro./Grill/Combi.";
b. Draai de knop “ " totdat“P80”wordt weergegeven, om het
magnetronvermogen in te stellen op 80%;
c. Druk de toets “START/+30SEC./BEVESTIG" om de invoer te bevestigen;
d. Draai de knop “ " om de bereidingstijd in te stellen op 7 minuten;
Druk na de volgende stappen niet op“START/+30SEC./BEVESTIG". Ga
daarna als volgt verder:
3. Druk "KLOK/VOORINST.". De urenaanduiding knippert;
4. Draai de knop " " om het juiste uur in te stellen. De ingevoerde tijd
dient in het bereik van 0--23 te zijn.
5. Druk“KLOK/VOORINST”, de minutenaanduiding knippert.
6. Draai de knop " " om het juiste aantal minuten in te stellen. De
ingevoerde tijd dient in het bereik van 0--59 te zijn.
7. Druk“START/+30SEC./BEVESTIG" om de instelling te voltooien. Er
verschijnt ":”op het scherm, de zoemer zoemt twee keer wanneer de
tijd wordt bereikt, waarna het bereiden automatisch wordt gestart.
Opmerking: De klok moet eerst worden ingesteld. Anders werkt de
functie voorinstelling niet.
10. Auto Menu
1. Draai in de wachtstand de knop“ " naar rechts om te kiezen uit menu
"A-1" tot "A-8";
2. Druk de toets“START/+30SEC./BEVESTIG" om het gekozen menu te
bevestigen;
3. Draai de knop “ " om het gewicht van de levensmiddelen in te stellen;
4. Druk de toets“START/+30SEC./BEVESTIG" om het bereiden te starten;
5. Als de bereiding is voltooid, klinkt de zoemer vijf keer.
Auto Menu
Menu Gewicht (g) Weergave Vermogen
A-1 OPWARMEN
200 200
100 %400 400
600 600
A-2 GROENTEN
200 200
100 %300 300
400 400
A-3 VIS
250 250
80 %350 350
450 450
A-4 VLEES
250 250
100 %350 350
450 450
A-5 PASTA 50 (met 450 ml water) 50 80 %
100 (met 800 ml water) 100
Magnetron met Grillfunctie

20
Gebruiksaanwijzing
Menu Gewicht (g) Weergave Vermogen
A-6
AARDAPPELEN
200 200
100 %400 400
600 600
A-7
PIZZA
200 200 100 %
400 400
A-8
SOEP
200 200 80 %
400 400
11. Kindersluiting
• Blokkeren: Houd in de wachtstand gedurende 3 seconden de toets
“STOP/LEEG" ingedrukt. Er klinkt een lange“pieptoon”die aangeeft dat
de kindersluiting is geactiveerd. Het scherm geeft " “ weer.
• Deblokkeren: Houd bij geactiveerde kindersluiting gedurende
3 seconden de toets“STOP/LEEG" ingedrukt. Er klinkt een lange
“pieptoon”die aangeeft dat de kindersluiting is gedeactiveerd.
12. Informatiefunctie
1. Druk in de bereidingsstand van de magnetron of combinatie“Micro./
Grill/Combi.”, het huidige vermogen wordt gedurende 3 seconden
weergegeven.
2. Druk in de stand voorinstelling“KLOK/VOORINST." om de starttijd voor
de vertraagde bereiding op te vragen. De vooraf ingesteld tijd knippert
gedurende 3 seconden, waarna het scherm van de oven terugkeert
naar de klok.
3. Druk in de bereidingsstand“KLOK/VOORINST." om de huidige tijd te
bekijken. De tijd wordt gedurende 3 seconden weergegeven.
13. Specicaties
1. De zoemer klinkt eenmaal wanneer de knop vanaf het begin wordt gedraaid;
2. Er moet op“START/+30SEC./BEVESTIG" worden gedrukt om het
bereiden te vervolgen nadat tijdens het bereiden de deur is geopend;
3. Als na het instellen van het bereidingsprogramma de toets
“START/+30SEC./BEVESTIG" niet binnen 1 minuut wordt gedrukt, wordt
de huidige tijd weergegeven. De instelling wordt geannuleerd.
4. Als een toets goed wordt ingedrukt, klinkt de zoemer eenmaal; als de
toets niet goed wordt gedrukt, is er geen geluid hoorbaar.
5. De zoemer klinkt vijf keer om u eraan te herinneren dat het bereiden is
voltooid.
REINIGEN
• Vóór het reinigen de stekker uit het stopcontact halen en wachten tot
het apparaat is afgekoeld.
• Reinig de binnenkant van het apparaat met een vochtige doek.
Gebruik nooit ruwe en schurende reinigingsmiddelen, schuurspons of
staalwol om schade aan het apparaat te voorkomen.
• Reinig de accessoires op normale wijze in een sopje.
Other manuals for MW-2705
1
Table of contents
Languages:
Other TriStar Microwave Oven manuals

TriStar
TriStar MW-2896 User manual

TriStar
TriStar MW-2897K User manual

TriStar
TriStar MW-2890 User manual

TriStar
TriStar MW-2905 User manual

TriStar
TriStar MW-2895K User manual

TriStar
TriStar MW-2705 User manual

TriStar
TriStar MW-2707 User manual

TriStar
TriStar MW-2706 User manual

TriStar
TriStar MW-2896 User manual

TriStar
TriStar MW-2897 User manual