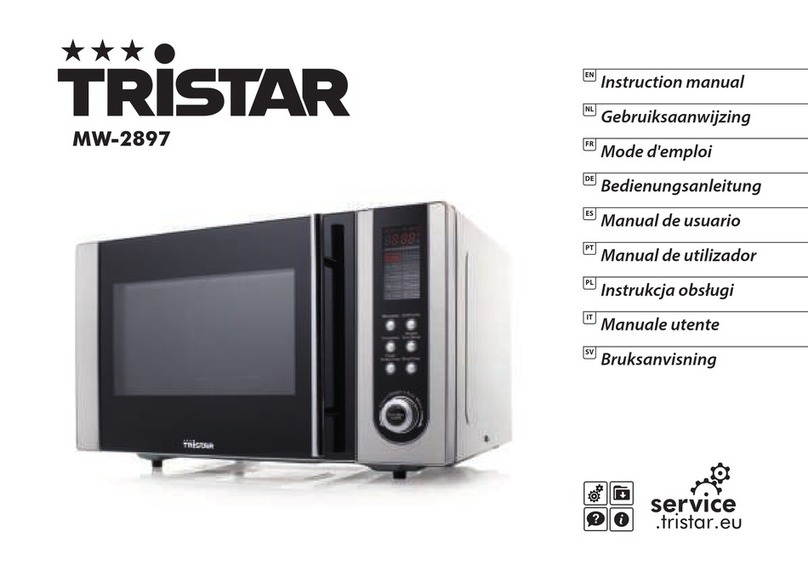
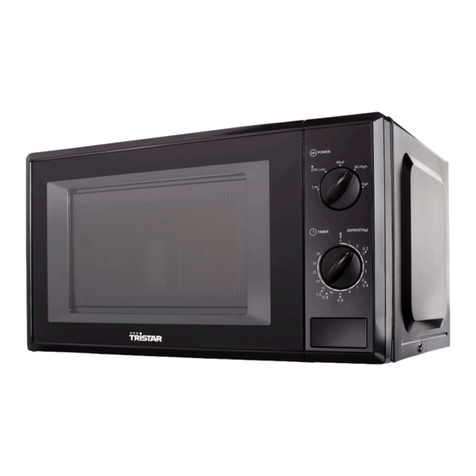
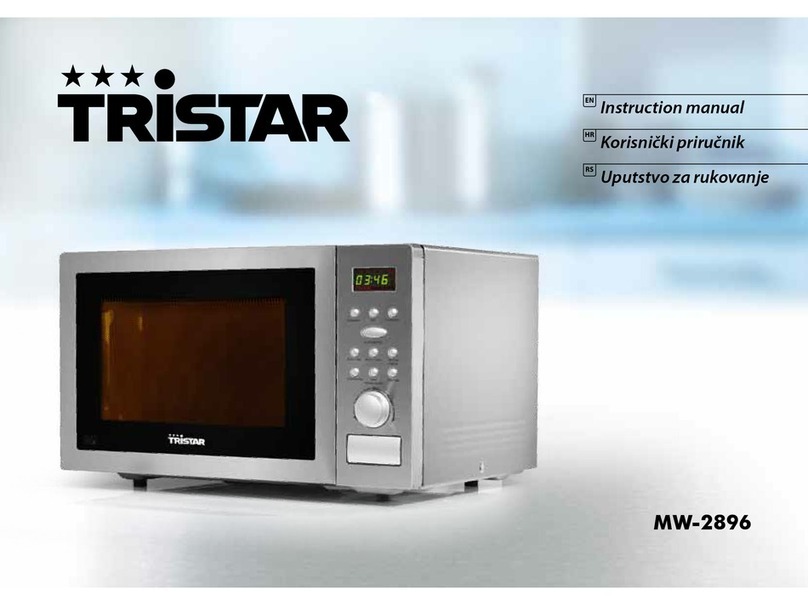
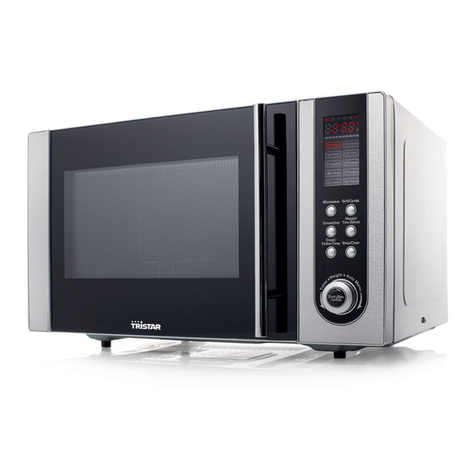
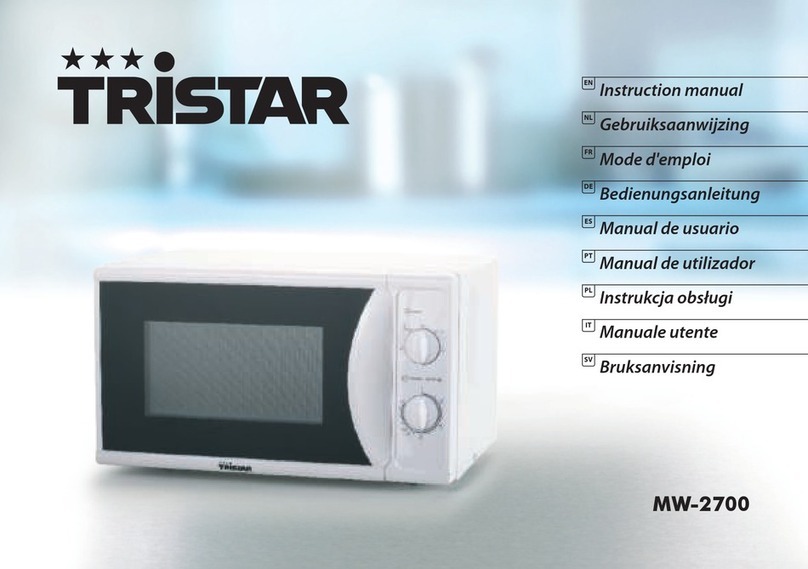
TriStar MW-2896 User manual

MW-2896
EN
NL
FR
DE
ES
PT
PL
IT
SV
Instruction manual
Gebruiksaanwijzing
Mode d'emploi
Bedienungsanleitung
Manual de usuario
Manual de utilizador
Instrukcja obsługi
Manuale utente
Bruksanvisning

2

3
EN
Microwave-grill
Dear customer,
Congratulations and thank you for purchasing this high quality product.
Please read the instruction manual carefully so that you will be able to make
the best possible use of the appliance. This manual includes all the necessary
instructions and advice for using, cleaning and maintaining the appliance. If
you follow these instructions you will be guaranteed of an excellent result, it
saves you time and will avoid problems. We hope you will have a great deal of
pleasure from using this appliance.
• Read these instructions carefully before using your microwave oven,
and keep it carefully.
• If you follow the instructions, your oven will provide you with many
years of good service.
SAVETHESE INSTRUCTIONS CAREFULLY
PRECAUTIONSTO AVOID POSSIBLE EXPOSURE TO EXCESSIVE
MICROWAVE ENERGY
• Do not attempt to operate this oven with the door open since this can
result in harmful exposure to microwave energy. It is important not to
break or tamper with the safety interlocks.
• Do not place any object between the oven front face and the door or
allow soil or cleaner residue to accumulate on sealing surfaces.
• WARNING: If the door or door seals are damaged, the oven must not
be operated until it has been repaired by a competent person.
ADDENDUM
If the apparatus is not maintained in a good state of cleanliness, its surface
could be degraded and aect the lifespan of the apparatus and lead to a
dangerous situation.
SPECIFICATIONS
Model: MW-2896
Rated Voltage: 230V~50Hz
Rated Input Power(Microwave): 1500W
Rated Output Power(Microwave): 900W
Rated Input Power(Grill): 1400W
Rated Input Power(Convection): 2400W
Oven Capacity: 25L
Turntable Diameter: Ф315mm
External Dimensions(LKWxH): 513x443.1x306.2mm
Net Weight: Approx. 16.37 kg
IMPORTANT SAFETY INSTRUCTIONS WARNING
To reduce the risk of re, electric shock, injury to persons or exposure to
excessive microwave oven energy when using your appliance, follow basic
precautions, including the following:
• Warning: Liquids and other foods must not be heated in sealed
containers since they are liable to explode.
• Warning : it is hazardous for anyone other than a competent person to
carry out any service or repair operation that involves the removal of a
cover which gives protection against exposure to microwave energy.
• Warning: Only allow children to use the oven without supervision when
adequate instructions have been given so that the child is able to use the
oven in a safe way and understand the hazards of improper use.
• Warning: When the appliance is operated in the combination mode,
children should only use the oven under adult supervision due to the
temperatures generated. (only for grill series)
• Only use utensils suitable for use in microwave ovens.
• The oven should be cleaned regularly and any food deposits should be
removed.

4
• Read and follow the specic: "PRECAU-TIONS TO AVOID POSSIBLE
EXPOSURE TO EXCESSIVE MICROWAVE ENERGY".
• When heating food in plastic or paper containers, keep an eye on the
oven due to the possibility of ignition.
• If smoke is observed, switch o or unplug the appliance and keep the
door closed in order to stie any ames.
• Do not overcook food.
• Do not use the oven cavity for storage purposes. Do not store items,
such as bread, cookies, etc. inside the oven.
• Remove wire twist-ties and metal handles from paper or plastic
containers/bags before placing them in the oven.
• Install or locate this oven only in accordance with the installation
instructions provided.
• Eggs in the shell and whole hard-boiled eggs should not be heated
in microwave ovens since they may explode, even after microwave
heating has ended.
• Use this appliance only for its intended uses as described in manual.
Do not use corrosive chemicals or vapors in this appliance. This oven
is especially designed to heat. It is not designed for industrial or
laboratory use.
• If the supply cord is damaged, it must be replaced by the manufacturer,
its service agent or similarly qualied persons in order to avoid a hazard.
• Do not store or use this appliance outdoors.
• Do not use this oven near water, in a wet basement or near a
swimming pool.
• The temperature of accessible surfaces may be high when the
appliance is operating. The surfaces are liable to get hot during use.
Keep cord away from heated surface, and do not cover any events on
the oven.
• Do not let cord hang over edge of table or counter.
• Failure to maintain the oven in a clean condition could lead to
deterioration of the surface that could adversely aect the life of the
appliance and possibly result in a hazardous situation.
• The contents of feeding bottles and baby food jars shall be stirred or
shaken and the temperature checked before consumption, in order to
avoid burns.
• Microwave heating of beverages can result in delayed eruptive boiling,
therefore care must be taken when handling the container.
• The appliance is not intended for use by persons (including children)
with reduced physical , sensory or mental capabilities, or lack of
experience and knowledge, unless they have been given supervision
or instruction concerning use of the appliance by a person responsible
for their safety.
• Children should be supervised to ensure that they do not play with the
appliance.
• The appliances are not intended to be operated by means of an
external timer or separate remote-control system.
• WARNING: Ensure that the appliance is switched o before replacing
the lamp to avoid the possibility of electric shock.
• Accessible parts may become hot during use. Young children should be
kept away. 29.Steam cleaner is not to be used.
• Do not use harsh abrasive cleaners or sharp metal scrapers to clean the
oven door glass since they can scratch the surface, which may result in
shattering of the glass.
• During use the appliance becomes hot. Care should be taken to avoid
touching heating elements inside the oven.
• Only use the temperature probe recommended for this oven.(for ovens
provided with a facility to use a temperature-sensing probe.)
• The rear surface of appliance shall be placed against a wall.
Instruction manual
5
EN
TO REDUCE THE RISK OF INJURY TO PERSONS
GROUNDING INSTALLATION
DANGER: Electric Shock Hazard
Touching some of the internal components can cause serious personal
injury or death. Do not disassemble this appliance.
WARNING
Electric Shock Hazard Improper use of the grounding can result in electric
shock. Do not plug into an outlet until appliance is properly installed and
grounded.
CLEANING
Be sure to unplug the appliance from the power supply.
• Clean the inside of the oven after using with a slightly damp cloth.
• Clean the accessories in the usual way in soapy water.
• The door frame and seal and neighbouring parts must be cleaned
carefully with a damp cloth when they are dirty.
TWOROUNDPIN PLUG
This appliance must be grounded. In the event of an electrical short
circuit, grounding reduces the risk of electric shock by providing an escape
wire for the electric current. This appliance is equipped with a cord having
a grounding wire with a grounding plug. The plug must be plugged into
an outlet that is properly installed and grounded. Consult a qualied
electrician or serviceman if the grounding instructions are not completely
understood or if doubt exists as to whether the appliance is properly
grounded. If it is necessary to use an extension cord , use only a 3-wire
extension cord.
1. A short power-supply cord is provided to reduce the risks resulting
from becoming entangled in or tripping over a longer cord.
2. If a long cord set or extension cord is used:
• The marked electrical rating of the cord set or extension cord should
be at least as great as the electrical rating of the appliance.
• The extension cord must be a grounding-type 3-wire cord.
• The long cord should be arranged so that it will not drape over the
counter top or tabletop where it can be pulled on by children or
tripped over unintentionally.
UTENSILS
CAUTION: Personal Injury Hazard
• It is hazardous for anyone other than a compentent person to carry
out any service or repair operation that involves the removal of a cover
which gives protection against exposure to microwave energy.
• See the instructions on "Materials you can use in microwave oven or
to be avoided in microwave oven." There may be certain non-metallic
utensils that are not safe to use for microwaving. If in doubt, you can
test the utensil in question following the procedure below.
Utensil Test:
1. Fill a microwave-safe container with 1 cup of cold water (250ml) along
with the utensil in question.
2. Cook on maximum power for 1 minute.
3. Carefully feel the utensil. If the empty utensil is warm, do not use it for
microwave cooking.
4. Do not exceed 1 minute cooking time.
Microwave-grill

6
MATERIALS YOU CAN USE IN MICROWAVE OVEN
Utensils Reamarks
Aluminum foil
Shielding only. Small smooth pieces can be used
to cover thin parts of meat or poultry to prevent
overcooking. Arcing can occur if foil is too close to
oven walls. The foil should be at least 1 inch (2.5cm)
away from oven walls.
Browning dish
Follow manufacturer's instructions. The bottom of
browning dish must be at least 3/16 inch (5mm)
above the turntable. Incorrect usage may cause the
turntable to break.
Dinnerware Microwave-safe only. Follow manufacturer's
instructions. Do not use cracked or chipped dishes.
Glass jars
Always remove lid. Use only to heat food until just
warm. Most glass jars are not heat resistant and
may break.
Glassware
Heat-resistant oven glassware only. Make sure there
is no metallic trim. Do not use cracked or chipped
dishes.
Oven cooking
bags
Follow manufacturer's instructions. Do not close
with metal tie. Make slits to allow steam to escape.
Paper plates and
cups
Use for short-term cooking/warming only. Do not
leave oven unattended while cooking.
Paper towels Use to cover food for reheating and absorbing fat.
Use with supervision for a short-term cooking only.
Parchment
paper
Use as a cover to prevent splattering or a wrap for
steaming.
Utensils Reamarks
Plastic
Microwave-safe only. Follow the manufacturer's
instructions. Should be labeled "Microwave Safe". Some
plastic containers soften, as the food inside gets hot.
"Boiling bags" and tightly closed plastic bags should be
slit, pierced or vented as directed by package.
Plastic wrap
Microwave-safe only. Use to cover food during
cooking to retain moisture. Do not allow plastic
wrap to touch food.
Thermometers Microwave-safe only (meat and candy
thermometers).
Wax paper Use as a cover to prevent splattering and retain
moisture.
MATERIALS TO BE AVOIDED IN MICROWAVE OVEN
Utensils Reamarks
Aluminum tray May cause arcing. Transfer food into microwave-
safe dish.
Food carton with
metal handle
May cause arcing. Transfer food into microwave-
safe dish.
Metal or metal-
trimmed utensils
Metal shields the food from microwave energy.
Metal trim may cause arcing.
Metal twist ties May cause arcing and could cause a re in the oven.
Paper bags May cause a re in the oven.
Plastic foam Plastic foam may melt or contaminate the liquid
inside when exposed to high temperature.
Wood Wood will dry out when used in the microwave
oven and may split or crack.
Instruction manual

1
234567
7
EN
SETTING UP YOUR OVEN
Names of Oven Parts and Accessories
Remove the oven and all materials from the carton and oven cavity.
Your oven comes with the following accessories:
• Glass tray
• Turntable ring assembly
• Instruction Manual
Oven parts
1. Control panel
2. Turntable shaft
3. Turntable ring assembly
4. Glass tray
5. Observation window
6. Door assembly
7. Safety interlock system
TURNTABLE INSTALLATION
Installation and connection
• Remove all packing material and accessories. Examine the oven for any
damage such as dents or a broken door. Do not install if the oven is damaged.
• Remove any protective lm, found on the microwave oven cabinet surface.
• Do not remove the light brown Mica cover that is attached to the oven
cavity to protect the magnetron.
• Select a level surface that provide enough open space for the intake
and/or outlet vents.
• The rear surface of appliance shall be placed against a wall. A minimum
clearance of 7.5cm is required between the oven and any adjacent
walls. One side must be open. Leave a minimum clearance of 30cm
above the oven. Do not remove the feet from the bottom of the oven.
• Blocking the intake and/or outlet openings can damage the oven.
• Place the oven as far away from radios and TV as possible. Operation of
microwave oven may cause interference to your radio or TV reception.
• Plug your oven into a standard household outlet. Be sure the voltage
and the frequency is the same as the voltage and the frequency on the
rating label.
• Do not install the oven over a stove or other heat-producing appliance.
If installed near or over a heat source, the oven could be damaged and
the warranty would be void.
The accessible surface may be hot during operation.
OPERATION INSTRUCTION
This microwave oven uses modern electronic control to adjust cooking
parameters to meet your needs better for cooking.
1. Clock Setting
When the microwave oven is electried, the oven will display "0:00", buzzer
will ring once.
Grill Rack( Only for Grill series )
Microwave-grill

8
• Press "CLOCK/PRE-SET" to choose 12-hour or 24-hour.
• Turn to adjust the hour gures, the input time should be within 0--
23(24-hour) or 1--12(12-hour).
• Press "CLOCK/PRE-SET", the minute gures will ash.
• Turn to adjust the minute gures, the input time should be within
0--59.
• Press "CLOCK/PRE-SET" to nish clock setting. ":" will ash.
Note: If the clock is not set, it would not function when powered.
During the process of clock setting, if you press "STOP/CLEAR ", the oven
will go back to the previous status automatically.
2. Microwave Cooking
• Press the "MICROWAVE" key once, and "P100" display.
• Press "MICROWAVE" for times or turn to select the microwave power
from 100% to 10%. "P100", "P80", "P50", "P30", "P10" will display in order.
• Press "START/+30SEC./CONFIRM" to conrm.
• Turn to adjust the cooking time. (The time setting should be 0:05-
95:00.)
• Press "START/+30SEC./CONFIRM" to start cooking.
NOTE:
the step quantities for the adjustment time of the coding switch are as follow:
0--- 1 min : 5 seconds
1—5 min : 10 seconds
5---10 min : 30 seconds
10---30 min : 1 minute
30---95 min : 5 minutes
Microwave Power Chart
Press Once Twice Thrice 4 times 5 times
Microwave Power 100% 80% 50% 30% 10%
3. Grill Cooking
• Press the "GRILL" key once, and "G-1" display.
• Turn to adjust the cooking time. (The time setting should be 0:05-
95:00.)
• Press "START/+30SEC./CONFIRM" to start cooking.
Note: If half the grill time passes, the oven will sound twice to tell you to
turn the food over. You can just leave it continue cooking. But in order to
have a better eect of grilling food, you should turn the food over, close
the door, and then press "START/+30SEC./CONFIRM" to continue cooking.
4. Microwave + Grill Cooking
• Press the "MICRO.+GRILL" key once, and "G-2" display.
• Press "MICRO.+GRILL" for times or turn to select "G-3", "G-4", "G-2" in
order.
• Press "START/+30SEC./CONFIRM" to conrm.
• Turn to adjust the cooking time. (The time setting should be 0:05-
95:00.)
• Press "START/+30SEC./CONFIRM" to start cooking.
5. Microwave + Convection Cooking
• Press the "MICRO.+CONV." key once, and "G-1" display.
• Press "MICRO.+CONV. " for times or turn to select "C-1","C-2","C-3" or
"C-4".
• Press "START/+30SEC./CONFIRM" to conrm.
• Turn to adjust the cooking time. (The time setting should be 0:05-
95:00.)
• Press "START/+30SEC./CONFIRM" to start cooking.
Instruction manual

9
EN
Note: Combination instructions
Display
Microwave
Power
(900W)
Grill Power
(1400W)
Convection
Power
(2400W)
G-2 28% 72%
G-3 38% 62%
G-4 48% 52%
C-1 28% 72%
C-2 38% 62%
C-3 48% 52%
C-4 28% 72% 72%
6. Convection Cooking(With preheating funtion)
The convection cooking can let you to cook the food as a traditional oven.
Microwave is not used. It is recommended that you should preheat the
oven to the appropriate temperature before placing the food in the oven.
• Press the "CONVECTION" key once, "150" ash.
• Keep pressing "CONVECTION" or turn to select the convection
function. Note: the temperature can be chosen from 150 degrees to
240 degrees.
• Press the "START/+30SEC./CONFIRM" to conrm the temperature.
• Press the "START/+30SEC./CONFIRM" to start preheating. When the
preheating temperature arrives, the buzzer will sound twice to remind
you to put the food into the oven. And the preheated temperature is
displayed and ash.
• Put the food into the oven and close the door.
• Turn to adjust the cooking time. (The maximum setting time is 95
minutes.)
• Press the "START/+30SEC./CONFIRM" key to start cooking.
Note: Cooking time cannot be input until the preheating temperature
arrives.If the temperature arrives, door must be opened to input the cooking
time. If the time not input in 5 minutes, the oven will stop preheating. The
buzzer sound ve times and turn back to waiting states.
7. Convection Cooking( Without pre-heating function)
• Press the "CONVECTION" key once, "150" ash.
• Keep pressing "CONVECTION" or turn to select the convection
function. Note: the temperature can be chosen from 150 degrees to
240 degrees.
• Press the "START/+30SEC./CONFIRM" to conrm the temperature
• Turn to adjust the cooking time. (The maximum setting time is 95
minutes.)
• Press the "START/+30SEC./CONFIRM" key to start cooking.
8.Multi-Stage Cooking
Two stages can be maximumly set. If one stages is defrosting, it should be
put in the rst stage. The buzzer will ring once after each stage and the
next stage will begin.
Note: Auto menu and preheating cannot be set as one of the multi-stage.
Example: if you want to defrost the food for 5 minutes, then to cook with
80% microwave power for 7 minutes. The steps are as following:
• Press "W.T./TIME DEFROST" twice, the screen will display "dEF2":
• Turn to adjust the defrost time of 5 minutes;
• Press "MICROWAVE" once;
• Press "MICROWAVE" for times or turn till "P80" display;
• Press "START/+30SEC./CONFIRM" to conrm;
• Turn to adjust the cooking time of 7 minutes;
• Press "START/+30SEC./CONFIRM" to start cooking.
Microwave-grill

10
9. Pre-set Function
1. Set the clock rst. (Consult the instruction of clock setting.)
2. Input the cooking program. Two stages can be set at most. Defrosting
should not be set in preset function. Auto menu can be set single stage only.
Example: if you want to cook with 80% microwave power for 7 minutes.
• Press "MICROWAVE" once;
• Press " MICROWAVE" for times or turn to choose 80% microwave
power till "P80" display;
• Press "START/+30SEC./CONFIRM" to conrm;
• Turn to adjust the cooking time of 7 minutes;
After the above steps, please do not press "START/+30SEC./
CONFIRM". Then do as following:
3. Press "CLOCK/PRE-SET", current time displays and the hour gures ash.
4. Turn to adjust the hour gures, the input time should be within 0--
23(24-hour) or 1--12(12-hour).
5. Press "CLOCK/PRE-SET", the minute gures will ash.
6. Turn to adjust the minute gures, the input time should be within
0--59.
7. Press "START/+30SEC./CONFIRM" to nish setting. ":" will light,
buzzer will ring twice when the time arrives, then cooking will start
automatically.
Note: clock must be set rst. Otherwise, pre-set function will not work.
10. Auto Menu
• In waiting state, press "AUTO MENU" keyonce, and "A-1" display.
• Press " AUTO MENU" for times or turn to choose "A2","A3"...."A10","A1".
• Press "START/ +30 SEC./CONFIRM" to conrm the menu you need.
• Turn to choose the weight of menu, and "g" indicator will light.
• Press "START/ +30 SEC./CONFIRM" to start cooking.
Note: When you choose A8 cake, please do not put the cake into the oven at
the begining.The oven needs to be preheated to 180 degree rst. After sevarel
minutes, the buzzer sounds twice to remind you to put the cake into the oven.
After putting the cake in the oven, please press "Start/+30Sec./Conrm" again.
The timer will count down, and the cake will be cooked perfectly.
AUTO MENU CHART
Menu Weight(g) Display Power
A1
Reheat
150 150
100 %
250 250
350 350
450 450
600 600
A2
Potato
1 (about 230g) 1
100 %
2 (about 460g) 2
3 (about 690g) 3
A3
Meat
150 150
100 %
300 300
450 450
600 600
A4
Vegetable
150 150
100 %
350 350
500 500
Instruction manual

11
EN
Menu Weight(g) Display Power
A5
Fish
150 150
80 %
250 250
350 350
450 450
650 650
A6
Pasta
50(with water 45ml) 50
80 %
100(with water 800ml) 100
150(with water 1200ml) 150
A7
Soup
200 200
100 %
400 400
600 600
A8
Cake
475 475 Preheat at 180
degrees
A9
Pizza
200 200
C-4
300 300
400 400
A10
Chicken
500 500
C-4
750 750
1000 1000
1200 1200
11. Defrost by W.T.
• Press "W.T./TIME DEFROST" pad once, the oven will display "dEF1",.
• Turn to select the weight of food. At the same time, "g" will lights,
The weight should be 100-2000g.
• Press "START/+30SEC./CONFIRM" key to start defrosting and
indicators will ash and "g" indicator will go out.
12. Defrost by Time
• Press "W.T./TIME DEFROST" key twice, the oven will display "dEF2"
• Turn to select the cooking time. The maximum setting time is 95
minutes.
• Press "START/+30SEC./CONFIRM" key to start defrosting. and
indicators will ash .
Note: if the food weight is no more than 200 grams, please place the food
at the edge of the glass turntable but not the center to be defrosted.
13. Speedy Cooking
• In waiting state, press "START/+30SEC./CONFIRM" key to cook with
100% power level for 30 seconds. Each press on the same key can
increase 30 seconds. The maximum cooking time is 95 minutes.
• During microwave, grill, convection and combination states, press
"START/+30SEC./CONFIRM" key to cook with 100% power level for 30
seconds. Each press on the same key can increase 30 seconds.
Note: this function cannot work under defrost, auto menu and multi-stage
cooking.
14. Speedy Microwave Cooking
• In waiting state, turn left to choose cooking time directly then press
"START/+30SEC./CONFIRM" key to cook with 100% microwave power.
• This program can be set as one of multi-stage.
15. Inquiring Function
• In cooking state, press "Microwave", "GRILL", "Micro. / Grill", "Micro. /
Conv .", or "Convection" , the current power will be displayed for 2-3
seconds.
Microwave-grill

12
• In pre-set state, press "CLOCK/PRE-SET" to inquire the time for delay
start cooking. The pre-set time will ash for 2-3 seconds, then the oven
will turn back to the clock display.
• During cooking state, press "CLOCK/PRE-SET" to check the current
time. It will be displayed for 2-3 seconds.
16. Lock-out Function for Children
• Lock: In waiting state, press "STOP/CLEAR" for 3 seconds, there will be
a long "beep" denoting entering into the children-lock state and
indicator will light. LED will display current time or 0:00.
• Lock quitting: In locked state, press "STOP/CLEAR" for 3 seconds,
there will be a long "beep" denoting that the lock is released, and
indicator will disapear.
17. Specication
• The buzzer will sound once when turning the knob at the beginning;
• "START/+30 SEC./CONFIRM" must be pressed to continue cooking if the
door is opened during cooking;
• Once the cooking programme has been set, "START/+30 SEC./
CONFIRM" is not pressed in 5 minutes. The current time will be
displayed. The setting will be cancelled.
• The buzzer sounds once by ecient press, inecient press will be no
responce.
• The buzzer will sound ve times to remind you when cooking is
nished.
TROUBLE SHOOTING
Normal
Microwave oven
interfering TV
reception
Radio and TV reception may be interfered when
microwave oven operating. It is similar to the
interference of small electrical appliances, like mixer,
vacuum cleaner, and electric fan. It is normal.
Dim oven light In low power microwave cooking, oven light may
become dim. It is normal.
Steam
accumulating on
door, hot air out of
vents
In cooking, steam may come out of food. Most will
get out from vents. But some may accumulate on
cool place like oven door. It is normal.
Oven started
accidentally with
no food in.
It is forbidden to run the unit without any food
inside. It is very dangerous.
Trouble Possible Cause Remedy
Oven can not be
started.
Power cord not
plugged in tightly.
Unplug. Then plug
again after 10 seconds.
Fuse blowing or circuit
breaker works.
Replace fuse or
reset circuit breaker
(repaired by
professional personnel
of our company)
Trouble with outlet. Test outlet with other
electrical appliances.
Oven does not heat. Door not closed well. Close door well.
Glass turntable makes
noise when microwave
oven operates
Dirty roller rest and
oven bottom.
Refer to "Maintenance
of Microwave" to clean
dirty parts.
Instruction manual

13
EN
GUARANTEE
• Tristar is not liable for damages occurred through:
o In case the appliance has fallen.
o In case the appliance has been technically changed by the owner or
another third party.
o In case of improper use of the appliance.
o In case of normal wear of the appliance.
• By executing repairs the original warranty period of 2 years will not
be extended, nor the right to a complied new warranty. This warranty
is only legal on European soil. This warranty does not overrule the
European directive 1944/44CE.
• Always keep your receipt, without this receipt you can not claim any
form of warranty whatsoever.
• Damage caused by not following the instruction manual will lead to a
void of warranty, if this results in consequential damages Tristar will not
be liable.
• Tristar will not be liable for material damage or personal injury caused
by improper use or if the safety instructions are not properly executed.
• Cleaning, as mentioned in this manual, is the only necessary
maintenance for this appliance.
• When the appliance should be repaired, make sure that this will be
performed by an authorized company.
• This appliance may not be amended or changed.
• If problems arise during the 2 years from the date of purchase, which
are covered by the factory warranty, you can go back to the point of
purchase to replace it for a new one.
• For questions or compliances please contact your retailer“point of
purchase.”
• This appliance is covered with a 24 month guarantee starting on the
date of purchase (receipt).
• Only material or manufacturing defects are included in this warranty.
• If you wish to make a claim please return the entire machine in the
original packaging to your dealer together with the receipt.
• Damage to accessories does not mean automatic free replacement of
the whole appliance. In such cases please contact our hotline. Broken
glass or breakage of plastic parts are always subject to a charge.
• Defects to consumables or parts subject to wearing, as well as cleaning,
maintenance or the replacement of these parts are not covered by the
guarantee and hence are to be paid!
• The guarantee lapses in case of unauthorized tampering.
• After the expiry of the guarantee repairs can be carried by the
competent dealer or repair service against the payment of the ensuing
costs.
Microwave-grill

14
GUIDELINES FOR PROTECTION OF THE
ENVIRONMENT
This appliance should not be put into the domestic garbage
at the end of its durability, but must be oered at a central
point for the recycling of electric and electronic domestic appliances. This
symbol on the appliance, instruction manual and packaging puts your
attention to this important issue. The materials used in this appliance
can be recycled. By recycling used domestic appliances you contribute
an important push to the protection of our environment. Ask your local
authorities for information regarding the point of recollection.
Packaging
The packaging is 100% recyclable, return the packaging separated.
Product
This device is equipped with a mark according to the European Directive
2012/19/EU on Waste Electrical and Electronic Equipment (WEEE). By
ensuring that this product will be correctly processed into waste, it will
help prevent possible negative consequences for the environment and
human health.
EC declaration of conformity
This appliance is designed to come into contact with food and is designed
in accordance with EC Directive1935/2004/EEC. This device is designed,
manufactured and marketed in accordance with the safety objectives of
the Low Voltage Directive "No 2006/95/EC", the protection requirements of
the EMC Directive 2004/108/EC "Electromagnetic Compatibility" and the
requirement of Directive 93/68/EEC.
Instruction manual

15
Magnetron met Grillfunctie
NL
Geachte klant,
Gefeliciteerd met de aankoop van dit kwaliteitsproduct. Lees de
gebruiksaanwijzing zorgvuldig door zodat u optimaal gebruik kunt maken van dit
apparaat. In deze handleiding vindt u alle benodigde aanwijzingen en adviezen
voor het gebruik, schoonmaak en onderhoud van het apparaat. Als u deze
aanwijzingen volgt, heeft u altijd een uitstekend resultaat, bespaart u tijd en kunt
u problemen voorkomen. Wij hopen dat u dit apparaat met plezier zult gebruiken.
• Lees deze instructies aandachtig door voordat u uw magnetronoven
gebruikt en bewaar het zorgvuldig.
• Als u de instructies opvolgt, zal uw oven u vele jaren goede diensten
opleveren.
BEWAAR DEZE INSTRUCTIES ZORGVULDIG
VOORZORGSMAATREGELEN OM MOGELIJKE BLOOTSTELLING AAN
OVERMATIGE MICROGOLVEN TE VOORKOMEN
• Probeer niet om deze oven met de deur open te bedienen, omdat dit tot
blootstelling aan schadelijke microgolven kan leiden. Het is belangrijk
om niet de veiligheidssloten te verbreken of ermee te knoeien.
• Plaats geen voorwerpen tussen voorkant van de oven en de deur en laat
geen vuil of reinigingsmiddelresten op de afdichtingvlakken verzamelen.
• WAARSCHUWING: Als de deur of de afdichtingen beschadigd is, mag
de oven niet gebruikt worden totdat het door een bevoegd persoon is
gerepareerd.
APPENDIX
Als het apparaat niet in een schone staat wordt bijgehouden, kan het
oppervlak verontreinigen en de levensduur van het apparaat beïnvloeden
en tot een gevaarlijke situatie leiden.
SPECIFICATIES
Model: MW-2896
Nominaal spanning: 230V ~ 50Hz
Nominaal ingangsvermogen (magnetron): 1500W
Nominaal uitgangsvermogen (magnetron):900W
Nominaal ingangsvermogen (Grill): 1400W
Nominaal ingangsvermogen (convectie): 2400W
Ovencapaciteit: 25L
Diameter van de draaitafel: Ф315mm
Buitenafmetingen (LxBxH): 513x443.1x306.2mm
Netto gewicht: ca. 16,37 kg
BELANGRIJKE WAARSCHUWNGEN
VEILIGHEIDSINSTRUCTIES
Om het risico van brand, elektrische schokken, letsel bij personen of
blootstelling aan overmatige microgolven bij het gebruik van uw apparaat,
volg elementaire voorzorgsmaatregelen, waaronder de volgende:
• Waarschuwing: Vloeistoen en andere voedingsmiddelen mogen
niet in afgesloten containers verwarmd worden, omdat ze kunnen
ontploen.
• Waarschuwing: het is voor iedereen, behalve een bevoegd persoon,
gevaarlijk om onderhouds- of reparatiewerkzaamheden uit te voeren
waarbij het verwijderen van een afdekking die bescherming biedt
tegen blootstelling aan microgolven.
• Waarschuwing: Laat kinderen alleen de oven zonder toezicht
gebruiken wanneer voldoende instructies zijn gegeven zodat het
kind in staat is om de oven op een veilige manier te gebruiken en de
gevaren van onjuist gebruik begrijpt.

16
Gebruiksaanwijzing
• Waarschuwing: Wanneer het apparaat in de combinatiemodus wordt
gebruikt, mogen kinderen wegens de gegenereerde temperaturen
alleen onder toezicht van volwassenen de oven gebruiken. (alleen voor
de grillserie)
• Gebruik alleen gebruiksvoorwerpen die geschikt zijn voor gebruik in
de magnetron.
• De oven moet regelmatig worden schoongemaakt en alle
voedselresten moeten worden verwijderd.
• Lees en volg de specicaties:“VOORZORGSMAATREGELEN OM MOGELIJKE
BLOOTSTELLING AAN OVERMATIGE MICROGOLVEN TE VOORKOMEN”.
• Bij het verwarmen van voedsel in plastic of papier containers, houd de
oven op mogelijke ontbranden in de gaten.
• Als er rook wordt waargenomen, schakel het apparaat uit of trek
de stekker uit het stopcontact en houd de deur dicht om eventuele
vlammen te doven.
• Bereid het voedsel niet te gaar.
• Gebruik de ovenruimte niet voor opslagdoeleinden. Bewaar geen
artikelen, zoals brood, koekjes, etc. in de oven.
• Verwijder de draad twistbandjes en metalen handgrepen van papier of
plastic containers/zakken voordat u ze in de oven plaatst. 13.
Installeer of plaats deze oven alleen in overeenstemming met de
meegeleverde installatie-instructies.
• Eieren in de schaal en hele hardgekookte eieren mogen niet in de
magnetron worden opgewarmd, omdat ze kunnen ontploen, zelfs
nadat het verwarmen in de magnetron is voltooid.
• Gebruik dit apparaat alleen voor de beoogde toepassingen, zoals
beschreven in de handleiding. Gebruik geen bijtende chemicaliën
of dampen in dit apparaat. Deze oven is speciaal ontworpen
om op te warmen. Het is niet ontworpen voor industrieel- of
laboratoriumgebruik.
• Als de het netsnoer beschadigd is, moet deze door de fabrikant, zijn
vertegenwoordiger, of door een vergelijkbaar bevoegd persoon
worden vervangen, om gevaar te voorkomen.
• Gebruik dit apparaat niet buitenshuis.
• Gebruik deze oven niet in de buurt van water, in een vochtige kelder of
in de buurt van een zwembad.
• De temperatuur van de bereikbare oppervlakken kan hoog zijn
wanneer het apparaat in gebruik is. De oppervlakken neigen ertoe om
tijdens het gebruik heet te worden. Houd het netsnoer uit de buurt van
het verwarmde oppervlak, en leg in geen geval iets op de oven.
• Laat het netsnoer niet over de rand van tafel of balie hangen.
• Als de oven niet in een schone staat wordt gehouden kan dat tot
verontreiniging van het oppervlak leiden wat de levensduur van
het apparaat negatief zou kunnen beïnvloeden en mogelijk tot een
gevaarlijke situatie resulteert.
• De inhoud van zuigessen en potjes babyvoeding moet worden
geroerd of geschud en de temperatuur vóór consumptie worden
gecontroleerd, om brandwonden te voorkomen.
• Verwarmen in de magnetron van drank tot vertraagd eruptief koken
kan leiden, daarom is voorzichtigheid geboden bij het hanteren van de
container.
• Dit apparaat is niet bedoeld voor gebruik door personen (met inbegrip
van kinderen) met verminderde lichamelijke, zintuiglijke of psychische
capaciteiten, of met een gebrekkige ervaring en kennis, tenzij ze m.b.t.
het gebruik van dit apparaat onder toezicht staan van of geïnstrueerd
zijn door een persoon verantwoordelijk voor hun veiligheid.
• Kinderen dienen onder toezicht te staan om te garanderen dat ze niet
met het apparaat spelen.
• Het apparaat is niet geschikt om bediend te worden door middel van
een externe timer of een afzonderlijk afstandsbedieningsysteem.

17
• WAARSCHUWING: Zorg ervoor dat het apparaat is uitgeschakeld
voordat u de lamp vervangt om de mogelijkheid van elektrische
schokken te voorkomen.
• Toegankelijke onderdelen kunnen tijdens gebruik heet worden.
Kinderen moeten uit de buurt worden gehouden.
• Een stoomreiniger mag niet worden gebruikt om de magnetron te reinigen.
• Gebruik geen agressieve schuurmiddelen of scherpe metalen
schrapers om de ovendeurglas schoon te maken, omdat zij het
oppervlak kunnen krassen, wat tot het breken van het glas kan leiden.
• Tijdens het gebruik wordt het apparaat heet. Zorg moet worden
genomen om het aanraken van de verwarmingselementen in de oven
te voorkomen.
• Gebruik alleen de temperatuursonde aanbevolen voor deze oven.
(voor ovens voorzien van een inrichting om een temperatuursonde te
gebruiken.)
• De achterzijde van het apparaat moet tegen een muur worden geplaatst.
OM HET RISICO VAN LETSEL AAN PERSONEN
AARDING
GEVAAR: Elektrisch schokgevaar
Het aanraken van sommige interne onderdelen kan tot ernstig lichamelijk
letsel of de dood leiden. Demonteer dit apparaat niet.
WAARSCHUWING
Gevaar voor elektrische schokken - Onjuist gebruik van de aarding kan
tot een elektrische schok leiden. Steek de stekker niet in een stopcontact
totdat het apparaat goed geïnstalleerd en geaard is.
REINIGING
Zorg ervoor dat u de stekker van het apparaat uit het stopcontact trekt.
• Reinig de binnenkant van de oven met een licht bevochtigde doek.
• Reinig de accessoires op de gebruikelijke wijze in zeepwater.
• De deurlijst en de afdichting en de aangrenzende onderdelen moeten
zorgvuldig met een vochtige doek worden gereinigd als ze vuil zijn.
STEKKER MET TWEE RONDE PENNEN
Dit apparaat moet geaard worden(16 ampère traag). In het geval van een
elektrisch kortsluiting, vermindert aarding het risico van een elektrische
schok door het voorzien van een afvoerdraad voor de elektrische stroom.
Dit apparaat is uitgerust met een snoer met een aardedraad en een
geaarde stekker. De stekker moet in een stopcontact worden gestoken
dat correct geïnstalleerd en geaard is. Raadpleeg een elektricien of
monteur als de instructies m.b.t. de aarding niet helemaal duidelijk zijn of
als er twijfel bestaat over de vraag of het apparaat correct is geaard. Als
het nodig is om een verlengsnoer te gebruiken, gebruik dan alleen een
3-aderige verlengsnoer.
1. Een kort netsnoer is voorzien om de risico's van verstrikt raken in of
struikelen over een langer snoer te verminderen.
2. Als een lang snoer of verlengsnoer wordt gebruikt:
• Het aangemerkte nominale vermogen van het snoer of verlengsnoer
moet minstens even groot zijn als het nominale vermogen van het
apparaat.
• Het verlengsnoer moet een geaarde 3-aderige kabel zijn.
• Het lange snoer moet zodanig worden gelegd, zodat het niet over
de toonbank of tafel zal hangen waar kinderen het er aan kunnen
trekken of per ongeluk over gestruikeld kan worden.
NL
Magnetron met Grillfunctie

18
Gebruiksaanwijzing
GEBRUIKSVOORWERPEN
VOORZICHTIG: Persoonlijk letselgevaar
• Het is voor iedereen, behalve een bevoegd persoon, gevaarlijk om
onderhouds- of reparatiewerkzaamheden uit te voeren waarbij
het verwijderen van een afdekking die bescherming biedt tegen
blootstelling aan microgolven.
• Zie de instructies over“Materialen die u in de magnetron kunt
gebruiken of moet vermijden.”Er zijn bepaalde niet-metalen
gebruiksvoorwerpen die niet veilig te gebruiken zijn voor de
magnetron. Als u twijfelt, kunt u het betreende gebruiksvoorwerp
volgens de onderstaande procedure testen.
Testen van het gebruiksvoorwerp:
1. Vul een magnetronveilige container met een beker koud water (250ml)
samen met het betreende gebruiksvoorwerp.
2. Koken gedurende 1 minuut op maximaal vermogen.
3. Voel voorzichtig het gebruiksvoorwerp. Als het lege gebruiksvoorwerp
warm is, gebruik het niet voor het koken met de magnetron.
4. Neem niet langer dan een minuut kooktijd.
MATERIALEN DIE U IN MAGNETRON KUNT
GEBRUIKEN
Gebruiksvoorwerpen Opmerkingen
Aluminiumfolie
Alleen afscherming. Kleine gladde stukken kunnen
worden gebruikt om de dunne delen van vlees of
gevogelte af te dekken om overkoken te voorkomen.
Vonkvorming kan optreden als folie te dicht bij de
ovenwand is. De folie moet minimaal een inch (2,5cm)
uit de buurt van de ovenwand blijven.
Gebruiksvoorwerpen Opmerkingen
Bruineringsschaal
Volg de instructies van de fabrikant. De onderkant
van bruineringsschaal moet minstens 3/16 inch
(5mm) boven de draaitafel worden geplaatst. Onjuist
gebruik kan leiden tot het breken van de draaitafel.
Serviezen Alleen magnetronveilig.Volg de instructies van de
fabrikant. Gebruik geen gebarsten of gebroken schalen.
Glazen potten
Verwijder altijd het deksel. Gebruik alleen om voedsel
tot net warm op te warmen. De meeste glazen potten
zijn niet hittebestendig en kunnen breken.
Glaswerk
Alleen hittebestendig glaswerk voor de oven. Zorg
ervoor dat er geen metalen afwerking aanwezig is.
Gebruik geen gebarsten of gebroken schalen.
Oven kookzakken
Volg de instructies van de fabrikant. Niet met
metalen binder afsluiten. Maak sneden zodat
stoom kan ontsnappen.
Papieren borden en
kopjes
Gebruik alleen voor kortdurend koken/opwarmen.
Laat de oven tijdens het koken niet onbewaakt
achter.
Papieren handdoeken
Gebruiken om voedsel af te dekken voor het
opwarmen en absorberen van vet. Gebruik onder
toezicht voor alleen kortdurend koken.
Perkamentpapier Gebruik als afdekking om spatten te voorkomen
of als verpakking voor het stomen.
Plastic
Alleen magnetronveilig. Volg de instructies van de
fabrikant. Moet “Magnetronveilig” gelabeld zijn.
Sommige plastic containers te verweken, wanneer
het eten erin heet wordt.“Kookzakken”en goed
afgesloten plastic zakken moet worden gesneden,
doorboord of ontlucht zoals voorgeschreven op
de verpakking.

1
234567
19
Gebruiksvoorwerpen Opmerkingen
Plasticfolie
Alleen magnetronveilig. Te gebruiken om voedsel
tijdens het koken af te bedekken om vocht vast
te houden. Laat plasticfolie niet in contact komen
met het voedsel.
Thermometers Alleen magnetronveilig (vleesthermometers).
Vetvrij papier Gebruik als afdekking om spatten te voorkomen
en vocht vasthouden.
TE VERMIJDEN MATERIALEN IN MAGNETRON
Gebruiksvoorwerpen Opmerkingen
Aluminium schaal Kan vonken veroorzaken. Breng voedsel in een
magnetronveilige schaal over.
Etendoos met metalen
handvat
Kan vonken veroorzaken. Breng voedsel in een
magnetronveilige schaal over.
Metaal of met
metaal bekleed
gebruiksvoorwerpen
Metaal schermt het voedsel af van de
magnetrongolven. Metalen afwerking kan
vonken veroorzaken.
Metalen twistbandjes Kunnen vonken en een brand in de oven
veroorzaken.
Papieren zakken Kan tot een brand in de oven leiden.
Schuimplastic
Plastic schuim kan smelten of de vloeistof erin
besmetten wanneer het aan hoge temperaturen
wordt blootgesteld.
Hout Hout zal bij gebruik in de magnetron uitdrogen
en kan splijten of breken
UW OVEN INSTELLEN
Namen van ovenonderdelen en -accessoires
• Verwijder de oven en alle materialen uit de doos en de ovenruimte.
Uw oven wordt met de volgende accessoires geleverd:
1. Glazen schaal
2. Draaitafel montagering
3. Gebruiksaanwijzing
Onderdelenbeschrijving
1. Bedieningspaneel
2. Draaitafelas
3. Draaitafel montagering
4. Glasschaal
5. Kijkvenster
6. Deurmontage
7. Veiligheidsvergrendeling-systeem
NL
Grill Rack( Only for Grill series )
Magnetron met Grillfunctie

20
Gebruiksaanwijzing
DRAAITAFEL INSTALLATIE
Installeren en aansluiten
• Verwijder al het verpakkingsmateriaal en accessoires. Controleer de
magnetron voor mogelijke schade zoals deuken of een kapotte deur.
Niet installeren als de magnetron is beschadigd.
• Verwijder eventuele beschermfolie aangebracht op de behuizing van
de magnetron.
• De lichtbruine Mica-kap, aangebracht op de binnenruimte van de
magnetron om de magnetron te bescherming, niet verwijderen.
• Kies een vlakke ondergrond die voldoende open ruimte heeft voor de
ventilatieopeningen.
• De achterkant van het apparaat moet tegen een muur worden
geplaatst. Een minimale vrije ruimte van 7,5cm is nodig is tussen
de magnetron en eventuele aanwezige muren. Een kant moet vrij
blijven. Laat minimaal een ruimte van 30 cm boven de magnetron vrij.
Verwijder De pootjes van de magnetron nooit.
• Het blokkeren van de inlaat- en/of uitlaatopeningen kan de magnetron
beschadigen.
• Plaats de magnetron zo ver mogelijk uit de buurt van radio en TV. Gebruik
van de magnetron kan storingen veroorzaken bij radio- of TV-ontvangst.
• Sluit uw magnetron aan op een standaard stopcontact. Zorg ervoor
dat de spanning en de frequentie hetzelfde zijn als de spanning en de
frequentie op het typeplaatje.
• Plaats de magnetron niet op een kachel of ander warmteopwekkend
apparaat. Als het apparaat vlakbij of boven een warmtebron wordt
geplaatst, kan de magnetron worden beschadigd en de garantie zou
vervallen.
De toegankelijke oppervlakken kunnen tijdens het gebruik zeer heet
worden.
BEDIENINGSINSTRUCTIE
Deze oven maakt gebruik van moderne elektronische regeling om
kookparameters aan te passen om beter aan uw behoeften voor het koken
te voldoen.
1. Klokinstelling
Als de magnetron is ingeschakeld, zal de oven "0:00" weergeven, en
zoemer zal een keer rinkelen.
• Druk op“KLOK/VOORINSTELLING”om 12-uurs of 24-uurs weergave te
kiezen.
• Draai aan om de urencijfers aan te passen, de invoertijd moet
tussen 0 - 23(24 uur) of 1 - 12(12-uur) zijn.
• Druk op“KLOK/VOORINSTELLING”, de minuutcijfers zullen knipperen.
• Draai aan om de minuutcijfers aan te passen, de invoertijd moet
tussen 0 – 59 zijn.
• Druk op“KLOK/VOORINSTELLING”om de klokinstelling te voltooien. De
“:”zal knipperen.
Opmerking:
• als de klok niet is ingesteld, zal het niet werken wanneer het
ingeschakeld wordt.
• Tijdens het instellingsproces van de klok, als u op “STOP/WISSEN”
drukt, zal de oven automatisch naar de vorige status terugkeren.
2. Koken met de magnetron
• Druk één keer op de“MAGNETRON”knop, en“P100” wordt
weergegeven.
• Druk vier keer op“MAGNETRON”of draai aan om het
magnetronvermogen kiezen van 100% naar 10% te selecteren.“P100”,
“P80”, “P50”, “P30”, “P10”wordt in volgorde weergegeven.
• Druk op“START/+30SEC./BEVESTIGEN”om te bevestigen.
Other manuals for MW-2896
1
Table of contents
Languages:
Other TriStar Microwave Oven manuals

TriStar
TriStar MW-2891 User manual

TriStar
TriStar MW-2897 User manual

TriStar
TriStar MW-2897K User manual

TriStar
TriStar MW-2706 User manual

TriStar
TriStar MW-2707 User manual

TriStar
TriStar MW-2905 User manual

TriStar
TriStar MW-2890 User manual

TriStar
TriStar MW-2700 User manual

TriStar
TriStar MW-2896 User manual

TriStar
TriStar MW-2705 User manual