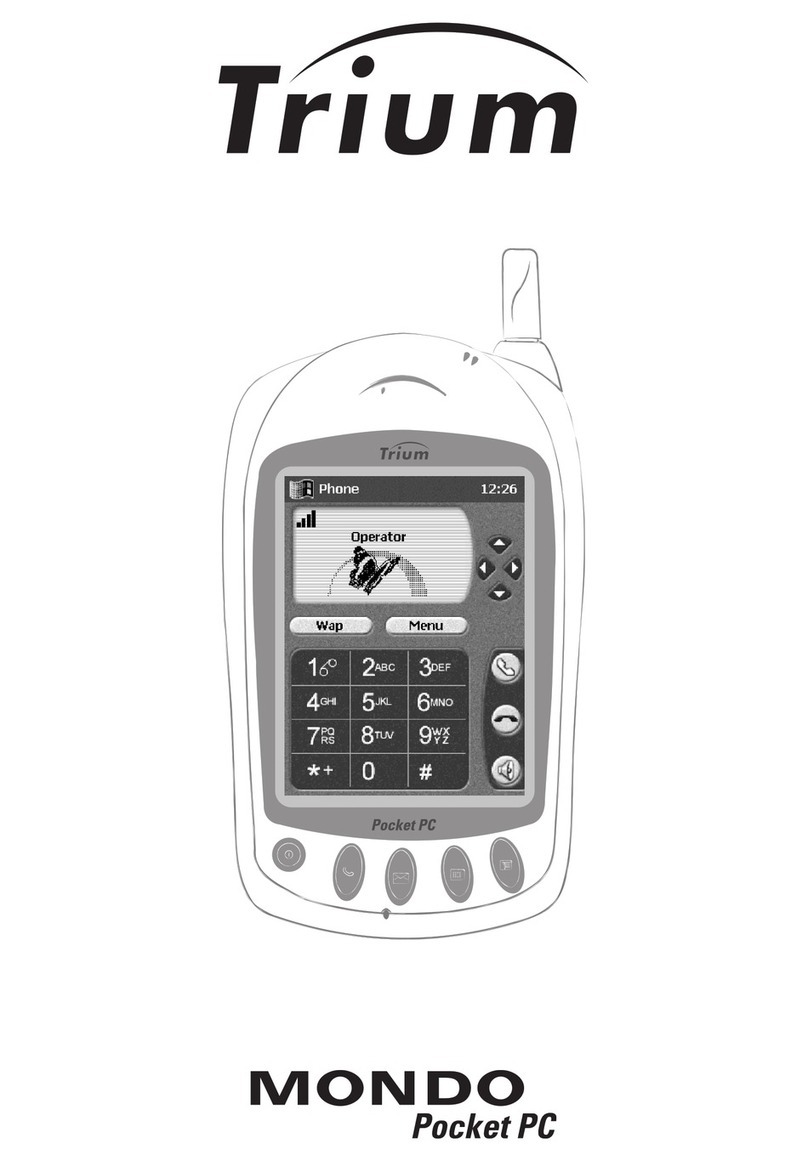
Trium Trium Mondo User manual


Table of contents - Windows-CE
• Basic Skills 3
- Today Screen 3
- Programs 4
- Navigation Bar and Command Bar 5
- Pop-up Menus 5
- Notifications 6
- Enter Information on Your Mondo 6
- Customize Your Mondo 12
- Power 15
- Adjusting the Backlight 16
- File Explorer 16
- Controlling Volume 17
- Backup and Restore Data 17
• Microsoft ActiveSync 18
• Microsoft Pocket Outlook 19
- Calendar: Scheduling Appointments and
Meetings 19
- Contacts: Tracking Friends and
Colleagues 21
- Tasks: Keeping a To Do List 22
- Notes: Capturing Thoughts and Ideas 23
- Inbox: Sending and Receiving E-mail
Messages 24
• Companion Programs 28
- Pocket Word 28
- Pocket Excel 30
- Microsoft Money 32
- Windows Media Player for Pocket PC 35
- Microsoft Reader 37
- Pocket Streets 39
• Pocket Internet Explorer 41
- The Mobile Favorites Folder 41
- Favorite Links 41
- Mobile Favorites 41
- Channels 42
- Use Pocket Internet Explorer 43
• Getting Connected 45
- Transfer Items Using Infrared 45
- Connect to an ISP 46
- Connect to Your Network 47
- End a Connection 48
- Connect Directly to an E-mail Server 48
- Get Help on Connecting 49
• Appendix A: Character Recognizer 50
• Appendix B: Troubleshooting 52
- Reset the Mondo and clear memory 52
- Batteries lose power 52
- If you forget your password 53
- If you run out of Mondo memory 53
- Screen freezes or responds slowly 54
- Screen is blank 54
- Screen is dark 54
- Screen is hard to read 54
- Inaccurate response to stylus taps 54
- Slow or no response 54
- Infrared (IR) connection problems 55
- Modem connection problems 55
- Cable and cradle connection problems 56
• Appendix C: Hardware Specifications 57
Microsoft® Windows® Powered Pocket PC
Microsoft, ActiveSync, Outlook, Pocket Outlook, Expedia, AutoRoute Express, MapPoint, Windows, and the Windows logo are
either registered trademarks or trademarks of Microsoft Corporation in the United States and/or other countries. Microsoft
products are licensed to OEMs by Microsoft Licensing, Inc., a wholly owned subsidiary of Microsoft Corporation.

• Today Screen
When you turn on your Mondo for
the first time each day (or after 4
hours of inactivity), you’ll see the
Today screen.
The Telephone application standby
screen will then be displayed.
You can also display it by tapping
ÿ and then Today. On the Today
screen, you can see at a glance
important information for the day.
You may see the following status
icons on the command bar:
Learning to use your Mondo is easy. This chapter describes the basic concepts
of using and customizing your Mondo.
3
Status Icon Meaning
Turns all sounds on and off
Backup battery is low
Backup battery is very low
Main batteries are charging
Main batteries are low
Main batteries are very low
External (AC) power source is connected
Dial-up connection is active
Direct connection is active
Basic Skills

4
• Programs
You can switch from one program to another by selecting it from the ÿ menu (you can
customize which programs you see on this menu. For information, see "Adjusting Settings",
later in this chapter). To access some programs, you’ll need to tap ÿ, Programs, and
then the program name.
Some programs have abbreviated labels for check boxes and drop-down menus. To see the
full spelling of an abbreviated label, tap and hold the stylus on the label. Drag the stylus off
the label so that the command is not carried out.
You can also switch to some programs by pressing a program button. Your Mondo has
one or more program buttons located on the front or side of the Mondo. The icons on the
buttons identify the programs they switch to.
Item
1
2
3
Icon Program
Microsoft Internet Explorer
Microsoft Task
Microsoft Note taker
Application 1 Application 2
Application 3
The following table contains a partial list of programs that are on your Mondo. Look
in the Extras folder on the ActiveSync CD for additional programs that you can install
onto your Mondo.
Icon Program
Calendar
Contacts
Inbox
Description
Keep track of your appointments and create meeting requests.
Keep track of your friends and colleagues.
Send and receive SMS and e-mail messages.
Notes Create handwritten or typed notes, drawings, and recordings.
Pocket
Excel
Create new workbooks or view and edit Excel workbooks created
on your desktop computer.
Pocket
Word
Create new documents or view and edit Word documents created
on your desktop computer.

5
Icon Program Description
Infrared
Receive
Receive information from another Windows-powered device.
View Web pages downloaded from your computer or connect to
an ISP and browse the Web.
Enter and view transactions and check on your account balances.
Read or listen to (using Audible) electronic books.
Keep track of your tasks.
Internet
Explorer
Microsoft
Money
Microsoft
Reader
Tasks
• Navigation Bar and Command Bar
The navigation bar is located at the top of the screen. It displays the active program and
current time, and allows you to switch to programs and close screens.
Use the command bar at the bottom
of the screen to perform tasks in
programs. The command bar inclu-
des menu names, buttons, and the
input panel button. To create a
new item in the current program,
tap New. To see the name of a
button, tap and hold the stylus on
the button. Drag the stylus off the
button so that the command is not
carried out.
• Pop-up Menus
With pop-up menus, you can quickly choose an action for an item. For example, you
can use the pop-up menu in the contact list to quickly delete a contact, make a copy
of a contact, or send an e-mail message to a contact. The actions in the pop-up menus
vary from program to program.

6
To access a pop-up menu, tap
and hold the stylus on the item
name that you want to perform
the action on. When the menu
appears, lift the stylus, and tap the
action you want to perform. Or
tap anywhere outside the menu
to close the menu without perfor-
ming an action.
• Notifications
Your Mondo reminds you in a variety of ways when you have something to do. For example,
if you’ve set up an appointment in Calendar, a task with a due date in Tasks, or an alarm in
Clock, you’ll be notified in any of the following ways:
• A message box appears on the screen.
• A sound, which you can specify, is played.
• A light flashes on your Mondo.
To choose reminder types and sounds for your Mondo, tap ÿ and then Settings. In the
Personal tab, tap Sounds & Reminders. The options you choose here apply throughout
the Mondo.
• Enter Information on Your Mondo
You have several options for entering new information:
• Use the input panel to enter typed text, either by using the soft keyboard or Character
Recognizer.
• Write directly on the screen.
• Draw pictures on the screen.
• Speak into your Mondo microphone to record a message.
• Use ActiveSync to synchronize or copy information from your desktop computer to your
Mondo. For more information on ActiveSync, see the booklet accompanying the
ActiveSync CD or ActiveSync Help on your desktop computer.

7
• Typing Using the Input Panel
Use the input panel to enter information in any program on your Mondo. You can either
type using the soft keyboard or write using Character Recognizer. In either case, the
characters appear as typed text on the screen.
To show or hide the input panel,
tap the Input Panel button. Tap
the arrow next to the Input Panel
button to see your choices.
When you use the input panel, your
Mondo anticipates the word you are
typing or writing and displays it above
the input panel. When you tap the
displayed word, it is inserted into
your text at the insertion point. The
more you use your Mondo, the more
words it learns to anticipate.
To change word suggestion options,
such as the number of words sug-
gested at one time, tap ÿ, Settings,
Personal tab, Input, and then the
Word Completion tab.
• To type with the soft keyboard:
1- Tap the arrow next to the Input Panel button and then Keyboard.
2- On the soft keyboard that is displayed, tap the keys with your stylus.
• To use Character Recognizer:
1- Tap the arrow next to the Input Panel button and then Character Recognizer.
2- Write a letter in the box.
When you write a letter, it is converted to typed text that appears on the screen. For
specific instructions on using Character Recognizer, see Appendix A.
• To select typed text:
If you want to edit or format typed text, you must select it first.
- Drag the stylus across the text you want to select.
You can cut, copy, and paste text by tapping and holding the selected words and
then tapping an editing command on the pop-up menu, or by tapping the command
on the Edit menu.

8
• Writing on the Screen:
In any program that accepts writing, such as the Notes program and the Notes tab in
Calendar, Contacts, and Tasks, you can use your stylus to write directly on the screen.
Write the way you do on paper. You can edit and format what you’ve written and
convert the information to text at a later time.
- To write on the screen:
Tap the Pen button to switch to writing mode.
This action displays lines on the screen to help
you write.
Some programs that accept writing may not
have the Pen button. See the documentation
for that program to find out how to switch to
writing mode.
- To select writing:
If you want to edit or format writing, you must select it first.
1- Tap and hold the stylus next to the text you want to select until the insertion
point appears.
2- Without lifting, drag the stylus across the text you want to select.
If you accidentally write on the screen, tap Tools and then Undo and try again.
You can also select text by tapping the Pen button to deselect it and then
dragging the stylus across the screen.
You can cut, copy, and paste written text in the same way you work with typed
text: tap and hold the selected words and then tap an editing command on the
pop-up menu, or tap the command on the Edit menu.
- To convert writing to text:
Tap Tools and then Recognize.
If you want to convert only certain words, select them before tapping Recognize
on the Tools menu (or tap and hold the selected words and then tap Recognize
on the pop-up menu). If a word is not recognized, it is left as writing.

9
If the conversion is incorrect, you can select different words from a list of
alternates or return to the original writing. To do so, tap and hold the incorrect
word (tap one word at a time). On the pop-up menu, tap Alternates. A menu
with a list of alternate words appears. Tap the word you want to use, or tap the
writing at the top of the menu to return to the original writing.
Tips for getting good recognition:
• Write neatly.
• Write on the lines and
draw descenders be-
low the line. Write
the cross of the "t"
and apostrophes be-
low the top line so
that they are not con-
fused with the word
above. Write periods
and commas above
the line.
• For better recognition,
try increasing the
zoom level to 300%
using the Tools
menu.

10
• Write the letters of a word closely and leave big gaps between words so that
the Mondo can easily tell where words begin and end.
• Hyphenated words, foreign words that use special characters such as accents,
and some punctuation cannot be converted.
• If you add writing to a word to change it (such as changing a "3" to an "8") after
you attempt to recognize the word, the writing you add will not be included if
you attempt to recognize the writing again.
• Drawing on the Screen:
You can draw on the screen in the same way that you write on the screen. The
difference between writing and drawing on the screen is how you select items
and how they can be edited. For example, selected drawings can be resized, while
writing cannot.
- To create a drawing:
Cross three ruled lines on
your first stroke. A drawing
box appears. Subsequent
strokes in or touching the
drawing box become part
of the drawing. Drawings
that do not cross three
ruled lines will be treated
as writing.
You may want to change
the zoom level so that you
can more easily work on
or view your drawing. Tap
Tools and then a zoom
level.
- To select a drawing:
If you want to edit or format a drawing, you must select it first.
• Tap and hold the stylus on the drawing until the selection handle appears.
To select multiple drawings, deselect the Pen button and then drag to select
the drawings you want.
You can cut, copy, and paste selected drawings by tapping and holding the
selected drawing and then tapping an editing command on the pop-up menu, or
by tapping the command on the Edit menu. To resize a drawing, make sure the
Pen button is not selected and drag a selection handle.

11
• Recording a Message:
In any program where you can write or draw on the screen, you can also quickly capture
thoughts, reminders, and phone numbers by recording a message. In Calendar, Tasks,
and Contacts, you can include a recording in the Notes tab. In the Notes program, you
can either create a stand-alone recording or include a recording in a written note. If you
want to include the recording in a note, open the note first.
- To create a recording:
1- Hold your Mondo’s microphone near your mouth or other source of sound.
2- Press and hold the Record
hardware button on your
Mondo until you hear a
beep.
3- While holding down the
Record button, make your
recording.
4- To stop recording, release the
Record button. Two beeps
will sound. The new recor-
ding appears in the note list
or as an embedded icon.
You can also make a recording
by tapping the Record button
on the Recording toolbar.
To play a recording, tap it in
the list or tap its icon in the
note.
• Find and Organize Information:
The Find feature on your Mondo helps you quickly locate information.
On the ÿ menu, tap Find. Enter the text you want to find, select a data type, and
then tap Go to start the search.
To quickly find information that is taking up storage space on your Mondo, select
Larger than 64 KB in Type.
You can also use the File Explorer to find files on your Mondo and to organize these files
into folders. On the ÿ menu, tap Programs, and then File Explorer.

12
• Customize your Mondo
You can customize your Mondo by adjusting Mondo settings and installing additional
software.
• Adjusting Settings
You can adjust Mondo settings to suit the way you work. To see available options,
tap ÿ, Settings, then the Personal, System or Connections tab located at the
bottom of the screen.
You might wish to do the following:
Item
Align Screen
Backlight
Buttons
Description
Adjust the touch screen if it is not responding accurately.
Set the length of time before the backlight turns off when the Mondo is idle.
Associate program buttons with specific programs and adjust the up/down control
of the jog wheel.
Clock Change the time or set alarms.
Input Customize the input method and set word completion settings.
Memory Adjust the allocation of storage and program memory.
Menus Customize what appears on the menu and enable a pop-up menu from the New
button.
Enter your contact information.
Limits access to your Mondo.
Maximize battery life.
Owner Information
Password
Power
You can move files in File Explorer by
tapping and holding the item you want
to move and then tapping Cut or Copy
and Paste on the pop-up menu.

13
• Setting a Password
Password security is provided to help protect against unauthorized use of your Mondo.
For immediate protection, we recommend setting up password security through the
Password utility in the Settings of your Mondo as soon as possible. If set, your login
password must be entered each time you turn on your Mondo.
Choose a password that's easy to remember. If you forget it, you must perform a
full reset to use your Mondo again. A full reset restarts your Mondo and removes
all infor-mation that was stored in memory, such as your data files and your system
settings.
To set your login password, follow these steps:
• Tap ÿ, Settings, then Password.
• Enter a new 4-digit PIN. This number is now your password.
• Enable the Mondo password by checking the Require password when Mondo
is turned on box.
• Save your new settings by tapping OK.
Your login password is now set. The login password screen appears each time you
turn on your Mondo.
• Adjusting Settings
You can adjust Mondo settings to suit the way you work. To see available options, tap ÿ,
Settings, then the Personal or System tab located at the bottom of the screen.
You might want to adjust the following:
• Clock, to change the time or to set alarms
• Menus, to customize what appears on the ÿ,menu and to enable a pop-up menu
from the New button
• Owner Information, to enter your contact information
• Password, to limit access to your Mondo
• Power, to maximize battery life
• Today, to customize the information that is displayed on the Today screen.
• Adding or Removing Programs
Programs added to your Mondo at the factory are stored in ROM (read-only memory).
You cannot remove or modify this software, and you’ll never accidentally lose ROM
contents. Programs and data files added to your Mondo after factory installation are
stored in RAM (random access memory). You can install any program created for
Mondo, as long as your Mondo has enough memory. The most popular place to find
software for your Mondo is on the World Wide Web.

14
- To add programs:
You’ll need to install the appropriate software for your Mondo on your desktop
computer before installing it on your Mondo.
1- Determine your Mondo and processor type so that you know which version
of the software to install. Tap ÿ and then Settings. On the System tab, tap
About. In the Version tab, make a note of the information in Processor.
2- Download the program to your desktop computer (or insert the CD or disk
that contains the program into your desktop computer). You may see a single
*.exe file, a *.zip file, a Setup.exe file, or several versions of files for different
device types and processors. Be sure to select the program designed for
Mondo and your Mondo processor type.
3- Read any installation instructions, Read Me files, or documentation that comes
with the program. Many programs provide special installation instructions.
4- Connect your Mondo and desktop computer.
5- Double-click the *.exe file.
• If the file is an installer, the installation wizard will begin. Follow the
directions on the screen. Once the software has been installed on your
desktop computer, the installer will automatically transfer the software to
your Mondo.
• If the file is not an installer, you will see an error message stating that the
program is valid but it is designed for a different type of computer. You will
need to move this file to your Mondo. If you cannot find any installation
instructions for the program in the Read Me file or documentation, use
ActiveSync Explore to copy the program file to the Program Files folder on
your Mondo. For more information on copying files using ActiveSync, see
ActiveSync Help.
Once installation is complete, tap ÿ, Programs, and then the program icon
to switch to it.
- To add a program to the Start menu:
Tap ÿ, Settings, Menus, the Start Menu tab, and then the check box for the
program. If you do not see the program listed, you can either use File Explorer
on your Mondo to move the program to the Start Menu folder or use ActiveSync
on the desktop computer to create a shortcut to the program and place the
shortcut in the Start Menu folder.
• Using File Explorer on the Mondo: Tap ÿ, Programs, File Explorer, and
locate the program (tap the folder list, labeled My Documents by default,
and then My Device to see a list of all folders on Mondo). Tap and hold
the program and tap Cut on the pop-up menu. Open the Start Menu folder
located in the Windows folder, tap and hold a blank area of the window,
and tap Paste on the pop-up menu. The program will now appear on the ÿ
menu. For more information on using File Explorer, see "Find and Organize
Information," earlier in this chapter.

15
• Using ActiveSync on the desktop computer: Use the Explorer in ActiveSync
to explore your Mondo files and locate the program. Right-click the program,
and then click Create Shortcut. Move the shortcut to the Start Menu folder
in the Windows folder. The shortcut now appears on the ÿ menu. For more
information, see ActiveSync Help.
- To remove programs:
Tap ÿ and then Settings. On the System tab, tap Remove Programs.
If the program does not appear in the list of installed programs, use File Explorer
on your Mondo to locate the program, tap and hold the program, and then tap
Delete on the pop-up menu.
• Power
When you are working with your Mondo and using battery power, you can monitor the
charge held in the battery by using the Power window. To conserve battery power, your
Mondo automatically powers off whenever it is idle for a continuous period of time. If you
are running on battery power, you can conserve charge if you shorten the idle time before
your Mondo automatically powers off.
- To display the Power control panel:
• Tap ÿ, Settings, System, then Power.
• If the battery is low on charge, the battery
icon appears on the command bar on the Today
screen. Tap the battery icon to display the
Power control panel.
• If the battery gets very low, your Mondo dis-
plays a warning message. If this occurs, save
any unsaved data you are working on, perform
a synchronization with your com-puter, then
turn off your Mondo. Don’t try to restart your
Mondo until you have connected to external
power. If your Mondo shuts down, you still
have about 24 hours to recharge the battery
before you lose the data on your Mondo.
The Power control panel only shows the battery
charge level if you are using the battery. If you
have connected the AC adapter, the window
shows the recharging status.
- To set the power off timer:
• Tap ÿ, Settings, System, then Power.
• Use the drop down menus to set the idle intervals before your Mondo automatically
powers off.

16
• If you are playing an audio file on your Mondo under battery power, the display will
automatically turn off after one minute if there has been no input to your Mondo.
The display will turn back on once the audio file has finished playing. This power
saving fea-ture is not adjustable.
• Adjusting the Backlight
Mondo features a built-in backlight that allows you
to view text and graphics clearly whether you're
indoors or outdoors, in a dim study or at a brightly
lit worksite.
To turn on or off the backlight press and hold the
Power button for one second.
- To adjust the backlight time-out:
Use the drop-down menus to set the amount
of idle time before the backlight turns off when
your Mondo is using battery power and external
power.
• File Explorer
You can use the File Explorer to
find files on your Mondo and to
organize these files into folders.
Press the Programs button, then
tap File Explorer.

17
• Controlling Volume
The Volume utility provides an easy way to adjust
the volume of your Mondo.Press the Settings button,
then tap Volume.
or
- Tap ÿ, Settings, System, then Sounds &
Reminders.
- Adjust the volume level on the slider.
- Tap OK to save the new setting.
• Backup and Restore Data
To avoid losing your data in the event that your Mondo is lost, stolen, or becomes defective,
we recommends periodic backups to the your computer’s hard drive. Depending on your
usage, you may want to perform a backup as often as once a day. You can back up and
restore your Mondo 's data using the following utility:
• ActiveSync Backup/Restore. Use this ActiveSync utility to periodically back up your
Mondo 's data onto your computer’s hard drive. You can manually back up data or
set this utility to back up automatically each time you connect to your Pocket PC. For
more information, see ActiveSync Help on your computer.

18
Using Microsoft ActiveSync, you can synchronize the information on your desktop computer
with the information on your Mondo. Synchronization compares the data on your Mondo
with your desktop computer and updates both computers with the most recent information.
For example:
• Keep Pocket Outlook data up-to-date by synchronizing your Mondo with your choice
of Microsoft Outlook, Microsoft Schedule+, or Microsoft Exchange on your desktop
computer.
• Synchronize Microsoft Word and Microsoft Excel documents between your Mondo and
desktop computer. Your files are automatically converted to the correct format.
By default, ActiveSync does not automatically synchronize all types of information, for
example, e-mail messages. Use ActiveSync options to turn synchronization on and off for
specific information types.
With ActiveSync, you can also:
• Back up and restore your Mondo data.
• Copy (rather than synchronize) files between your Mondo and desktop computer.
• Control when synchronization occurs by selecting a synchronization mode. For example,
you can synchronize continually while the Mondo is in the cradle or only when you
choose the synchronize command.
• Select which information types are synchronized and control how much data is
synchronized. For example, you can choose how many weeks of past appointments
you want synchronized.
For information on installing ActiveSync, see the booklet accompanying the ActiveSync CD.
For information on using ActiveSync, see ActiveSync Help on the desktop computer.
Microsoft ActiveSync

19
Microsoft Pocket Outlook® includes Calendar, Contacts, Tasks, Inbox, and Notes. You
can use these programs individually or together. For example, e-mail addresses stored in
Contacts can be used to address e-mail messages in Inbox.
Using ActiveSync, you can synchronize information in Microsoft Outlook, Microsoft
Schedule+, or Microsoft Exchange on your desktop computer with your Mondo. Each time
you synchronize, ActiveSync compares the changes you made on your Mondo and desktop
computer and updates both computers with the latest information. For information on using
ActiveSync, see ActiveSync Help on the desktop computer.
You can switch to any of these programs by tapping them on the ÿ menu.
• Calendar: Scheduling Appointments and Meetings
Use Calendar to schedule appointments, inclu-
ding meetings and other events. You can
check your appointments in one of several
views (Agenda, Day, Week, Month, and Year)
and easily switch views by using the View
menu.
You can customize the Calendar display, such
as changing the first day of the week, by
tapping Options on the Tools menu.
- To create an appointment:
1- If you are in Day or Week view, tap the desired date and time for the
appointment.
2- Tap New.
3- Using the input panel, enter a description and a location. Tap first to select the
field.
4- If needed, tap the date and time to change them.
5- Enter other desired information. You will need to hide the input panel to see all
available fields.
6- To add notes, tap the Notes tab. You can enter text, draw, or create a recording.
For more information on creating notes, see "Notes: Capturing Thoughts and
Ideas", later in this chapter.
7- When finished, tap OK to return to the calendar.
Microsoft Pocket Outlook

20
If you select Remind me in an appointment,
your Mondo will remind you according to
the options set in ÿ, Settings, Personal
tab, Sounds & Reminders.
- Using the Summary Screen:
When you tap an appointment in Calendar,
a summary screen is displayed. Tap the
top portion of the summary screen to
change the appointment.
- Creating Meeting Requests:
You can use Calendar to set up meetings with users of Outlook, Pocket Outlook, or
Schedule+. The meeting notice will be created automatically and sent either when
you synchronize Inbox or when you connect to your e-mail server. Indicate how
you want meeting requests sent by tapping Tools and then Options. If you send
and receive e-mail messages through ActiveSync, select ActiveSync.
To schedule a meeting:
1- Create an appointment.
2- In the appointment details, hide the input panel, and then tap Attendees.
3- From the list of e-mail addresses you’ve entered in Contacts, select the meeting
attendees.
The meeting notice is created automatically and placed in the Outbox folder.
For more information on sending and receiving meeting requests, see Calendar
Help and Inbox Help on the Mondo.
Other manuals for Trium Mondo
1
Table of contents
Other Trium Handheld manuals
