Trodat T1511M User manual

Flash Stamp Machine T1511M
User Manual

Declaration of conformity (Europe only)
We,
Trodat GmbH
Linzer Straße 156
A-4600 Wels
hereby declare that the Flash Stamp Machine model T1511M is CE certified respectively in
conformity with the essential requirements of all relevant directives and regulations applied
with the European Union.
The CE certification can be requested from your Trodat sales representative.
Trodat GmbH cannot be held responsible for any direct or indirect damages, which result
from using or working with the machine described herein. Only trained and skilled personnel
must use the machine. Before use the manual should be read and followed carefully.
Furthermore, Trodat reserves the right to change or alter any product described herein
without prior notice.

3
Flash Stamp Machine T1511M
Trodat Flash Machine T1511M
User Manual
Content
I. General and safety information......................................................................................4
II. Scope of use.................................................................................................................5
III. Delivery content and installation....................................................................................6
IV. Controls and Functions .................................................................................................7
V. Required Equipment....................................................................................................10
VI. Operation....................................................................................................................12
VII. Maintenance................................................................................................................18
VIII. Technical specification................................................................................................18
Congratulations and thank you for your purchase of the Trodat Flash Machine T1511M. Before
using the machine please read this manual to insure safe and proper operation and keep it for
future reference. In case of problems or further questions please contact your Trodat sales
representative.
Version 1.5_EN (01/2019)

4
Flash Stamp Machine T1511M
I. General and safety information
Before putting the T1511M Flash Machine into operation read this user manual carefully and
keep it for future reference.
The machine may only be used in closed and dry areas. Do not operate it in explosive
environments.
Make sure that the machine is situated away from heat sources or equipment that may
generate excessive vibration, dust or moisture.
To prevent condensation inside the Flash Machine avoid exposing it to sudden
temperature changes.
The machine may only be operated on a stable, even and clean work surface. Serious
injury to the operator and damage to the machine can result from poor machine
placement.
Do not use the machine with non-grounded power sources. Operate the machine only
with a power source that meets the specifications indicated on the label at the back of
the machine.
Do not overload wall sockets, extension cords or surge protectors with other devices
as this can result in a risk of fire or electrical shock. Power supply cords should be
routed so that they are not likely to be walked on or pinched by items placed against
them.
Do not use any accessories or supplies (spacers, glass plates, vellum papers,
transparency sheets etc.) that are not recommended or supplied by Trodat, as this may
cause hazards.
Always unplug the machine from the power supply prior to any installation,
maintenance or cleaning procedures.
Very high voltages may be inside the machine (due to capacitors). Never modify or
bridge any of the safety features. Serious injuries due to an electric shock or
unintentional exposure could be the consequence.
Do not use the machine if it shows any damage. Immediately disconnect it from the
power supply.
The electric power supply cables must not show any damages or material fatigue.
Never attempt to disassemble or repair the machine. Electrical repairs should only be
done by a qualified and authorized technician (familiar with these types of electronics
and capacitors).
Do not dispose of the machine with domestic waste! Electronic devices have to be
disposed according to the regional directives on electronic and electric waste disposal.
5
Flash Stamp Machine T1511M
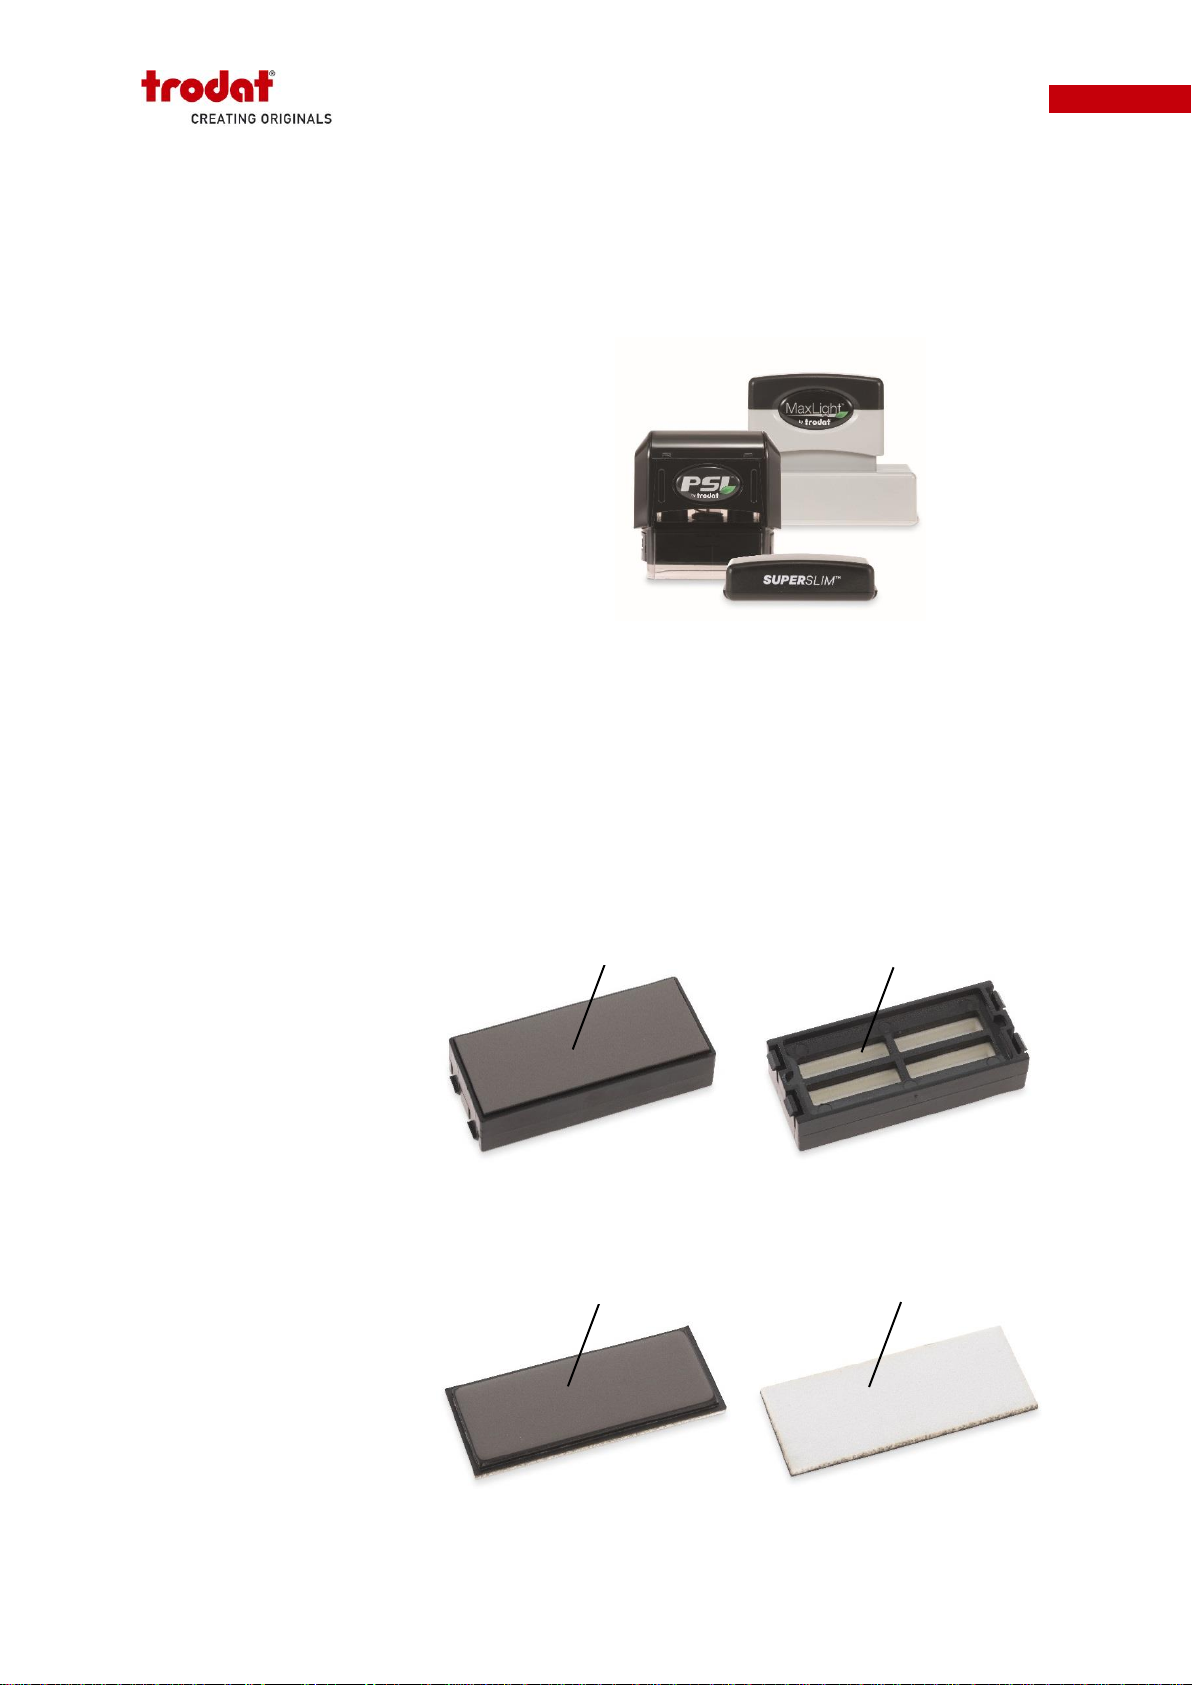
II. Scope of use
The Flash Machine T1511M is an exposure system, designed to quickly and easily expose
(flash) all models and sizes of Trodat's Premium Flash range including the new (die box) and
regular (foam) systems:
MaxLight (S-Style, Z-Style)
MaxLight X (Pre-Assembled Z-Style)
PSI (E-Style)
Slim Stamp (E-Style)
Super Slim (Slim Style)
The Flash Machine T1511M supports all production methods of the Premium Flash range, no
matter if (a) an entire die box or (b) foam only (microporous photosensitive text plate) is
exposed (explanation see below). After placing the printed vellum paper and a clear
transparency film in the machine, the die box or foam can be positioned and the machine
closed. The desired energy level will charge the system and properly expose the die box or
foam. The exposed die box or foam is then ready for inking and assembling in the proper
MaxLight, MaxLight X, PSI or Slim Stamp pre-inked stamp.
(a) DIE BOX (new system)
Combines foam and dry
cartridge all in one. The die
box is exposed on the grey
foam side and is inked by
filling ink into the ink cartridge
cavities.
Die box front side
Die box back side
(b) FOAM (regular system)
The foam only textplate has
foam on the one side and a
thin cartridge layer on the
other side for fast ink
migration. The foam is
exposed on the grey foam
side and is assembled in a
retainer ring or die box for
inking.
Foam front side
Foam back side
Foam
Foam
Cartridge layer
Ink cartridge cavities

6
Flash Stamp Machine T1511M
III. Delivery content and installation
Please check the packaging for transport damages and completeness. In case of any damage
contact your supplier immediately and do not use the Flash Machine.
Delivery content
Flash Machine T1511M
Exposure glass
Spacer (pressure plate)
Power cable
User manual
Premium Flash Catalogue (including inking and assembling instructions)
Installation
Place the Flash Machine on a stable, even and
clean surface and make sure that it is placed in an
unobstructed area to ensure that the coolingfan can
operate properly. Put the exposure glass plate on
top of the lamps.
Use the supplied power cable to connect the
machine to a grounded power outlet.
Attention: Never place or remove the glass plate
when the machine is plugged into a power
supply. High voltages inside the machine may
cause serious injuries!
Placing glass plate
Power connection

7
Flash Stamp Machine T1511M
IV.Controls and Functions
Power plug
The power plug is located on the back of the Flash Machine. It allows the use of grounded
power cables only.
Fuse
The fuse holder is located above the power plug. This contains the fuse that provides overload
protection for the Flash Machine.
Power switch
The power switch is located on the back of the Flash Machine. Press this switch to turn the
power on/off to machine. The switch will be lighted when the machine is turned on. The light
will go off when the machine is turned off.
Fan switch
The fan switch is located on the back of the Flash Machine. Press this switch to turn the cooling
fan on/off. The cooling fan is for cooling the electronic device, lamps and glass. Due to the
integrated cooling fan a continuous production process is possible, as no cooling phases are
required. It is recommended to turn on the cooling fan when the temperature rises above 35°C,
to cool down the exposure system and ensure optimal exposure results. The cooling fan has
no impact on the exposure result and can be turned on/off during the exposure process.
3
1
4
2
Machine back side

8
Flash Stamp Machine T1511M
Energy dial
The energy dial sets the energy level of the lamps when the exposure is activated. The energy
levels are numbered "1-10", with "1" being the lowest and "10" being the highest setting. For
exposing all Trodat Premium Flash models it is recommended to set the energy level at "6".
Cover and clamping mechanism
The clamping mechanism of the cover is for the compression of the die box orfoam. The cover
evenly applies pressure and compresses the die box or foam, which is required for proper
exposure results. Due to safety reasons the exposure process will not start if the cover is in
open position.
Start button (Flash button)
The start button is located on the front of the Flash Machine. Press the button to execute an
exposure. Thisbutton is onlyactive with the clamping mechanism inthe fully closed and locked
position.
Temperature indicator
The temperature indicator is located on the front of the Flash Machine and indicates the
temperature of the exposure system in degrees Celsius. The temperature of the machine will
increase with a continuous production process. Operating the machine over a temperature of
50°C can have a negative impact on the exposure result and can lead to an overexposure
(overflashing) of the foam. It is recommended to turn on the cooling fan when the temperature
rises above 35°C, to cool down the exposure system and ensure optimal exposure results.
Machine front side
7
8
6
5
9
Flash Stamp Machine T1511M
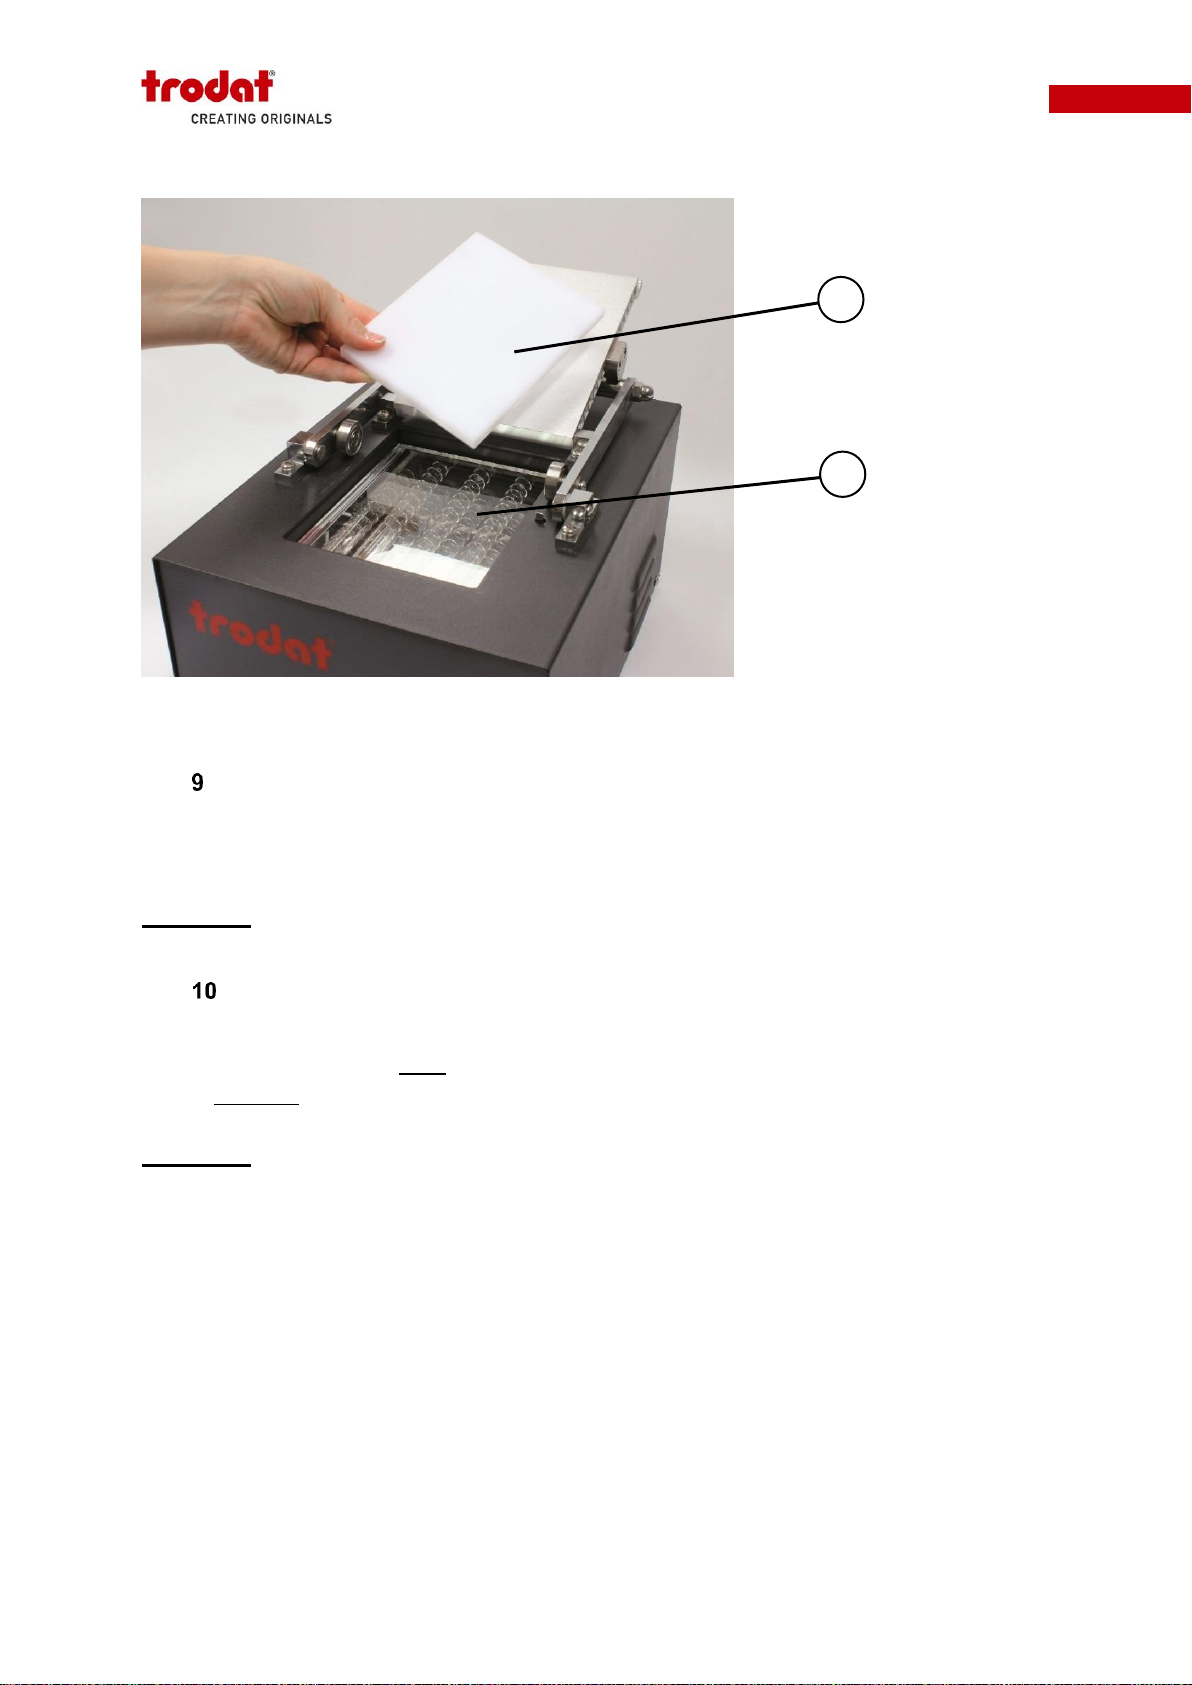
Exposure area
The exposure area of the machine (150mm x 110mm) is designed to expose all MaxLight,
MaxLight X, PSI, Slim Stamp and Super Slim sizes.
Important: Always make sure that the exposure area is clean before flashing.
Spacer (pressure plate)
The spacer is mounted on the cover with magnets for simple exchange. For exposing foam
only the delivered spacer must be mounted on the cover. For exposing entire die boxes the
spacer must not be mounted on the cover.
Important: Never expose a die box, while the spacer is mounted on the cover. This can cause
serious damage to the machine.
10
9
Machine open

10
Flash Stamp Machine T1511M
V. Required Equipment
For proper stamp production with the Flash Machine T1511M the following additional
equipment is needed:
Computer with graphic arts software
A computer with basic graphic arts software (e.g. Corel Draw) is recommended for typesetting.
A regular word processing software can also be used for typesetting, but you will be unable to
use the recommended Trodat typesetting templates.
Please note: Trodat offers typesetting templates for allMaxLight, MaxLightX, PSI, Slim Stamp
and Super Slim models and sizes as Corel Draw files. Each typesetting template consists of 3
attributes: model number, black positioning frame (outer border) and red typesetting frame
(inner border) –see picture "Typesetting template". The model number is located next to the
positioning frame of each individual template. The black positioning frame represents the total
overall size of the die boxor foam and is used for centering the die boxor foam overthe printed
artwork. The red typesetting frame represents the maximal area for typesetting. Before printing
make sure to delete the red typesetting frame, otherwise it will be visible on the stamp text
plate.
Please contact your Trodat sales representative to get the typesetting templates.
Monochrome laser printer
A monochrome (only black and white) laser printer with 600 DPI (dots per inch) or higher
resolution is required for printing an artwork on vellum paper. Do not use a colour laser or ink
jet printer for vellum printing. Using the improper printer will cause unsatisfactory stamp
impression quality. The density of the toner is important to block the light of the print areas.
You may need to adjust the print density setting of your printer for optimal performance. See
your printer’s owner manual. Please also make sure you are onlyusing original tonercartridges
for best printing results.
Sample artwork
Typesetting template
black positioning
frame
red typesetting
frame
model number

11
Flash Stamp Machine T1511M
Trodat Premium Vellum Paper
The vellum paper is used for printing the desired artwork. It is available in two sizes: pre-cut
(108mm x 140mm) or US letter (216mm x 279mm). The pre-cut size perfectly fits into the
T1511M Flash Machine (no extra cutting needed before putting into the machine). It is highly
recommended that you use only the Trodat Premium Vellum paper. Using improper vellum
can cause bad exposure results and lead to unsatisfactory stamp impression quality.
Trodat Premium Transparency Film
The clear transparency film is placed on top of the printed vellum to separate the artwork from
the Flash foam. It is available in two sizes: pre-cut (108mm x 140mm) or US letter (216mm x
279mm). The pre-cut size perfectly fits into the T1511M Flash Machine (no extra cutting
needed before putting into the machine). Please use only the Trodat Premium Transparency
Film for proper production results.
12
Flash Stamp Machine T1511M
VI.Operation
All Trodat's Premium Flash models use a high quality flash foam as text plates. The foam will
be sealed during the exposure process according to the artwork.
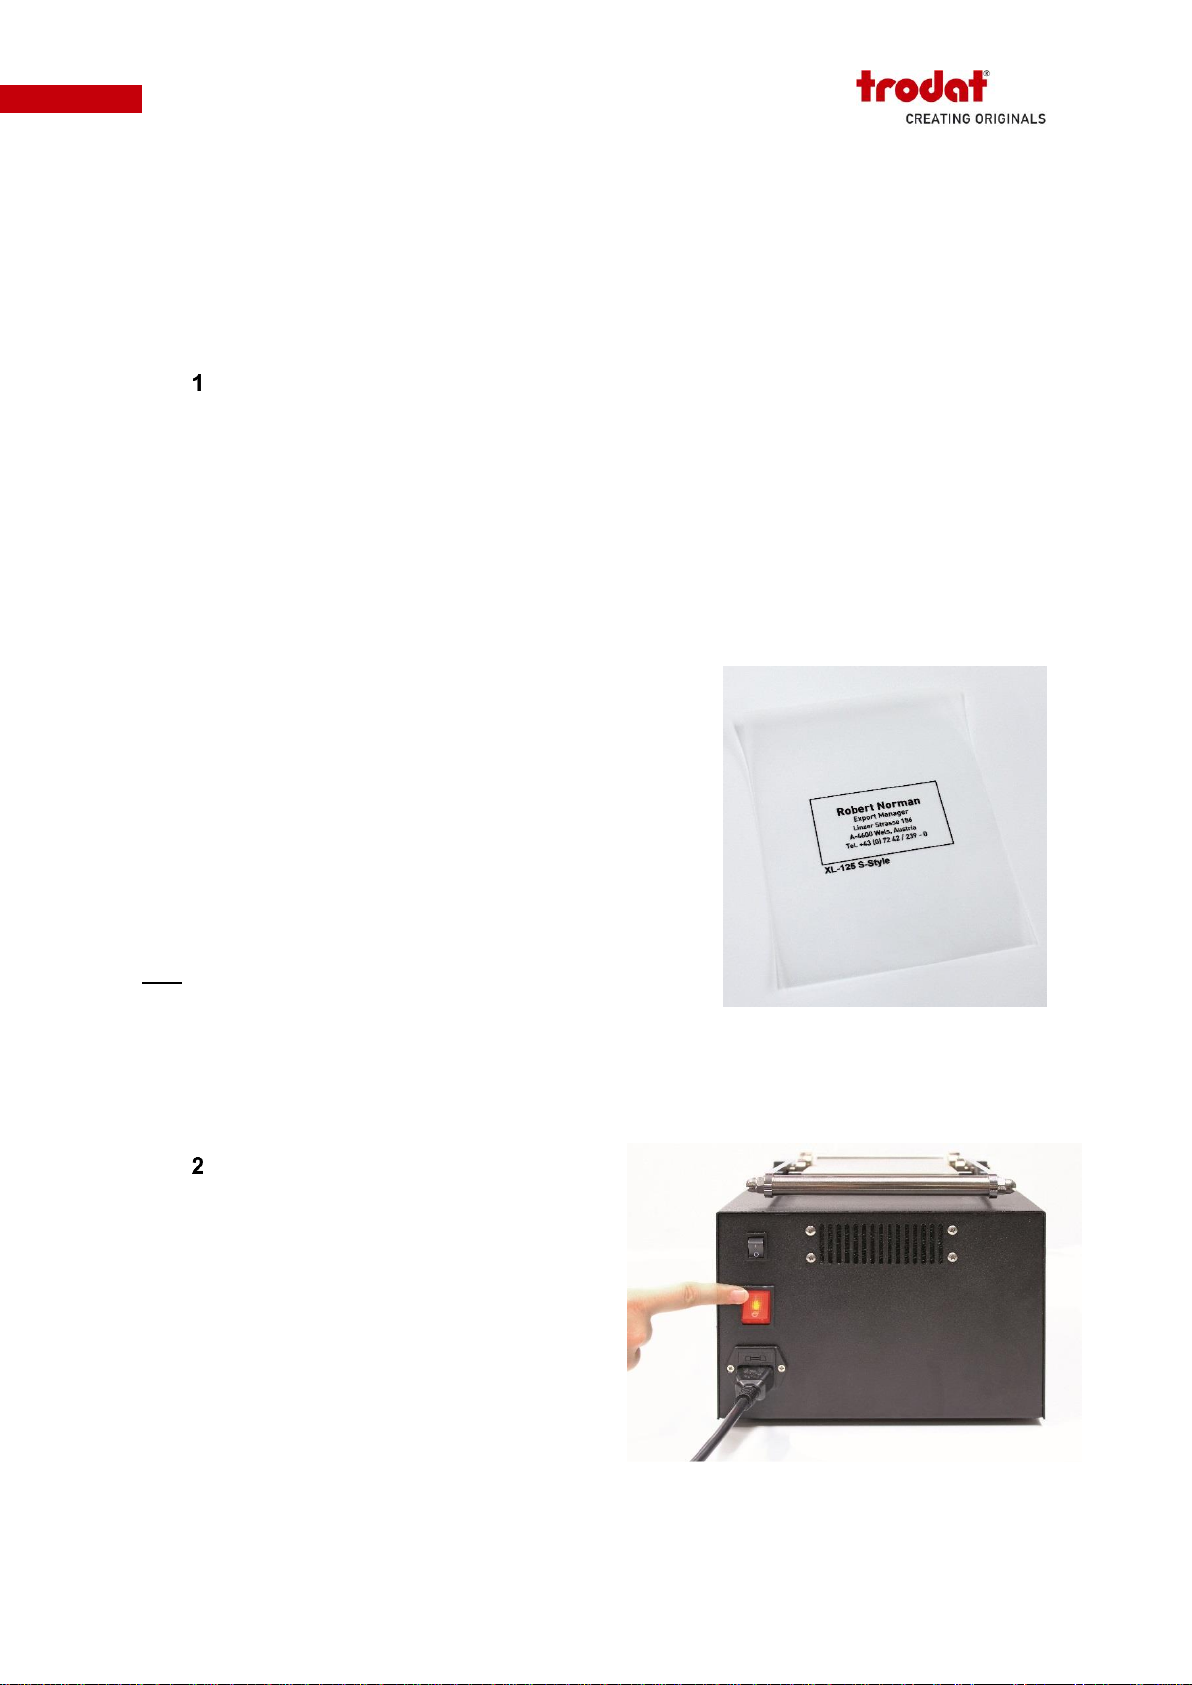
Print artwork
The artwork for the exposure process should be printed using a 600 dots per inch (DPI) or
higher monochrome laser printer on Trodat Premium Vellum Paper. The vellum can be printed
from both sides. The print should be right-reading (positive) and not reversed or mirrored for
use in the T1511M Flash Machine. For proper exposure results, the printed artwork has to be
deep black. Make sure to not use grey or colour tones in your artwork. Set the print density in
the printer properties to its highest setting and use the printer setting "Print black only". Do not
print in greyscale, this will have a negative impact on the exposure result.
The artwork for the stamp should be surrounded by a
black printable positioning frame that is the same overall
size as the die box or foam that will be exposed. Doing this
will allow for easy placement of the die box or foam during
the loading process. For fast and easy artwork designing
you can use Trodat's typesetting templates (described in
the previous chapter), which offer positioning frames for
all MaxLight, MaxLight X, PSI, Slim Stamp and Super Slim
models and sizes.
Tip: When printing several artworks on one vellum sheet,
make sure to leave at least a 1cm gap between each
artwork in your layout. This is to allow for quick and easy
placement of die box or foam.
Switch on machine
Switch the machine on using the main power
switch on the back side of the machine.
Switch on machine
Printed vellum
13
Flash Stamp Machine T1511M
Open cover and adapt machine setup
Open the cover of the machine and make sure that you have the correct machine setup
depending on whether a (a) die box or (b) foam only will be exposed:
(a) Exposing Die Boxes: For exposing entire
die boxes remove the spacer from the cover.
Following models have to be exposed
without spacer:
MaxLight S-Style
MaxLight X Pre-Assembled Z-Style
PSI E-Style
Slim Stamp E-Style
Super Slim
(b) Exposing Foam: For exposing foam only
place the spacer onto the cover (magnets
centre it automatically).
Following models have to be exposed with
the spacer:
MaxLight Z-Style
MaxLight X Foam Only *
(=disassembled Pre-Assembled Z-Style)
*X39 cannot be flashed as assembled die box.
Always disassemble the X39 die box and flash
foam only!
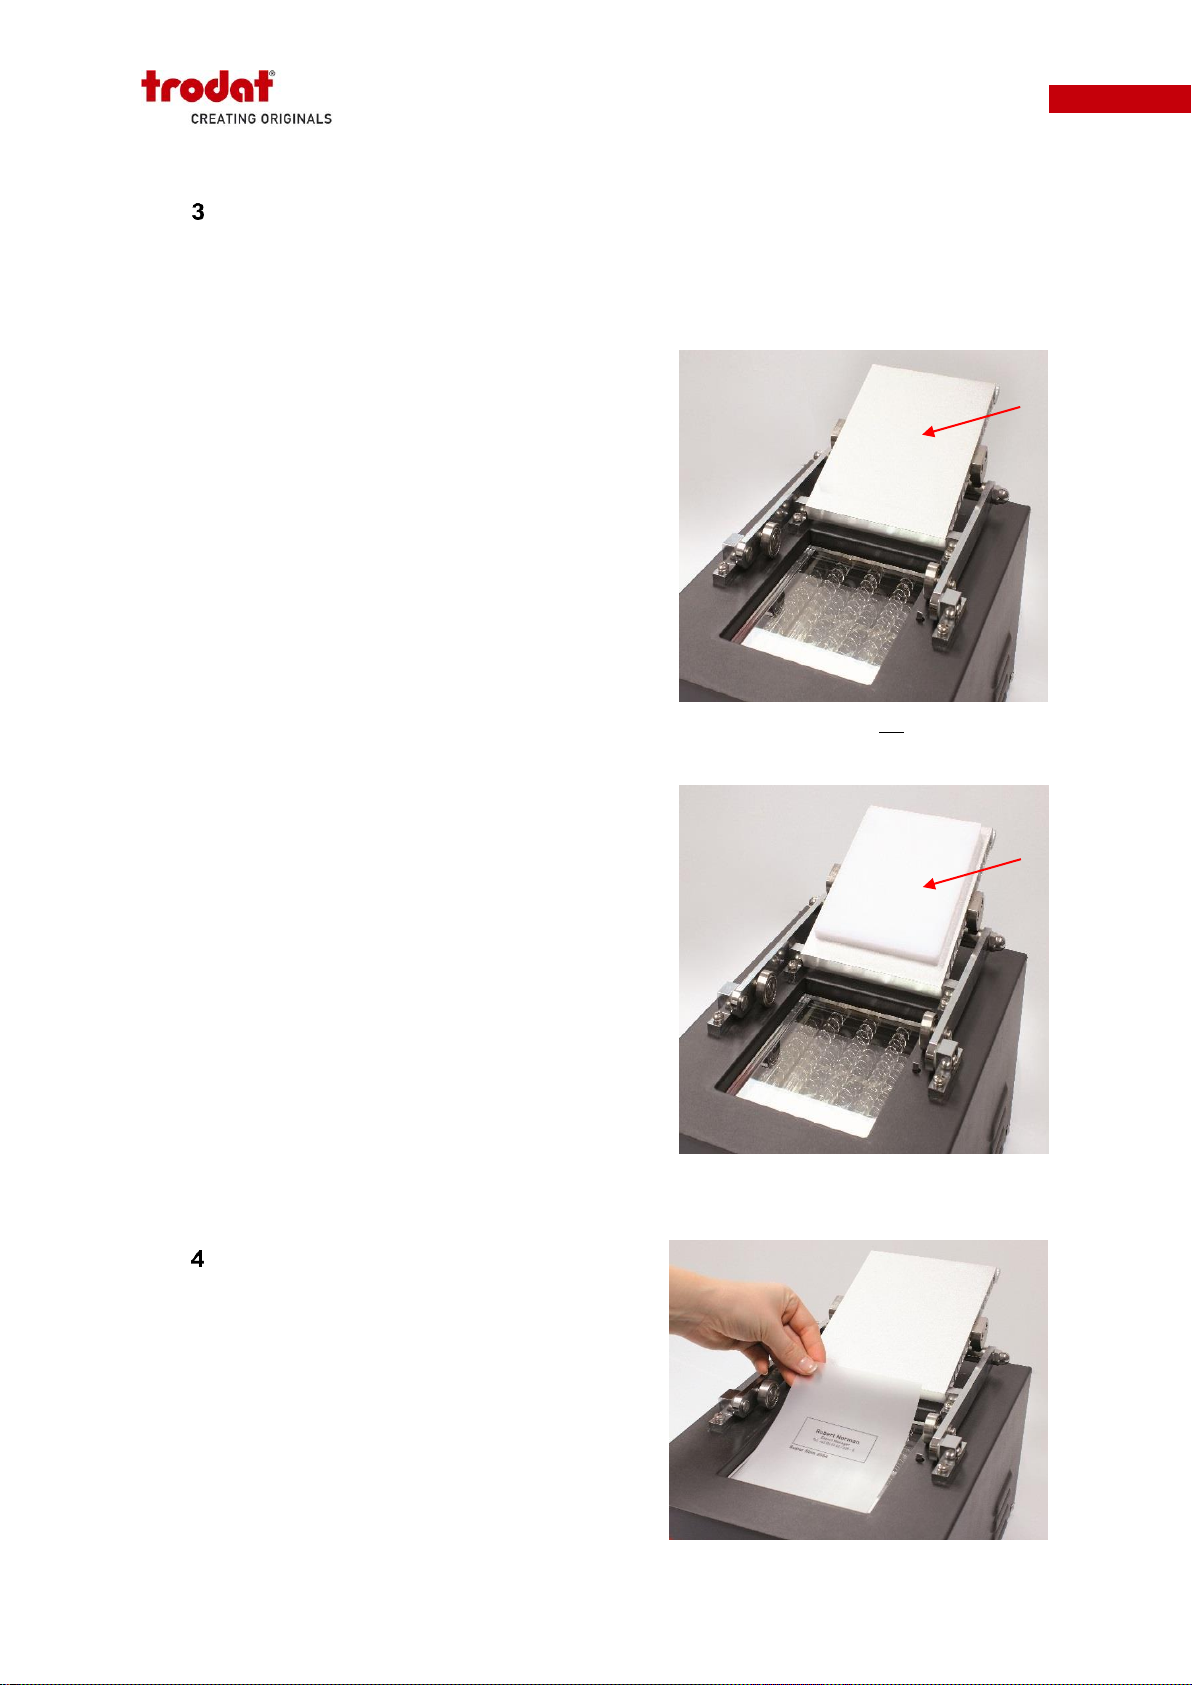
Place vellum
Make sure that the exposure area is clean and place
the printed vellum paper onto the glass. The vellum
is placed with the toner side facing up and the copy
right reading (not reversed or mirrored). Ensure that
the vellum paper is larger than the exposing die box
or foam.
Place vellum
(b) Setup for foam –spacer on cover
(a) Setup for die box –no spacer on cover

14
Flash Stamp Machine T1511M
Place transparency film
Place one sheet of transparency film on top of the
printed vellum. Ensure that the transparency sheet
fully covers the vellum paper. The clear transparency
film can be used from both sides. It is necessary to
prevent the toner (from the printed vellum) from being
deposited on the die box or foam due to the pressure
and heat generated during the exposure process.
Tip: For easier handling you can staple the vellum
and transparency together and then place it on the
glass. This will prevent the vellum and transparency
from sliding when you proceed to the next step.
Place die box or foam
Take the appropriately sized die box or foam for your printed artwork. Make sure that the
transparency film as well as the die box or foam is clean and dust free. If necessary you can
clean it with a dry cloth. Place the (a) die box or (b) foam (grey foam side facing down) on top
of the transparency using the positing frame of the artwork. Make sure that the (a) die box or
(b) foam is positioned exactly within the positing frame. You can also expose multiple die boxes
or foams during one exposure process.
(a) Place die box
(b) Place foam
Place transparency
(a) Die box within positioning frame
(b) Foam within positioning frame
15
Flash Stamp Machine T1511M
Please note: Super Slim stamps do not use an extra die box or foam. Super Slims have the
foam and ink cartridge already included in the stamp and are exposed like die boxes. Just
remove the dust cover (do not remove the index window) and place the complete stamp (grey
foam side facing down) on the transparency film.
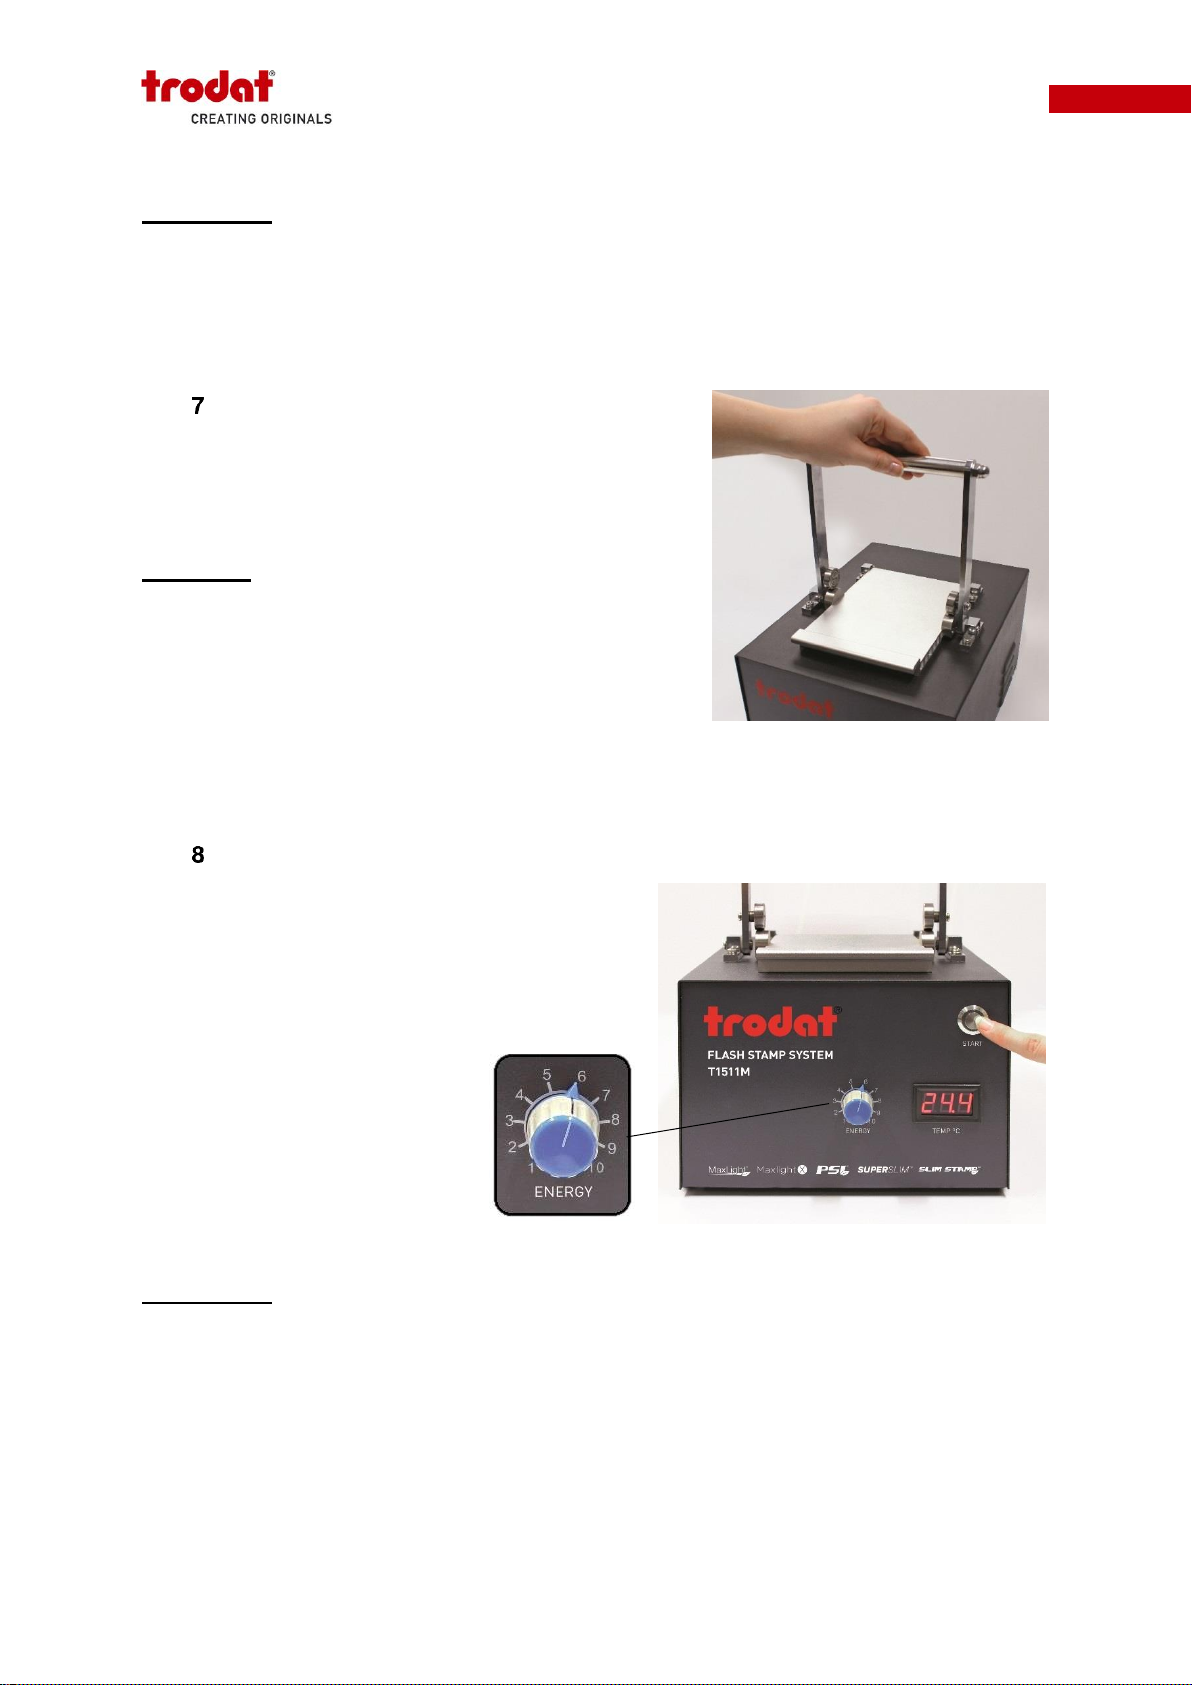
Close cover
Lower the cover down, grasp the handle and push it into
an upright position until the handle meets with resistance
and feels locked.
Important: Do not over push the handle!
Set energy and press start
Switch on the machine using the main switch on the
back side. Set the energy dial to an energy level of
"6" and press the start button one time. After a few
seconds the machine will flash once. The die box or
foam is fully exposed after one flash cycle. There is
no need to flash a second time.
Please note: Both die box and foam only use the identical flash foam material so there is no
need to adjust the energy level between components. For artwork layouts with very fine details,
the energy level can be adapted, if the impression quality is not as desired. To reach an even
more fine impression, increase the energy level to "8" and expose two times. After first
exposure press start button again. Do not open the cover between the first and second
exposure cycle. With these exposure settings, very thin lines and fine details will print even
more crisp.
Close cover
Set energy at "6" and press start
16
Flash Stamp Machine T1511M
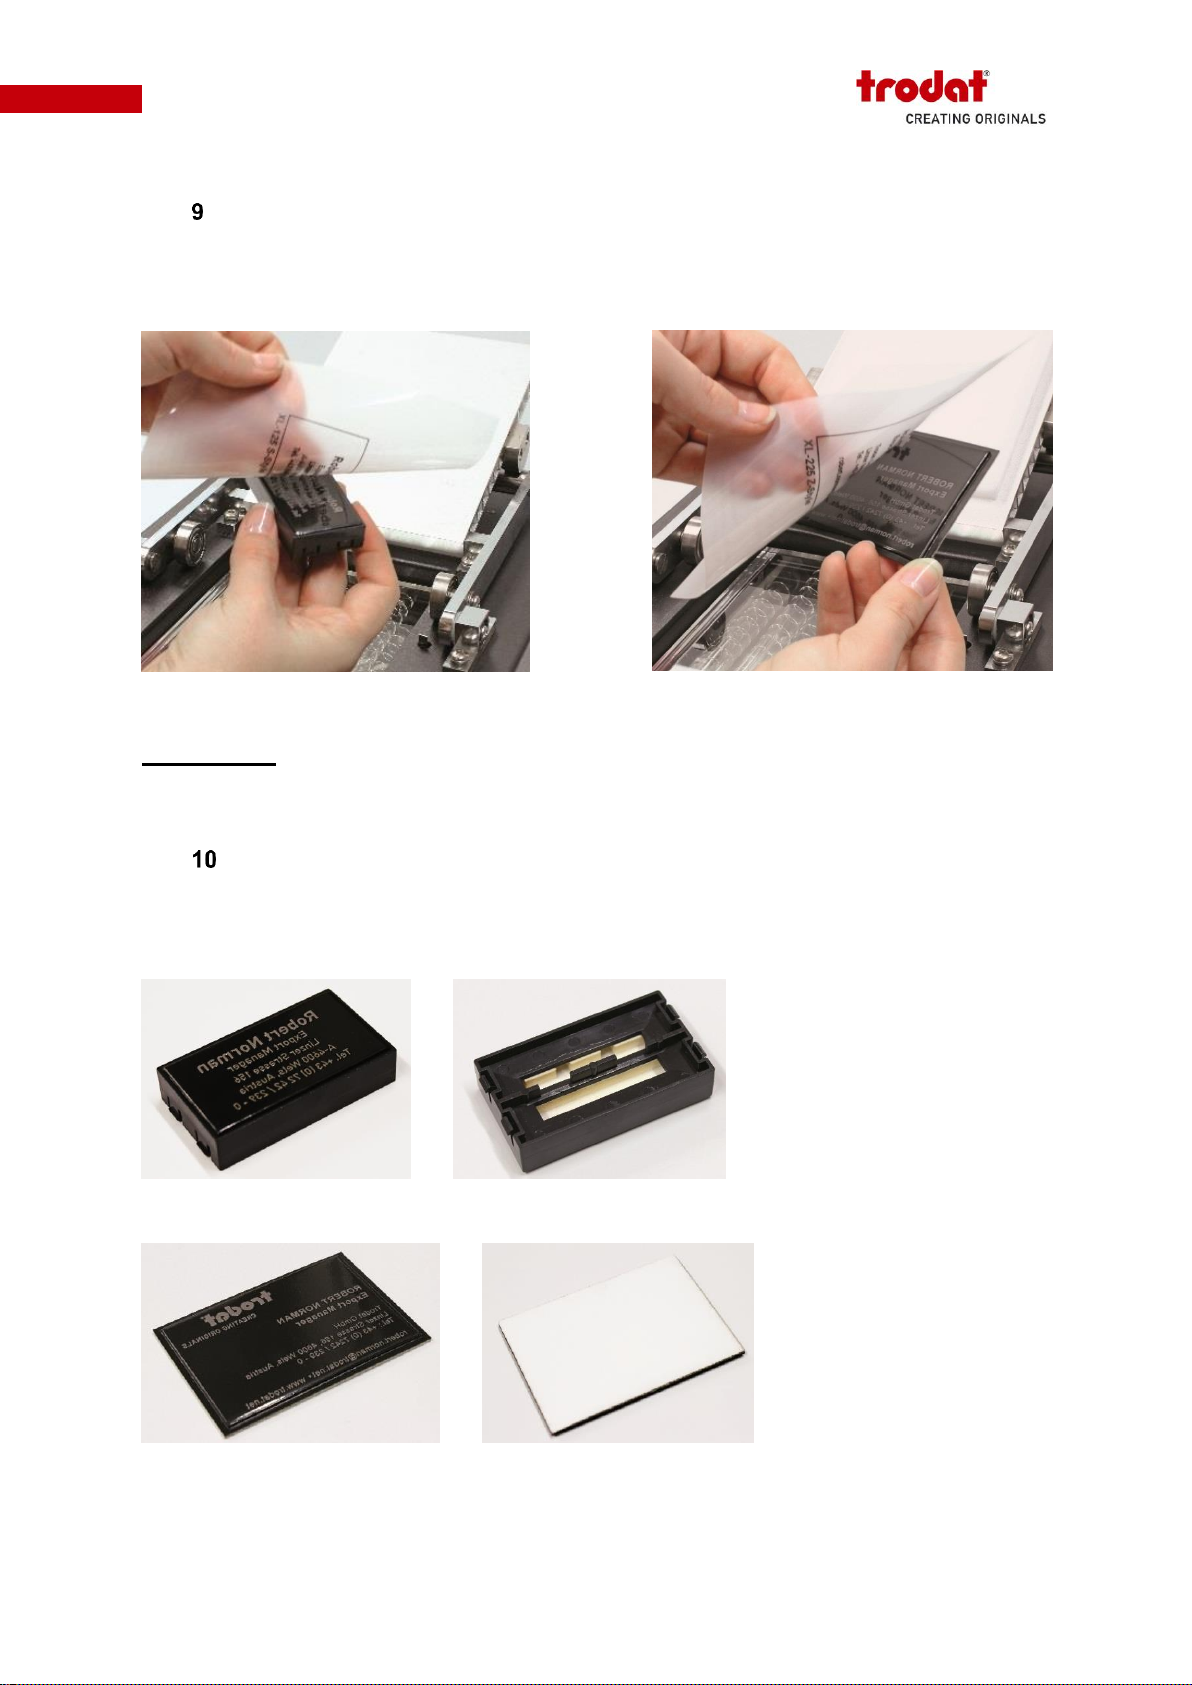
Remove transparency
Open the clamp cover and take out the die box or foam. Remove the transparency from the
exposed (a) die box or (b) foam.
Please note: Exposing without transparency film is not possible. The printed vellum and
transparency film can only be used for one exposure (no reuse possible).
Ink and assemble the stamp
The exposed (a) die box or (b) foam is now ready to be used in the corresponding MaxLight,
MaxLight X, PSI or Slim Stamp mount.
(a) Remove transparency from die box
(b) Remove transparency from foam
(a) Exposed die box ready for inking
(b) Exposed foam ready for inking and assembly
17
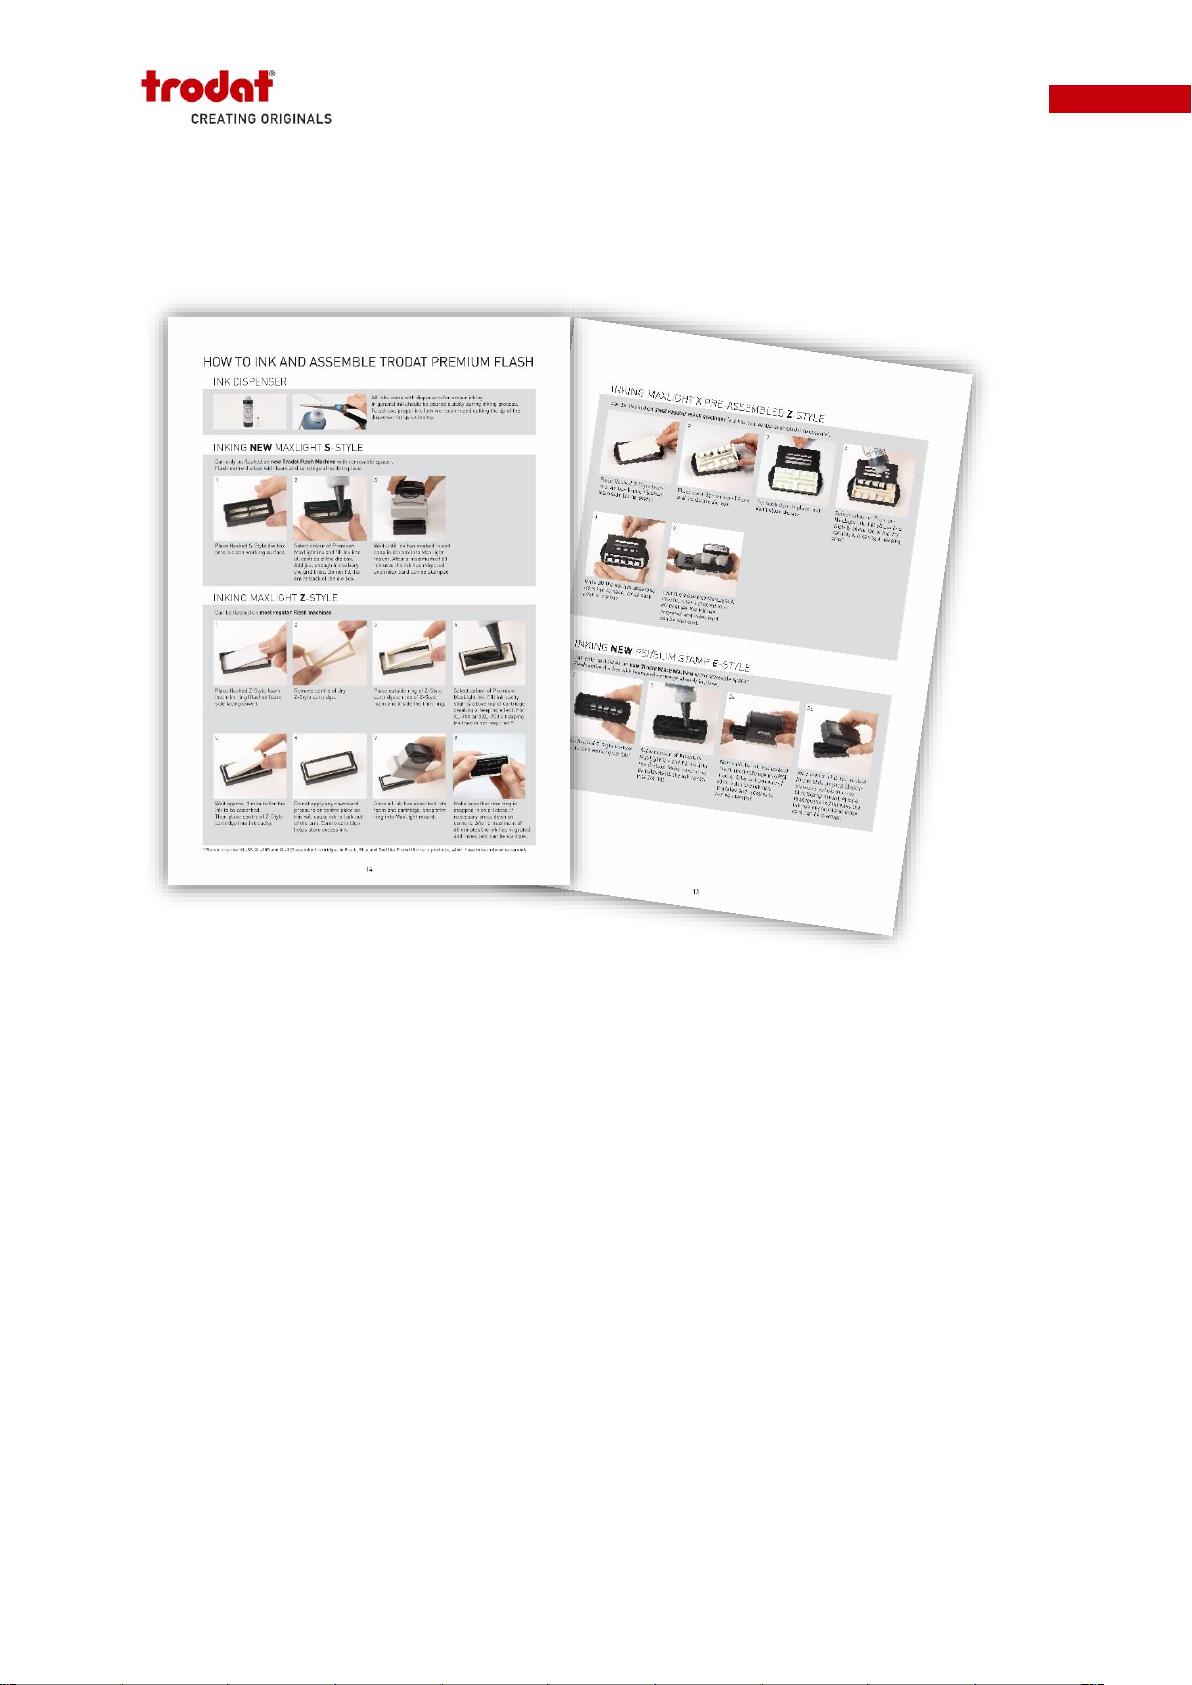
Flash Stamp Machine T1511M
For proper stamp assembly follow the detailed inking and assembling instructions to
be found in Trodat's Premium Flash Catalogue.

18
Flash Stamp Machine T1511M
VII. Maintenance
The Trodat Flash Machine T1511M has been designed for low maintenance operation as well
as ease of use. There are regularly scheduled maintenance requirements consisting of
cleaning the glass and machine body as needed. Please observe the following cleaning tips.
Cleaning the exposure glass
Unplug the unit for 10 minutes before performing any operations below. It is very important to
keep the glass in the exposure area clean and dust free. This will prevent any possibility of
foreign objects interfering with producing a properly exposed die box or foam. Clean the glass
with any household glass cleaner. Apply glass cleaner to a soft paper towel and then use the
towel to clean the glass. Do not spray any cleaners directly on the glass or any other part of
the machine.
Cleaning the machine body
Unplug the unit for 10 minutes before performing any operations below. Apply water or any
mild household cleaner if needed to a soft towel and wipe the surface of the machine clean.
The towel should be damp, not wet. Do not use any solvent based cleaners to clean the unit,
this may cause damage to the paint or display.
VIII. Technical specification
Flash Stamp Machine Model: T1511M
Quantity of lamps: 3
Exposure area: 150mm x 110mm
Dimension: 340mm x 235mm x 187mm
Weight: 9,7kg
AC power supply: 220-240 V
Frequency: 50/60 Hz
Power consumption: 1200 W
Table of contents
Popular Industrial Equipment manuals by other brands


Olympus
Olympus IPLEX NX IV9000N instructions

Netafim
Netafim NETAJET 4G user manual

Neutronics
Neutronics H1301 Installation, operation and maintenance manual

American Backflow
American Backflow CLA-VAL RP-4 manual

TREND
TREND CRT/MK3 Original instructions

Dorner
Dorner 3200 Series Installation, maintenance & parts manual


