Tronios Road Safety Guard 351.136 User manual

Road Safety Guard
351.136
Instruction Manual
Handleiding
Gebrauchsanweisung

UK
Install and remove the memory card:
::
:
1: In accordance with the direction of the memory card into the slot until the memory card is fixed in
the slot so far.
2: Remove the memory card, gently press a memory card until the card pops out, that can be removed.
3: If no card insert then the screen will be prompted: "No Card"
Note:
1: Please pay attention to the direction of the memory card is inserted, if inverted insertion, it may
damage the machine and memory card.
2: When your insert the memory card into the machine, the machine will set the memory card.
Product Features:
::
:
Ultra-small portable with a screen Mini DV Driving Recorder various occasions to easily
take pictures, camera, sound recording, high-definition screen, easy to use random capture
2.0 inch LTPS TFT LCD
Four fixed focus lens, the focal length range from 12cm to infinity
High-definition wide-angle camera
4X digital zoom
Video Format:MJPEG (AVI)
Built-in MIC and speaker.
Support recording while charging camera
Support high capacity SD(SDHC)card
IR
Motion Detection
Note: According to the different shooting host, memory card brand, and other settings, the file size and
the number of shooting will be different.

Product Structure:
::
:
Charge: the first three CAR DVR, insert the product batteries run out of charge, and each time to keep
the 12 hours of continuous charging the battery to maximum performance.
Native built-in rechargeable lithium battery, use it the first time, please charge firstly, CAR DVR can
charge by:
1) connected to the computer charge, use the USB data cable connected to the computer, you can
charge
2), charging the charger, USB data cable and charger Block connection, then the charger plugged into
the mains socket to charge.
Note: When the battery is low, CAR DVR directly into the protected status will not turn on, charge for
it.
User Guide:
::
:
1.The camera turned on / off and mode switch
2.Short press "POWER" key to boot.
3.Turned on, the system default video mode, press the "OK" button to start recording video after the
press the "OK" button to suspend file and automatically Sponsor.
4. If you need to switch modes, press the "MODE" button in the suspended state switch into camera
mode, click again to enter the recording mode, click the replay mode, click again to return to the
camera mode.
5. In the suspended state, long press the "POWER" button for three seconds to turn it off.
Key Functions
The video / camera / playback mode
"POWER" button to turn the power on / off
"OK" button to confirm
"UP" key 1/2/3/4 multiple digital zoom up on key
"DOWN" key down down key 4/3/2/1 multiple digital zoom
"MODE" key camera / video / recording / replay function toggle key
"MENU" button menu function keys
Attention
:
::
:“
““
“
c
”
””
”means“POWER”,
,,
,“
““
“”
””
”means“
““
“OK”
””
”
Manual Setting
The camera settings / system settings
1.
Boot, press the power button in camera mode, press the "MENU" button to enter the menu setting
mode, and then through the "MODE" button (camera settings / system settings), select the camera
settings Press the "OK" button to confirm. Resolution:1280*720,848*480,640*480
2.
Video time stamp: To select the Cassette time and without time。
3.
Loop Camera: Select the camera function to open or close the loop;
4.
Loop recording time: selectable camera saved in sub-loop length of time: 2 minutes, 5 minutes, 10
minutes
Recording sound: on / off, the video with sound or without sound
Press the "OK" button to confirm the choice of a good, complete set, and then press the "MENU" to
exit mode

Camera Settings
Press the "POWER" key to boot, in camera mode, press the "MODE" button to enter the camera mode,
select the "MENU" key to enter menu setting mode, and then through "DODE" selection
1 Image Size: 2592 * 1944, 2048 * 1536, * 1200, * 1024,
Image quality: quality / better / General
Shooting modes: Close / self-timer to 2 seconds / 10 seconds self-timer / Burst
Exposure: exposure brightness adjusting knot
Datestamps: Close / date / date time
Press the "OK" button to confirm the choice of a good, complete set, and then press the "MENU" to
exit mode
Replay Setting
Press the "POWER" key to boot, camera mode, press the "MODE" key twice to enter the recording
mode, three times to enter the playback mode, select "MENU" button to enter the menu setting mode,
and then through the "MODE" button to select:
File locking: lock / unlock leaflets, lock all, unlock all
File delete: delete leaflets, delete all
Slide show: Start with an interval of 1 second loop.
voice memo: add, delete
set to boot screen: Yes / No
Press the "OK" button to confirm the choice of a good, complete set, and then press the "MENU" to
exit mode
System installation
Boot, press the "POWER" button in camera mode, press the "MENU" button to enter the menu setting
mode, and then through the "MODE" button (camera settings / system settings), select System Settings
Press the "OK" button to confirm
Sound settings :
Shutter sound: closed, open;
Start-up sound: three switch sound choice, or none;
Key tone: closed, open;
Volume: 0, 1, 2, 3, choose 0 to be silent;
Power frequency: 50Hz, 60Hz
Automatic shutdown: 1 minute, 3 minutes, 5 minutes
4 the Screensavers time: Off. 30 seconds, 1 minute. 2 minutes
Date Time settings: month / day / hour / minute
Language: English, Simplified Chinese, Traditional, Spanish. French, Portuguese, German, Japanese,
Russian
TV system: NISC / PAL
8 boot screen: Turn off the system, a custom
9. Formatting: Yes / No
10 .. restore the factory values: Yes / No
11 Version Information: when software
"DOWN / UP" select Settings, then click the "OK" button to determine, to complete the setup, and then
press the "MENU" to exit mode, exit the mode, press the "power" key shutdown, reboot after
setting
success.

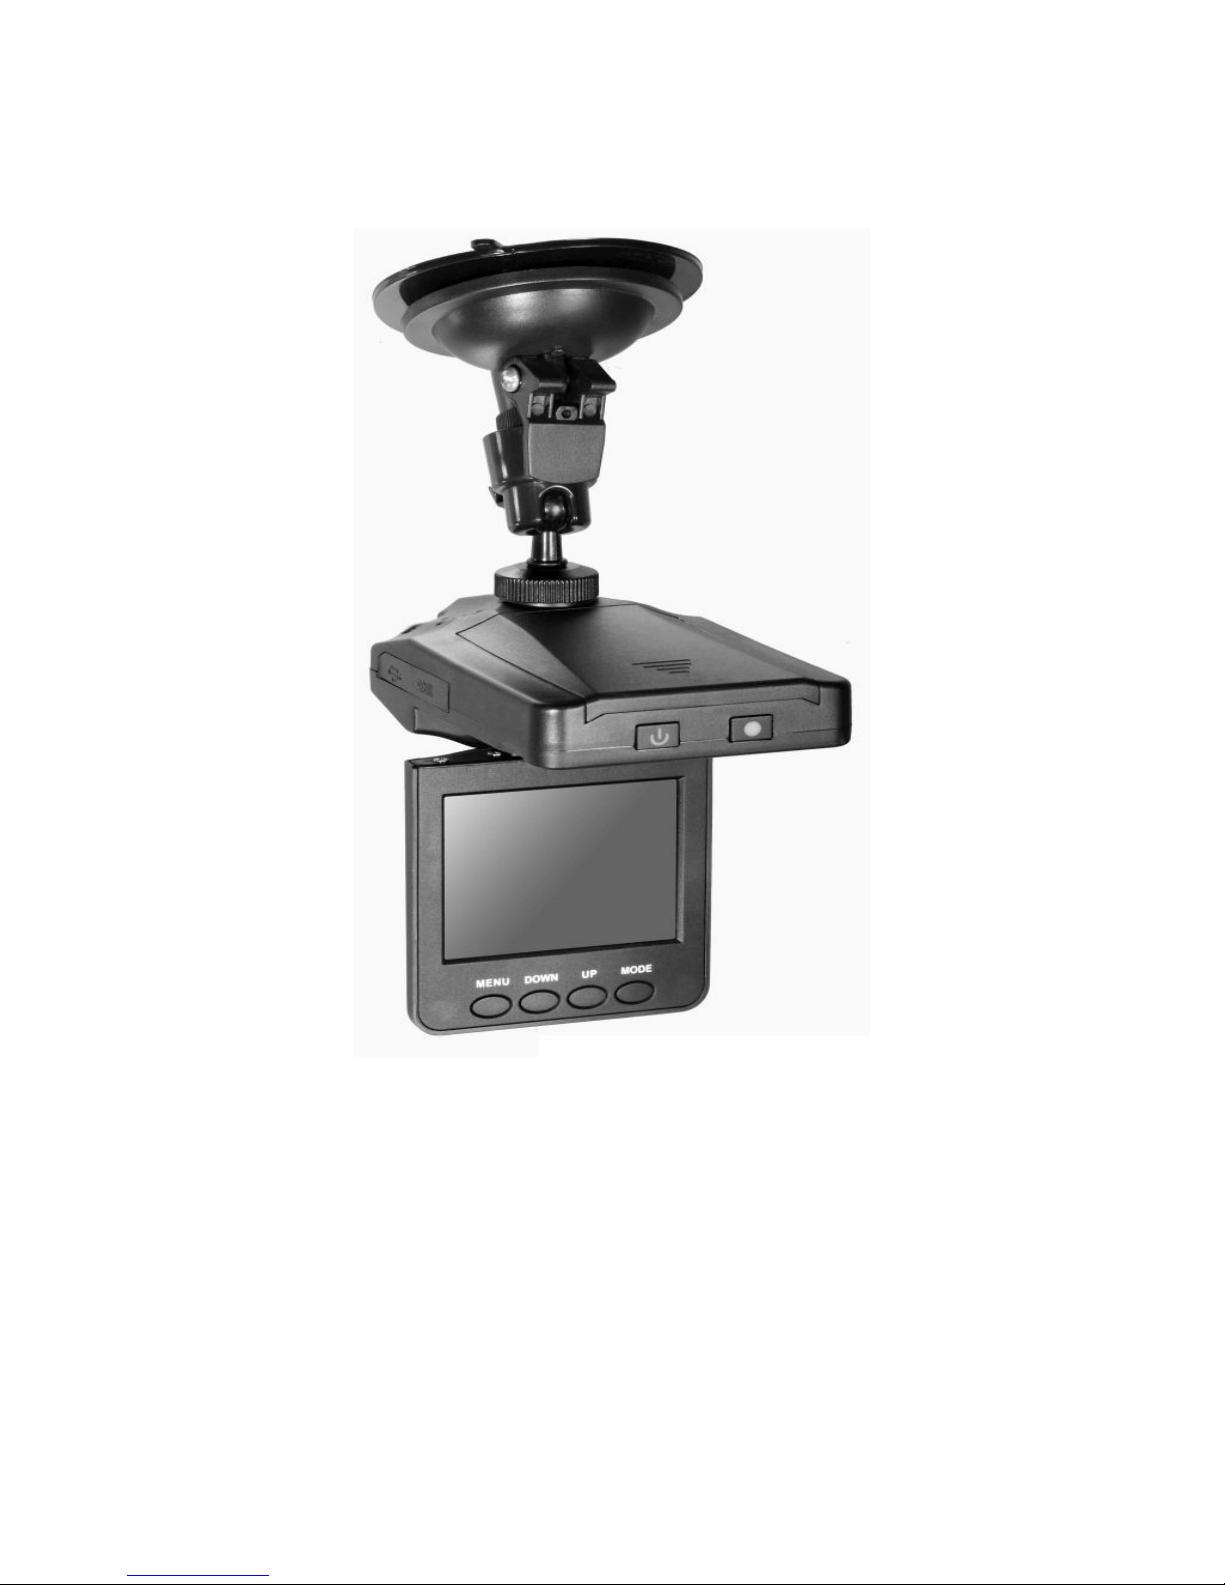
Functional operation
Boot loop photography
CAR DVR complete the boot program to enter the camera mode, the upper left corner of display
red camera symbol, has entered the shooting standby. Press the the Camera "OK" button to start
recording, the recording process, if no manual control products, CAR DVR will automatically
save a video file in 2 minutes, when the card is full, it will automatically be the first to file delete,
continue recording to achieve loop recording function (night light camera, the machine
automatically open infrared light to capture light camera).
●
●●
●
While charging. Side camera and loop camera
Car DVR connected to the charger, the machine will automatically boot into the camera mode
and automatically starts recording a file every two minutes, when the card is full, automatically
delete a file, continue recording, reaching the loop recording. To stop recording, press the "OK"
button to stop. Note: 1. Connected to the computer, and then connect the charger can not enter
through charging recorded, shut down and then connected to the charger;
When users do not want to loop recording function, users can be a loop recorder on the table in
the camera function, you can select "on" and "off" on the opened loop camera and two minutes a
file
Car charger can be used, but also ordinary charger can be used to achieve the functionality while
charging camera; When the car charging the car, opened the machine will automatically boot and
automatically starts recording. After the car stopped, the machine will automatically save the file,
and shut down automatically after 5 seconds.
Time loop recording, you can set up their own 2,5,10 minute arbitrarily chosen,
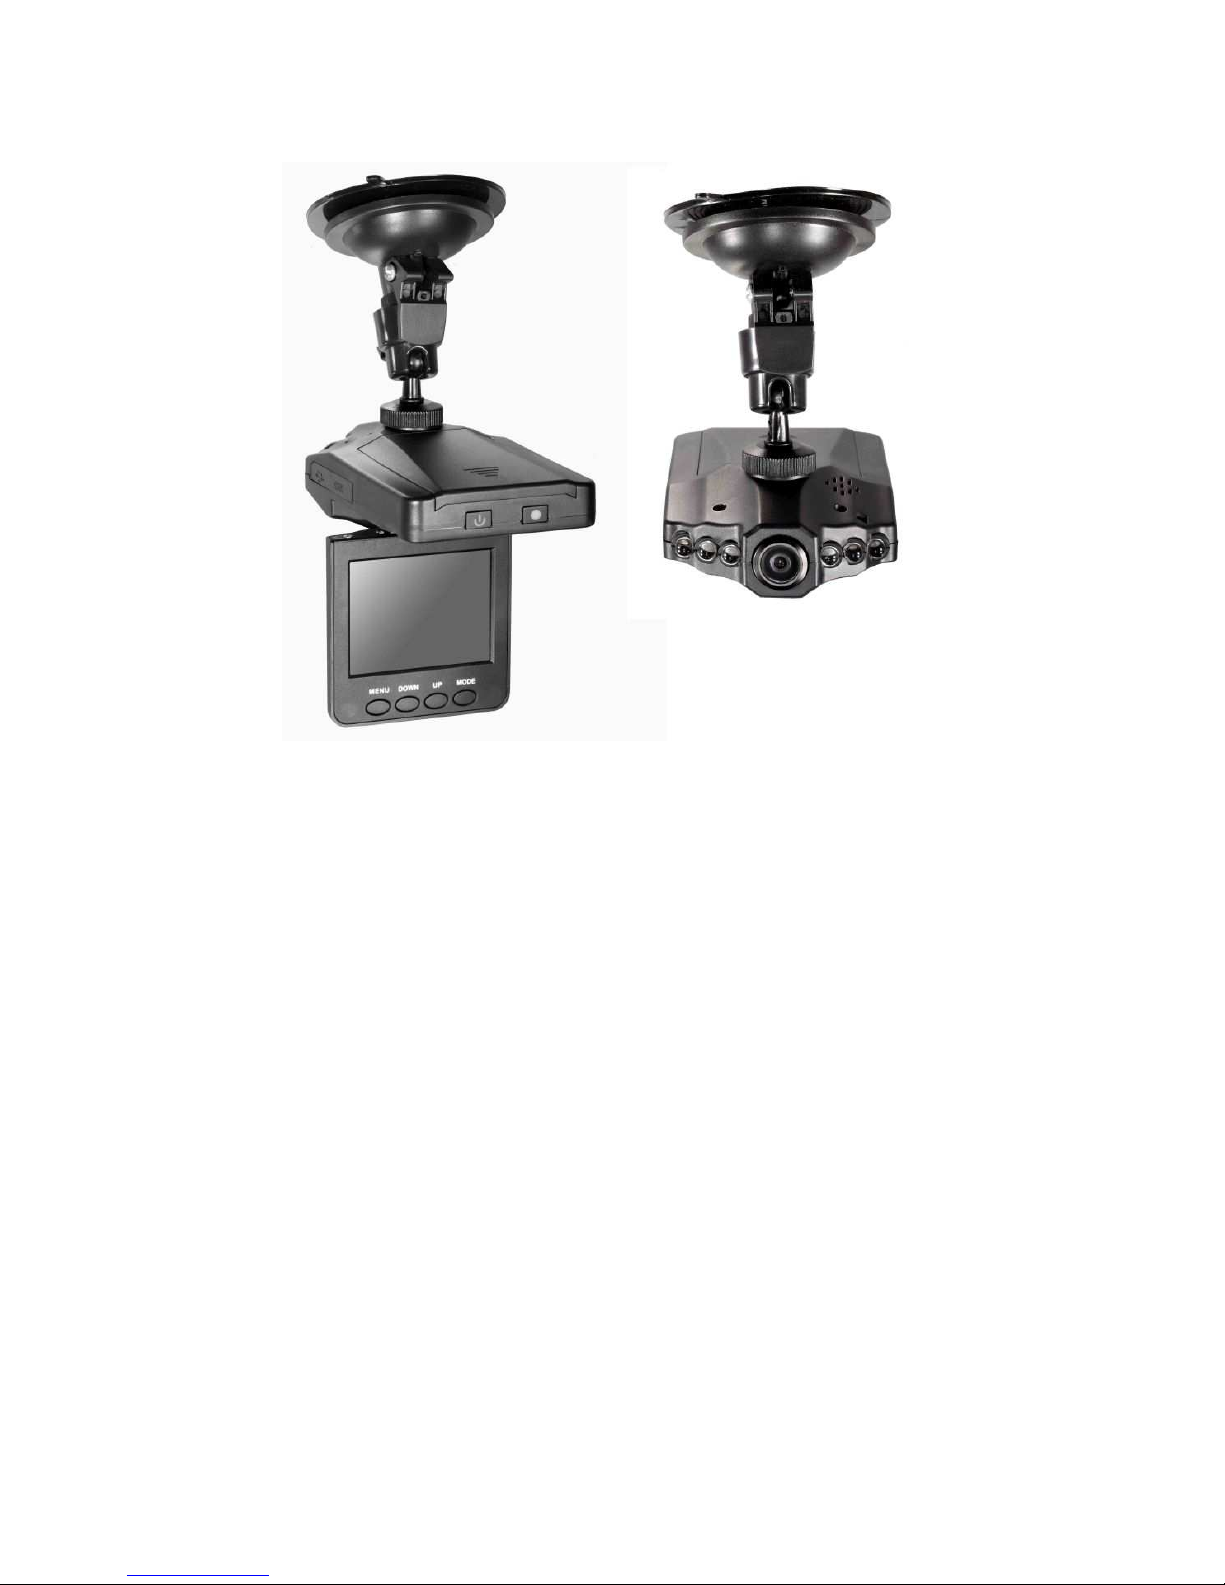
Camera mode
The CAR DVR complete the boot program, press the "MODE" button to select the camera mode is
displayed in the upper left corner of the red photographed symbol, enter the camera mode.
1. Aligned with the camera taking pictures the camera main body, and can be "DOWN / UP" key up,
down digital zoom, this time we should pay attention to steady the camera as much as possible not to
jitter.
2. Press "OK" button when the camera, the camera makes the the "carbazole Crash" sound, camera
complete.
3. Self-timer, and other features
In camera mode, press the "MENU" button, press "UP" key down "shooting mode", press "OK" to
confirm
Requirements of the self-timer, and then press the "OK" button to confirm.
In addition, image quality, exposure, and other options, the same is "UP" key to select the item you
want to change, then press the "OK" button to confirm. Press the "MENU" button again to return to the
previous menu.
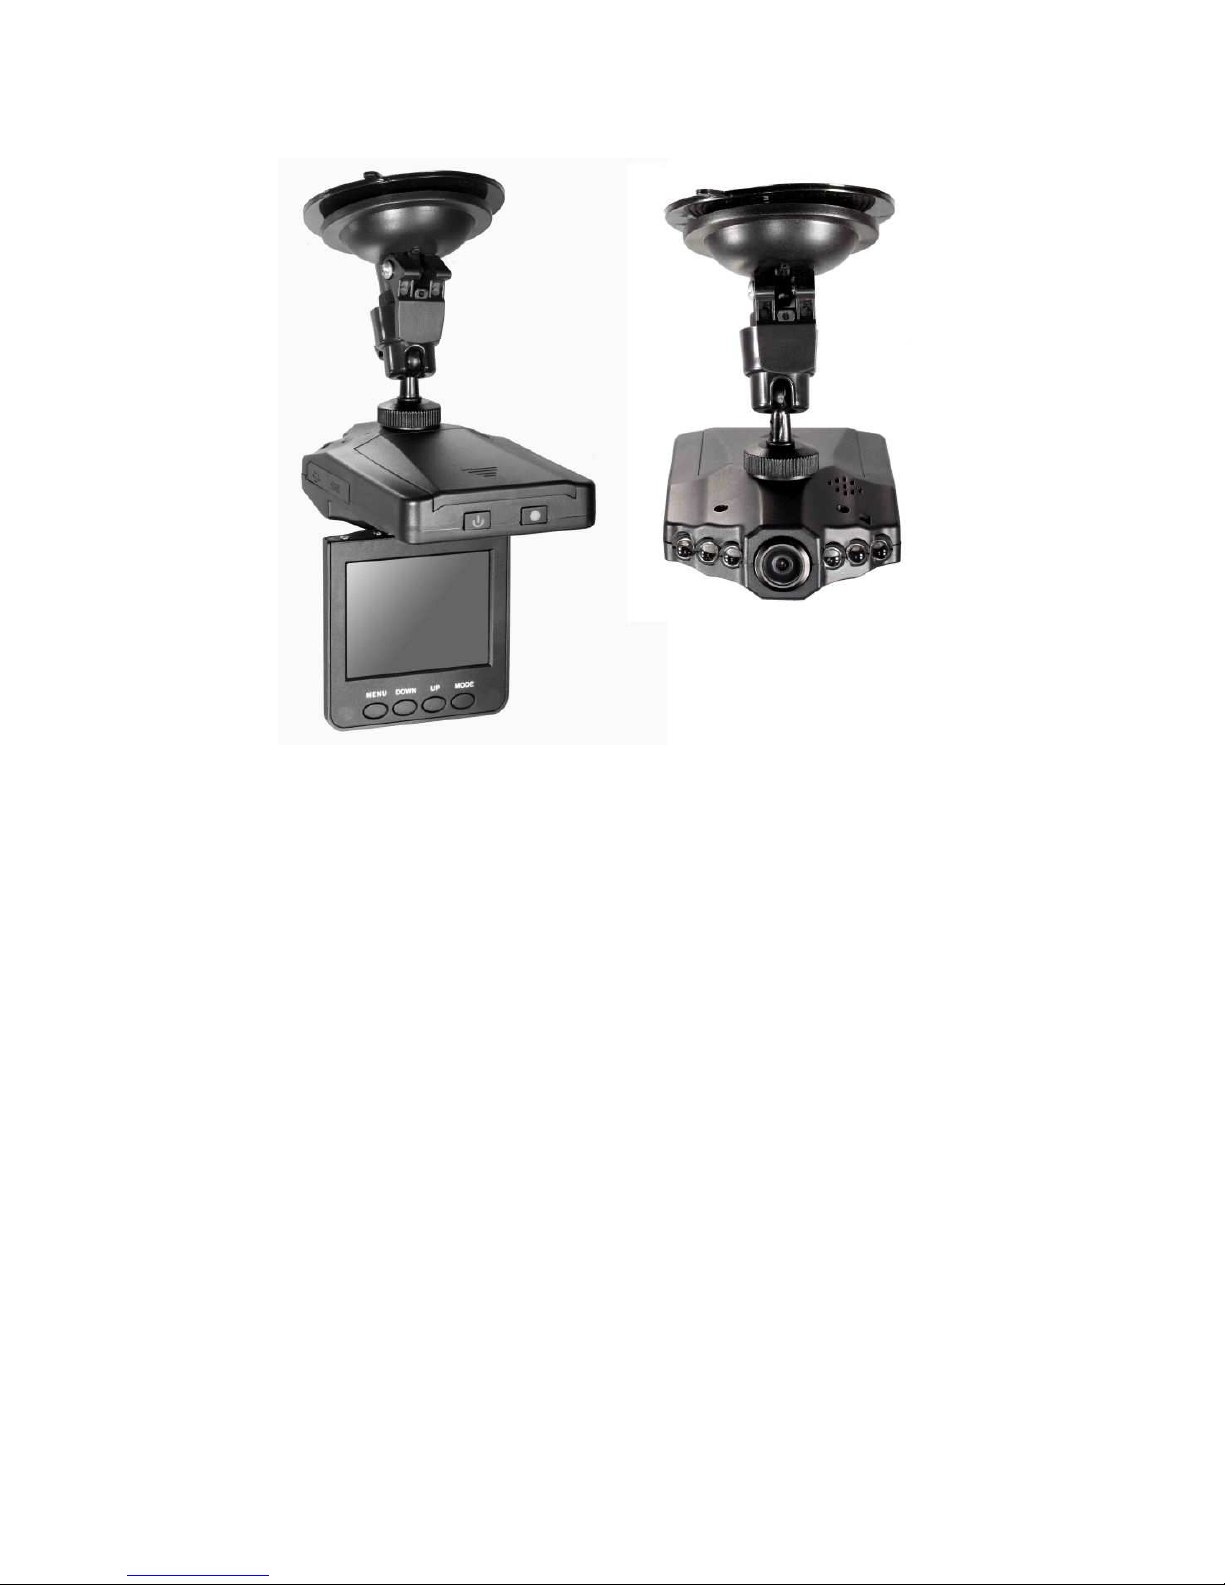
Separate Recording Function
CAR DVR complete the boot program, press the "MODE" button twice to enter the recording mode,
the recording symbol is displayed in the upper left corner of Figure
At this time to enter the recording mode, press the "OK" button in mind when, during recording, press
the "DOWN" key up can pause recording and continue recording, press the "OK" button to stop
recording and save. Such as recording again, press the "OK" button.

Replay mode.
CAR DVR complete the boot program, press the "MODE" button to enter the playback mode,
the player is displayed in the upper left corner of the icon, if you want to play video files or audio
files, press "DOWN / UP" key up or down to select files, selectafter a good player, press "OK",
press "UP" key to pause or resume playback
1. Delete function
l playback status (play to take a picture / video), select the file you need to delete the "DOWN /
UP" "UP" key down, press the "MENU" button, select the file to delete, then delete or All content
Slides / effects / rotation / set the start-up screen
Playback status (play photo), select "MENU" button, select the slide, and press the Enter key to
enter the sub-menu to select intervals player or loop playback interval loop settings, and then
select "MODE".
Other functional part of the application, such as the operation of the above, in particular the
effects section, you can personalize your photos.
PC camera mode
Shutdown or turned with a USB cable to connect the machine and the
computer on the display shows a MSDC U disk mode, a PC-CAM mode
network camera, the other one is the "Video" to enter the video mode . Select
"DOWN / UP" PC-CAM, and click the "OK" button, you can switch to a PC
camera mode, and can be used when the computer camera.
TV output line of black the TV outlet port into the unit, and the other end
connected to the TV, you can achieve TV output, in replay mode to select the
desired output, and for sharing with friends and family.
Specification:
::
:
Sensor COMS chip
Lens 120 degree wide angle
Zoom 12cm~
Screen 2.4 inch LTPS T T LCD
TV-out NTSC/PAL
Photo 1M,2M,3M,5M
Video AVI
Storage SDHC SD card(Max.32G,SDHC card)
Interface USB2.0 / AV OUT
USB USB2.0
Dimention 119*55*13.2
Temprature 0~40 degree / 10%~80%

NL
Installeren van de geheugenkaart:
::
:
1: Steek de kaart in de kaarthouder tot deze niet verder wil.
2: Bij het verwijderen, druk rustig op de kaart tot deze uit de houder komt.
3: "No Card" wordt weergegeven indien zich geen kaart in de houder bevindt.
Let op:
Kijk goed hoe de kaart geplaatst moet worden, als deze omgekeerd geplaatst wordt kan dit schade
aanbrengen aan het product en de geheugenkaart.
Product Kenmerken:
::
:
Een auto beveiligingscamera voor het opnemen van verkeerssituaties. Gewoon monteren in
je auto, en alle gebeurtenissen op de weg worden op een DVR opgenomen. Op het 2,5"
LCD-scherm kunt u dan de video bekijken van de opname. Ook kunnen met deze autocamera
geluidsopnamen worden gemaakt. De microfoon neemt automatisch geluid op. In geval van een
ongeluk zou u de opnamen kunnen gebruiken.
2.5” LTPS TFT LCD
Focus lens, van 12cm tot oneindig
High-definition groothoek camera
4X digital zoom
Video Formaat:MJPEG (AVI)
Opname mogelijkheid tijdens het laden
Ondersteunt SDHC kaart
IR
Bewegingsdetectie

Voeding:
::
:
Let op : Voordat u deze DVR gebruikt dienen de batterijen eerst 12 uur geladen te worden.
De DVR kan geladen worden:
1) Via de computer, gebruik een USB datakabel.
2) Via de lader.
NB: Als batterijen bijna leeg zijn gaat de DVR onmiddellijk in “protect status” en werkt de DVR dus
niet.
Bediening:
::
:
MODE schakelaar
Druk de "POWER" toets om de DVR op te starten.
Het systeem gaat standaard naar video mode, druk "OK" om op te nemen en op te slaan.
Gebruik de "MODE" tuimelschakelaar om tussen de modi te schakelen: camera mode, recording mode,
replay mode..
Druk en houd de "POWER" toets drie seconden vast om de DVR uit te schakelen.
Functies
Video / camera / playback mode
"POWER" toets om aan/uit te schakelen
"OK" toets om te bevestigen
"UP" toets 1/2/3/4 multiple digitale zoom up
"DOWN" toets 4/3/2/1 multiple digitale zoom down
"MODE" toets camera / video / recording / replay functie tuimelschakelaar
"MENU" functie toets
Let op:
::
:“
““
“
c
betekent “POWER aan/uit”,
,,
,“
““
“betekent “
““
“OK”
””
”
Instellingen:
Camera en systeem
Druk de power toets, druk in camera mode de "MENU" toets om in de menu instel mode te komen, en
dan via de "MODE" toets (camera settings / system settings), de camera settings te doen. Druk "OK"
om te bevestigen. Resolutie: 1280*720,848*480,640*480
Tijdsaanduiding: Deze loopt mee tijdens de opname en wordt nadien ook weergegeven.
Loop Camera: Selecteer de camera functie “open of sluiten” van de looplus;
Loop opnametijd: 2 minuten, 5 minuten of 10 minuten opnametijd van de looplus.
Recording sound: on / off , video-opname met geluids-opname of zonder
Gebruik de "DOWN / UP" toetsen om te selecteren en druk "OK" om uw keuze te bevestigen, toets
"MENU" om de modus te verlaten.
Camera
Druk de power toets, druk in camera mode de "MODE" toets, gebruik de "MENU" toets om in de
menu instel mode te komen, en dan via de "MODE" toets de instellingen te doen.
Image Beeldgrootte: 2592 * 1944, 2048 * 1536, * 1200, * 1024,
Image quality – Beeldkwaliteit: quality / better / General
Foto’s schieten: Stoppen / zelfontspanner tot 2 seconden / 10 seconden zelfontspanner / starten
Exposure: Helderheidsregeling
Datestamps: Tijdsaanduiding op foto : Sluiten / datum / datum en tijd
Gebruik de "DOWN / UP" toetsen om te selecteren en druk "OK" om uw keuze te bevestigen,
toets
"MENU" om de modus te verlaten.

Replay
Druk de power toets, druk in camera mode de "MODE" toets twee keer op in opname mode te komen
en drie keer om in playback mode te komen, druk de "MENU" toets om in menu setting mode te
komen, en selecteer via de "MODE" toets:
File locking: Lock all, unlock all: Bestanden vergrendelen/ontgrendelen
File delete: Delete / delete all : Bestanden verwijderen
Slide show: Foto’s bekijken met een interval van 1 seconde.
Voice memo: add, delete : Geluid toevoegen of verwijderen
Set to boot screen: Yes / No : Scherm aan/uit zetten
Gebruik de "DOWN / UP" toetsen om te selecteren en druk "OK" om uw keuze te bevestigen, toets
"MENU" om de modus te verlaten.
Systeem installatie
Druk de power toets, druk in camera mode de "MENU" toets om in de menu instel mode te komen, en
dan via de "MODE" toets (camera settings / system settings), de camera settings te doen. Druk "OK"
om te bevestigen.
Sound settings – geluid instellingen
Key tone: close / open : Toetstoon tijdens het drukken van de toets
Volume: 0, 1, 2, 3. (0 betekent geen geluid)
Power frequency: 50Hz, 60Hz. De aansluitspanning in Nederland en Belgie is 220-240Vac / 50Hz.
Automatic shutdown: 1 minuut, 3 minuten, 5 minuten. Automatisch uitschakelen
Screensavers time: Off. 30 seconds, 1 minute. 2 minutes
Date Time settings: month / day / hour / minute
Language/Taal: Engels, Chinees, Spaans. Frans, Portugees, Duits, Japans, Russisch
TV systeem: NTSC / PAL. In Nederland en Belgie wordt het PAL systeem gebruikt.
Formatting: Yes / No. Formateren Ja/Nee
Restore the factory values: Yes / No . Herstel de fabrieksinstellingen Ja/Nee
NB: Gebruik de "DOWN / UP" toetsen om te selecteren en druk "OK" om uw keuze te bevestigen,
toets "MENU" om de modus te verlaten.
Functionele bediening
Ga naar de camera mode, linksboven in het scherm verschijnt een (rood) camerasymbool, u bent nu in
de fotoshoot standby. Druk de Camera "OK" toets om de opname te starten. De DVR zal automatisch
iedere 2 minuten* een videobestand opslaan; als de SD kaart vol is, blijft de DVR opnemen en zal de
eerste file verwijderen. (nachtzicht camera : infrarood licht wordt automatisch ingeschakeld). Druk de
"OK" toets om de opname te stoppen.
Indien de camera/DVR is aangesloten op een computer kan deze niet worden opgeladen.
Zogauw de DVR van spanning wordt voorzien is deze in staat om op te nemen. Als de spanning wordt
verwijderd wordt het bestand automatisch opgeslagen en stopt de DVR na 5 seconden.
*Opnametijd van een bestand in te stellen in 2,5, of 10 minuten

Camera mode
Druk de "MODE" toets om de camera mode te selecteren (in het scherm verschijnt een (rood)
camerasymbool). Gebruik de "DOWN / UP" toetsen voor digitale zoom.
Zelfontspanner :
In camera mode, druk de "MENU" toets, selecteer met de "UP" toets "shooting mode", druk "OK"
om
te bevestigen. Kies zelfontspanner parameters, druk "OK" om op te slaan.
Ook beeldkwaliteit, helderheid en andere opties kunnen ingesteld worden( image quality, exposure)
Gebruik dus de "UP" toets om de items te selecteren die ingesteld moeten worden. Druk "OK" om op
te slaan en druk opnieuw de "MENU" toets om naar het voorgaande menu te gaan.
Opname Functie
Druk "MODE" twee keer om in de opname mode te komen, het opname symbool wordt
weergegeven Druk nu de "OK" toets. Druk de "DOWN" toets voor PAUZE tijdens een opname,
of doorgaan tijdens Pauze, druk "OK" om een opname te stoppen en op te slaan. Wilt u opnieuw
opnemen druk dan weer de "OK" toets.
Replay mode.
Druk de "MODE" toets om in playback mode te komen, dit wordt weergegeven in de linker
bovenhoek, als u video files of audio files wilt afspelen, druk "DOWN / UP" om de files te
selecteren, druk "OK", druk "UP" voor Pauze of opnieuw afspelen.
Delete/verwijder –functie, selecteer de file die u wilt verwijderen mbv de "DOWN / UP" toetsen,
druk "MENU" , selecteer één file verwijderen of Alle files verwijderen.
Playback status (foto’s), selecteer "MENU" , selecteer het gewenste, druk Enter om in het
sub-menu te komen om de intervals of de loop settings te selecteren, selecteer dan "MODE".
PC camera mode :
Selecteer “Down/Up” PC-CAM en klik op “OK” om in PC camera mode te komen.
U kunt de camera gebruiken als webcam.
In replay mode kunnen de beelden op de unit via uw TV worden afgespeeld.
Specificaties:
::
:
Sensor CMOS chip
Lens 120° groothoek
Zoom 12cm~
Screen 2.4 “ LTPS T T LCD
TV-out NTSC/PAL
oto 1M, 2M, 3M, 5M
Video AVI
Geheugen SDHC SD card(Max.32G,SDHC card)
Interface USB 2.0 / AV OUT
USB USB 2.0
Afmetingen 119*55*13.2
Temperatuur 0~40°C / 10%~80%

DE
Installieren Sie die Speicherkarte:
1: Stecken Sie die Karte in den Kartenschlitz, bis sie wird gestoppt.
2: Beim entnehmen, drücken Sie vorsichtig auf die Karte, um sie aus der Halterung zu entfernen.
3: "No Card" wird angezeigt, wenn sich keine Karte in der Halterung befindet.
Hinweis:
Schauen Sie genau, wie die Karte eingesteckt werden soll.
Produkt Merkmale:
::
:
Auto Überwachungskamera für die Aufnahme von Verkehrssituationen. Einfach in Ihrem Auto zu
installieren, und allen Ereignisse auf der Straße werden auf einem DVR aufgezeichnet. Auf dem 2,5
"-LCD-Bildschirm können Sie sich dann die Aufnahme anschauen. Sie können auch mit dieser Auto
Kamera Tonaufnahmen machen. Das Mikrofon macht automatisch Aufnahmen. Im Falle eines Unfalls
würden Sie eine bestimmte Aufnahme verwenden können.
2.5” LTPS TFT LCD
Fokusieren Objektiv : von 12cm bis unendlich
High-Definition Weitwinkel Kamera
4X Digital Zoom
Video Format:MJPEG (AVI)
Aufnahme-möglickeit während Aufladen
Unterstützt SDHC Karte
Infra Rot
Bewegungserkennung

Vor der Verwendung dieses DVR sollten die Batterien für 12 Stunden geladen werden.
Der DVR kann geladen werden:
1) Verwenden Sie den Computer mit einem USB-Datenkabel.
2) Verwenden Sie das Ladegerät.
Hinweis: Wenn die Batterien schwach sind, kommt den DVR sofort in "Schutz-Status" und funktioniert
dann nicht.
Bedienung:
::
:
=MODE= Schalter
Drücken Sie die "POWER" Taste um den DVR zu starten.
Das System funktioniert standardmäßig in Video-Modus, drücken Sie "OK" um aufzuzeichnen
und zu speichern.
Verwenden Sie den "MODE" Schalter um zwischen den Modi umzuschalten: Kamera-Modus,
Aufnahmemodus, Wiedergabe-Modus ..
Drücken und halten Sie die "POWER"-Taste für 3 Sekunden zum Ausschalten des DVR.
Funktionen
Video / Kamera / Playback Modus
"POWER" Taste um Ein/Aus zu schalten
"OK" Taste um zu speichern
"UP" Taste 1/2/3/4 Multiple Digital Zoom-Up
"DOWN" Taste 4/3/2/1 Multiple Digital Zoom-Down
"MODE" Taste Kamera / Video / Recording / Replay Funktion -Wippschalter
"MENU" Taste
Hinweis
:
::
:“
““
“
c
bedeutet “POWER Ein/Aus”,
,,
,“
““
“bedeutet “
““
“OK”
””
”
Einstellungen
Kamera und System
Drücken Sie die Power-Taste, drücken Sie in Kamera-Modus die "MENU"-Taste um ins Menü
Setup-Modus zu gelangen, und dann über die "MODE"-Taste (Kamera-Einstellungen /
System-Einstellungen) die Kamera-Einstellungen vorzunehmen. Drücken Sie auf "OK" zur
Bestätigung. Auflösung: 1280 * 720 848 * 480 640 * 480
Zeit Anzeige: Dies wird während der Aufnahme und nachher angezeigt.
"Loop" Kamera: Wählen Sie die Kamera-Funktion "öffnen oder schließen" der Schleife.
"Loop" Aufnahmezeit : 2 Minuten, 5 Minuten oder 10 Minuten.
Tonaufnahme: On / Off, Videoaufnahmen mit Tonaufnahmen oder ohne.
Verwenden Sie die "DOWN / UP" Tasten um zu wählen und drücken Sie "OK" um Ihre Wahl zu
bestätigen, drücken Sie "MENU" um den Modus zu verlassen.
Kamera
Drücken Sie die Power-Taste, in Kamera-Modus drücken Sie die "MODE"-Taste, verwenden Sie die
"MENU" Taste um ins Menü Setup-Modus zu gelangen, und dann über die "MODE"-Taste die
Einstellungen vorzunehmen.
Bild Format: 2592 * 1944, 2048 * 1536, * 1200, * 1024,
Bildqualität : Qualität / Besser / Allgemein
Fotos schießen: Stoppen / Selbstauslöser auf 2 Sekunden / 10 Sekunden / Starten
Belichtung: Helligkeitsregelung
Datumsstempel: Anzeige der Uhrzeit im Bild / Foto: Schließen / Datum / Datum und Uhrzeit
Verwenden Sie die "DOWN / UP" Tasten und drücken Sie "OK" um Ihre Wahl zu bestätigen, drücken
Sie "MENU" um den Modus zu verlassen.

Replay
Drücken Sie die Power-Taste, drücken Sie in Kamera-Modus die "MODE"-Taste zweimal um in den
Aufnahme-Modus zu gelangen, und dreimal um in den Wiedergabe-Modus zu gelangenen, drücken Sie
die "MENU" Taste um ins Menü Einstellmodus zu gelangen, und wählen Sie mit der "MODE"-Taste:
Sperren von Dateien: sperren Sie alle / entsperren alle (File Lock / Unlock)
Datei löschen: Löschen / Alle löschen: Löschen von Dateien
Diashow: Wiedergabe Fotos mit einem Intervall von 1 Sekunde.
Sprachnotiz: Hinzufügen, Löschen: Sound hinzufügen oder entfernen(Voice memo)
Bildschirm einschalten: Ja / Nein (on / off)
Verwenden Sie die "DOWN / UP" Tasten um zu wählen und drücken Sie "OK", um Ihre Wahl zu
bestätigen, drücken Sie "MENU" Taste, um den Modus zu verlassen.
System Installation
Drücken Sie die Power-Taste, drücken Sie in Kamera-Modus die "MENU"-Taste um ins Menü
Setup-Modus zu gelangen, und dann über die "MODE"-Taste (Kamera-Einstellungen /
System-Einstellungen) die Kamera-Einstellungen vorzunehmen. Drücken Sie auf "OK" um zu
bestätigen.
Tastenton: close / open: Tastenton beim Drücken einer Taste
Lautstärke: 0, 1, 2, 3. (0 bedeutet kein Ton)
Netzfrequenz: 50Hz, 60Hz. Die Netzspannung in Deutschland ist 220-240Vac / 50Hz.
Automatische Abschaltung: 1 Minute, 3 Minuten, 5 Minuten. (Auto shutdown)
Bildschirmschoner Zeit: Nach 30 Sekunden, 1 Minute. 2 Minuten einschalten
DateTime Einstellungen: Monat / Tag / Stunde / Minute
Language / Sprache: Englisch, Chinesisch, Spanisch. Französisch, Portugiesisch, Deutsch, Japanisch,
Russisch
TV-System: NTSC / PAL. In Deutschland wird das PAL-System verwendet.
Formatieren: Ja / Nein
Wiederherstellen der Werkseinstellungen: Ja / Nein (Restore)
HINWEIS: Verwenden Sie die "DOWN / UP" um zu wählen und drücken Sie "OK" um Ihre Wahl zu
bestätigen, drücken Sie "MENU" um den Modus zu verlassen.
Funktionelle Bedienung
Gelangen Sie in den Kameramodus, links oben auf dem Bildschirm wird ein (rot) Kamera-Symbol
angezeigt, das System befindet sich jetzt in "Standby-Fotoshooting". Drücken Sie die
Kamera-"OK"-Taste, um die Aufnahme zu starten. Der DVR wird automatisch alle 2 Minuten * eine
Videodatei speichern, wenn die SD-Karte voll ist, wird der DVR aufzeichnen und wird die erste Datei
löschen. (Night Vision Kamera: Infrarot-Licht wird automatisch eingeschaltet). Drücken Sie die
"OK"-Taste um die Aufnahme zu stoppen.
Wenn die Kamera / DVR mit einem Computer verbunden ist, kann nicht geladen werden.
Sobald der DVR mit Spannung/Strom ausgestattet ist, ist es in der Lage aufzuzeichnen. Wenn die
Spannung entfernt wird, wird die Datei automatisch gespeichert und die DVR stoppt nach 5 Sekunden.
* Aufnahmezeit einer Datei kann auf 2,5 oder 10 Minuten eingestellt werden.
Kamera Modus
Drücken Sie die "MODE"-Taste um den Kamera-Modus (der Bildschirm zeigt ein (rot)
Kamera-Symbol) auszuwählen. Verwenden Sie die "DOWN / UP" Tasten für Digital Zoom.
Selbstauslöser:

Im Kameramodus, drücken Sie die "MENU" Taste, wählen Sie mit der "UP" Taste "Shooting Mode",
drücken Sie "OK" um zu bestätigen. Wählen Sie (Auslöser)Timer-Parameter, drücken Sie
"OK" um zu
speichern.
Auch Qualität, Helligkeit und andere Optionen können eingestellt werden (Bildqualität, Belichtung).
So verwenden Sie die "UP"-Taste um die Items zu wählen, die eingestellt werden müssen. Drücken Sie
auf "OK" um zu speichern und drücken Sie erneut die "MENU" Taste um zum vorherigen Menü
zurückzukehren.
Aufnahme Funktion
Drücken Sie zweimal die "MODE" Taste um in den aufnahme Modus zu gelangen. Ein
Aufnahme-Symbol wird angezeigt. Drücken Sie die "OK" Taste. Drücken Sie die "DOWN"-Taste um
zu PAUSieren während einer Aufnahme oder während einer Pause wieder abzuspielen; drücken Sie die
"OK"-Taste um eine Aufnahme zu beenden und zu speichern. Wollen Sie erneut aufnehmen drücken
Sie dann die "OK" Taste.
Replay Modus.
•Drücken Sie die "MODE" Taste um in den Wiedergabe-Modus zu gelangen (wird in der linken
oberen Ecke angezeigt), wenn Sie Video-Dateien oder Audio-Dateien abspielen möchten, drücken
Sie die "DOWN / UP"-Tasten um Dateien auszuwählen; klicken Sie auf "OK", und drücken Sie
"UP" für eine Pause oder erneut Abspielen.
•Delete Funktion, wählen Sie die Datei die Sie löschen möchten mit Hilfe von den "DOWN /
UP"-Tasten, drücken Sie "MENU", wählen Sie "Eine Datei löschen" oder "Alle Dateien löschen".
•Wiedergabestatus (Fotos), wählen Sie "MENU", wählen Sie das Gewünschte, drücken Sie ENTER
um ins Untermenü zu gelangen um die Intervalle oder die Loop-Einstellungen (Schleife) wählen
zu können, selektieren Sie dann "MODE".
PC Kamera Modus :
Wählen Sie "Down / Up" PC CAM und klicken Sie auf "OK" um in den
PC-Kamera-Modus zu gelangen. Sie können die Kamera als Webcam verwenden.
Im Wiedergabemodus können die Bilder des DVR über Ihren Fernseher abgespielt
werden.
Technische Daten:
::
:
Sensor CMOS chip
Objektiv 120° Weitwinkel
Zoom 12cm~
Screen 2.4 “ LTPS T T LCD
TV-out NTSC/PAL
oto 1M, 2M, 3M, 5M
Video AVI
Speicherung SDHC SD card (Max.32G, SDHC card)
Interface USB 2.0 / AV OUT
USB USB 2.0
Abmessungen 119*55*132mm
Temperatur 0~40°C / 10%~80%

•UK :Electric products must not be put into household waste. Please bring them to a recycling
centre. Ask your local authorities or your dealer about the way to proceed.
The specifications are typical. The actual values can slightly change from one unit to the other. Specifications
can be changed without prior notice.
The date the product leaves the importer is considered to be the date the warranty begins. Only companies
approved by Tronios are allowed to work on the equipment.
During warranty period (defective) equipment must be returned to the dealer by pre-paid mail
in the original box. Potentiometers have a limited lifetime and are not covered by the
manufacturer for more than normal use. For all service enquiries, refer to your local
distributor,as he is best able to help you.
NL : Afgedankte artikelen !!
Raadpleeg eventueel www.wecycle.nl en/of www.vrom.nl v.w.b. het afdanken van elektronische apparaten
in het kader van de WEEE-regeling. Vele artikelen kunnen worden gerecycled, gooi ze daarom niet bij het
huisvuil maar lever ze in bij een gemeentelijk depot of uw dealer. Lever ook afgedankte batterijen in bij uw
gemeentelijk depot of bij de dealer, zie www.stibat.nl .
Alle (defecte) artikelen dienen gedurende de garantieperiode altijd retour te worden gezonden in de originele
verpakking.
* Onder voorbehoud :
Specificaties zijn specifiek, toestel kan hiervan afwijken. Specificaties kunnen veranderd worden zonder
kennisgeving.
Voer zelf geen reparaties uit aan het toestel; in élk geval vervalt de totale garantie.
Ook mag het toestel niet eigenmachtig worden gemodificeerd, ook in dit geval vervalt de totale garantie. Ook
vervalt de garantie bij ongevallen en beschadigingen in élke vorm t.g.v. onoordeelkundig gebruik en het niet in
achtnemen van het gestelde in deze gebruiksaanwijzing.
Deutschland : Tronios BV Registrierungsnummer : DE51181017 (ElektroG).
Dieses Produkt darf am Ende seiner Lebensdauer nicht über den normalen Haushaltsabfall entsorgt werden,
sondern muss an einem sammelpunkt für das Recycling abgegeben werden. Hiermit leisten Sie einen
wichtigen Beitrag zum Schutze unserer Umwelt.
Tronios BV Registrierungsnummer : 21003000 (BatterieG).
Lithiumbatterien und Akkupacks sollten nur im entladenen Zustand in die Altbatteriesammelgefäße bei Handel und
bei öffentlich-rechtlichen Entsorgungsträgern gegeben werden. Bei nicht vollständig entladenen Batterien Vorsorge
gegen Kurzschlüß treffen durch Isolieren der Pole mit Klebestreifen.
Der Endnutzer ist zur Rückgabe von Altbatterien gesetzlich verpflichtet.
Die Spezifikationen sind typisch. Die Werte können leicht von einem Gerät zum anderen ändern. Spezifikationen
können ohne vorherige Ankündigung geändert werden.
Alle (fehlerhafte) Ware bitte immer in der Originalverpackung an den Fachhändler senden.
*Änderungen und Druckfehler vorbehalten.

CE Declaration of Conformity
Importer: TRONIOS BV
Bedrijvenpark Twente 415
7602 KM - ALMELO
Tel : 0031546589299
Fax : 0031546589298
The Netherlands
Product number:
351.136
Product Description:
Road Safety Guard
Regulatory Requirement: EN 55013: 2001/A2:2006
EN 55020: 2007
EN 61000-3-2 : 2006+A2:2009
EN 61000/-3-3: 2008
The product meets the requirements stated in the above mentioned Standards. This
certificate does not cover the aspects that may be relevant such as performance and
fitness for purpose.
Almelo,
14-01-2013
Signature :
Table of contents
Languages: