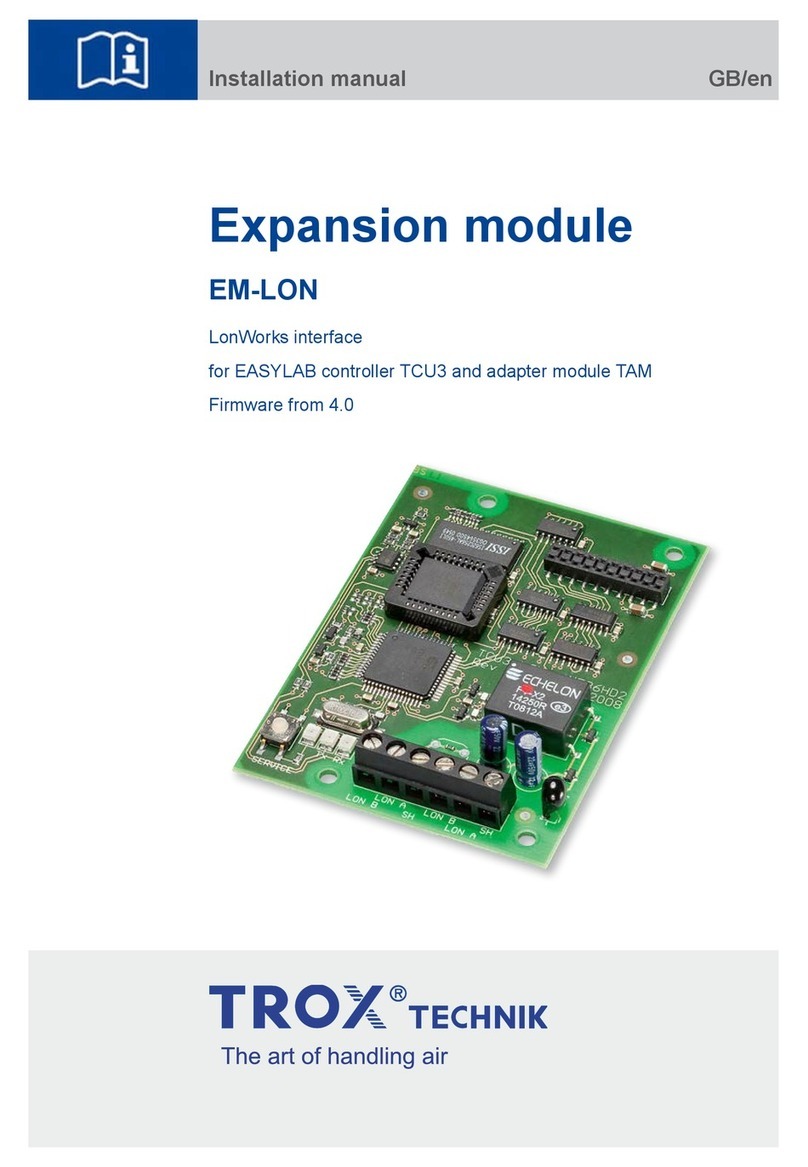
Trox EM-LON Specification sheet

EM-LON Operating Manual / Leaflet no. M375EV4 (3/2013)
The art of handling air
Operating and Installation Manual
EASYLAB Expansion module
EM-LON
LonWorks interface for EASYLAB
TCU3 controllers and TAM adapter modules

EM-LON Operating Manual / Leaflet no. M375EV4 (3/2013)2
1 General information __________________ 3
Other applicable documentation ________ 3
Symbols used in this manual ____________ 3
2 Safety and correct use ________________ 4
General information regarding safety ______ 4
General safety measures ______________ 4
Correct use ________________________ 4
Incorrect use ________________________ 4
Residual risks ______________________ 4
3 Product description __________________ 5
Product overview and technical data ______ 5
Functional description ________________ 6
4 Transport, storage and packaging ________ 6
5 LonWorks network variables ____________ 8
6 Installation __________________________ 10
7 Wiring ____________________________ 12
Making connections __________________ 12
Recommended bus cables ____________ 12
8 Commissioning ______________________ 13
9 Maintenance ________________________ 13
Contents
TROX GmbH
Heinrich-Trox-Platz
D-47504 Neukirchen-Vluyn
Phone +49(0)28 45 20 20
Fax +49(0)28 45 20 22 65
www.troxtechnik.com Subject to change / All rights reserved © TROX GmbH

EM-LON Operating Manual / Leaflet no. M375EV4 (3/2013) 3
Danger!
Designates danger to life and limb due to
electrical voltage.
Warning!
Designates danger to life and limb.
Important!
Designates danger that can cause minor
personal injury or damage to property.
Symbols used in this manual
This manual describes the EM-LON expansion
module that supplements EASYLAB TCU3
controllers and TAM adapter modules with a
LonWorks-FTT-10A interface.
To ensure complete functioning of the expansion
module it is essential to read this operating and
installation manual before starting any work, and
to comply with it.The manual must be given to the
facilities manager when handing over the system.
The facilities manager must include the manual with
the system documentation.
The manufacturer does not accept any liability
for any malfunction or damage resulting from
non-compliance with these instructions or non-
compliance with relevant statutory regulations.
Other applicable documentation
In addition to this manual, the following documents
apply:
• Control Systems catalogue
– EASYLAB EM-LON expansion module
– EASYLAB TCU3 controller
• Project-specific wiring documents
1 General information

General information regarding safety
Only skilled qualified personnel are allowed to
perform the described work on the expansion
module. Only skilled qualified electricians are
allowed to work on the electrical system.
For all work performed on EASYLAB components,
the following regulations and guidelines must be
complied with.This applies in particular to the
following German country specific regulations or as
appropriate in the country where the installation is
taking place:
• Equipment and Product Safety Laws (GPSG)
• Industrial Health and Safety Regulations
(BetrSichV)
• Accident Prevention Regulations (BGV A1,
BGV A3)
General safety measures
• Large temperature differences
Condensation can damage the electronics
beyond repair. If the expansion module has been
kept in an unheated area, wait at least two hours
before switching on the supply voltage for
commissioning.
• Electrostatic charge
Electrostatic charge can damage the electronics.
For this reason, first touch an equipotentially
bonded metal surface, e.g. a water pipe, for
electrical earthing before you remove the unit
from its protective wrapping. Avoid skin contact
with any components or printed circuits on the
expansion module or the main PCB.
• Installing the PCB
Tighten the mounting screws and distance pieces
only hand-tight to avoid damage to the PCB or to
the fixing points in the casing.
• Foreign matter and liquids
If liquid gets onto the PCB or inside the
expansion module, let the expansion module
completely dry before commissioning. Remove
foreign matter, if any.
If the device emits a smell or smoke, have it
checked by the manufacturer.
4 EM-LON Operating Manual / Leaflet no. M375EV4 (3/2013)
2 Safety and correct use
Correct use
The EM-LON expansion module provides a
LonWorks interface for EASYLAB base
components.
• Use the expansion module only for an EASYLAB
TCU3 controller or a TAM adapter module.
• Use the expansion module only within the
ranges given in the technical data.
• When used on a room controller or adapter
module with active room management function
(RMF) the expansion module provides data for
the entire room.
• When used on a fume cupboard controller, room
controller or adapter module the expansion
module provides access to the data of the
controller.
• Observe the technical data of the expansion
module.
Incorrect use
Do not use the expansion module outdoors, in wet
areas, or in potentially explosive atmospheres.
Residual risks
Failure of the LonWorks interface does not affect
the control function of the volume flow controller but
does affect data exchange with the central BMS.
Additional safety measures are required for
safety-relevant applications.

EM-LON Operating Manual / Leaflet no. M375EV4 (3/2013) 5
Product overview
Product overview and technical data
Service pin push button
Service pin push button indicator light
Indicator lights for LonWorks communication
TX: Sending data
RX: Receiving data
Terminals for LON FTT-10A network
Plug base for connection with the EASYLAB
main PCB
3 Product description
LON B
LON A
SH
SH
LON A
LON B
Technical data
Supply voltage 5 V DC from the TCU3 controller or TAM adapter module
Communication LonWorks transceiver FTT-10A (Free Topology, Twisted Pair)
Acceptable temperature range for storage: -10°C to +70 °C
for operation: 0°C to +50 °C
Permissible humidity for storage and
operation <90 % non-condensing
Protection level IP 20
Dimensions B × H × T 65 × 15 × 90 mm
Connection to LonWorks network 6 terminals for cable cross sections of 0.12 – 1.5 mm² (LON A, LON B
and shielding, two of each)
Operation and display Service pin push button and three indicator lights

6 EM-LON Operating Manual / Leaflet no. M375EV4 (3/2013)
3 Product description
4 Transport, storage and packaging
Delivery check
Check delivered items immediately after arrival for
transport damage and completeness. In case of any
damage or an incomplete shipment, inform the
shipping company and your TROX contact person
immediately.
A complete shipment includes:
• PCB
• 20-pin header
• Fixing material (4 distance pieces and 4 screws)
• Operating and installation manual
Transport on site
• If possible, take the expansion module in the
transport packaging up to the installation location.
• Do not remove the protective wrapping until just
before installation.
Storage
If you need to store the expansion module
temporarily, make sure that the following conditions
apply:
• Leave the unit in its packaging and do not expose
it to the effects of weather.
Store the unit in a dry place and away from direct
sunlight.
• Temperature: –10°C to +70°C
Maximum humidity: 90% (non-condensing)
Packaging
Properly dispose of packaging material.
Functional description
The EM-LON expansion module supplements the
EASYLAB base components (TCU3 controller or
TAM adapter module) with a LonWorks interface for
the purpose of linking rooms or individual volume
flow controllers to the central BMS.
The PCB contains terminals for the LonWorks
network and a service pin push button with indicator
light.The PCB can be fitted to the TCU3 or TAM
main PCB using a header.
To simplify diagnosis during commissioning the
expansion module is equipped with two additional
indicator lights that indicate data traffic on the
LonWorks interface.
Standard network variables are used for the
communication within the LonWorks infrastructure.
These variables ensure unambiguous data
exchange between the nodes. For commissioning, it
is necessary to link the network variables between
the nodes (binding). Project software is used to link
the outputs of a node to the inputs of other nodes.

EM-LON Operating Manual / Leaflet no. M375EV4 (3/2013) 7
5 LonWorks network variables
Name of variable Data type
FH
RR
TAM
RR RMF
TAM RMF
Meaning
nviManOverride
SNVT_hvac_overid
x¹ x x
Operating mode default setting for controller or room
nviMode
SNVT_state
x¹ x x
Operating mode default setting for controller or room
nviOccCmd
SNVT_occupancy
x¹ x x
Operating mode default setting for controller or room
nviManOP_Disable
SNVT_switch
x¹ x x
Enabling/disabling manual control
nviVolOffset_T
SNVT_switch
x x
Signalling of flow rate setpoint change for temp. control
nviVolOffset_P
SNVT_switch
x x
Signalling of flow rate setpoint change for diff. pressure control
nviPressSetSel
SNVT_switch
x x
Switching between differential pressure setpoint values 1 and 2
nvoManOverride
SNVT_hvac_overid
x x x
Current operating mode for a single controller
nvoManOverride_R
SNVT_hvac_overid
x x
Current operating mode for the room
nvoMode
SNVT_state
x x x
Current operating mode for a single controller
nvoMode_R
SNVT_state
x x
Current operating mode for the room
nvoOccCmd
SNVT_occupancy
x x x
Current operating mode for a single controller
nvoOccCmd_R
SNVT_occupancy
x x
Current operating mode for the room
nvoVolflowSet
SNVT_flow
x x x
Volume flow rate setpoint value for the controller
nvoVolflowAct
SNVT_flow
x x x
Volume flow rate actual value for the controller
nvoVolTotalExh
SNVT_flow
x x x x x
Total extract air for the room
nvoVolTotalSup
SNVT_flow
x x x x x
Total supply air for the room
nvoPressSet
SNVT_press_p
x x
Differential pressure setpoint value for the room
nvoPressAct
SNVT_press_p
x x
Differential pressure actual value for the room
nvoLocalAlarm
SNVT_switch
x x x x x
Single controller alarm
nvoSummaryAlarm
SNVT_switch
x x
Consolidated alarm for the room
nvoPressAlarm
SNVT_switch
x x
Differential pressure alarm
nvoVelocitySet
SNVT_speed_mil
x
Face velocity actual value
nvoVelocityAct
SNVT_Count
x
Face velocity setpoint value
nvoSwitchPos
SNVT_switch
x
Sash position (stage 1,2,3)
nvoWireSensorPos
SNVT_switch
x
Sash position (sash opening %)
nvoDampPos
SNVT_switch
x x x
Damper blade position of single controller
nvoDampPosMax_FH
SNVT_switch
x x x x x
Evaluated damper blade position for fume cupboards – max
nvoDampPosMin_FH
SNVT_switch
x x x x x
Evaluated damper blade position for fume cupboards – min
nvoDampPosMax_RE
SNVT_switch
x x x x x
Evaluated damper blade position, extract air – max
nvoDampPosMin_RE
SNVT_switch
x x x x x
Evaluated damper blade position, extract air – min
nvoDampPosMax_TE
SNVT_switch
x x x x x
Evaluated damper blade position, total extract air – max
nvoDampPosMin_TE
SNVT_switch
x x x x x
Evaluated damper blade position, total extract air – min
nvoDampPosMax_RS
SNVT_switch
x x x x x
Evaluated damper blade position, supply air – max
nvoDampPosMin_RS
SNVT_switch
x x x x x
Evaluated damper blade position, supply air – min
FH: Fume cupboard controller
RR: Room controller for supply air or extract air
TAM: Adapter module
RR RMF: Room controller with active room management function
TAM RMF: Adapter module with active room management function
¹ only for individually selected operating mode (stand-alone operation)
Overview of data points for EM-LON LonWorks interface, firmware version 1.0

EM-LON Operating Manual / Leaflet no. M375EV4 (3/2013)8
5 LonWorks network variables
Name of variable Data type
FH
RR
TAM
RR RMF
TAM RMF
Meaning
nviSunblinder SNVT_switch x x Control input signal for sun protection/blinds
nviVolflowExh SNVT_flow
xxxxx
Connection of an extract air flow
nviVolflowSuph SNVT_flow
xxxxx
Connection of a supply air flow
nvoSystemDevices SNVT_count
xxxxx
Number of EASYLAB controllers
nvoStateDIO SNVT_state
xxxxx
State of the digital inputs and outputs (TCU3)
Overview of additional data points for EM-LON LonWorks interface firmware version 2.0,
and TCU firmware version 3.0
Name of variable Data type
FH
RR
TAM
RR RMF
TAM RMF
Meaning
nviSC_LockHP SNVT_switch
x
Automatic sash device
Close and lock sash - HighPrio
nvoSC_LockHP SNVT_switch x Automatic sash device
Feedback, sash has been locked - HighPrio
nviSC_SetPos SNVT_switch x Automatic sash device
Default setting from central BMS: Close sash
nvoSC_GetPos SNVT_switch x Automatic sash device
Position status
nvoSC_Alarm SNVT_switch x Automatic sash device
Alarm
Overview of additional data points for EM-LON LonWorks interface firmware version 2.0,
and TCU firmware version 4.0

EM-LON Operating Manual / Leaflet no. M375EV4 (3/2013) 9
5 LonWorks network variables
nviManOP_Disable
nviManOverride
nviMode
nviOccCmd
nviPressSetSel
nviVolOffset_P
nvi
nviSunblinder
nviVolflowExh
nviVolflowSup
nviSC_LockHP
nviSC_SetPos
VolOffset_T
nvoDampPos
nvoDampPosMax_FH
nvoDampPosMax_RE
nvoDampPosMax_RS
nvoDampPosMax_TE
nvoDampPosMin_FH
nvoDampPosMin_RE
nvoDampPosMin_RS
nvoDampPosMin_TE
nvoLocalAlarm
nvoManOverride
nvoMode
nvoOccCmd
nvoManOverride_R
nvoMode_R
nvoOccCmd_R
nvoPressAct
nvoPressAlarm
nvoPressSet
nvoSummaryAlarm
nvoSwitchPos
nvoVelocityAct
nvoVelocitySet
nvoVolflowAct
nvoVolflowSet
nvoVolTotalExh
nvoVolTotalSup
nvoWireSensorPos
nvoSystemDevices
nvoStateDIO
nvoSC_LockHP
nvoSC_GetPos
nvoSC_Alarm
Virtual functions
Variables of firmware versions 1.0 and 2.0
The variables marked ‘X’ are available for
firmware version 2.0 and higher.
X
X

EM-LON Operating Manual / Leaflet no. M375EV4 (3/2013)10
6 Installation
For installation, wiring, and commissioning
observe the recognised technical regulations,
especially safety and accident prevention
regulations.
For any wiring work follow the national and
local regulations and guidelines for electrical
installation.
Installation
The expansion module is to be fitted into the casing
of a TCU3 controller or TAM adapter module.
Step 1
Screw the four distance pieces into the
corresponding openings in the TCU3 or TAM
main PCB and tighten them (hand-tight only).
Step 2
Take the pin header and push it from below
through the EM-LON PCB just far enough such
that the pins protrude slightly on the upper side.
Danger!
Danger of electric shock! Do not touch any
live components! Electrical equipment
carries a dangerous electrical voltage
during operation.
• Only skilled qualified electricians are
allowed to work on the electrical system.
• Switch off the power supply before
working on any electrical equipment.
Important!
Danger of injury from the metal pins of the
pin header.
Wear electrician gloves for protection.

EM-LON Operating Manual / Leaflet no. M375EV4 (3/2013) 11
6 Installation
Step 3
Take the EM-LON PCB with the upside up and
position it on the TCU3 or TAM main PCB such that
the pin header is exactly above the corresponding
plug-in base, and the holes for the distance pieces
are above the distance pieces. Then press the PCB
onto the distance pieces.
• In case the positions do not exactly line up,
check whether the pin header is still correctly
positioned.Repeat step 2.
• If the pins have been pushed too far through the
PCB (step 2), the electrical connection may not
work properly. Repeat step 2.
Step 4
Fix the PCB using the four fixing screws .Tighten
the screws only hand-tight.

EM-LON Operating Manual / Leaflet no. M375EV4 (3/2013)12
For installation, wiring, and commissioning
observe the recognised technical regulations,
especially safety and accident prevention
regulations.
For any wiring work follow the national and
local regulations and guidelines for electrical
installation.
Danger!
Danger of electric shock! Do not touch any
live components! Electrical equipment
carries a dangerous electrical voltage
during operation.
• Only skilled qualified electricians are
allowed to work on the electrical system.
• Switch off the power supply before
working on any electrical equipment.
Making connections
The EM-LON PCB has terminals for two bus cables
of a LonWorks network. Depending on the network
topology, controllers at the end of a chain may be
connected to one bus, controllers at other positions
in the chain may be connected to two buses.
Strip the insulation from at least two wires of the bus
cable, insert the bare wires into the terminals and
tighten the screws.
• Fix the bus cable to the casing using the wire
clamping bracket.
• Connect the shield of shielded cables to the
SH terminals.Within a chain (channel) connect
the shield only at one point with the earth.
Earthing the shield at every controller will
lead to interferential voltages.
• To avoid reflections at the end of a chain
(channel) use a terminator.
Recommended bus cables
Bus cables to TIA 568A, category 5
• Belden 8471 or 85102
• Cables to DOCSIS specification level IV
• JY(St)Y 2×2×0.8 (use only twisted pair for
LON-A and LON-B)
Bus
LON-B
LON-A
SH (shield)
7 Wiring

EM-LON Operating Manual / Leaflet no. M375EV4 (3/2013) 13
8 Commissioning
9 Maintenance
Commissioning
Commissioning the LonWorks interface requires
detailed technical knowledge and special software,
e.g. Echelon LonMaker.The installation should only
be carried out by qualified experts.
1.Commissioning
Press the service pin push button and download
the software for the EASYLAB LonWorks node.
The software for the EM-LON expansion module
is available for download on our website.
2.Binding
Create the logical bindings for the network
variables to be transferred by the EM-LON
expansion module. As an alternative, use
polling.
3.Configuration
If necessary, adjust the configuration for
nciMaxSendTime or nciConfig_Occ.
Maintenance
The EM-LON expansion module is
maintenance-free.

EM-LON Operating Manual / Leaflet no. M375EV4 (3/2013)14

EM-LON Operating Manual / Leaflet no. M375EV4 (3/2013) 15

EM-LON Operating Manual / Leaflet no. M375EV4 (3/2013)16
Other manuals for EM-LON
1
Table of contents
Other Trox Computer Hardware manuals
Popular Computer Hardware manuals by other brands
GigaDevice Semiconductor
GigaDevice Semiconductor GD32130F-START user guide

ADLINK Technology
ADLINK Technology cPCI-9116 user guide
ESD
ESD CPCI-DP-2S Hardware manual

Texas Instruments
Texas Instruments HVL038 manual
ADLINK Technology
ADLINK Technology NuDAQ DAQ-2500 Series user guide
Vtron
Vtron Digicom Ark5000 user manual
