manuals.online logo
Brands
  1. Home
  2. •
  3. Brands
  4. •
  5. Troy-Bilt
  6. •
  7. Tiller
  8. •
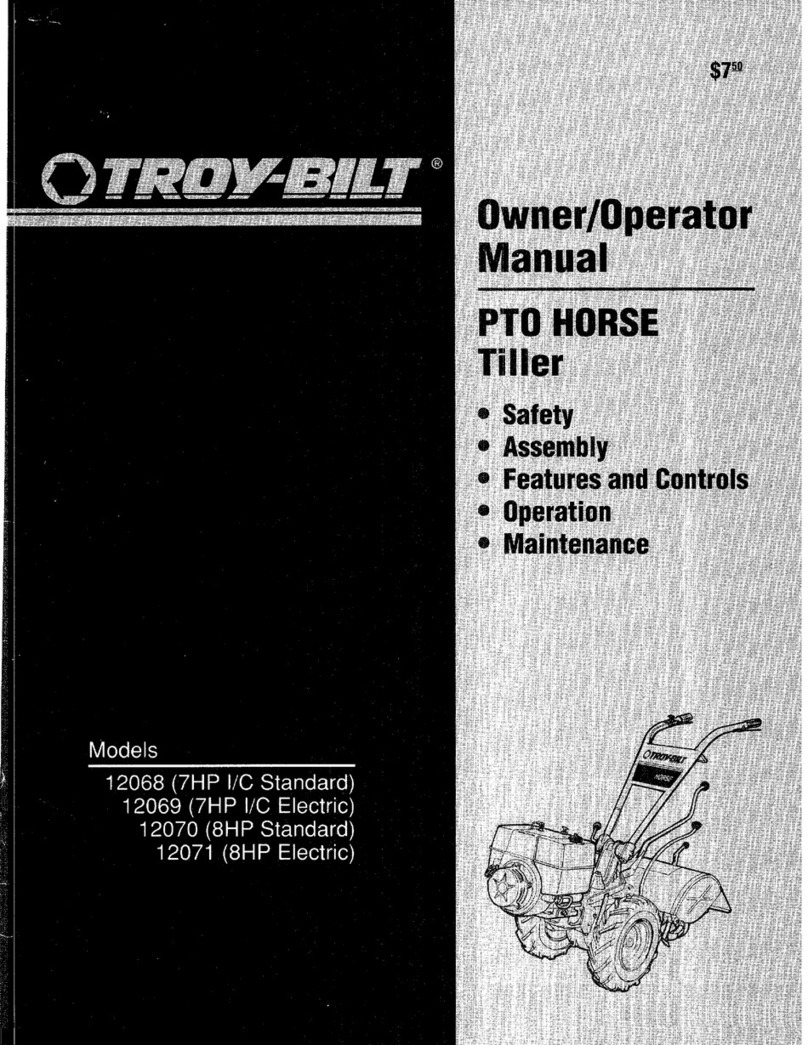
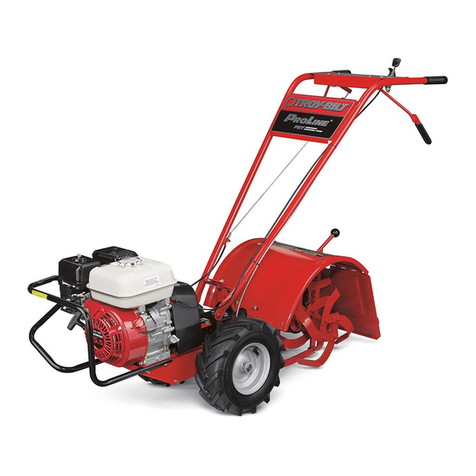
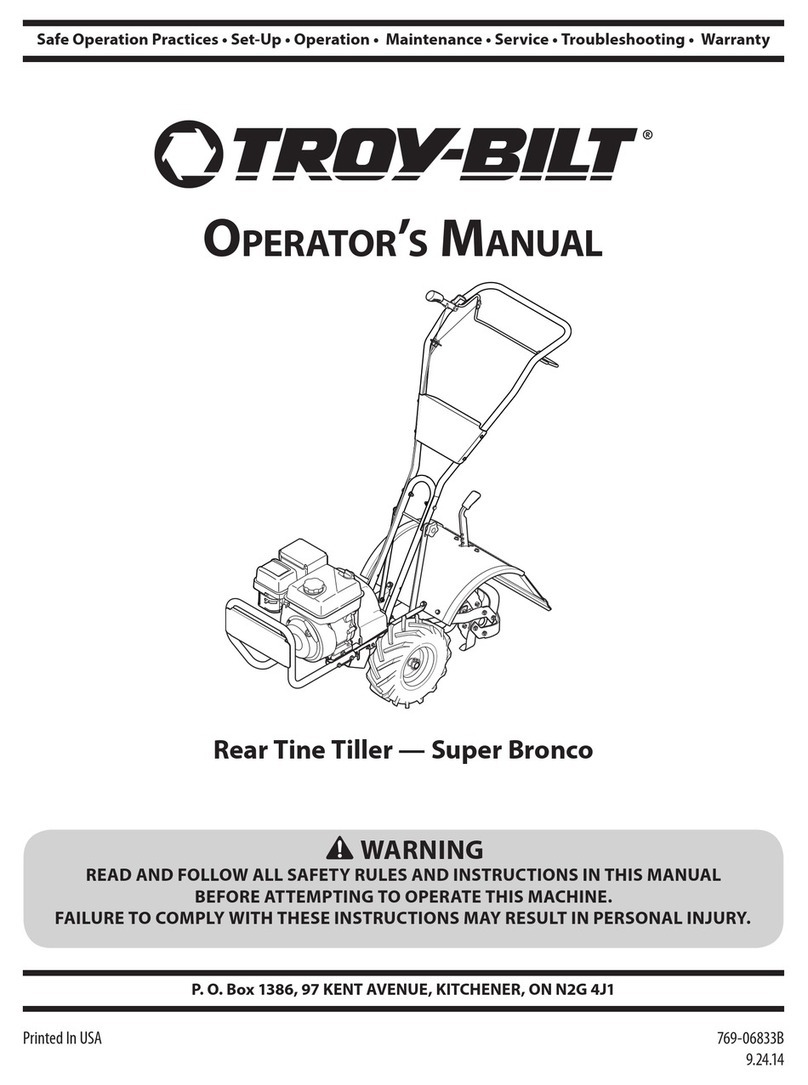
  9. Troy-Bilt Horse 682J User manual

Troy-Bilt Horse 682J User manual

Other manuals for Horse 682J

2

This manual suits for next models

1

Other Troy-Bilt Tiller manuals

Troy-Bilt 12087 Owner's manual

Troy-Bilt

Troy-Bilt 12087 Owner's manual

Troy-Bilt 12234 User manual

Troy-Bilt

Troy-Bilt 12234 User manual

Troy-Bilt TB144 User manual

Troy-Bilt

Troy-Bilt TB144 User manual

Troy-Bilt 12070-8HP Owner's manual

Troy-Bilt

Troy-Bilt 12070-8HP Owner's manual

Troy-Bilt 769-00485A P/N 769-00485A User manual

Troy-Bilt

Troy-Bilt 769-00485A P/N 769-00485A User manual

Troy-Bilt PRO LINE Bronco 644H User manual

Troy-Bilt

Troy-Bilt PRO LINE Bronco 644H User manual

Troy-Bilt 12214 - 5.5HP User manual

Troy-Bilt

Troy-Bilt 12214 - 5.5HP User manual

Troy-Bilt PONY User manual

Troy-Bilt

Troy-Bilt PONY User manual

Troy-Bilt ECONO-HORSE Owner's manual

Troy-Bilt

Troy-Bilt ECONO-HORSE Owner's manual

Troy-Bilt Garden Way 12194 User manual

Troy-Bilt

Troy-Bilt Garden Way 12194 User manual

Troy-Bilt Pony 12211 User manual

Troy-Bilt

Troy-Bilt Pony 12211 User manual

Troy-Bilt Super Bronco User manual

Troy-Bilt

Troy-Bilt Super Bronco User manual

Troy-Bilt Series 200 World Rear Wheel Tiller User manual

Troy-Bilt

Troy-Bilt Series 200 World Rear Wheel Tiller User manual

Troy-Bilt 683-Horse User manual

Troy-Bilt

Troy-Bilt 683-Horse User manual

Troy-Bilt 660 Series Setup guide

Troy-Bilt

Troy-Bilt 660 Series Setup guide

Troy-Bilt 390 Series User manual

Troy-Bilt

Troy-Bilt 390 Series User manual

Troy-Bilt 12235 User manual

Troy-Bilt

Troy-Bilt 12235 User manual

Troy-Bilt PRO LINE 644HMBRONCO User manual

Troy-Bilt

Troy-Bilt PRO LINE 644HMBRONCO User manual

Troy-Bilt 128T User manual

Troy-Bilt

Troy-Bilt 128T User manual

Troy-Bilt 680 Series Setup guide

Troy-Bilt

Troy-Bilt 680 Series Setup guide

Troy-Bilt Series 200 World Rear Wheel Tiller User manual

Troy-Bilt

Troy-Bilt Series 200 World Rear Wheel Tiller User manual

Troy-Bilt TB144 User manual

Troy-Bilt

Troy-Bilt TB144 User manual

Troy-Bilt 12234 User manual

Troy-Bilt

Troy-Bilt 12234 User manual

Troy-Bilt OEM-290-101 User manual

Troy-Bilt

Troy-Bilt OEM-290-101 User manual

Popular Tiller manuals by other brands

WIL-RICH 2500 Operator's manual

WIL-RICH

WIL-RICH 2500 Operator's manual

MTD 410R parts list

MTD

MTD 410R parts list

Viking HB 685 instruction manual

Viking

Viking HB 685 instruction manual

SMASH TLG415 instruction manual

SMASH

SMASH TLG415 instruction manual

FarmBoy FB-IC-209P user manual

FarmBoy

FarmBoy FB-IC-209P user manual

Craftsman 247.29931 Operator's manual

Craftsman

Craftsman 247.29931 Operator's manual

MTD FRT Series Operator's manual

MTD

MTD FRT Series Operator's manual

Craftsman 917.298353 owner's manual

Craftsman

Craftsman 917.298353 owner's manual

MTD OHV Series Original operating instructions

MTD

MTD OHV Series Original operating instructions

YAT YT5601-01 Assembly, Use, Maintenance Manual

YAT

YAT YT5601-01 Assembly, Use, Maintenance Manual

Craftsman 917.296010 owner's manual

Craftsman

Craftsman 917.296010 owner's manual

Scheppach MTP560 Translation from the original instruction manual

Scheppach

Scheppach MTP560 Translation from the original instruction manual

GARDEN WAY 12194 owner's manual

GARDEN WAY

GARDEN WAY 12194 owner's manual

Classen STAND-AER SA-25 Operator's manual and parts list

Classen

Classen STAND-AER SA-25 Operator's manual and parts list

Altrad ATIKA BH 1400 N Original instructions, safety instructions, spare parts

Altrad

Altrad ATIKA BH 1400 N Original instructions, safety instructions, spare parts

DR PILOT 2 Safety & Operating Instructions

DR

DR PILOT 2 Safety & Operating Instructions

AL-KO TL 1820 Instructions for use

AL-KO

AL-KO TL 1820 Instructions for use

breviglieri mekfarmer 120 Operating and maintenance

breviglieri

breviglieri mekfarmer 120 Operating and maintenance

manuals.online logo
manuals.online logoBrands
  • About & Mission
  • Contact us
  • Privacy Policy
  • Terms and Conditions

Copyright 2025 Manuals.Online. All Rights Reserved.

TRnV BILT
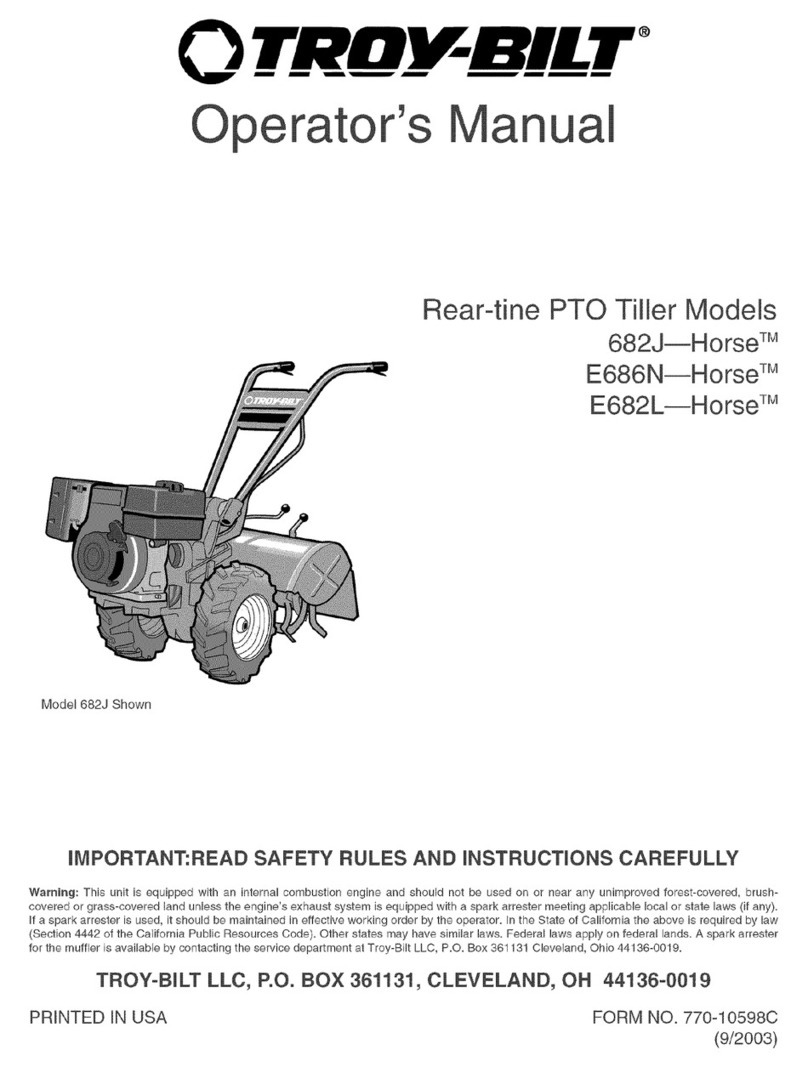
Operator's Manual
Rear-tine PTO Tiller Models
682J--Horse TM
E682L--Horse TM
Model 682J Shown
IMPORTANT:READ SAFETY RULES AND INSTRUCTIONS CAREFULLY
Warning: This unit is equipped with an internal combustion engine and should not be used on or near any unimproved forest-covered, brush-
covered or grass-covered land unless the engine's exhaust system is equipped with a spark arrester meeting applicable local or state laws (if any).
If a spark arrester is used, it should be maintained in effective working order by the operator. In the State of California the above is required by law
(Section 4442 of the California Public Resources Code). Other states may have similar laws. Federal laws apply on federal lands. A spark arrester
for the muffler is available by contacting the service department at Troy-Bilt LLC, P.O. Box 361131 Cleveland, Ohio 44136-0019.
TROY-BILT LLC, P.O. BOX 361131, CLEVELAND, OH 44136-0019
PRINTED IN USA FORM NO. 770-10598A
(01/2002)
TABLE OF CONTENTS
Content Page
Calling Customer Support .................................................... 2
Safety ................................................................... 3
Assembly ................................................................. 6
Features and Controls ....................................................... 11
Operation ................................................................ 14
Maintenance .............................................................. 28
Troubleshooting ........................................................... 41
Attachments & Accessories .................................................. 43
Parts List ................................................................. 44
Warrany Information ........................................................ Back Cover
FINDING MODEL NUMBER
This Operator's Manual is an important part of your new Rear-tine Tiller. It will help you assemble, prepare and
maintain the unit for best performance. Please read and understand what it says.
Before you start assembling your new equipment, please locate the model plate on the equipment and copy the infor-
mation from it in the space provided below. This information is very important if you need help from our Customer
Support Department or an authorized dealer.
You can locate the model number by looking at the rear surface of the tine shield. A sample model plate is
explained below. For future reference, please copy the model number and the serial number of the equipment
in the space below
O BILT" TROY-BILT LL(
P. O. BOX 361131
www.troybilt.com CL_E_ND, OH_136
330-558-7220
•866-840-648_
Copy Model Number Here
Copy Serial Number Here
ENGINEINFORMATION
The engine manufacturer is responsible for all engine-related issues with regards to performance, power-rating, speci-
fications, warranty and service. Please refer to the engine manufacturer's Owner's/Operator's Manual packed sepa-
rately with your unit for more information.
CALLINGCUSTOMERSUPPORT
If you have difficulty assembling this product or have any questions regarding the controls, operation or maintenance
of this unit, please call the Customer Support Department.
Call 1- (330) 558-7220 or 1- (866) 840-6483 to reach a Customer Support representative. Please have
your unit's model number and serial number ready when you call. See previous section to locate this
information. You will be asked to enter the serial number in order to process your call.
2
nSafety
SafetyAlert Symbol
,_ This is a safety alertsymbol. It is used in this
manualand on the unit to alertyou to
potential hazards. Whenyou seethis symbol,
readand obey the messagethat follows it.
Failureto obeysafety messagescould result in personal
injury or property damage.
This machine meets voluntary safety standard B71.8
- 1996, which is sponsored by the Outdoor Power
Equipment Institute, Inc., and is published by the
American National Standards Institute.
WARNING
Theengineexhaustfromthis productcontains
chemicalsknowntothe State ofCaliforniatocause
cancer, birth defects or other reproductive harm.
Training
1. Carefullyreadthis Owner's Manual,the
separateEngineOwner's Manual,and any
other literature you may receive.Be thor-
oughly familiar with the controls and the
proper useof the tiller and its engine.
Know howto stop the unit and disengage
the controls quickly.
2. Neverallow children to operatethe
tiller. Neverallow adults to operatethe
tiller without proper instruction.
3. Keepthe area of operation clearof all
persons, particularly children and pets.
4. Keepin mind that the operator or user
is responsible for accidents or hazards
occurring to other people,their property,
andthemselves.
Preparation
1. Thoroughly inspect thearea wherethe
tiller isto be usedand remove all foreign
objects.
2. Putthe Wheels/Tines/PTODrive Lever
into NEUTRALbeforestarting theengine.
3. Do not operatethe tiller without
wearingadequateoutergarments. Avoid
loose garmentsor jewelry that could get
caught in moving parts.
4. Do not operatethe tiller when barefoot
or wearingsandals,sneakers,or light
footwear. Wear protectivefootwear that
will improve footing on slippery surfaces.
5. Do nottill nearunderground electric
cables,telephone lines, pipesor hoses.If
in doubt, contact your telephoneor utility
company.
6. Warning:Handlefuel with care; it is
highly flammable and its vapors are
explosive. Besureto takethe following
precautions:
a. Storefuel in containersspecifically
designedfor this purpose.
b. The gascapshall neverbe removed
or fuel addedwhile the engine is
running. Allow the engine to cool
for severalminutes beforeadding
fuel.
c. Keepmatches,cigarettes, cigars,
pipes, open flames, and sparks
awayfrom thefuel tank and fuel
container.
d. Fillfuel tank outdoors with extreme
care. Neverfill fuel tank indoors.
Usea funnel or spout to prevent
spillage.
e. Replaceall fuel tank and container
caps securely.
f. If fuel is spilled, do not attempt to
start the engine, but move the
machine awayfrom thearea of
spillageand avoid creating any
source of ignition until fuel vapors
havedissipated.
7. Never makeadjustmentswhen engine
is running (unless recommendedby
manufacturer).
Operation
1. Do not put hands or feet nearor under
rotating parts. Donot allow handsor any
other part of the bodyor clothing nearthe
rotating tines or nearanyother moving
part. Thetines beginto rotate forward
oncethe enginestarts, the Tines/PTO
ClutchLeveris in the ENGAGEposition,
the Forward Interlock Leversare squeezed
closedand the Wheels/Tines/PTODrive
Leveris shiftedto FORWARD.Thetines
rotate in Reversewhether the Interlock
Leversare closed or open.
2. Exerciseextremecaution when on or
crossing graveldrives, walks, or roads.
Stayalert for hidden hazardsor traffic. Do
not carry passengers.
3. After striking aforeign object, stop the
engine,removethe wire from thespark
plug wire and prevent it from touching the
spark plug. Thoroughly inspectthe
machinefor anydamageand repair the
damagebefore restarting and operating
the machine.
4. Exercisecaution to avoid slipping or
falling.
5. If the unit should start to vibrate abnor-
mally,stop the engine,disconnect the
spark plug wire and prevent it from
touching the spark plug, and check imme-
diatelyfor the cause.Vibration is
generallya warning of trouble.
6. Stopthe engine,disconnect the spark
plug wire and prevent it from touching the
spark plug wheneveryou leavethe
operatingposition, before unclogging the
tines, or when making any repairs,adjust-
ments or inspections.
7. Takeall possible precautionswhen
leavingmachine unattended.Stopengine.
Disconnectspark plug wire and move it
away from spark plug. Removeignition
keyon electric start models
Section1: Safety
8. Beforecleaning, repairing, or inspect-
ing, stop the engine and make certain all
moving parts havestopped. Disconnect
the spark plug wire and prevent it from
touching thespark plug to preventacci-
dentalstarting.
9. Theflap on the tine hood must be
down when operatingthetiller, unless
using the Hiller/Furrower attachment.
10. Neverusethe tiller unless proper
guards, plates,or other safety protective
devicesare in place.
11. Donot run engine in anenclosed
area.Engineexhaustcontains carbon
monoxide gas, a deadlypoison that is
odorless, colorless, and tasteless.
12. Keepchildren and pets away.
13. Neveroperatethe tiller underengine
power if the WheelSpeedLeveris in the
FREEWHEELposition. In FREEWHEEL,
thewheels will not hold thetiller backand
the revolving tines could propel thetiller
rapidly, possibly causing loss of control.
Alwaysengagethe WheelSpeedLeverin
either FASTor SLOWposition before
starting the engine or engaging thetines
with theWheels/Tines/PTODrive Lever.
14. Beawarethatthetiller mayunex-
pectedlybounceupwardor jump
forwardifthetines shouldstrike
extremelyhardpackedsoil, frozen
ground,or buriedobstacleslike large
stones,roots, orstumps.If in doubt
aboutthetilling conditions,alwaysuse
thefollowingoperatingprecautionsto
assistyouin maintainingcontrolofthe
tiller:
a. Walk behindandto oneside ofthe
tiller, usingonehandonthe han-
dlebars.Relax yourarm, but usea
securehandgrip.
b. Useshallowerdepthregulator
settings,workinggraduallydeeper
with eachpass.
c. Useslowerwheel, tine and engine
speeds.
d. Clearthe tilling areaof all large
stones,rootsand otherdebris.
e. Avoidusingdownwardpressureon
handlebars.If need be, useslight
upwardpressureto keepthe tines
fromdiggingtoo deeply.
f. Beforecontactinghardpackedsoil
at the endof a row, reduceengine
speedand lift handlebarsto raise
tines outofthe soil.
g. In an emergency,stoptines and
wheels byshiftingthe
Wheels/Tines/PTODriveLever
intoNEUTRAL.If youcannot
reachthe lever or havelostcontrol
ofthetiller, let go ofthehandle-
barsand all controls. Do not
attempttorestrainthetiller.
15. Do not overloadthe tiller's capacity by
attempting to till too deeplyat too fast a
rate.
16. Never operatethe tiller at high
transport speedson hard or slippery
surfaces. Look behindand usecarewhen
backing up.
17. Do not operatethe tiller on aslope
that is too steep for safety.When on
slopes, slow downand makesure you
havegood footing. Never permit the tiller
to freewheel down slopes.
18. Neverallow bystandersnear the unit.
19. Onlyuseattachments and accessories
that are approved bythe manufacturer of
the tiller.
20. Usetiller attachments and acces-
sories when recommended.
21. Never operatethe tiller without good
visibility or light.
22. Never operatethe tiller if you are
tired, or under the influence of alcohol,
drugs or medication.
23. Operatorsshall nottamper with the
engine-governorsettings on the machine;
the governor controls the maximum safe
operating speedto protect the engineand
all moving parts from damagecaused by
overspeed. Authorized serviceshall be
sought if a problem exists.
24. Do nottouch engineparts which may
be hot from operation. Let parts cool
down sufficiently.
25. POISON/DANGER--CAUSES
SEVEREBURNS.The batteryon electric
start models contains sulfuric acid. Avoid
contact with skin, eyesor clothing. Keep
out of reachof children.
Antidotes:
External- Flushimmediately with lots of
water.
Internal- Drink largequantities of water
or milk. Followwith milk of magnesia,
beateneggs or vegetableoil. Calla
doctor immediately.
Eyes- Flushwith water for 15 minutes.
Getprompt medical attention.
26. DANGER-BATTERIESPRODUCE
EXPLOSIVEGASES. Keepsparks, flame
or smoking materialsaway. Ventilate
when charging batteryor using in an
enclosed space. Alwayswear safety
goggles when working near battery.
27. Pleaseremember:You canalways
stop the tines and wheels by releasingall
controls, or by moving the ignition switch
and/or throttle control leveron the engine
to OFFor STOP.
28. To load or unloadthe tiller, seethe
instructions in Section 4 of this Manual.
29. Useextremecaution when backing or
pulling the machinetowards you.
30. Startthe enginecarefully according to
instructions and with feet well awayfrom
the tines.
31. Neverpick up or carry a machine
while the engine is running.
32. When loading or unloadingthe tiller,
alwaysdisengagetines and useslower
wheel and enginethrottle speeds. Use
sturdy ramps wide and strong enough to
easily support the tiller (280-to-325 Ibs.,
depending on model) and operator.
Nevergo down ramps in FORWARD
drive--the tiller could tip forward,
exposing you to the tines (which should
be disengaged). Alwaysuse REVERSE
drive and backdown ramps. Togo up
ramps, useFORWARDdrive and follow
the tiller.
33. TheForward Interlock SafetySystem
should betested for correct functioning
every time thetiller or PTOpowerunit is
used. SeeSection 4 in this Manual.
34. If using the optional Dozer Blade,
either removethe tine attachment, or
disengagethe tines with the Tines/PTO
ClutchLever. Revolvingtines are
dangerous.

Section1: Safety
MaintenanceandStorage
1. Keepthe tiller, attachmentsand acces-
sories in safe working condition.
2. Checkall nuts, bolts, and screws at
frequent intervalsfor proper tightness to
be surethe equipment is in safe working
condition.
3. Neverstore the tiller with fuel in the
fuel tank insidea building where ignition
sources are presentsuch ashot water
and space heaters,furnaces, clothes
dryers, stoves, electric motors, etc.).
Allow engine to cool beforestoring in any
enclosure.
4. To reducethe chancesof afire hazard,
keepthe enginefree of grass, leaves,or
excessivegrease.
5. Store gasolinein a cool, well-ventilated
area,safelyaway from any spark- or
flame-producing equipment. Store
gasolinein an approvedcontainer, safely
away from the reachof children.
6. Referto the Maintenancesections of
this Manualand the separateEngine
Owner's Manualfor instructions if the
tiller is to be stored for an extended
period.
7. Neverperform maintenancewhile the
engine is running orthe spark plug wire is
connected, exceptwhen specifically
instructed to do so.
8. If thefuel tank hasto bedrained,do
this outdoors.
Decals
Foryour safetyand the safety of others,
various safety and operationaldecalsare
located on your unit (Figure 1).
Keepthe decalscleanand legible at all
times. Contactyour local servicedealer
or the Factoryfor replacementsif any
decalsare damagedor missing.
C) WARNING:Operatingand
A) WARNING:HotSurfaces.
Topoftheaircleanerhousing. SafetyInstructions
D) PowerUnit
Referto the Parts List for decal locations,
descriptions and part numbers.
F) EngineStabilization.
Topoffuel tank. B) WARNING:EngineIgnition.
Electricstartmodelsonly.
Figure1:LocationofSafetyand OperatingDecals.
(Briggs& Stratton engineshown)
OperatingSymbols
Varioussymbols (shown here,with word
descriptions)areusedonthetillerandengine.
Yourunitmaynothaveallofthesymbols.
I I I÷I
FAST SLOW CHOKE CHOKE
STOP ON OFF ROTATING
TINES
TO AVOID SERIOUS INJURY:
• READTHEOWNER'SMANUAL.
•KNOWLOCATIONSAND FUNCTIONSOFALL CONTROLS.
•KEEPALLSAFETYDEVICESANDSHIELDSIN PLACEANDWORKING.
•NEVERALLOWCHILDRENORUNINSTRUCTEDADULTSTO OPERATETILLER.
•SHUTOFFENGINEAND DISCONNECTSPARKPLUGWIRE BEFOREMANUALLYUNCLOG-
GINGTINES ORMAKINGREPAIRS.
•KEEPBYSTANDERSAWAYFROMMACHINE.
•KEEPAWAYFROM ROTATINGPARTS.
•USEEXTREMECAUTIONWHEN REVERSINGORPULLINGTHE MACHINETOWARDSYOU.
I1
Assembly
To prevent personal injury or property
damage, do not start the engine until
all assembly steps are complete and
you have read and understand the
safety and operatinginstructionsin this
manual.
Introduction
Carefullyfollow these assembly stepsto
correctly prepareyour tiller for use. It is
recommendedthat you readthis Section
in its entirety beforebeginning assembly.
NOTE:Varioustiller models are presented
in this Manual. Useonly the information
appropriatefor your tiller model.
InspectUnit
Inspectthe unitand carton for damage
immediately after delivery. Contactthe
carrier (trucking company) if you find or
suspect damage. Inform them of the
damageand request instructions for filing
a claim. To protectyour rights, put your
claim in writing and mail a copy to the
carrier within 15 days after the unit has
beendelivered. Contact usat the Factory
if you needassistancein this matter.
STEP1: UnpackingInstructions
NOTE:Donot severelybend anyof the
control cables on the unit.
1. Thetiller is heavy. Do not attempt to
remove it from the shipping platform until
instructed to do so in these Assembly
steps.
2. Removeall unassembledpartsfrom
the carton. Thehardwarebag is included
in your literature packaging.
3. Checkthat you havethe items listed
below (contact your local dealeror the
Factory if any itemsare missing or
damaged).
NOTE: Usethe screw lengthtemplate
(Figure2-1) to identify screws.
LoosePartsList
Qty. Description
1 HandlebarAssembly
1 Wheels/TinesPTODrive Lever
Thefollowing items
are in thehardwarebag:
2 20 oz. BottlesSAE30W Oil
1 Clutch PawlSpring
1 BeltAdjusting Tool
2 PlasticCableTies
1 Curved HeadScrew, 1/4-20 x 2
1 FlangedLock Nut, 1/4-20
1 PanHeadScrew,#10-32 x 1/2
Thefollowing parts (electric start models
only), packagedseparately.
2 Nuts, 1/4-20
(for battery terminals)
2 Screws, 1/4-20 x 5/8
(for battery terminals)
2 Keys
(in ignition switch)
NOTE:LEFTand RIGHTsides of the
tiller are as viewed from the
operator's position behind the han-
dlebars(unless otherwise noted).
Tools]MaterialsNeeded
for Assembly
(1) 3/8" open-endwrench*
(2) 7/16"open-end wrench*
(2) 1/2" open-endwrench*
(1) 9/16"open-end wrench*
(1) 3/4"open-end wrench*
(1) Flatblade screwdriver
(1) Scissors (to trim plastic ties)
(1) Tire pressure gauge
(1) 4-1/2" high wood block to prop unit
*Adjustable wrenchesmay be used.
Figure2-1: Toidentifylengthofscrew,
placescrewontemplateasshownand
measuredistancebetweenbottomofscrew
headandtipofscrew.
STEP 2: Attach Handlebar
IMPORTANT: When disassembling
handlebar assembly, keep left-side clamp
and ratchet separatedfrom the right-side
clamp and ratchet.
1. Disassemblethe handlebarassembly.
To do this, remove the heightadjustment
leverby turning the leverin a counter-
clockwise direction (Figure2-2).
2. Placethe handlebarendson either side
ofthe base,with thewire harnesstoward
the rear ofthe base(Figure2-2).
3. Installthe heightadjustment lever
through the right-side clamp, handlebar
end, ratchet, and base;then out through
the left-side ratchet, handlebarend,and
clamp (Figure2-2). Securewith nut, but
don't fully tighten.
IMPORTANT:Do notforce the height
adjustment leverthrough the handlebars.
The interlock wires may be blocking the
leverand could be damaged.You may
gently move the wires aside if this
condition occurs.
6
Section2: Assembly
4. Raisehandlebarsto one of two height
settings andtighten the heightadjustment
lever. Also, makesureall other mounting
hardware issecurely tightened.
NOTE: Fully assembledhandlebar
assembly should appearas shown in
Figure2-3.
Figure 2-3. Fully assembled handle-
bars.
Height
Adjustment
Lever
Right
Clam
Base
Base
Handlebam
Left
Clamp
Nut
STEP3: MoveTiller OffShipping
Platform
1. Setthe Depth Regulator Lever
(A, Figure2-4) to Travel position. Dothis
by lifting the tiller by the handlebars,then
pulling straight back on the leverand
sliding down to the highest notched
setting.
2. Setthe WheelSpeedLever(B, Figure
2-4) to Freewheelposition. To do this,
move the leverapproximately halfway
betweenthe Fastand Slowsettings while
you rock the tiller forward and backward
until thewheels movefreely.
3. Lift Handlebars high enoughto clear
tiller tines and pull back firmly to dislodge
the tiller from the platform wheel wells.
STEP4: ConnectForward
InterlockWire Harness
1. Removeany dirt fromthe Forward
Interlock wire harnessplug (C, Figure
2-5) and its receptacle(D).
2. Connectthe Forward interlock wire
harness plug (C, Figure2-5) to the recep-
tacle (D).
STEP5: Attach
WheelsiTines/PTODriveLever
1. Loosenthe bolt (Figure2-2) on the
handlebar baseand swing the handlebars
out to the right side.
FRONT
OFTILLER
Figure 2-2. Handlebar assembly.
Wire
Harness
Figure 2-4: Photo shows the Depth
Regulator Lever (A) and the Wheel
Speed Lever (B).
2. Removeboth sets of nuts, star
washers, screws, and one bushing
(A, B, C, D, E,F, G,Figure2-6) from the
yoke plates (H). Thereis a bushing inside
the short link (I). Becareful not to loseit
when removing screw (G).
3. Slidethe platesat the end of the
Wheels/Tines/PTOLeveroverthe yoke
plates (Figure2-9). To aid in the next
step, insert a screwtemporarily into the
forward most holes (J, Figure2-7) of the
yoke platesand the lever.
Figure 2-5. Forward Interlock Wire
Harness connection.
4. Align the rear most holes of theyoke
platesand the Wheels/Tines/PTOLever.
Uselong nose pliersto hold the bushing
(L, Figure27) in placewhile inserting the
screw (K)through the leverand yoke
plates.Install star washer (B, Figure2-6)
and nut (A),then handtighten.
5. Retrievethe clutch pawl spring (Figure
2-8) from hardwarebag.
Section2: Assembly
Removethe temporary screw (J, Figure
2-7) from the forward holes and move the
Wheels/Tines/PTOLeverfully forward.
Install the wider hook end of the clutch
pawl spring (M, Figure2-8) down into the
small holeat the end of the handle. Use
pliers to insert the other end into the hole
in the long link bar (N).
NOTE:Do not bend or over stretch the
spring while installing.
6. Pull the Wheels/Tines/PTOLeverback
to align the forward most holes (Q,Figure
2-9) in the yoke platewith the holes in the
lever plates. Also align the bushing that is
insidethe short link bar (P). Install the
screw, star washer, and nut, then tighten
securely.
Securelytighten all other hardware(Q,R,
Figure2-9). Alsoensure that the spring
(S) is properly seatedat both ends.
Completedassembly should appearas
illustrated in Figure2-9.
7. Testthe operation of the
Wheels/Tines/PTOLever. Pushthe lever
down until it engagesin the Forward
position. The clutch roller (T, Figure2-
10) must rest beneaththe adjustment
block (U). Next,move the lever up to the
Neutral position. Theclutch roller (T,
Figure2-11) should rest on theface of the
adjustment block (U). To test Reverse,lift
and hold the leverall the way up in
Reverseposition, then let it go. Thelever
should automatically return to the Neutral
position (Figure2-11). If not, do not use
the tiller. Seeyour local authorized dealer
or call the FactoryTechnicalService
Departmentfor instructions.
Figure 2-9: Fully assembled
Wheels/Tines/PTO Lever assembly.
Figure 2-10 Forward position; roller
(T) rests under the adjustment
block (U).
Figure 2-6: Illustration shows the yoke plates (H), nuts, washers, and
screws (A, E, B, F, D, G), bushing (C), and long and short links (I, J).
Figure 2-7: Drive Lever assembly. Figure 2-8: Clutch pawl spring. Tilt
WheelsiTinesiPTO Lever fully
forward before installing spring.
Figure 2-11: Neutral position; roller
(7) rests against middle area of the
adjustment block (U).
STEP6: CheckGearOilLevels
Your tiller hastwo separatetransmis-
sions: one for the PowerUnit (Figure 2-
12), the otherfor the TineAttachment
(Figure2-13). Both transmissions were
filled atthe factory with SAE#85W-140
weight gear oil (with an A.P.I rating of
GL-4). Checklevelin both transmis-
sions to verify that they are still correct.
SeeSection 5, TransmissionGearOil
Maintenancefor complete information
on howto check and fill the transmis-
sions.
Section2: Assembly
IMPORTANT: Checkgear oil level in both
transmissions after the first 2 hours of
new tiller operation, then every 30
operating hours thereafter. SeeSection 5
for instructions.
OilLevel Hole
Figure 2-12: Checking oil level on
Power Unit Transmission.
Figure 2-13: Checking oil level on
Tine Attachment Transmission.
STEP7: AddMotor0il to Engine
1. Beforeadding motor oil, park thetiller
on levelground. Levelthe engine by
placinga sturdy block under thetines or
the tines depth regulator bar.
2. Referto the EngineOwner's Manual
provided with your tiller for detailed infor-
mation on how to add motor oil andfor
motor oil specifications.
IMPORTANT:Two 20 oz. bottles of motor
oil are includedwith your tiller. Checkthe
oil level as instructed in the Engine
Owner's Manual provided with your tiller
BEFOREpouring the full amount of each
bottle into the engine.
IMPORTANT:
•Changeengine oil after first 2 hours of
newoperation.
• Checkengine oil levelevery 5 hours of
operation or eachuse.
STEP8: AttachEngineThrottle
Leverand Cable
Forshipping purposes,the throttle cable,
together with the throttle lever, is wound
around the engine. Carefullyunwindthe
cable. If the throttle control label is
coveredwith a clear protectivecoating,
peel it off.
To avoid electric shock from a short
circuit (electric starttillers only), never
allow the throttle cable to touch the
battery. Routecable belowthe battery,
onthe outsideofthebatteryholder.
To attachthe throttle leverand cable:
1. Runthethrottle cableup the inside
edge of the right handlebarand position
the leverasshown in Figure2-14.
2. Fromthe outside of the handlebar,
insert the curved headscrew (A, Figure2-
14), through the handlebarand the center
hole in the throttle levermounting
bracket.
3. Loosely install the flanged lock nut
and movethethrottle lever back to the
STOPposition.
4. Fromthe lever sideof the bracket,
threada pan headscrew (B, Figure2-14)
through the small hole in the throttle lever
bracketand intothe handlebar. Tighten
the screw securely.
5. Securelytighten boththe flanged lock
nut and the curved headscrew.
6. Usetwo plastic ties to securethe
throttlecableto the right handlebarin two
places (Figure2-15). Loop eachtie
around the handlebarand cable (serrated
sidefaces in) and pull the ties tight. Trim
the ends.
B
Figure2-14: Engine ThrottleLever
position and installation.
Figure 2-15: Plastic Ties placement
on handlebars.
STEP9: Adjust Air Pressure in
Tires
Forshipping purposes,the tires may be
overinflated. Checkthe air pressure in
eachtire andadjust them to between10
and 20 pounds per square inch. You
must inflate eachtire to equalair
pressuresto prevent thetiller from pulling
to one side.
Assembly is complete for recoilstart
tillers. SeeAssembling TheElectric
Start System if you own an electric
start tiller; otherwise, refer to Section
3, Controlsfor information on tiller
controls.
Section2: Assembly
ASSEMBLINGTHEELECTRICSTARTSYSTEM
Thefollowing steps explain howto install and chargethe batteryon electric start tillers. Foryour safety,follow all steps and observe
all accompanying safety messages. Section 5 contains other generalbattery maintenanceand recharginginstructions.
Batteryproducesexplosivegases.
*Keep away sparks, flames, and
cigarettes.
.Ventilate area when chargingor using
batteryin anenclosedspace.
.Make surebatteryvent tube is always
openafter batteryisfilled with acid.
Remove metal jewelry before working
near the battery or near the electrical
system. Failureto complymay causea
short circuit, resulting in electrical
burns, a shock, or battery gas
explosion.
NOTE:If the battery is put into
serviceafter the dateshown on the
top of the battery, chargefor a
minimum of one hour at 6-10
amps. Referto the Maintenence
section of this manualfor more
detailedinstructions regarding
proper batterycharging procedure
STEP1: Connectthe Wire
HarnessReceptacle
1. Beforeinstalling the batteryand its
hold-down clamp, insert the plastic wire
harness receptacle(A, Figure2-18) into
the prongs of the keyswitch (M)located
on the hold-down clamp.
2. Removethe ignition keysfrom the
keyswitch and store them safelyaway.
Do not insertthe key intothe keyswitch
until you completethis section and read
Section 3, Controls.
STEP 2: Install the
BatteryCables
NOTE:The cableterminals should be
toward the rear (keyswitch side) of the
battery posts.
1. Usea 5/8" long screw (K,Figure2-18)
and 1/4-20 hexnut (L) to connectthe
positive (+) batterycable(B) to the
positive (marked +) battery post (C).
Make surethat this is the cableon the left
side, with one end attachedto the
solenoid (D).
2. Slidethe black rubber boot (E) com-
pletely over the battery post and cable
connector.
3. Usea 5/8" long screw and 1/4-20 hex
nut to connectthe negative (-) battery
cable (F)to the negative(marked -)
battery post (G) andsecure with screw
(H) and nut (I).
4. Slidethe black rubber boot (J) com-
pletely over the battery post and cable
connector.
Assembly is complete for electric start
tillers. SeeSection 3, Controlsfor
information on tiller controls.
K
To Avoid Personal Injury or Property
Damage:
* Do not touch positive batteryterminal
and any surrounding metal objects
with tools, jewelry or other metal
items. Failure to complycould cause
a short circuit leading to electrical
burnsor explosionof batterygases.
* Neverbringa gascannearthe positive
(+) battery terminal. A short circuit
could occurleadingto an explosionof
the gasoline or the battery gases.
Always fill the engine fuel tank from
thefrontor sideof theengine.
Never jump start the battery with a
vehicle battery or chargingsystem. This
may produce a battery explosion,
causingacid orelectrical burns.
G(-)
J
Figure 2-18: Battery cable assembly.
10