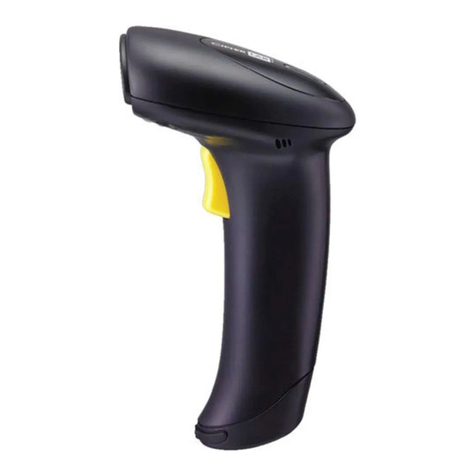
Tru-Test ERS User manual

ERS Handheld EID Reader Quickstart Guide
1
ERS Handheld EID Reader
QUICKSTA
R
T GUIDE
This guide takes you through your first use of the ERS Handheld EID Reader.
Contents
Unpacking the box................................................1
Charging the battery.............................................2
Getting around.....................................................3
Recording EID tags ...............................................4
Bluetooth
®connection .........................................5
Viewing sessions ..................................................6
Getting sessions off ..............................................7
Modifying the settings ..........................................8
Maintenance and servicing....................................9
Compliance ........................................................10
For further information, view the ‘How to…
videos’ on the supplied USB flash drive or visit
www.tru-test.com.
1 Unpacking the box
Check that you have all of these items. If anything is missing, contact your supplier.
ERS Handheld EID Reader
(the EID reader)
Mains power adaptor and
power plug
Power plugs for different
countries are included.
USB flash drive
The flash drive contains Data Link
software and reference information.
USB cable
This cable is for charging and also
connects the EID reader to a PC.

ERS Handheld EID Reader Quickstart Guide
2
2Charging the battery
Attention!
If the EID reader is not working, try charging the battery for 30 minutes
before contacting your local Tru-Test distributor.
Use the mains power adaptor and USB cable to charge the EID reader’s internal
battery from the mains power supply.
Note:
For best results, do not charge the battery if the temperature is less than 5 oC,
or greater than 40 oC.

ERS Handheld EID Reader Quickstart Guide
3
3 Getting around
Parts of the EID reader
Parts of the EID reader’s LCD
When the EID reader is first switched on, the LCD displays the Home screen:

ERS Handheld EID Reader Quickstart Guide
4
4 Recording EID tags
Ways of using the EID reader
The EID reader can be used in two ways:
1 Standalone - the EID reader saves each scanned tag in its internal memory. These
records can be transferred afterwards, as described in
Section 7 – Getting
information off
.
2 Connected – the EID reader immediately transmits every scanned tag to a
connected device, such as an indicator.
Recording EID tags (standalone)
1 Switch on the EID reader.
2 Start a new recording session by pressing and selecting .
3 Move the animal into the cattle crush.
4 Press while holding the EID reader near to an EID tag.

ERS Handheld EID Reader Quickstart Guide
5
5
Bluetooth
® connection
To establish a
Bluetooth
wireless connection between the EID reader and a Tru-Test
Bluetooth
enabled indicator, you need to ‘pair’ the two devices. The EID reader can
be paired with any Tru-Test
Bluetooth
enabled indicator and to some third party
devices.
Note:
When connecting the EID reader wirelessly to a Tru-Test indicator, always turn
the indicator on BEFORE the EID reader.
1 With both devices off, position the EID reader within 30 cm of the
indicator.
2 Switch on the indicator and, if necessary, check that its
Bluetooth
setting is enabled.
3 Switch on the EID reader.
4 Press to display the Settings screen.
Select to display
Bluetooth
settings.
5 Make sure
Bluetooth
is set to ON.
6 Select .
A list of available devices will be displayed.
7 Select a device.
Wait for up to 2 minutes until the two devices are paired. When
pairing is complete, the
Bluetooth
icon at the top of the screen
changes to green .
8 Use the EID reader to scan an EID tag in order to test the
connection.

ERS Handheld EID Reader Quickstart Guide
6
6 Viewing sessions
To view EID tags recorded in a session:
1 From the Home screen, select .
A list of available sessions appears.
2 Select a session.
A list of all of the EID tags recorded in the session is displayed:
Press to scroll down the list.
Press to delete a record, duplicate IDs in the session or the whole session:

ERS Handheld EID Reader Quickstart Guide
7
7 Getting sessions off
Session files can be transferred from the EID reader to a PC using the Data Link
software application.
Note:
Do NOT connect the EID reader to the PC until you have installed the Data Link
software.
Before you can transfer information from the EID reader to a PC, you must first install
Data Link on the PC. To do this, insert the USB flash drive into a USB port and follow
the instructions.
To transfer information from the EID reader to a PC:
1 Connect the EID reader to a PC using the USB cable supplied.
2 Launch the Data Link application.
3 Wait for the EID reader to connect to the PC (this may take up to a minute).

ERS Handheld EID Reader Quickstart Guide
8
8 Modifying the settings
You can modify the settings on the EID reader.
Switch on the EID reader and press to display the Settings screen:
Start a new recording session. We recommend that you start a new
session each day or for each group of animals.
Change the scanning mode from Standard to Continuous.
Access the
Bluetooth
settings.
Change the way EID tags are stored and output from the EID reader.
999 000123456789 is the default.
Disable/enable the beeper.
Adjust the contrast used on the LCD to suit the light conditions.
Change the current date and time.
View the software version.

ERS Handheld EID Reader Quickstart Guide
9
Maintenance and servicing
Regularly transferring information
We strongly recommend that you regularly transfer the data on your EID reader to a
PC using the Data Link software application.
Updating your software
We recommend that you regularly update the EID reader’s software so that you keep
up with the latest features and improvements.
To update the EID reader’s software:
1 Connect the EID reader to a PC using the USB cable supplied.
2 Launch Data Link on your PC.
3 Click Tools / Updates.
4 Follow the step-by-step instructions.
For more information, see the Data Link help.
Note
: When updating software, the data on your EID reader will remain intact.
However, we strongly recommend that you transfer onto a PC
before
updating.
Caring for the EID reader
Do not leave the EID reader submerged in water. Store the EID reader in a cool, dry
place.
Wipe the EID reader using a damp cloth, warm water and soap. Other cleaners may
damage the case.
Always replace the dust cap over the USB port when it is not in use.
Always remove the dust cap when transporting the EID reader in an aeroplane.

ERS Handheld EID Reader Quickstart Guide
10
Compliance
FCC notice
This device complies with part 15 of the FCC Rules. Operation is subject to the following two conditions: (1) This device may not cause
harmful interference, and (2) this device must accept any interference received, including interference that may cause undesired
operation.
This equipment has been tested and found to comply with the limits for a Class B digital device, pursuant to part 15 of the FCC Rules.
These limits are designed to provide reasonable protection against harmful interference in a residential installation.
This equipment generates, uses and can radiate radio frequency energy and, if not installed and used in accordance with the
instructions, may cause harmful interference to radio communications. However, there is no guarantee that interference will not occur
in a particular installation. If this equipment does cause harmful interference to radio or television reception, which can be determined
by turning the equipment off and on, the user is encouraged to try to correct the interference by one or more of the following
measures:
- Reorient or relocate the receiving antenna.
- Increase the separation between the equipment and receiver.
- Connect the equipment into an outlet on a circuit different from that to which the receiver is connected.
- Consult the dealer or an experienced radio/ TV technician for help.
FCC warning
Note: Users are cautioned that changes or modifications not expressly approved by the party responsible for compliance could void the
user’s authority to operate the equipment.
Industry Canada notice
This radio transmitter, model ERS, has been approved by Industry Canada to operate only with its integral antenna.
This device complies with Industry Canada licence-exempt RSS standard(s). Operation is subject to the following two conditions:
(1) this device may not cause interference, and
(2) this device must accept any interference, including interference that may cause undesired operation of the device.
EU declaration of conformity
Tru-Test Limited hereby declares that the radio equipment type ERS EID reader is in compliance with Directive
2014/53/EU. The full text of the EU declaration of conformity may be consulted at the following internet address
http://livestock.tru-test.com/en/compliance

ERS handburen EID-läsare Snabbstartguide
11
SNABBST
A
RTGUIDE
Denna guide hjälper dig att komma igång med ERS handburna EID-läsare.
Innehåll
Uppackning av lådan................................... 11
Laddning av batteriet................................... 12
Lära känna .................................................. 13
Registrering av EID-etiketter......................... 14
Olika sätt att använda EID-läsaren ............... 14
Registrering av EID-etiketter (standalone)..... 14
Bluetooth
®-anslutning .................................. 15
Visning av sessioner..................................... 16
Överföring av sessioner................................ 17
Ändring av inställningar............................... 18
Underhåll och service................................... 19
Överenstämmelse ........................................ 20
För ytterligare information, se ”Hur... filmer” i
det medföljande USB-flashminnet eller besök
www.tru-test.com.
1 Uppackning av lådan
Kontrollera att du har alla dessa delar. Om något saknas måste du kontakta
återförsäljaren.
ERS handburna EID-läsare
(EID-läsaren)
Nätanslutningsadapter
och nätkontakt
Nätkontakter för olika länder
ingår.
USB-flashminne
Flashminnet innehåller
programmet Data Link och
referensinformation.
USB-kabel
Denna kabel är avsedd för
laddning och ansluter även EID-
läsaren till en PC.

ERS handburen EID-läsare Snabbstartguide
12
2Laddning av batteriet
Observera!
Om EID-läsaren inte fungerar, börja med att försöka ladda batteriet i
30 minuter innan du kontaktar din lokala Tru-Test-distributör.
Använd nätanslutningsadaptern och USB-kabeln för att ladda EID-läsarens interna
batteri från elnätet.
OBS:
För bäst resultat, ladda inte batteriet om temperaturen ligger under 5 °C eller
över 40 °C.

ERS handburen EID-läsare Snabbstartguide
13
3 Lära känna
EID-läsarens delar
Delar på EID-läsarens LCD
Första gången EID-läsaren sätts på visar LCD:n sidan Hem:

ERS handburen EID-läsare Snabbstartguide
14
4 Registrering av EID-etiketter
Olika sätt att använda EID-läsaren
EID-läsaren kan användas på två sätt:
1 Standalone – EID-läsaren sparar varje skannad etikett i det interna minnet.
Efteråt kan dessa registreringar överföras enligt beskrivningen i
Avsnitt 7 –
Överföring av information
.
2 Ansluten – EID-läsaren överför genast varje skannad etikett till en ansluten
enhet, som exempelvis en indikator.
Registrering av EID-etiketter (standalone)
1 Sätt på EID-läsaren.
2 Starta en ny registreringssession genom att trycka på och välja .
3 Flytta djuret till boskapsburen.
4 Tryck på samtidigt som du håller EID-läsaren nära en EID-etikett.

ERS handburen EID-läsare Snabbstartguide
15
5
Bluetooth
®-anslutning
För att skapa en trådlös anslutning med
Bluetooth
mellan EID-läsaren och en Tru-
Test
Bluetooth
-aktiverad indikator måste dessa två enheter ”kopplas ihop”. EID-
läsaren kan kopplas ihop med valfri Tru-Test
Bluetooth
-aktiverad indikator och till en
del enheter från andra tillverkare.
OBS:
När EID-läsaren ansluts trådlöst till en Tru-Test-indikator ska indikatorn alltid
sättas på FÖRE EID-läsaren.
1 Stäng av båda enheterna och placera EID-läsaren högst 30 cm från
indikatorn.
2 Sätt på indikatorn och kontrollera vid behov att
Bluetooth
-
inställningen är aktiverad.
3 Sätt på EID-läsaren.
4 Tryck på för att visa sidan Inställningar.
5 Välj för att visa inställningarna för
Bluetooth
.
Kontrollera att
Bluetooth
har ställts in på PÅ.
6 Välj .
En lista över tillgängliga enheter visas.
7 Välj en enhet.
Vänta i upp till 2 minuter tills de två enheterna har kopplats ihop.
När kopplingen har genomförts ändras ikonen för
Bluetooth
överst
på sidan och blir grön .
8 Använd EID-läsaren för att skanna en EID-etikett för att testa
anslutningen.

ERS handburen EID-läsare Snabbstartguide
16
6 Visning av sessioner
För att visa EID-etiketter som registrerats i en session:
1 Från sidan Hem väljer du .
En lista över tillgängliga sessioner visas.
2 Välj en session.
En lista över alla EID-etiketter som registrerats i sessionen visas:
Tryck på för att bläddra ner i listan.
Tryck på för att ta bort en registrering, dubbla ID:n i sessionen eller hela
sessionen:

ERS handburen EID-läsare Snabbstartguide
17
7 Överföring av sessioner
Sessionsfiler kan överföras från EID-läsaren till en PC med hjälp av Data Link
programapplikationen.
OBS:
Anslut INTE EID-läsaren till PC:n innan du har installerat Data Link-programmet.
Innan du kan överföra information från EID-läsaren till en PC måste du först installera
Data Link i PC:n. För att göra detta sätter du i USB-flashminnet i USB-porten och
följer instruktionerna.
För att överföra information från EID-läsaren till en PC:
1 Anslut EID-läsaren till en PC med hjälp av den medföljande USB-kabeln.
2 Starta Data Link-applikationen.
3 Vänta tills EID-läsaren ansluter till PC:n (det kan ta upp till en minut).

ERS handburen EID-läsare Snabbstartguide
18
8 Ändring av inställningar
Det går att ändra inställningarna på EID-läsaren.
Sätt på EID-läsaren och tryck på för att visa sidan Inställningar:
Starta en ny registreringssession. Vi rekommenderar att du startar en ny
session varje dag eller för varje grupp djur.
Ändra skanningläget från Standard till Kontinuerlig.
Gå till inställningarna för
Bluetooth
.
Ändra sättet EID-etiketter sparas och skrivs ut från EID-läsaren.
999 000123456789 är standard.
Avaktivera/aktivera pipljudet.
Justera kontrasten på LCD:n för att anpassa till ljusförhållandena.
Ändrar aktuellt datum och tid.
Visar programvaruversionen.

ERS handburen EID-läsare Snabbstartguide
19
Underhåll och service
Regelbunden överföring av information
Vi rekommenderar starkt att du regelbundet överför data från EID-läsaren till en PC
med hjälp av Data Link programapplikationen.
Uppdatering av programmet
Vi rekommenderar att du regelbundet uppdaterar EID-läsarens programvara så att du
har tillgång de nyaste egenskaperna och förbättringarna.
Uppdatera EID-läsarens programvara:
1 Anslut EID-läsaren till en PC med hjälp av den medföljande USB-kabeln.
2 Installera Data Link i din PC.
3 Klicka på Tools / Updates (Verktyg / Uppdateringar)
4 Följ instruktionerna steg för steg.
För mer information, se hjälpdelen i Data Link.
OBS
: När programvaran uppdateras förblir alla data i din EID-läsare intakta. Trots
detta rekommenderar vi starkt att du gör en överföring till en PC
före
uppdateringen.
Skötsel av EID-läsaren
Lämna inte EID-läsaren nedsänkt i vatten. Förvara EID-läsaren på en sval, torr plats.
Torka av EID-läsaren med en fuktig trasa, varmt vatten och tvål. Andra
rengöringsmedel kan skada höljet.
Sätt alltid på dammlocket över USB-porten när den inte används.
Avlägsna alltid dammlocket när EID-läsaren transporteras i ett flygplan.

ERS handburen EID-läsare Snabbstartguide
20
Överenstämmelse
EC-försäkran om överensstämmelse
Tru-Test Limited försäkrar härmed att denna radioutrustning typ ERS EID-läsare överensstämmer med de
erforderliga kraven och andra relevanta bestämmelser i direktiv 2014/53/EC. Försäkran om överensstämmelse finns
under http://livestock.tru-test.com/en/compliance
Table of contents
Languages:
Other Tru-Test Scanner manuals
