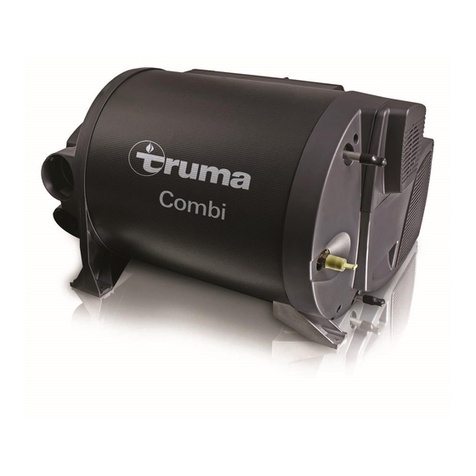
Truma Trumatic E 2400 E Operating instructions

Operating instructions Page 4
Installation instructions Page 7
To be kept in the vehicle!
Trumatic E 2400 (Australia)
Trumatic E
1
3
5
7
9
1
3
5
7
9
1
2
3
4
5

Trumatic E 2400 (Australia)
Installation options
Installation example
1 Control panel
2 Time switch (accessories)
3 Combustion air
4 Flue gas
5 Electronic control units
6 Power supply
7 Gas connection
W Warm air
U Circulating air
Installation inside the vehicle
with wall flue kit
1
Table of contents
Installation example .......................................................... 2
Symbols used ........................................................................ 3
Safety instructions ............................................................ 3
Important operating notes ............................................... 3
Operating instructions
Control panel with rotary switch .......................................... 4
Switching on the Heating ..................................................... 4
Switching on the Ventilation ................................................. 4
Switching off ......................................................................... 4
Green LED “Operation” ......................................................... 4
Fuses ..................................................................................... 4
Red LED “Failure” ................................................................. 4
Maintenance ....................................................................... 4
Accessories ......................................................................... 4
Technical data ..................................................................... 5
Dimensions ........................................................................... 5
Truma warranty policy ..................................................... 5
Trouble-shooting list ......................................................... 6
Installation instructions
Intended use .......................................................................... 7
Approval ................................................................................ 7
Regulations ........................................................................... 7
Choice of location .............................................................. 7
Exhaust duct ....................................................................... 8
Permissible duct lengths ....................................................... 8
Interior installation using the wall cowl kit ................. 8
Assembly of wall cowl .......................................................... 8
Fastening the appliance ........................................................ 8
Double cowl duct connection to the heating
appliance ............................................................................. 8
Warm air distribution and circulating air
return with interior installation ....................................... 9
Warm air distribution ............................................................ 9
Circulating air return ............................................................. 9
Fitting the control panel ................................................... 9
Installing the control panel with rotary switch ..................... 9
Fitting the electronic control units ............................... 10
Electrical connection 12 V .............................................. 10
Gas connection ................................................................. 10
Function check ................................................................. 11
Warning information ....................................................... 11
2

3
Symbols used
This symbol indicates possible hazards.
Information and advice.
Safety instructions
The use of upright gas cylinders from which gas is taken in
the gas phase is mandatory for the operation of gas regu-
lators, gas equipment and gas systems. Gas cylinders from
which gas is taken in the liquid phase (e.g. for fork lifts) must
not be used, since they would result in damage to the gas
system.
If the gas system is leaking or if there is a smell of gas:
– extinguish all flames
– do not smoke
– switch off the appliances
– shut off the gas cylinder
– open windows and door
– do not actuate any electrical switches
– have the entire system checked by an expert!
Repairs may only be carried out by an expert!
A new O-ring must always be installed after dismantling the
exhaust duct!
Guarantee claims, warranty claims and acceptance of liability
will be ruled out in the event of the following:
– modifications to the unit (including accessories),
– modifications to the exhaust duct and the cowl,
– failure to use original Truma parts as replacement parts and
accessories,
– failure to follow the installation and operating instructions.
It also becomes illegal to use the appliance, and in some
countries this even makes it illegal to use the vehicle.
The gas supply’s operating pressure (2.75 kPa) must be the
same as the unit´s operating pressure (see type plate).
LPG Systems and pressure regulators must comply with
the technical and administrative regulations of the country
in which the appliance is used. For your own safety it is
absolutely necessary to have the complete gas installation
regularly checked by an expert (at least every 2 years).
The vehicle owner is always responsible for arranging
the gas inspection.
Pressure regulating equipment and hoses must be replaced
with new ones no more than 10 years after the date of
manufacture. This is the responsibility of the operator.
Liquid gas equipment must not be used when refuelling, in
multi-storey car parks, in garages or on ferries.
During the initial operation of a brand new appliance (or after
it has not been used for some time), a slight amount of fumes
and smell may be noticed for a short while.
This will be remedied by running the heater and ensuring ade-
quate room ventilation.
If the burner makes an unusual noise, it is likely that the
gas pressure regulator is faulty and it is essential to have it
checked.
Do not place articles on or against this appliance.
Do not use or store flammable materials near this appliance.
Do not spray aerosols in the vicinity of this appliance while it
is in operation.
For the gas supply, only a pressure regulator with a fixed de-
livery pressure of 2.75 kPa may be used.
The flow rate of the pressure control device must correspond
to at least the maximum consumption of all devices installed
by the system manufacturer.
Controller connecting hoses that meet national regulations
must always be used in the respective country for which the
equipment is destined. These hoses must be checked regular-
ly for brittleness. Winter-proof special hoses must always be
used if the equipment is operated during the winter.
Important operating notes
The integrity and tight fit of the exhaust gas double duct must
be checked regularly, particularly at the end of long trips. Also
check the mounting of the appliance and the cowl.
Following a blow-back (misfire) always have the exhaust gas
system checked by an expert!
Always keep the cowl for conducting exhaust gas and sup-
plying combustion air, free from contamination (slush, leaves
etc.).
The installed temperature limiter shuts off the gas supply if
the appliance becomes too hot. Therefore do not shut the
warm air outlets and the opening for the returning circulating
air.
The cabin air flow through the heater must not be restricted in
any way. Do not use any after market air filters or air grills.
The use of such components may cause the unit to over heat.
Warning: Air from the discharge vent may be hot. Do not
place combustible materials directly in front of the discharge
vent. Keep curtains, bedding and other flammable materials
away from the vent.
Always use original Truma parts for maintenance and repair
work!

4
Always observe the operating instructions and “Impor-
tant operating notes” prior to starting! The vehicle owner
is responsible for the correct operation of the appliance!
The installer or vehicle owner must apply the yellow sticker
with the warning information, which is enclosed with the ap-
pliance, to a place in the vehicle where it is clearly visible to
all users (e.g. on the wardrobe door)! Ask Truma to send you
stickers, if necessary.
Control panel with rotary switch
1
3
5
7
9
Trumatic E
1
2
3
4
5
b
a
d
c
e
g
f
a = rotary switch (external ring)
b = “Ventilation” rotary switch
c = “Off” rotary switch
d = “Heating” rotary switch
e = green LED lit “Operation”
f = rotary knob for room temperature (1 – 5, 4 ≈23 ˚C)
g = red LED lit, red LED blinking “Failure”
Switching on the Heating
Turn on gas cylinder and open quick-acting valve in the gas
supply line.
Adjust desired room temperature at rotary knob.
Switching the heating on:
Set the rotary switch to (d).
Switching on the Ventilation
Set the rotary switch to (b).
Switching off
Set the rotary switch (a) to the centre (c). If the appliance is
switched off after a heating phase, the fan can continue run-
ning in order to make use of the residual heat.
If the appliance is not used for a prolonged period of time,
close quick-acting valve in the gas supply line and turn off
gas cylinder.
Green LED “Operation”
(under rotary control knob)
When the appliance is switched on (heating or ventilation)
the green LED must be illuminated (the fan is running). If the
LED is not illuminated, possibly check the (main) switch. For
this purpose observe respective instructions of the vehicle
manufacturer.
During the heating operation, while the flame is burning, the
green LED lights up with twice the intensity. This also makes
it possible to determine the instantaneous switching point of
the room temperature.
Operating instructions Fuses
The device and control panel fuses are on the electronic con-
trol unit on the device.
Device fuse (F1):
3.15 AT – slow –
Control panel fuse (F3):
1.6 AT – slow –
The fine-wire fuse must only be replaced by a fuse of the
same design.
Red LED “Failure”
Should a failure occur, the red LED is illuminated permanently.
Possible causes for the failure can be e.g. no gas, insufficient
combustion air, heavily soiled fan, defective fuse etc.. Deacti-
vate by switching off and then switching on again.
Flash operation indicates that the operating voltage is
too low (charge battery, if necessary) or too high for the
appliance.
Maintenance
The unit must be checked annually for contamination (dust,
dirt, debris) by an expert and cleaned if necessary.
Servicing shall be carried out only by authorised
personnel.
Please contact Dometic Service Centre for service and repairs.
Accessories
1 Time switch ZUE 2
for pre-programming 3 switch-on times within 7 days,
including 4 m connecting cable (suitable for 12 V vehicle
electrical system).
2 Remote sensor FFC 2
monitors the room temperature independent of the position
of the control panel (with 4 m connecting cable).
3 Multiple box MSD
for connecting several accessories (e.g. time switch and
remote sensor).
Extension cable for accessories
items 1, 3 of 4 m or 10 m (not illustrated).
All electrical accessories are fitted with a connector and can
be connected individually.

5
Technical data
determined in accordance with AS 4556/2000 or
Truma test conditions
Manufacturer
Truma Gerätetechnik GmbH & Co. KG
P.O. Box 1252
85637 Putzbrunn / Munich
Germany
Type of gas
LPG (propane)
Test point pressure
2.75 kPa (see type plate)
Nominal input
8.56 MJ/h
Gas consumption
170 g/h
Air flow rate
Approx. 78 m³/h
Power consumption 12 V
1.1 A
Standby
0.01 A
Weight
Heater unit (without control devices) 5.0 kg
Heater unit with peripheral devices (without cowl kit) 6.0 kg
Cowl kit 0.7 kg
Declaration of conformity
The heater E 2400 (Australia) is tested and approved accord-
ing AS 4556/2000 and fulfils the standard.
The heater complies with the interference suppression
directive 72/245/EEC for vehicle engines with annexes
2004/104/EC, 2005/83/EC and 2006/28/EC.
AGA approval number
7550
5375
The right to effect technical modifications is reserved!
Dimensions
110
248
370 12347
All dimensions in mm.
Truma warranty policy
The warranty is given by Dometic Pty Ltd, Building 3B,
Clayton Business Park, 1508 Centre Road, Clayton, Victoria,
3168, for 12 months from the date of purchase against any
defect arising from faulty materials or workmanship.
Repairs will be carried out during normal business hours only
by Dometic Pty Ltd, or its duly authorised service agents,
and are subject to the warranty conditions and exclusions
hereunder.
Warranty conditions
– The company will only provide service on presentation of
proof of purchase, on either the Truma product, or the Car-
avan / RV / Pleasure Craft in which the Truma product has
been installed, to any authorised service agent. The pur-
chaser must allow the service agent to photocopy the proof
of purchase to facilitate his claim to the manufacturer.
– Warranty repairs can only be performed by authorised ser-
vice agents and under no circumstances will Dometic reim-
burse repairs carried out by unauthorised persons. Tamper-
ing with any part of the product by unauthorised personnel
will automatically void the warranty.
– The product must be used solely for domestic purposes
only. If the product is used for commercial purposes the
warranty is 6 months only.
– Where applicable, the products must be used on the ap-
propriate electrical voltage, gas type and pressure, or fuel
source.
– If at any time during the warranty period any part or parts
are replaced with a part or parts not supplied or approved
by Truma, this warranty shall immediately become void.
Important notice
Before calling a service technician please check carefully
the operating instructions, warranty terms and conditions. If
the product fails for any of the reasons detailed therein, or is
faulty due to abuse, misuse or improper installation, then a
service fee shall be charged to the purchaser.
If you have any queries regarding the interpretation of the
warranty you should contact Dometic Pty Ltd.
Whilst this book represents service outlets at the time of
printing, changes occur from time to time. Should you have
any queries or wish to locate your nearest authorised service
agent please contact Dometic Pty Ltd.
Warranty does not cover
– Any heater which has been:
(a) Subject to misuse, neglect, accident or alteration by any
person.
(b) Damaged or destroyed by fire, flood, act of God or other
inevitable accident.
– Fair wear and tear.
– Damage from foreign substances such as dirt or liquid.
– Travelling expenses or call out fee to and from authorised
service agents premises.
– Accommodation or Site Expenses.
– Cleaning of the system or cleaning and adjustment of the
gas system. This is considered to be a part of normal prod-
uct maintenance.
– Non operation of the heater or resultant damage to the
unit where the heater has been operated in an out of level
situation.
– Freight cost of the appliance or parts, to or from, point of
service or transit damage.
– Dometic / Truma are not responsible for resultant loss or
damage sustained by the purchaser.
– Non operation of the appliance or resultant damage to the
unit where the appliance has not been installed, ventilated,
flued or operated in accordance with the manufacturers
instructions.
Apart from any warranties implied by the Trade Practices Act
1974 or any relevant State legislation all other warranties ex-
press or implied whether arising by virtue of statute or other-
wise are hereby excluded.

6
Trouble-shooting list
Fault Cause Rectification
After switching on none of
the LEDs are lit. – No operating voltage.
– Device fuse or vehicle fuse
defective.
– Check 12 V battery voltage, charge if necessary.
– Check all electrical plug connections.
– Check the unit or vehicle fuse and replace if necessary
(see fuses).
The green LED comes on
when the unit is switched
on but the heater does not
operate.
– The temperature setting on
the control panel is lower
than the room temperature.
– Select higher room temperature at the control panel.
Red LED flashes 1 x per sec.
Red LED flashes 3 x per sec.
– Under-voltage range
10.9 V – 10.5 V.
– Over-voltage range
15.8 V – 16.4 V.
– Charge battery!
– Check the battery voltage and power supply such as
e.g. the charging device.
Approximately 30 seconds
after the heater is switched
on, the red LED is lit.
– Gas cylinder or quick-act-
ing valve in the gas line is
closed.
– Combustion air infeed or
exhaust outlet is sealed.
– Check gas supply and open valves.
– Remove cowl cap.
– Inspect openings for contamination (slush, ice, leaves, etc.)
and remove contamination if necessary.
After operating for a longer
period of time, the heater
switches to failure.
– Hot-air outlets blocked.
– Recirculated air intake
blocked.
– Gas pressure regulator
iced up.
– Check individual outlet apertures.
– Remove blockage from recirculated air intake.
– Use regulator heating (EisEx).
If these measures do not remove the failure, please contact the nearest Dometic Service.

7
This appliance must be installed by an authorised
person.
Non-compliance with installation instructions or incor-
rect installation can result in endangerment of persons
and property.
This appliance shall be installed in accordance with the manu-
facturer’s installation instructions, local gas fitting regulations,
municipal building codes, electrical wiring regulations,
AS 5601/2004 “Gas Installations”, and any other statutory
regulations.
Intended use
This device was designed for installing in vehicles (motor
homes and caravans). Other applications are also possible
following consultation with Truma.
Vehicles for hazardous materials
Combustion heaters for gaseous fuel are not permitted.
Approval
Declaration of conformity
The heater E 2400 (Australia) is tested and approved accord-
ing AS 4556/2000 and fulfils the standard.
The heater complies with the interference suppression
directive 72/245/EEC for vehicle engines with annexes
2004/104/EC, 2005/83/EC and 2006/28/EC.
AGA approval number
7550
5375
The year when the equipment was first taken into oper-
ation must be indicated with a check on the type plate.
Regulations
Guarantee claims, warranty claims and acceptance of liability
will be ruled out in the event of the following:
– modifications to the unit (including accessories),
– modifications to the exhaust duct and the cowl,
– failure to use original Truma parts as replacement parts and
accessories,
– failure to follow the installation and operating instructions.
It also becomes illegal to use the appliance, and in some
countries this even makes it illegal to use the vehicle.
In-vehicle installations must comply with the technical and
administrative regulations of the respective country of use
(e.g. AS 5601/2004 for vehicles). The national regulations and
rules must be complied with.
In other countries always observe the respectively valid
regulations.
For further details on the rules and regulations in the respec-
tive country of designation, please contact our agencies
abroad (see www.truma.com).
Installation instructions Choice of location
Always install the appliance and its exhaust duct in such a
way that it is always easily accessible for service work and
can be removed and installed easily.
This appliance can be installed without any clearance to com-
bustible materials providing the surrounding materials will
withstand temperatures of up to 85 °C. The flue and warm air
ducts can also be installed without clearance providing only
Truma components supplied with the appliance are fitted.
Make sure that there is at least 10 mm clearance to com-
bustible materials around the warm air discharge vent and
500 mm in front of the vent. Locate the vent so that curtains,
bedding, etc. cannot be blown directly in front of or in contact
with the warm air vent.
Steps must be taken to ensure that the warm air outlet of the
heating system is never obstructed (see warm air distribution).
The installation space must have appropriate openings for the
circulating air return (see circulating air return).
Locate the heater in such a way that the cowl can be mount-
ed on the outside on a surface which is as straight and
smooth as possible.
For evenly distributed heating, the installation of the appliance
should be as much in the centre of the vehicle as possible,
and in such a way that the air distribution ducts can be routed
with approximately the same length.
The cowl must be placed in such a way that the exhaust gas
cannot find its way into the vehicle interior. The exhaust gas
cowl can only be installed through a vertical wall to the
outside, never through a horizontal surface.
The flue cowl must always vent to outdoors and
not into any annex or other enclosed area.
This outside surface must be exposed to wind from all
directions and, if possible, there should be no trim strips or
covers in this area, mount heater on an appropriate base,
if necessary.
The wall cowl is to be fitted in such a way that no tank nozzles
or tank ventilation apertures are located within 500 mm (R) of
it. In addition, no air discharge apertures for the living area or
window openings may be located with 300 mm of it.
300 mm
300 mm
R
If installing the cowl directly underneath a window
that will be opened, installation of an electric window
switch (part no. 34000-85800) is mandatory. The gas unit
must automatically switch itself off using the Truma automatic
shut-off facility if the window is opened (Accessories, part no.
39050-00800).
Refer to AS 5601/2004 – Gas Installations, for location re-
quirements of the flue terminal.

8
Exhaust duct
With the Trumatic E 2400 (Australia) only use the Truma ex-
haust duct AA 24 (part no. 39420-00) with wall cowl and the
combustion air supply duct ZR 24 (part no. 39440-00) for the
installation, as the appliance has only been tested and ap-
proved with these ducts.
A new O-ring must always be installed after dismantling
the exhaust duct!
Permissible duct lengths
Interior installation with wall cowl
(refer to installation variant 1, page 2):
– Duct lengths of up to max. 70 cm can be routed as
ascending duct in any way required, or descending by max.
30 cm.
– Duct lengths from 30 cm to max. 100 cm must be rout-
ed as ascending duct with an ascending angle of min. 45°.
Interior installation using the wall cowl
kit
Refer to installation variant, Fig 1 (page 2).
Assembly of wall cowl
Assemble wall cowl on a surface which is as flat as possible
and which is exposed to wind from all directions. Drill an
opening (8) measuring 70 mm in diameter (pack wood into
hollow spaces in the area of the cowl opening). Use the pro-
vided rubber seal (10) for sealing. In the event of structured
surfaces, coat with plastic body sealant – do not use silicone.
In the event of a greater wall thickness, first connect the
exhaust double duct to the cowl from the outside.
Slide rubber seal (10) and clamp (4) onto the cowl inner
part (11).
Top
Ø
70 mm
1
8
4
10
211
12
14
13
5
9
Compress the corrugations of the exhaust duct (1) for the full
width of the clamp (4) as shown in the diagram below. Slide
exhaust duct over the O-Ring (2a) on the flue cowl connection
fitting (2) up to the collar (3). Make sure the flue cowl bend
points upwards. Ensure the edge of the clamp (4) fits over
the collar (3). Tighten the clamp (4) over the collar (3) and the
compressed corrugations of the exhaust duct (1) as shown in
the diagram below.
142
3
2a
Coat serrated connection fitting (9) with plastic body sealant –
do not use silicone! – and slide over combustion air supply
duct (5).
Fasten cowl inner part (11) with 3 screws (12 – observe instal-
lation position! Mount cowl outer part (13) and screw on with
2 screws (14).
Always install a new O-ring following any disassembly!
Fastening the appliance
Depending on the installation position, bolt on the appliance
using fastening strap (a) or mounting brackets (b). Fasten
exhaust double duct to the wall using duct clamp ZR 24 (c), if
necessary (in the scope of delivery).
Double cowl duct connection to the
heating appliance
Compress the corrugations of the exhaust duct (1) for the full
width of the clamp (4) as shown in the diagram below. Slide
exhaust duct over the O–Ring (2b) on the heater connection
fitting (2) up to the collar (3). Ensure the edge of the clamp (4)
fits over the collar (3). Tighten the clamp (4) over the collar (3)
and the compressed corrugations of the exhaust duct (1) as
shown in the diagram below. Fasten combustion air supply
duct (5) on the connection fitting (6) using clamp (7).
Always install a new O-ring following any disassembly!

9
Warm air distribution and circulating air
return with interior installation
Warm air distribution
Hot air suction apertures must be arranged in such a way that
no exhaust gases from the engine or the heating device can
be drawn in. It must be ensured by means of construction
design that the heating air introduced into the vehicle is not
polluted (e.g. by oil vapour). This is achieved, for example,
with air heaters with circulating air operation.
Only use original Truma parts for ducting, outlets, fit-
tings and accessories, supplied by Dometic or Truma.
Do not use any other parts.
The warm air (W) is blown out from the appliance, either
directly or using a warm air duct VR 80 (80 mm diameter).
Remove grating from warm air outlet of the appliance. Con-
nect duct VR 80 (80 mm diameter). By positioning a manifold
section, the ducts VR 72 (72 mm diameter), ÜR (65 mm dia-
meter) or ZR 18 (49 mm diameter) can also be added on.
Use the following table to determine the number of required
air openings in the warm air duct.
Duct length* Number of air openings
up to and
including 1 m at least 1 air opening
over 1 m
up to 5 m at least 2 air openings
(the first air opening after max. 1 m)
5 m a more at least 3 air openings
(the first air opening after max. 1 m)
* In the case of duct branches, the sum of the installed warm
air ducts.
In order to avoid overheating, there must be at least
one air passage which is always open (swivel
nozzle SCW 2).
Secure all duct connections with self-tapping screws. Fasten
ducts with clamps.
The hot air system is individually designed for each vehicle
model using a modular principle. A wide range of accessories
is available for this purpose.
Circulating air return
The circulating air (U) is sucked back into the appliance, either
directly or via a duct piece VR 80 (80 mm diameter).
1. Direct intake: If the appliance is installed in a storage
compartment or such, drill two holes measuring 75 mm in
diameter into it, or make a corresponding opening for the
circulating air return.
Do not obstruct the air passage to the appliance!
2. Circulating air outside the storage area can be drawn in via
a duct piece VR 80 (1) 80 mm diameter (max. 100 cm in
length) and returned to the appliance. The storage compart-
ment can then be used to the full.
Remove protective grating from the connection fitting (3).
Insert duct piece (1) into the grating connection fitting and
fasten using the available screws. Attach swivel nozzle SCW 2
to the duct end (4).
min 0.5m
max 1m
3
1
4
W
U
Fitting the control panel
Any modification made to the Truma components
pertaining to this will lead to the cancellation of the
guarantee and to the exclusion of any claims for liability.
The installer (manufacturer) is responsible for providing oper-
ating instructions for the user as well as for the labelling of
the control panels!
When selecting the location, take note that the control panels
must not be subjected to any direct radiant heat. Length of
the connection cable 4 m or 10 m.
Selecting the position of the thermostat is very impor-
tant, the reading of the air temperature is taken by the
thermostat, therefore the position of the thermostat needs
to be considered. The thermostat must be placed in an area
away from sunlight or any external source of heat. The posi-
tion should be chosen to represent the average air tempera-
ture experienced inside the vehicle.
If installation is only possible behind curtains or in similar
locations with temperature fluctuations, a remote sensor for
the ambient temperature must be used (Accessories).
Installing the control panel with rotary switch
If flush mounting is not possible, Truma will supply an
on-surface frame (1 – part no. 40000-52600) as an ac-
cessory on request.
Drill a hole Ø 55 mm in diameter.
Plug the control panel cable (2) into the control panel (3) and
then fit the rear cover cap (4) as a stress-relieving device.
Push the cable through to the rear and lay it to the electronic
control unit.
Secure the control panel with four screws (5) and fit the cover
frame (6) in place.
Truma offers side parts (7) in eight different colors for
finishing the cover frames (6) in a visually pleasing way.
Please ask your dealer.
Ø 55 mm
2
7
76
1
3
5
4
TrumaticE
3
1
4
5
2

10
Fitting the electronic control units
Unscrew the cover of the control units (A and B).
The plugs on the electronic control units should only be
withdrawn or plugged in if the supply voltage had been
disconnected beforehand. Pull the plug out straight!
Insert the plug on the control panel cable (1) as shown in the
diagram onto the red terminal strip of the control unit (A).
Insert plug (2) – 20-pin – in the grey terminal strip on the
control unit (A).
Insert plug (3) – 10-pin – in the red terminal strip on the
control unit (B).
If a timer switch or a remote sensor is fitted, its plug
is to be inserted on the black terminal strip (control
unit – A). If several accessory components are being used at
the same time, connection is effected via the multiple box
(Accessories).
Secure the lower parts with two screws at an easily accessi-
ble location, protected against moisture (must not be heated
to above 65 °C).
Screw the cover of the control units into place.
Electrical connection 12 V
Electric cables, switching units and control units for heaters
must be arranged in the vehicle in such a way that their satis-
factory operation cannot be adversely affected under normal
operating conditions. All cables leading to the outside must
be splash proof at the leadthrough opening.
Prior to working on electric components the appliance
must be disconnected from the power supply. Switch-
ing off at the control panel is not sufficient!
When carrying out electric welding work on the body the
appliance connection must be disconnected from the vehicle
electrical system.
If the connections are transposed there is a risk of cable
burning. This also rules out any guarantee or liability
claims!
The red cable is positive, the blue cable is negative!
Connect the appliance to the fused vehicle electrical system
(central electrical system 5 – 10 A) using the 2 x 1.5 mm2
cable, for lengths over 6 m use 2 x 2.5 mm2cable. Negative
cable to central ground. For direct connection to the battery
the positive and negative cable must be fused. Connections in
Faston terminals, fully insulated (motor vehicle flat connector
system, 6.3 mm).
Do not connect any other consumers to the supply line!
When power packs or power supply units are being
used, note that the output voltage is between 11 V and
15 V and the alternating current ripple is < 1.2 Vpp.
Gas connection
The gas supply’s operating pressure (2.75 kPa) must
be the same as the unit´s operating pressure (see type
plate).
The gas inlet connection on the E 2400 (Australia) is a 8 mm
connection.
The gas connection fitting on the appliance is not to be short-
ened or bent.
To connect, the UNF 1/2" – 20 (SAE Male AN Flare) gas inlet
connection provided with the appliance must be used.
UNF 1/2"
8 mm
For connection to 8 mm steel piping Dometic povides an
adapter UNF 1/2" x RVS 8, part no. 70020-02700.
Before connecting to the appliance make sure that the gas
lines are free from dirt, chips and such!
Route the pipes in such a way that the appliance can be
removed again for servicing.
Refer to AS 5601/2004 – Gas Installations, for gas pipe sizing.
The gas inlet connection is preinstalled.
Please check for leaks before starting up for the first time.
Check for gas leaks (do not check for gas leaks with a naked
flame), then check that the gas pressure is as follows:
Propane gas: 2.75 kPa
Keep the number of parting connections in the gas supply
line in rooms frequented by people to a technically feasible
minimum.
The gas system must accord with the technical and adminis-
trative provisions of the individual country of use (in Australia,
AS 5601/2004 for motor vehicles). National regulations and
rulings must be respected.

11
Function check
After installation, check gas supple line for leaks in accord-
ance with the pressure drop method.
Always observe the operating instructions prior to starting!
Then check all functions of the appliance, as specified in the
operating instructions.
If the appliance can not be adjusted to perform correctly,
please contact Dometic Service Centre.
The operating instructions and completed guarantee card are
to be given to the owner of the vehicle.
Remove the type plate from the operating and installa-
tion instructions and affix it at a position on the heater
which is clearly visible and well protected against damage.
The year of initial operation must be marked on the type plate.
Warning information
The installer or vehicle owner must apply the yellow sticker
with the warning information, which is enclosed with the
appliance, to a place in the vehicle where it is clearly visible
to all users (e.g. on the wardrobe door)! Ask Dometic to send
you stickers, if necessary.

39050-06400 · 06 · 03//2014 ·
In Australia, always notify the Dometic Service Centre
if problems are encountered; in other countries the
relevant service partners should be contacted
(www.truma.com).
Having the equipment model and the serial number
ready (see type plate) will speed up processing.
Service (Australia)
Telephone:+61 (0)3 92 39 10 50
Facsimile: +61 (0)3 92 39 10 99
Dometic Pty Ltd
Building 3B,
Clayton Business Park
1508 Centre Road
Clayton, Victoria, 3168
Australia
Dometic New Zealand Ltd.
Post Box 12011
1642 Penrose, Auckland
New Zealand
Service (New Zealand)
Telephone +64 (0)9 622 14 90
Facsimile +64 (0)9 622 15 73
©
Other manuals for Trumatic E 2400 E
4
Table of contents
Other Truma Heating System manuals
Popular Heating System manuals by other brands

Thermo King
Thermo King HK-430 HO installation manual

Ventur
Ventur IDEO - 275 Ecowatt installation manual

Watts
Watts Tekmar WiFi Snow Melting Control 670 user manual

jablotron
jablotron FUTURA Series System design guide

Watlow
Watlow Rapid Response Electric Heat Exchanger Specifications

saro
saro PLC 250 instruction manual