Truper MOTO-AI User manual
Manual
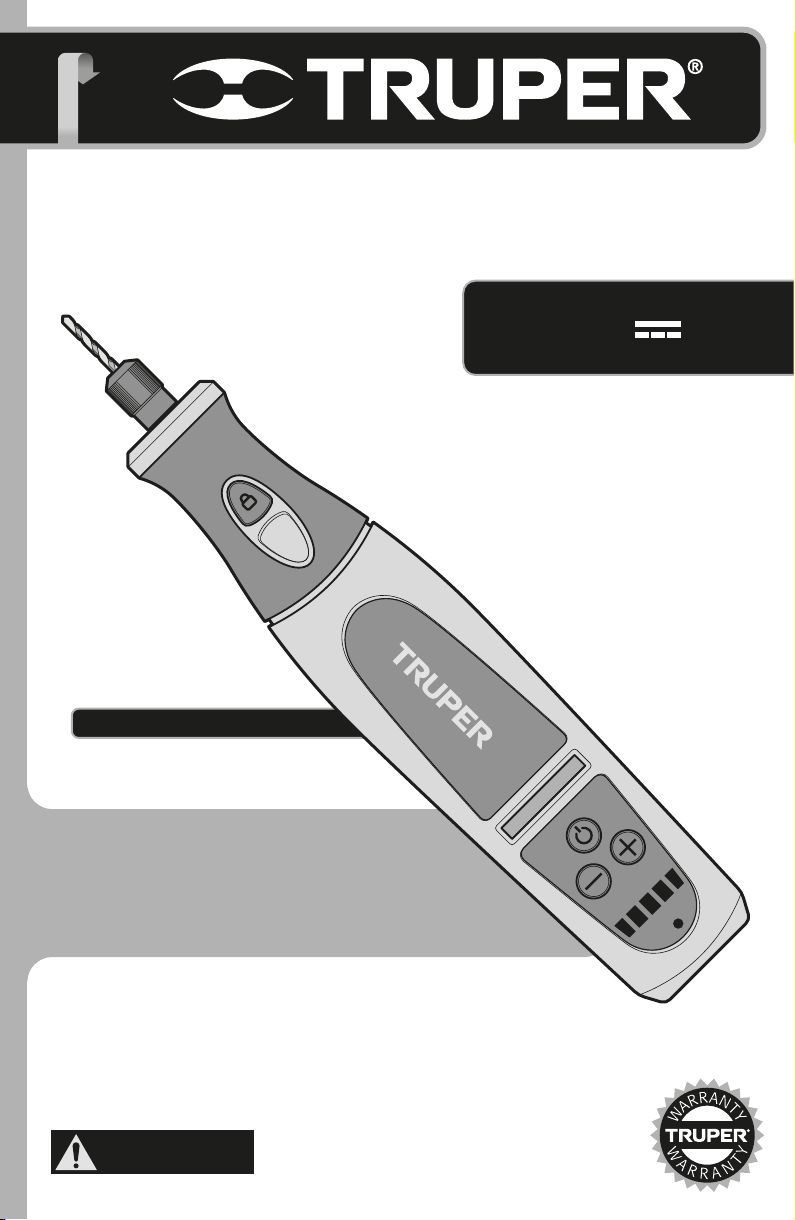
Cordless
Rotary Tool
MOTO-AI
ModelCode
MOTO-AI
Applies for
102271
CAUTION
ENGLISH
ESPAÑOL
Read this manual thoroughly
before using the tool.
7.2 V
2
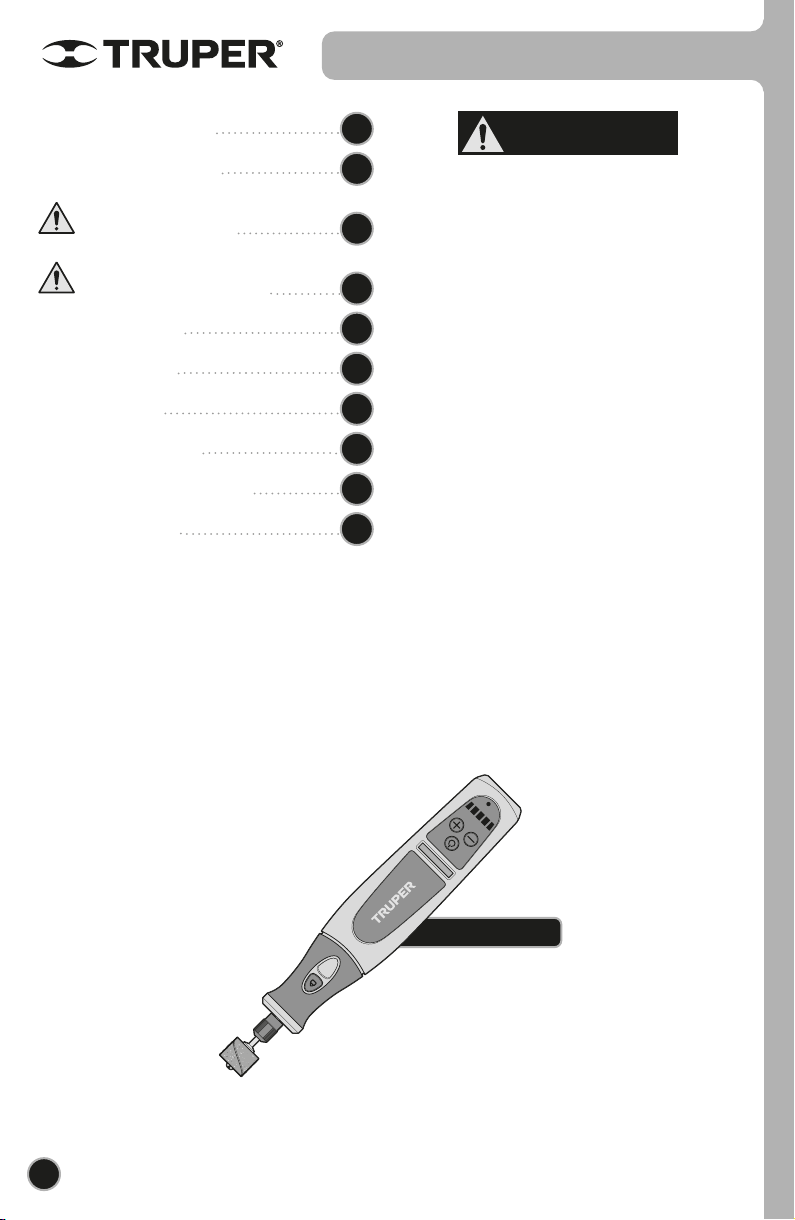
Technical Data
Power Requirements
General power tool safety warnings
Safety warnings for rotary tools
Parts and Accessories
Start Up
Maintenance
Enviromental Protection
Authorized Service Centers
Warranty Policy
3
3
4
5
7
8
10
10
11
12
MOTO-AI
ENGLISH
CAUTION
Contents
Keep this manual for future references.
The illustrations in this manual are for reference
only. They might be different from the real tool.
To gain the best performance of
the tool, prolong the duty life,
make the Warranty valid if
necessary, and to avoid hazards
of fatal injuries please read and
understand this Manual before
using the tool.
3
Power Cord Grips used in this product: Type “Y”.
Tool Build Quality: Reinforced insulation
Technical Data
ENGLISH
WARNING
WARNING Avoid the risk of electric shock or severe injury. When the power cable gets damaged
it should only be replaced by the manufacturer or at a Authorized Service Center.
The build quality of the electric insulation is altered if spills or liquid gets into the tool while in use.
Do not expose to rain, liquids and/or dampness.
Before gaining access to the terminals all power sources should be disconnected.
*It is safe to use only if the extensions have a built-in artifact for over current protection.
AWG = American Wire Gauge - Reference NMX - J - 195 - ANCE
When operating power tools outdoors, use a grounded
extension cable labeled “For Outdoors Use”. These extensions are especially designed for
operating outdoors and reduce the risk of electric shock.
WARNING
From 0 and up to 10 A
From 10 and up to 13 A
From 13 and up to 15 A
From 15 and up to 20 A
18 AWG
16 AWG
14 AWG
8 AWG
16 AWG
14 AWG
12 AWG
6 AWG
3 (one grounded)
From 6 ft to 49 ft | Higher than 49 ft
Ampere
Capacity Number of
Conductors Extension Gauge
MOTO-AI
102271
7.2 V
IP 20
Cordless rotary tool
1/8”
Code
Description
Voltage
Speed
IP Grade
Jaw
Rechargeable Battery
5000 RPM - 25000 RPM
Charger Input
Output
Voltage: 127 V~ 60 Hz 0.2 A
Voltage: 9 V 0.5 A
Capacity: 0.9 Ah Type: lón-LitioVoltage: 7.2 V
Power Requirements
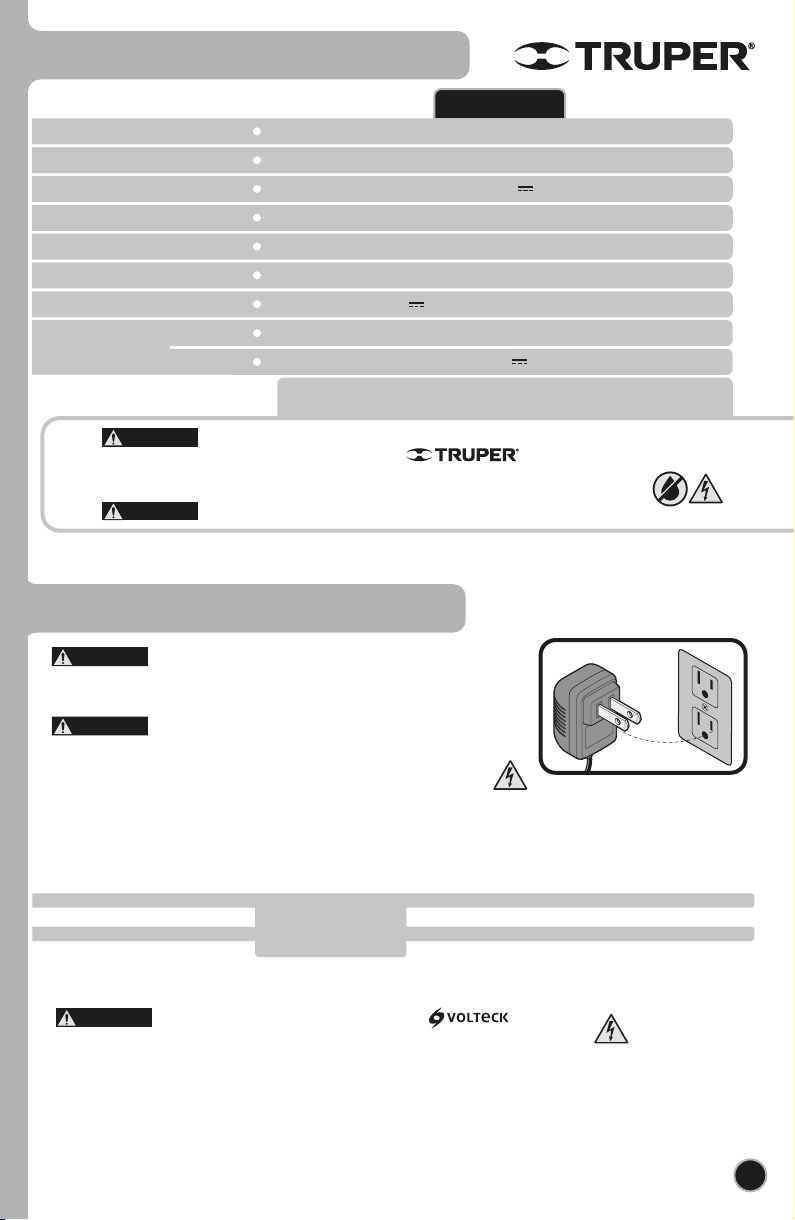
Tools with double insulation and reinforced insulation
eliminate the need of a grounded power cord with three prongs or a grounded
power connection.
When using an extension cable, verify the gauge is enough for
the power that your product needs. A lower gauge cable will cause voltage drop
in the line, resulting in power loss and overheating. The following table shows
the right size to use depending on cable’s length and the ampere capability
shown in the tool’s nameplate. When in doubt use the next higher gauge.
WARNING
WARNING

4ENGLISH
This tool is in compliance with
the Official Mexican Standard
(NOM - Norma Oficial Mexicana).
Work area
Keep your work area clean, and well lit.
Cluttered and dark areas may cause accidents.
Never use the tool in explosive atmospheres, such as in the
presence of flammable liquids, gases or dust.
Sparks generated by power tools may ignite the flammable material.
Keep children and bystanders at a safe distance while operating
the tool.
Distractions may cause loosing control.
Electrical Safety
The tool plug must match the power outlet. Never modify
the plug in any way. Do not use any adapter plugs with
grounded power tools.
Modified plugs and different power outlets increase the risk of electric shock.
Avoid body contact with grounded surfaces, such as pipes,
radiators, electric ranges and refrigerators.
The risk of electric shock increases if your body is grounded.
Do not expose the tool to rain or wet conditions.
Water entering into the tool increases the risk of electric shock.
Do not force the cord. Never use the cord to carry, lift or unplug
the tool. Keep the cord away from heat, oil, sharp edges or
moving parts.
Damaged or entangled cords increase the risk of electric shock.
When operating a tool outdoors, use an extension cord suitable
for outdoor use.
Using an adequate outdoor extension cord reduces the risk of electric shock.
If operating the tool in a damp location cannot be avoided, use
a ground fault circuit interrupter (GFCI) protected supply.
Using a GFCI reduces the risk of electric shock.
Personal safety
Stay alert, watch what you are doing and use common sense
when operating a tool. Do not use a power tool while you are
tired or under the influence of drugs, alcohol or medication.
A moment of distraction while operating the tool may result in personal injury.
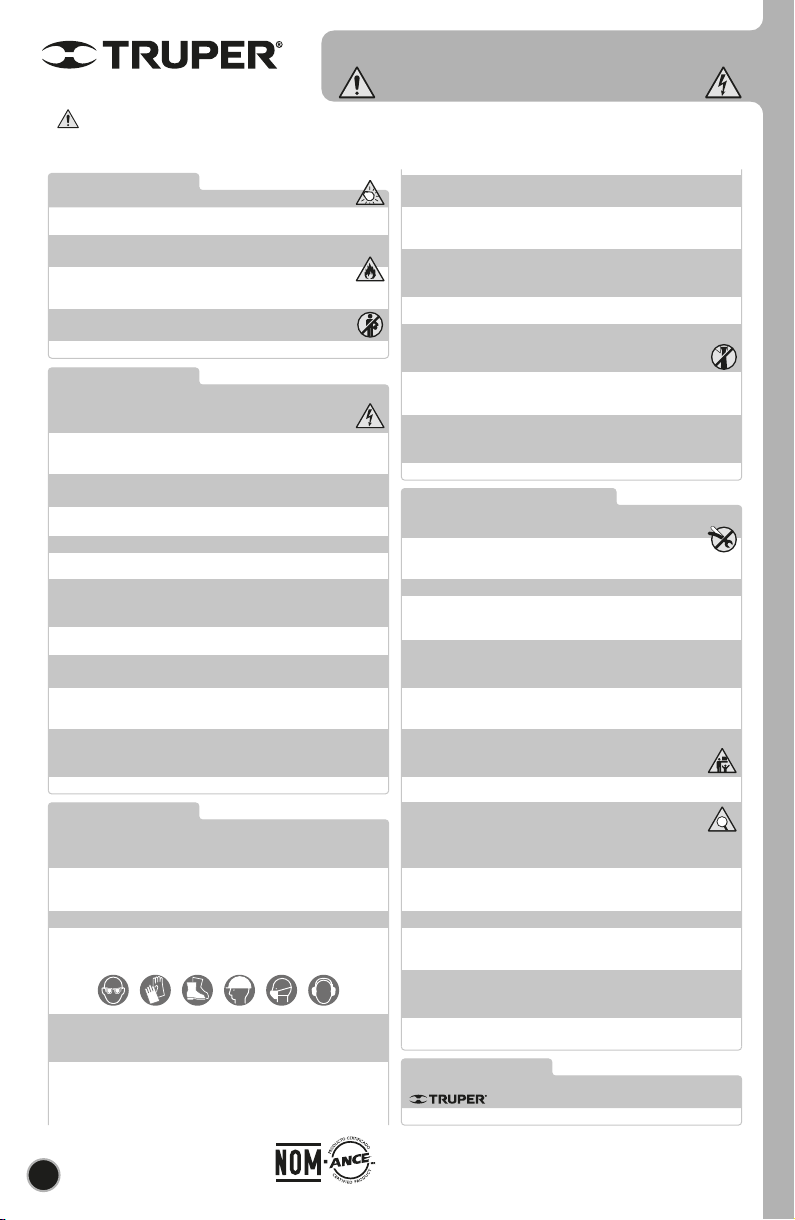
Use personal protective equipment. Always wear eye
protection.
Protective equipment such as safety glasses, anti-dust mask, non-skid shoes,
hard hats and hearing protection used in the right conditions significantly
reduce personal injury.
Prevent unintentional starting up. Ensure the switch is in the
“OFF” position before connecting into the power source and /
or battery as well as when carrying the tool.
Transporting power tools with the finger on the switch or connecting power
tools with the switch in the “ON” position may cause accidents.
Remove any wrench or vice before turning the power tool on.
Wrenches or vices left attached to rotating parts of the tool may result in personal
injury.
Do not overreach. Keep proper footing and balance at all times.
This enables a better control on the tool during unexpected situations.
Dress properly. Do not wear loose clothing or jewelry. Keep
hair, clothes and gloves away from the moving parts.
Loose clothes or long hair may get caught in moving parts.
If you have dust extraction and recollection devices connected
onto the tool, inspect their connections and use them correctly.
Using these devices reduce dust-related risks.
Power Tools Use and Care
Do not force the tool. Use the adequate tool for your
application.
The correct tool delivers a better and safer job at the rate for which it was designed.
Do not use the tool if the switch is not working properly.
Any power tool that cannot be turned ON or OFF is dangerous and should be
repaired before operating.
Disconnect the tool from the power source and / or battery
before making any adjustments, changing accessories or
storing.
These measures reduce the risk of accidentally starting the tool.
Store tools out of the reach of children. Do not allow persons
that are not familiar with the tool or its instructions to
operate the tool.
Power tools are dangerous in the hands of untrained users.
Service the tool. Check the mobile parts are not misaligned or
stuck. There should not be broken parts or other conditions that
may affect its operation. Repair any damage before using the
tool.
Most accidents are caused due to poor maintenance to the tools.
Keep the cutting accessories sharp and clean.
Cutting accessories in good working conditions are less likely to bind and are
easier to control.
Use the tool, components and accessories in accordance with
these instructions and the projected way to use it for the type of
tool when in adequate working conditions.
Using the tool for applications different from those it was designed for, could
result in a hazardous situation.
Service
Repair the tool in a Authorized Service Center
using only identical spare parts.
This will ensure that the safety of the power tool is maintained.
General power tool
safety warnings
WARNING! Read carefully all safety warnings and instruction listed below. Failure to comply with any of
these warnings may result in electric shock, fire and / or severe damage. Save all warnings and instructions for
future references.

5
• Kickback is a sudden reaction to a
pinched or snagged rotating wheel, backing pad, brush or
any other accessory. Pinching causes rapid stalling of the
rotating accessory which in turn causes the uncontrolled
power tool to be forced in the direction opposite of the
accessory’s rotation at the point of the binding. Kickback is
the result of power tool misuse and/or incorrect operating
procedures or conditions and can be avoided by taking
proper precautions as given below.
• Maintain a firm grip on the power tool and position your
body and arm to allow you to resist kickback forces. Always
use auxiliary handle, if provided, for maximum control over
kickback or torque reaction during start-up. The operator
can control torque reactions or kickback forces, if proper
precautions are taken.
• Never place your hand near the rotating accessory.
Accessory may kickback over your hand.
• Do not position your body in the area where power tool
will move if kickback occurs. Kickback will propel the tool in
direction opposite to the wheel’s movement at the point of
snagging.
• Use special care when working corners, sharp edges etc.
Avoid bouncing and snagging the accessory. Corners,
sharp edges or bouncing have a tendency to snag the
rotating accessory and cause loss of control or kickback.
Kickback
CAUTION
• Take a few minutes to assess the job. Before operating
the tool double-check all the necessary caution standards.
• Adjust all the accessories before connecting the rotary
tool.
• Verify the switch is in the “0” position.
Otherwise the tool will start unexpectedly causing severe
injury.
• Avoid injury or deficient performance. To stay in control
while operating the tool keep it supported with a vice or
wrench.
• Double-check there are no embedded objects such as
cables, electric conductors or pipes before boring a wall,
floor or ceiling.
• Always wear eye protection. Accessories may brake and
shoot out with great speed.
Before operating the tool
• Keep your hands away from the moving accessories.
• Let the accessory develop its highest speed before
making contact with the work piece.
• Never start the tool when the accessory is inside the
work piece material.
• When carving, milling or cutting use special attention to
the direction you work the material. To prevent from
kickback push the accessory towards the shooting
shavings.
• If the accessory gets stuck into the work piece,
immediately turn off the tool, disconnect, and then
release the stuck material.
• Refrain from touching the accessories or collets after
use. They are very hot.
• Before setting the tool, verify all moving parts have
come to a complete stop.
• Immediately after using, refrain from setting the tool
onto a place with particles and / or dust. The particles and
dust may be absorbed into the mechanism and damage
the tool.
• Do not modify or use the tool incorrectly.
• Rotary tool IS NOT designed to be used neither as a
dental drill nor for medical applications.
While operating the tool
• Select the accessory best suited for the
material. It reduces the risk of severe injury and makes the
job faster.
Select the right accessory
CAUTION
DANGER
ENGLISH
Safety warnings for
rotary tools

6ENGLISH
Safety warnings for
rotary tools
Charging the Rotary Tool
• Misusing the charger may cause damages.
• Regularly check the charger is not damaged, especially
the connector cable and the housing.
• Do not use the charger if it was submitted to knocks or
discharge. Go to a Authorized Service
Center to repair before using it.
• For no reason at all disassemble the charger. Repairs
shall only be carried out by
Authorized Service Center staff. Improper assembly may
cause fire or electric shock.
• Never use the charger in places where explosive or
flammable materials are present.
• Connect the charger only to household power outlet. Do
not connect the charger if the power outlet has a different
voltage tension different to the one indicated in the
specifications label.
• A faulty electric installation or excessive tension in the
power outlet may originate an electric discharge.
• Connect the charger into a power outlet with easy access
to be able to disconnect quickly in case of fault.
• Not charging the rotary tool correctly may damage the
battery, the charger and the rotary tool.
• Charge the rotary tool in a 32 °F to 113 °F environment.
Ideal environment temperature is 73 °F
• Double check the ventilation is adequate when charging
the batteries. In this process gases are released.
• Charge the rotary tool inside. Do not charge outdoors.
• Check the charger is not in humid environment.
Otherwise there is risk of electric shock.
• Do not use the rotary tool for purposes different from its
designed. The charger is only built to charge the rotary
tool. Different uses may result in fire or
fatal electric shock.
• Do not try to charge the rotary tool with a charger that is
different from the one supplied.
• Use the charger only to charge the rotary tool and not as
power supply while operating the rotary tool.
• Do not set object onto the charger. Do not cover,
because it overheats. Never set it close to heat sources.
• Set the power cable in a way that nobody will trip with it
or step on it.
• After charging the rotary tool always disconnect the
charger from the power supply.
• Never pull or disconnect the charger using the
connection cable.
• Preferably, avoid using extension cables. If absolutely
necessary using an extension cable double check the
electric requirement mentioned in page 3 are observed.
• Never set the rotary tool or the accessories onto o near
hot surfaces.

7
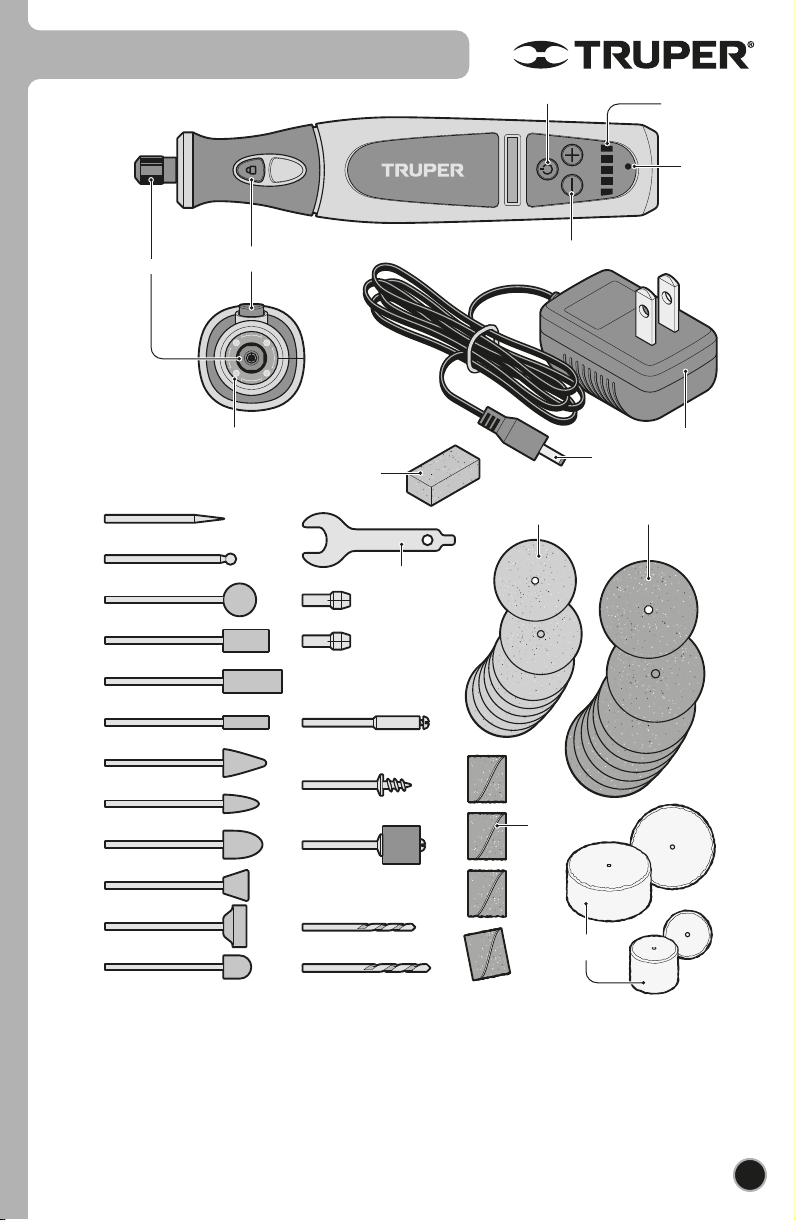
Parts and accessories
• Before using the rotary tool please learn about all its application possibilities.
• Rotary tool is a high-speed, efficient, versatile and easy to handle manual tool. It is designed to polish, cut, grind,
strip, sand, bore, make holes, brush, clean, etc.
• It has a small but powerful motor, equipped with a speed selector allowing to operate from 5000 RPM up to
25000 RPM. With a comfortable in the hand design accepts a large variety of accessories including high speed
abrasive cutting discs, silicon carbide grinding stones, tungsten carbide cutters, high-speed wire discs, polishing tips,
embossing and cutting tips, sanding discs, bits and other accessories.
• These accessories have different sizes and shapes allowing a large scope of jobs.
ENGLISH
Shaft
lock
Switch
Speed
controls
Speed
indicator
LED battery
charging
indicator
LED
lights Charger
Chick
Abrasive
cutting discs
Round
sandpaper
Adjusting wrench
Grinding
stone
3/32”
1/8”
Polishing
discs
Sandpaper
ring shaft
Disc holder shaft
Shank for
felt wheels Sandpaper
rings
Deburring stones
Collet nuts
Drill bits
Cutting tips
Wire contact
charger
C
8
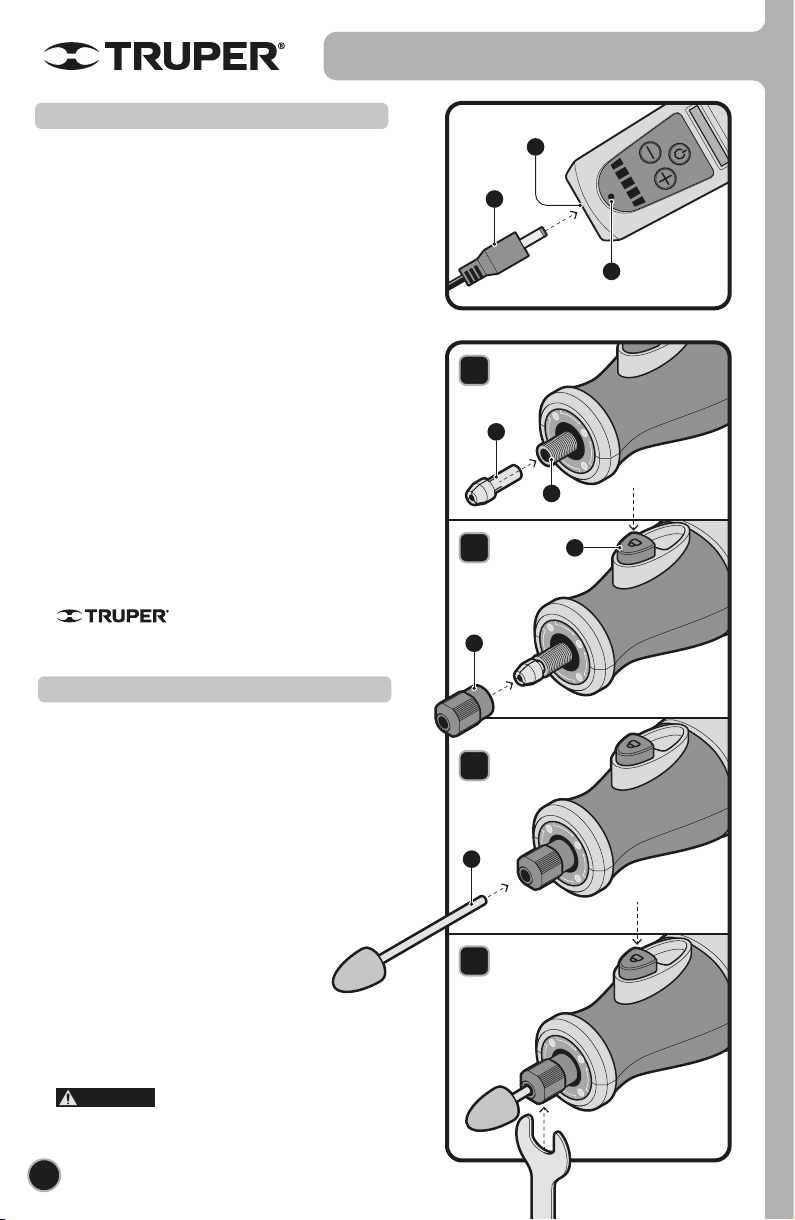
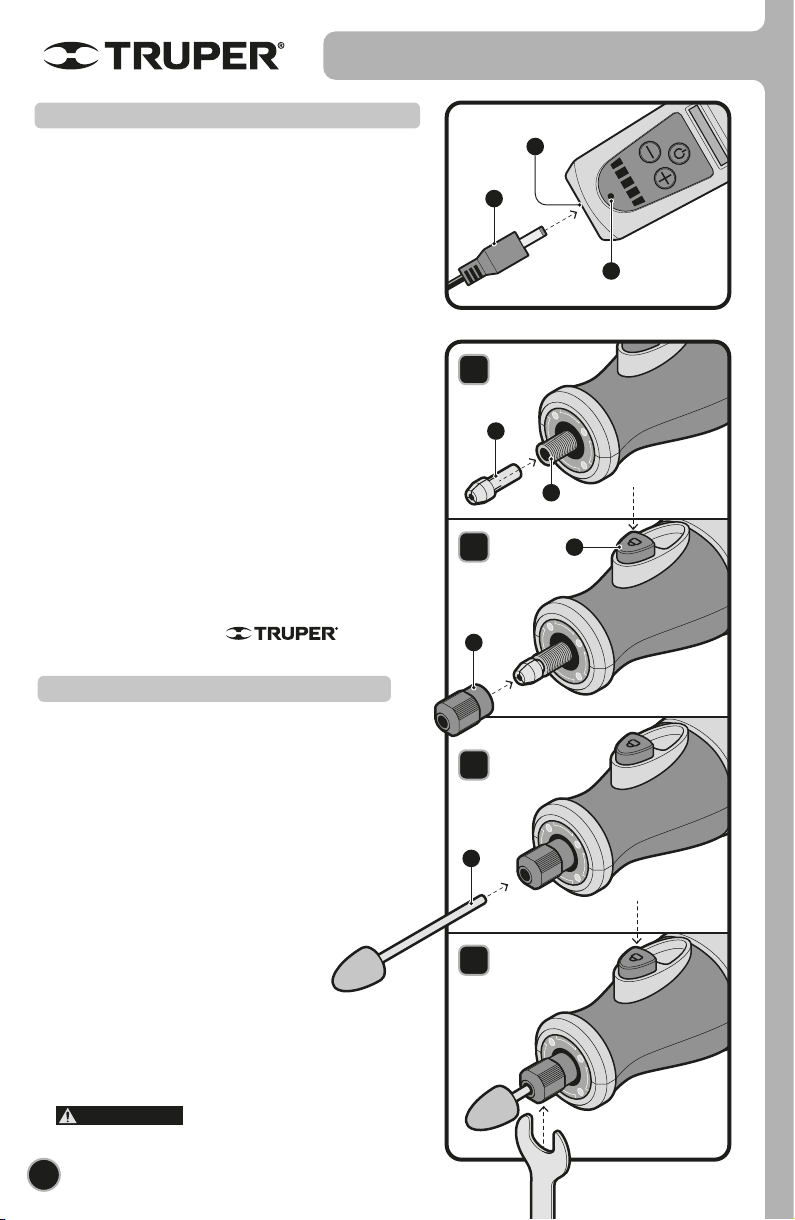
Start Up
• Un-plug the rotary tool.
1. Insert a jaw (A) of the desired gauge for the axis
accessory into the rotary tool axis (B).
2. Depress the shaft lock (C) while threading but not
tightening the jaws chuck (D).
3. Insert he accessory (E) you need into the jaws. Never
try to force entry of the accessory. Better, change the jaws
and use a larger caliber.
4. Pressing the shaft lock use a collet wrench to tighten
the collet chuck and have the collet securing the
accessory. Verify the accessory is not loose in the
tightened jaws. In which case, change it for a
lower caliber.
• To remove the accessory, press the shaft lock while
loosening the collet.
• Do not press the shaft lock while the
tool is running.
Installing accessories
A
D
E
B
1
2
3
4
WARNING
b
c
a
ENGLISH
Rotary Tool Battery Charging
•Charge the rotary tool it is completely discharged; the sample
turns on and off rapidly without generating any load.
• When using an Ion-Lithium rechargeable battery, the rotary
tool may be charge at any moment no matter the charge level
and with no capacitance loss.
• The rotary tool has low battery charge when purchased. It
shall be charged before the first use:
1. Insert the cable contact plug (b) in the rotary tool battery
charge connection (c).
2. Plug the charger plug into a 127V~ outlet. The LED
indicator (a) should turn red, indicating that charging has
started. When the battery is fully charged, the red light will
turn green.
3. Disconnect the charger from the power outlet after charging
is complete.
4. Remove the charger cable from rotary tool battery charge
connection.
5. Give the rotary tool time to cool down in environment
temperature if getting hot during the charge process. You can
now operate the rotary tool.
If the green light stays on, it is a sign of the following
conditions:
1. The battery temperature is lower than 0 °C or higher than
45 °C; please wait until the battery temperature is in the
proper range to be able to charge.
2. The battery or the tool is defective; you must go to a
Authorized Service Center.
D
D
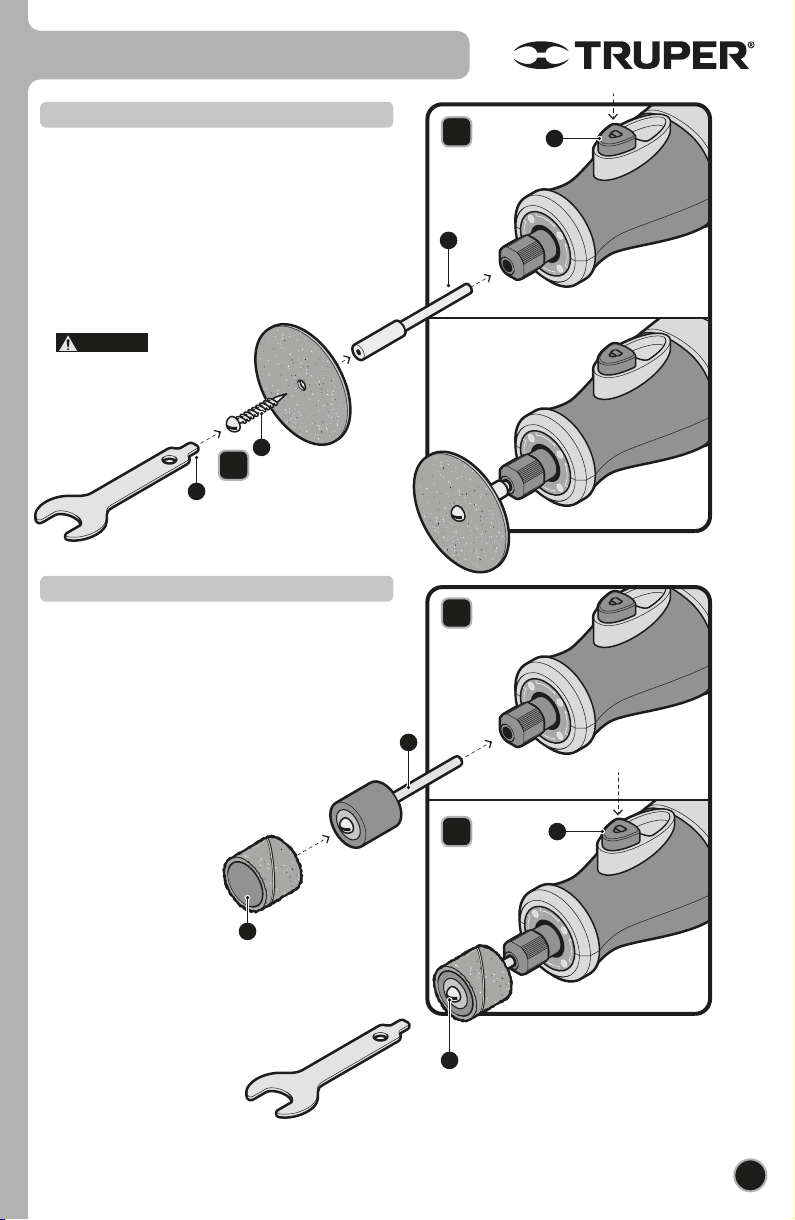
Disc holder shaft
9
Start Up
A
A
B
B
C
C
1
1
3
2
• The disc holder is used with serrated cutting discs,
abrasive discs and polishing discs.
1. Fit the disc holder (A) into the rotary tool as you do the
other accessories. (See page 8).
2. Using the screw (B), secure the disc you need, firmly
tightened with the screwdriver tip in the accessory
adjusting wrench (C). While tightening the disc, keep the
shaft lock depressed (D).
• Use care not
tightening the discs in excess. They
might break.
Sandpaper ring shaft
1. Insert the sanderpaper ring (A) in the grain sander (B)
more suitable for the job.
2. Install the stud in the Moto - Tool as you do for the
other accessories. (See page 8).
3. Tighten the stud screw (C) ) to secure the sander. Keep
the shaft locked (D) pressed while tightening the screw.
ENGLISH
CAUTION
Start Up
Maintenance
10
• The rotary tool uses a high-grade lubricant. It ensures lubrication the tool’s full working life when used in regular
conditions. Does not need further lubrication.
• Inspect regularly all the mounting screws and double-check they are tightly secured. Loose screws present a high risk.
Service and repairs
• In the event the tool is not working properly go to an
Authorized Service Center.
• Service and repairs should only be made in a
Authorized Service Center. Service
and maintenance performed by non-qualified people may
be dangerous and can lead to personal injuries. It also
makes the product Warranty void.
• Use only original spare parts.
Otherwise there you may be exposed to accidents and
make the Warranty void.
Cleaning and Storage
• Do not use aggressive cleaning products, metal brushes,
sharp or metal utensils, otherwise the rotary tool housing
gets damaged.
• Clean the housing with a soft and dry cloth.
• Remove dirt with a humid cloth and mild detergent.
• Never submerge the rotary tool in water or other type
of liquids.
• Dry the rotary tool thoroughly before storing.
• Load the battery full before storing the rotary tool for
long periods of time. Storing unloaded batteries or
partially discharged may cause a deep discharge. This,
destroys the batteries cells and makes them useless.
• Store the rotary tool out of the reach of children. Keep
it in a locked placed with a storing temperature ranging
between 41 °F and 68 °F
ENGLISH
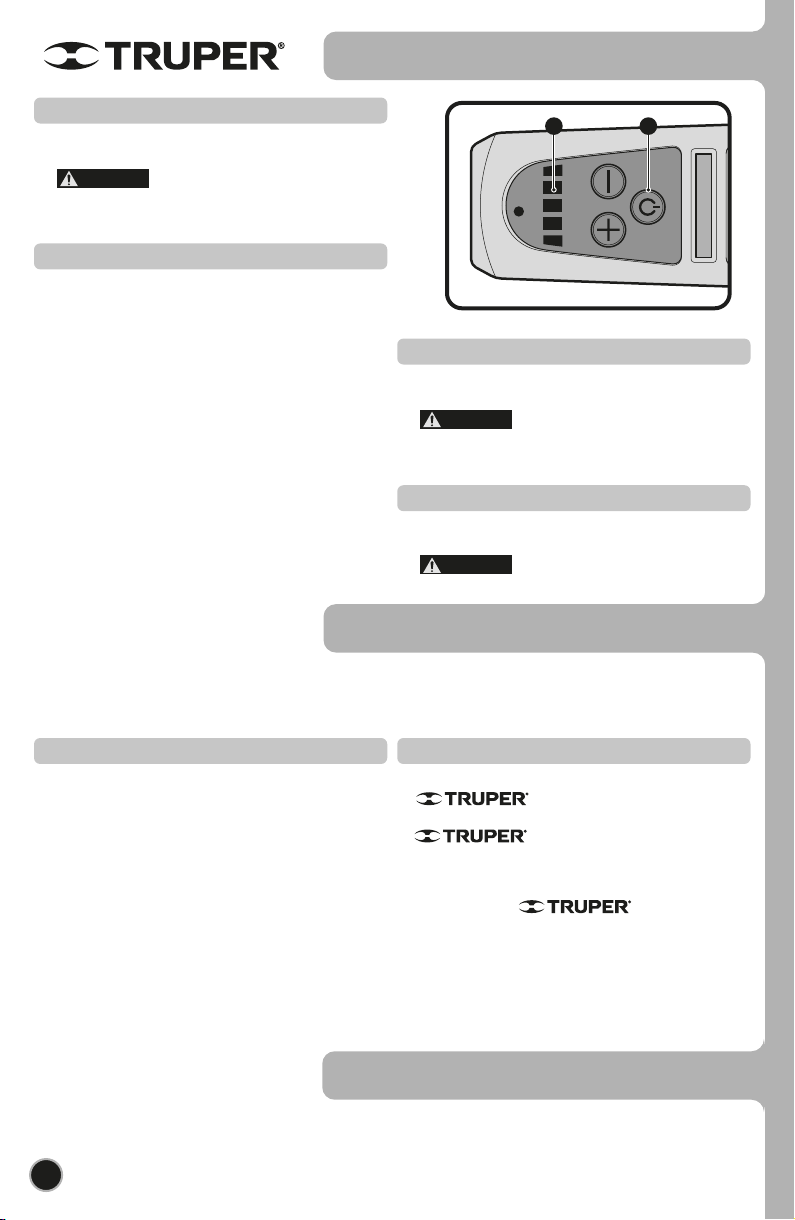
AB
On/Off Switch
• To start the tool, press the on/off switch (A).
• To stop the tool, press the on/off switch again.
• This tool has been set to the slowest
speed before switching on.
Drilling Operation
• Turn the tool on to full speed. Apply the tool to the
workpiece gently.
Apply light pressure on the tool. Excessive
pressure will only cause a poor finish and overloading of
the motor.
Speed Adjustment
• To achieve the best result when working with different
materials, you can adjust the tool speed with the variable
speed control button. Press the “+” speed button to
increase the speed and press the “
-
” speed button to
decrease the speed.
• Select a low speed when working with wood, plastics
and polishing.
• The 5 blue speed indicators (B) indicate the 5 levels of
speed, the speed is corresponding from 5000 to 25000
RPM.
Holding the Tool
• For milling or engraving, hold the tool like a pen. Take
care not to cover the ventilation slots.
The tool will get warm during normal
operation. Observe the rated operating time.
CAUTION
CAUTION
CAUTION
Environmental protection
Power tools and batteries should not be disposed off together with household trash. Please deliver this tool and the
batteries to its adequate recycling in the authorized disposal sites. Verify the nearest recycling center in your community.

11
ENGLISH
Authorized Service Centers
In the event of any problem contacting a Authorized Service Center, please see our webpage
www.truper.com to get an updated list, or call our toll-free numbers 800 690-6990 or 800 018-7873 to get
information about the nearest Service Center.
AGUASCALIENTES
BAJA
CALIFORNIA
BAJA
CALIFORNIA SUR
CAMPECHE
CHIAPAS
CHIHUAHUA
CIUDAD DE
MÉXICO
COAHUILA
COLIMA
DURANGO
ESTADO DE
MÉXICO
GUANAJUATO
GUERRERO
HIDALGO
JALISCO
MICHOACÁN
MORELOS
NAYARIT
NUEVO LEÓN
OAXACA
PUEBLA
QUERÉTARO
QUINTANA ROO
SAN LUIS
POTOSÍ
SINALOA
SONORA
TABASCO
TAMAULIPAS
TLAXCALA
VERACRUZ
YUCATÁN
DE TODO PARA LA CONSTRUCCIÓN
GRAL. BARRAGÁN #1201, COL. GREMIAL, C.P. 20030,
AGUASCALIENTES, AGS. TEL.: 449 994 0537
SUCURSAL TIJUANA
AV. LA ENCANTADA, LOTE #5, PARQUE INDUSTRIAL EL
FLORIDO II, C.P 22244, TIJUANA, B.C.
TEL.: 664 969 5100
FIX FERRETERÍAS
FELIPE ÁNGELES ESQ. RUIZ CORTÍNEZ S/N, COL. PUEBLO
NUEVO, C.P. 23670, CD. CONSTITUCIÓN, B.C.S.
TEL.: 613 132 1115
TORNILLERÍA Y FERRETERÍA AAA
AV. ÁLVARO OBREGÓN #324, COL. ESPERANZA
C.P. 24080 CAMPECHE, CAMP. TEL.: 981 815 2808
FIX FERRETERÍAS
AV. CENTRAL SUR #27, COL. CENTRO, C.P. 30700,
TAPACHULA, CHIS. TEL.: 962 118 4083
SUCURSAL CHIHUAHUA
AV. SILVESTRE TERRAZAS #128-11, PARQUE INDUSTRIAL
BAFAR, CARRETERA MÉXICO CUAUHTÉMOC, C.P. 31415,
CHIHUAHUA, CHIH. TEL. 614 434 0052
FIX FERRETERÍAS
EL MONSTRUO DE CORREGIDORA, CORREGIDORA # 22,
COL. CENTRO, C.P. 06060, CUAUHTÉMOC, CDMX.
TEL: 55 5522 5031 / 5522 4861
SUCURSAL TORREÓN
CALLE METAL MECÁNICA #280, PARQUE INDUSTRIAL
ORIENTE, C.P. 27278, TORREÓN, COAH.
TEL.: 871 209 68 23
BOMBAS Y MOTORES BYMTESA DE MANZANILLO
BLVD. MIGUEL DE LA MADRID #190, COL. 16 DE
SEPTIEMBRE, C.P. 28239, MANZANILLO, COL.
TEL.: 314 332 1986 / 332 8013
TORNILLOS ÁGUILA, S.A. DE C.V.
MAZURIO #200, COL. LUIS ECHEVERRÍA, DURANGO,
DGO.TEL.: 618 817 1946 / 618 818 2844
SUCURSAL CENTRO JILOTEPEC
PARQUE INDUSTRIAL # 1, COL. PARQUE INDUSTRIAL
JILOTEPEC, JILOTEPEC, EDO. DE MÉX. C.P. 54257
TEL: 761 782 9101 EXT. 5728 Y 5102
CÍA. FERRETERA NUEVO MUNDO S.A. DE C.V.
AV. MÉXICO - JAPÓN #225, CD. INDUSTRIAL, C.P. 38010,
CELAYA, GTO. TEL.: 461 617 7578 / 79 / 80 / 88
CENTRO DE SERVICIO ECLIPSE
CALLE PRINCIPAL MZ.1 LT. 1, COL. SANTA FE, C.P. 39010,
CHILPANCINGO, GRO. TEL.: 747 478 5793
FERREPRECIOS S.A. DE C.V.
LIBERTAD ORIENTE #304 LOCAL 30, INTERIOR DE PASAJE
ROBLEDO, COL. CENTRO, C.P. 43600, TULANCINGO,
HGO. TEL.: 775 753 6615 / 775 753 6616
SUCURSAL GUADALAJARA
AV. ADOLFO B. HORN # 6800, COL: SANTA CRUZ DEL
VALLE, C.P.: 45655, TLAJOMULCO DE ZUÑIGA, JAL.
TEL.: 33 3606 5285 AL 90
FIX FERRETERÍAS
AV. PASEO DE LA REPÚBLICA #3140-A, COL.
EX-HACIENDA DE LA HUERTA, C.P. 58050, MORELIA,
MICH. TEL.: 443 334 6858
FIX FERRETERÍAS
CAPITÁN ANZURES #95, ESQ. JOSÉ PERDIZ, COL.
CENTRO, C.P. 62740, CUAUTLA, MOR.
TEL.: 735 352 8931
HERRAMIENTAS DE TEPIC
MAZATLAN #117, COL. CENTRO, C.P. 63000, TEPIC, NAY.
TEL.: 311 258 0540
SUCURSAL MONTERREY
CARRETERA LAREDO #300, 1B MONTERREY PARKS,
COLONIA PUERTA DE ANÁHUAC, C.P. 66052, ESCOBEDO,
NUEVO LEÓN, TEL.: 81 8352 8791 / 81 8352 8790
FIX FERRETERÍAS
AV. 20 DE NOVIEMBRE #910, COL. CENTRO, C.P. 68300,
TUXTEPEC, OAX. TEL.: 287 106 3092
SUCURSAL PUEBLA
AV PERIFÉRICO #2-A, SAN LORENZO ALMECATLA,
C.P. 72710, CUAUTLACINGO, PUE.
TEL.: 222 282 8282 / 84 / 85 / 86
ARU HERRAMIENTAS S.A DE C.V.
AV. PUERTO DE VERACRUZ #110, COL. RANCHO DE
ENMEDIO, C.P. 76842, SAN JUAN DEL RÍO, QRO.
TEL.: 427 268 4544
FIX FERRETERÍAS
CARRETERA FEDERAL MZ. 46 LT. 3 LOCAL 2, COL EJIDAL,
C.P. 77710 PLAYA DEL CARMEN, Q.R.
TEL.: 984 267 3140
FIX FERRETERÍAS
AV. UNIVERSIDAD #1850, COL. EL PASEO, C.P. 78320,
SAN LUIS POTOSÍ, S.L.P. TEL.: 444 822 4341
SUCURSAL CULIACÁN
AV. JESÚS KUMATE SUR #4301, COL. HACIENDA DE LA
MORA, C.P. 80143, CULIACÁN, SIN.
TEL.: 667 173 9139 / 173 8400
FIX FERRETERÍAS
CALLE 5 DE FEBRERO #517, SUR LT. 25 MZ. 10, COL.
CENTRO, C.P. 85000, CD. OBREGÓN, SON.
TEL.: 644 413 2392
SUCURSAL VILLAHERMOSA
CALLE HELIO LOTES 1, 2 Y 3 MZ. #1, COL. INDUSTRIAL,
2A ETAPA, C.P. 86010, VILLAHERMOSA, TAB.
TEL.: 993 353 7244
VM ORINGS Y REFACCIONES
CALLE ROSITA #527 ENTRE 20 DE NOVIEMBRE Y GRAL.
RODRÍGUEZ, FRACC. REYNOSA, C.P. 88780, REYNOSA,
TAMS. TEL.: 899 926 7552
SERVICIOS Y HERRAMIENTAS INDUSTRIALES
PABLO SIDAR #132, COL . BARRIO DE SAN BARTOLOMÉ,
C.P. 90970, SAN PABLO DEL MONTE, TLAX.
TEL.: 222 271 7502
LA CASA DISTRIBUIDORA TRUPER
BLVD. PRIMAVERA. ESQ. HORTENSIA S/N, COL.
PRIMAVERA C.P. 93308, POZA RICA, VER.
TEL.: 782 823 8100 / 826 8484
SUCURSAL MÉRIDA
CALLE 33 #600 Y 602, LOCALIDAD ITZINCAB Y MULSAY,
MPIO. UMÁN, C.P. 97390, MÉRIDA, YUC.
TEL.: 999 912 2451

12 ENGLISH
2
YEARS
www.truper.com
02-2022
102271
Warranty
policy
Code
MOTO-AI
Model Brand
Warranty. Duration: 2 years. Coverage: parts, components and workmanship against manufacturing or
operating defects, except if used under conditions other than normal; when it was not operated in accordance
with the instructive; was altered or repaired by personnel not authorized by Truper®. To make the warranty valid,
present the product, stamped policy or invoice or receipt or voucher, in the establishment where you bought it
or in Corregidora 22, Centro, Cuauhtémoc, CDMX, 06060, where you can also purchase parts, components,
consumables and accessories. It includes the costs of transportation of the product that derive from its fulfillment
of its service network. . Phone number 800-018-7873. Made in China. Imported by Truper, S.A. de C.V. Parque
Industrial 1, Parque Industrial Jilotepec, Jilotepec, Edo. de Méx. C.P. 54257, Phone number 761 782 9100.
Stamp of the business. Delivery date:

Instructivo de
Lea este Instructivo por completo
antes de usar la herramienta.
Herramienta rotativa
inalámbrica
MOTO-AI
ModeloCódigo
MOTO-AI
Este Instructivo es para:
102271
ATENCIÓN
ESPAÑOL
ENGLISH
7.2 V
Í
ndice
2
Especificaciones técnicas
Requerimientos eléctricos
Advertencias generales de seguridad
para herramientas eléctricas
Advertencias de Seguridad
para uso de herramientas rotativas
Partes y accesorios
Puesta en marcha
Mantenimiento
Protección Ambiental
Centros de Servicio Autorizados
Póliza de Garantía
Guarde este Instructivo para futuras referencias.
Los gráficos de este Instructivo son para
referencia, pueden variar del aspecto real de la
herramienta.
3
3
4
5
7
8
10
10
11
12
MOTO-AI
Para poder sacar el máximo
provecho de la herramienta,
alargar su vida útil, hacer válida
la garantía en caso de ser
necesario y evitar riesgos o
lesiones graves, es fundamental
leer este Instructivo por
completo antes de usar la
herramienta.
ATENCIÓN
ESPAÑOL

3
MOTO-AI
102271
7.2 V
IP 20
Herramienta rotativa inalámbrica
1/8” (3 mm)
Código
Descripción
Tensión
Velocidad
Grado IP
Mordaza
Batería recargable
El cable de alimentación tiene sujeta-cables tipo: Y
La clase de construcción de la herramienta es: Aislamiento reforzado.
5000 r/min - 25000 r/min
Especificaciones técnicas
Si el cable de alimentación se daña, éste debe ser reemplazado por el fabricante o Centro de Servicio
Autorizado , con el fin de evitar algún riesgo de descarga o accidente considerable.
La construcción del aislamiento eléctrico de esta herramienta es alterado por salpicaduras o
derramamiento de líquidos durante su operación. No la exponga a la lluvia, líquidos y/o humedad.
Antes de obtener acceso a las terminales, todos los circuitos de alimentación deben ser desconectados.
ADVERTENCIA
ADVERTENCIA
ESPAÑOL
de 0 A hasta 10 A
de 10 A hasta 13 A
de 13 A hasta 15 A
de 15 A hasta 20 A
18 AWG(*)
16 AWG
14 AWG
8 AWG
16 AWG
14 AWG
12 AWG
6 AWG
3 (uno a tierra)
de 1,8 m a 15 m | mayor de 15 m
Capacidad en
Amperes Número de
conductores Calibre de extensión
*Se permite utilizarlo siempre y cuando las extensiones mismas cuenten con un artefacto de protección contra sobrecorriente.
AWG = Calibre de alambre estadounidense (American Wire Gauge). Referencia: NMX-J-195-ANCE
Al operar herramientas eléctricas en exteriores, utilice una extensión
aterrizada marcada como “Uso exterior” marca . Estas extensiones son
especiales para el uso en exteriores y reducen el riesgo de sufrir una descarga eléctrica.
ADVERTENCIA
Cargador Entrada
Salida
Tensión: 127 V~ 60 Hz 0.2 A
Tensión: 9 V 0.5 A
Capacidad: 0.9 Ah Tipo: lón-LitioTensión: 7.2 V
Requerimientos eléctricos
Las herramientas de doble aislamiento y aislamiento
reforzado eliminan la necesidad de un cable de corriente de 3 partes con conexión a
tierra o de un sistema de corriente eléctrica con conexión a tierra.
Al usar un cable de extensión, asegúrese de usar el calibre
suficiente para transportar la corriente que consumirá su herramienta. Un cable
de un calibre inferior ocasionará caídas de tensión en la línea, teniendo como
resultado pérdida de potencia y sobrecalentamiento del motor. La siguiente tabla
muestra el tamaño correcto que debe usarse dependiendo de la longitud del cable y de la capacidad de amperes indicada
en la placa de datos de la herramienta. Si tiene dudas use el siguiente calibre más alto.
ADVERTENCIA
ADVERTENCIA
4Esta herramienta cumple con la
Norma Oficial Mexicana (NOM).
Área de trabajo
Mantenga el área de trabajo limpia y bien iluminada.
Las áreas desordenadas y obscuras son propensas a accidentes.
No maneje la herramienta en ambientes explosivos, como en
presencia de líquido, gas o polvo inflamables.
Las herramientas eléctricas producen chispas que pueden encender
material inflamable.
Mantenga alejados a los niños y curiosos cuando opere la
herramienta.
Las distracciones pueden hacer que pierda el control.
Seguridad eléctrica
La clavija de la herramienta debe coincidir con el tomacorrien-
te. Nunca modifique una clavija. No use ningún tipo de
adaptador para clavijas de herramientas puestas a tierra.
Clavijas modificadas y enchufes diferentes aumentan el riesgo de
choque eléctrico.
Evite el contacto del cuerpo con superficies puestas a tierra
como tuberías, radiadores, cocinas eléctricas y refrigeradores.
Hay un mayor riesgo de choque eléctrico si el cuerpo está puesto a tierra.
No exponga la herramienta a la lluvia o condiciones de humedad.
El agua que ingresa en la herramienta aumenta el riesgo de choque eléctrico.
No fuerce el cable. Nunca use el cable para transportar,
levantar o desconectar la herramienta. Mantenga el cable
lejos del calor, aceite, orillas afiladas o piezas en movimiento.
Los cables dañados o enredados aumentan el riesgo de choque eléctrico.
Cuando maneje una herramienta en exteriores, use una
extensión especial para uso en exteriores.
El uso de una extensión adecuada para exteriores reduce el riesgo de choque
eléctrico.
Si el uso de la herramienta en un lugar húmedo es inevitable,
use una alimentación protegida por un interruptor de circuito
de falla a tierra (GFCI).
El uso de un GFCI reduce el riesgo de choque eléctrico.
Seguridad personal
Esté alerta, vigile lo que está haciendo y use el sentido común
cuando maneje una herramienta. No la use si está cansado o
bajo la influencia de drogas, alcohol o medicamentos.
Un momento de distracción mientras maneja la herramienta puede
causar un daño personal.
Use equipo de seguridad. Use siempre protección para los ojos.
El uso de equipo de seguridad como lentes de seguridad, mascarilla antipolvo,
zapatos antideslizantes, casco y protección para los oídos en condiciones
apropiadas, reduce de manera significativa los daños personales.
Evite arranques accidentales. Asegúrese de que el interruptor
está en posición “apagado” antes de conectar a la fuente de
alimentación y/o a la batería o transportar la herramienta.
Transportar herramientas eléctricas con el dedo sobre el interruptor o
conectar herramientas eléctricas que tienen el interruptor en posición de
“encendido” puede causar accidentes.
Retire cualquier llave o herramienta de ajuste antes de arrancar
la herramienta eléctrica.
Las llaves o herramientas que quedan en las partes rotativas de la
herramienta pueden causar un daño personal.
No sobrepase su campo de acción. Mantenga ambos pies bien
asentados sobre el suelo y conserve el equilibrio en todo
momento.
Esto permite un mejor control de la herramienta en situaciones inesperadas.
Vista adecuadamente. No vista ropa suelta o joyas. Mantenga
su pelo, su ropa y guantes alejados de las piezas en
movimiento.
La ropa o el pelo sueltos o las joyas pueden quedar atrapados en las piezas en
movimiento.
En caso de contar con dispositivos de extracción y recolección
de polvo conectados a la herramienta, verifique sus conexiones
y úselos correctamente.
El uso de estos dispositivos reduce los riesgos relacionados con el polvo.
Uso y cuidados de la herramienta
No fuerce la herramienta. Use la herramienta adecuada para el
trabajo a realizar.
La herramienta adecuada hace un trabajo mejor y más seguro cuando
se usa al ritmo para el que fue diseñado.
No use la herramienta si el interruptor no funciona.
Cualquier herramienta eléctrica que no pueda encenderse o
apagarse es peligrosa y debe repararse antes de ser operada.
Desconecte la herramienta de la fuente de alimentación
y/o de la batería antes de efectuar cualquier ajuste,
cambiar accesorios o almacenarla.
Estas medidas reducen el riesgo de arrancar la herramienta
accidentalmente.
Almacene las herramientas fuera del alcance de los niños y no
permita su manejo por personas no familiarizadas con las
herramientas o con las instrucciones.
Las herramientas eléctricas son peligrosas en manos no entrenadas.
Déle mantenimiento a la herramienta. Compruebe que las
partes móviles no estén desalineadas o trabadas, que no
haya piezas rotas u otras condiciones que puedan afectar su
operación. Repare cualquier daño antes de usar la herramienta.
Muchos accidentes son causados por el escaso mantenimiento de las
herramientas.
Mantenga los accesorios de corte afilados y limpios.
Los accesorios de corte en buenas condiciones son menos probables de
trabarse y más fáciles de controlar.
Use la herramienta, sus componentes y accesorios de acuerdo
con estas instrucciones y de la manera prevista para el tipo de
herramienta, en condiciones de trabajo adecuadas.
El uso de la herramienta para aplicaciones diferentes para las que
está diseñada podría causar una situación de peligro.
Servicio
Repare la herramienta en un Centro de Servicio Autorizado
usando sólo piezas de repuesto idénticas.
Para mantener la seguridad de la herramienta.
Advertencias generales de seguridad
para herramientas eléctricas
¡ADVERTENCIA! Lea detenidamente todas las advertencias de seguridad y todas las instrucciones que se
enlistan a continuación. La omisión de alguna de ellas puede dar como resultado un choque eléctrico, incendio y/o
daño serio. Conserve las advertencias y las instrucciones para futuras referencias.
ESPAÑOL

5
Advertencias de Seguridad
para uso de herramientas rotativas
• El contragolpe es la reacción
ocasionada por un disco en movimiento, almohadilla o
cualquier accesorio que se atora o engancha. El enganche
ocasiona que el accesorio giratorio se detenga de repente
y haga que la herramienta sea lanzada en dirección
opuesta. El contragolpe es el resultado del mal uso de la
herramienta o de procedimientos o condiciones
incorrectos de operación. Esto se puede evitar tomando las
siguientes medidas de precaución:
• Mantenga la herramienta con firmeza y coloque el
cuerpo y brazo de forma que se pueda resistir las fuerzas
del contragolpe. Para tener completo control sobre el
contragolpe o la reacción de torque durante el arranque
siempre se debe utilizar el mango auxiliar, en caso que se
tenga. El operario puede controlar la reacción de torque o
la fuerza del contragolpe cuando se tienen los cuidados
adecuados.
• Nunca coloque la mano cerca del accesorio en
movimiento. El accesorio puede hacer contragolpe contra
su mano.
• No se coloque en el área en la que la herramienta podría
moverse en caso de tener un contragolpe. El contragolpe
propulsa la herramienta en dirección opuesta al
movimiento del disco en el punto donde se atore.
• Tenga cuidado especial cuidado cuando trabaje con
esquinas, orillas filosas, etc. Evite rebotar o atorar el
accesorio. Las esquinas, orillas filosas o el rebote tienen la
tendencia de atorar el accesorio giratorio y ocasionar
pérdida de control o contragolpe.
Contragolpe
ATENCIÓN
• Tómese su tiempo para evaluar el trabajo a realizar y
asegúrese de haber respetado todas las precauciones
necesarias antes de comenzar a taladrar.
• Ajuste correctamente los accesorios.
• Asegúrese que el interruptor esté
apagado (posición 0) antes de conectar la herramienta
rotativa, de lo contrario éste comenzará a funcionar
inesperadamente, pudiendo provocar lesiones graves.
• Mantenga bien asegurada la pieza de trabajo con
abrazaderas o prensas para mantener el control mientras
opera la herramienta y así evitar accidentes o trabajos
deficientes.
• Antes de perforar en una pared, suelo o techo, asegúrese
de que no haya objetos empotrados, tales como cables o
conducciones eléctricas o tuberías.
• Utilice siempre protección para los ojos, los accesorios
pueden llegar a romperse y salir despedidos a gran
velocidad.
Antes de operar la herramienta
• Mantenga las manos alejadas de los accesorios en
movimiento.
• Deje que el accesorio gire a su máxima velocidad antes
de hacer contacto con la pieza de trabajo.
• Nunca arranque la herramienta cuando el accesorio se
encuentre dentro del material de la pieza de trabajo.
• Al tallar, fresar o cortar ponga especial atención a la
dirección con la que trabaja el material. Empuje el
accesorio en dirección de las virutas que salen despedidas
para evitar un contragolpe.
• Si el accesorio se atasca en la pieza de trabajo, apague
la herramienta inmediatamente, desconéctela y luego
libere el material atascado.
• No toque con las manos los accesorios ni las boquillas
después de utilizarlas. Están demasiado calientes.
• Antes de soltar la herramienta, asegúrese de que todas
las partes móviles se hayan detenido por completo.
• Evite colocar la herramienta en un sitio con partículas
y/o polvo inmediatamente después de haber sido usada,
estas pueden ser absorbidas dentro del mecanismo de la
herramienta y así dañarla.
• No altere ni utilice incorrectamente la herramienta.
• La herramienta rotativa NO está diseñado para utilizarse
como taladro dental ni en aplicaciones médicas.
Mientras opera la herramienta
• Elija el accesorio apropiado para el
material a trabajar, esto reduce el riesgo de lesiones graves
y agiliza el trabajo.
Elija el accesorio apropiada
ATENCIÓN
PELIGRO
ESPAÑOL

• Cargue la herramienta rotativa en interiores, no al aire
libre.
• Confirme que el cargador no esté en ambientes
húmedos. De lo contrario existe el riesgo de
descarga eléctrica.
• No utilice el cargador para propósitos para los que no fue
diseñado. El cargador es solo para cargar la herramienta
rotativa. Otros usos pueden resultar en incendio o
descarga eléctrica fatal.
• No intente recargar la herramienta rotativa con un
cargador diferente al suministrado.
• Use el cargador solo para cargar la herramienta rotativa y
no como suministro eléctrico mientras opera la
herramienta rotativa.
• No coloque objetos sobre el cargador y no lo cubra o
puede sobrecalentarse. No coloque el cargador cerca de
fuentes de calor.
• Coloque el cable eléctrico de tal forma que nadie se
pueda tropezar con él o pisarlo.
• Después de cargar la herramienta rotativa, desconecte
siempre el cargador del suministro eléctrico.
• Nunca jale o desconecte el cargador usando el cable
de conexión.
• De preferencia evite el uso de cables de extensión. En
caso de que su uso sea absolutamente necesario,
asegúrese de que cumplan con los requerimientos
eléctricos de la página 3.
• Nunca coloque la herramienta rotativa o los accesorios
sobre o cerca de superficies calientes.
6
Advertencias de Seguridad
para uso de herramientas rotativas
ESPAÑOL
Carga de la herramienta rotativa
• El uso incorrecto del cargador puede ocasionar daños.
• Revise con regularidad que el cargador no esté dañado,
especialmente el cable conector y la carcasa.
• No utilice un cargador expuesto a golpes o descargas, o
si se cae o está dañado. Acuda a un Centro de Servicio
Autorizado para su reparación antes
de usarlo.
• Por ningún motivo desarme el cargador. Las reparaciones
solo las debe llevar a cabo personal de un Centro de
Servicio Autorizado . Un mal
ensamblado puede ocasionar un incendio o
descarga eléctrica.
• Nunca use el cargador en ambientes donde existan
materiales explosivos o inflamables.
• Conecte el cargador solo a tomacorrientes domésticos.
No conecte el cargador si el tomacorriente tiene un valor
de tensión diferente al indicado en su etiqueta
de especificaciones.
• Una instalación eléctrica defectuosa o tensión excesivo en
el tomacorriente pueden originar una descarga eléctrica.
• Conecte el cargador a tomacorrientes de fácil acceso para
poder desconectarlo rápidamente en caso de falla.
• No cargar la herramienta rotativa de manera correcta
puede dañar su batería, el cargador y la herramienta
rotativa.
• Cargue la herramienta rotativa a una temperatura
ambiente de 0 °C a 45 °C. La temperatura ideal es de 23 °C
• Asegúrese de que la ventilación sea adecuada al recargar
las baterías, pues en el proceso se liberan gases.
Botón
de bloqueo
Interruptor
Control de
velocidad
Indicador de
velocidad
Indicador
LED
de carga
de bateria
Luces
LED Cargador
Contacto del cable
de cargador
Discos abrasivos
de corte
Lijas de papel
redondo
Discos de
pulido
Llave
Piedra de
desbaste
7
Partes y accesorios
• Antes de utilizar la herramienta rotativa tome conocimiento de todas sus posibilidades de aplicación.
• La herramienta rotativa es una herramienta manual de alta velocidad, eficiente, versátil y altamente maniobrable. Está
diseñado para pulir, cortar, esmerilar, decapar, lijar, agujerar, hacer cavidades, cepillar, limpiar, etc.
• Cuenta con un potente y pequeño motor equipado con un variador de velocidad que permite operarlo de 5000 r/min
hasta 25000 r/min. Tiene un diseño confortable para el uso a mano y está diseñado para aceptar una gran variedad de
accesorios incluyendo discos abrasivos de corte de alta velocidad, puntas montadas de óxidos de silicio o carburo de
tungsteno, discos de alambre, puntas pulidoras, puntas para grabar, cortar, discos para lijar, brocas y otros.
• Estos accesorios vienen en distintas medidas y formas que permiten una amplia gama de trabajos.
ESPAÑOL
Boquilla
Tambor
porta-lijas
Eje porta-discos
Zanco para
discos de pulido
Puntas montadas de óxido de aluminio
Mordazas
2.5 mm
3 mm
Brocas de acero rápido
Fresas diamantadas
Tambores
de lija
C
A
b
c
D
E
B
a
1
2
3
4
8
Puesta en marcha
• Desconecte la herramienta rotativa.
1. Inserte una mordaza (A) del calibre adecuado para el
calibre del accesorio en el eje (B) de la herramienta rotativa.
2. Mantenga presionado el botón de bloqueo (C) mientras
rosca la boquilla (D) en el eje sin apretarla.
3. Inserte el accesorio (E) que vaya a utilizar en la mordaza.
Nunca trate de forzar la entrada del accesorio en la mordaza,
en lugar de esto cambie la mordaza por otra de calibre mayor.
4. Con el seguro del eje presionado utilice la llave para
apretar la boquilla y hacer que la mordaza
asegure el accesorio. Asegúrese de que el
accesorio no quede flojo en la mordaza ya
apretada, de ser así cambie la mordaza por otra de calibre
menor.
• Para retirar el accesorio presione el seguro del eje mientras
afloja la boquilla.
• No presione el seguro del eje cuando
la herramienta esté funcionando.
Instalación de accesorios
ADVERTENCIA
ESPAÑOL
Carga de batería de la herramienta rotativa
• Cargue la herramienta rotativa si se encuentra completamente
descargada; la muestra enciende y apaga rápidamente sin generar
alguna carga.
• Al utilizar una batería recargable Ion-Litio, la herramienta rotativa
se puede cargar en cualquier momento sin importar su nivel de
carga y sin pérdida de capacitancia.
• La herramienta rotativa tiene poca carga de batería al momento
de la compra. Debe recargarse antes del primer uso:
1. Inserte el contacto del cable del cargador (b) en la conexión
para carga de batería (c) de la herramienta rotativa.
2. Conecte la clavija del cargador en un tomacorriente de 127 V~.
El indicador LED (a) debe encender en color rojo, indicando que
la carga se ha iniciado. Cuando la batería se encuentre
completamente cargada, la luz roja cambiara a color verde.
3. Desconecte el cargador del suministro una vez concluida la
carga .
4. Retire el contacto del cable del cargador de la conexión para
carga de batería de la herramienta rotativa.
5. Permita que la herramienta rotativa se enfríe a temperatura
ambiente en caso que se caliente durante el proceso de carga. Ya
puede operar la herramienta rotativa.
Si la luz verde permanece encendida es señal de las siguientes
condiciones:
1. La temperatura de la bateria es menor a 0 °C o mayor a 45 °C;
espere a que la temperatura de la batería se encuentre en el
rango adecuado para poder cargar.
2. La batería o la herramienta esta defectuosa;debe recurrir a un
Centro de Servicio Autorizado .
This manual suits for next models
1
Table of contents
Languages:
Other Truper Power Tools manuals

Truper
Truper MAX-20L User manual

Truper
Truper ENNE-120 User manual

Truper
Truper CALA-A3 User manual

Truper
Truper AFB-118 User manual

Truper
Truper CALA-A4 User manual

Truper
Truper Pro PISCA-A User manual

Truper
Truper PISCA-A2 User manual

Truper
Truper PISCA-AM User manual

Truper
Truper LIMI-20A User manual

Truper
Truper CANT-6X User manual

Truper
Truper PISCA-A2 User manual

Truper
Truper CAU-50 User manual

Truper
Truper CALA-A2 User manual

Truper
Truper MOTO-A2 User manual

Truper
Truper CALA-NX6 User manual

Truper
Truper CALA-NX6 User manual

Truper
Truper TPN-711 User manual

Truper
Truper HIDR-1/2X24 User manual

Truper
Truper MULH-35A User manual

Truper
Truper TALI-20A User manual


