TSM 12” Meat Slicer User manual

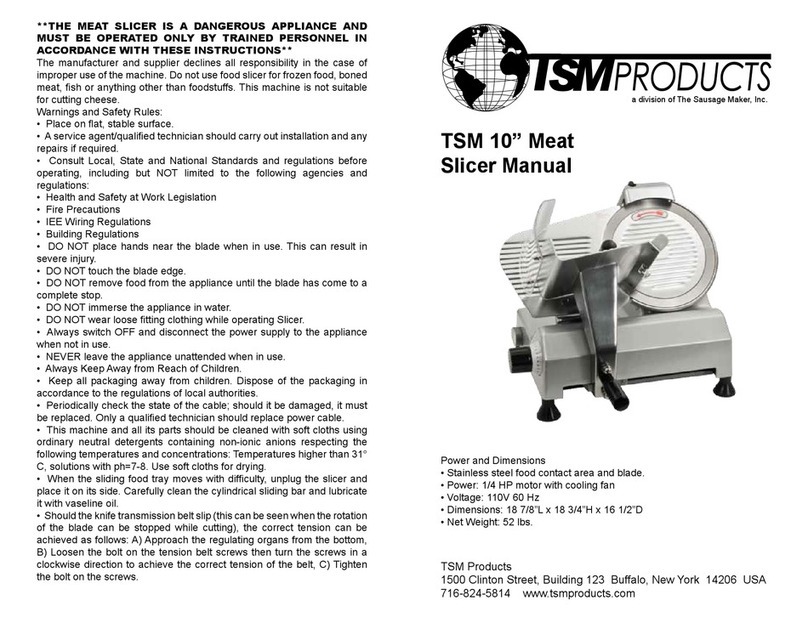
Power and Dimensions:
• Power: 1/2 HP Motor with Cooling Fan
• Voltage: 110V 60 Hz
• Dimensions: 23 1/2”L x 21”H x 17 3/4”D
• Net weight 63lbs.
TSM 12” Meat
Slicer Manual
a division of The Sausage Maker, Inc.
TSM Products
1500 Clinton Street, Building 123 Buffalo, New York 14206 USA
716-824-5814 www.tsmproducts.com
**THE MEAT SLICER IS A DANGEROUS APPLIANCE AND
MUST BE OPERATED ONLY BY TRAINED PERSONNEL IN
ACCORDANCE WITH THESE INSTRUCTIONS**
The manufacturer and supplier declines all responsibility in the case of
improper use of the machine. Do not use food slicer for frozen food, boned
meat, sh or anything other than foodstuffs. This machine is not suitable
for cutting cheese.
Warnings and Safety Rules:
• Place on at, stable surface.
• A service agent/qualied technician should carry out installation and any
repairs if required.
• Consult Local, State and National Standards and regulations before
operating, including but NOT limited to the following agencies and
regulations:
• Health and Safety at Work Legislation
• Fire Precautions
• IEE Wiring Regulations
• Building Regulations
• DO NOT place hands near the blade when in use. This can result in
severe injury.
• DO NOT touch the blade edge.
• DO NOT remove food from the appliance until the blade has come to a
complete stop.
• DO NOT immerse the appliance in water.
• DO NOT wear loose tting clothing while operating Slicer.
• Always switch OFF and disconnect the power supply to the appliance
when not in use.
• NEVER leave the appliance unattended when in use.
• Always Keep Away from Reach of Children.
• Keep all packaging away from children. Dispose of the packaging in
accordance to the regulations of local authorities.
• Periodically check the state of the cable; should it be damaged, it must
be replaced. Only a qualied technician should replace power cable.
• This machine and all its parts should be cleaned with soft cloths using
ordinary neutral detergents containing non-ionic anions respecting the
following temperatures and concentrations: Temperatures higher than 31°
C, solutions with ph=7-8. Use soft cloths for drying.
• When the sliding food tray moves with difculty, unplug the slicer and
place it on its side. Carefully clean the cylindrical sliding bar and lubricate
it with vaseline oil.
• Should the knife transmission belt slip (this can be seen when the rotation
of the blade can be stopped while cutting), the correct tension can be
achieved as follows: A) Approach the regulating organs from the bottom,
B) Loosen the bolt on the tension belt screws then turn the screws in a
clockwise direction to achieve the correct tension of the belt, C) Tighten
the bolt on the screws.

TSM 12" Meat Slicer Instructions
1. Food holder arm
2. Movable bulk
3. Blade
4. Knife guard
5. On/off switch
6. Graduated knob
7. Sliding carriage
8. Knife guard screw
9. Sharpener group
10. Data plate
Instructions for Use:
• Once unwrapped, place the slicer so that the on/off switch is in front of the operator.
• Regulate the thickness of the slice desired by turning the graduated knob.
• Switch on, thus activating the blade.
• Place the food to be sliced on the sliding carriage (pushing against the food holder arm) facing
the blade, making sure that the food is resting against the movable bulkhead.
TSM 10" Meat Slicer Instructions
1. Food holder arm
2. Movable bulk
3. Blade
4. Knife guard
5. On/off switch
6. Graduated knob
7. Sliding carriage
8. Knife guard screw
9. Sharpener group
10. Data plate
Instructions for Use:
• Once unwrapped, place the slicer so that the on/off switch is in front of the operator.
• Regulate the thickness of the slice desired by turning the graduated knob.
• Switch on, thus activating the blade.
• Place the food to be sliced on the sliding carriage (pushing against the food holder arm) facing
Instructions for Use:
32
Blade Sharpening:
*Read ALL Warnings and Safety Rules Before Operating
Meat Slicer*
Instructions for Use:
• Once unwrapped Clean Slicer thoroughly with soft cloths and neutral
detergents.
• Place the slicer so that the ON/OFF Switch is in front of the operator.
• Regulate the thickness of the slice desired by turning the Graduated
Knob.
• Be sure to plug into a Grounded Electrical Outlet.
• Switch ON, thus activating the blade.
• Let Slicer run for 1-2 minutes and see if blade is aligned with the Mov-
able Bulk and that the blade is turning Counter-Clockwise. If either is not
ideal, adjust blade, call a technician or call The SausageMaker, Inc. for
further instruction.
• Place the food to be sliced on the sliding carriage (pushing against the
food holder arm) facing the blade, making sure that the food is resting
against the Movable Bulkhead.
• After use, turn the Graduated Knob back to position “0”. The food grip
should not be removed unless the shape and size of the food does not
allow its use. If the sharpener is not mounted, proceed as follows:
• Place the sharpener in its support.
• Tighten the safety screw (15)
• Block the knob (12)
1. Food Holder Arm
2. Movable Bulk
3. Blade
4. Knife Guard
5. ON/OFF Switch
6. Graduated Knob
7. Sliding Carriage
8. Knife Guard Screw
9. Sharpener Group
10. Data Plate
The blade is highly resistant, thus normally needs to be sharpened about
once a year if used regularly.
• Unplug
• Check that the movable bulkhead is closed (graduated knob in position
“0”)
• Carefully clean the part of the blade to be sharpened
• Reinsert the plug
• Loosen the locking knob (12) on the sharpener group
• Raise the sharpener group, turning it by 180° so that both grinding
wheels are in working position. See Fig. 2
• Lower the sharpener group until it locks
• Secure the group by turning the locking knob (12)
• Press the on/off switch (1) and press button (13)
• Let the blade turn for about 1-2 minutes. When the blade is still, check
to see if any burr has formed on the edge.
• After having veried the presence of burr, switch on and gently press
button (13) for about 3 seconds to remove the burr produced during
sharpening.
• Turn the graduated knob (6) back to position “0”
• After sharpening, move the sharpener group back to its original
position, clean the edge of the blade and the grinding wheels with
alcohol.
• After several sharpening operations, the grinding wheels should be
cleaned with a brush to remove any traces of alcohol.
Other TSM Kitchen Appliance manuals
