manuals.online logo
Brands
  1. Home
  2. •
  3. Brands
  4. •
  5. Tsume
  6. •
  7. Toy
  8. •
  9. Tsume Shanks HQS User manual

Tsume Shanks HQS User manual

INSTRUCTIONS DE MONTAGE
ASSEMBLY INSTRUCTIONS
©Eiichiro Oda/Shueisha, Toei Animation
DE PRÉFÉRENCE, METTEZ DES GANTS EN LATEX
POUR MANIPULER VOTRE STATUE.
WE RECOMMEND TO PUT LATEX GLOVES ON
TO HANDLE YOUR STATUE.
NE MONTEZ PAS VOTRE STATUE DE COLLECTION
IMMÉDIATEMENT APRÈS L’AVOIR REÇUE.
Laissez le temps à la résine de se réchauffer à température
ambiante pendant 24 heures an d’éviter tout risque de casse.
PLEASE DO NOT ASSEMBLE YOUR STATUE
RIGHT AFTER YOU HAVE RECEIVED IT.
The resin material needs time to warm up at room
temperature a daytime to avoid risks of breaking.
2
1
Insérez les trois plots de la barrière dans les emplacements prévus sur la base.
Insert the three keys of the guardrail into the slots provided on the base.
Insérez le mât dans l’emplacement prévu sur la base.
Insert the mast into the slot on the base.
Insérez la structure en bois bleu clair sur le coté droit de la base grâce au plot.
Insert the light blue wooden structure on the right side of the base with the key.
Insérez la structure en bois bleu clair sur le coté gauche de la base grâce au plot.
Insert the light blue wooden structure on the left side of the base with the key.
3
4
Voici les cordages supérieurs à installer sur le mât. Veuillez prêter attention aux numéros ci-dessus.
Here are the top ropes to install on the mast. Please pay attention to the numbers above.
Sur la partie gauche de la base : Insérez délicatement chaque anneau du cordage numéro 1 sur le haut du
mât dans les emplacements prévus. (1)
On the left side of the base: Insert each ring of the rope number 1 carefully on the top of the mast into the
slots provided.(1)
5
2
1
6
1
12
3
4
1
2
3
4
5
6
7
8
Voici les cordages inférieurs à installer sur la base. Veuillez prêter attention aux numéros ci-dessus.
Here are the lower ropes to install on the base. Please pay attention to the numbers above.
8
2
5
6
78
7
Sur la partie droite de la base : Insérez délicatement chaque anneau du cordage numéro 2 sur le haut du
mât dans les emplacements prévus. (1)
On the right side of the base: Insert each ring of the rope number 2 carefully on the top of the mast into the
slots provided.(1)
Sur la partie droite de la base : insérez chaque petit cordage grâce aux numéros correspondants. Veuillez préter attention
aux numéros inscrits sur les plots. Insérer d'abord le plot du petit cordage dans la structure en bois (A) puis l'autre extrémité
dans le cordage supérieur (B)
On the right side of the base : insert each small rope with the corresponding numbers. Please pay attention to the numbers
on the keys. First insert the small rope into the wooden structure (A) and then the other end into the upper rope (B)
Sur la partie gauche de la base : insérez chaque petit cordage grâce aux numéros correspondants. Veuillez préter attention
aux numéros inscrits sur les plots. Insérer d'abord le plot du petit cordage dans la structure en bois (A) puis l'autre extrémité
dans le cordage supérieur (B)
On the left side of the base : insert each small rope with the corresponding numbers. Please pay attention to the numbers
on the keys. First insert the small rope into the wooden structure (A) and then the other end into the upper rope (B)
9
1
1234
1
4
3
2
A
B
10
8
8
7
6
5
8
5
6
7
A
B
Insérez le bras droit du personnage dans son corps. Placez ensuite le personnage dans
l’emplacement prévu à droite sur la base. Insert the character's right arm into his body.
Insert the character into the slot on the right side of the base.
Insérez la jarre ronde dans l’emplacement à gauche prévu sur la base.
Insert the round jar into the left slot on the base.
11
3
3
3
3
3
3
3
12 13
Insérez le plot du bras gauche dans le corps du
personnage tout en coinçant la corde en dessous.
Insert the left arm key into the character's body while
trapping the rope underneath.
Placez la corde enroulée devant le personnage.
Place the rope in front of the character.
Insérez le personnage de gauche dans la base à l’emplacement prévu.
Insert the left character into the base into the slot provided.
16
3
3
3
3
3
3
3
14
3
3
3
3
3
3
3
1
15
15
17
18
Insérez la tête du personnage de gauche sur son corps ainsi que ses bras.
Insert the head of the left character on his body and insert his arms too.
Insérez le corps de Shanks grâce aux les plots sous ses pieds, dans les emplacements sur la base.
Insert Shanks' body with the keys under his feet, into the slots on the base.
13
19
20
Insérez la tête de Shanks sur son corps.
Insert Shank’s head on his body.
Insérez la partie avant du sabre de Shanks dans l’emplacement prévu au niveau de sa taille
Insert the front part of Shanks' sword into the slot on his waist.
21
22
Insérez la partie arrière du sabre dans la partie avant de celui-ci grâce au plot.
Insert the rear part of the sword into the front part of the sword with the key.
Insérez le bras droit de Shanks tenant la corde dans l’emplacement prévu sur son corps.
Insert Shanks' right arm holding the rope into the slot on his body.
23
24
Insérez l’extremité de la corde de la jarre dans le creux arrière de la main droite de Shanks.
Insert the end of the jar rope in the palm of Shanks' right hand.
Terminez en insérant chaque plot de la cape de Shanks sur ses épaules dans les emplacements
prévus. Finish by inserting each key of Shanks' cape over his shoulders into the slots provided.

Other Tsume Toy manuals

Tsume BLEACH User manual

Tsume

Tsume BLEACH User manual

Tsume DRAGON BALL Z HQS GOKU KAIO-KEN User manual

Tsume

Tsume DRAGON BALL Z HQS GOKU KAIO-KEN User manual

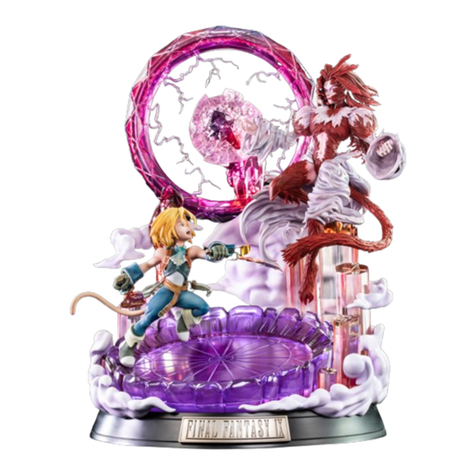
Tsume HQS Final Fantasy IX Battle of Destiny User manual

Tsume

Tsume HQS Final Fantasy IX Battle of Destiny User manual

Popular Toy manuals by other brands

marklin 37028 user manual

marklin

marklin 37028 user manual

Mattel HotWheels Disney STAR WARS THRONE ROOM... instructions

Mattel

Mattel HotWheels Disney STAR WARS THRONE ROOM... instructions

dji T20 user manual

dji

dji T20 user manual

BigPlanes F6F Hellcat instruction manual

BigPlanes

BigPlanes F6F Hellcat instruction manual

REVELL Corsair F4U-4 Assembly manual

REVELL

REVELL Corsair F4U-4 Assembly manual

LeapFrog Yum-2-3 Toaster Parents' guide

LeapFrog

LeapFrog Yum-2-3 Toaster Parents' guide

Faller HISTORICAL TOWN GATE manual

Faller

Faller HISTORICAL TOWN GATE manual

roco Camera Locomotive manual

roco

roco Camera Locomotive manual

Eduard M-26 quick start guide

Eduard

Eduard M-26 quick start guide

Trix KOF II manual

Trix

Trix KOF II manual

REVELL Kick Flip user manual

REVELL

REVELL Kick Flip user manual

Hubsan H101 instruction manual

Hubsan

Hubsan H101 instruction manual

marklin 22450 Instruction

marklin

marklin 22450 Instruction

Betzold 89211 manual

Betzold

Betzold 89211 manual

Fisher-Price STARSTATION L8145 instruction sheet

Fisher-Price

Fisher-Price STARSTATION L8145 instruction sheet

project mc2 McKeyla's Light Bulb quick start guide

project mc2

project mc2 McKeyla's Light Bulb quick start guide

Lionel Conventional 2-6-0 Mogul Steam Locomotive owner's manual

Lionel

Lionel Conventional 2-6-0 Mogul Steam Locomotive owner's manual

Rail King READY-TO-RUN ES44AC Operation manual

Rail King

Rail King READY-TO-RUN ES44AC Operation manual

manuals.online logo
manuals.online logoBrands
  • About & Mission
  • Contact us
  • Privacy Policy
  • Terms and Conditions

Copyright 2025 Manuals.Online. All Rights Reserved.