manuals.online logo
Brands
  1. Home
  2. •
  3. Brands
  4. •
  5. TT electronics
  6. •
  7. Measuring Instrument
  8. •
  9. TT electronics S-2CONNECT User manual

TT electronics S-2CONNECT User manual

S-2CONNECT
Pro Tracking and Monitoring Kit
LTE Cat M1 / NB-IoT
Getting started
Contents
3 Getting Started
9 Quick-Start Guide S-2CONNECT Hub
13 Quick-Start Guide S-2CONNECT Sense
Introduction
Thank you for choosing the S-2CONNECT Pro Tracking and Monitoring Kit by TT Electronics.
Please read this quick start guide thoroughly before bringing your devices into service. To access
the user manuals in full visit www.s-2connect.com
What is included in the kit?
The S-2CONNECT Pro Tracking and Monitoring Kit contains:
• 1 S-2CONNECT Hub
• 1 S-2CONNECT Sense with battery and hatch key
• 1 Power Supply with interchangeable plugs for global use
Also includes:
• 3 months SIM subscription for Hub communication
• 3 months access to the S-2CONNECT portal
Register your devices
Complete the registration process to gain access to the S-2CONNECT system.
https://registration.s-2connect.com/
Getting Started
3
The System
S-2CONNECT is an end-to-end IoT
framework that delivers hardware,
connectivity, infrastructure
and user experience solutions
for seamlessly and securely
connecting products and systems.
S-2CONNECT Hub
S-2CONNECT Hub is the central system hardware. It can operate
as a stand-alone device as it includes integrated sensors and
accelerometer. It can also simultaneously operate as a central
connecting point for S-2CONNECT Sense devices.
The S-2CONNECT Hub features positioning capabilities, sending
both sensor and location data to the S-2CONNECT backend
system.
One Hub can accommodate up to eight Sense devices.
You can access technical data for S-2CONNECT at
www.s-2connect.com
S-2CONNECT Sense
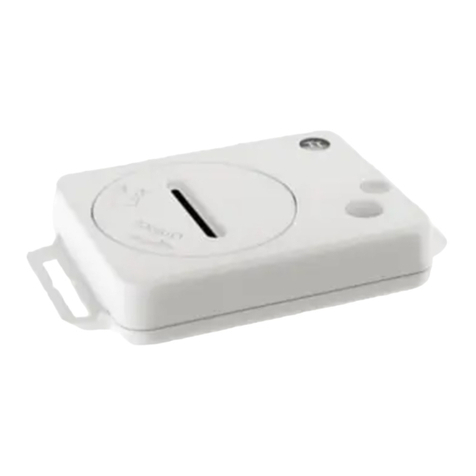
S-2CONNECT Sense is a sensor device that connects into the
system. It includes temperature, humidity and light sensors as well
as an accelerometer.
The Sense communicates with the S-2CONNECT Hub within
the range of approximately 10 metres. It can also operate
independently.
If the Sense is moved away from the Hub it will continue to operate
and collect data. When the Sense returns within radio range
from the Hub, it will transfer all collected data via the Hub to the
backend system.
4 5
HUB SENSE
S-2CONNECT
ENGINE
DATABASE
DASHBOARD CONFIGURATOR
BACKEND
FRONTEND
Connectivity
The Hub communicates with the backend system via a cellular network. It uses LTE/NB-IoT/CatM, with
2G-fallback for global coverage.
A mobile operator subscription is required. The Hub includes a soldered in SIM-card within the device and it
cannot be removed or replaced.
Your Pro Tracking and Monitoring Kit includes a mobile operator subscription provided by Telenor Connexion.
This subscription is intended for use within Region 1. Refer to the Roaming List at www.s-2connect.com
Your subscription includes a predened level of data usage adequate for 3 months data collection, based on
Region 1 Roaming.
If your device is used outside Region 1 and/or your device over-consumes data you may be charged.
Your subscription details will be provided upon Registration.
Your subscription can be extended if required. Contact us for further details.
Backend
The Backend handles all communication with the Hub. It receives data and stores it in the database.
Frontend
The S-2CONNECT system features two frontend user interfaces:
 • Portal with Dashboards
 • Congurator
Portal The portal is the user interface for viewing all data collected from the Hub and Sense. It features options for
dashboard user experience.
Congurator The Congurator is the user interface for setting up and conguring the Hub and Sense. The devices
are precongured to standard requirements.
Getting started
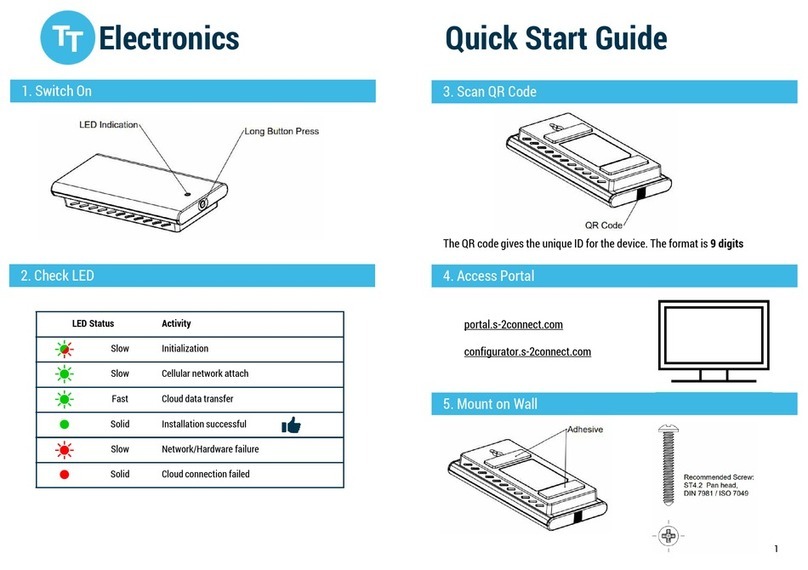
Following registration and receipt of your access credentials to the S-2CONNECT system, log in to the portal and
congurator to see the Hub device.
The Hub will at this point be in contact with the backend system. You are now ready to view your collected data in
the portal and recongure your devices from the congurator.
The Sense provided in your kit is ready to use with the Hub. In the congurator you can add additional Sense
devices to the Hub.
Access to the user interfaces:
https://portal.s-2connect.com
https://congurator.s-2connect.com
The Portal
Setting up your prole Click on the Setup icon which is positioned in the lower left corner of the
dashboard screen to edit your prole and change your password.
Dashboard options Click on the Dashboard Menu icon shown below which is positioned on the upper left
side of the screen to view dashboard options.
6 7
Support
For support with the S-2CONNECT system and devices visit www.s-2connect.com/support
or email [email protected]
Quick Start Guide
S-2CONNECT Hub S19A01
This is the quick start manual for S-2CONNECT Hub.
For the full user guide visit: www.s-2connect.com
The Congurator
S-2CONNECT devices are provided with a default conguration to enable fast set up. For conguration options
refer to the Conguration Guide available at www.s-2connect.com
S-2CONNECT devices use cellular network for communication. Changing conguration parameters may impact
the volume of data that is sent through the cellular network, and thereby your SIM subscription. Changing
conguration parameters may also affect the battery operation time.
8 9
Introduction
Please read the full user guide
found on the website thoroughly
before bringing this device into
service.
Installation
1. Make sure there is no damage to the
equipment.
2. Choose your suitable installation location.
Consider the environmental requirements
and be advised that this device contains
antennas that could be affected from
other equipment within close range.
3. Connect the power supply
4. Check the LED’s to verify proper operation
This symbol on the device
or the package means
that all electronic and
electric equipment should
not be mixed with general
household waste.
Visit www.s-2connect.com/
documentation
Switching the device on
This device switches on automatically following
charging of the battery.
The battery is fully charged when the charging LED
switches off. It may take up to 9 hours to charge a fully
discharged battery.
USB/Power
connector
Using the device
This device is intended for remote operation.
Log in to your user interface to interact with the
device.
Battery operation
This device is primarily battery operated, but
the external power supply can be continuously
connected. The battery operation time can be
up to 12 months, dependent on conguration,
surrounding temperature and other parameters.
LED functionality
Cellular
network GNSS Charging Low
battery
Humidity and Temperature sensor
LED Colour Function
GNSS Yellow Flashing = Satellite search
Cellular
Network
Orange Slow flash 20% ON, 80% OFF = Network
Searching
Slow flash 80% ON, 20% OFF = Idle mode
Fast flash 50% ON, 50% OFF = Data
transfer
Charging Green Solid = Charging
Low battery Red Flashing = Low battery charge immediately
Radio frequencies
Radio
technology
Frequency
band
Maximum radio-
frequency power
LT E 1,2,3,4,5,8,12,13,
18,19,20,25,28,39 24 dBm
2G 2,3,5,8 33 dBm
GNSS GPS, GLONASS,
QZSS
Bluetooth 2.4 GHz BLE
S-2CONNECT Hub must be used in compliance with
applicable and international regulations that restrict
utilisation of radio communication modules. Refer
to the full S-2CONNECT Hub user guide for more
information which can be downloaded from
www.s-2connect.com/documentation
10 11
To maintain battery life all LEDs remain inactive unless communicating a function, as outlined in the table below.
Quick Start Guide
S-2CONNECT Sense S19P01
This is the quick start guide for S-2CONNECT Sense.
For the full user guide visit www.s-2connect.com
Declaration of Conformity
TT Electronics hereby declares that S-2CONNECT
Hub complies with the essential requirements of EU
directive RED2014/53/EU
Full details are available at:
www.s-2connect.com/documentation
FCC Compliance
S-2CONNECT Hub has been tested to full the FCC
requirements. Test reports are available upon request.
12 13
Introduction
Please read the full user guide
available on the website
before bringing this device
into service.
This symbol on the device
or the package means
that all electronic and
electric equipment should
not be mixed with general
household waste.
Visit www.s-2connect.com/
documentation
Installation
1. Make sure there is no damage to the
equipment.
2. Choose your suitable installation location.
Consider the environmental requirements
and be advised that this device contains
antennas that could be affected from other
equipment within close range.
3. Remove the battery isolation tab. See below
for instructions.
4. Check the LEDs to verify proper operation.
1. Use the battery hatch
key provided to open or
close the battery hatch.
2. To activate the battery,
lift the battery hatch
and remove the battery
isolation tab.
3. When replacing the
battery, pay attention to the
plus and minus indicators.
4. Close the battery hatch
carefully using the battery
hatch key. Ensure the hatch
is aligned with the indicator
as shown.
Activating and replacing the battery
Switching the
device on
This device switches on
automatically following insertion
of the battery.
Using the device
This device is intended for strictly
remote operation. Log in to your user
interface to interact with the device.
LED functionality
The LED in S-2CONNECT Sense
operates as follows:
• Long Blink at battery insertion
• Short Blink when communicating
with S-2CONNECT Hub
Radio frequencies
Radio technology Bluetooth
Frequency band 2.4 GHz BLE
S-2CONNECT
S-2CONNECT Sense must
be used in compliance
with applicable and
international regulations
that restrict utilisation
of radio communication
modules. Refer to the full
S-2CONNECT Sense user
guide for more information.
The full user guide can
be downloaded from
www.s-2connect.com/
documentation
Declaration of Conformity
TT Electronics hereby declares that S-2CONNECT Sense complies
with the essential requirements of the EU directive RED2014/53/EU
Full details available at: www.s-2connect.com/documentation
FCC Compliance
S-2CONNECT Sense has been tested to full FCC requirements. Test
reports are available upon request.
14 15
© TT Electronics 2020. All rights reserved

Other TT electronics Measuring Instrument manuals

TT electronics SGUV MK.2 User manual

TT electronics

TT electronics SGUV MK.2 User manual

TT electronics S19P01 User manual

TT electronics

TT electronics S19P01 User manual

TT electronics S-2CONNECT Pro1 User manual

TT electronics

TT electronics S-2CONNECT Pro1 User manual

Popular Measuring Instrument manuals by other brands

geo-FENNEL FLP 100 user manual

geo-FENNEL

geo-FENNEL FLP 100 user manual

Wohler HF 300 operating manual

Wohler

Wohler HF 300 operating manual

OHAUS ST20D instruction manual

OHAUS

OHAUS ST20D instruction manual

Shot-Scope PRO L1 user manual

Shot-Scope

Shot-Scope PRO L1 user manual

LaserLiner 4K5 PN 150 manual

LaserLiner

LaserLiner 4K5 PN 150 manual

Addi-Data MSX-E3711 Quick installation

Addi-Data

Addi-Data MSX-E3711 Quick installation

Elma Instruments 593R manual

Elma Instruments

Elma Instruments 593R manual

Total Control Systems 700-20 Engineering manual

Total Control Systems

Total Control Systems 700-20 Engineering manual

CAI 600 Series user manual

CAI

CAI 600 Series user manual

Gill Instruments WindObserver II user manual

Gill Instruments

Gill Instruments WindObserver II user manual

Industrial Temperature Sensors Series P400 operating instructions

Industrial Temperature Sensors

Industrial Temperature Sensors Series P400 operating instructions

Siemens Sitrans F Series quick start

Siemens

Siemens Sitrans F Series quick start

Televes RG3000 quick start guide

Televes

Televes RG3000 quick start guide

Rohde & Schwarz FSQ series quick start guide

Rohde & Schwarz

Rohde & Schwarz FSQ series quick start guide

Megger DCM310 user guide

Megger

Megger DCM310 user guide

KERN Optics ORA 2SA operating manual

KERN Optics

KERN Optics ORA 2SA operating manual

Symmetricom TimeAnalyzer 7500 user guide

Symmetricom

Symmetricom TimeAnalyzer 7500 user guide

Bender NGRM500 manual

Bender

Bender NGRM500 manual

manuals.online logo
manuals.online logoBrands
  • About & Mission
  • Contact us
  • Privacy Policy
  • Terms and Conditions

Copyright 2025 Manuals.Online. All Rights Reserved.