5
How do the dowels and Minifix system work?
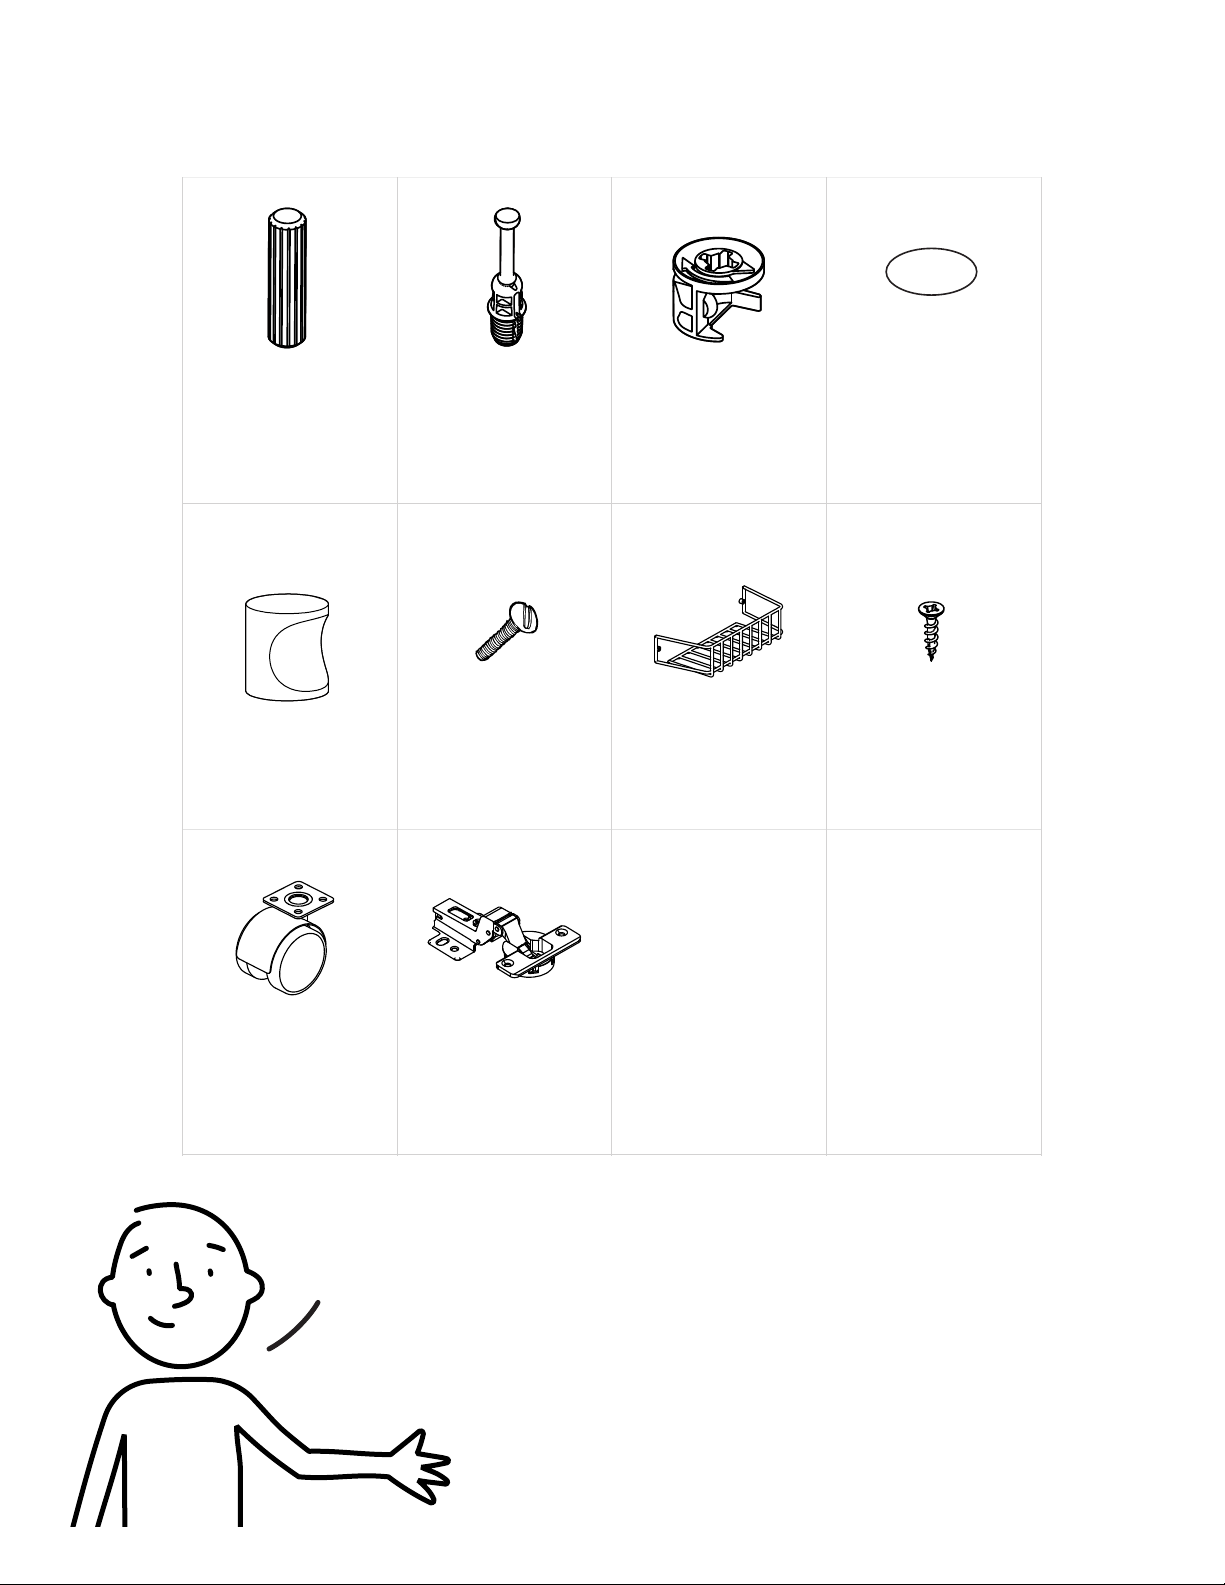
Wood dowels
this is so important too!
They are little wooden cylinders.
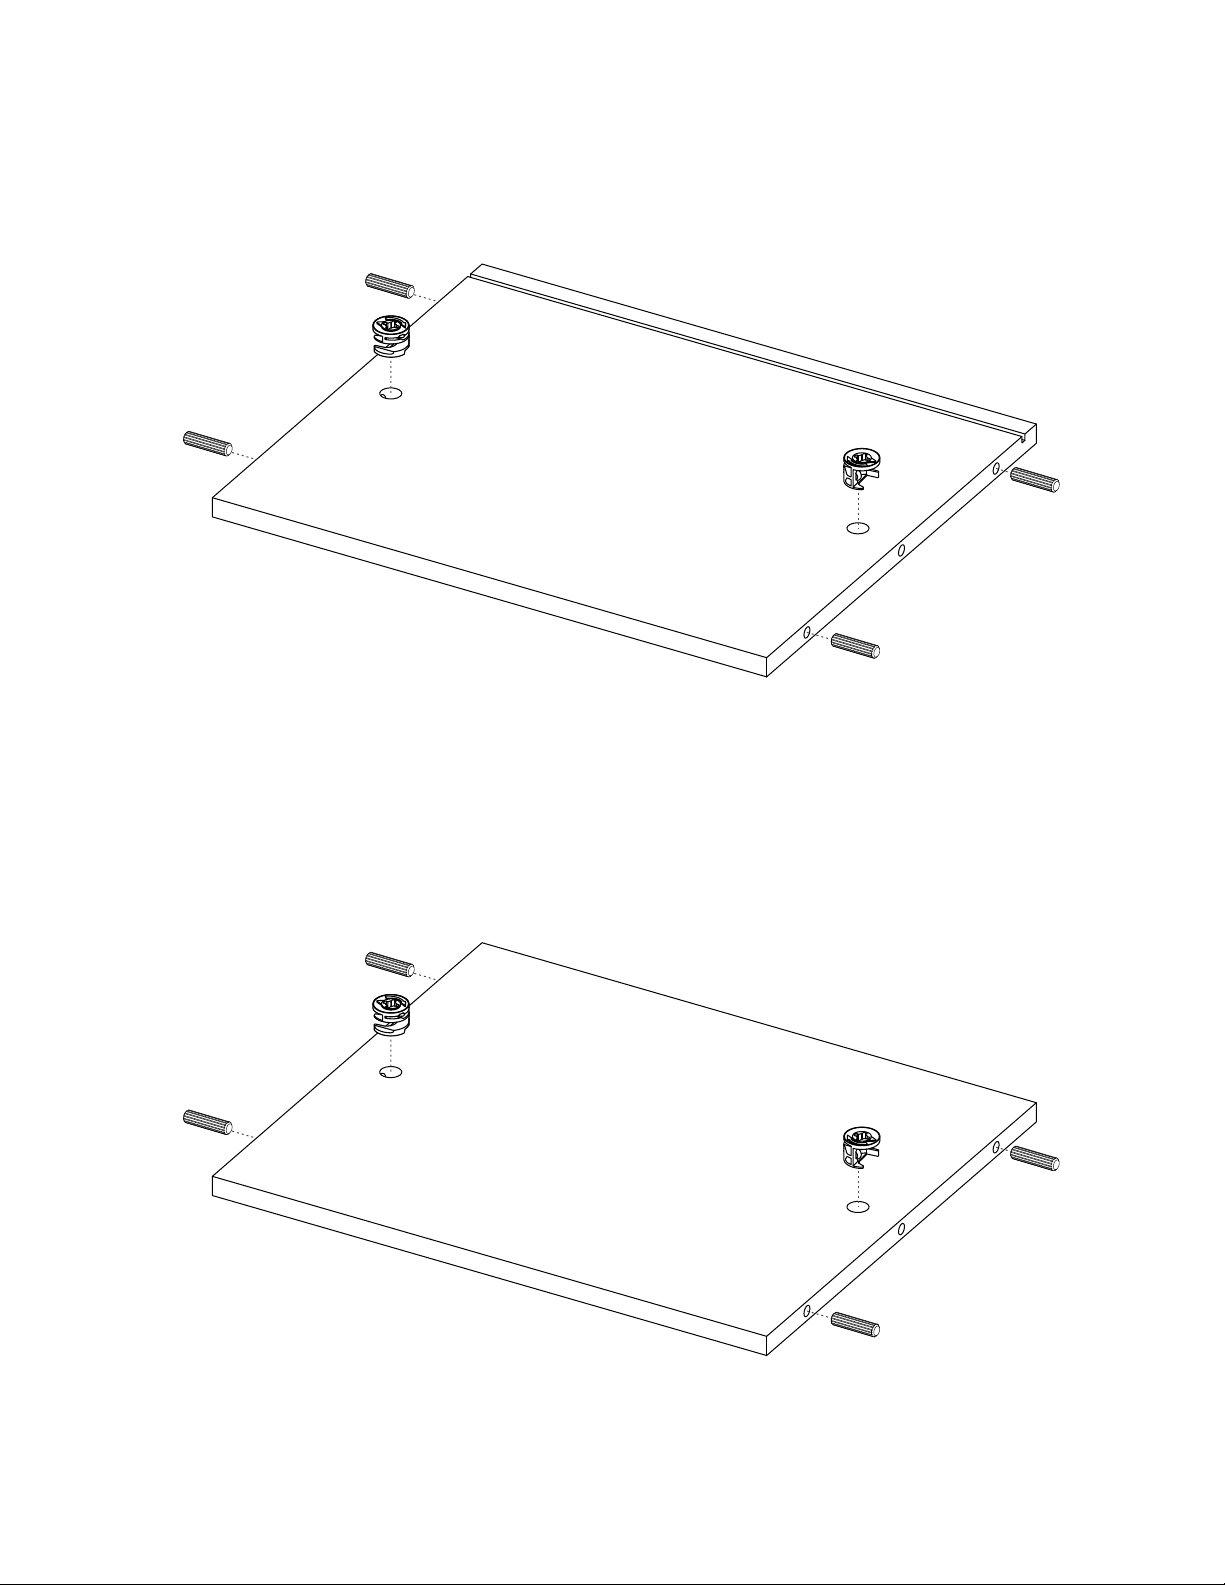
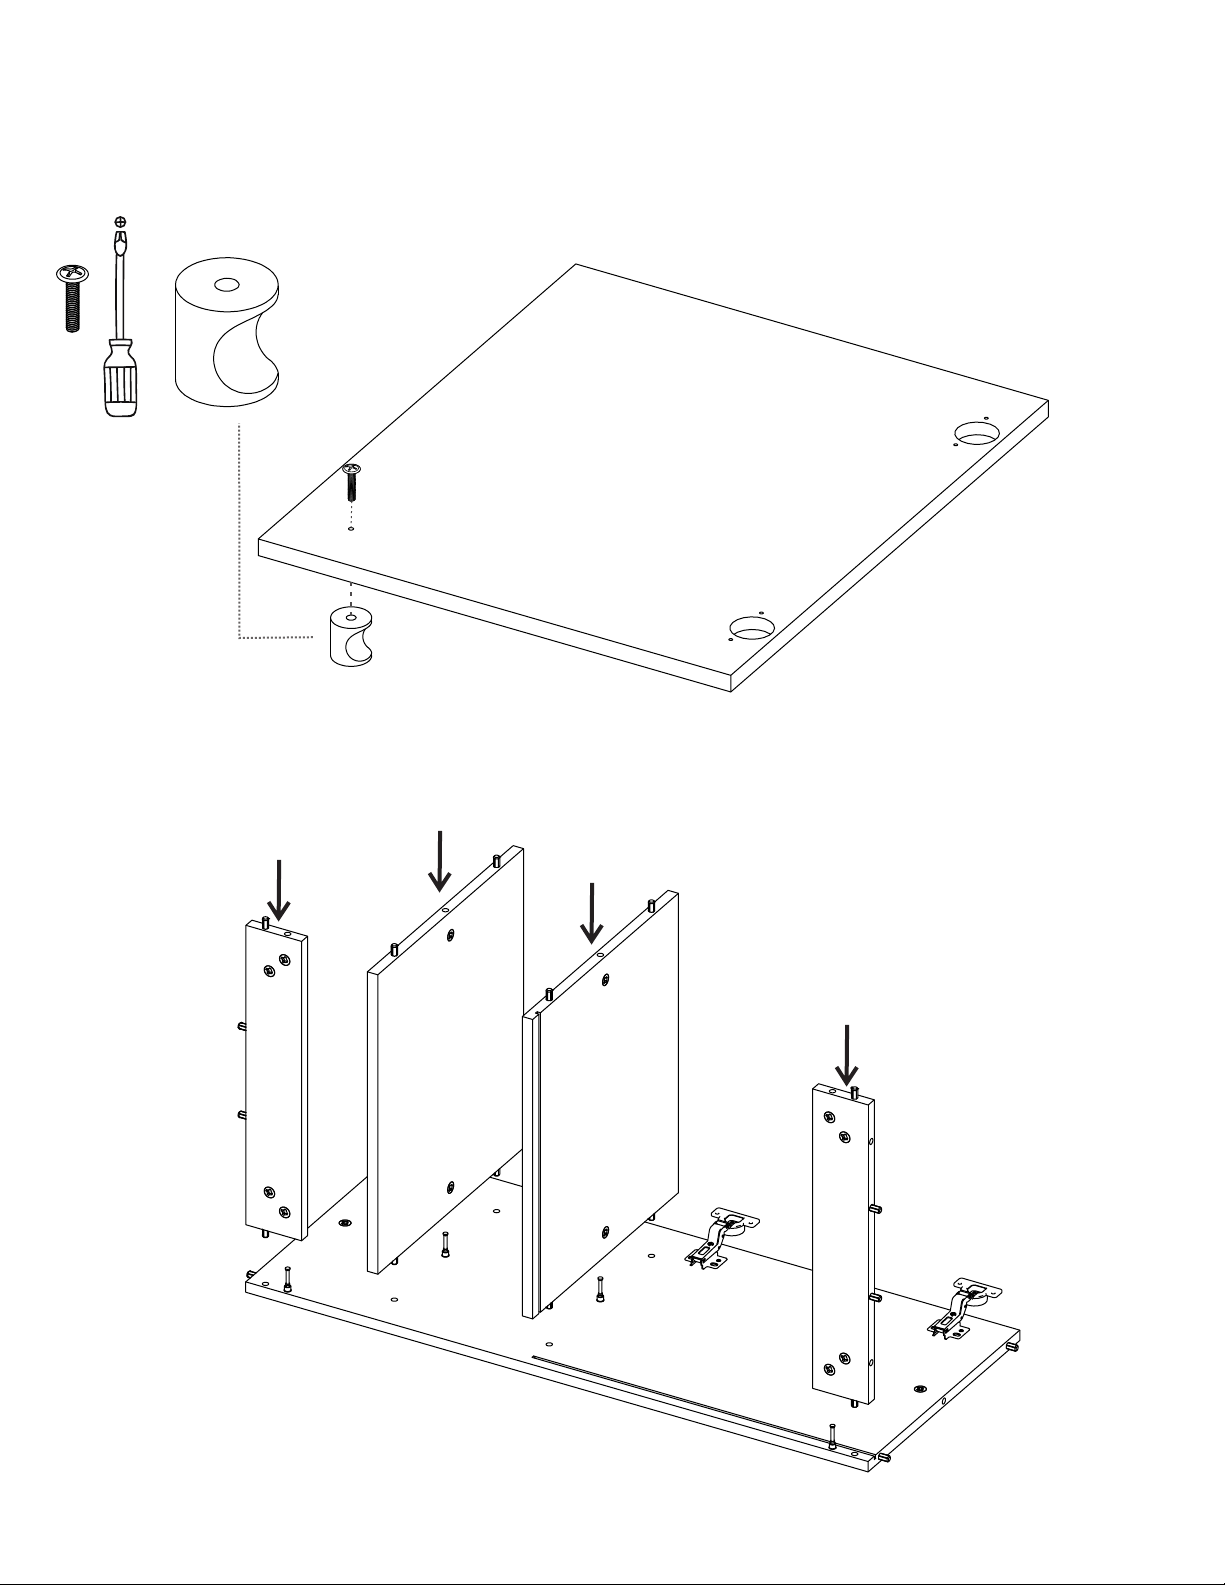
1Put in the dowel
inside the indicated
hole and softly hit it
until it’s fully inside.
Everytime you’re using one of these
connectors during the assembly, you
should follow these same steps.
2When joining two
panels together, don’t
forget to gently hit
the panels to adjust
the joint.
Minifix system
It’s a joint compound of two parts: a spreading bolt and a Minifix cam.
2You should insert these cams
with the little arrow pointing
towards the drilling on the
panel’s edge (shown on the
left).
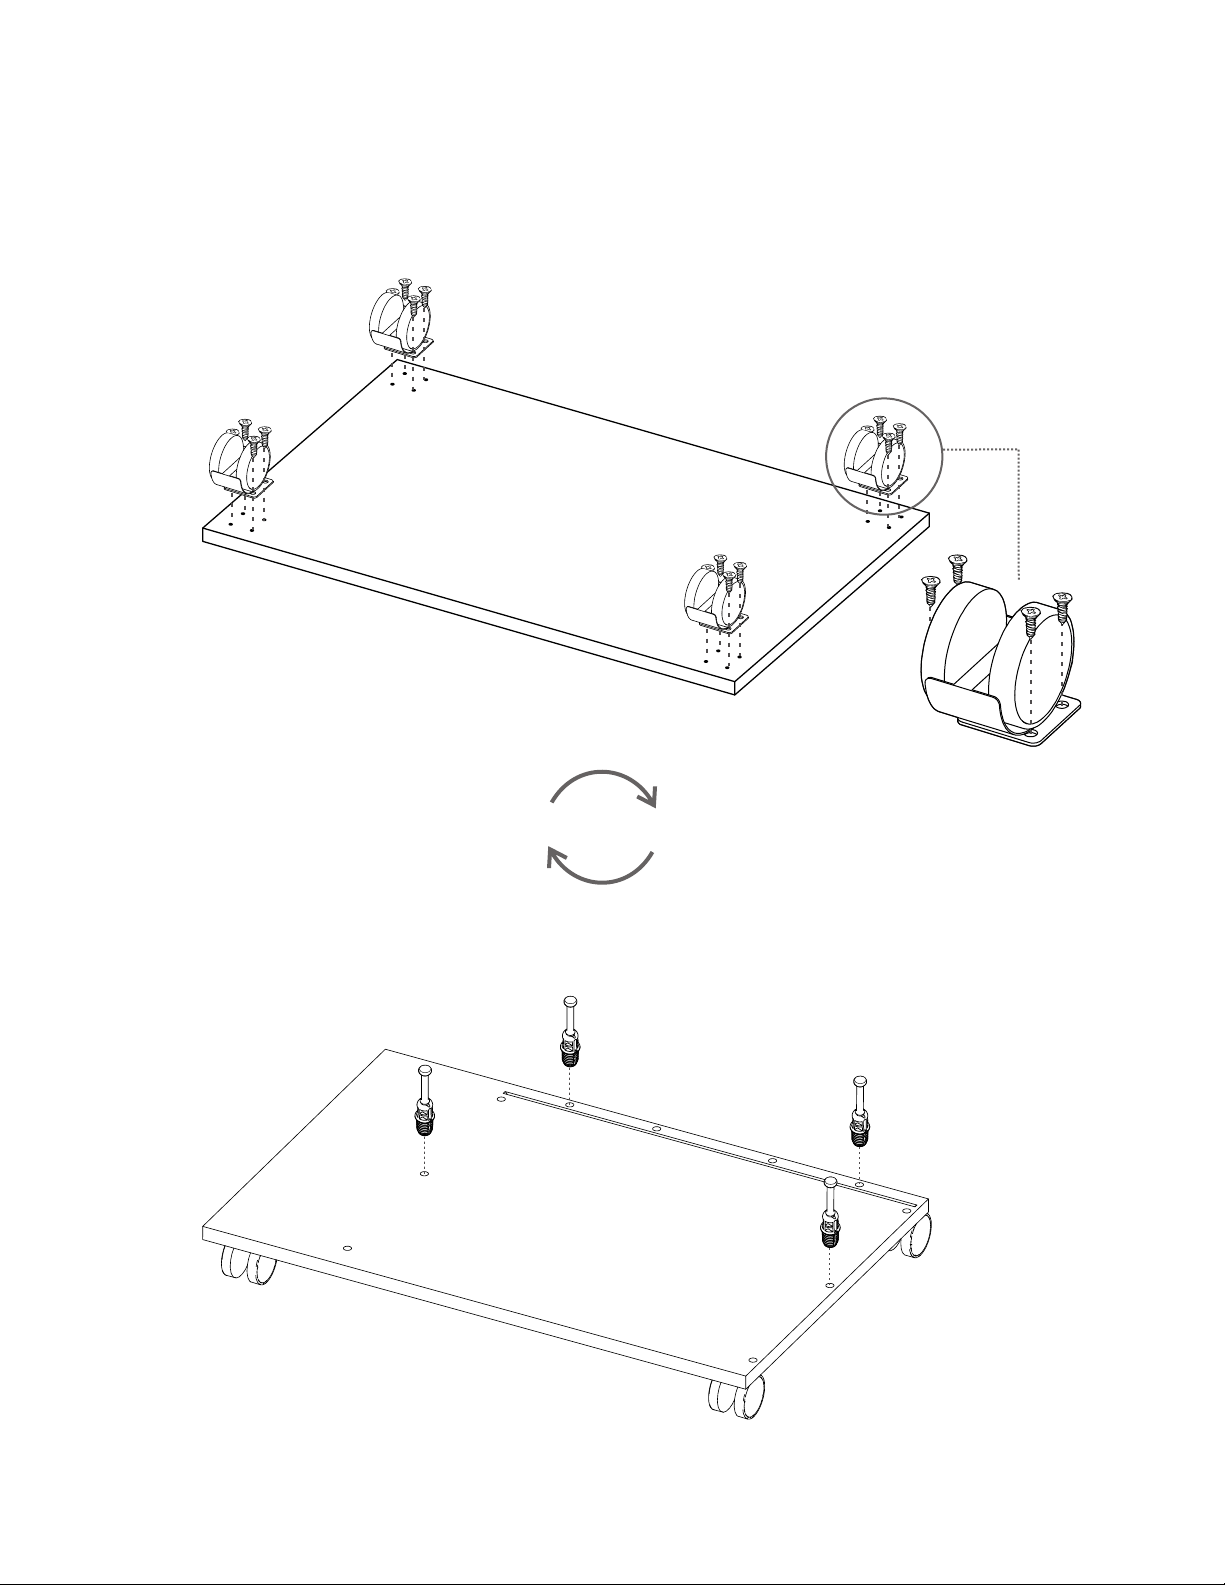
3This is a spreading bolt.
You should put it with the
black plastic part facing down.
4After joining two panels
together you should turn the
cams 180° with a phillips
head screwdriver to adjust
and secure the joint.
1This is a Minifix cam.
It has a little arrow on its
upper surface.
small arrow