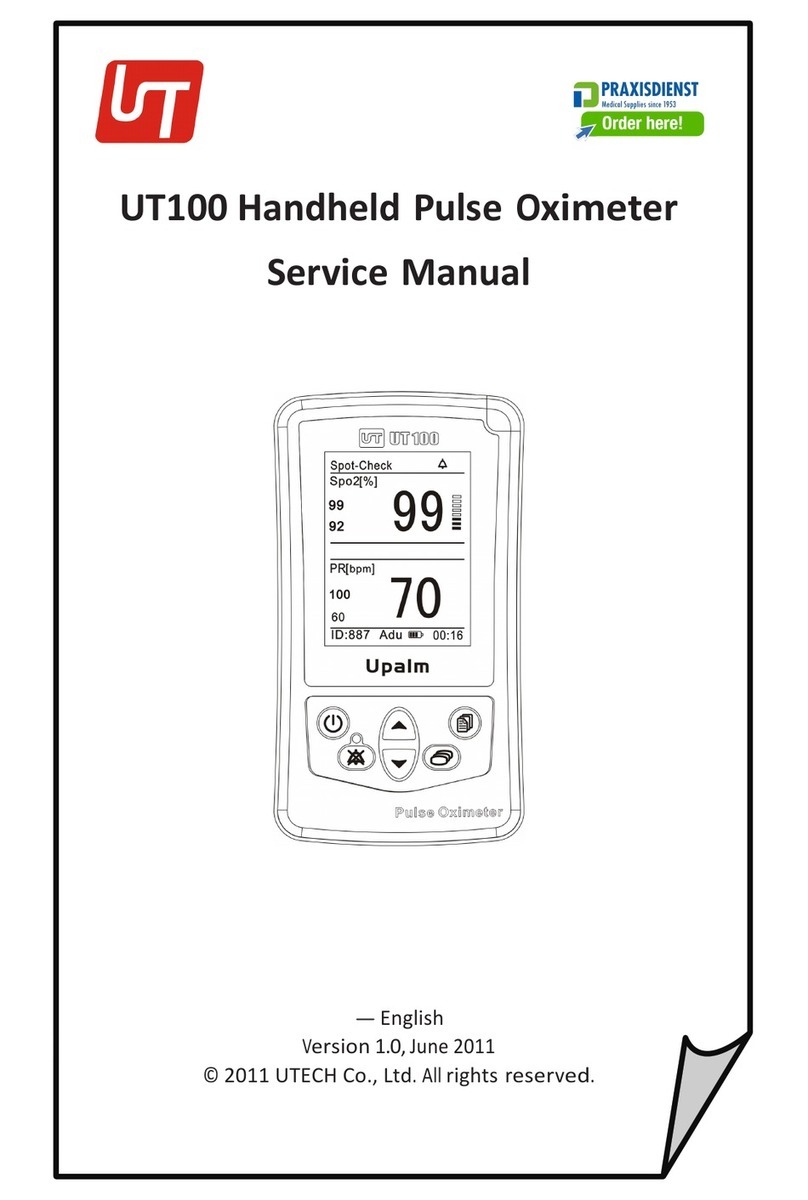
U-Tech UT100 User manual

UT100 Handheld Pulse
O
ximet
er
Operation Manual
-
English
V
ersion
1.0,
January 2010
©
2010 UTECH Co., Ltd
.
All
rights
r
eser
v
ed
.


Table of Contents
UT100 Handheld Pulse Oximeter Operation Manual I
Table of Contents
Warranty and Service Information .......................................... III
Proprietary Notice .............................................................................. III
Limited Warranty ............................................................................... III
Service Support .................................................................................. III
Chapter 1: Introduction ......................................................... 1-1
1.1 About this Manual ...................................................................... 1-1
1.2 Definition of Symbols ................................................................. 1-1
1.3 Warning Information .................................................................. 1-1
Chapter 2: Intended Use and General Information ................. 2-1
2.1 Intended Use .............................................................................. 2-1
2.2 Monitor Features ........................................................................ 2-1
2.3 Theory of Operation ................................................................... 2-2
Chapter 3: Controls and Features .......................................... 3-1
3.1 Monitor Front Panel ................................................................... 3-1
3.2 Monitor Operating keys ............................................................. 3-3
Chapter 4: Operating Instructions ......................................... 4-1
4.1 Unpacking the Monitor .............................................................. 4-1
4.2 Install the Batteries .................................................................... 4-1
4.3 AC Power Adapter ...................................................................... 4-2
4.3.1 Charging Ni-MH batteries .............................................................. 4-2
4.4 Attaching the Sensor to the Patient ........................................... 4-3
4.4.1 Choosing the Sensor ...................................................................... 4-3
4.4.2 Care and Handling of the Sensor ................................................... 4-4
4.4.3 Checking the Sensor and Oximetry Cable ..................................... 4-5
4.4.4 Cleaning or Disinfecting the Sensors ............................................. 4-6
4.5 Performance Considerations ...................................................... 4-7
4.6 Turning On the Monitor ............................................................. 4-8
4.6.1 Four Display Modes ....................................................................... 4-9
4.6.2 Three Measuring Modes ............................................................... 4-9
4.7 Turning Off the Monitor ........................................................... 4-10
Chapter 5: Changing the Monitor’s Settings .......................... 5-1
5.1 Changing the Pulse and Alarm Volume ...................................... 5-1

Table of Contents
II UT100 Handheld Pulse Oximeter Operation Manual
5.2 Managing the Patient’s Information .......................................... 5-1
5.3 Changing the Alarm Limits .......................................................... 5-1
5.3.1 Alarm Summary ............................................................................. 5-2
5.3.2 Changing the Alarm Settings ......................................................... 5-3
5.4 Changing the date and time ....................................................... 5-4
5.5 Resetting ..................................................................................... 5-4
Chapter 6 Trend Data Output and Analysis ........................... 6-1
6.1 Connecting the Oximeter to PC .................................................. 6-1
6.2 Installing the Oximetry Data Management System .................... 6-1
6.3 Function of Main Menu .............................................................. 6-2
6.4 Trend Data Download ................................................................. 6-2
6.5 Open the Data Base .................................................................... 6-4
6.6 Data Analysis and Reports .......................................................... 6-5
Chapter 7: Accessories .......................................................... 7-1
7.1 Standard Configuration .............................................................. 7-1
7.2 Optional Accessories................................................................... 7-1
Chapter 8: Maintenance and Troubleshooting....................... 8-1
8.1 Schedule of Maintenance ........................................................... 8-1
8.2 Storage ........................................................................................ 8-1
8.3 Troubleshooting.......................................................................... 8-2
8.4 EMI Interference ......................................................................... 8-3
Chapter 9: Specification ........................................................ 9-1
9.1 Equipment Classification ............................................................ 9-1
9.2 SpO2 ............................................................................................ 9-1
9.3 Pulse Rate ................................................................................... 9-1
9.4 Default Settings of Alarms Limits ................................................ 9-1
9.5 Power Requirements .................................................................. 9-1
9.6 Battery Life.................................................................................. 9-2
9.7 Dimensions ................................................................................. 9-2
9.8 Environmental Specification ....................................................... 9-2

Warranty and Service Information
UT100 Handheld Pulse Oximeter Operation Manual III
Warranty and Service Information
Proprietary Notice
I
nf
or
mation
contained
in this
document
is
copyrighted
by UTECH
Co., Ltd
.
and may not
be
duplicated in full or part by any person without prior written
approval of UTECH
Co.,
Ltd
.
Its purpose is to provide the user with
adequately
detailed
documentation
to efficiently
install
,
opera
t
e
,
maintain and order
spare parts for the device
supplied
.
All
information
contained
in
this
document
is believed to be current and accurate as of the date of
publication or revision, but
does
not
constitute
a
w
ar
r
an
t
y
.
Limited Warranty
UTECH Co., Ltd
.
(“
Seller
”)
warrants each new device to be free from defects in
workmanship and materials under normal use and service for a period of two
(2) years from the date of shipment. The sole obligation of UTECH company
under this warranty will be repair or replace, at its option, products that prove
to be defective during the warranty period. The foregoing shall be the sole
warranty remedy. Except as set forth herein, seller makes no warranties,
either expressed or implied, including the implied warranties of
merchantability and fitness for a particular purpose. No warranty is provide if
the products are modified without the express written consent of UTECH
company and seller shall not be liable in any event for incidental or
consequential damage. This warranty is not assignable.
Service Support
Repairs for devices manufactured by UTECH company under warranty must be
made at authorized repair centers. If the device needs repair, contact your
local distributor or the UTECH company after-service department. When
calling, have the device’s model and serial number ready.
If you need to ship the device, pack the device and accessories carefully to
prevent shipping damage. All accessories should accompany the device.
Students Pioneer Park A-10-10,
No.77, Kecheng Road,
Chongqing, China

Warranty and Service Information
IV UT100 Handheld Pulse Oximeter Operation Manual
NOTE!
Shipments received without a return number will be returned to
sender.
Phone
(+86)23-8650-2468
Fax (+86)23-8650-2468
E-mail [email protected]
Web site http://www.chinautech.com

Chapter 1: Introduction
UT100 Handheld Pulse Oximeter Operation Manual 1-1
Chapter 1: Introduction
1.1 About this Manual
T
he
Operation Manual provides installation, operation, and
maintenance
instructions for health-care professionals and other
users
,
trained in
monitoring respiratory and cardiovascular
ac
tivit
y
.
These instructions contain important information for the safe use of the
product. Read the entire contents of these Instructions For Use, including
Warnings and Cautions, before using the monitor. Failure to properly follow
warnings, cautions and instructions could result in death or serious injury to
the patient.
1.2 Definition of Symbols
SYMBOLS DEFINITION
Attention, see in
instructions for use
BF Type Defibrillation
Power on/off
Alarm silence
Up and Down
Arrows
Mode Change Key
Menu Key
SpO
2
S
ensor
No Connect
SpO
2
S
ensor
O
ff
line
Pulse search
Low perfusion
Date of Manufactur
ing
IPX1
Drip Proof (monitor only)
Collect Separately.
1.3 Warning Information
KEYWORD DEFINITION
WARNING
Tells you something that could hurt the patient or hurt the
operator.

Chapter 1: Introduction
1-2 UT100 Handheld Pulse Oximeter Operation Manual
CAUTION
Tells you something that could damage the device.
NOTE Tells you other important information.
Warnings
WARNING! Do not use this device in the
presence
of flammable
anesthetics
or other flammable substance in combination
with air, oxygen-enriched environments, or nitrous oxide.
WARNING! Do not use this device in the presence of magnetic resonance
imaging (MR or MRI) equipment.
WARNING! Use only SpO2 sensors supplied with, or specifically intended
for use with, this device.
WARNING! Do not plug the monitor into an outlet controlled by a wall
switch.
WARNING! This device is intended for use by persons trained in
professional health care. The operator must be thoroughly
familiar with the information in this manual before using the
device.
WARNING! This device must be used in conjunction with clinical signs and
symptoms. This device is only intended to be an adjunct in
patient assessment.
WARNING! It is the operator’s responsibility to set alarm limits
appropriately for each individual patient.
WARNING! Prolonged use or the patient’s condition may require changing
the sensor site periodically. Change sensor site and check skin
integrity, circulatory status, and correct alignment at least
every 4 hours.
WARNING! ELECTRICAL SHOCK HAZARD when cover is removed. Do not
remove covers. Refer servicing to qualified personnel.
WARNING! Chemicals from a broken LCD display panel are toxic when
ingested. Use caution when handling a monitor with a broken
display panel.

Chapter 1: Introduction
UT100 Handheld Pulse Oximeter Operation Manual 1-3
WARNING! In the event that earth ground integrity is lost, the
performance of this device and/or other devices nearby may
be affected due to excessive RF emissions.
WARNING! Any monitor that has been dropped or damaged should be
inspected by qualified service personnel, prior to use, to insure
proper operation.
WARNING! If the accuracy of any measurement is in question, verify the
patient’s vital sign(s) by an alternative method and then check
the monitor for proper functioning.
WARNING! Remove device batteries prior to long term storage.
WARNING! Operation of this device may be adversely affected in the
presence of strong electromagnetic sources, such as
electrosurgery equipment.
WARNING! Operation of this device may be adversely affected in the
presence of computed tomograph (CT) equipment.
WARNING! Use only SpO2 sensors supplied with, or specifically intended
for use with, this device.
WARNING! SpO2 measurements may be adversely affected in the presence
of high ambient light. Shield the sensor area (with a surgical
towel, for example) if necessary.
WARNING! Dyes introduced into the bloodstream, such as methylene blue,
indocyanine green, indigo carmine, patent blue V (PBV), and
fluorescein may adversely affect the accuracy of the SpO2
reading.
WARNING! Any condition that restricts blood flow, such as use of a blood
pressure cuff or extremes in systemic vascular resistance, may
cause an inability to determine accurate pulse rate and SpO2
readings.
WARNING! Significant levels of dysfunctional hemoglobins, such as
carboxyhemoglobin or methemoglobin, will affect the accuracy
of the SpO2 measurement.

Chapter 1: Introduction
1-4 UT100 Handheld Pulse Oximeter Operation Manual
WARNING! The monitor was not designed or tested to be an apnea
monitor.
WARNING! Optical cross-talk can occur when two or more sensors are
placed in close proximity. It can be eliminated by covering each
site with an opaque material.
WARNING! Tissue damage may result from overexposure to sensor light
during photodynamic therapy with agents such as
verteporphin, porfimer sodium, and
metatetrahydroxyphenylchlorin (mTHPC). Change the sensor
site at least every hour and observe for signs of tissue damage.
More frequent sensor site changes/inspections may be
indicated depending upon the photodynamic agent used, agent
dose, skin condition, total exposure time or other factors. Use
multiple sensor sites.
WARNING! When connecting this monitor to any instrument, verify proper
operation before clinical use. Refer to the instrument’s user
manual for full instructions. Accessory equipment connected to
the monitor’s data interface must be certified according to the
respective IEC standards, i.e., IEC 60950 for data processing
equipment or IEC 601-1 for electromedical equipment. All
combinations of equipment must be in compliance with IEC
601-1-1 systems requirements. Anyone connecting additional
equipment to the signal input port or the signal output port
configures a medical system, and, therefore, is responsible that
the system complies with the requirements of the system
standard IEC 601-1-1.
WARNING! Disconnect the AC power supply from the outlet before
disconnecting it from the monitor. Leaving the AC power
supply connected to an AC power outlet without being
connected to the monitor may result in a safety hazard.
WARNING! Do not allow any moisture to touch the AC power supply
connectors or a safety hazard may result. Ensure that hands
are thoroughly dry before handling the AC power supply.
WARNING! Failure to place the monitor away from the patient may allow
the patient to turn off, reset, or damage the monitor, possibly
resulting in the patient not being monitored.

Chapter 1: Introduction
UT100 Handheld Pulse Oximeter Operation Manual 1-5
WARNING! Failure to carefully route the cable from the sensor to the
monitor may allow the patient to become entangled in the
cable, possibly resulting in patient strangulation. Route the
cable in a way that will prevent the patient from becoming
entangled in the cable. If necessary, use tape to secure the
cable.
WARNING! If there is a risk of the AC power supply becoming disconnected
from the monitor during use, secure the cord to the monitor
several inches from the connection.
WARNING! Under certain clinical conditions, pulse oximeters may display
dashes if unable to display SpO2 and/or pulse rate values.
Under these conditions, pulse oximeters may also display
erroneous values. These conditions include, but are not limited
to: patient motion, low perfusion, cardiac arrhythmias, high or
low pulse rates or a combination of the above conditions.
Failure of the clinician to recognize the effects of these
conditions on pulse oximeter readings may result in patient
injury.
WARNING! Verify that all LEDs (light emitting diodes) on the display light
up upon startup of the device.
Cautions
CAUTION! Do not autoclave, ethylene oxide sterilize, or immerse the
monitor or sensors in liquid. Always disconnect the power
source and remove all batteries before cleaning or disinfecting
the monitor.
CAUTION! Should the device become wet, wipe off all moisture and allow
sufficient time for drying before operating.
CAUTION! The monitor should be operated from its internal power source
if the integrity of the protective earth conductor is in doubt.
CAUTION! Pressing front panel keys with sharp or pointed instruments
may permanently damage the keypad. Press front panel keys
only with your finger.

Chapter 1: Introduction
1-6 UT100 Handheld Pulse Oximeter Operation Manual
CAUTION! Do not allow water or any other liquid to spill onto the monitor.
Unplug the external power supply from the monitor before
cleaning or disinfecting the monitor. Evidence that liquid has
been allowed to enter the monitor voids the warranty.
CAUTION! Ensure the device’s AC rating is correct for the AC voltage at
your installation site before using the monitor. The monitor’s AC
rating is shown on the external power supply. If the rating is not
correct, do not use the monitor; contact the UTECH Co., Ltd
after-service department, or your local distributor, for help.
CAUTION! Chemicals used in some cleaning agents may cause brittleness
of plastic parts. Follow cleaning instructions in this manual.
Not
es
NOTE! Batteries are user replaceable. Follow local governing ordinances
and recycling
instructions regarding disposal or recycling of device
components, including ba
tt
eries
.
NOTE! When using AC power, the Oximeter is a class II device with
functional earth. This earth connection is for device
electromagnetic compatibility and does not provide protection to
the patient or user.
NOTE! It is recommended that batteries be used with the monitor when
operating with AC power to prevent monitor shutdown with loss of
AC power.
NOTE! All user and patient accessible materials are non-toxic.
NOTE! Each input and output connection of the monitor is electrically
isolated.

Chapter 2: Intended Use and General Information
UT100 Handheld Pulse Oximeter Operation Manual 2-1
Chapter 2: Intended Use and General Information
2.1 Intended Use
The UT100 Handheld Pulse Oximeter is a low cost monitor for spot checking,
continuous, noninvasive monitoring or recording of functional oxygen
saturation of arterial hemoglobin (SpO2), pulse rate and pulse strength. The
monitor is a battery or AC adapter powered pulse oximeter. It may be used in
the hospital, clinical environment, homecare, and during emergency land
transportation. The oximeter will operate accurately over an ambient
temperature range of 32 to 113°F (0 to 45°C). The oximeter works with given
sensors providing SpO2 and pulse rate on all patients from neonatal to adult.
This
device is
intended
for
continuous
patient monitoring with adjustable
alarm limits as well
as
visible and audible alarm
sig
nals
.
NOTE!
T
he
monitor was not
designed
or
tested
to be an apnea
monit
or
.
2.2 Monitor Features
• Provides fast, reliable
SpO
2
,
pulse
r
a
t
e
,
and pulse
strength measur
emen
ts
.
•
Ideally suited for use in intensive care
units
,
outpatient clinics,
emergency
r
ooms
,
and
during emergency land
transpor
t.
•
Portable and lightweight. It weighs only 500 grams, with
ba
tt
er
ies
.
• Ergonomically designed to fit comfortably in the palm of your
hand
.
•
Uses four
(4) standard “AA”
alkaline or Ni-MH
ba
tt
er
ies
.
•
Battery life
is approximately twenty
(20)
hours
.
•
Bright,
easy-to-read LCD displays indicate SpO2 and pulse rate
measur
emen
ts
,
Plethysmogram and trend table.
•
Screen rotation provides upright display for vertical or horizontal
monitoring positioning.
•
Perfusion Index
indicates arterial pulse
signal
str
ength.

Chapter 2: Intended Use and General Information
2-2 UT100 Handheld Pulse Oximeter Operation Manual
•
Three measuring modes:
Spot-Check mode: Measure data intermittently.
Monitor mode: Measure and store data continuously.
Record mode: Measure and store data in energy-save mode.
•
Adjustable volume (including silence)
“
beep
”
sounds with each pulse beat.
• Positive identification of SpO2 or pulse rate alarm. Adjustable high and low
alarm limits for SpO2 and pulse rate
measur
emen
ts
.
•
Adjustable volume for alarm and alert tones (including silence).
• L
o
w
battery icon flashes when about 15 minutes of battery use
r
emains
. A
red high priority alarm information
turns on the alarm bar and an audible
two groups of 5-beep burst notifies the user low battery life.
• Patient information management. Patient’s information such as ID, Sex, Type
can be managed.
•
Data can be transferred to PC through a data line for storage, review and
analysis.
2.3 Theory of Operation
T
he
pulse oximeter
determines
%SpO2 and pulse rate by passing two
wavelengths
of
low
intensity light, one red and one
infrared
,
through body
tissue to a
photodet
ec
t
or
.
I
nf
or
mation
about
wavelength
range can be
especially useful to
clinicians
.
Wavelength information for
this
device can be
found in the
SpO
2
Specifications
section of this
manual
.
Pulse identification is accomplished by using plethysmographic techniques,
and oxygen saturation measurements are determined using
spectrophotometric oximetry principles. During measurement, the signal
strength resulting from each light source depends on the color and
thickness of the body tissue, the sensor placement, the intensity of the
light sources, and the absorption of the arterial and venous blood
(including the time varying effects of the pulse) in the body tissues.

Chapter 2: Intended Use and General Information
UT100 Handheld Pulse Oximeter Operation Manual 2-3
1
2
Figure
2.1:
Th
eor
y
of
Oper
ation
1. Low intensity Red and Infrared LED light sources
2. Detector
Oximetry processes these
sig
nals
,
separating
the time invariant
parameters
(tissue
thick
ness
,
skin
c
olor
,
light
in
t
ensit
y
,
and venous blood) from the time
variant
parameters
(arterial volume
and
SpO
2
)
to identify the pulses and
calculate functional oxygen saturation. Oxygen
saturation
calculations can
be performed because blood
saturated
with oxygen predictably absorbs
less
r
ed
light than
oxygen-depleted blood
.
WARNING!
Since measurement of SpO2 depends on a pulsating vascular
bed, any condition that restricts blood flow, such as the use of
a blood pressure cuff or extremes in systemic vascular
resistance, may cause an inability to determine accurate SpO2
and pulse rate readings.
WARNING! Under certain clinical conditions, pulse oximeters may display
dashes if unable to display SpO2 and/or pulse rate values.
Under these conditions, pulse oximeters may also display
erroneous values. These conditions include, but are not limited
to: patient motion, low perfusion, cardiac arrhythmias, high or
low pulse rates or a combination of the above conditions.
Failure of the clinician to recognize the effects of these
conditions on pulse oximeter readings may result in patient
injury.

Chapter 2: Intended Use and General Information
2-4 UT100 Handheld Pulse Oximeter Operation Manual
This page is intentionally left blank.

Chapter 3: Controls and Features
UT100 Handheld Pulse Oximeter Operation Manual 3-1
Chapter 3: Controls and Features
3.1 Monitor Front Panel
Figure 3.1: Monitor
C
on
tr
ols
,
and
F
ea
tures
1. Sensor Connector
The sensor connects
her
e
,
or an oximetry extension cable can be
connected
between
the
monitor and the
sensor
.
2.
SpO2 Numeric
D
ispla
y
A number shows the patient’s SpO2 value in percent. Dashes (- - -) mean the
monitor is not able to calculate the SpO2 value.
3. Mute icon
The mute icon is displayed at the status bar and it has three statuses:
“ ” this icon means the normal status of pulse/alarm sound.
“ ” this icon is displayed during temporary two-minute pulse/alarm silence.
“ ” this icon is displayed steadily during permanent pulse/alarm silence.

Chapter 3: Controls and Features
3-2 UT100 Handheld Pulse Oximeter Operation Manual
4. Power Indicator
This indicator lights steadily to inform the working status of the monitor.
Green means the monitor working normally and red means alarm occurred.
5. Pulse Strength Bar Graph
Th
e
pulse
strength
bar graph
“
sw
eeps
”
with the
pa
tien
t
’
s
pulse beat. T
he
height of the
bar
graph shows the
pa
tien
t
’
s
pulse
str
ength.
6. Speaker
It provides audible indication of alarm conditions, pulse tone and
feedback for key-presses. Ensure the speaker is not covered.
7. Pulse Rate Numeric Display
A number shows the
pa
tien
t
’
s
pulse rate value in beats per
minut
e
.
Dashes
(- - -)
mean
the
monitor is not able to calculate the pulse rate
v
alue
8. Information Bar
The information bar displays patient’s ID/ type, battery level icon, date/time.
9. Battery level Icon
This icon is displayed at the information bar and has four levels. It flashes
when there is only 15 minutes left for the monitor shut down it self.
10. Status Bar
The status bar displays the there measuring modes, sensor off/finger off/pulse
search/low perfusion icon and volume icon.
11. Current Alarm Limits of SpO
2
If the high/low alarm limit has been changed from the default settings, there
will be a decimal point displayed after it.
12. Alarm bar
The alarm bar displays high and medium alarm events to alert users.
13. Current Alarm Limits of Pulse Rate
If the high/low alarm limit has been changed from the default settings, there
will be a decimal point displayed after it.
14. Silence Indicator
This indicator flashes during temporary two-minute alarm
silenc
e
.
The
indictor
ligh
ts
steadily during
permanent/indefinite
alarm
silenc
e
.

Chapter 3: Controls and Features
UT100 Handheld Pulse Oximeter Operation Manual 3-3
15. USB Interface
The USB interface is used to connect the monitor with PC for trend data
output.
16. AC Power Jack
An optional AC
power supply connects
her
e
.
17. Slot for hanging strap
3.2 Monitor Operating keys
Figure 3.2: Monitor Operating Keys
1. ON/OFF
k
e
y
Pressing this key for 5 seconds turns the monitor ON and OFF.
2.
Silence key
Pressing the Silence key once disables the pulse/alarm tone for two
(2)
minutes
.
The icon will flash about 3 seconds at the upper-right corner of
the screen. Pressing the Silence key twice disables the pulse/
alar
m
tone
indefinitely (until canceled or the monitor is turned
off
). The icon will
flash about 3 seconds at the upper-right corner of the screen.
To
cancel either
the
indefinit
e
or the two-minute pulse/alarm and alert tone silenced
condition, press the Silence
key once.
T
he
Silence indicator
will
turn
off
.
3. Up and Down Arrows
The Up and Down arrow keys are used to adjust the following
settings:
• Alarm/ Pulse Volume
• Move the cursor circularly.
• Increase/decrease numbers
• Choose options.
4. Mode Key
Press this key to switch between the four display modes that are big display
mode, waveform mode, trend table mode and horizontal display mode.

Chapter 3: Controls and Features
3-4 UT100 Handheld Pulse Oximeter Operation Manual
5. Menu Key
Press this key to change the settings like: patient’s information, high/low
alarm limits, time and date.
Other manuals for UT100
1
Table of contents
Other U-Tech Medical Equipment manuals
Popular Medical Equipment manuals by other brands

NHS
NHS Barts Health KTMED OXYPALM Supplemental Operators Information

EDAN
EDAN F9 Express user manual

apollo endosurgery
apollo endosurgery OverStitch Sx Instructions for use

CMF
CMF SpinaLogic Patient manual

Skytron
Skytron AURORA LED Series installation instructions

Moretti
Moretti SKEMA FORM LYTUS MI310X instruction manual