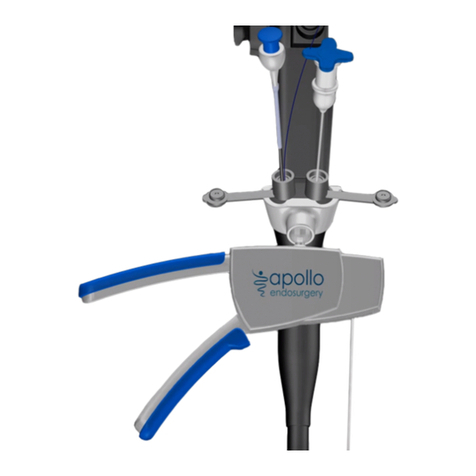
apollo endosurgery OverStitch Sx User manual

SINGLE PATIENT USE
DISPOSABLE
Caution:
Please read all instructions prior to use
GRF-00400-00R05
OverStitch Sx™ Endoscopic Suturing System ESS-G02-Sx1
OverStitch™ 2-0 Polydioxanone Suture PDO-G02-020
OverStitch™ 2-0 Polypropylene Suture PLY-G02-020
OverStitch™ 2-0 Polypropylene Suture PLY-G02-020-A
OverStitch™ 2-0 Polypropylene Suture PLY-G02-020-APL
OverStitch™ Suture Cinch CNH-G01-000
Tissue Helix THX-165-028
Product Code:
OverStitch Sx™
English page 3
[Endoscopic Suturing System (ESS)]
INSTRUCTIONS FOR USE
Español página 11
[Sistema de sutura endoscópico (SSE)]
INSTRUCCIONES DE USO
Deutsch Seite 19
(Endoskopisches Nahtsystem [ENS])
GEBRAUCHSANWEISUNG
Français page 27
(Système de suture endoscopique [SSE])
MODE D’EMPLOI
Italiano pagina 35
[Sistema di sutura endoscopica (SSE)]
ISTRUZIONI PER L’USO
Português página 43
[Sistema de sutura endoscópica (SSE)]
INSTRUÇÕES DE UTILIZAÇÃO
Nederlands pagina 51
[Endoscopisch hechtsysteem (EHS)]
GEBRUIKSAANWIJZING
Dansk side 59
[Endoskopisk sutureringssystem (ESS)]
BRUGSANVISNING
Norsk side 67
[Endoskopisk sutureringssystem (ESS)]
BRUKSANVISNING
Suomi sivu 75
[Endoskooppinen ommeljärjestelmä (EO)]
KÄYTTÖOHJEET
Svenska sida 83
[Endoskopiskt sutursystem (ESS)]
BRUKSANVISNING
Polski strona 91
[System wziernikowego zakładania szwów (SWZS)]
INSTRUKCJA UŻYTKOWANIA
Čeština strana 99
[Endoskopický šicí systém (ESS)]
NÁVOD K POUŽITÍ
Magyar 107. oldal
[Endoszkópos varrógéprendszer (EVR)]
HASZNÁLATI ÚTMUTATÓ
Български страница 115
[Ендоскопска система за хирургични шевове (ESS)]
ИНСТРУКЦИИ ЗА УПОТРЕБА
Eesti lk 123
[Endoskoopiline õmblussüsteem (EÕS)]
KASUTUSJUHISED
Srpski strana 131
[Sistem za endoskopsko ušivanje (SEU)]
UPUTSTVO ZA UPOTREBU
Slovenščina stran 147
[Endoskopski sistem za šivanje (ESŠ)]
NAVODILA ZA UPORABO
Slovenčina strana 139
[Endoskopický šijací systém (ESS)]
NÁVOD NA POUŽITIE
Українська стор. 163
[Система накладання ендоскопічного шва (СЕШ)]
ІНСТРУКЦІЯ З ВИКОРИСТАННЯ
Ελληνικά σελίδα 171
[Σύστημα ενδοσκοπικής συρραφής (ΣΕΣ)]
ΟΔΗΓΙΕΣ ΧΡΗΣΗΣ
Türkçe sayfa 179
[Endoskopik Sütür Sistemi (ESS)]
KULLANMA TALİMATI
187
[(ESS)
]
Română pagina 155
[Sistem endoscopic de suturare (ESS)]
INSTRUCȚIUNI DE UTILIZARE


3
Table of Symbols
Single use only. Disposable. Do not resterilize. Caution: Federal law (USA) restricts this device to sale by or on the order of a physician. Patent Pending.
DISCLAIMER OF WARRANTY AND LIMITATION OF REMEDY
THERE IS NO EXPRESS OR IMPLIED WARRANTY, INCLUDING WITHOUT LIMITATION ANY IMPLIED WARRANTY OF MERCHANTABILITY OR FITNESS FOR A PARTICULAR
PURPOSE, ON THE APOLLO ENDOSURGERY, INC. PRODUCT(S) DESCRIBED IN THIS PUBLICATION. TO THE FULLEST EXTENT PERMITTED BY APPLICABLE LAW, APOLLO
ENDOSURGERY, INC. DISCLAIMS ALL LIABILITY FOR ANY INDIRECT, SPECIAL, INCIDENTAL, OR CONSEQUENTIAL DAMAGES, REGARDLESS OF WHETHER SUCH LIABILITY
IS BASED ON CONTRACT, TORT, NEGLIGENCE, STRICT LIABILITY, PRODUCTS LIABILITY OR OTHERWISE. THE SOLE AND ENTIRE MAXIMUM LIABILITY OF APOLLO
ENDOSURGERY, INC., FOR ANY REASON, AND BUYER’S SOLE AND EXCLUSIVE REMEDY FOR ANY CAUSE WHATSOEVER, SHALL BE LIMITEDTO THE AMOUNT PAID BY THE
CUSTOMER FOR THE PARTICULAR ITEMS PURCHASED. NO PERSON HASTHE AUTHORITYTO BIND APOLLO ENDOSURGERY, INC. TO ANY REPRESENTATION OR WARRANTY
EXCEPT AS SPECIFICALLY SET FORTH HEREIN. DESCRIPTIONS OR SPECIFICATIONS IN APOLLO ENDOSURGERY, INC PRINTED MATTER, INCLUDINGTHIS PUBLICATION, ARE
MEANT SOLELYTO GENERALLY DESCRIBETHE PRODUCT ATTHETIME OF MANUFACTURE AND DO NOT CONSTITUTE ANY EXPRESS WARRANTIES OR RECOMMENDATIONS
FOR USE OF THE PRODUCT IN SPECIFIC CIRCUMSTANCES. APOLLO ENDOSURGERY, INC. EXPRESSLY DISCLAIMS ANY AND ALL LIABILITY, INCLUDING ALL LIABILITY FOR
ANY DIRECT, INDIRECT, SPECIAL, INCIDENTAL, OR CONSEQUENTIAL DAMAGES, RESULTING FROM REUSE OF THE PRODUCT.
1. Intended Use
The Apollo Endosurgery OverStitch Sx™ Endoscopic
Suture System (ESS) is intended for endoscopic
placement of suture(s) and approximation of soft
tissue.
1.1 Contraindications
Contraindications include those specific to use of
an endoscopic suturing system, and any endoscopic
procedure, which may include, but not limited to, the
following:
- This system is not for use where endoscopic
techniques are contraindicated.
- This system is not for use with malignant tissue.
1.2 Warnings
- Do not use a device where the integrity of the
sterile packaging has been compromised or if the
device appears damaged.
- Only physicians possessing sufficient skill and
experience in similar or the same techniques should
perform endoscopic procedures.
- Contact of electrosurgical components with other
components may result in injury to the patient and/
or operator as well as damage to the device and/or
endoscope.
- Verify compatibility of endoscope size, endoscopic
instruments and accessories and ensure
performance is not compromised.
- Ensure endoscope is clean, dry, and free of
lubricants prior to device installation.
- OverStitch Sx is recommended to be used in
combination with an overtube having an inner
diameter of at least 16.7 mm
- Ensure that there is sufficient space for the Needle
to open.
- Ensure that the Handle Grip of the Endoscopic
Suturing System is closed and locked, and Actuation
Catheter slack removed, during intubation and
extubation.
- Users should be familiar with surgical procedures
and techniques involving absorbable sutures before
employing Synthetic Absorbable Sutures for wound
closure, as the risk of wound dehiscence may vary
with the site of application and the suture material
used.
- In situations where the operative site poses a risk
of harm to adjacent anatomic structures, use of
endoscopic accessories such as the OverStitch
Tissue Helix is recommended to retract the tissue
intended to be sutured away from these unseen
structures.
- If used to oversew foreign objects, such as staples,
stents, clips or mesh, it is possible for the needle
to become trapped in the foreign body, requiring
surgical intervention.
- Reuse or reprocessing of the OverStitch system
could result in device malfunction or patient
consequences to include:
-Infection or the transmission of disease
-Failure of the handle mechanism causing the
device to become locked on tissue that may
require surgical intervention
-Reduced retention on the endoscope, causing
the device to detach during use that may require
surgical intervention to retrieve
-Reduced retention of the Anchor to the Needle
Body, resulting in an inadvertent Anchor drop
causing procedural delay or requiring subsequent
intervention
-Bending of the Needle Body, preventing the
physician from driving the Needle correctly or
performing the intended procedure
-Failure of the Helix to extend fully, limiting the
ability to acquire tissue and perform intended
procedure
1.3 Precautions
- The System may only be used if purchased from
Apollo Endosurgery, Inc. or one of its authorized
agents.
- With the Endoscopic Suturing System installed, the
endoscope’s effective outer diameter is increased
by approximately 5mm.
1.4 Adverse Events
Possible complications that may result from using the
Endoscopic Suturing System include, but may not be
limited to:
- Pharyngitis / Sore throat
- Nausea and / or Vomiting
- Abdominal pain and / or Bloating
- Hemorrhage
- Hematoma
- Conversion to laparoscopic or open procedure
- Stricture
- Infection / Sepsis
- Pharyngeal, colonic and/or esophageal perforation
- Esophageal, colonic and/or pharyngeal laceration
- Intra-abdominal (hollow or solid) visceral injury
- Aspiration
- Wound dehiscence
- Acute inflammatory tissue reaction
- Death
1.5 Compatibility
- The system is compatible with endoscopes having an
insertion tube and distal diameter between 8.8mm
and 9.8mm, a working length up to 110cm, and
using overtubes having an inner diameter of at least
16.7mm.
- The system is only compatible with the sutures listed
on the first page. The system is not compatible with
other sutures on the market.
Description Symbol
Consult Instructions for Use
Do Not Re-use
Sterilized Using Ethylene Oxide
Reference Number
Description Symbol
Manufacturer
Caution: Federal law (USA) restricts this
device to sale by or on the order of a
physician
Date of manufacture
Do Not Resterilize
Description Symbol
Use By
Lot Number
Do not use if package is damaged
Authorized Representative in the
European Community

4
2. Packaged System
3. Nomenclature
Needle Driver & Anchor
Exchange
Package 1
Package 2
Package 3 Package 4
Polydioxanone (absorbable) -
VIOLET
Polypropylene (nonabsorbable) -
BLUE
Needle Driver
Endcap
Anchor Exchange
Anchor Release Button
Needle Driver Handle
Suture Assembly
Anchor Body
Suture
Helix Tip
Helix
Helix Handle
Cinch
Cinch Handle
Collar Plug
Suture Loading Loop
Helix
(AVAILABLE SEPARATELY)
Cinch
Suture Assembly
Anchor Receptacle

5
4. Assembly
Prepare Endoscope
WARNING: Endoscope distal end and
insertion tube must be dry and free of any
lubricants prior to device installation. Failure
to do so may cause the device to slip off
endoscope during use.
4.1. Connect endoscope to video processor and light
source to assist device installation.
4.2. Ensure endoscope is straight with wheels locked
prior to device installation.
Prepare Device
4.3. Remove Needle Driver from packaging.
CAUTION: Ensure Endcap is not dropped or
otherwise damaged.
4.4. Close Needle Body.
4.5. From the Actuation Catheter side of the device,
thread the endoscope between Actuation
Catheter and Catheter Sheath.
Secure Handle
4.6. Slide Needle Driver Handle Collar firmly onto
endoscope handle until the channel ports are
positioned near the endoscope channel port.
4.7. Secure by stretching the rubber Handle Strap
around the rear of endoscope and fitting end
back onto attachment peg.
Position Endcap
4.8. Fully insert endoscope distal end through
clear Endcap Strap loops until endoscope face
touches the Overhang Stop feature.
CAUTION: Ensure the Catheter Sheath is not
twisted along the length of the scope.
4.9. Use the monitor to orient the Endcap as desired.
NOTE: Final orientation on monitor may
shift clockwise during assembly and can be
compensated for here.
4.10. Confirm both ends of the Needle Body are
visible on the monitor.
Secure Endcap Straps
4.11. With left thumb placed on the Apollo logo of
Endcap clip, slowly pull Strap 1 until a watertight
seal is achieved.
NOTE:The strap appears clear in colour when
sufficiently tightened.
WARNING: Straps should not be stretched
beyond 3cm (1 inch) of travel as damage may
occur.
WARNING: Do not attempt to twist or re-
position Endcap. Doing so may damage
device or endoscope.
4.12. Repeat for Strap 2.
4.13. To lock the Straps, apply further stretching of
both Straps 1 and 2 to remove any slack and
firmly press the Apollo logo on Clip Hinge until
Hinge Step is fully recessed.
NOTE:The Hinge Step is easier to close whilst
a stretch is applied to both Straps.
Fix Catheter Sheath to Endoscope
CAUTION: Ensure endoscope is flat, straight
and with scope wheels locked.
4.14. Working from the distal end, remove protective
backing from each side of the Sheath Strap and
wrap Strap around endoscope, pressing back
onto itself.
4.15. Work along the length of the Catheter Sheath
and secure remaining 4 Straps.
CAUTION:The endoscope should fit within
the inner surface of the Catheter Sheath
along its length.
CAUTION: Do not overstretch any Sheath
Strap.
WARNING: Ensure the Catheters and Sheath
are flush along the length of the scope.
WARNING: Ensure all Sheath Straps are
adhered to themselves and not misaligned.
An exposed corner may unpeel if force is
applied.

6
Remove Endcap Clip
4.16. While securing Endcap, twist Endcap Clip
counter-clockwise (indicated by arrows) to
remove from Endcap.
4.17. Discard Endcap Clip.
Trim Excess Endcap Straps
WARNING: Confirm the concealed ends of
both Endcap Straps are fully recessed within
the Endcap.
4.18. Use a surgical blade to trim the excess lengths
of both Endcap Straps flush with the Endcap
surface.
Install Biopsy Valves
4.19. Fit standard biopsy valves to all endoscope and
device working channels.
4.20. The biopsy valve for the Anchor Exchange
(outside) channel should be in the open position.
Load Anchor
4.21. Select appropriate Suture.
4.22. Remove Suture Assembly and Anchor Exchange
from packaging.
4.23. Load the Anchor onto the Anchor Exchange.
4.24. Remove Suture from Suture Cartridge by holding
and pulling the Suture, not the Anchor or Anchor
Exchange.
NOTE: Ensure Suture is not tangled after
removal from the cartridge.
4.25. Insert Anchor Exchange into the open Anchor
Exchange (outside) channel of the device.
CAUTION: Do not use when valve covers are
closed as Suture drag will be increased.
4.26. Using a ‘pencil-grip’ on the catheter for optimum
control, advance Anchor Exchange until Anchor is
positioned near to the distal end of the device.
CAUTION: If resistance is encountered when
advancing the Anchor Exchange through
the Anchor Exchange Channel, reduce the
endoscope angulation until the device passes
smoothly.
Lubricate Device
4.27. Fully lubricate the distal 50cm of the installed
device and endoscope, and full length of the
inner walls of the overtube.
WARNING: Use of an appropriate overtube
(with an inner diameter of at least 16.7 mm)
is recommended for transoral procedures.
WARNING: Confirm installed device is of
compatible size with overtube prior to use.
4.28. Insert endoscope into patient.
WARNING: Do not introduce the device with
the Needle Body in its open position.
5. Navigating to target anatomy
5.1. Advance until target anatomy is located.
CAUTION: When intubating or extubating
with the Endoscopic Suturing System, ensure
that the working length of the endoscope and
the external Sheath are advanced or retracted
together and any slack in Actuation Catheter
is removed.
CAUTION: Do not articulate endoscope
without device accessories installed up to
the distal end of the primary channel and
secondary channel (if in use) as this may
result in minor kinking of catheters.
5.2. Open Needle Body.
5.3. Advance Anchor Exchange and/or manipulate
endoscope to create Suture slack.
5.4. Once sufficient slack has been created, retract
Anchor Exchange into the device.
5.5. Close Needle Body.
5.6. Use a ‘pencil-grip’ on the white portion of the
cable to advance Anchor Exchange until Anchor
fully seats onto Needle Body.
5.7. A tactile ‘click’ or firm stop may be felt as the
Anchor seats fully onto Needle Body.
5.8. Check the monitor image to ensure Anchor is
properly installed on Needle Body.
5.9. Ensure that the proximal end of the Suture is
visible beyond the Handle channel valves.

7
5.10. Fully depress Anchor Release Button to release
Anchor.
5.11. With Anchor Release Button still fully depressed,
slightly retract Anchor Exchange.
6. Tissue and Suture Management
6.1. Open Needle Body.
CAUTION: If the Needle Body does not open,
ensure that the Anchor has been released
from the Anchor Exchange.
WARNING: Ensure appropriate Suture slack
has been created for desired Suture path and
pattern. Advance Anchor Exchange and/or
manipulate endoscope to create Suture slack.
6.2. Position tissue in appropriate location for
suturing, using Apollo Helix or other 2.8mm
compatible accessory if required.
7. Use ofTissue Helix (Optional)
7.1. Advance Helix into Helix Channel of ESS in the
retracted position, until distal tip is visible on the
monitor.
CAUTION: If resistance is encountered
when advancing the Helix through the Helix
Channel of the ESS, reduce the endoscope
angulation until the device passes smoothly,
and ensure that the device’s secondary
working channel is not obstructed.
7.2. Fully depress Helix Handle button to expose
Helix Tip.
CAUTION: Do not depress Helix Handle
button while advancing Helix through the
device.
7.3. Acquire tissue by rotating Helix Handle
clockwise until correct tissue depth is achieved.
7.4. Maintain gentle forward pressure during tissue
acquisition.
7.5. Advance / retract Helix to position tissue into
desired location.
8. Suturing
8.1. Drive Needle through tissue by closing the
Needle Body.
8.2. Ensure that the Needle Arm does not
inadvertently close on any foreign object or
device.
Retrieve Anchor
8.3. Use a ‘pencil-grip’ to advance the Anchor
Exchange until the Anchor is engaged and
resistance is felt.
NOTE: Resistance may vary due to the
position of the endoscope.
8.4. Retract Anchor Exchange to acquire Anchor.
8.5. Use a ‘pencil-grip’ on the white section of the
cable and place the remaining fingers of the
same hand on the device handle to prevent
damage to Suture or tissue once the Anchor
‘pops’ off the Needle Body.
CAUTION: Do not press the Anchor Release
Button, as this may cause inadvertant drop of
the Anchor.
WARNING: If sufficient slack has not been
created prior to driving the Anchor through
tissue, retraction of the Anchor Exchange may
be difficult and the Anchor may not release
correctly from the Needle Body.
ReleaseTissue
8.6. Rotate Helix handle counter-clockwise until the
device is free from tissue.
8.7. Return the Helix handle button.
8.8. Check monitor to ensure tip is fully retracted into
shaft before withdrawing into Helix Channel.
8.9. Withdraw Helix a short distance into Helix
Channel.
8.10. Open Needle Body.
CAUTION: Do not tension the Suture with the
Anchor in the Needle Body.

8
8.11. To continue placing stitches with this Anchor,
repeat sections 5-8.
If stitching is complete for this Anchor, proceed
to section 9 to approximate tissue, secure and
cut the Suture.
Multiple Anchors can be utilized with each
Needle Driver and Anchor Exchange.
9. Securing and Cutting Suture
9.1. Ensure Anchor is in Anchor Exchange and open
Needle Body.
9.2. Advance Anchor distal of the device until visible
on monitor.
9.3. Fully depress Anchor Release Button and retract
Anchor Exchange to release Anchor.
CAUTION: Do not release the Anchor inside
the Anchor Exchange channel.
9.4. Remove Anchor Exchange from ESS.
NOTE:The Anchor Exchange can be utilized
for additional sutures.
9.5. Feed proximal end of Suture into removable
Suture Loading Loop.
9.6. After threading, release the proximal end of the
Suture to enable loading.
9.7. Pull Suture Loading Loop parallel to the device,
to pull Suture into Cinch.
9.8. Holding the proximal end of the Suture, feed the
Cinch down the Anchor Exchange channel until
‘Plug and Collar’ can be seen on the monitor.
9.9. Pull the Suture and apply counter traction to the
Cinch until the tissue is approximated and the
desired Suture tension is achieved between the
Anchor and the Cinch Collar.
NOTE: It is the Collar that sets the final
position of the Cinch, not the Plug.
WARNING: Excessive tension may damage
tissue.
9.10. While holding suture tension, remove safety
spacer from Cinch handle.
CAUTION:The safety spacer must only be
removed immediately prior to deploying
Cinch.
9.11. Firmly squeeze Cinch Handle to deploy Cinch
and cut Suture.
CAUTION: Suture tension must be
maintained during cinch deployment.
NOTE: Significant force is required to pull
and lock the Plug into the Collar, a ‘pop’ can
often be felt once the Suture is cut. Do not
over deploy cinch - only squeeze handle until
suture is cut.
9.12. Remove the Cinch.
9.13. Close Needle Body.
10. Multiple Sutures
10.1. Anchor Exchange and Needle Driver can be
utilized with multiple sutures. Removal of the
endoscope after cinching is not required if
further sutures are to be deployed.
WARNING: If endoscope is removed, ensure
Endcap is secure to endoscope before
next intubation.The Endcap cannot be
repositioned or refitted to the endoscope.
10.2. To use another Suture Assembly, return to
step 4.21 for Anchor loading and follow all
subsequent steps.
If suturing is complete, proceed to section 11
for removal of the device.
11. Removal of Device
11. 1. Remove any accessory devices.
11.2. Ensure the Needle Body is closed and retract
endoscope from patient, making sure the
external Sheath is retracted together with the
endoscope.
WARNING: Ensure any Actuation Catheter
slack in device is removed prior to device
removal from patient.
11.3. Insert a surgical blade through the long vertical
slot on side of Endcap and cut each Endcap
Strap.
NOTE:The vertical slot protects the
endoscope from damage during removal of
Endcap.
11.4. While looking down on endoscope face, twist
Endcap clockwise around endoscope to remove
Endcap.
11.5. Unwrap each Sheath Strap and remove Catheter
Sheath from endoscope.
11.6. Undo Handle Strap and slide Handle Bracket off
endoscope.

9
Under the scan conditions defined above, the
Anchoring System is expected to produce a maximum
temperature rise of less than 2º C after 15 minutes of
continuous scanning.
In non-clinical testing, the image artifact caused by the
Anchoring System extends approximately 10 mm from
this device when imaged with a gradient echo pulse
sequence and a 3.0 T MRI system.
13.Troubleshooting
13.1. Needle Body will not open:
Cause Resolution
13.1.1. Needle obstructed: i. Assess the space in which you are working and maneuver the Sheath and endoscope as a system, straighten
the endoscope to the non-Retroflexed position.
13.1.2. Suture movement restricted:
i. If the Anchor is on the Needle Body, ensure the suture is not held proximally near the handle during the
opening operation.
ii.Transfer the Anchor to the Anchor Exchange. Open the Needle Body. Slowly retract the Anchor Exchange
proximally and then advance the Needle Body distally to free the Suture.
13.1.3. Sheath or Actuation Catheter looped or kinked:
i. Check to ensure that the Sheath and Actuation Catheter running down the outside of the endoscope are not
looped or kinked. Straighten the endoscope to the non-Retroflexed position. Advance the endoscope forward and
slightly pull any slack from the Sheath and Actuation Catheter proximally until minimal resistance is felt. Grasp
both the Sheath and endoscope and adjust by advancing and retracting as a system.
13.1.4. Foreign body obstruction:
i. Remove the Anchor Exchange only:
a. Transfer the Anchor to the Needle Body and remove the Anchor Exchange from the device.
b. Load a grasper through the primary channel and push the Needle Body open.
ii. Remove the Anchor and Anchor Exchange, cutting the Suture if necessary:
a. Transfer the Anchor to the Needle Body and remove the Anchor Exchange from the device.
b. Through either channel use an appropriate accessory to cut the Suture.
c. Use an accessory to push open the Needle Body
d. Use appropriate means to remove the cut Suture.
iii. Once standard endoscopic techniques have been exhausted, utilize laparoscopic techniques to remove the
device.
13.2. Needle Body will not close:
Cause Resolution
13.2.1. General obstruction:
i. Follow steps 13.1.1, 13.1.2, 13.1.3 above (Needle Body will not open).
ii. Ensure the Needle Driver handle is locked closed and:
a. Stretch the Actuation Catheter to change the effective length of the Needle Body drive cable.
b. Remove the Anchor Exchange and use graspers (through the device primary channel) to grab the Needle
Body. Cut the Suture if necessary.
13.2.2. Needle Driver cable broken:
i. Deploy the Anchor and Cinch. Advance grasper through endoscope and secure Needle Driver. Pull Needle
Driver closed while removing the device. If using an overtube, advance the overtube as far distally as possible
and withdraw the endoscope and device into the overtube, using the distal tip of the overtube to close the
Needle Body.
13.3. Anchor Exchange will not exchange:
Cause Resolution
13.3.1. Anchor Exchange will not install Anchor onto the
Needle Body:
i. Ensure there is sufficient Suture slack and the Suture outside the device is not entangled.
ii. Ensure Anchor Exchange is properly positioned in Endcap of Needle Driver.
iii. If Anchor and Suture are through tissue, either drop Anchor and deploy Cinch per Section 9 of Instructions for
Use or drop Anchor and use a suitable accessory to cut and remove the Suture.
iv. If Anchor and Suture are not through tissue, close handle of Needle Driver. Remove device. Replace Anchor
and/or Anchor Exchange.
13.3.2. Anchor Exchange will not release an Anchor:
i. Ensure there is sufficient Suture slack and the Suture outside the device is not entangled.
ii. Ensure the Anchor Exchange Release Button is FULLY depressed while retracting Anchor Exchange.
iii. Reduce the articulation / tortuosity of the endoscope (if possible) and try to release the Anchor.
iv. Use accessories compatible with device secondary channel or endoscope working channel to cut and remove
the Suture.
v. Replace the Anchor Exchange.
12.MRI Information
MR Conditional
Non-clinical testing has demonstrated that the
Sutures, Cinches and Anchors (collectively termed
Anchoring System) deployed by the OverStitch
Endoscopic Suturing System are MR Conditional.
A patient with this Anchoring System can be safely
scanned immediately after placement in an MR
system meeting the following conditions:
- Static magnetic field of 1.5 T or 3.0 T
- Maximum spatial field gradient of 2,000 gauss/cm
(20 T/m)
- Maximum MR system reported, whole body
averaged specific absorption rate (SAR) of 2 W/kg

10
13.3.3 Anchor Exchange will not retrieve Anchor from
Needle Body:
i. Ensure there is sufficient Suture slack and Needle Driver handle is in closed position.
ii. Use ‘pencil-grip’ to advance Anchor Exchange until the Anchor is engaged and resistance is felt. Retract Anchor
Exchange to acquire Anchor.
iii. If the Anchor cannot be retrieved, replace the Anchor Exchange. Alternatively, use a suitable accessory to cut
and remove the Suture.
iv. Replace the Anchor and resume suturing per Section 8 of Instructions for Use.
13.4. Cinch does not cut the Suture when fired:
Cause Resolution
13.4.1. Suture not cut:
i. Use a suitable accessory through the device secondary channel or endoscope working channel to cut the
Suture and remove the Cinch.
ii. Use standard endoscopic techniques to remove the cut Suture.
13.5. Inadvertent drop of Anchor:
Cause Resolution
13.5.1. Anchor Exchange button depressed out of sequence:
i. Retrieve the Anchor as a foreign body, or follow the procedure to Cinch in place. If the Anchor is dropped inside
the device channel, use the Anchor Exchange or 3.2mm compatible grasper to push the Anchor out through the device.
Do not attempt to pull the Anchor back through the device as it may get stuck in the channel or y-junction at the handle.
13.6. Suture entanglement:
Cause Resolution
13.6.1. Suture outside field of view: i. Close the Needle Driver Handle and manipulate the endoscope back to release.
13.6.2. Suture behindTissue Guard:
i. Slightly close the Needle Body while retracting the endoscope.
ii. If necessary, transfer the Anchor to the Anchor Exchange.
iii. Open the Needle Body and advance the Anchor Exchange beyond the Endcap to push the Suture free.
13.6.3. Suture twisted:
i. If the Suture is twisted, move the endoscope and transfer the Anchor between the Needle Body and Anchor
Exchange, on the opposite side of the suture thread, as needed to untwist.
NOTE: If the twist was noted immediately after articulation of the endoscope, first try to articulate in reverse
order to remove.
ii. If the Anchor has been deployed, use the Cinch to push and guide the Suture free.
13.7. Endcap detachment from endoscope:
Cause Resolution
13.7.1. Detached during use:
i. Close the Needle Body, remove any slack in Actuation Catheter and slowly remove the device from the patient.
If using an overtube, advance the overtube as far distally as possible and withdraw the endoscope and device
into the overtube, maintaining tight hold of the Sheath to keep the Endcap flush with the endoscope.
13.8. Helix does not unscrew:
Cause Resolution
13.8.1. Helix stuck in tissue:
i. Use a suitable accessory through the device primary channel or endoscope working channel to apply counter
traction to the tissue around the Helix, and pull the Helix free.
ii. Once endoscopic techniques have been exhausted, utilize laparoscopic techniques to remove the Helix.
13.9. Endcap Strap end is not seated in Endcap prior to cutting Endcap StrapTails:
Cause Resolution
13.9.1. Endcap Clip Hinge not fully pushed in during
installation:
i. Gently pull on the endoscope to fully recess non-tail end of both Endcap Straps within Endcap
ii. If not discarded, thread Endcap Strap tails through the corresponding channel slots 1 and 2 in Endcap Clip. Re-
fit Endcap Clip with a clockwise rotation onto Endcap (opposite of section 4.16) and repeat assembly steps.
iii. If Endcap Clip is not available, use left thumb in place of the Endcap Clip to hold the non-tail end of each
Endcap Strap within Endcap and repeat Endcap Strap tightening steps.
13.10. Difficulty passing installed device through overtube:
Cause Resolution
13.10.1. Insufficient lubricant applied: i. Fully lubricate device and inside of overtube. Apply a twisting motion of the endoscope with the installed
device during intubating and extubating.
13.10.2. Endoscope and/or overtube sizing not compatible: i. Exchange overtube selected with a larger sized overtube.
13.10.3. Catheters are not flat against scope: i. Maneuver the scope and device to lay flat against each other. Apply a twisting motion of the endoscope with
the installed device during intubating and extubating.
13.10.4. Endcap Straps not trimmed flush with Endcap: i. Remove endoscope from overtube. Trim Endcap Straps flush with Endcap per Step 4.18.

11
Tabla de símbolos
Un solo uso únicamente. Desechable. No reesterilizar. Precaución: La ley federal de EE. UU. restringe la venta de este dispositivo a médicos o por prescripción
facultativa. Patente en trámite.
DESCARGO DE LA GARANTÍAY LIMITACIÓN DE REMEDIO
NO SE OTORGA NINGUNA GARANTÍA, NI EXPRESA NI IMPLÍCITA, INCLUIDAS SIN LIMITACIÓN LAS GARANTÍAS IMPLÍCITAS DE COMERCIABILIDAD O ADECUACIÓN A UN
PROPÓSITO PARTICULAR, EN LOS PRODUCTOS DE APOLLO ENDOSURGERY, INC. DESCRITOS EN ESTA PUBLICACIÓN. HASTA EL MÁXIMO GRADO PERMITIDO POR LA
LEY APLICABLE, APOLLO ENDOSURGERY INC. RECHAZA TODA RESPONSABILIDAD POR CUALQUIER DAÑO INDIRECTO, ESPECIAL, INCIDENTAL O RESULTANTE, CON
INDEPENDENCIA DE QUE DICHA RESPONSABILIDAD SE BASA EN CONTRATO, RESPONSABILIDAD EXTRACONTRACTUAL, NEGLIGENCIA, RESPONSABILIDAD ESTRICTA,
RESPONSABILIDAD POR PRODUCTOS U OTRO TIPO. LA ÚNICA Y MÁXIMA RESPONSABILIDAD DE APOLLO ENDOSURGERY, INC. POR CUALQUIER MOTIVO, Y EL ÚNICO Y
EXCLUSIVO REMEDIO DEL COMPRADOR POR CUALQUIER CAUSA, SE LIMITARÁ AL IMPORTE PAGADO POR EL CLIENTE POR LOS ARTÍCULOS CONCRETOS ADQUIRIDOS.
NINGUNA PERSONA TIENE AUTORIDAD PARA VINCULAR A APOLLO ENDOSURGERY, INC. A NINGUNA DECLARACIÓN NI GARANTÍA, SALVO SEGÚN LO ESPECÍFICAMENTE
INDICADO EN LA PRESENTE. LAS DESCRIPCIONES O ESPECIFICACIONES EN EL MATERIAL IMPRESO DE APOLLO ENDOSURGERY, INC., INCLUIDA ESTA PUBLICACIÓN,
TIENEN POR OBJETO TAN SOLO DESCRIBIR EN TÉRMINOS GENERALES EL PRODUCTO EN EL MOMENTO DE LA FABRICACIÓN Y NO CONSTITUYEN NINGUNA GARANTÍA
EXPRESA NI RECOMENDACIONES DE USO DEL PRODUCTO EN CIRCUNSTANCIAS ESPECÍFICAS. APOLLO ENDOSURGERY, INC. RECHAZA EXPRESAMENTE CUALQUIER
RESPONSABILIDAD, INCLUIDA LA RESPONSABILIDAD POR DAÑOS DIRECTOS, INDIRECTOS, ESPECIALES, INCIDENTALES O RESULTANTES, DERIVADOS DE LA
REUTILIZACIÓN DEL PRODUCTO.
1. Uso indicado
El sistema de sutura endoscópica (SSE)
OverStitch Sx™ de Apollo Endosurgery está indicado
para la colocación endoscópica de una o más suturas y
para la aproximación de tejido blando.
1.1Contraindicaciones
Entre las contraindicaciones se cuentan aquellas
específicas al uso de un sistema de sutura
endoscópica y a cualquier tipo de procedimiento
endoscópico, y pueden incluir, entre otras, las
siguientes:
- Este sistema no está concebido para utilizarse
ahí donde están contraindicadas las técnicas
endoscópicas.
- Este sistema no está concebido para utilizarse con
tejido maligno.
1.2Advertencias
- No utilice el dispositivo si la integridad del envase
estéril se ha visto afectada o si el dispositivo parece
dañado.
- Solo médicos con el suficiente conocimiento
y experiencia en estas mismas técnicas o en
otras parecidas deberían realizar procedimientos
endoscópicos.
- El contacto de los componentes electroquirúrgicos
con otros componentes puede ocasionar lesiones al
paciente o al operador, así como daño al dispositivo
o al endoscopio.
- Verifique la compatibilidad del tamaño del
endoscopio y de los instrumentos y accesorios
endoscópicos, y asegúrese de que el rendimiento
no se vea afectado.
- Asegúrese de que el endoscopio esté limpio, seco
y libre de lubricantes antes de instalar el dispositivo.
- Se recomienda utilizar OverStitch Sx en
combinación con un tubo de inserción con
un diámetro interior de al menos 16,7 mm.
- Compruebe que haya suficiente espacio para que la
aguja se abra.
- Asegúrese de que el agarre del mango del sistema
de sutura endoscópica esté cerrado y bloqueado,
y de que se haya eliminado cualquier holgura
del catéter accionador, durante la intubación y la
extubación.
- Los usuarios deberán estar familiarizados con los
procedimientos y técnicas quirúrgicas que utilizan
suturas absorbibles antes de emplear suturas
sintéticas absorbibles para el cierre de las heridas,
ya que el riesgo de dehiscencia de la herida puede
variar con el sitio de aplicación y el material de
sutura usado.
- En las situaciones en las que el lugar de la
intervención suponga un riesgo de daños a las
estructuras anatómicas adyacentes, se recomienda
utilizar accesorios endoscópicos, como la hélice
para tejido OverStitch, para retraer el tejido que se
vaya a suturar y alejarlo de estas estructuras no
visibles.
- Si se utiliza para sobrecoser objetos extraños,
como grapas, stents, clips o mallas, la aguja puede
quedar atrapada en el cuerpo extraño, lo que podría
requerir una intervención quirúrgica.
- La reutilización o el reprocesamiento del sistema
OverStitch puede provocar el funcionamiento
incorrecto del dispositivo o consecuencias en el
paciente, como:
-Infección o transmisión de enfermedades
-Fallo del mecanismo del mango que hace que el
dispositivo quede bloqueado sobre el tejido, lo
que puede requerir una intervención quirúrgica
-Reducción de la retención sobre el endoscopio,
que hace que el dispositivo se desprenda durante
el uso, lo que puede requerir una intervención
quirúrgica para recuperarlo
-Reducción de la retención del anclaje al cuerpo
de la aguja, que provoca una caída accidental
del anclaje que, a su vez, produce un retraso
del procedimiento o requiere una intervención
posterior
-Doblamiento del cuerpo de la aguja, que impide
al médico introducir la aguja correctamente o
realizar el procedimiento deseado
-Imposibilidad de extender totalmente la hélice, lo
que puede limitar la capacidad para obtener tejido
y realizar el procedimiento deseado
1.3Precauciones
- El sistema solo puede utilizarse si ha sido comprado
directamente de Apollo Endosurgery, Inc. o de uno
de sus agentes autorizados.
- Con el sistema de sutura endoscópica instalado, el
diámetro exterior eficaz del endoscopio aumenta
unos 5mm.
1.4Reacciones adversas
Entre las posibles complicaciones que podrían derivarse
del uso del sistema de sutura endoscópica cabe
mencionar las siguientes:
- Faringitis/dolor de garganta
- Náuseas o vómitos
- Dolor o distensión abdominal
- Hemorragia
- Hematoma
- Conversión a procedimiento laparoscópico o abierto
- Estenosis
- Infección y septicemia
- Perforación faríngea, colónica o esofágica
- Laceración esofágica, colónica o faríngea
- Lesión visceral intraabdominal (hueca o sólida)
- Aspiración
- Dehiscencia de la herida
- Reacción tisular inflamatoria aguda
- Muerte
1.5Compatibilidad
- El sistema es compatible con endoscopios que
tengan un tubo de inserción, un diámetro distal de
entre 8,8mm y 9,8mm, y una longitud de trabajo de
un máximo de 110cm, y que utilicen sobretubos que
tengan un diámetro interior de al menos 16,7mm.
- El sistema solo es compatible con las suturas
indicadas en la primera página. El sistema no es
compatible con otras suturas disponibles en el
mercado.
Descripción Símbolo
Consultar las Instrucciones de uso
No reutilizar
Esterilizado con óxido de etileno
Número de referencia
Descripción Símbolo
Fabricante
Precaución: La ley federal de EE. UU.
restringe la venta de este dispositivo a
médicos o por prescripción facultativa.
Fecha de fabricación
No reesterilizar
Descripción Símbolo
Fecha de caducidad
Número de lote
No utilizar si el envase está dañado
Representante autorizado en la
Comunidad Europea

12
2. Sistema envasado
3. Nomenclatura
Accionador de la aguja e
dispositivo de cambio de anclaje
Envase 1
Envase 2
Envase 3 Envase 4
Polidioxanona (absorbible) –
VIOLETA
Polipropileno (no absorbible) –
AZUL
Accionador de la aguja
Mecanismo de cierre
terminal
Dispositivo de cambio del anclaje
Botón de liberación del anclaje
Mango del accionador de la aguja
Conjunto de sutura
Cuerpo del anclaje
Hilo de sutura
Punta helicoidal
Hélice
Mango de la hélice
Guía tensora
Mango de la guía tensora
Anillo Tapón
Lazo de carga de la sutura
Hélice
(DISPONIBLE POR SEPARADO)
Guía tensora
Conjunto de sutura
Receptáculo del anclaje

13
4. Montaje
Prepare el endoscopio
ADVERTENCIA: El extremo distal del
endoscopio y el tubo de inserción deben
estar secos y libres de lubricantes antes
de instalar el dispositivo. Si no es así,
el dispositivo podría desprenderse del
endoscopio durante el uso.
4.1. Conecte el endoscopio al procesador de vídeo y
a la fuente luminosa para facilitar la instalación
del dispositivo.
4.2. Asegúrese de que el endoscopio esté recto y
con las ruedas bloqueadas antes de instalar el
dispositivo.
Prepare el dispositivo
4.3. Extraiga el accionador de la aguja del envase.
PRECAUCIÓN: Asegúrese de que el
mecanismo de cierre terminal no se caiga
ni se dañe de ninguna otra forma.
4.4. Cierre el cuerpo de la aguja.
4.5. Desde el lado del catéter accionador del
dispositivo, inserte el endoscopio entre el
catéter accionador y la vaina del catéter.
Fije el mango
4.6. Deslice el anillo del mango del accionador
de la aguja firmemente sobre el mango del
endoscopio hasta que los accesos del canal
se encuentren cerca del acceso del canal del
endoscopio.
4.7. Fíjelo estirando la correa de goma del mango
alrededor de la parte trasera del endoscopio
y encajando el extremo sobre la chaveta de
acoplamiento.
Coloque el mecanismo de cierre terminal
4.8. Inserte por completo el extremo distal del
endoscopio a través de los lazos transparentes
de la correa del mecanismo de cierre terminal
hasta que la cara del endoscopio entre en
contacto con el tope sobresaliente.
PRECAUCIÓN: Asegúrese de que la vaina
del catéter no quede retorcida a lo largo del
endoscopio.
4.9. Utilice el monitor para orientar el mecanismo de
cierre terminal como lo desee.
NOTA: La orientación final sobre el monitor
puede desplazarse en el sentido de las
agujas del reloj durante el montaje y puede
compensarse aquí.
4.10. Confirme que ambos extremos del cuerpo de la
aguja están visibles en el monitor.
Fije las correas del mecanismo de cierre terminal
4.11. Con el pulgar izquierdo colocado sobre el
logotipo de Apollo del clip del mecanismo de
cierre terminal, tire lentamente de la correa 1
hasta lograr un cierre hermético.
NOTA: La correa se vuelve transparente
cuando está suficientemente tensa.
ADVERTENCIA: Las correas no deben
estirarse más de 3 cm de carrera, ya que
podrían resultar dañadas.
ADVERTENCIA: No intente girar o cambiar
de posición el mecanismo de cierre terminal.
Si lo hace, el dispositivo o el endoscopio
podrían resultar dañados.
4.12. Repita el procedimiento con la correa 2.
4.13. Para fijar las correas, estire más las correas 1
y 2 para eliminar cualquier holgura y presione
firmemente el logotipo de Apollo de la bisagra
del clip hasta que el estribo de la bisagra quede
totalmente empotrada.
NOTA: El estribo de la bisagra es más fácil de
cerrar si se estiran ambas correas.
Fije la vaina del catéter al endoscopia
PRECAUCIÓN: Asegúrese de que el
endoscopio está plano, recto y con las ruedas
bloqueadas.
4.14. Empezando por el extremo distal, retire el
revestimiento protector de cada lado de la
correa de la vaina y enrolle la correa alrededor
del endoscopio, presionando hacia atrás sobre
sí mismo.
4.15. Proceda a lo largo de la vaina del catéter y fije las
4 correas restantes.
PRECAUCIÓN: El endoscopio deberá encajar
dentro de la superficie interior de la vaina del
catéter a lo largo de esta.
PRECAUCIÓN: No estire demasiado ninguna
de las correas de la vaina.
ADVERTENCIA: Asegúrese de que los
catéteres y la vaina queden a ras a lo largo
del endoscopio.
ADVERTENCIA: Asegúrese de que todas
las correas de la vaina estén adheridas a sí
mismas y de que no estén desalineadas. Si
se aplica fuerza, las esquinas al descubierto
pueden descortezarse.

14
Retire el clip del mecanismo de cierre terminal
4.16. Mientras fija el mecanismo de cierre terminal,
gire el clip del mecanismo en sentido contrario al
de las agujas del reloj (indicado por flechas) para
retirarlo del mecanismo.
4.17. Deseche el clip del mecanismo de cierre
terminal.
Recorte los cabos sobrantes de las correas del
mecanismo de cierre terminal
ADVERTENCIA: Confirme que los extremos
ocultos de las dos correas del mecanismo de
cierre terminal están totalmente empotradas
dentro del mecanismo.
4.18. Utilice una cuchilla quirúrgica para recortar
los cabos sobrantes de las dos correas del
mecanismo de cierre terminal a ras con la
superficie del mecanismo.
Instale las válvulas de biopsia
4.19. Acople válvulas de biopsia estándar a todos
los canales de trabajo del endoscopio y del
dispositivo.
4.20. La válvula de biopsia del canal del dispositivo de
cambio del anclaje (exterior) deberá estar en la
posición abierta.
Cargue el anclaje
4.21. Seleccione la sutura adecuada.
4.22. Extraiga el conjunto de la sutura y el dispositivo
de cambio del anclaje del envase.
4.23. Cargue el anclaje sobre el dispositivo de cambio
del anclaje.
4.24. Extraiga la sutura del cartucho de la sutura
sujetando y tirando de esta última, no del anclaje
ni del dispositivo de cambio del anclaje.
NOTA:Tras extraer la sutura del cartucho,
compruebe que no esté enredada.
4.25. Inserte el dispositivo de cambio del anclaje en
el canal del dispositivo de cambio del anclaje
(exterior) abierto del dispositivo.
PRECAUCIÓN: No lo utilice cuando las
cubiertas de las válvulas estén cerradas ya
que aumentará la resistencia de la sutura.
4.26. Sujetando el catéter con la mano como si fuera
un lápiz para lograr un control óptimo, haga
avanzar el dispositivo de cambio del anclaje
hasta que el anclaje esté situado cerca del
extremo distal del dispositivo.
PRECAUCIÓN: Si se encuentra resistencia al
hacer avanzar el dispositivo de cambio del
anclaje a través del canal del dispositivo de
cambio del anclaje, reduzca la angulación del
endoscopio hasta que el dispositivo pase sin
atorarse.
Lubrique el dispositivo
4.27. Lubrique por completo los 50 cm distales del
dispositivo instalado y del endoscopio, y todo el
largo de las paredes interiores del sobretubo.
ADVERTENCIA: Para los procedimientos
transorales se recomienda el uso de un tubo
de inserción apropiado (con un diámetro
interior de al menos 16,7 mm).
ADVERTENCIA: Confirme que el tamaño del
dispositivo instalado es compatible con el
sobretubo antes del uso.
4.28. Inserte el endoscopio en el paciente.
ADVERTENCIA: No introduzca el dispositivo
con el cuerpo de la aguja en la posición
abierta.
5. Desplazamiento a la diana anatómica
5.1. Avance hasta que se localice la diana anatómica.
PRECAUCIÓN: Durante la intubación o
la extubación con el sistema de sutura
endoscópica, asegúrese de que la longitud
de trabajo del endoscopio y la vaina externa
se hagan avanzar o se retraigan juntas, y
de eliminar cualquier holgura del catéter
accionador.
PRECAUCIÓN: No dirija el endoscopio sin los
accesorios del dispositivo instalados hasta el
extremo distal del canal principal y del canal
secundario (si se está utilizando), ya que
ello podría hacer que los catéteres queden
ligeramente retorcidos.
5.2. Abra el cuerpo de la aguja.
5.3. Haga avanzar el dispositivo de cambio del anclaje
o manipule el endoscopio para crear holgura en
la sutura.
5.4. Una vez que se haya creado la suficiente
holgura, retraiga el dispositivo de cambio del
anclaje al interior del dispositivo.
5.5. Cierre el cuerpo de la aguja.
5.6. Sujete el tramo blanco del cable con la mano
como si fuera un lápiz para hacer avanzar el
dispositivo de cambio del anclaje hasta que
el anclaje esté totalmente asentado sobre el
cuerpo de la aguja.
5.7. Es posible que se perciba un «clic» táctil o una
parada firme en el momento en que el anclaje
se asienta completamente sobre el cuerpo de
la aguja.
5.8. Compruebe la imagen del monitor para
garantizar que el anclaje esté bien instalado
sobre el cuerpo de la aguja.
5.9. Asegúrese de que el extremo proximal de la
sutura esté visible más allá de las válvulas de los
canales del mango.

15
5.10. Presione a fondo el botón de liberación del
anclaje para liberar el anclaje.
5.11. Sin soltar el botón de liberación del anclaje,
retraiga ligeramente el dispositivo de cambio del
anclaje.
6. Manejo del tejido y de la sutura
6.1. Abra el cuerpo de la aguja.
PRECAUCIÓN: Si el cuerpo de la aguja no
se abre, compruebe que el anclaje se haya
liberado del dispositivo de cambio del anclaje.
ADVERTENCIA: Asegúrese de que la holgura
de la sutura que se ha creado sea suficiente
para el trayecto y el patrón de sutura
deseados. Haga avanzar el dispositivo de
cambio del anclaje o manipule el endoscopio
para crear holgura en la sutura.
6.2. Coloque el tejido en el lugar adecuado para
suturarlo, usando la hélice de Apollo u otro
accesorio compatible de 2,8 mm si se requiere.
7. Uso de la hélice para tejido (opcional)
7.1. Haga avanzar la hélice al interior del canal para
hélice del SSE en la posición retraída, hasta que
la punta distal esté visible en el monitor.
PRECAUCIÓN: Si se encuentra resistencia
al hacer avanzar la hélice a través del canal
para hélice del SSE, reduzca la angulación
del endoscopio hasta que el dispositivo pase
sin atorarse, y asegúrese de que el canal de
trabajo secundario del dispositivo no esté
obstruido.
7.2. Presione del todo el botón del mango de la
hélice para dejar a la vista la punta helicoidal.
PRECAUCIÓN: No presione el botón del
mango de la hélice mientras esta avanza a
través del dispositivo.
7.3. Obtenga tejido girando el mango de la hélice en
el sentido de las agujas del reloj hasta que se
consiga la profundidad de tejido correcta.
7.4. Durante la obtención de tejido, mantenga una
suave presión hacia delante.
7.5. Haga avanzar/retraiga la hélice para colocar el
tejido en el lugar deseado.
8. Sutura
8.1. Pase la aguja a través del tejido cerrando el
cuerpo de la aguja.
8.2. Asegúrese de que el brazo de la aguja no se
cierre accidentalmente sobre ningún cuerpo
extraño o dispositivo.
Recupere el anclaje
8.3. Sujete el dispositivo de cambio del anclaje con
la mano como si fuera un lápiz y hágalo avanzar
hasta que el anclaje se enganche se sienta
resistencia.
NOTA: La resistencia puede variar según la
posición del endoscopio.
8.4. Retraiga el dispositivo de cambio del anclaje para
extraer el anclaje.
8.5. Sujete el tramo blanco del cable con la mano
como si fuera un lápiz y coloque los otros dedos
de la misma mano en el mango del dispositivo
para evitar que la sutura o el tejido sufran daño
una vez que el anclaje salga del cuerpo de la
aguja.
PRECAUCIÓN: No presione el botón de
liberación del anclaje, ya que esto puede
hacer que el anclaje se caiga de forma
inadvertida.
ADVERTENCIA: Si no se ha creado suficiente
holgura antes de pasar el anclaje a través del
tejido, la retracción del dispositivo de cambio
del anclaje podría ser difícil y el anclaje
podría no liberarse correctamente del cuerpo
de la aguja.
Libere el tejido
8.6. Gire el mango de la hélice en sentido contrario al
de las agujas del reloj hasta que el dispositivo se
suelte del tejido.
8.7. Retorne el botón del mango de la hélice.
8.8. Compruebe en el monitor que la punta está
totalmente retraída en el eje antes de la retirada
al interior del canal para hélice.
8.9. Retraiga la hélice una distancia corta al interior
del canal para hélice.
8.10. Abra el cuerpo de la aguja.
PRECAUCIÓN: No tense la sutura con el
anclaje en el cuerpo de la aguja.

16
8.11. Para seguir colocando puntos con este anclaje,
repita las secciones 5-8.
Si se ha terminado de poner puntos para este
anclaje, pase a la sección 9 para aproximar el
tejido y sujetar y cortar la sutura.
Se pueden utilizar varios anclajes con cada
accionador de aguja y dispositivo de cambio del
anclaje.
9. Fijación y corte de la sutura
9.1. Asegúrese de que el anclaje esté en el dispositivo
de cambio del anclaje y abra el cuerpo de la aguja.
9.2. Haga avanzar el anclaje en dirección distal con
respecto al dispositivo hasta que esté visible en
el monitor.
9.3. Presione a fondo el botón de liberación del
anclaje y retraiga el dispositivo de cambio del
anclaje para liberar el anclaje.
PRECAUCIÓN: No libere el anclaje dentro del
canal del dispositivo de cambio del anclaje.
9.4. Retire el dispositivo de cambio del anclaje
del SSE.
NOTA: El dispositivo de cambio del anclaje
puede utilizarse para otras suturas.
9.5. Introduzca el extremo proximal de la sutura en el
lazo de carga de la sutura desmontable.
9.6. Tras pasar la sutura, libere el extremo proximal
de la sutura para permitir la carga.
9.7. Tire del lazo de carga de la sutura paralelamente
al dispositivo, para introducir la sutura en la guía
tensora.
9.8. Sosteniendo el extremo proximal de la sutura,
baje la guía tensora por el canal del dispositivo
de cambio del anclaje hasta que pueda verse
el texto «Plug and Collar» (tapón y anillo) en el
monitor.
9.9. Tire de la sutura en un sentido y ejerza tracción
en la guía tensora en sentido contrario, hasta
que el tejido se aproxime y se consiga la tensión
de la sutura deseada entre el anclaje y el anillo
de la guía tensora.
NOTA: El anillo es lo que determina la
posición final de la guía tensora, no el tapón.
ADVERTENCIA: Una tensión excesiva podría
dañar el tejido.
9.10. Mientras mantiene tensa la sutura, retire el
espaciador de seguridad del mango de la guía
tensora.
PRECAUCIÓN: El espaciador de seguridad
solo debe retirarse inmediatamente antes de
desplegar la guía tensora.
9.11. Apriete firmemente el mango de la guía tensora
para desplegar la guía tensora y cortar la sutura.
PRECAUCIÓN: La tensión de la sutura debe
mantenerse durante el despliegue de la guía
tensora.
NOTA: Se requiere una fuerza significativa
para tirar del tapón y bloquearlo en el interior
del anillo; con frecuencia puede percibirse
un chasquido una vez cortada la sutura.
No despliegue demasiado la guía tensora;
apriete el mango solamente hasta que se
corte la sutura.
9.12. Retire la guía tensora.
9.13. Cierre el cuerpo de la aguja.
10. Varias suturas
10.1. El dispositivo de cambio del anclaje y el
accionador de la aguja pueden utilizarse con
varias suturas. No es necesario retirar el
endoscopio después de usar la guía tensora si
se van a desplegar más suturas.
ADVERTENCIA: Si el endoscopio se retira,
asegúrese de que el mecanismo de cierre
terminal esté fijado al endoscopio antes de la
próxima intubación. El mecanismo de cierre
terminal no puede cambiarse de posición ni
volverse a encajar en el endoscopio.
10.2. Para utilizar otro conjunto de sutura, vuelva al
paso 4.21 para cargar el anclaje y siga todos los
pasos posteriores.
Si la sutura ha concluido, vaya a la sección 11
para retirar el dispositivo.
11. Retirada del dispositivo
11. 1. Retire los dispositivos accesorios.
11.2. Asegúrese de que el cuerpo de la aguja esté
cerrado y retraiga el endoscopio del paciente,
asegurándose de retraer la vaina externa junto
con el endoscopio.
ADVERTENCIA: Asegúrese de eliminar
cualquier holgura del catéter accionador en el
dispositivo antes de retirar el dispositivo del
paciente.
11.3. Inserte una cuchilla quirúrgica a través de la
ranura vertical larga del lateral del mecanismo
de cierre terminal y corte cada correa del
mecanismo de cierre terminal.
NOTA: La ranura vertical protege el
endoscopio de daños durante la retirada del
mecanismo de cierre terminal.
11.4. Mientras mira por la cara del endoscopio, gire el
mecanismo de cierre terminal en el sentido de
las agujas del reloj alrededor del endoscopio para
retirar el mecanismo de cierre terminal.
11.5. Desenrolle cada correa de la vaina y extraiga la
vaina del catéter del endoscopio.
11.6. Desate la correa del mango y retire el soporte
del mango del endoscopio.

17
En las condiciones de RM definidas más arriba,
se espera que el sistema de anclaje produzca un
aumento de temperatura máximo de menos de 2 °C
después de 15 minutos de escaneado continuo.
En las pruebas no clínicas, el artefacto de la imagen
causado por el sistema de anclaje se extiende unos
10 mm desde este dispositivo en una exploración
de secuencia de pulsos en gradiente de eco con un
sistema de RM de 3,0 T.
13.Solución de problemas
13.1. El cuerpo de la aguja no se abre:
Causa Resolución
13.1.1. Aguja obstruida: i. Evalúe el espacio en el que está trabajando y maniobre la vaina y el endoscopio a la vez como si fueran un
sistema; enderece el endoscopio hasta colocarlo en la posición no retroflexionada.
13.1.2. Movimiento de la sutura restringido:
i. Si el anclaje está sobre el cuerpo de la aguja, asegúrese de que la sutura no se mantenga proximal cerca del
mango durante la operación de apertura.
ii.Transfiera el anclaje al dispositivo de cambio del anclaje. Abra el cuerpo de la aguja. Retraiga lentamente el
dispositivo de cambio del anclaje proximalmente y luego haga avanzar el cuerpo de la aguja distalmente para
liberar la sutura.
13.1.3. Vaina o catéter accionador enrollado o doblado:
i. Compruebe para asegurarse de que la vaina y el catéter accionador que baja por el exterior del endoscopio
no estén enrollados ni doblados. Enderece el endoscopio a la posición no retroflexionada. Haga avanzar el
endoscopio y tire ligeramente para eliminar cualquier holgura de la vaina y del catéter accionador proximalmente
hasta que se perciba una resistencia mínima. Sujete la vaina y el endoscopio, y ajuste mediante el avance y la
retracción de los dos a la vez.
13.1.4. Obstrucción por cuerpo extraño:
i. Retire el dispositivo de cambio del anclaje solamente:
a. Transfiera el anclaje al cuerpo de la aguja y retire el dispositivo de cambio del anclaje del dispositivo.
b. Introduzca un agarrador a través del canal principal y empuje el cuerpo de la aguja para abrirlo.
ii. Retire el anclaje y el dispositivo de cambio del anclaje, cortando la sutura si fuera necesario:
a. Transfiera el anclaje al cuerpo de la aguja y retire el dispositivo de cambio del anclaje del dispositivo.
b. Corte la sutura con el accesorio adecuado (introdúzcalo a través de cualquiera de los canales).
c. Utilice un accesorio para empujar y abrir el cuerpo de la aguja.
d. Retire la sutura cortada usando los medios adecuados.
iii. Una vez agotadas las técnicas endoscópicas habituales, utilice técnicas laparoscópicas para retirar el dispositivo.
13.2. El cuerpo de la aguja no se cierra:
Causa Resolución
13.2.1. Obstrucción general:
i. Siga los pasos 13.1.1, 13.1.2, 13.1.3 anteriores (el cuerpo de la aguja no se abre).
ii. Asegúrese de que el mango del accionador de la aguja esté cerrado y bloqueado, y:
a. Estire el catéter accionador para cambiar la longitud eficaz del cable de accionamiento del cuerpo de la aguja.
b. Retire el dispositivo de cambio del anclaje y utilice agarradores (a través del canal principal del dispositivo)
para agarrar el cuerpo de la aguja. Corte la sutura si es necesario.
13.2.2. Cable del accionador de la aguja roto:
i. Despliegue el anclaje y la guía tensora. Haga avanzar el agarrador a través del endoscopio y asegure al
accionador de la aguja. Tire para cerrar el accionador de la aguja mientras retira el dispositivo. Si utiliza un tubo
de inserción, haga avanzar el tubo lo más distalmente posible y retire el endoscopio y el dispositivo al interior del
tubo de inserción, usando la punta distal del tubo de inserción para cerrar el cuerpo de la aguja.
13.3. El dispositivo de cambio del anclaje no realizará el cambio:
Causa Resolución
13.3.1. El dispositivo de cambio del anclaje no instalará el
anclaje sobre el cuerpo de la aguja:
i. Asegúrese de que haya suficiente holgura en la sutura y de que la sutura del exterior del dispositivo no esté enredada.
ii. Asegúrese de que el dispositivo de cambio del anclaje esté adecuadamente colocado en el mecanismo de
cierre terminal del accionador de la aguja.
iii. Si el anclaje y la sutura están atravesando el tejido, o bien deje caer el anclaje y despliegue la guía tensora
según la sección 9 de las instrucciones de uso o bien deje caer el anclaje y utilice un accesorio adecuado para
cortar y retirar la sutura.
iv. Si el anclaje y la sutura no están atravesando el tejido, cierre el mango del accionador de la aguja. Extraiga el
dispositivo. Cambie el anclaje o el dispositivo de cambio del anclaje.
13.3.2. El dispositivo de cambio del anclaje no liberará un
anclaje:
i. Asegúrese de que haya suficiente holgura en la sutura y de que la sutura del exterior del dispositivo no esté enredada.
ii. Asegúrese de que el botón de liberación del dispositivo de cambio del anclaje estéTOTALMENTE pulsado
mientras repliega el dispositivo de cambio del anclaje.
iii. Reduzca la articulación/tortuosidad del endoscopio (si es posible) y trate de liberar el anclaje.
iv. Utilice accesorios compatibles con el canal secundario del dispositivo o con el canal de trabajo del endoscopio
para cortar y retirar la sutura.
v.Cambie el dispositivo de cambio del anclaje.
12.Información de RM
MR Conditional
En pruebas no clínicas se ha demostrado que las
suturas, las guías tensoras y los anclajes (en su
conjunto denominados sistema de anclaje) desplegados
por el sistema de sutura endoscópica OverStitch
son «MR Conditional» (esto es, seguros bajo ciertas
condiciones de la RM), según la clasificación de la
American Society for Testing and Materials.
Un paciente con este sistema de anclaje puede
ser escaneado de manera segura, inmediatamente
después de la colocación, en un sistema de RM que
cumpla las condiciones siguientes:
- Campo magnético estático de 1,5T o 3,0T
- Gradiente de campo espacial máximo de
2000gauss/cm (20T/m)
- Promedio de índice de absorción específica (SAR,
por sus siglas en inglés) de cuerpo entero máximo
indicado por el sistema de RM de 2W/kg

18
13.3.3 El dispositivo de cambio del anclaje no recuperará el
anclaje del cuerpo de la aguja:
i. Asegúrese de que haya suficiente holgura en la sutura y de que el mango del accionador de la aguja esté en
posición cerrada.
ii. Sujete el dispositivo de cambio del anclaje con la mano como si fuera un lápiz y hágalo avanzar hasta que el
anclaje se enganche y se sienta resistencia. Retraiga el dispositivo de cambio del anclaje para extraer el anclaje.
iii. Si el anclaje no puede recuperarse, cambie el dispositivo de cambio del anclaje. Alternativamente, utilice un
accesorio adecuado para cortar y retirar la sutura.
iv. Cambie el anclaje y reanude la sutura siguiendo la sección 8 de las instrucciones de uso.
13.4. La guía tensora no corta la sutura cuando se activa:
Causa Resolución
13.4.1. Sutura no cortada:
i. Utilice un accesorio adecuado a través del canal secundario del dispositivo o del canal de trabajo del
endoscopio para cortar la sutura y retirar la guía tensora.
ii. Utilice técnicas endoscópicas estándar para retirar la sutura cortada.
13.5. Caída inadvertida del anclaje:
Causa Resolución
13.5.1. El botón del dispositivo de cambio del anclaje se ha
presionado en una secuencia distinta a la establecida:
i. Recupere el anclaje como si fuera un cuerpo extraño, o siga el procedimiento establecido para tensar con la
guía tensora. Si el anclaje se ha caído dentro del canal del dispositivo, use el dispositivo de cambio del anclaje o
un agarrador compatible de 3,2mm para empujar el anclaje a través del dispositivo hasta que salga de él.
No intente volver a introducir el anclaje a través del dispositivo tirando de él, ya que podría quedar atascado en el
canal o en el acople en Y en el mango.
13.6. Enredo de la sutura:
Causa Resolución
13.6.1. Sutura fuera del campo de visión: i. Cierre el mango del accionador de la aguja y haga retroceder el endoscopio para liberarlo.
13.6.2. Sutura detrás del protector de tejido:
i. Cierre ligeramente el cuerpo de la aguja al tiempo que retrae el endoscopio.
ii. Si es necesario, transfiera el anclaje al dispositivo de cambio del anclaje.
iii. Abra el cuerpo de la aguja y haga avanzar el dispositivo de cambio del anclaje más allá de el mecanismo de
cierre terminal para empujar la sutura y liberarla.
13.6.3. Sutura enrollada:
i. Si la sutura está enrollada, mueva el endoscopio y transfiera el anclaje entre el cuerpo de la aguja y el
dispositivo de cambio del anclaje, en el lado opuesto del hilo de sutura, según sea necesario para desenrollarla.
NOTA: Si se notó cómo la sutura se enrollaba justo después de la articulación del endoscopio, intente primero
articular este último en el orden inverso para retirarla.
ii. Si el anclaje se ha desplegado, utilice la guía tensora para empujar y guiar la sutura hasta liberarla.
13.7. Separación del mecanismo de cierre terminal del endoscopio:
Causa Resolución
13.7.1. Separado durante el uso:
i. Cierre el cuerpo de la aguja, elimine cualquier holgura en el catéter accionador y retire lentamente el dispositivo
del paciente. Si utiliza un tubo de inserción, haga avanzar el tubo lo más distalmente posible y retire el endoscopio
y el dispositivo al interior del tubo, con una sujeción firme de la vaina para mantener el mecanismo de cierre
terminal a ras con el endoscopio.
13.8. La hélice no se desenrosca:
Causa Resolución
13.8.1. Hélice atascada en el tejido:
i. Utilice un accesorio adecuado a través del canal principal del dispositivo o del canal de trabajo del endoscopio
para aplicar tracción en sentido contrario al tejido alrededor de la hélice y tirar de la hélice hasta liberarla.
ii. Una vez agotadas las técnicas endoscópicas, utilice técnicas laparoscópicas para retirar la hélice.
13.9. El extremo de la correa del mecanismo de cierre terminal no está asentado en este antes de cortar las colas de las correas del mecanismo de cierre terminal:
Causa Resolución
13.9.1. La bisagra del clip del mecanismo de cierre terminal
no se encajó por completo durante la instalación:
i. Tire suavemente del endoscopio para empotrar por completo los extremos opuestos a las colas de las dos
correas del mecanismo de cierre terminal al interior de este.
ii. Si no se desechan, pase las colas de las correas del mecanismo de cierre terminal a través de las ranuras 1 y
2correspondientes del canal en el clip del mecanismo de cierre terminal. Vuelva a colocar el clip del mecanismo
de cierre terminal girándolo en el sentido de las agujas del reloj sobre el mecanismo de cierre terminal (lo
contrario a lo descrito en la sección 4.16) y repita los pasos de montaje.
iii. Si no está disponible el clip del mecanismo de cierre terminal, utilice el pulgar izquierdo en el lugar del clip
del mecanismo de cierre terminal para sostener el extremo opuesto a la cola de cada correa del mecanismo de
cierre terminal dentro de este y repita los pasos de apriete de las correas del mecanismo de cierre terminal.
13.10. Dificultad al hacer pasar el dispositivo instalado a través del sobretubo:
Causa Resolución
13.10.1. No se ha aplicado suficiente lubricante: i. Lubrique por completo el dispositivo y el interior del sobretubo. Aplique un movimiento giratorio del endoscopio
con el dispositivo instalado durante la intubación y la extubación.
13.10.2. Los tamaños del endoscopio o del sobretubo no
son compatibles:
i. Cambie el sobretubo seleccionado por otro de mayor tamaño.
13.10.3. Los catéteres no están colocados planos contra el
endoscopio:
i. Maniobre el endoscopio y el dispositivo para que queden planos uno contra otro. Aplique un movimiento
giratorio del endoscopio con el dispositivo instalado durante la intubación y la extubación.
13.10.4. Las correas del mecanismo de cierre terminal no se
han recortado a ras con el mecanismo de cierre terminal:
i. Retire el endoscopio del sobretubo. Recorte las correas del mecanismo de cierre terminal a ras con el
mecanismo de cierre terminal siguiendo lo indicado en el paso 4.18.

19
Tabelle der Symbole
Nur für den Einmalgebrauch. Einwegartikel. Nicht resterilisieren.Achtung: Laut US-Gesetzgebung darf dieses Produkt nur von einem Arzt oder im Auftrag eines Arztes
gekauft werden. Zum Patent angemeldet.
GARANTIEAUSSCHLUSS UND HAFTUNGSBESCHRÄNKUNG
APOLLO ENDOSURGERY, INC. SCHLIEßT JEGLICHE AUSDRÜCKLICHE ODER IMPLIZIERTE GARANTIE, EINSCHLIEßLICH UND OHNE EINSCHRÄNKUNG JEGLICHER
IMPLIZIERTEN GARANTIE HINSICHTLICH DER MARKTTAUGLICHKEIT ODER EIGNUNG FÜR EINEN BESTIMMTEN ZWECK, FÜR DAS ODER DIE IN DIESER PUBLIKATION
BESCHRIEBENENPRODUKTEAUS.APOLLO ENDOSURGERY, INC. LEHNT JEGLICHE HAFTUNGFÜR INDIREKTE, BESONDERE,ZUFÄLLIG ENTSTANDENE ODER FOLGESCHÄDEN
IM VOLLEN RECHTLICH ZULÄSSIGEN UMFANG AB, UNABHÄNGIG DAVON, OB DERARTIGE HAFTUNGSANSPRÜCHE AUF EINEM VERTRAG, DEM SCHADENSERSATZRECHT,
FAHRLÄSSIGKEIT, DER ERFOLGSHAFTUNG, DER PRODUKTHAFTUNG ODER SONSTIGEM BERUHEN. DIE EINZIGE UND MAXIMALE HAFTBARKEIT SEITENS APOLLO
ENDOSURGERY, INC. AUS JEGLICHEM GRUNDE SOWIE DER EINZIGE UND AUSSCHLIEßLICHE HAFTUNGSANSPRUCH DES KÄUFERS AUS JEGLICHEM GRUNDE IST AUF DEN
VOM KUNDEN FÜR DIE BESTIMMTEN WAREN GEZAHLTEN KAUFPREIS BESCHRÄNKT. KEINE PERSON HAT DIE BEFUGNIS, APOLLO ENDOSURGERY, INC. AN IRGENDEINE
ANDERE DARSTELLUNG ODER GARANTIEALS DIE HIERIN SPEZIFISCHVEREINBARTE ZU BINDEN. DIE IN DEN DRUCKERZEUGNISSEN, EINSCHLIEßLICH DIESER PUBLIKATION,
VON APOLLO ENDOSURGERY, INC. AUFGEFÜHRTEN BESCHREIBUNGEN UND SPEZIFIKATIONEN DIENEN AUSSCHLIEßLICH DER ALLGEMEINEN BESCHREIBUNG DES
PRODUKTS ZUM ZEITPUNKT DER HERSTELLUNG UND STELLEN KEINE AUSDRÜCKLICHEN GARANTIEN ODER EMPFEHLUNGEN FÜR DIE VERWENDUNG DES PRODUKTS
UNTER BESONDEREN BEDINGUNGEN DAR. APOLLO ENDOSURGERY, INC. LEHNT AUSDRÜCKLICH JEGLICHE HAFTUNG, EINSCHLIEßLICH JEGLICHER HAFTUNG FÜR
DIREKTE, INDIREKTE, BESONDERE, ZUFÄLLIG ENTSTANDENE ODER FOLGESCHÄDEN AB, DIE SICH AUS DER WIEDERVERWENDUNG DES PRODUKTS ERGEBEN.
1.Verwendungszweck
Das Apollo Endosurgery OverStitch Sx™
endoskopische Nahtsystem (ENS), ist für die
endoskopische Platzierung von Nähten und die
Approximation von Weichgewebe vorgesehen.
1.1Kontraindikationen
Bei den Kontraindikationen handelt es sich um jene,
die speziell mit der Verwendung eines endoskopischen
Nahtsystems und jeder Art von endoskopischen
Verfahren einhergehen. Sie umfassen u.a.:
- Dieses System darf nicht verwendet werden, wenn
ein endoskopisches Verfahren kontraindiziert ist.
- Dieses System darf nicht bei malignem Gewebe
verwendet werden.
1.2Warnhinweise
- Es darf kein Produkt verwendet werden, bei
dem Zweifel an der Unversehrtheit der sterilen
Verpackung bestehen. Es darf außerdem kein
anscheinend beschädigtes Produkt verwendet
werden.
- Endoskopische Verfahren dürfen nur von Ärzten
durchgeführt werden, die über hinreichend
Kompetenz und Erfahrung in ähnlichen oder
gleichen Techniken verfügen.
- Der Kontakt von elektrochirurgischen Komponenten
mit anderen Komponenten kann Verletzungen des
Patienten und/oder Operateurs sowie Schäden am
Produkt und/oder Endoskop zur Folge haben.
- Die Kompatibilität der Größe des Endoskops, der
endoskopischen Instrumente und Zubehörteile
muss überprüft und die uneingeschränkte Funktion
sichergestellt werden.
- Das Endoskop muss vor der Produktinstallation
sauber, trocken und frei von Schmiermitteln sein.
- Es wird empfohlen, OverStitch Sx in Kombination
mit einem Übertubus mit einem Innendurchmesser
von mindestens 16,7 mm zu verwenden.
- Es muss sichergestellt werden, dass genügend
Platz zur Öffnung der Nadel vorliegt.
- Es muss sichergestellt werden, dass der
Handgriff des endoskopischen Nahtsystems
bei der Intubation und Extubation geschlossen
und verriegelt ist und ein Fadendurchhang am
Auslösekatheter beseitigt wurde.
- Vor der Verwendung von synthetischem
resorbierbarem Nahtmaterial für den Wundverschluss
müssen dem Operateur die chirurgischen Verfahren
und Techniken mit resorbierbarem Nahtmaterial
bekannt sein, da das Risiko einer Wunddehiszenz
je nach Anwendungssitus und verwendetem
Nahtmaterial variieren kann.
- In Situationen, in denen der Anwendungssitus ein
Verletzungsrisiko für umliegende anatomische
Strukturen darstellt, wird die Verwendung von
endoskopischem Zubehör wie der OverStitch
Gewebe-Helix empfohlen, mit der das zu
nähende Gewebe von diesen okkulten Strukturen
ferngehalten werden kann.
- Bei Verwendung zum Nähen über Fremdobjekte,
wie Klammern, Stents, Clips oder Netzen, kann die
Nadel im Fremdkörper hängenbleiben und einen
weiteren operativen Eingriff erforderlich machen.
- Die Wiederverwendung oder Wiederaufbereitung
des OverStitch-Systems könnte eine Fehlfunktion
der Vorrichtung oder Konsequenzen für den
Patienten nach sich ziehen, einschließlich:
-Infektion oder Übertragung von Krankheiten
-Ein Versagen des Griffmechanismus, der dazu
führt, dass das am Gewebe festsitzende Produkt
operativ entfernt werden muss
-Eine unzureichende Haftung am Endoskop, die zur
Ablösung des verwendeten Produkts führt, das
dann als Folge möglicherweise operativ geborgen
werden muss
-Eine unzureichende Haftung des Ankers am
Nadelkörper, was zur unbeabsichtigten Ablösung
des Ankers und entweder zu Verzögerungen
im Verfahrensablauf führt oder einen weiteren
Eingriff erfordert
-Verbiegung des Nadelkörpers, der einen
ordnungsgemäßen Vorschub der Nadel oder die
Durchführung des geplanten Eingriffs durch den
Arzt verhindert
-Bei nicht vollständig ausgefahrener Helix werden
die Möglichkeit zur Gewebeerfassung sowie das
beabsichtigte Verfahren eingeschränkt.
1.3Vorsichtsmaßnahmen
- Das System darf nur verwendet werden, wenn es
von Apollo Endosurgery, Inc. oder einem autorisierten
Vertreter erworben wurde.
- Beim installierten endoskopischen Nahtsystem wird
der effektive Außendurchmesser des Endoskops um
ca. 5mm vergrößert.
1.4Unerwünschte Ereignisse
Zu den möglichen Komplikationen in Folge der
Verwendung des endoskopischen Nahtsystems
gehören u.a.:
- Pharyngitis/Halsschmerzen
- Übelkeit und/oder Erbrechen
- Bauchschmerzen und/oder Blähungen
- Blutung
- Hämatom
- Umstellung auf ein laparoskopisches oder offenes
Verfahren
- Striktur
- Infektion/Sepsis
- Pharynx-, Kolon- und/oder Ösophagusperforation
- Pharynx-, Kolon- und/oder Ösophaguslazeration
- Verletzung der intraabdominellen (hohlen oder
soliden) Viszera
- Aspiration
- Wunddehiszenz
- Akute entzündliche Gewebereaktion
- To d
1.5Kompatibilität
- Das System ist mit Endoskopen kompatibel, die
einen Einführtubus und einen distalen Durchmesser
zwischen 8,8mm und 9,8mm, eine Arbeitslänge bis
110cm haben und einen Übertubus mit mindestens
16,7mm Innendurchmesser verwenden.
- Das System ist nur mit den auf der ersten Seite
angegebenen Fäden kompatibel. Das System ist nicht
mit anderen Fäden auf dem Markt kompatibel.
Beschreibung Symbol
Gebrauchsanweisung beachten
Nicht wiederverwenden
Mit Ethylenoxid sterilisiert
Referenznummer
Beschreibung Symbol
Hersteller
Achtung: Laut US-Gesetzgebung darf
dieses Produkt nur von einem Arzt oder
im Auftrag eines Arztes gekauft werden
Herstellungsdatum
Nicht resterilisieren
Beschreibung Symbol
Verwendbar bis
Losnummer
Inhalt bei beschädigter Verpackung
nicht verwenden
Bevollmächtigter in der EU

20
2.Verpacktes System
3. Nomenklatur
Nadelschieber und
Ankerwechsler
Packung 1
Packung 2
Packung 3 Packung 4
Polydioxanon (resorbierbar) -
VIOLETT
Polypropylen (nicht resorbierbar) -
BLAU
Nadelschieber
Endkappe
Ankerwechsler
Ankerfreigabeknopf
Nadelschiebergriff
Fadeneinheit
Ankerkörper
Faden
Helixspitze
Helix
Helix-Griff
Cinch
Cinch-Griff
Manschette Stopfen
Fadendurchführschlaufe
Helix
(SEPARAT ERHÄLTLICH)
Cinch
Fadeneinheit
Ankeranschluss
This manual suits for next models
7
Table of contents
Languages:
Other apollo endosurgery Medical Equipment manuals