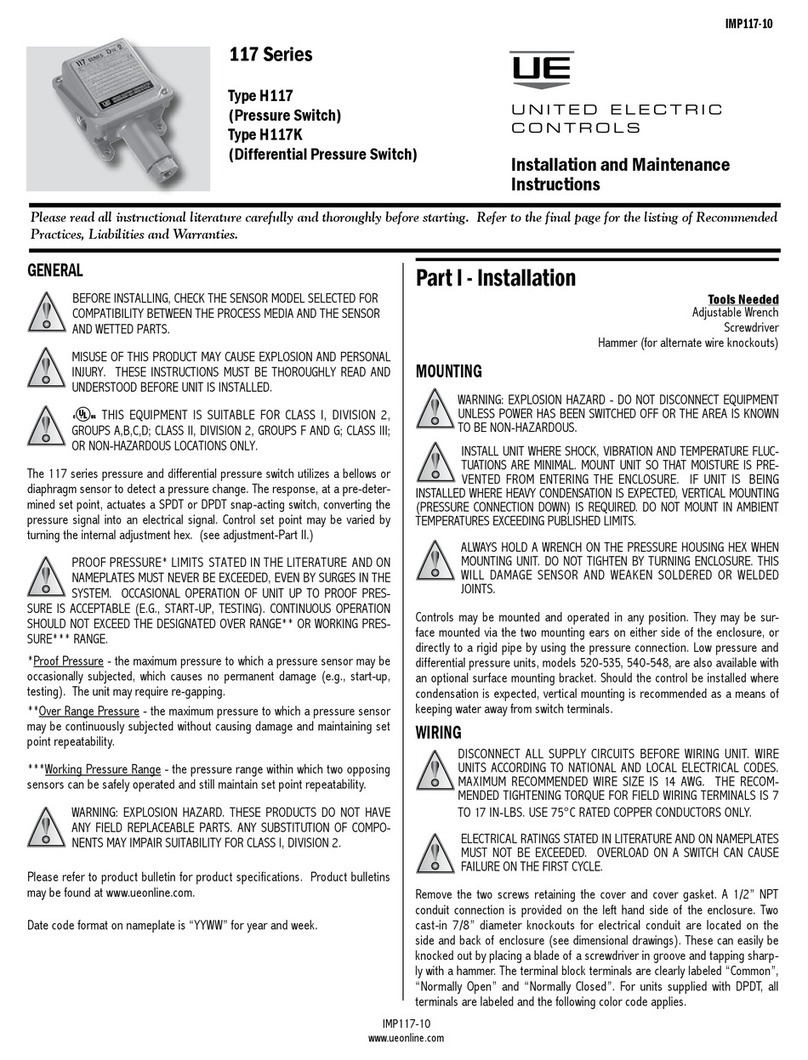
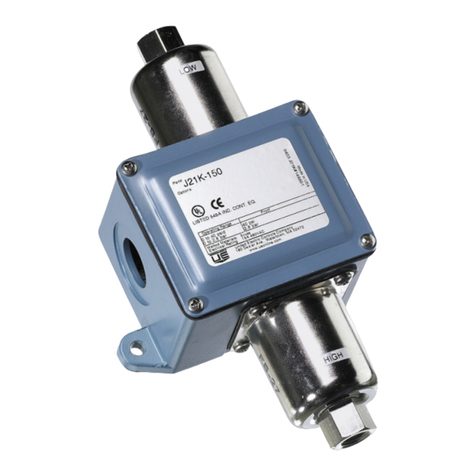
UE ONE Series User manual

IM_1XSW-02
www.ueonline.com 1
GENERAL
MISUSE OF THIS PRODUCT MAY CAUSE EXPLOSION AND PERSONAL INJURY. THESE INSTRUCTIONS MUST BE THOROUGHLY READ AND UNDERSTOOD
BEFORE UNIT IS INSTALLED. SEE THE PRODUCT NAMEPLATE INFORMATION FOR SPECIFIC AGENCY CERTIFICATIONS APPLICABLE TO YOUR PRODUCT.
SUBSTITUTION OF COMPONENTS MAY IMPAIR SUITABILITY FOR USE IN HAZARDOUS LOCATIONS. CABLE GLANDS USED MUST BE RATED FOR A MINIMUM
OF IP66 IN ORDER TO MAINTAIN THE SAME IP RATING.
FOR ZONE HAZARDOUS LOCATIONS, ALL CABLE ENTRY DEVICES SHALL BE CERTIFIED IN TYPE OF EXPLOSION PROTECTION FLAMEPROOF ENCLOSURE “d”
WITH AN IP66 RATING, SUITABLE FOR THE CONDITIONS OF USE AND CORRECTLY INSTALLED. IF CABLES AND CABLE GLANDS ARE NOT USED, A STOPPING
BOX SHALL BE PROVIDED WITHIN 2” OF THE ENCLOSURE. FLAMEPROOF JOINT AND GAP DETAILS ARE PROVIDED ON PAGE 2.
INSTALL UNITS WHERE SHOCK, VIBRATION AND TEMPERATURE FLUCTUATIONS ARE MINIMAL. ORIENT UNIT TO PREVENT MOISTURE FROM ENTERING
ENCLOSURE. USE PROPERLY RATED SEALING FITTINGS FOR ELECTRICAL WIRE ENTRY. DO NOT MOUNT UNIT IN AMBIENT TEMPERATURES EXCEEDING
PUBLISHED LIMITS. THIS IS ESPECIALLY CRITICAL FOR LOCAL MOUNT TEMPERATURE UNITS. USE OF A SHROUD IS RECOMMENDED WHERE DIRECT SUNLIGHT
AND RAIN MAY COME IN CONTACT WITH THE ENCLOSURE.
DURING INSTALLATION, MARK THE BOX NEXT TO EACH PROTECTION METHOD ON THE NAMEPLATE THAT APPLIES TO YOUR APPLICATION.
THIS EQUIPMENT IS CERTIFIED IN ACCORDANCE WITH THE REQUIREMENTS OF THE FOLLOWING APPLICABLE STANDARDS (SEE TABLE 1) AND
IS SUITABLE FOR USE IN NON-HAZARDOUS AND THE FOLLOWING HAZARDOUS LOCATIONS, AND IS ATEX AND IECEX CERTIFIED SUITABLE FOR
APPROPRIATE USE IN GAS AND DUST ZONE 1 APPLICATIONS.
N. America Europe International
Intrinsic Safety - Model 1XSWLL Only
Cert number: UL File E226592 DEMKO 09 ATEX 0813748X IECEx UL 08.0017X
Applicable Standards UL 913, UL-60079-0, UL 60079-11, CSA C22.2 No.
157-92, CSA C22.2 No. 60079-0:11, CSA C22.2 No.
60079-11:14
EN 60079-0:2012 + A11:2013
EN 60079-11:2012
IEC 60079-0:Ed.6(2011-06) +
Corr.1 (2012-01) + Corr.2 (2013-
12)
IEC 60079-11:Ed.2011
Suitable for appropri-
ate use in:
EXIA Intrinsically
Safe - Sécurité Intrin-
séque
Class I, Div. 1, Groups A, B, C & D
Class II, Div. 1 Groups E, F & G
Class III
Class I, Zone 0 AEx ia IIC T4
Ex ia IIC T4
II 1 G Ex ia IIC T4 Ga
II 1 D Ex ia IIIC T135°C Da
-40°C < TAMB < +85°C
Ex ia IIC T4 Ga
Ex ia IIIC T135°C Da
-40°C < TAMB < +85°C
Flameproof - Models 1XSWLL, 1XSWHL and 1XSWHH
Cert Number: UL File E226592 DEMKO 09 ATEX 0813748X IECEx UL 08.0017X
Applicable Standards UL 1203, UL 60079-0, UL 60079-1, UL 61010-1, UL
50, UL 50E, CSA C22.2 No. 25, CSA C22.2 No. 30, CSA
C22.2 No. 60079-0:11, CSA C22.2 No. 60079-1:11, CSA
C22.2 No. 61010-1-12, CSA C22.2 No. 94.01-07, CSA
C22.2 No. 94.2-07
EN 60079-0:2012 + A11:2013
EN 60079-1:2014
EN 60079-31:2014
IEC 60079-0:Ed.6(2011-06) +
Corr.1 (2012-01) + Corr.2 (2013-
12)
IEC 60079-1:Ed.7
IEC 60079-31:Ed.2
Suitable for appropri-
ate use in:
Class I, Div. 1, Groups A, B, C & D
Class II, Div. 1 Groups E, F & G
Class III
Class I, Zone 1 AEx db IIC T5 (1XSWLL)
Class I, Zone 1 Ex db IIC T5
Class I, Zone 1 AEx db IIC T3/T5 (1XSWHL & 1XSWHH)
II 2 G Ex db IIC T3/T5 Gb
II 2 D Ex tb IIIC T90°C Db
IP66
-40°C ≤ TAMB ≤ +85°C (1XSWLL)
-40°C ≤ TAMB ≤ +80°C (1XSWHL &
1XSWHH)
Ex db IIC T3/T5 Gb
Ex tb IIIC T90°C Db
IP66
-40°C ≤ TAMB ≤ +85°C (1XSWLL)
-40°C ≤ TAMB ≤ +80°C (1XSWHL
& 1XSWHH)
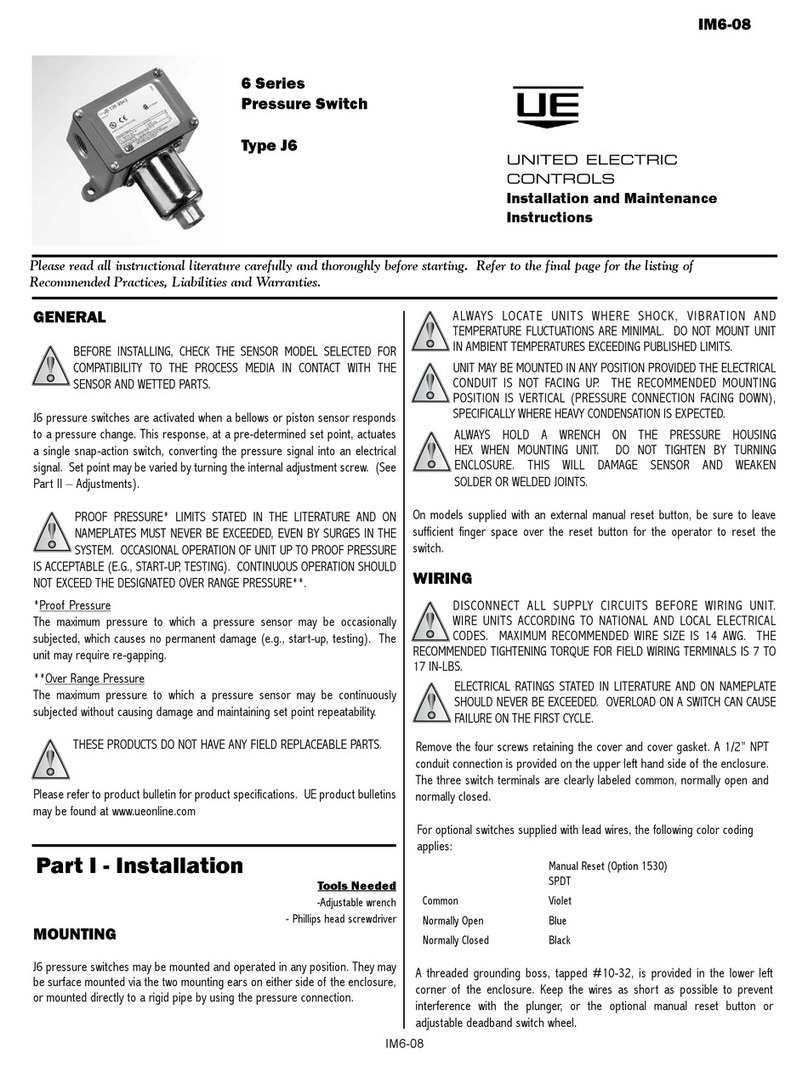
One Series
Electronic Pressure, Differential
Pressure and Temperature Switches
Discrete Input, Intrinsically Safe,
Flameproof and Non-Incendive
Models: 1XSWLL, 1XSWHL, and 1XSWHH
UNITED ELECTRIC
CONTROLS
Installation and Maintenance
Instructions
IM_1XSW-02
Please read all instructional literature carefully and thoroughly before starting. Refer to the final page for the listing of Recommended
Practices, Liabilities and Warranties. All Warnings are translated to French and can be found on pages 21 and 22.
IM_1XSW-02
www.ueonline.com
2
Non-Incendive - Model 1XSWLL, 1XSWHL and 1XSWHH
N. America Europe International
Cert number: UL File E226592 DEMKO 15 ATEX 1483 IECEx UL 08.0017X
Applicable
Standards
UL-60079-0, UL 60079-15, ISA 12.12.01,
CSA C22.2 No. 157-92, CSA C22.2 No.
213, CSA C22.2 No. 60079-0:11, CSA
C22.2 No. 60079-15:12
EN 60079-0:2012 +
A11:2013
EN 60079-15:Ed.10
IEC 60079-
0:Ed.6(2011-06) +
Corr.1 (2012-01) +
Corr.2 (2013-12)
IEC 60079-15:Ed.4
Suitable for ap-
propriate use in:
Class I, Div. 2, Groups A, B, C & D
Class II, Div. 2 Groups F & G
Class III
Class I, Zone 2 AEx nA IIC T5
Ex nA IIC T5
II 3 G Ex nA IIC T4 Gc Ex nA IIC T4 Gc
FLAMEPROOF - SPECIAL CONDITIONS FOR SAFE USE
• Field wiring must be rated 105°C minimum. For ambient temperatures below -10°C, use suitable field wiring.
• Blanking elements from factory have been tested for flameproof “d” and dust “tb” with the enclosure as an assembly and carry no
markings.
• A suitable thermowell made from corrosion-resistant material and engaging 5 threads minimum (with thread sealant) is required for
the local spring loaded temperature sensor to maintain IP66
Flameproof joint and gap details
– Enclosure to cover threaded joint: 4” - 16 UN-2, 7 threads engaged minimum
– Glass to cover cemented joint: 0.753” (19.1 mm) rabbet/spigot minimum length
– Breather element threaded joint: M8-1.25 (6g/6H medium fit class), 11 threads engaged minimum
– Electrical conduit threaded joint: 3/4”-14 NPT, 5 threads engaged minimum
– Enclosure to sensor threaded joint:
• Pressure models: 1”-20 UNEF-2, 10 threads engaged minimum
• Temperature models: 1/2”-14 NPT, 5 threads engaged minimum
• Remote and local spring loaded temperature sensor gap joints: 0.0045” (0.114 mm) maximum annular gap by
1.25” (31.8 mm) minimum length
• The Unit must be cleaned with a damp cloth to avoid static discharge.
Dual Seal Adaptor (Option M041)
• Threaded Dual Seal Adaptor Option Enclosure to One Series Enclosure : 1”-20 UNEF-2, 10 threads engaged minimum
• Breather element threaded joint: 1/4”-20 UNC-2, 10 threads engaged minimum
• Secondary Seal Housing to union housing joint: 0 .580” (14.73 mm) rabbet/spigot minimum length, maximum annular gap 0.003
in. (0.08 mm)
• Sensor to union housing joint: 0 .580” (14.73 mm) rabbet/spigot minimum length, maximum gap 0.003 in. (0.08 mm)
• Threaded Dual Seal Adaptor option to Sensor 1”-20 UNEF-2, 10 threads engaged minimum or 1/2”-14 NPT 5 threads engaged
minimum.
INTRINSIC SAFETY - SPECIAL CONDITIONS FOR SAFE USE
• Enclosure and cover are made from Aluminum Alloy, do not strike with heavy object.
• Separation distances were assessed to Annex F.
• Device must be powered by a galvanically isolated intrinsic safety barrier.
Table 1

IM_1XSW-02
www.ueonline.com 3
CONTINUOUS OPERATION SHOULD NOT EXCEED THE DESIGNATED OVER RANGE PRESSURE OR WORKING PRESSURE RANGE STATED WITHIN
THE LITERATURE AND ON DEVICE NAMEPLATE.
Over Range Pressure: The maximum pressure to which a pressure sensor may be continuously subjected without cause damage and maintaining
set point repeatability.
Max Working Pressure: The maximum that can be applied to both process ports simultaneously without affecting sensor performance.
The One Series electronic switch product line is based on an all-solid-state electronic module that incorporates a microprocessor. The com-
bination of features like no moving parts and IAW™ self-diagnostics provide a highly reliable, accurate and repeatable monitor for detecting
pressure and temperature thresholds which once reached, can make intelligent switch decisions based opon retained settings and current
conditions. The One Series monitors its own health and reports the status locally through the IAW™ (I Am Working) feature that provides a
solution to the “blind device” issue common with mechanical switches. You will always know the health status of the One Series.
The One Series is also very rugged, featuring a Type 4X, weather-tight enclosure suitable for harsh environments and hazardous (Class I,
Division 1) locations. The 0.5% accuracy rating is maintained over a very wide -40°C to +70°C operating range using active temperature
compensation. Repeatability is 0.1% of full range while the switch set point and deadband (hysteresis) is fully programmable over the entire
range of the sensor. Reaction time for the One Series to a process change is typically 100 mS or less.
2-WIRE SIMPLICITY (MODEL 1XSWLL AND 1XSWHL)
The One Series 2-Wire electronic switch is designed to operate on discrete input leakage current. The microprocessor-based One Series is the
only switch to operate and switch over a single pair of wires, similar to a traditional mechanical switch. It combines the simplicity and low cost
features of a switch and the reliability features found in a transmitter and without the need to provide additional wiring.
• Models 1XSWLL and 1XSWHL are designed to work with most Programmable Logic Controller (PLC) or Distributed Control System (DCS)
discrete inputs and some interposing relays. When open, the switch draws 750 µA (max); when closed, the switch sinks or sources 0.1
A maximum.
I Am Working (IAW™)
The One Series also contains UE’s patented IAW™ self-diagnostic software. On a continuous basis, the IAW™ algorithm checks for proper opera-
tion, and locally reports the status using messages or revolving arrows on the display. For remote reporting, a discrete IAW™ Output signal can
be monitored by the control system and used to detect normal, tripped, and fault conditions. IAW™ self-monitors, searching for possible faults, both
within the instrument and in the overall system (see Fault Codes, table 4, page 16). In the event of a detected fault, the One Series will attempt to
display the fault details and provide remote electrical indication by opening (turning off) the IAW™ Output. In the case of certain micro-controller
faults, the revolving arrow may freeze or go out; indicating locally that a failure exists.
DISPLAY FEATURES AND DIAGNOSTICS
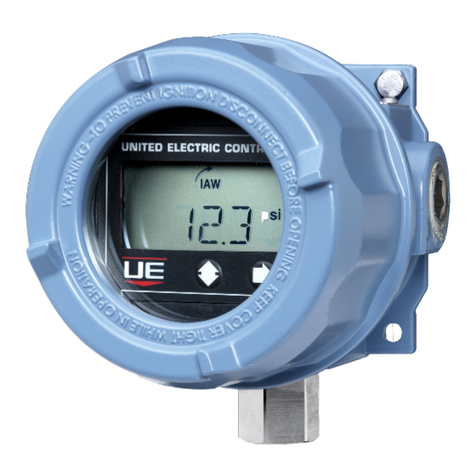
The One Series features a large, easy to read LCD display (see Figure 1). It is used for three main purposes: process indication, programming of
key features and switch status/troubleshooting.
In the Process Display mode, the display may be indicating the following:
• Current process value and units of measure: A value will be displayed as long as the reading is within 110% of the full
scale range noted on the nameplate.
• I Am Working (IAW™) status: When the unit is working properly, a circular 4-segment arrow will be revolving around the letters “IAW” in the
top center of the display.
• Offset/Span Adjustment: The word “offset” will appear above the process value, indicating that the factory offset and/or span
calibration has been modified by the user.
In addition, the user can easily access information such as the set point, deadband and minimum/maximum process readings:
By pushing the right gbutton once, the display will scroll as follows:
SP1 XX.XX DB1 XX.XX
By pushing the left 2button once, the display will scroll the min/max process values recorded in memory:
MAX XX.XX MIN XX.XX
The display will automatically revert back to the Process Display mode after scrolling.
ALARM CONDITION
When the process goes beyond the set point, the display will begin to flash, alternating between the process value and “SW1”. The display will
continue to flash until the process has returned to a value beyond the deadband, at which point the display will revert to normal operation and
process value display. If the unit was programmed to have a latching output, a small “Latch” icon will light in the display when the set point is
reached, indicating that the output is latched and needs to be manually reset.
Figure 1

IM_1XSW-02
www.ueonline.com
4
PART I - MOUNTING
FLAMEPROOF, NON-INCENDIVE, INTRINSIC SAFETY - MOUNTING
Tools Required: Screwdriver for mounting bolts; 4 mounting bolts (1/4”Max.)
NOTE: For optional surface and pipe mounting kit, order part no. 6361-704. See page 19.
BEFORE INSTALLING, CHECK THE SENSOR MODEL SELECTED FOR COMPATIBILITY TO THE PROCESS MEDIA IN CONTACT WITH THE
SENSOR AND WETTED PARTS.
IN ALL APPLICATIONS, SECURE THE ENCLOSURE AS DETAILED BELOW. DO NOT MOUNT VIA THE PROCESS CONNECTION ONLY.
Mount the device using the four (4) 1/4” clearance holes in the enclosure base. Plumb sensor to the process port. See page 19 for
dimensions.
The device may be mounted in any position except with the sensor connection facing up. Ensure the process connection is sealed to the
process port to prevent leakage. Care should be taken to minimize effects of shock and vibration. The One Series should be protected
from direct sunlight and rain in outdoor installations using a shroud (user supplied). NOTE: the optimal display viewing position is 6:00.
FOR PRESSURE AND LOCAL TEMPERATURE MODELS ALWAYS HOLD A WRENCH ON THE SENSOR HEX WHEN MOUNTING THE
DEVICE. DO NOT TIGHTEN BY TURNING ENCLOSURE, THIS WILL DAMAGE THE CONNECTION BETWEEN THE SENSOR AND HOUSING.
FOR DIFFERENTIAL PRESSURE MODELS (ESPECIALLY LOW RANGE MODELS), MOUNT THE SENSOR LEVEL TO MINIMIZE ANY
PRESSURE READING OFFSETS. THE OFFSET COMMAND MAY BE USED TO ZERO THE DISPLAY (SEE PAGE 12 FOR ADDITIONAL
INFORMATION).
PROCESS CONNECTIONS AND SENSOR FOR FLAMEPROOF, NON-INCENDIVE AND INTRINSIC
SAFETY INSTALLATIONS
NEVER INSERT ANY OBJECT INTO THE PRESSURE SENSOR OPENING. DAMAGE TO THE SENSOR WILL RESULT, AFFECTING
ACCURACY.
Pressure and Differential Pressure Models
To pipe mount: Thread the pressure connection onto the pressure port, with thread sealant, making sure that the mating threads are
clean and free of debris. Use a wrench on the pressure connection hex to tighten. Test for leaks. On Differential Pressure models, the
Low (L) side pressure must NOT exceed the high (H) side pressure. Damage to the sensor may result.
Local and Remote Temperature Models
For Local Ambient Sensing (model L): Mount using the mounting holes on the electronics housing. Mount the device to ensure that the
sensor housing will not be damaged and where the measured temperature is representative of the surrounding environment.
For Local Spring-Loaded (model T): A suitable thermowell, made from corrosion-resistant material, 5 threads engaged minimum, with
FAULT CONDITIONS
In the case of a fault condition, the display may indicate the following:
If the IAW™software detects a fault outside of the micro-controller, and can still operate, it will display an error message.
If the fault is one which affects the micro-controller or the display, the revolving arrow around “IAW” will either freeze or go out.
If it is a failure of the power supply or the wiring, the display will go blank.
(See Fault Codes, page 16 for a complete description of fault diagnostics.)
Please refer to the product technical brochure for product specifications. Product technical brochure may be found at www.ueonline.com.
UE declarations and third party issued certifications are available for download at www.ueonline.com/support/certifications/.
Date code format on nameplate is “YYWW” for year and week (see Figure 13, Page 17)

IM_1XSW-02
www.ueonline.com 5
thread sealant, is required to maintain enclosure type 4X/IP66.
For Remote Sensing: Route the extension wire to avoid contact with live components or close proximity to electrical noise sources. Avoid kinks, or
excessive flexing. Tighten the ferrule fitting, if applicable.
For Surface Sensing: Secure the sensor housing to the pipe or vessel using an adhesive or strapping method suitable for the application.
For Immersion Sensing (models C, H, R & L): Use of a thermowell is highly recommended to aid in maintenance, testing and preservation of the
system integrity. Insert the sensor housing (0.25”diameter) into the well ensuring that the sensor’s sheath bottoms out and the well is completely
immersed in the media (2.5”min.) Screw the sensor’s nipple into the thermowell, with thread sealant, by placing a wrench on the union nut. Tighten
the union connector.
For best temperature measurements, the sensor housing must be in full contact with the surface or media being measured. Heat transfer compound
may be used to aid in fully transferring the media temperature to the sensor housing. Locate where the temperature is most representative of the
system. Minimum insertion depth is 2-1/2”. Sensor dimensional drawings are shown on page 20.
PART II - WIRING
Removing the One Series Enclosure Cover and Display Module
TO PREVENT ELECTROSTATIC DISCHARGE WIPE DOWN COVER AND ENCLOSURE OF ANY DUST BUILD-UP BEFORE REMOVING COVER.
DISCONNECT ALL SUPPLY CIRCUITS BEFORE WIRING DEVICE. WIRE DEVICE IN ACCORDANCE WITH LOCAL AND
NATIONAL ELECTRICAL CODES. MAXIMUM RECOMMENDED WIRE SIZE AND TIGHTENING TORQUE FOR FIELD
WIRING TERMINAL BLOCKS ARE SHOWN WITHIN TABLE 3(PAGE 8).
TO PREVENT SEIZURE OF ENCLOSURE COVER, DO NOT REMOVE LUBRICANT. THREADS SHOULD ALSO BE FREE OF DIRT
AND OTHER CONTAMINANTS.
Remove the enclosure cover by turning it counter-clockwise for 7 revolutions (Figure 2). Carefully remove the display
module by grasping the outer edge and pulling it away from the base enclosure (Figure 3), being careful not to
strain any of the wired connections. Allow the display module to hang from the wired connections to access the base
enclosure and terminal blocks for wiring. Do not remove the display module wire assemblies. Insert the field wiring
through the conduit opening(s) of the base enclosure. Make the connections as shown within the wiring diagrams
beginning (Figures 4-8, page 6-7). The primary chassis and equipment grounding terminal is
provided inside the base enclosure.
Cleaning the display and keypad surface should be performed with a damp cloth only. Do not attempt to wash down
the One Series with the cover removed.
WIRING FOR FLAMEPROOF & NON-INCENDIVE INSTALLATIONS
Tools Required: Small flat-head screwdriver; wire strippers
TO PREVENT IGNITION, DISCONNECT POWER BEFORE REMOVING ENCLOSURE COVER. KEEP COVER TIGHT WHILE IN OPERATION. DO NOT
DISCONNECT EQUIPMENT UNLESS POWER HAS BEEN SWITCHED OFF OR THE AREA IS KNOWN TO BE NON-HAZARDOUS.
DO NOT REPLACE COMPONENTS UNLESS POWER HAS BEEN SWITCHED OFF OR THE AREA IS KNOWN TO BE NON-HAZARDOUS.
THE DEVICES SHALL BE PROPERLY GROUNDED IN THE END USE APPLICATION USING THE GROUND SCREWS PROVIDED WITH THE ENCLOSURE.
FIELD WIRING MUST BE RATED 105°C MINIMUM. FOR AMBIENT TEMPERATURES BELOW -10°C, USE SUITABLE FIELD WIRING.
MODELS 1XSWLL AND 1XSWHL DERIVE THEIR POWER DIRECTLY FROM A PLC/DCS DISCRETE INPUT OR OTHER LOW-CURRENT DC LOADS
(Figures 4-5, page 6). THE SWITCHED OUTPUT MAXIMUM LOAD RATING IS 0.1A. THE DEVICE MUST NOT BE CONNECTED DIRECTLY TO
A POWER SUPPLY WITHOUT AN APPROPRIATE CURRENT LIMITING LOAD SUCH AS THAT PROVIDED BY A PLC/DCS DISCRETE
INPUT. OVERLOADING THE SWITCH MAY CAUSE FAILURE (SEE TABLE 2).
Figure 2
Figure 3

IM_1XSW-02
www.ueonline.com
6
PLC
DIN1
DIN2
COM
PWR
PLC
D
IN
1
D
IN
2
L2/N
L1/H
7.8-50 VDC
Common
SW and IAW
PLC Inputs Circuit
PLC
DIN2
COM
PWR
COM
RELAY
Common
Interposing
Relay with
IAW Circuit
70-240 VAC/VDC
L1/H/+
PLC
DIN2
COM
PWR
COM
RELAY
7.8-50 VDC 7.8-50 VDC
70-240 VAC/VDC
L2/N/-
Common
L1/H/+
L2/N/-
1XSWLL
1XSWLL
1XSWHL
1XSWHL
WIRING DIAGRAMS - Models 1XSWLL and 1XSWHL
Maximum Switch Ratings – Flameproof and Non-Incendive
Model Signal Name Voltage Rating Current Rating
1XSWLL SW 7.8 – 50.0 VDC 0.1 amperes1
IAW 7.8 – 50.0 VDC 0.1 amperes1
1XSWHL SW 70 – 240 VAC/VDC 0.1 amperes1
IAW 7.8 – 50.0 VDC 0.1 amperes1
1XSWHH SW 70 – 240 VAC 0.150 – 10 amperes2
IAW 7.8 – 50.0 VDC 0.1 amperes1
1Derate at 0.001 amperes per ˚C above 25˚C
2Derate at 1 ampere per 5.5˚C above 38˚C ambient
Table 2
Figure 4 Figure 5
Figure 6 Figure 7

IM_1XSW-02
www.ueonline.com 7
Models 1XSWLL and 1XSWHL can also be wired in series with the coil of certain interposing relays, as shown in figures 6-7. The relay coil
specifications must not exceed the maximum switch ratings. (See Table 2, page 6).
NOTE: For bench testing model 1XSWLL, a circuit is required as shown in figure 8. These components are not included and must be provided
by the user. Do not connect model 1XSWLL directly to a power supply without a suitable load in series with the switch. Do not
exceed the maximum switch ratings or permanent damage may result (See table 2 on page 6).
L2/N
LEDs
20KΩ@
5W min.
24 VDC
1.8KΩ
LED
Recommended
Bench Test
Circuit
70-240 VAC
L1/H
Common
1XSWLL 1XSWHL
Figure 8
WIRING DIAGRAMS - Model 1XSWHH
Model 1XSWHH requires 70 – 240 VAC @ 0.015 A external power supply for each device. Power for all One Series functions are provided by this
power supply connection at TB2, terminals C (L1/H) and D (L2/N). Connections for the programmable solid state relay switch are made at TB2
terminals A and B. (refer to table 2, page 6 and table 3, page 8).
The wiring diagram below (Figure 9) provides a view inside the One Series base enclosure with the display module removed. TB2 is located there.
All models include a separate IAWTM switched output located at TB3 on the back of the display module. This signal provides the health status of
the One Series and is normally closed. When open, this signal provides an indication that IAWTM has detected a fault condition. Monitor this signal
by connecting it to the discrete input of a PLC or DCS. The IAWTM wiring connection is not required if remote health status of the One Series is not
used.
NOTE: The solid state relay switch in model 1XSWHH has a minimum load requirement of 0.150 A making it incompatible with control system
inputs. Do not exceed the maximum switch ratings (see table 2, page 6) or permanent damage to the One Series may result.
PLC
DIN2
PWR
COM
7.8-50 VDC
Common
Base Enclosure
L1/H
L2/N 70-240 VAC
70-240 VAC
0.150-10A MAX
Model
1XSWHH
Load and
Power
Supply Wiring
TB2
1XSWHH
Figure 9

IM_1XSW-02
www.ueonline.com
8
Terminal Block and Torque Details for Flameproof, Non-Incendive and Intrinsic Safety Installations
Terminal Description Max. Wire Gauge Min. Wire Gauge Recommended Tightening Torque
TB1 3-Position 14 AWG 22 AWG 7 in-lbs.
TB2 4-Position 10 AWG 20 AWG 4.4 in-lbs.
TB3 2-Position 14 AWG 22 AWG 7 in-lbs.
INTRINSIC SAFETY WIRING DIAGRAMS - MODEL 1XSWLL
(Use Class 2 or SELV Power Supply Only)
Model 1XSWLL is intended for direct connection to a PLC or DCS discrete input, or other suitable load (see graph 1, page 15). Power is
obtained and the discrete switch signal is provided by the same two-wire connection. Polarity must be observed. (refer to Table 2, page 6)
for switch ratings.
DO NOT CONNECT MODEL 1XSWLL DIRECTLY TO A POWER SUPPLY WITHOUT A SUITABLE LOAD IN SERIES WITH THE
SWITCH.
For 1XSWLL models, only one conduit opening is required. The unused conduit opening must include an explosion-proof/flameproof plug,
made from a corrosion-resistant material, suitable for all gas and dust groups as listed on the nameplate. Blanking elements from factory
have been tested with the enclosure as an assembly and carry no markings.
SELECTING AN INTRINSIC SAFETY BARRIER (Model 1XSWLL)
For Intrinsically-Safe (I.S.) installations, please reference the Control Drawing UE 62174–64 for Intrinsic Safety entity parameters and wiring
information (https://www.ueonline.com/support/product-drawings/). Model 1XSWLL must be wired to an approved I.S. galvanically isolated
barrier for Zone 0 EPL Ga and Class I, Division 1 classifications. The information provided is for reference only and is intended to act as a
guide in the selection of a suitable I.S. Barrier.
SUBSTITUTION OF COMPONENTS MAY IMPAIR INTRINSIC SAFETY.
Installation of Intrinsically-Safe circuits must be performed in accordance with the requirements of the government and/or other local
authority having jurisdiction. System components and installation methods must be approved by the appropriate recognized approval
authority.
There are two general types of I.S. Barriers, shunt diode (passive) safety barriers and transformer isolated barriers. Shunt diode safety
barriers are not recommended for use with model 1XSWLL.
Transformer Isolated Barriers:
Due to the unique method by which the model 1XSWLL operates, a specifically designed isolated barrier must be used. Any safety barrier
that adheres to NAMUR standard EN 60947-5-6 for proximity and dry contact switches may be used to achieve intrinsic safety with the One
Series model 1XSWLL.
Recommended NAMUR standard transformer isolated intrinsic safety barriers:
Pepperl+Fuchs models KCD2-SR-Ex1.LB and KFD2-SR2-Ex1.W.LB
Figure 4 (page 6) shows a typical wiring scheme depicting model 1XSWLL connected to a programmable logic controller (PLC), distributed
control system (DCS) or other logic solver discrete input.
Table 3

IM_1XSW-02
www.ueonline.com 9
Part III - PROGRAMMING
Tools Required: Programming Flowchart, page 18
Programming of the One Series is accomplished using the two buttons on the faceplate (labeled 2and g- See Figure 10). Stepping
down through the main menu using the left 2button, you can access the various commands of the One Series software menu. The right
button is then used to move into the command submenu for setting up or modifying the parameters.
NOTE: The flowchart on page 18 shows the entire programming commands menu structure. Before removing the enclosure cover,
please read the instructions on page 5. The One Series programming menu is a single direction loop, with submenus embedded within,
so there is no way to back up in the program. If you need to make a correction to a prior Main Menu step, you will need to continue
forward, exit and then re-enter the program and step through to the appropriate feature. If you are in a Submenu, you will need to
continue to the beginning of the menu item and re-enter the Submenu to make the correction.
Entering the Programming Mode
NOTE: While in the Programming Mode, the One Series will remove itself from service (go offline). All outputs are set to the fail safe
state and the One Series ignores process variable input from the process sensor. The IAW™ Output signal will open. The switch output
failsafe state will be based on the programmed operating mode of the switch. For example, the failsafe state for “Open on” modes is
open. The control system will interpret these signals as a detected fault and a process upset (set point reached) simultaneously. It is
essential to alert the control system operators before entering the Programming Mode.
Use the Flowchart on page 18 as a guide through the various commands in the Programming Mode.
• Press and release both buttons 2g simultaneously and then press the right button gto enter
the password.
• Enter the 4-digit password. The factory defualt password is “0000”.
• The left 2button increments the blinking digit.
• The right gbutton sets the digit and moves to the next.
• Once a valid password is entered, “OK” will appear on the display.
• Press and release the right gbutton.
• CLR MAX/MIN (or MAN RSET if Latch is set) will appear on the display.
This is the first command prompt in the Programming Mode.
NOTE: The One Series will automatically exit the Programming Mode and resume monitoring the process (go back online) if two minutes
elapse without a button being pressed. The One Series recalls all previously saved parameters from memory and any program changes
that were made will be discarded. This two-minute timeout feature prevents the One Series from being left offline accidentally.
Exiting the Programming Mode
When any of the program commands are displayed, it is possible to escape and exit the Programming Mode by pressing the left 2and
right gbutton simultaneously. Doing this redirects the programmer to the Save Changes menu location, which is only possible at menu
actions indicated by an asterisk (*) on the Programming Flowchart, found on page 18.
NOTE: It is also possible to exit the Programming Mode by repeatedly pressing the left 2button from any program command until the
Save Changes menu location is reached.
Saving Programming Changes
When changes have been made to the program settings, a choice is provided to Save or Discard the changes. At any prompt:
• Press both left 2and right gbuttons to display SAVE CHNG menu.
To Save changes, press the right gbutton. NO (the default) will be displayed.
• Press the left 2button to toggle and display YES.
• Then press both left 2and right gbuttons to confirm, save the changes and return to the Process Display mode.
The One Series will resume process monitoring (go back online) using the new program parameters.
To Discard changes, press the right gbutton. NO will be displayed.
• Press both left 2and right gbuttons to confirm, discard changes and return to the Process Display mode.
The One Series will resume monitoring the process (go back online) recalling all previously saved parameters from memory.
BASIC FEATURES
Setting the Units of Measure
The One Series allows the units of measure to be set in the field. The default units are pounds per square inch (PSI) for pressure models
Figure 10

IM_1XSW-02
www.ueonline.com
10
and degrees Fahrenheit (˚F) for temperature models.
• To change the units of measure, enter the programming mode. Press the left 2button. The display will scroll SET UNITS.
• Press the right gbutton and the display will read the default units psi or˚F.
• Repeatedly press and release the left 2button to select from the available choices. Stop at the desired choice.
• Press the right gbutton to make the selection. The display will return to “Set Units.”
• Press the left 2button to continue on in the menu or press both left 2and right gbuttons to exit the Programming Mode and
save changes.
NOTE: MAX/MIN memory is reset (changed to zero) whenever the units of measure have been changed. Set Point, Deadband, Offset,
Span and Plug Port values are recalculated for the newly selected units of measure.
Setting the Switch Mode, Set Point and Deadband
Please refer to the Programming Flowchart, page 18.
• Enter the programming mode (see page 9).
• Press and release the left 2 button until SW1 appears on the display.
• Press the right g button. The previously selected mode will appear. OPEN RISE is the factory default.
The One Series has six available modes of operation
OPEN RISE - Switch opens on rising process values that exceed the set point.
OPEN FALL - Switch opens on falling process values that drop below the set point
OPEN WINDOW - Switch opens when process values go outside programmed limits specified by set point high and set point low.
CLOSE RISE - Switch closes on rising process values that exceed the set point.
CLOSE FALL - Switch closes on falling process values that drop below the set point.
CLOSE WINDOW - Switch closes when process values go outside programmed limits specified by set point high and set point low.
Note: “OPEN” Modes are recommended in safety applications where a DTT (De-energize to Trip) output is required. This ensures that the switch
output will go to the fail safe state in the event of a power loss or line break. The IAW™ output always operates in DTT mode.
Please use the Switch Decision Logic (Figure 11, page 11) for help with setting the appropriate switch mode.
• Press and release the left 2button until the desired mode appears.
• Press the right gbutton to select the mode and move on to the set point. SP will appear.
NOTE: The set point is the process value at which the One Series opens or closes the switch. The Set Point is fully programmable
throughout the operating range of the sensor as noted on the device nameplate.
• Press the right gbutton to select a positive or negative set point. POS is the default. Use the left 2button to change to NEG.
• Press the right gbutton to view and change the set point. Press the left 2button to increment the blinking digit. Press the right
gbutton to enter and move to the next digit.
• Press the right gbutton to enter a new Deadband. DB will show on the display.
NOTE: The Deadband is the amount above or below the set point at which the One Series resets the switch, returning it to the normally
closed or open state. Deadband is represented as a value which is added or subtracted from set point, depending on the control mode.
• Example 1: If the Control Mode is OPEN RISE and the set point is 100 and the deadband is 10, the Switch will open as pressure rises
to 100 and close (reset) as the pressure falls to 90.
• Example 2: If the Control Mode is CLOSE RISE and the set point is 100 and the deadband is 10, the Switch will close as pressure rises
to 100 and open (reset) as the pressure falls to 90.
• Example 3: If the Control Mode is OPEN FALL and the set point is 100 psi and the deadband is 10, the Switch will open as pressure
falls to 100 psi and close (reset) as pressure rises to 110 psi.
• Example 4: If the Control Mode is CLOSE FALL and the set point is 100 psi and the deadband is 10, the Switch will close as pres-
sure falls to 100 psi and open (reset) as pressure rises to 110 psi.
NOTE: Deadband should be set wide enough so that frequent or rapid switch cycling (chatter) does not occur but narrow enough to satisfy
the process conditions. A Deadband value of zero is undefined and, therefore, not permitted.

IM_1XSW-02
www.ueonline.com 11
Open
Closed Closed
Open
Closed Closed
SP
DB
SP
DB
Open Open
Closed Closed Closed
DBH
DBL
SPH
SPL
Open on Rise
Open on Fall
Window
Open Open
OpenOpen
Closed
Closed
Close on Fall
Close on Rise
Switch Mode
Open Closed Closed
Open Open
Open Window
Close Window
• Press the right gbutton to view and change deadband. Press the left 2button to increment the blinking digit. Press the right gbutton to
enter and move to the next digit.
• Press the right gbutton to enter a new Deadband. SW1 will show on the display.
NOTE: The Set Point and Deadband settings are subject to the accuracy of the instrument. Actual switch points may vary up to +0.5% of the
sensor’s maximum range at room temperature. Example: The P15 sensor has a range of 0 to 300 psi. When setting a Set Point of 150, the
actual switch point may occur between 148.5 and 151.5 due to the accuracy error of +1.5 (300 x 0.5%).
Switch Decision Logic
Figure 11
Resetting the Maximum & Minimum Values
The One Series continuously captures the readings from the sensor and stores one minimum and maximum value since the last time they were
reset. The values can be viewed at any time by removing the enclosure cover and pushing the left 2button. The display will scroll the values and
then return to the Process Display mode.
To reset the values, enter the Programming Mode (see page 9). Repeatedly press the left 2button to get to the CLR MAX/MIN command and then
press the right gbutton two times. After exiting the Programming Mode and saving the changes (see page 9), the values will be reset to the cur-
rent reading and begin recording again.

IM_1XSW-02
www.ueonline.com
12
ADVANCED FEATURES
NOTE: No initial programming of these features is required. The default for these advanced commands is zero or off.
Adjusting Display Offset
The One Series is factory calibrated to 0.25% of the sensor’s maximum range at room temperature. In some installations, it may be
necessary to adjust the display’s offset due to the range and position of the sensor. Chemical seals with long capillaries combined with
low maximum range sensors are a common cause of offset error. The OFFSET command allows the user to enter a positive (“POS”) or
negative (“NEG”) offset to the display readings. An offset adjustment of up to +10% of the sensor’s maximum range is allowed.
Example: When the sensor has a zero pressure applied, but the display reads a value other than zero, entering the additive inverse
(reversing the sign) of the displayed value for OFFSET will force the display to read zero.
NOTE: Any numerical value entered other than 0.00 will cause the display to indicate “Offset” just above the process reading in the
process display.
USE OF THIS OPTION MAY CREATE A CONDITION WHERE THE DISPLAY MAY INDICATE “0.00” WHEN SIGNIFICANT PRESSURE OR
TEMPERATURE (UP TO 10% OF MAXIMUM RANGE) EXISTS IN THE SYSTEM. INDEPENDENT VERIFICATION OF THE PROCESS VARI-
ABLE SHOULD BE DONE PRIOR TO MAINTENANCE ON THE SYSTEM WHEN “OFFSET” APPEARS ON THE DISPLAY.
Refer to the Programming Flowchart on page 18.
• Enter the Programming Mode and use the left 2button to move to the OFST command.
• Press the right gbutton to select a positive or negative offset. POS is default. Use the left 2button to change to NEG.
• Press the right gbutton to view and change the offset. Zero is the factory setting. Press the left 2button to increment the blink-
ing digit. Press the right gbutton to enter and move to the next digit.
• Press the right gbutton to enter the new offset and return to the main menu.
Adjusting Span
SPAN provides an adjustment to shift the slope of the sensor’s response curve to accommodate an offset value other than zero. To
adjust SPAN, calculate and enter a new SPAN value.
To calculate the SPAN value, apply a reference source below maximum scale to the sensor. Record the value that shows on the One
Series display and the reference source value. Divide the reference source value by the display value and then multiply the result by the
sensor’s upper range.
FORMULA: SPAN = reference source / display value x upper range value
• Pressure example: For a sensor range of 0 - 100 psi, choose a reference source (90) below the upper range limit (100) to
prevent an over range condition. Divide the reference source value from the resulting display value (88). Multiply the result by the
upper range limit. Span = 90 / 88 x 100 = 102 (rounded)
• Temperature example: For a sensor range of -40 to 450ºF, choose a reference source (400) below the upper range limit (450) to
prevent an over range condition. Divide the reference source value from the resulting display value (404). Multiply the result by
the upper range limit. Span = 400 / 404 x 450 = 446 (rounded)
Refer to the Programming Flowchart on page 18.
• Enter the Programming Mode (see page 9) and use the left 2button to move to the SPAN command.
• Press the right gbutton to select a positive or negative span. POS is the default. Use the left 2button to change to NEG.
• Press the right gbutton to view and change the span. Zero is the factory setting. Press the left 2button to increment the blink-
ing digit. Press the right gbutton to enter and move to the next digit.
• Press the right gbutton to enter the new span and return to the main menu.

IM_1XSW-02
www.ueonline.com 13
NOTE: To return to factory calibration settings, enter all zeros for both SPAN and OFST.
Setting the Latch Mode (Manual Reset)
The switch can be configured to latch when the set point is reached. Refer to the Programming Flowchart on page 18.
• LCH1: In the Programming Mode, press the right gbutton.
• If OFF is displayed, press the left 2button to set LCH1 to ON.
• Press the right gbutton to set the latch. When latch mode is on (set), the Switch changes state when the set point is crossed and
remains latched until the Switch is manually reset by the user or the One Series is power cycled.
When latched, the display will read MAN RSET.
To Reset the Latch
• Enter the Programming Mode (see page 9). If the Latch is set, the display will read MAN RSET. To return to the Process Display
without resetting the latch, press the right gbutton.
• To continue programming without resetting the latch, press the left 2button.
• Press both 2g buttons to reset the latch. The display now reads RSET DONE.
• Press the right gbutton to return to the Process Display.
• Press the left 2button to continue programming.
NOTE: Interrupting power to the One Series will also reset the latch.
SETTING THE PLUGGED PORT FEATURE
The One Series IAW™ self-diagnostics have the ability to detect that the process port may be plugged. It does this by monitoring the
sensor for changes over time. The amount of change and the time period are programmable. If the process variable does not change
by the amount and selected time period, the display will indicate PLUG and the IAW™Output will open, indicating a fault. Refer to the
Programming Flowchart on page 18.
• Enter the Programming Mode and press the left 2button until PLUG PORT is scrolling on display. Press the right gbutton.
• There are four possible selections -
• OFF - This disables the plugged port function and is the default setting. This should be done where sensor plugging is
not a concern or where the system pressures may not change over time (example: a storage tank).
• 1 minute
• 1 Hour Maximum time with no process variation before fault indication
• 24 Hours
• Using the left 2button, select a time.
• If OFF is selected, press the right gbutton to return to the PLUG PORT command and leave Plug Port deactivated.
• Press the right gbutton to enter a process value < 10% of the sensor’s maximum range. This number represents the minimum
variation expected in the process value over the time period entered above under normal operating conditions. Each time the
process value reaches this value, the Plug Port timer is reset.
NOTE: This value can be accurately determined by subtracting the minimum from the maximum process value as recorded by the MAX/
MIN feature. See RESETTING MAXIMUM AND MINIMUM VALUES on page 11 for additional information.
}

IM_1XSW-02
www.ueonline.com
14
Resetting Trip Counter
Trip Count provides information that may be useful for troubleshooting a process. Each time the set point is reached, the trip count is
incremented by 1, up to 9999, where it will automatically return to 1. Trip Count is always on and can be manually reset to zero at any
time by following these steps.
Refer to the Programming Flowchart on page 18.
• Enter the Programming Mode (see page 9)
• Press and release the left 2button until RESET TRIP CNT appears on the display
• Press the right gbutton. The recorded value of times the set point was reached (the trip count) will appear on the display.
• Press the right gbutton to clear (reset) the trip count to zero.
• Press the left 2button to retain the trip count value without resetting.
Setting the Filter
In some applications, it is desirable to “dampen” the switch response and prevent intermittent false trips due to pressure spikes or other
transient/isolated events. The Filter feature provides a software digital filter with a programmable time constant for suppressing certain
transient short-duration events.
Refer to the Programming Flowchart on page 18
• Enter the Programming Mode (see page 9) and move through the program until FILTER is scrolling on the display. Press the right
gbutton.
• The available selections are as follows
Pressure Models: OFF (Default) Temperature Models: 1/2 second
1/4 second 1 second
1/2 second 2 seconds
1 second
2 seconds
• Using the left 2button, select a time constant.
• Press the right gbutton to enter the time constant and return to main menu.
NOTE: The One Series typically responds to a process value change in less that 100 milliseconds when the Filter is set to off. Using this
feature can lengthen the overall response time of the One Series for certain types of process value changes (pressure spikes).
• A shorter delay setting provides a faster response but is less stable.
• A longer delay setting provides a slower response and is more stable.
Setting the Trip Delay
The Trip Delay provides a programmable delay for the switch with a range of 0 – 999.9 seconds. Zero seconds is the factory default.
When the set point is reached, the switch trip will be delayed by the number of seconds entered into the Trip Delay command using the
following steps.
Refer to the Programming Flowchart on page 18.
• Enter the Programming Mode (see page 9).
• Press and release the left 2button until TRIP DELAY scrolls on the display.
• Press the right gbutton. OFF will appear on the display.
• Press the left 2button to select ON. The Trip Delay value in seconds (default = 000.0) will appear on the display with the left digit
blinking.
• Press the left 2button to increment the blinking digit.
• Press the right gbutton to move to the next digit.
• Press the right gbutton to enter the new Trip Delay value.

IM_1XSW-02
www.ueonline.com 15
0
5000
10000
15000
20000
25000
30000
35000
40000
45000
70 90 110 130 150 170 190 210 230 250
Ohms
V
supply
Rload (max)
Rload (min)
NOTE: Do not replace the One Series display module or pressure
sensor. Swapping these amongst devices will cause a mis-match
between the stored sensor calibration data and the pressure sensor.
For proper operation, the display module serial number must always
match the serial number inside the enclosure (See Figure 12).
These serial numbers must match for proper operation.
DISPLAY MODULE CALIBRATION
ACCEPTABLE SUPPLY VOLTAGES AND LOADS FOR 1XSWLL AND 1XSWHL
The graphs below provide a range of acceptable power supply voltages (in Volts) and series loads (in Ohms). This is useful when the One Series
is connected to non-standard PLC and DCS inputs or is connected in series with a relay or solenoid coil.
NOTE: If you need assistance with determining the compatibility of the One Series with your PLC, DCS, or relay, we can help. Please have the manu-
facturer's model number ready when you call us. In rare cases, when the series resistor value is too large and falls out of the Acceptable Range,
placing another resistor across the input will allow it to work. Please call +1 (617) 923-6977 (Inside Sales) for assistance.
0
2000
4000
6000
8000
10000
12000
14000
16000
18000
812 16 20 24 28 32 36 40 44 48
Rload (Max)
Rload (Min)
Vsupply Rload (Max) RLoad (Min)
81111 30
12 2593 70
16 4074 110
20 5556 150
24 7037 190
28 8519 230
32 10000 270
36 114 81 310
40 12963 350
44 14444 390
48 15926 430
Vsupply
Rload
Rload (Min) = (Vsupply - 5)/0.1*A
*De-rate 0.001A per C above 25°C
Rload (Max) = (Vsupply - 5)/0.0027A
1XSWLL Allowable Voltage / Load Characteristics
Vsupply Rload (Max) RLoad (Min)
70 10000 600
90 13333 800
110 16667 1000
130 20000 1200
150 23333 1400
170 26667 1600
190 30000 1800
210 33333 2000
230 36667 2200
250 40000 2400
Vsupply
Rload
Rload(Min) = (Vsupply - 10) / 0.1A
De-rate 0.001A per °C above 25°C
Rload(Max) = (Vsupply - 10) / 0.006A
1XSWHL Allowable Voltage / Load Characteristics
Figure 12
Graph 1
Graph 2

IM_1XSW-02
www.ueonline.com
16
The One Series IAW™ diagnostics are capable of detecting many possible fault conditions. Some fault conditions will clear automatically when
the parameter returns to normal; others require the device to be powered down and restarted; and some may require repair or replacement.
A list of fault conditions is shown below:
If a fault message appears on the One Series display, a fault code can be obtained by pressing both keypad buttons 2g simultaneously.
Please provide this code if calling UE Inside Sales for assistance.
ONE SERIES FAULT CODES
Code Probable Cause Reason Action
E- 04 Loop Current Fault The current measured in the 4-20mA loop, by the fault monitoring
circuitry, is incorrect.
Verify that the power supply voltage
and load resistance on the 4-20mA
loop are within allowable limits.
E- 15 Diagnostic Fault Sensor OPEN An open circuit has been detected on the sensor drive pins 2 & 3. Diagnostic Fault Sensor open, check
all sensor connections.
E- 16 Diagnostic Fault Sensor SHORT A short circuit has been detected on the sensor drive pins 2 & 3. Diagnostic Fault Sensor Short, check
all sensor connections.
E- 18 Diagnostic Fault Relay Monitor The relay output fault monitor circuit has detected that the output
state of the solid state relay is incorrect. This feature must be
enabled in the menu.
Check the wiring connections or dis-
able feature if not being used.
E- 65 Error -- switch output The switch output fault monitor circuit has detected that the switch
output state is incorrect.
Internal Hardware Fault, contact
factory
E- 88 Error -- Process Variable Extreme
Overrange
Extreme overrange, a pressure input has exceeded 150% of the op-
erating range or a temperature input has exceeded 110% of range.
Warning: This fault may indicate
damage to the sensor. Check that
the process is within the operating
limits of the device. Verify all sensor
connections.
NOTE: Power cycling the One Series will reset some faults. If the fault remains after power cycling, please contact UE Inside Sales at
[email protected] or call +1 (617)-923-6977. Some fault codes not noted above indicate microprocessor faults.
Tabel 4

IM_1XSW-02
www.ueonline.com 17
TROUBLESHOOTING
The switches contained in the One Series are electronic. The on/off switch signal is produced by a transistor or a solid-state relay, depending on the
One Series model. Electronic switches cannot be properly tested with an ohmmeter. Instead, measure the voltage drop across the switch connected
to the intended load to determine if it is open or closed. A properly functioning One Series electronic switch will exhibit the following voltage levels
(see Table 5):
Signal Location Voltage Open Voltage Closed
Ser point switch
1XSWLL
TB1 Supply voltage (up to 50 VDC) 4.7 VDC (nominal)
Set point switch
1XSWHL
TB1 Supply voltage (70-240 VAC, VDC) 13.5 VAC, VDC (nominal)
Set point switch
1XSWHH
TB2 A, B Supply voltage (24-280 VAC, VDC) 0 VAC, VDC (nominal)
IAW output switch
All models
TB3 +, - Supply voltage (up to 50 VDC) 4.7 VDC (nominal)
LOST PASSWORDS
Contact UE Inside Sales at +1-617-923-6977 or go online at www.UEonline.com/UUC to obtain a unique unlock code. The Kanban number from
the product nameplate is required (see Figure 13).
THIS DOCUMENT IS PROPRIETARY
PROPERTY OF UNITED ELECTRIC CONTROLS.
UNAUTHORIZED USE IS STRICTLY PROHIBITED.
TOLERANCES ON FRACTIONS
±1/64
±1/2°
±0.010 ±0.005
2 PLACE DEC 3 PLACE DEC ANGLES
Page 1 of 1
WARNING: AGENCY CRITICAL DOCUMENT.
NO REVISIONS WITHOUT CERTIFICATION
ENGINEER APPROVAL
NOTES:
LASER MARKED ON BLANK NAMEPLATE P/N 6211-751. 1.
NAMEPLATE DIMENSIONS ARE 3.943" REF X 1.35" REF
FORMAT SHOWS FIXED TEXT AND GRAPHICS ONLY.
2.
ANY VARIABLE TEXT SHOWN IS BETWEEN * MARKS.
C
E5537
ADDED PROTECTION METHOD CHECK BOXES.
6-12-15
SR
EM
B
E5530
UPDATED PER AGENCY REQUIREMENTS
6/9/15
SR
EM
A
E5453
FIRST ISSUE
5/14/15
SR
EM
EM
2.25:1
DWG NO
UNITED ELECTRIC
CONTROLS COMPANY
WATERTOWN * MASSACHUSETTS
SCALE
TITLE
ORIGINAL DATE
DRWN
CHKD
APPD
DO NOT SCALE THIS DRAWING
DOC #: DE733010102 Rev B
EM
ONE SERIES
1X
NAMEPLATE
A-6211-847
SR
5/14/15
6211-847
DESCRIPTION
DATE
DRWN
APPD
UNLESS OTHERWISE SPECIFIED
DIMENSIONS ARE IN INCHES
REV.
ECN#
Table 5
Figure 13
Kanban number and Date Code

IM_1XSW-02
www.ueonline.com
18
Process display
1234
Display to Scroll:
SP1 XXXX, DB1 XXXX, SP2
XXXX, DB2 XXXX
Display to Scroll:
MAX XXXX, MIN XXXX, TRIPS XXXX
PASS
WORD 8888
Set Blinking Digit
Increments of Blinking Digit
Sets Digit and moves to the next Invalid
PWORD
Flash Err
PWORD
Valid OK
Abort
Both
ENTER
NEW
PWORD
Abort
8888
Set Blinking Digit
Increments of Blinking Digit
Sets Digit and moves to the next
CONF PASSWORD
8888
Abort
Change
SAVING
BOTH
SAVING
BDOOR PWORD
Valid
NO
RESET
BOTH
No Latch
Set
MAN
RSET
If Latch
Set
both RSET
DONE
CLR
MAX/MIN
*CLR?
YES
NO
SET
UNITS
PSI
BAR/mBAR
KPa/MPa
Kg/cm2
“wc
°F
°C
SW1
Note: BAR/mBAR or KPa/MPa will depend on sensor
OPEN
RISE SP POS
NEG
Skip if range only POS
Set Point Outside Sensor
range
flash “Err”
8888 DB 8888
Set Blinking Digit
Increments of Blinking Digit
Sets Digit and moves to the next
Set Blinking Digit
Increments of Blinking Digit
Sets Digit and moves to the next
Shortcut to
Save
Changes
BOTH
Dead Band out of Range
flash “Err”
OPEN
FALL
CLOSE
RISE
CLOSE
FALL
OPEN OUT
OF
WINDOW
CLOSE
OUT OF
WINDOW SPH DBH SPL DBL
Note: Enter Set Point High, Dead Band High, Set Point Low and Dead Band Low.
Details of entry are similar above.
OFST POS
NEG
Offset out of Range
Flash “Err”
8888
Set Blinking Digit
Increments of Blinking Digit
Sets Digit and moves to the next
SPAN POS
NEG
SPAN out of Range
Flash “Err”
8888
Set Blinking Digit
Increments of Blinking Digit
Sets Digit and moves to the next
LCH1 ON
OFF
PLUG
PORT
OFF
1MIN
1HR
24HR
8888
Set Blinking Digit
Increments of Blinking Digit
Sets Digit and moves to the next
Set Window
If OFF is selected,
pressing will
return to menu
Setting > 10% of Range
flash “Err”
RESET
TRIP CNT 8888 CLR?
YES
NO
OFF*
1/4S*
1/2S
1Sec
2Sec
FILTER
TRIP
DELAY
ON
OFF 8888
Set Blinking Digit
Increments of Blinking Digit
Sets Digit and moves to the next
ON
OFF
SAVE
CHNG NO
YES Both Saves
Changes
Both
Discards
Changes
CHANGES
DISCARDED
SAVING
CHANGES
One Series
Software
Flowchart
PLUG
PORT
DELAY
Un-shaded = Display Toggles
Shaded = Display Scrolls
*Denotes shortcut to Save Changes
when both buttons are pressed.
*
*
*
*
*OFF and 1/4 Sec. settings not available
on temperature models
Flowchart 1

IM_1XSW-02
www.ueonline.com 19
5.3”
5.7”
5.4”
6.1”
5.3 5.4
10.4”
8.0”
5.4”
5.3”
5.1”
5.4”
3.00”
3.63”
CLEARANCE
HOLE FOR 1/4" BOLT
4 PLCS
5.3”
5.1”
5.4”
3/4” - 14 NPT
CONDUIT PORTS
1/2” - 14 NPT
SENSOR PORT
3/4” - 14 NPT
CONDUIT PORTS
3/4” - 14 NPT
CONDUIT PORTS
3/4” - 14 NPT
CONDUIT PORTS
3/4” - 14 NPT
CONDUIT PORTS
1/2” - 14 NPT
SENSOR PORT 1/2” - 14 NPT
SENSOR PORT
1”-20 NPT
SENSOR PORT
1”-20 NPT
SENSOR PORT
[111.92]
mm
[76.2]
mm
[133.35]
mm
[12.7]
mm
SURFACE MOUNTING KIT
6361-704
[144.78]
mm
[134.62]
mm
[137.16]
mm
[154.94]
mm
[134.62]
mm
[137.16]
mm
[264.16]
mm
[203.2]
mm
[137.16]
mm
[129.54]
mm
[134.62]
mm
[137.16]
mm
[76.2]
mm
[92.20]
mm
[129.54]
mm
[134.62]
mm
[137.16]
mm
[107.95]
mm
[61.91]
mm
[158.75]
mm
[7.11]
mm
[107.95]
mm
[76.2]
mm
[6.35]
mm [8.73]
mm
DIMENSIONAL DRAWINGS
GAGE PRESSURE
LOCAL TEMPERATURE
(SPRING LOADED)
DIFFERENTIAL PRESSURE
LOCAL TEMPERATURE
(WELDED)
MOUNT BOLT PATTERN

IM_1XSW-02
www.ueonline.com
20
4”, 6”, 10”
[101.6, 152.4, 254] mm
(FIXED DIM.’S)
Ø0.250
[6.35] mm 316 st/st
SHEATH
WELD
1/2” NPT HEX FITTING
300 SERIES st/st
22 AWG STRANDED
TEFLON INSULATION
4.50
[114.3] mm
(FIXED DIM.)
EPOXY SEAL
0.94
[23.87] mm
(FIXED DIM.)
4.50
[114.3] mm
(FIXED DIM.)
EPOXY SEAL
1/2” NPT
HEX FITTING
300 SERIES st/st
22 AWG STRANDED
TEFLON INSULATION
1/2” NPT
UNION
300 SERIES st/st
316 st/st
SHEATH
Ø0.250
[6.35] mm
0.25
[6.35] mm
SPRING
LOAD
L DIM.
(CUSTOMER SUPPLIED DIM.)
0.50
[12.7] mm
NUN DIM.
(CUSTOMER SUPPLIED DIM.)
L DIM.
(CUSTOMER SUPPLIED DIM.)
2.5
[63.5] mm
Ø0.250
[6.35] mm
Ø0.125
[3.18] mm 300 SERIES st/st
MINERAL INSULATED CABLE
Ø0.125, [3.18] mm (FOR DC UNITS)
Ø0.250
[6.35] mm 1/2” NPT COMPRESSION FITTING
300 SERIES st/st
26 AWG STRANDED
TEFLON INSULATION
4.50
[114.3] mm
(FIXED DIM.)
EPOXY SEAL
2.00
[50.8] mm
(FIXED DIM.)
1/2”-14 NPT
PIPE NIPPLE
300 SERIES st/st
0.50
[12.7] mm
Temperature Sensors
Remote (TR1, TRC, TH1, THC, TC1, TCC)
SENSOR OPTIONS
Spring Loaded Local (TTC)
Fixed Local (TL1 - TL3)
Differential Pressure
1/4”-18 NPT (MALE)
BOTH ENDS
3.0
[76.2mm]
1.06
[26.9mm]
Gauge Pressure
1.06
[26.9mm]
1/2”-14 NPT (FEMALE)
Pressure Sensors
5.30”
[134.6mm]
2.44”
[61.9mm]
2.86”
[72.6mm]
[221mm]
8.70”
DUAL SEAL
ENCLOSURE
1/8" NPT
ANNUNCIATION
VENT CAN BE
ROTATED UP TO
90° IN EITHER
DIRECTION
Dual Seal with Gage Pressure
Sensor (Option M041)
0.375 REF
0.250
REF
2.50
REF
SENSOR
THERMOWELL ADAPTER
[6.35] mm
[63.5] mm
[9.53] mm
Thermowell Adapter Kit Option W081
(UE Part #62169-44)
Other manuals for ONE Series
2
This manual suits for next models
3
Table of contents
Other UE Switch manuals