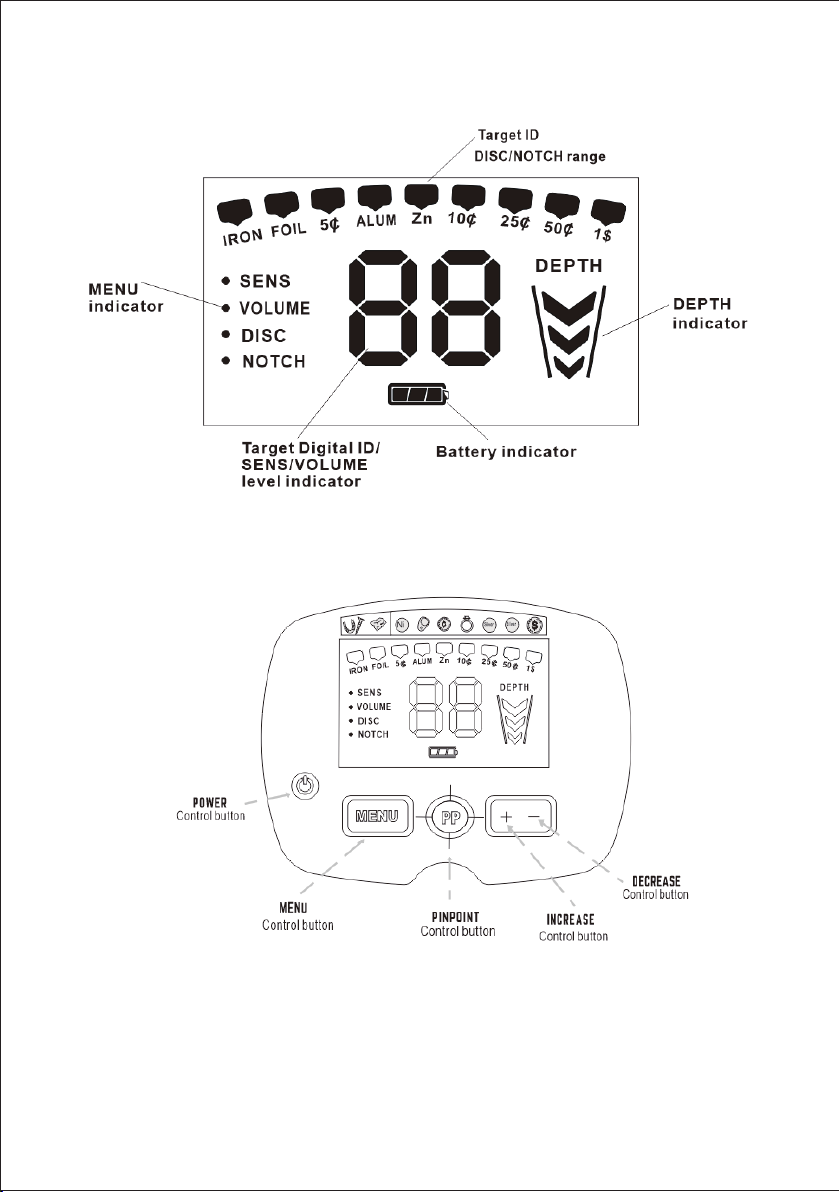
DISC (Discrimination)
Discrimination is an important feature of professional metal detectors. It allows user
to ignore trash and undesirable objects.
Notice that the 4 right-most categories cannot be eliminated.
Right-most categories represent silver or other high-value targets, which are
generally desirable; therefore the detector does not allow them to be discriminated
out.
To pick up the eliminated target category, press “-” and categories will be accepted
back for detection from right to left.
NOTCH
The NOTCH control is similar to Discrimination. It allows you to accept or reject
different types of metals. While DISC works left to right, the NOTCH control allows
you to accept or reject individual categories.
Categories eligible for NOTCH are FOIL, 5¢, ALUM, Zn.
Press “+” or “-” to program the NOTCH feature. Each press of “+” or “-” cycles to a
new category and that category icon will flash for 3 seconds. Then the category will
reverse status. Alternatively, press MENU while the icon is flashing to accept the
Notch. If the icon had previously been illuminated it will now disappear indicating
that the category has been eliminated from detection. Likewise, an icon that is not
visible on the display will re-illuminate, indicating that category is now notched in
(i.e. detected).
Any of the 4 eligible categories can be “Notched” in or out.
The DISC controls the detector's Discrimination function. In its default setting all
metals are detected. Use this DISC control in order to eliminate unwanted types of
metals from detection. Targets are eliminated from detection from left to right.
Each time you press “+” button, a target category icon will disappear. When an icon
disappears, that category is eliminated from detection.
7