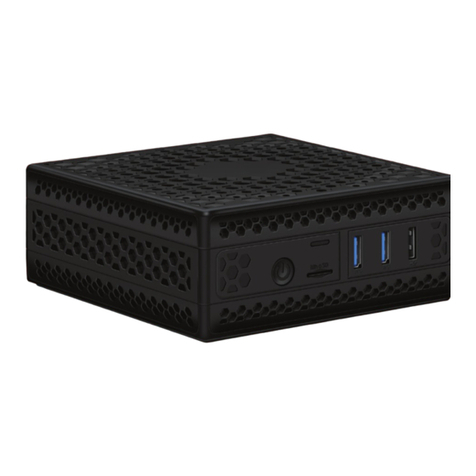
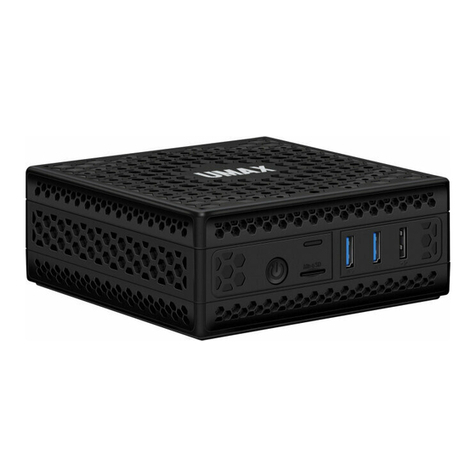
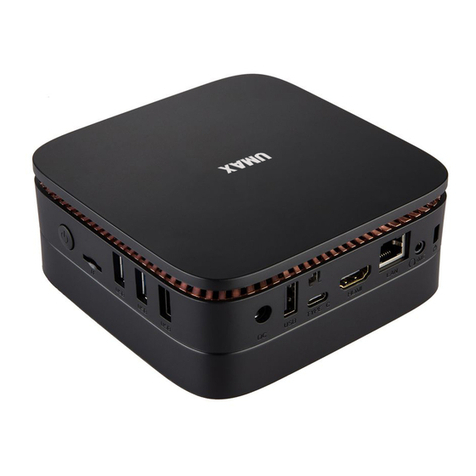
UMAX Technologies U-Box J41 Pro User manual

U-Box
J41 Pro
EN
CZ
SK
PL
HU


U-Box
J41 Pro
USER MANUAL ENGLISH

en
12345678
910 11 12
1. power button
2. micro SD
3. USB 3.0
4. USB 3.0
5. USB 2.0
6. power
GETTING TO KNOW YOUR COMPUTER
press to turn on
TURNING ON YOUR COMPUTER
7. USB 2.0
8. HDMI 2.0
9. HDMI 2.0
10. LAN
11. headphones+microphone jack
12. Kensington lock

U-Box J41 Pro en
EXPANDING STORAGE - M.2 SATA SSD
1. Unplug your mini-pc from the power adapter. Ground
yourself to avoid electrostatic discharge by touching any
metal object, for example radiator.
2. Unscrew two screws on the bottom side.
3. Remove the bottom cover.
4. Unscrew the screw holding installed M.2 SSD and
remove the SSD.
5. Insert your new M.2 SATA 2280 SSD.
6. Fix the SSD position by a screw.
7. Put back the bottom cover and fix it by two screws.
You can expand the storage capacity of your mini-PC by
changing the M.2 SATA 2280 SSD. You might need to
format the drive before use.

en
EXPANDING STORAGE - 2.5” SSD/HDD
1. Unplug your mini-pc from the power adapter. Ground
yourself to avoid electrostatic discharge by touching any
metal object, for example radiator.
2. Unscrew two screws on the bottom side.
3. Remove the bottom cover.
4. Plug your 2.5” SSD/HDD to the SATA3 cable.
5. Place the SSD/HDD inside the mini-pc.
6. Put back the bottom cover and fix it by two screws.
You can expand the storage capacity of your mini-PC
by adding a 2.5” SATA3 SSD or HDD. You might need to
format the drive before use.

U-Box J41 Pro en
EXPANDING MEMORY - DDR4 SO-DIMM
1. Unplug your mini-pc from the power adapter. Ground
yourself to avoid electrostatic discharge by touching any
metal object, for example radiator.
2. Unscrew two screws on the bottom side.
3. Remove the bottom cover.
4. Remove current memory module by pushing apart
clips that hold it.
5. Insert new memory module and press it down to fix it.
6. Put back the bottom cover and fix it by two screws.
You can change the memory of your mini-PC. The
supported type is DDR4 SO-DIMM. The maximum
memory size is 8 GB. Supported frequencies are 2400
MHz and 2666 MHz.

en
INSTALLING VESA MOUNT
You can place your mini-PC on the back side of an LCD
screen or TV using VESA mount included in the package.
1. Place the VESA mount on the back side of your
LCD or TV.
2. Fix it by two screws.
3. Fix two screws to the holes on the back of your mini-
pc.
4. Hang your mini-pc on the VESA mount that is on your
LCD or TV .

U-Box J41 Pro en
WORKING WITH WINDOWS® 10
Launches the Start menu
Launches Action Center
+
Launches the desktop
+
Launches the File Explorer
+
Launches Settings
+
Launches Connect panel
+
Activates the Lock screen
+
Minimazes all currently active windows
+
Launches Search
+

en
Launches Project panel
Opens the Run windows
Opens Ease of Access Center
Opens the context menu of the Start
button
Zooms out your screen
The Tips app in Windows
10 is full of short-and-sweet
tips that help you get the
most out of Windows 10.
Select the Start button,
type tips, and then select
Tips at the top of the list of
results.
Launches the magnifier icon and zooms
in your screen
WINDOWS 10 TIPS
+
+
+
+
+
+

U-Box J41 Pro en
Operating temperature: 10° to 35° C, storage temperature: -25° to 45° C,
relative humidity: 0% to 90% (noncondensing).
Handle with care. It has sensitive electronic components inside. Place it on a stable
work surface that allows for air circulation under and around the computer. Your
computer can be damaged if dropped, burned, punctured, or crushed, or if it comes
in contact with liquids, oils, and lotions. Do not use a damaged computer as it may
cause injury.
Liquid exposure. Keep your computer away from sources of liquid, such as drinks,
oils, lotions, sinks, bathtubs, shower stalls, and so on. Protect your computer from
dampness, humidity, or wet weather, such as rain, snow, and fog.
Charging. Charge only with the included power adapter. Other power adapters might
not meet safety standards, and using such power adapters could pose a risk of death
or injury. Using damaged power adapters or cables, or charging when moisture is
present, can cause fire, electric shock, injury, or damage to your computer or other
property. Do not use a power adapter in wet locations, such as near a sink, bathtub,
or shower stall, or connect or disconnect the power adapter with wet hands.
Medical device interference. It contains components and radios that emit
electromagnetic fields, including magnets, which may interfere with pacemakers,
defibrillators, and other medical devices. Maintain a safe distance between
your medical device and computer. Consult your physician and medical device
manufacturer for information specific to your medical device.
Repetitive motion. When you perform repetitive activities such as typing or playing
games, you may experience discomfort in your hands, arms, wrists, shoulders, neck,
or other parts of your body. If you experience discomfort, stop using computer and
consult a physician.
Choking hazard. Some accessories may present a choking hazard to small children.
Keep these accessories away from small children.
High-consequence activities. Your computer is not intended for use where the
failure of the computer could lead to death, personal injury, or severe environmental
damage.
Explosive and other atmospheric conditions. Using computer in any area with a
potentially explosive atmosphere may be hazardous—particularly in areas where
the air contains high levels of flammable chemicals, vapors, or particles such as
grain, dust, or metal powders. Exposing computer to environments having high
concentrations of industrial chemicals, including evaporating liquified gases such as
helium, may damage or impair its functionality.
SAFETY INFORMATION

en
Windows is a registered trademark of Microsoft Corporation in the United States and/or other countries. Umax and the Umax
logo are trademarks of Umax Czech a.s. All other trademarks are the property of their respective owners.
+420 800 118 629
Umax Czech a.s.
Kolbenova 962/27e
198 00 Prague 9
Czech Republic
Web: www.umax.cz
Facebook: Umax.cz
Youtube: UMAX Czech Republic
Umax Czech a.s., Kolbenova 962/27e, 198 00 Prague 9, Czech Republic
Importer hereby declares that this wireless device is in compliance
with the essential requirements and other relevant provisions of the
R&TTE Directive and Radio Equipment Directive 2014/53/EU, as
applicable. A copy of the EU Declaration of Conformity is available
at www.umax.cz.
Do not dispose of electrical appliances as unsorted municipal
waste, use separate collection facilities. Contact your local
authority for information regarding the collection systems
available. If electrical appliances are disposed of in landfills or
dumps, hazardous substances can leak into the groundwater and
get into the food chain, damaging your health and well-being.
Please contact your local or regional waste authority for more
information on collection, reuse and recycling programs.
TECHNICAL SUPPORT AND SERVICE CENTER
LET’S KEEP IN TOUCH
MANUFACTURER


U-Box
J41 Pro
UŽIVATELSKÝ MANUÁL ČEŠTINA

cz
1. tlačítko pro zapnutí
2. micro SD
3. USB 3.0
4. USB 3.0
5. USB 2.0
6. napájení
SEZNÁMENÍ S POČÍTAČEM
12345678
910 11 12
7. USB 2.0
8. HDMI 2.0
9. HDMI 2.0
10. LAN
11. konektor pro sluchátka a
mikrofon
12. Kensington zámek
zmáčkněte pro zapnutí
SPUŠTĚNÍ POČÍTAČE

U-Box J41 Pro cz
ROZŠÍŘENÍ ÚLOŽIŠTĚ - M.2 SATA SSD
1. Odpojte mini-pc od napájecího adaptéru. Uzemněte
se, abyste předešli elektrostatickému výboji, dotykem
jakéhokoli kovového předmětu, například radiátoru.
2. Odšroubujte dva šrouby na spodní straně.
3. Sejměte spodní kryt.
4. Odšroubujte šroubek u namontovaného M.2 SSD a
disk poté odstraňte.
5. Vložte nový M.2 SATA 2280 SSD.
6. Přišroubujte šroubek SSD pro zajištění polohy.
7. Vraťte spodní kryt a upevněte jej dvěma šrouby.
Kapacitu úložiště vašeho mini-PC můžete rozšířit
výměnou M.2 SATA 2280 SSD. Před použitím může být
nutné disk naformátovat.

cz
ROZŠÍŘENÍ ÚLOŽIŠTĚ - 2.5” SSD/HDD
1. Odpojte mini-pc od napájecího adaptéru. Uzemněte
se, abyste předešli elektrostatickému výboji, dotykem
jakéhokoli kovového předmětu, například radiátoru.
2. Odšroubujte dva šrouby na spodní straně.
3. Sejměte spodní kryt.
4. Připojte 2.5” SSD/HDD ke kabelu SATA3.
5. Vložte SSD/HDD do mini-pc.
6. Vraťte spodní kryt a upevněte jej dvěma šrouby.
Kapacitu úložiště vašeho mini-PC můžete rozšířit
přidáním 2.5” SATA3 SSD nebo HDD. Před použitím
může být nutné disk naformátovat.

U-Box J41 Pro cz
ROZŠÍŘENÍ PAMĚTI - DDR4 SO-DIMM
1. Odpojte mini-pc od napájecího adaptéru. Uzemněte
se, abyste předešli elektrostatickému výboji, dotykem
jakéhokoli kovového předmětu, například radiátoru.
2. Odšroubujte dva šrouby na spodní straně.
3. Sejměte spodní kryt.
4. Vyjměte aktuální paměťový modul tak, že oddálíte
kovové spony, které jej drží.
5. Vložte nový paměťový modul a zamáčkněte ho pro
připevnění.
6. Vraťte spodní kryt a upevněte jej dvěma šrouby.
Paměť vašeho mini-pc můžete vyměnit. Podporovaný
typ je DDR4 SO-DIMM. Maximální podporovaná velikost
paměti je 8 GB. Podporované frekvence jsou 2400 MHz
a 2666 MHz.

cz
INSTALACE DRŽÁKU VESA
Vaše mini-pc můžete pověsit na zadní stranu LCD
displeje nebo TV použitím držáku VESA, který je
součástí balení.
1. Umístěte držák VESA na zadní stranu LCD monitoru
nebo TV.
2. Upevněte jej dvěma šrouby.
3. Na zadní stranu mini-pc zašroubujte dva šrouby.
4. Pověste svoje mini-pc na VESA držák na zadní straně
LCD nebo TV.
This manual suits for next models
1
Table of contents
Languages:
Other UMAX Technologies Desktop manuals
UMAX Technologies
UMAX Technologies U-One 24GL User manual

UMAX Technologies
UMAX Technologies U-Box J51 Pro User manual

UMAX Technologies
UMAX Technologies U-Box J34 User manual

UMAX Technologies
UMAX Technologies U-Box N41 User manual

UMAX Technologies
UMAX Technologies U-One 24AL User manual

UMAX Technologies
UMAX Technologies U-Box J50 User manual

UMAX Technologies
UMAX Technologies U-One 24GR Plus User manual

UMAX Technologies
UMAX Technologies SuperMac C600x User manual
UMAX Technologies
UMAX Technologies U-Box N42 User manual
UMAX Technologies
UMAX Technologies U-Box J34 User manual