Quick Installation Guide DX120 CAT5 DVI KVM Extender Over LAN w/Audio & Mic
1
http://www.uniclass.com.tw Rev. 1.1 Copyright @ All Rights Reserved
Quick Installation Guide
DX120 –TX Front View
DX120 –RX Front View
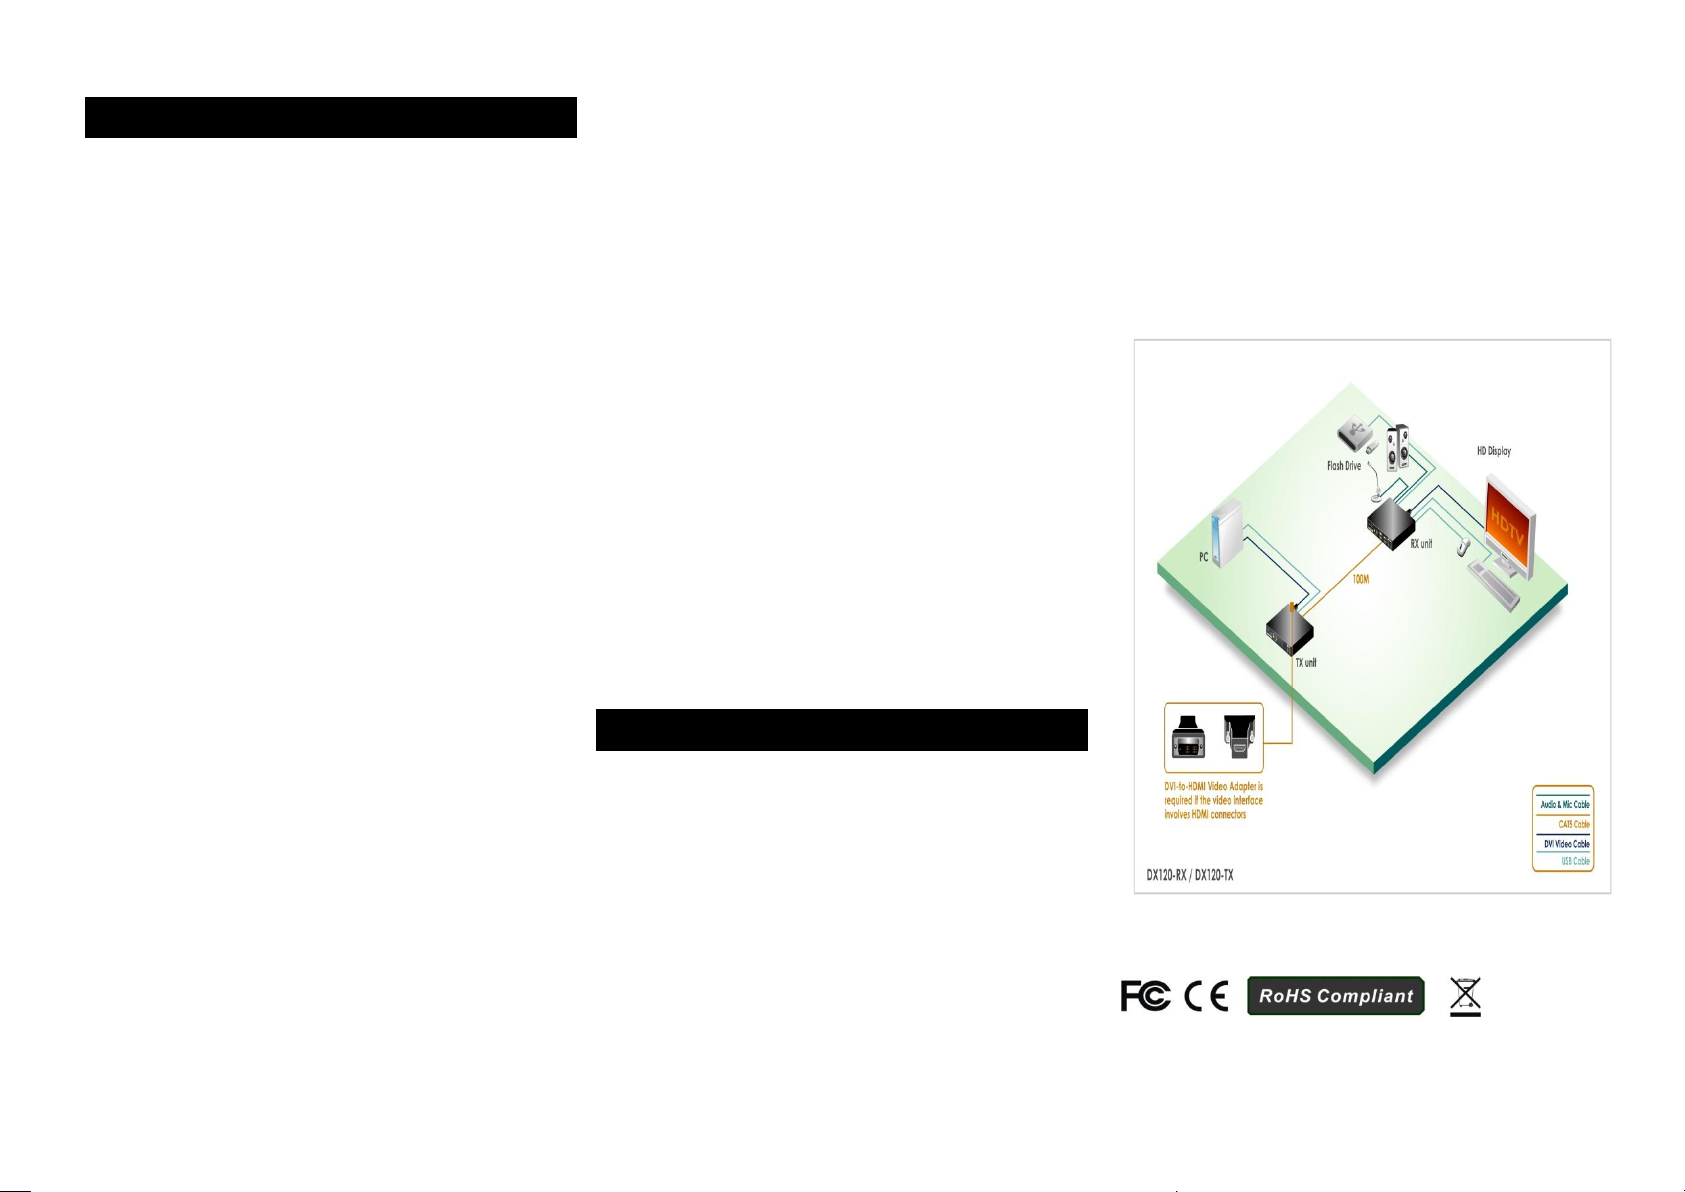
CAT5 DVI KVM Extender Over LAN
w/ Audio & Mic.
4 x USB 2.0 ports for keyboard, mouse and other
USB 2.0 devices
Digital Video Support Full HD 1080p up to 100M
Extension
DX120
Thank you for purchasing the CAT5 DVI KVM Extender! With our
highly reliable and quality product, users can enjoy countless
benefits from using this KVM Extender.
Introduction
The CAT5 DVI KVM Extender Over LAN comprises two distinct
units, the Transmitter and Receiver Unit. It is allows fully access
and complete control of your computing resources over the UTP
cable. They are LAN based KVM Extender systems that allow
access to a computer system from a remote console anywhere
on your existing network infrastructure.
The CAT5 DVI KVM Extender offers the extension of keyboard,
mouse, video, Mic. and USB equipment; use a single Cat5 cable
transmission, up to 100m away from your local PC.
The KVM Extender can support a digital video resolution up to
1920 x 1080 @60Hz/Full HD 1080p over 100M of a single Cat5
Cable, while still keeping a satisfying video quality at the same
time. Furthermore, the Cat5 DVI KVM Extenders support
Graphic Mode/Video Mode selection to suit your display
requirements. Graphic mode is optimized for still graphic
displays; while video mode is best for a dynamically changing
video stream.
Note: In case of to extend another 100M range, it needs to
install the Gigabit Network Switch, other than 10/100Mbs
Network Switch. Otherwise, the consequently will affected the
data transmission. Therefore should be avoided.
Package Contents
Please check whether you have all the following items from the
packaging box.
1 x Transmitter Unit (TX)
1 x Receiver Unit (RX)
2 x Power Adapter (DC9V)
1 x Quick Installation Guide
Note: Optional for IR Remote Control Unit Pack (Include: Wired
Transmitter and Wired Receiver).
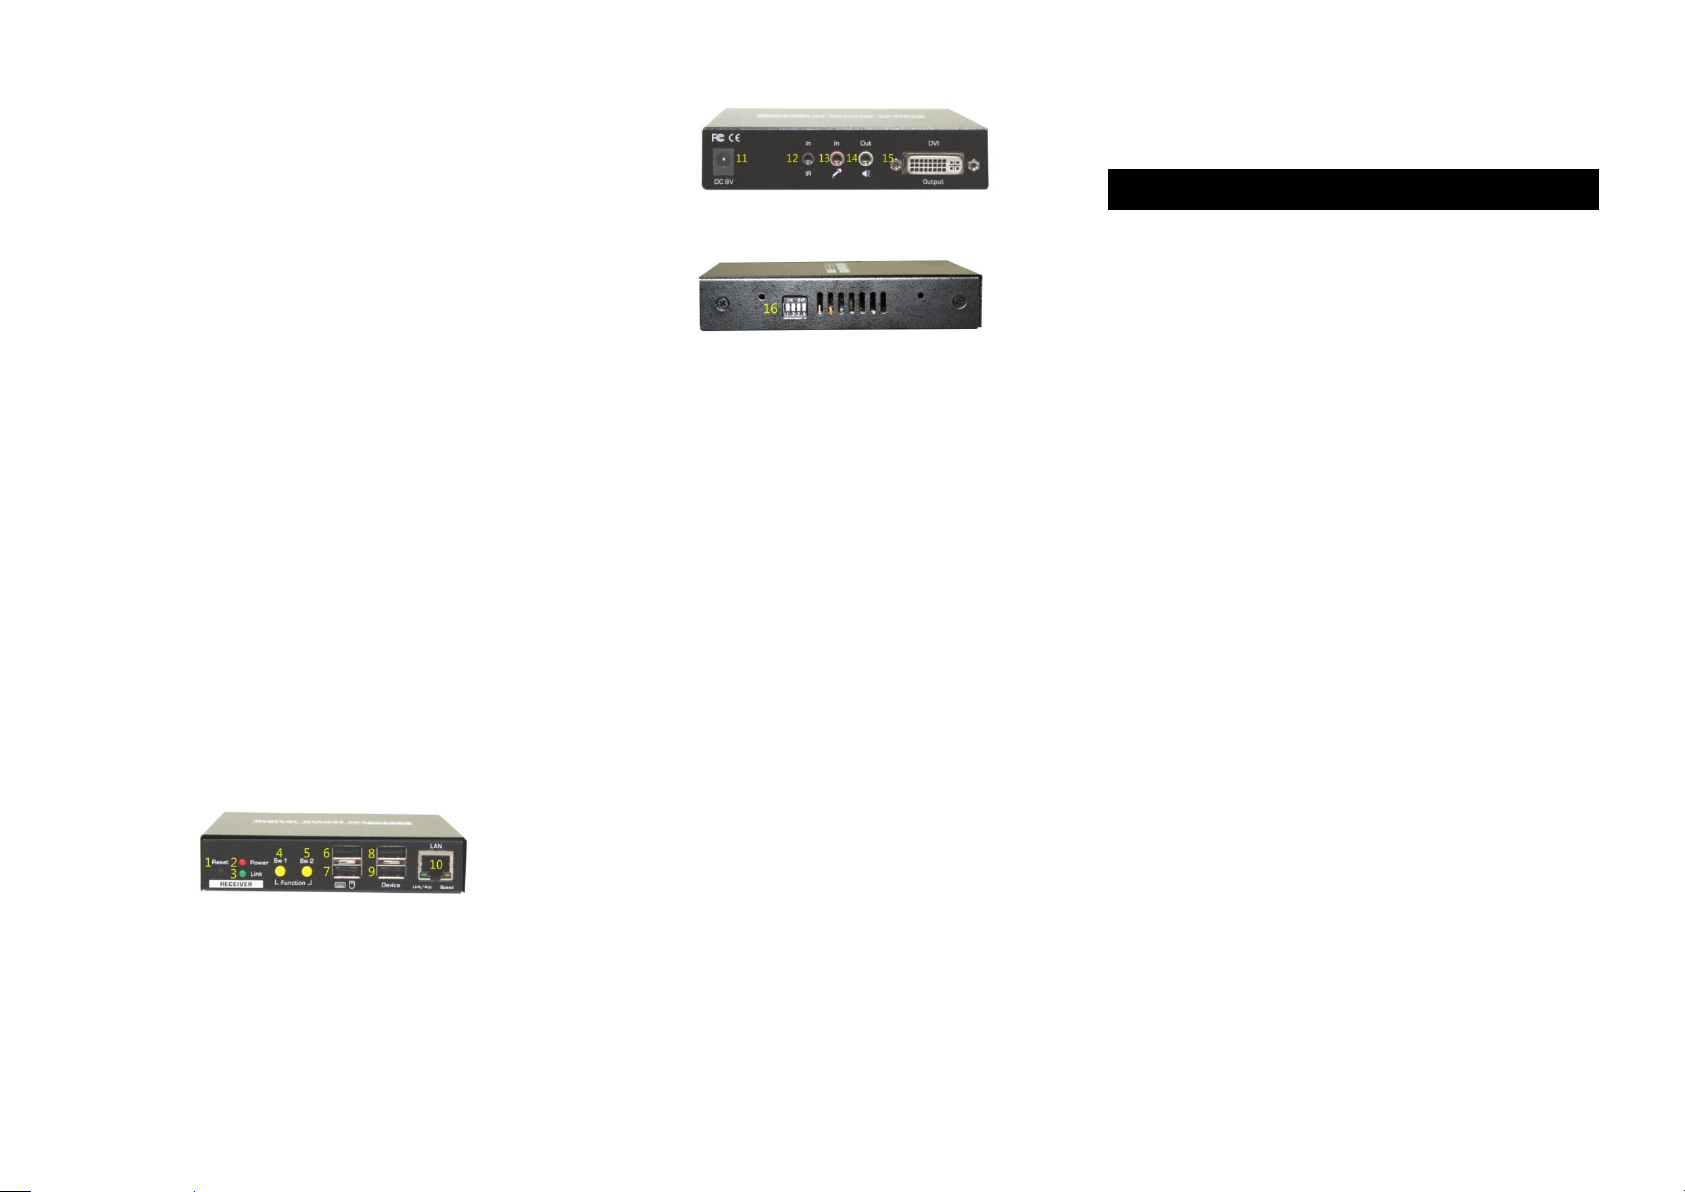
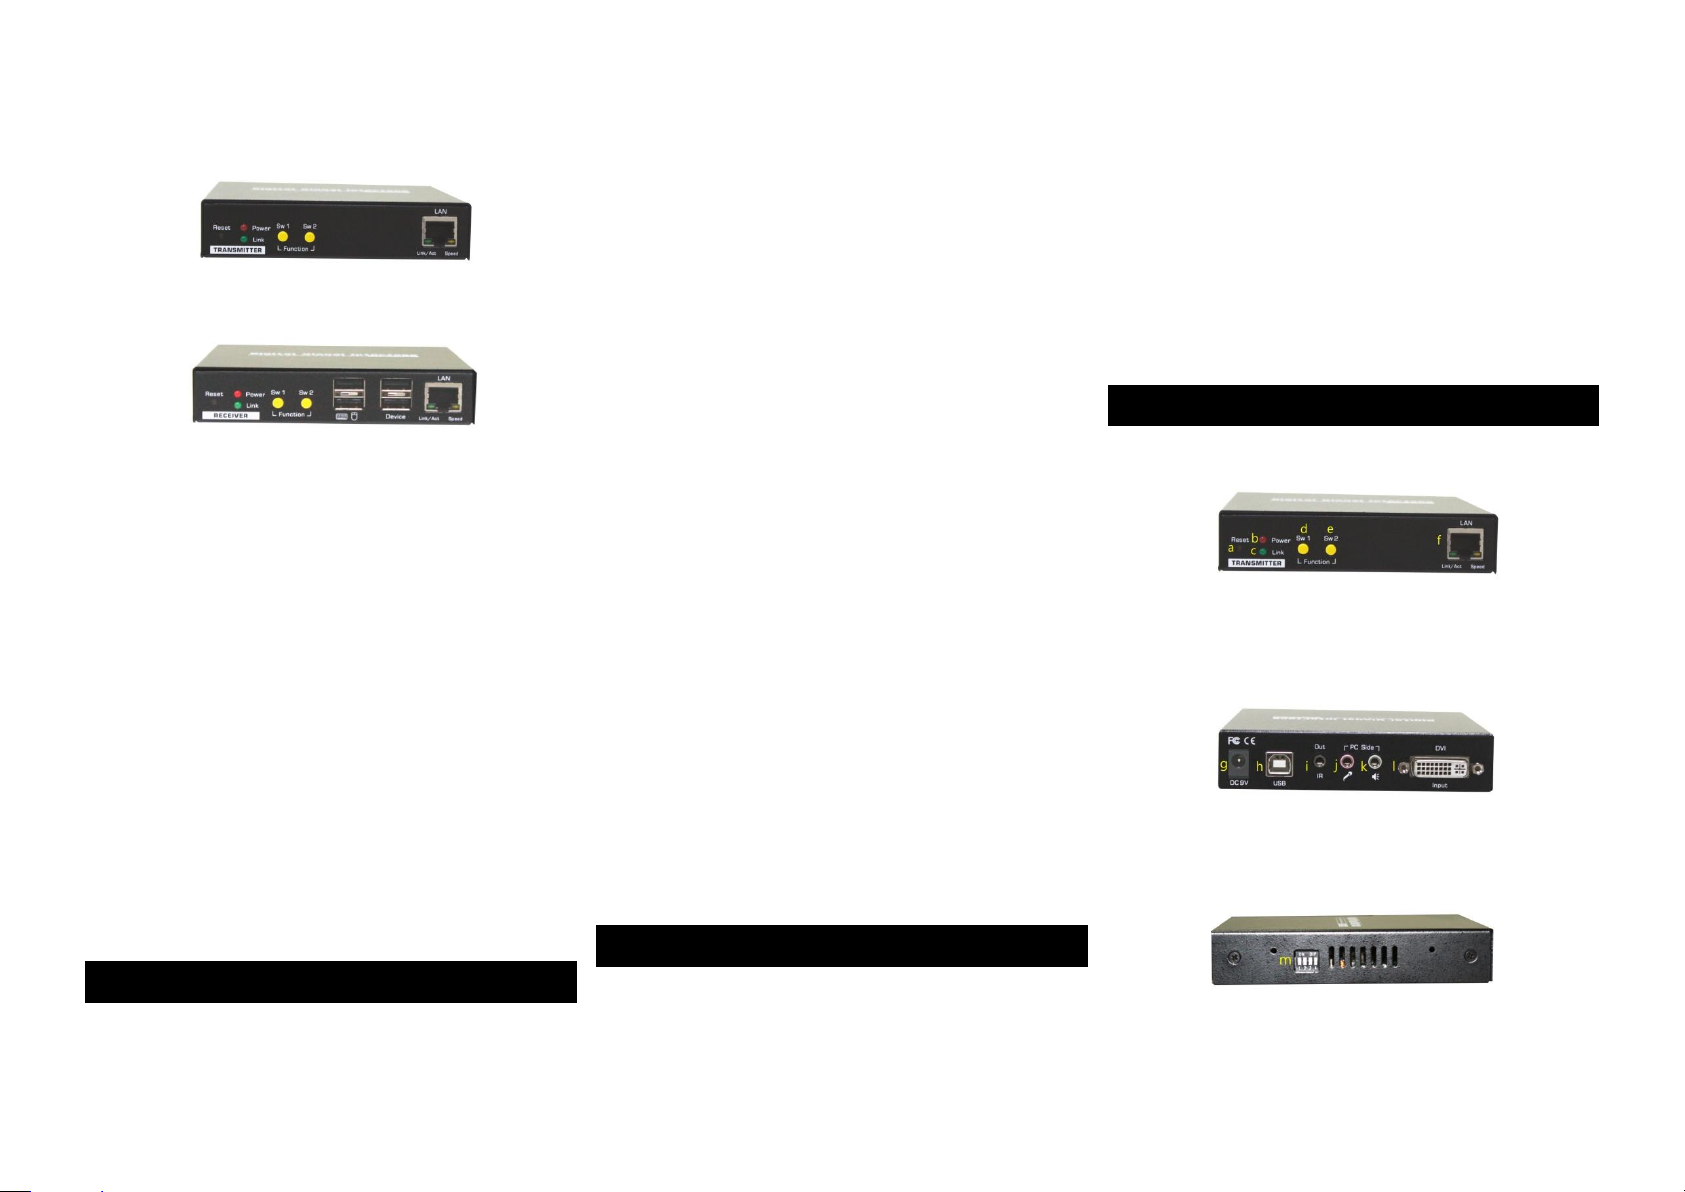
Front-Panel & Back-Panel
TRANSMITTER (TX) Unit
Transmitter (TX) Unit Front-View
Transmitter (TX) Unit Back-View
Transmitter Unit Right Side-View