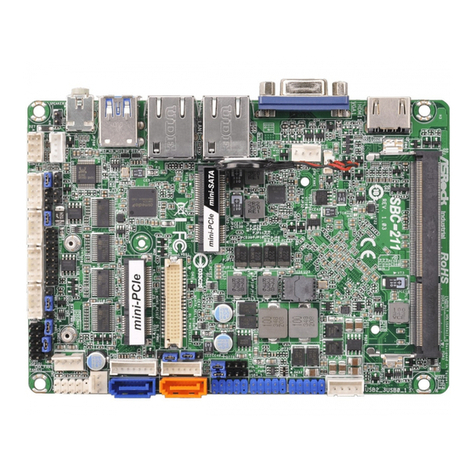
Unicorn ENDAT-586EL User manual

ENDAT-586EL
All-In-One motherboard
User’s Manual
Rev. 1x/2x
(For PCB 1x/2x)
PCB 2x:
1. Page IV: Specification
2. Page 4 (1-4): Motherboard Layout
3. Page 9 (2-1): JP5 S-Video Jumper Setting
4. Page 11 (2-4): Installing Riser Card
5. Page 48: Expansion Slot Pin Assignment(E9/E10)


Copyright Notice
The content of this manual has been checked for accuracy. The manufacturer
assumes no responsibility for any inaccuracies that may be contained in this
manual. The manufacturer reserves the right to make improvements to this
document and/or the product at any time without prior notice. No part of this
document may be reproduced, transmitted, photocopied or translated into any
language, in any form or by any means, electronic, mechanical, magnetic, optical
or chemical, without the prior written permission of the manufacturer.
VIA is registered trademark of VIA Technology Incorporation
VT82C598MVP and VT82C586B may only be used to identify products of VIA
Technology
ATI is registered trademark of ATI Technologies Inc.
Multiscan is a trademark of Sony Corp of America
IBM, EGA, VGA, PC/XT, PC/AT, OS/2 and PS/2 are registered trademarks of
International Business Machines Corporation
Intel is a registered trademark of Intel Corporation
Plug and Play is registered trademarksof Intel Corporation
Microsoft, Windows and MS-DOS are trademarks of Microsoft Corporation
Award is a trademark of Award Software Inc.
PCI is a registered trademark of PCI Special Interest Group
VESA is a trademark of the Video Electronics Standards Association
Other product names mentioned herein are used for identification purpose only
and may be trademarks and/or registered trademarks of their respective
companies.
Installation Notice
The manufacturer recommends using a grounded plug to ensure proper
motherboard operation. Care should be used in proper conjunction with a
grounded power receptacle to avoid possible electrical shock. All integrated
circuits on this motherboard are sensitive to static electricity. To avoid damaging
components from electrostatic discharge, please do not remove the board from the
anti-static packing before discharging any static electricity to your body, by
wearing a wrist-grounding strap. The manufacturer is not responsible for any
damage to the motherboard due to improperoperation.
User’s Manual IV
Specification:
MODEL ENDAT-586EL-1x ENDAT-586EL-2x
CPU Pentium 75-500MHz,
INTEL MMX, AMD K5/K6/K6-2/K6-3,
IDT C6, Rise MP6, IBM Cyrix 6x86 CPU
System Chipset VIA MVP3 82C598MVP + 82C586B Chipset
Support 100MHz Bus frequency
System BIOS Award (2Mbit Flash ROM)
LCD/VGA Chipset ATI Rage XL 2x AGP 3D Chipset,
Support for Digital Flat Panel (DFP)
4MB / 8MB / 16MB SDRAM Video RAM
LAN Chipset Realtek 8139A/B 10BaseT/100 BaseT
(Boot ROM Optional)
FLASH Disk Socket for DiskOnChip
System Memory Upto 256MB(PC66/PC100)
IDE Interface PCI IDE Support Ultra DMA33
Multi I/O Supports 4 Serial and 1 Parallel Ports
Serial Port with +5V/+12V Power
+5V/+12V for COM
Ports Yes
External Cache 512KB Burst Cache
IrDA Port, USB Port Yes
Expansion Slot Extension for PCI/ISA Bus
AD Selector AD23 LAN (INT.A,B,C,D)
AD22 FREE (INT.B,C,D,A)
AD21 FREE (INT.C,D,A,B)
AD24 FREE (INT.D,A,B,C)
AD24 LAN (INT.A,B,C,D)
AD23 FREE (INT.B,C,D,A)
AD22 FREE (INT.C,D,A,B)
AD21 FREE (INT.D,A,B,C)
Location of Expansion
Slot On the 6
th
slot of Standard MB
Keyboard / Mouse
Jack Two Mini Din Jack
Pin Header for Keyboard / Mouse / VGA / Multi I/O ports
ATX Power Connector Yes
Form Factor PC/AT -4 Layers
Board Size 223x220mm (8.77”x 8.66”)

TABLE OF CONTENTS
CHAPTER 1. INTRODUCTION................................................1
1-1. FEATURES ........................................................................................................1
1-2. UNPACKING.....................................................................................................3
1-3. ELECTROSTATIC DISCHARGE PRECAUTIONS .................................3
1-4. MOTHERBOARD LAYOUT ........................................................................4
CHAPTER 2. SETTING UP THE MOTHERBOARD.............5
2-1. JUMPERS AND CONNECTORS...................................................................5
2-2. INSTALLING MEMORY...............................................................................12
2-3. VGA SD-RAM SUPPORTING.....................................................................12
2-4. INSTALLING RISER CARD ........................................................................12
2-5. ASSIGNING IRQs FOR EXPANSION CARDS.......................................13
2-6. ASSIGNING DMA CHANNELS FOR ISA CARDS ...............................14
CHAPTER 3. AWARD BIOS SETUP.......................................15
3-1. QUICK SETUP.................................................................................................15
3-2. DESCRIPTION OF BIOS SETUP OPTIONS............................................16
3-3. DETAILS OF CHIPSET FEATURE SETUP..............................................16
3-4. DETAILS OF POWER MANAGEMENT SETUP....................................18
3-5. PCI CONFIGURATION SETUP...................................................................22
3-6. INTEGRATED PERIPHERALS ..................................................................25
CHPATER 4. VGA, LCD, DOC, IDE FEATURE...................29
4-1. AGP-BUS VGA FEATURE...........................................................................29
4-2. LCD FEATURE................................................................................................30
4-3. AGP-BUS VGA DRIVER..............................................................................31
4-4. PCI BUS IDE DRIVER AND UTILITIES..................................................31
4-5. DISKONCHP FEATURE...............................................................................31
4-6. DRIVER UTILITY INSTALLATION GUIDE ..........................................32

User’s Manual VI
CHPATER 5. LAN ADAPTER..................................................33
5-1. FEATURES ........................................................................................................33
5-2. UTP CABLE/RJ-45 JACK DEFINITION....................................................34
5-3. CONNECTING 100BASE-TX FAST ETHERNET NETWORK............35
5-4. CONNECTING 10BASE-T ETHERNET NETWORK.............................35
5-5. 10MBASE/100MBASE INSTALLATION NOTICE.................................35
5-6. REMOTE BOOT ROM INSTALLATION GUIDE....................................36
5-7. LED INDICATORS..........................................................................................37
5-8. SETUP PROGRAM ........................................................................................37
5-9. LAN DRIVER INSTALLATION PROCEDURE.......................................40
APPENDIX A: FLASH MEMORY UTILITY ........................41
APPENDIX B: CONNECTOR PIN ASSIGNMENT..............42
APPENDIX C: CPU SPECIFICATION...................................50

Chapter 1. Introduction
The ENDAT-586EL All-In-One motherboard uses VIA VT82C598MVP and
VT82C586B chipsets, built-in ATI Rage XL x2 AGP chipset which supports
Digital Flat Panel (DFP) and Realtek 8139x LAN chipset with RJ45 Jack for
10BaseT/100BaseT. Our board offers the highest performance PC specifications in
the industry. The ENDAT-586EL runs with the Intel Pentium P54C/P55C, AMD
K5/K6, K6-2/K6-3, IDT C6, Rise MP6 or IBM/Cyrix 6x86 CPU upto 5O0MHz.
The motherboard is fully compatible with industry standards, adding many
technical enhancements and is fully compatible with thousands of software
applications developed for IBM PC/AT compatible computers. The control logic
provides high-speed performance for the most advanced multi-user, multitasking
applications available today. “Tomorrows PC technology is here today”.
1-1.Features
•
Support for P54/P55C CPUs, AMD K5/K6, K6-2, K6-3, IDT C6, Rise
MP6 and IBM/Cyrix 6x86 CPUs Clock base on 60MHz ~ 100MHz
supports 75MHz –500MHz.
•
Provides for separately powered 3.3V (5V tolerant) interfaces to system
memory and PCI BUS
•
PC-97 compatible, using VT82C598MVP single-chip socket-7 north
bridge with AGP and PCI, plus Advanced ECC memory Controller and
support for SDRAM, EDO and FPM.
•
Maximum 512K pipeline burst SRAM cache
•
Single chip implementation for 64bit Socket-7 CPU, 64bit system
memory and 32bit AGP interfaces
•
Supports up to 512MB memory with two 168 pin DIMM socket
(PC-100/66 DIMM)

User’s Manual 2
•
Supports “Plug-Play” functions
•
On board built-in PCI BUS master IDE control and floppy drive
controller
•
Onboard socket for DiskOnChip supports M-System products
•
Onboard LAN Adapter supports 10BaseT/100BaseT, (On board) BOOT
ROM optional
•
Support for 4 COM ports, STD. RI(RS-232) +12V/+5V DC Power
selectable and one SPP/EPP/ECP Parallel port.
•
Supports Ultra DMA33 EIDE
•
Supports up to Mode 4 hard disk drives
•
Onboard support for 4 high-speed UARTS (W/16550 FIFO) and
multi-mode
•
Parallel port for standard, enhanced(EPP) and high-speed(ECP) mode
•
Onboard built-in USB functions
•
Onboard built-in 2x AGP BUS VGA adapter with ATI Rage XL chipset
•
On board built-in TMDS(DFP) connector for Digital Flat Panel LCD.
•
Support for 4MB/8MB/16MB SDRAM Video RAM
•
188pin expansion slot for both PCI and ISA BUS signals
•
AWARD BIOS FLASH ROM (2Mbits)
•
Hardware “Green” function support
•
IR function can be Enabled/Disabled by BIOS
•
Onboard LAN adapter, Video adapter can be Enabled/Disabled by
jumper settings.

3
The ENDAT-586EL All-In-One motherboard
1-2.Unpacking
The motherboard comes securely packaged in a sturdy cardboard shipping carton.
In addition to the User's Manual, the motherboard package includes the following
items:
•
ENDAT-586EL All-In-One Motherboard
•
HDC/FDC Cables
•
LCD Panel Cable (Optional)
•
Serial port kit for COM3 and COM4
•
IDE Driver includes: Drivers for Windows 3.1, Windows NT 3.x/4.x,
Windows 95, OS/2, Novell Netware and AWARD FLASH ROM
utilities.
•
VGA utilities and software drivers
•
Driver utilities for LAN adapter
If any of these items are missed or damaged, please contact the dealer from whom
you purchased the motherboard. Save the shipping materials and carton in the
event that you want to ship or store the board in the future.
Note:
Leave the motherboard in its original packing until you are ready to install
it!
1-3.Electrostatic Discharge Precautions
Make sure you properly ground yourself before handling the motherboard, or other
system components. Electrostatic discharge can easily damage the components.
Note: You must take special precaution when handling the motherboard in dry or
air-conditioned environments.

User’s Manual 4
1-4.Motherboard Layout

CHAPTER 2. Setting up the Motherboard
This chapter describes getting your motherboard ready for operations.
•
Installing the CPU upgrade
•
Installing DIMM memory. Make sure the correct CPU operating
voltage, jumper settings and frequency.
•
Double-check the insertion and orientation of the CPU before applying
power. Improper installation will result in permanent damage to the
CPU.
2-1. Jumpers and Connectors
Jumpers/Connectors Overview:
Function Jumpers/Connectors
CPU: CPU Clock Frequency JP10, JP11, JP12
CPU Ratio JP20
CPU Vcore Voltage JP18
Power for CPU Cooling Fan JP9
Power Supply: Type (AT/ATX) JP7
Power Good JP17
ATX Power on/off Switch J23 Pin 13, Pin 15
SDRAM Sync./Async. Mode Selector JP13
TV-OUT Pin Header JP5(pin1, 2, 3)
S-Video Pin Header(For PCB 2x only) JP5(pin4, 5, 6)
VGA/LCD Adapter Disable/Enable JP8
LAN Adapter Disable/Enable JP21

User’s Manual 6
Function Jumpers/Connectors
COM Ports Power Selector JP2, JP3, JP15, JP16
COM3/COM4 IRQ JP14, JP6
DiskOnChip Memory Address JP4
DFP Port For LCD J8
Clear CMOS JP1
PS/2 Keyboard header J4
PS/2 Mouse Header J3
IR JP19
USB Header J15
Header for Panel J23
Power LED / Keylock J23 Pin 1, 3, 5, 7, 9
ATX Power On/Off J23 Pin 13, Pin 15
Doze LED J23 Pin 17, Pin 19
Ring-Detected J23 Pin 21, Pin 23
External Speaker J23 Pin 2, 4, 6, 8
Hard Disk LED J23 Pin 12, Pin 14
Hardware Reset Switch J23 Pin 18, Pin 20
Buzzer On/Off J23 Pin 25, Pin 26
Turbo LED for Case Panel only J23 Pin 22, Pin 24
Note:
The cooling fan and heat sink are required for Pentium processors.
Please pay close attention to the direction of the CPU and cooling fan
during installation. Position the cooling ventilator directly facing the
regulator heat sink, which is located beside the CPU socket. This will
reduce the overheating of the regulator and increase the reliability of
the system.

7
The ENDAT-586EL All-In-One motherboard
JP13:SDRAM Sync/Async. ModeSelector(U4=ICS”9148BF-37”)
JP10 JP11 JP12 JP13
Close 2-3JP13
Close 1-2CPU
Clock AGP
Clock PCI
Clock
2-31-22-368 MHz 68 MHz 68 MHz 68 MHz 33 MHz
2-32-32-360 MHz 60 MHz 60 MHz 60 MHz 30 MHz
1-22-32-366 MHz 66 MHz 66 MHz 66 MHz 33 MHz
2-32-31-260 MHz 75 MHz 75 MHz 60 MHz 30 MHz
1-22-31-266 MHz 83 MHz 83 MHz 66 MHz 33 MHz
2-31-21-263 MHz 95 MHz 95 MHz 63 MHz 31 MHz
1-21-21-266 MHz 100MHz 100MHz 66 MHz 33 MHz
Note:
Please do not leave these jumpers at “OPEN” in any speed of CPU otherwise
the system won’t be boot-up.
JP13: 1-2 Memory = CPU Clock
JP13: 2-3 Memory = AGP Clock
DIMM Memory must be PC-100 type, if Memory Clock Setting = CPU
Clock at JP13
JP13:SDRAM Sync/Async. ModeSelector(U4=ICS”9148AF-58”)
JP10 JP11 JP12 JP13
Close 2-3JP13
Close 1-2CPU
Clock AGP
Clock PCI
Clock
2-31-22-383 MHz 124 MHz 124 MHz 83 MHz 41 MHz
2-32-32-375 MHz 112 MHz 112 MHz 75 MHz 37 MHz
1-22-32-366 MHz 66 MHz 66 MHz 66 MHz 33 MHz
1-21-22-375 MHz 75 MHz 75 MHz 75 MHz 37 MHz
1-22-31-266 MHz 83 MHz 83 MHz 66 MHz 33 MHz
2-31-21-263 MHz 95 MHz 95 MHz 63 MHz 31 MHz
1-21-21-266 MHz 100 MHz 100 MHz 66 MHz 33 MHz
2-32-31-288 MHz 133 MHz 133 MHz88 MHz 44 MHz
Note:
Please do not leave these jumpers at “OPEN” in any speed of CPU otherwise
the system won’t be boot-up.
JP13: 1-2 Memory = CPU Clock
JP13: 2-3 Memory = AGP Clock
DIMM Memory must be PC-133 type, if Memory Clock Setting = CPU Clock at JP13

User’s Manual 8
JP18: CPU Vcore Voltage Selector
Pin 1-2Pin 3-4Pin 5-6Pin 7-8Vcore
Close Close Close Close 3.5V
Close Close Close Open 3.4V
Close Close Open Close 3.3V
Close Close Open Open 3.2V
Close Open Close Close 3.1V
Close Open Close Open 3.0V
Close Open Open Close 2.9V
Close Open Open Open 2.8V
Open Close Close Close 2.7V
Open Close Close Open 2.6V
Open Close Open Close 2.5V
Open Close Open Open 2.4V
Open Open Close Close 2.3V
Open Open Close Open 2.2V
Open Open Open Close 2.1V
Open Open OpenOpen 2.0V
JP20: CPU Frequency Ratio Setting
Pin 1-2Pin 3-4Pin 5-6CPU Ratio
Close Close Open 2.5x
Close Open Open 2.0x
Open Close Open 3.0x
Open Open Open 1.5x / 3.5x
Close Close Close 4.5x
Close Open Close 4.0x
Open Close Close 5.0x
Open Open Close 5.5x
JP9: CPU Cooling Fan Power Selector
Pin 1, 3 Ground
Pin 2 +12V

9
The ENDAT-586EL All-In-One motherboard
JP7: Power Supply Type Selector
Pin 2-3AT Power
Pin 1-2ATX Power
JP17: Power Good Source Selector
Pin 1-2Internal Power Good
Pin 2-3External Power Good
JP8: VGA/LCD Disable/Enable
Pin 1-2VGA Disable
Pin 2-3VGA Enable

User’s Manual 10
JP5: TV-OUT Pin Header
Pin 1 / 3 GND
Pin 2 Composite Video out (NTSC/PAL)
JP5: S-Video (For PCB 2x only)
Pin 4 Y/RED
Pin 5 C/GREEN
Pin 6 SYNC
JP21: LAN Disable/Enable
Pin 1-2Enabled
Pin 2-3Disabled
JP2, JP3, JP16, JP15: DC Power Selector for COM Port
Standard RI +12V +5VCOM 1: JP2
COM 2: JP3
COM 3: JP16
COM 4: JP15 Close Pin 3-4Close Pin 1-2Close Pin 5-6

11
The ENDAT-586EL All-In-One motherboard
JP14, JP6: COM3/COM4 IRQ Selector
JP14 COM3 JP6 COM4
1-2IRQ5 (Default) 1-2IRQ4
2-3IRQ3 2-3IRQ10 (Default)
JP4: DiskOnChip Memory Address Selector
JP4 Memory Address
1-27-80C800H-0C9FFH
1-29-10 0CC00H-0CDFFH
3-47-80DCCCH-0D1FFH
3-49-10 0D400H-0D5FFH
5-67-80D800H-0D9FFH
5-69-10 0DC00H-0DDFFH(Default)
JP1: CMOS Data Clear
Pin 1-2Normal
Pin 2-3Clear CMOS Data
J15: USB Header (for USB1, USB2)
PIN Description
12USB VCC
34USB DATA-(0,1)
56USB DATA+(0,1)
78USB_GND
910 USB_GND

User’s Manual 12
2-2. Installing Memory
The motherboard offers two 168pin DIMM sockets supporting up to 512MB of
memory. The DIMM memory can be 66MHz or 100MHz (PC-100).
2-3. VGA S-DRAM Supporting
The ENDAT-586EL supports 4MB/8MB/16MB SDRAM. The amount of video
memory on your motherboard determines the number of colors and the video
graphic resolution.
2-4. Installing Riser Card
Installing Riser Card (Max. 3 PCI Slot on Riser Card)
PCI Slot INT ADSEL ENDAT-586EL-1x ADSEL ENDAT -586EL-2x
PCI 1 A,B,C,D AD23
Onboard LAN
AD24
Onboard LAN
PCI 2 B,C,D,A AD22 Free AD23 Free
PCI 3 C,D,A,B AD21 Free AD22 Free
PCI 4 D,A,B,C AD24 Free AD21 Free
There are two different riser cards that can be fitted to ENDAT-586EL All-In-One
motherboard. The first one is a 98pin ISA only Bus riser card (traditional ISA Bus
riser card), the second one is a 188pin PCI/ISA riser card.
Please note: PCI/ISA
riser cards jumper settings have to be matched with the motherboard
AD select.
The correct AD select for ENDAT-586EL All-In-One motherboard is
listed on the above table.
Caution:
Do not insert PCI Bus Add-On cards directly intothe on-board
expansion slot!

13
The ENDAT-586EL All-In-One motherboard
2-5. Assigning IRQs for Expansion Cards
Some expansion cards require an IRQ (Interrupt request vector) to operate.
Generally, an IRQ must be exclusively assigned to one use. In a standard design,
there are 16 IRQ available with 11 of them already in used by other part of the
system.
Both ISA and PCI expansion cards may need to use IRQ. System IRQs are
available to cards installed in the ISA Expansion Bus first. Any remaining IRQ
then may be assigned to this PCI Bus. You can use Microsoft's Diagnostic
(MSD.EXE) utility included in the Windows directory to see their map. Make sure
that there are no two devices using the same IRQ in the system. Otherwise this will
cause the system to hang up or give unexpected results. To simplify the process,
this motherboard complies with the Plug and Play (PnP) specifications, which was
developed to allow automatic system configuration. Whenever a PnP-compliant
card is added to the system, PnP cards and IRQs are automatically assigned if
available. If the system has both Legacy and PnP ISA cards installed. IRQs are
assigned to PnP cards from those not used by Legacy cards. The PCI and PnP
configuration of the BIOS setup utility can be used to indicate which IRQs are
being used by Legacy cards. For older Legacy cards that do not work with the
BIOS, you can contact your vendor for an ISA configuration utility.
An IRQ number is automatically assigned to PCI expansion cards after those used
by Legacy and PnP ISA cards. In the PCI Bus design, the BIOS is automatically
assigned an IRQ to a PCI slot that has a card in it which requires an IRQ. To install
a PCI card, you need to set the correct "ADSEL" and "INT" (interrupt) assignment.
Please refer to "Chapter 2-4" Installing a Riser Card for detail assignments.
IRQ Status Assignment
0Used Timer
1Used Keyboard
2Used Second 8259
3Used COM2
4Used COM1
5Used COM3 (Optional)
6Used Floppy Disk

User’s Manual 14
IRQ Status Assignment
7Used LPT1
8Used RTC
9Used Redirected IRQ2
10 Used COM4 (Optional)
11 Used LAN Adapter (on board)
12 Used PS/2 Mouse
13 Used Coprocessor
14 Used Hard Disk (IDE 1)
15 Used Reserved (IDE 2)
2-6. Assigning DMA Channels for ISA Cards
Since ISA cards, both Legacy and PnP may also need to use a DMA (direct
memory access) channel, DMA assignments for this motherboard are handled the
same way as the IRQ assignment process described above. You can select a DMA
channel in the PCI and PnP configuration section of the BIOS setup utility. In the
BIOS setup, you should choose "Yes" for those IRQ's and DMA's you wish to
reserve for Legacy cards.
Table of contents
Other Unicorn Motherboard manuals

Unicorn
Unicorn SBC-211 User manual

Unicorn
Unicorn ENDAT-5701 User manual

Unicorn
Unicorn ENDAT-3810 User manual

Unicorn
Unicorn ENDAT-GM451 User manual

Unicorn
Unicorn SBC-210 User manual

Unicorn
Unicorn ENDAT-D2512 User manual

Unicorn
Unicorn ENDAT-7301M User manual

Unicorn
Unicorn ENDAT-4052I/M User manual

Unicorn
Unicorn ENDAT-3203M User manual