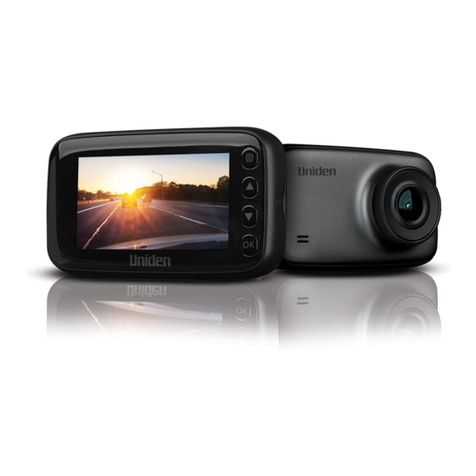
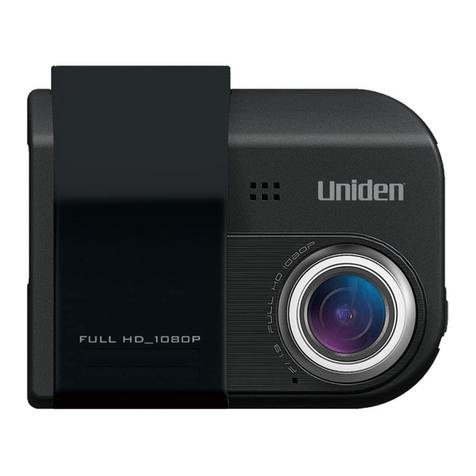
Uniden iGO CAM 750 User manual

iGO CAM 750
Accident CAM
Vehicle Recorder
For more exciting new products please visit our website:
Australia: www.uniden.com.au
New Zealand: www.uniden.co.nz

NOTE
Uniden does not represent this product to be waterproof. Do not
expose this product to Rain or Moisture.
NOTE
This product is intended for use in a motor vehicle. Don’t install
the device where it will block the driver’s view of the road
(including the mirrors!) or the deployment of any airbags.
NOTE
Keep your attention on the road! Don’t try to operate or focus
on any device while driving. If you have to concentrate on a
device, pull off the road for a few minutes.
NOTE
Ensure that the camera lens is kept clean and there is nothing
blocking the lens.
NOTE
Don’t leave the device in direct sunlight for a long period of time
or where the temperature could go above 60°C.
2
UNIDEN iGO CAM 750 Vehicle Recorder
Important Safety Instructions

Contents
Important Safety Instructions ............................................. 2
What Do I Do First? ................................................................4
Make Sure These Items Arrived in the Box .................................................4
Controls & Indicators ............................................................5
How Do I Put It in My Car? .................................................... 7
Attaching the Windshield Mount ..................................................................7
Operation .............................................................................. 8
Micro SD Card .......................................................................................................8
Plug it in, Power On/O .................................................................................... 9
Video Mode ........................................................................................................ 10
Photo Mode ....................................................................................................... 13
Playback Mode ................................................................................................. 14
Connecting to a PC .......................................................................................... 15
iGO CAM Player ................................................................................................. 15
Special Features .................................................................................................17
Important Information ................................................................................... 19
Warranty ..............................................................................20
3
UNIDEN iGO CAM 750 Vehicle Recorder

4
UNIDEN iGO CAM 750 Vehicle Recorder
Make Sure These Items Arrived in the Box
What Do I Do First?
DC (CAR) Adaptor
• If any item is missing or damaged, contact your place of purchase
immediately. Never use damaged products!
• Need help? Get answers at our website:
www.uniden.com.au for Australian model.
www.uniden.co.nz for New Zealand model.
• Owner’s Manual
Windshield Mount
iGO CAM 750
HDMI Cable
USB Cable
iGO CAM Player
software CD

Controls & Indicators
Ref Component Description
1 MODE • Use this button to switch between various modes -
Video, Photo and Playback
• When the unit is recording, press this button to
manuallylocktheles.
2 MENU In standby, open the Menu
3Power Function varies with different screens/modes.
• Press and hold to either switch on or off the unit.
• While recording, press to turn on or off the
audio.
• At other times, press to turn on, off or auto
detect the IR light.
UNIDEN iGO CAM 750 5Vehicle Recorder
1
2
3
4
5
6
789
10
11
12
13
14
15
HDMI Cable

6Vehicle RecorderUNIDEN iGO CAM 750
4UP Function varies with different screens/modes.
• In Menu list, move the cursor, one line up.
• In the Playback Mode, use to scan through the
les.
5DOWN Function varies with different screens/modes.
• In Menu list, move the cursor, one line down.
• In the Playback Mode, use to scan through the
les.
6OK Acts as an ENTER key
• In Record mode, press this button to start or stop
video recording.
• In Photo mode, press this button to take a photo.
• InPlaybackmode,pressthisbuttontoselectale
to view.
• PresstoconrmaselectionintheMenu.
• Presstoconrmachangeinthesettings.
7Micro SD
Card Slot
Use this slot to insert the micro SD card.
8HDMI HDMI output. Connect using an HDMI cable.
9Reset If the device fails to operate properly, try resetting
thedevice.Presstheresetbuttonbyusingane
pen or paperclip.
10 Mic Records Sound
11 AV Out Connects to an external device.
12 CAM Camera Lens
13 USB/DC IN • Connect to External Power & charge battery.
• Connect to PC for data (SD card) transfer.
14 IR Filter
Switch
This function helps the unit to record better during
low-light conditions. Please switch to the night icon
side to record in low-light conditions.
15 Status LED
indicator
Glows blue when the unit is turned on.
Glows red when charging.

7
UNIDEN iGO CAM 750 Vehicle Recorder
Attaching the Windshield Mount
How Do I Put It in My Car?
3.Pressthesuctioncupatagainstthewindshield.
NOTE
Suction cups will not stick well on a curved/textured or wet surfaces.
4. Rotate the suction lock clockwise to secure the unit in place and tighten the
locking collar.
5. Gently pull on the mount to make sure it is secure.
6. To remove the unit, press the lever at the back of the windshield mount and
gently pull the unit out.
It maybe a good idea to secure the power cord with cable clips so that it does
not interfere while driving.
The unit can be rotated to 180° to the left and right. However, avoid rotating
the unit at 360° as it might damage the cabling inside.
SLIDE LOCK
1. Slide the bracket hook into the bracket slot provided on the top of the unit.
2. After inserting the hook, push it down till it locks in position.
BRACKET SLOT
LEVER
LOCKING COLLAR
SUCTION LOCK
BRACKET HOOK
DC IN Port

Micro SD Card
NOTE
A compatible micro SD card has to be inserted before you start
using the unit. Ensure that the unit is turned off before inserting
or removing the SD card.
The unit can support micro SDHC cards (High Capacity SD) up to 32GB in
capacity. A micro SDHC card of at least 8GB capacity and minimum speed of
Class 10 is recommended.
Insert a formatted micro SD card gently in the slot at the bottom of the unit. To
remove the card from the slot, press the edge of the SD card inwards for it to
pop out and then pull it out of the slot.
It is important to format the micro SD card before using it, so as to avoid any
damagetothelescreatedoniGOCAM750.
Uniden recommends using good quality micro SD cards.
Operation
8Vehicle RecorderUNIDEN iGO CAM 750
Battery Information
The unit has an in-built battery of 180mAh capacity.
The iGOCAM 750 is designed mainly for in-vehicle use, drawing on vehicle
power and the duration of portable use is limited by the settings and the
battery operating time.
The unit will charge the battery whenever power is detected through the USB/
DC IN port on the unit or on the bracket.
The unit will take about 2 hours to charge completely.
NOTE
Please ensure that the battery is fully charged before using it
forthersttime.Toextendthebatterylife,chargetheunitfully
once every 3 months.

Plug it in, Power On/Off
NOTE
When connected to a car charger with power, the unit will power
on automatically and start recording.
Connect the DC car adaptor to the power connector (USB/DC IN port)
found on the device.
Connect the other end of the DC car adaptor to your car’s cigarette lighter.
When connected to the car charger the unit will power on automatically
and start recording. When the car’s engine is turned off, the unit will
automatically turn off.
To manually turn the unit on or off, press and hold the POWER button for 2-3
seconds.
The GPS icon on the screen:
-ashesredwhentheunithasn’tdetectedtheGPSsignal
- glows blue when the unit has detected the GPS signal.
NOTE
Only use the DC car adaptor that comes with your device. Any
other adaptor might damage the device.
Full Half full Low Empty
9
UNIDEN iGO CAM 750 Vehicle Recorder
Battery Alert
The image given below indicates the battery level at different stages.
The GPS icon on the screen:
-ashesredwhentheunithasn’tdetectedtheGPSsignal

10
UNIDEN iGO CAM 750 Vehicle Recorder
Video Mode
NOTE
To record a video, ensure that a valid micro SD card is inserted
in the given slot. Though this unit has an internal memory, we
recommend that you use a valid micro SD to record videos.
Using the iGO CAM 750 you can record videos and take photos. To record
videos, you need to ensure that the unit is in the Video mode.
Press MODE to switch between Video, Photo and Playback modes.
When connected to a car charger with power, the unit automatically goes into
the video mode and starts recording.
Aashingreddotappearsatthetoprighthandofthescreenindicatingthat
the unit is recording. To stop recording, press OK and the red dot disappears,
indicating that the recording has stopped.
Recording
Protect the Current Recording
While recording, if you want to protect the current recordings, then press the
MODE button, the icon will appear on the screen. This indicates that
those recordings have been locked and will not be overwritten by new video
clips.
Menu Settings
NOTE
Please note, you cannot access MENU in the video mode,
when the unit is recording. To access the Menu settings, you will
need to stop recording by pressing OK.
Press MENU to open the Menu Settings. The UP/DOWN keys can be used
to scan through the options, under each menu setting. Press OK to select the
required option.
Press MODE to exit the Menu Settings.

Item Description
Resolution Set the video resolution. The options available are,
1920x1080 30P, 1280x720 60P and 1280X720
30P.
Quality Choose between the options - Super Fine, Fine,
Normal-todenethequalityoftherecordings.
Audio Opt to turn on or off the audio for the recordings.
Loop Recording Use this option to set the length of each video clip.
If you choose the option ‘Off’ then the recorder will
notlooprecordandtheleswillnotbeoverwritten
on the micro SD card.
Digital Zoom Turn on this option to zoom in and out of an image.
Date/Time display Choose to display either date or time or both on
theLCDandtherecordedles.
Motion Detection Enable this setting to allow the recorder to record
only when it detects movement.
Lane Assist This option will alert you when the vehicle is
moving into another lane.
Line Calibration The Lane Assist feature requires correct calibration
to capture road markings. Adjust the sensor lines to
encompass only the area of the display where road
markings can be seen (see page 18 for details).
Click the Menu button again for the following settings to be displayed.
Anti-Flicker Change depending on the electrical power
frequency in your area (Default setting is 50Hz and
you may not have to change this setting).
White Balance Establish the condition to capture the recordings.
Colour Set the background colour for the recordings.
Contrast Adjust the contrast of the image.
Sharpness Usetodenetheclarityofdetailintherecordings.
EV (Exposure Value) Set the brightness sensitivity.
BL Compensation
(Backlight)
Turn on this feature to reduce the glare on the
recordings due to the background light.
11
UNIDEN iGO CAM 750 Vehicle Recorder

12 Vehicle RecorderUNIDEN iGO CAM 750
Click the Menu button again for the following settings to be displayed.
Language Set the language.
AV Out Connect to an external audio/video display.
Date/Time Setup Use the UP/DOWN and the OK buttons to set the
date and time.
Format Use this setting to format the micro SD card.
Default Setting Use to change the settings to the default factory
settings.
LCD Control Use this setting to control the brightness and
contrast of the LCD.
Auto Power Off Enable or disable the unit to shut down when idle.
IR Light Enable or disable the IR Light. The IR light is used
in low-light conditions.
Volume Increase or decrease the volume.
Key Tone Enable or disable this feature to sound a tone or go
mute when you press the keys.
G Sensor Thisfunctionshelpsprotect/lockvideolesincase
of a sudden movement/collision. You can change
the sensitivity level of the G-sensor.
LCD Off Enable to automatically turn off the LCD.
GPS Enable or disable the GPS signal.
Alert Enable to receive the Red Light/Speed/Safety
Camera alerts. By default, it is set to 200m. This
means that the unit will issue the relevant alerts,
200m around the camera.
Car Plate Stamp Enter the details of your car plate number, this will
thendisplayontherecordedles.UsetheUPand
DOWN buttons to select a number or an alphabet
andpressOKtoconrmandmoveontothenext
character.
Version Firmware version

13
UNIDEN iGO CAM 750 Vehicle Recorder
Photo Mode
• Press the MODE button to switch to the photo mode, the icon will
display on the top left corner of the screen.
• Now, press the OK button to take a photo.
In the Photo mode, press MENU button to open the Menu Settings. The UP/
DOWN keys can be used to scan through the options, under each menu
setting. Press OK to select the required option.
Press MODE to exit the Menu Settings.
Item Description
Resolution Set the image resolution. The options available are
- 3M, 5M, 8M, 12M.
Quality Choose between the options - Super Fine, Fine,
Normal-todenethequalityoftherecordings.
Digital Zoom Turn on this option to zoom in and out of an image.
Date/Time Display Choose to display either date or time or both on the
LCD.
Click the Menu button again for the following settings to be displayed.
Anti-Flicker Change depending on the electrical power
frequency in your area
(Default setting is 50Hz and you may not have to
change this setting).
White Balance Establish the condition to capture the recordings.
Colour Set the background colour for the recordings.
Contrast Adjust the contrast of the image.
Sharpness Usetodenetheclarityofdetailintherecordings.
EV (Exposure
Value)
Set the brightness sensitivity.
BL Compensation
(Backlight
Compensation)
Turn on this feature to reduce the glare on the
images due to the background light.

14
UNIDEN iGO CAM 750 Vehicle Recorder
Playback Mode
• Press the MODE button to switch to the playback mode. The following
two options are displayed on the screen.
- SD Card
- Internal Memory
• Press the Up and Down buttons to select either of the above options and
toconrmpressOK.
• Based on what you select, the screen displays the images or the video
clips stored in the SD card or the Internal Memory. Press the UP and
DOWN keys to scan through the various recordings or images.
• To select a particular image or clip, press OK.
Click the Menu button again for the following settings to be displayed.
Language Set the language.
AV Out Connect to an external audio/video display.
Date/Time Setup Use the UP/DOWN and the OK buttons to set the
date and time
Format Use this setting to format the micro SD card.
Default Setting Use to change the settings to the default factory
settings.
LCD Control Use this setting to control the brightness and
contrast of the LCD.
Auto Power Off Enable or disable the recorder to shut down when
idle.
IR Light Enable or disable the IR setting.
Volume Increase or decrease the volume.
Key Tone Enable or disable this feature to sound a tone or go
mute when you press the keys.
Car Plate Stamp Enter the details of your car plate number, this will
thendisplayontherecordedles.UsetheUPand
DOWN buttons to select a number or an alphabet
andpressOKtoconrmandmovetothenext
character.
Version Firmware version

iGO CAM Player
iGO CAM Player allows you to view the videos recorded on the iGO CAM
750 and trace them on a map.
iGO CAM Player software is supported on Windows XP, Windows 7 and
Windows 8.
Installing iGO CAM Player
Copy the contents of the iGO CAM Player software CD (included in the
package) to your PC. You can also opt to download it from the Uniden
website.
RemembertorstinstalltheCodecpackage.
After having installed the Codec, double click on the iGO CAM Player icon.
15
UNIDEN iGO CAM 750 Vehicle Recorder
Connecting to a PC
The iGO CAM 750 can be connected to a PC (plug the USB cable (supplied)
into the USB/DC IN port).
When the unit is connected to a PC, ‘USB Connected’ is displayed on the
unit’s screen.
Two drives (SD card and the Internal memory) open up on the PC. Select the
relevant drive to view and manage the contents on the PC.
Access the Recorded Files
BeforeplayingtherecordedlesontheiGOCAMPlayer,ensurethatyoucan
accesstheleseasily.
Either remove the micro SD card from the recorder, and access the card
(les)onthecomputerviaacardreader.
or
Connect one end of the USB cable to the recorder and the other end to the
USB port on your computer. Select the relevant drive (SD card or Internal
Memory) to manage and view the SD card contents on the PC.

16
UNIDEN iGO CAM 750 Vehicle Recorder
Ensure that the PC is connected to the internet to view the map screen.
View the Recorded Files
ToviewtherecordedlesontheiGOCAMPlayer,followthestepsbelow:
1. Start the iGO CAM Player (i.e., double click on the iGO CAM Player icon).
2.ClickontheoptionFileandselectOpentoopentheleson
to the iGO CAM Player.
3. Click on the PLAY button (Playback Controls) to start playback.
Video
Playback
Screen
Map
Screen
Compass
Playback
Controls
Menu
Speed
Snap Shot
NOTE
GPS Player version is subject to change without notice. See
Uniden website to download the latest GPS Player.
Click on the ‘Snap Shot’ icon to take photos of the recording. These photos
will automatically save into a folder named ‘screenshot’. This folder is located
in the GPS Player folder stored in your PC.

17
UNIDEN iGO CAM 750 Vehicle Recorder
Special Features
TheiGOCAM750alertstheuserwhenthereisaxedSpeed/RedLight/Red
Light-Speed or Average Speed Camera.
For this feature to work, please ensure that the Menu option, Alert, in the
Video mode is turned on. By default, it is set to 200m. This means that the
unitwillissuetherelevantalerts,200maroundthexedcameras.
Whenthevehicleisclosetoanyofthexedcameras,theLCDwilldisplay
thecameraalerticonalongwithspecicinformation.Thisinformationwill
includethedistancefromthevehicletothecamera,thespeciedspeedlimit
and the current speed of the vehicle. Please refer to the image below. This
display is accompanied by a voice alert.
Camera Alerts
GPS
The iGO CAM 750 has an in-built GPS antenna, allowing your videos to be
geo-tagged.Pleaseensurethatthebracketisttedontheunitforittobe
able to detect the GPS signal. You can view the recorded videos on the iGO
CAM Player and trace them on a map.
The cameras alerts will be disabled when the unit loses the GPS signal.
SPEED CAMERA
Distance Speed Limit Current Speed

Lane Assistance
This option will alert the user when it calculates the vehicle has crossed over
clear lane markings.
• The Lane Assist feature requires correct calibration to capture road
markings.
• Lane Assist will be limited in poor visibility or where there is inconsistent
or faded road markings.
• Line Calibration is best carried out with the iGO CAM mounted and
powered on with the vehicle safely parked.
• This feature is best suited for drivers who spend time on long roads who
are worried about falling asleep at the wheel – truck drivers, etc. So the
feature is not suited for drivers traversing short roads in city areas where
deliberate lane changing is done often.
18
UNIDEN iGO CAM 750 Vehicle Recorder
Please Note:
RED LINE
BLUE LINE
1. First, ensure that the iGO CAM 750 is mounted and powered on and the
vehicle is safely parked.
2. Next, ensure that the Menu option (in the Video Mode) Lane Assist is
turned ON.
3. After that select the Menu option, Line Calibration, (Video Mode). You will
see 2 sensor lines (Red and Blue) displayed on the screen.
4. Press the Power button to select either of the sensor lines. Then use the
UP and DOWN keys to position the lines to encompass only the area of
the display where road markings can be seen. Please refer to the image
below.
Ensure to follow the steps listed and read the notes below to get the most out
of this feature.

General Problems Possible Solutions
The unit cannot take photos or
record videos
The unit stops automatically when
recording
• Ensure that the micro SD card is
formatted properly and inserted
correctly.
• Use the recommended type of
SD card (8GB Class 10)
Video is unclear Ensurethattherearenongerprints
or dirt on the lens. Ensure that the
lens is always kept clean.
Colour of the images is not good Set the ‘Colour’ setting to Off.
Cross-stripe interference in an
image
This is due to the light frequency.
Change the light frequency
depending on the local power supply.
The unit crashes Press and hold the ‘Reset’ button,
with a pin, to reset the unit.
Important Information
Solving Problems
Listed below are some of the problems and the possible solutions. If you still
need help, visit our website, listed on the front cover.
19
UNIDEN iGO CAM 750 Vehicle Recorder

20
UNIDEN iGO CAM 750 Vehicle Recorder
Warranty
UNIDEN iGO CAM 750
IMPORTANT: Satisfactory evidence of the original purchase is required
for warranty service
Please refer to our Uniden website for any details or warranty durations offered
in addition to those contained below.
Warrantor: The warrantor is either Uniden Australia Pty Limited ABN 58 001
865 498 (“Uniden Aust”) or Uniden New Zealand Limited (“Uniden NZ”) as the
case may be.
Terms of Warranty: Uniden Aust/NZ warrants to the original retail purchaser
only that the iGO CAM 750 (“the Product”), will be free from defects in materials
and craftsmanship for the duration of the warranty period, subject to the
limitations and exclusions set out below.
Warranty period: This warranty to the original retail purchaser is only valid in
theoriginalcountryofpurchaseforaProductrstpurchasedeitherinAustralia
or New Zealand and will expire one (1) year from the date of the original retail
sale.
If a warranty claim is made, this warranty will not apply if the Product is found
by Uniden to be:
(A) Damaged or not maintained in a reasonable manner or as recommended
in the relevant Uniden Owner’s Manual;
(B) Modied,alteredorusedaspartofanyconversionkits,subassembliesor
anycongurationsnotsoldbyUnidenAustorUnidenNZ;
(C) Improperly installed contrary to instructions contained in the relevant
Owner’s Manual
(D) Repaired by someone other than an authorized Uniden Repair Agent
in relation to a defect or malfunction covered by this warranty; or
(E) Used in conjunction with any equipment, parts or a system not
manufactured by Uniden.
Parts Covered: This warranty covers the Product and included accessories.
User-generated Data: This warranty does not cover any claimed loss of
or damage to user-generated data (including but without limitation phone
numbers, addresses and images) that may be stored on your Product.
Table of contents
Other Uniden Dashcam manuals

Uniden
Uniden iGO CAM 300 User manual

Uniden
Uniden iGO CAM 850 User manual

Uniden
Uniden iGO CAM 80 User manual

Uniden
Uniden iGO CAM 70R User manual

Uniden
Uniden DC10QG User manual

Uniden
Uniden iGO CAM 755 User manual

Uniden
Uniden iWitness DC3 User manual

Uniden
Uniden iGO CAM 55 User manual

Uniden
Uniden iGO CAM 40 User manual

Uniden
Uniden iGO CAM 75 User manual

Uniden
Uniden DC4 User manual

Uniden
Uniden iGO CAM 320 User manual

Uniden
Uniden Witness DC1 User manual

Uniden
Uniden iGO CAM 50R User manual

Uniden
Uniden iGo CAM 820 User manual

Uniden
Uniden iGO CAM 345 User manual

Uniden
Uniden iGO CAM 850 User manual

Uniden
Uniden DASH VIEW 30 User manual

Uniden
Uniden iGO CAM 60 User manual
Uniden
Uniden iGO CAM 800 User manual